
Recommended
More Related Content
What's hot
What's hot (20)
Similar to Oral prophylaxis
Similar to Oral prophylaxis (20)
More from DrBindu Kumari
Recently uploaded
Recently uploaded (20)
Oral prophylaxis
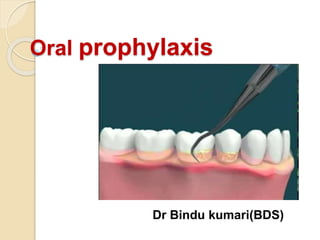
- 1. Oral prophylaxis Dr Bindu kumari(BDS)
- 2. What is oral prophylaxis? Oral Prophylaxis is a procedure done for teeth cleaning. It removes tartar and plaque build-up from the surfaces of the teeth as well as those hidden in between and under the gums. The dentist uses a scaler, a type of hand instrument, to remove the plaque and tartar.
- 3. Regular Cleaning or Prophylaxis A regular cleaning, which is called prophylaxis by dental professionals, is what most people think of when they think of going to the dentist for a checkup. Prophylaxis involves removing plaque, calculus & stains from teeth.
- 4. Plaque is a sticky substance that builds up on teeth as a byproduct of bacteria feasting on the food you eat. Calculus, also known as tartar, occurs when plaque & minerals in your mouth harden.
- 5. Regular cleaning is only recommended for patients who have generally good oral health & do not suffer from bone loss or gum problems (bleeding, recession, infection, etc. A dental hygienist or a dentist uses a specialized cleaning device, called an ultrasonic scaler, to remove plaque & calculus. This cleaning occurs only on the visible part of the tooth, known as a the crown.
- 7. Scaling and root planing Root planing is a procedure that involves removing tartar, bacteria, toxic deposits from the root of a tooth, all the way down to where gum & bone meet. This procedure is required as a treatment for periodontal disease or periodontitis (commonly called gum disease, though it also affects the bone).
- 9. Many people can have periodontal disease & not even know it. Symptoms of the disease include bleeding gums, bad breath, teeth that look longer due to recessed gums, & swollen or red gums. However, many people do not notice any symptoms at all. That’s why it may come as a surprise when your dentist recommends scaling & root planing instead of a regular cleaning.
- 10. Steps of oral prophylaxis 1. Patient History and Physical exam- Many times, clues in the patient’s history can lead us to a specific dental lesion. Some systemic diseases can have implications for oral health. 2. Initial oral survey
- 11. 3. Supragingival Calculus removal It is the most visible part of the procedure for the owner, but is the least important part for the patient’s dental health. Supragingival calculus removal usually is accomplished with a combination of power equipment followed by hand scaling.
- 13. Hand scaling can be very effective, but is fatiguing and time-consuming when used as the sole method of calculus removal. The common hand instruments used are tartar forceps for cracking loose large accumulations of calculus, and hand scaling instruments.
- 14. Hand scaling instruments consists of scalers and curettes. Scalers have sharp tips and are designed to be used only above the gumline. The sharp tip facilitates cleaning of small areas and grooves present in some teeth. Curettes have a blunt “toe” and curved back, and may be used above and below the gum line. Most operators save their curettes for fine work below the gum line.
- 16. The majority of supragingival calculus removal is accomplished utilizing power equipment. Scaling with power equipment should be considered a contaminated procedure. All power equipment creates aerosolized bacteria, which can travel several meters in the air.
- 17. Mask, eye, and hand protection for the operator are recommended to decrease bacterial exposure. Protection for patient should include covering the eyes and placing gauze sponges in the pharynx to help prevent aspiration of calculus and fluid laden with microorganisms.
- 18. There are a number of different types of power scaling equipment available. a. Rotary instrument on high-speed (Roto-Pro) – not recommended, very damaging b. Sonic scalers- requires air compressor, high pitched whine5
- 19. c. Ultrasonic scalers- All types work well ◦ Magnetostrictive (“stack”) Figure-8 tip motion (25-30 KHZ) ◦ Piezoelectric (crystal) linear tip motion (20-45 KHZ) ◦ Magnetostrictive (“Ferrite rod”/Odontoson) circular tip motion (42 KHZ) d. Hydraulic Scalers – “sandblasters”- messy, difficult to control, can cause sodium overload if using sodium bicarbonate
- 22. All types of sonic and ultrasonic power equipment are effective and all can be damaging when used improperly. Some specific tips for proper use include: 1. Use only the side of the tip. This is the most effective and least damaging area of the instrument to place on the teeth. 2. Scale for less than 15 seconds per tooth. It is possible to kill a tooth with ultrasonic trauma.
- 23. 3. If an individual tooth is going to take longer to scale, leave that tooth and come back to it in 1- 2 minutes. 4. A light touch is actually more effective than hard pressure. Too much pressure can stall the tip and decrease the effectiveness of the scaler. 5. Be gentle. Gingival tissues are very delicate.
- 24. 6. Take care under the gum line. You need special periodontal tips on your power equipment to use subgingivally 7. In general, higher frequencies are quieter and provide smaller excursions of the tip
- 25. 8. Water spray is essential for cooling and flushing debris. Adjust the water spray until a fine “halo” of water is produced. 9. All power equipment aerosolizes debris and bacteria. Take precautions as detailed above. 10. Replace tips and stacks regularly.
- 26. 4. Subgingival cleaning In contrast to supragingival scaling, subgingival scaling is the least visible part of the procedure for the owner, but is the most important part of the procedure for the patient. Subgingival scaling serves to remove calculus, plaque, and toxins from the root surfaces, allowing normal re- attachment of periodontal structures to the root.
- 28. Subgingival scaling involves a combination of power equipment and hand instruments, and may involve three different steps. 1. Subgingival scaling (calculus removal) 2. Root planing (smoothing rough surfaces) 3. Subgingival curettage (soft tissue debridement of the inside of the gingival pocket)
- 29. Periodontal disease results from the combined action of oral bacteria and the immune response of the host. These two factors may result in the gradual loss of the supporting structures of the teeth, including attached gingiva, alveolar bone, periodontal ligament and cementum, collectively referred to as “normal attachment”. .
- 30. As this loss occurs, periodontal pockets can form. Pockets are detected by gently placing a periodontal probe under the gingival margin in several locations around the tooth, looking for areas of increased depth.
- 31. Periodontal pockets allow the collection of plaque, calculus, and foreign material under the gingival margin. As plaque mineralizes to become calculus, the newly formed calculus serves as a plaque retentive surface, more plaque is mineralized and more calculus forms. One important consideration in cleaning periodontal pockets is the depth of the pocket
- 32. A pocket of up to 5-6mm in depth can be cleaned effectively without using a surgical flap. This is referred to as “closed root planing” . A combination of ultrasonic and hand scaling will usually clean the pocket effectively, leading to some re- attachment of tissues to the root surfaces.
- 33. When the pocket depth is greater than 5-6 mm, effective cleaning requires the use of a surgical flap to expose the pocket surfaces. This is referred to as “open root planning”, Open root planing frequently involves bone contouring, augmentation of the bone, and repositioning of the surgical flap.
- 34. Recently, the use of ultrasonic equipment has gained popularity for subgingival scaling. This involves the use of thin periodontal tips, which are now available for most almost all scalers. Common acronyms for this procedure are “PerioBUD” (Periodontal Bacterial Ultrasonic Debridement) and “UPL” (Ultrasonic Periodontal Lavage).
- 35. 5. Polishing Polishing of the tooth surfaces removes small defects and irregularities that occur during the cleaning process. Smoothing the surfaces decreases plaque retention and slows the formation of calculus.
- 36. Polishing is accomplished using a prophy angle on a slow-speed handpiece, and a fluoridated prophy paste. To avoid thermal damage, be sure to not polish any single for more than 15 seconds at a time
- 38. 6. Sulcus irrigation/lavage After cleaning and polishing, debris will be present in the gingival sulcus. This debris should be removed to prevent irritation of the soft tissues.
- 39. Water, saline, or dilute Chlorhexidine are all effective irrigants The use of a the air-water hand piece or curved tip syringe allows you to direct the irrigant gently into the gingival sulcus, effectively removing loose calculus and polishing materials.
- 40. 7. Fluoride application Flouride application serves the strengthen the enamel and helps decrease sensitivity associated exposed dentin and/or root surfaces. 8. Complete charting At this point you are ready to chart all pathology present in the mouth.
- 41. 9. Treatment plan The next step is to develop your treatment plan for any additional treatment required on the patient.
- 43. 11. Home care brushing Chlorhexidine rinses Zinc Ascorbate (Maxiguard) gel- This product is very useful during the healing phase after periodontal treatment 12. Schedule the next appointment It might be a 6-month re-check in a periodontal patient to assess how home care is working.