1. Instruction Manual
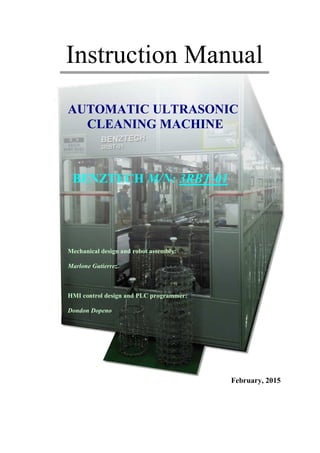
AUTOMATIC ULTRASONIC
CLEANING MACHINE
BENZTECH M/N: 3RBT-01
Mechanical design and robot assembly:
Marlone Gutierrez
HMI control design and PLC programmer:
Dondon Dopeno
February, 2015
2. 1. THE SYSTEM
1.1 SYSTEM OVERVIEW
The system is comprised with three (3) custom engineered XY Robots
driven by a high speed AC Servo motors rated at 450 watts and 750 watts
respectively with a load capacity up to 100 kg max. These robots are
being controlled by two (2) of the most advanced and efficient PLC being
linked together for simultaneous operation of its fully automated material
handling system for a single line 24 stations cleaning system containing a
load station, 21 tank stations, plus 2 unload stations.
The workflow is from left to right, consisting a number of wash with
ultrasonic and rinse tanks being equipped with automatic water spray,
rotation, heating, and a slow motion upward movement at the final rinse
(station#22) to free up parts from water and then the baskets will go to
unload#2 (station#24) that will be ready for drying in oven, otherwise, if
station#22 is bypassed in the recipe, baskets will be unloaded at unload#1
(station#23) which will go to another cleaning process.
Robot no. 1 will handle materials from station 1 (load station) to station
9. Robot no. 2 will handle materials from station 9 to station 18 and,
Robot no. 3 will handle materials from station 18 to station 24 (unload
station#2).
SPECIAL FEATURES:
Aside from being multi-lingual, the system is capable of handling 5
recipes and can run the recipes simultaneously at any time during the
process. Also, tank heaters ON function can be programmed to your
desired time to save energy as well as prolonged heaters’ life span.
IMPORTANT SAFETY NOTICE: The system is designed to ultra-
clean with water and water-detergent solutions only. It is not equipped
with the safeguards necessary for cleaning with combustible or
flammable chemicals.
Therefore, you must NOT use either combustible or flammable
chemicals in this machine.
1
3. 1.2 XY ROBOT DESIGN
The 3 identical robots are made out of a stainless steel material and
utilizing a high-grade bearings, rollers, and belts on its mechanism. It
used a 40:1 gearbox ratio from the driving servomotors to ensure that
they are capable of handling heavier loads up to 100 kg maximum.
These robots will travel in left – right, up – down direction that are
positioned at the rear end of the tanks so that only its arm are extended
above the tanks to pickup and transfer baskets. This is to minimize the
possibility of micro particles out from the robot mechanism that may
fall into the tanks that may cause contamination to the parts being
cleaned.
The robots arm has two claws assemblies in it so that it can carry two
baskets at the same time. The robot claws with an open / close
function were driven by a precision pneumatic cylinders.
High speed sensors that detect and sends signal to the central PLC are
being used to give swift corresponding actions to robot position,
movements, and limits.
2
4. 1.3 CONTROL DESIGN
The overall machine status, robot positions and movement directions,
its inputs, and outputs are being processed by two PLC
(Programmable Logic Controller) being linked together for
simultaneous operation. These PLC are one of today’s best in
automation industry that is fast, super compact, and expandable. They
are housed together with the HMI, relays, and contactors in a single
standard 22 X 26 X 70 inch control cabinet that is placed near to the
machine input or at left side for an easy operation.
Each PLC is capable to handle a maximum of two XY axis or two
robots so that 2 PLC are needed to handle 3 robots.
A wide screen 11-inch (1024 X 768 pixel) hi-speed HMI (Human
Machine Interface) touch screen is paired to the PLC for easy
monitoring and controlling the machine and to input its process
parameters. This is also where the machine operator can be able to
load the specific process recipe (from recipe#1 to recipe#5) that will
go along with the parts to be cleaned from start to finish or from
loading (1) to unloading (23, 24) stations.
Both HMI and the PLC have the capability to be controlled and
monitored remotely anywhere around the world if they are being
connected to the Internet.
3
5. 2. MACHINE OPERATION
2.1 PUSH BUTTONS AND SWITCHES @
CONTROL PANEL:
4
Main switch
Stop / Pause
Start / Load
Recipe Select (1 - 5)
HMI screen
Emergency STOP
Alarm silence
Slow down
Buzzer / Alarm
Tower lamps (x3)
6. 2.1.1 Main switch (toggle sw, red color) – switch to ON position
to apply 220 VAC to the main control, motor drivers, AC
contactors, and 24 VDC power supply to the HMI, PLC, and
sensors.
2.1.2 Start / Load button (momentary sw, green color) – press
this button to start the very first process operation in which
robot 1 will pickup basket if present at load station. Press
this button to restart process if being paused. This button is
also available in the HMI main screen.
2.1.3 Stop / Pause button (momentary sw, red color) – press
this button to pause the machine operation at any time. Long
press this button for 5 seconds to reset robot back to its
initial positions (will only function during manual mode).
This button is also available in the HMI main screen.
2.1.4 Recipe selection buttons (5 momentary sw, green color) –
this is used to select process recipe number from 1 to 5 (left
to right). Be sure to press any of this buttons to start a new
recipe. Recipe number indicator will blink to indicate which
recipe is being loaded. Note that recipe selection buttons are
also available in the HMI main screen.
2.1.5 Alarm silence (momentary sw, red color) – press this
button to acknowledge any alarm after the fault is corrected.
2.1.6 Emergency STOP button (latching, red color) – press this
button to cause the process into sudden stop causing all
robots to an abrupt stoppage. Only used for emergency!
2.1.7 Slow down motion (2-way flip sw with OFF @ center
position, black color) – only flip this switch to the right to
cause a general slow down motion of the three robots of all
recipes. It is only intended just in case all recipes are
running for critical or small components, which is very
uncommon. Note that only recipe number 3 has a slow down
button option that you can set in the recipe edit screen.
5
7. 2.2 TOWER LAMP INDICATORS ON TOP OF THE
CONTROL CABINET:
2.2.1 Red lamp – flashing light, indicates that an error in the
system has occurred and alarm will sound. Check the alarm
status at HMI for listed error and possible corrective action.
- Steady light, indicates that an emergency stop switch is
being activated. Pullout the Emergency Stop button to
deactivate.
2.2.2 Yellow lamp – flashing light, indicates that auto process is
being paused.
2.2.3 Green lamp – flashing light, indicates that the system is
ready and waiting for basket input at load station.
- Steady light, indicates that the system is running in
normal cleaning process.
6
8. 2.3 IMPORTANT HMI SCREENS OR WINDOWS
AND ITS FUNCTIONS:
2.3.1 Main screen – this screen contains most of the machines’
primary buttons such as START, STOP / PAUSE, individual
PAUSE, AUTO on/off, MANUAL operation, RESET,
Basket ON/OFF, RECIPE select buttons, FAST SEL button
– to access other setup windows, and of course it contains
the graphics that corresponds to the real – time monitoring
of the cleaning process. Please note that the Start and Pause
buttons can only be activated when the Auto on/off button is
turned ON while other buttons can also be activated when
Auto on/off button is OFF.
7
9. 2.3.2 Manual screen (accessible when Auto on/off button is at
OFF state), to access from main screen, click the “Manual
opn” button at the bottom - right corner of the screen then
you’ll be prompted with “YES or NO” pop – up window for
confirmation, click YES to proceed – here you can
manually move any robots to any direction you want until
hitting their XY limits, also, you can do any of the ff;
- Manually open or close tank lid cover at station#2 or first
tank, rest of the tanks does not have lid cover.
- Manually open or close any of the robots claw.
- Setup the XY speed parameters of the 3 robots.
- Reset robots to its initial positions (can also be done in
the main screen).
- Reset unloads basket counters.
8
10. 2.3.3 Basket ON/OFF screen, (accessible when process is being
paused) – here you can virtually placed any baskets at any
tanks by hitting the “Basket ON” button located right on top
of each tank. This is useful during power interruptions
where basket is already moved to the station but still not
detected when the power goes off. Or use this function to
simulate the process.
9
11. 2.3.4 Recipe #1 to #5 edit screens, (accessible only when process
is halted and also, it is a password protected window – be
sure that you have the password ready to get an access).
- This is where you can input recipe parameters such as
dwell time in each tanks, bypass a tank or a number of
tanks, if you intend that the basket will not go through a
certain tank or station.
- Turn ON or OFF water spray – if ON, can also select
either heavy spray or light spray for critical components.
- Turn auto rotate ON or OFF.
- Turn ultrasonic ON or OFF.
- And turn the SLOW option ON or OFF – if ON, the
robot down movement speed is reduced down to about
20%, this is useful for critical or small components.
NOTE: All individual recipe settings will not affect to any other
recipe settings.
10
12. 2.3.5 Heater setup screen (hit Heaters setup button from Fast Sel
menu).
In this screen, you can turn ON or OFF manually any tank
heater available along the system, this very useful during
setup. You’ll also find the “Auto heater ON “ setup
parameters with HR (hour), MIN (minutes), SEC (seconds)
data entry for numeric inputs of the specific time you want
all tank heaters to automatically turned ON. It is actually a
countdown type timer.
Use the timer function if you wanted to turn ON the tank
heaters hours in advance to the work schedule in the
following day to give the heating system enough time to
achieved its temperature set points so that you can have the
cleaning system get ready for cleaning right at the first hour
of work.
11
13. 2.3.6 RECTIFIER, ULTRASONIC, ROTATION, WATER
SPRAY screens (all is accessible from Fast Sel menu).
All these windows are intended for manual, testing, or setup
purposes where you can manually turn ON or OFF each of
these tank attributes functions.
Window select color-coded buttons are located at the top on
each of these windows and ON / OFF button is located in
each tank if that certain feature is available (see below figure
as an example for rotation screen with tank number 4, 5, and
6 were turned ON and the rest are OFF).
12
14. 2.3.7 EVENT LOG pop-up screen (button can be found
somewhere at the bottom of the main screen next to the
system current status display).
Use this window to view event log or system status,
warning, and alarm messages.
13
15. 3. TROUBLESHOOTING GUIDE
3.1 PLC INPUTS ( X ) ADDRESS:
3.1.1 PLC NO. 1
X Link L remarks
0 Vacant
1 Vacant
2 Vacant
3 rbt1 pre-home
4 rbt1 0 pos
5 rbt2 pre-home
6 rbt2 0 pos
7 rbt1 up pos
8 rbt1 down pos
9 rbt2 up pos
A rbt2 down pos
B rbt1 fwd sw
C rbt1 rev sw
D rbt2 fwd sw
E rbt2 rev sw
F rbt1 clyA close
20 2a rbt1 clyA open
21 rbt1 clyB close
22 rbt1 clyB open
23 rbt2 clyA close
24 rbt2 clyA open
25 rbt2 clyB close
26 rbt2 clyB open
27 D6 cylinder open
28 D6 cylinder close
29 Vacant
2A Vacant
2B Vacant
2C Vacant
2D Vacant
2E Vacant
2F Vacant
14
16. 3.1.2 PLC NO. 2
X remarks Link L
0 Vacant
1 Vacant
2 Vacant
3 rbt3 pre-home
4 rbt3 0 pos
5 rbt3 up pos
6 rbt3 dwn pos
7 rbt3 fwd sw
8 rbt3 rev sw
9 rbt3 clyA close 214
A rbt3 clyA open 215
B rbt3 clyB close 216
C rbt3 clyB open 219
D Vacant
E Vacant
F RBT4 @ unload pos int
20 load sensor A 23a
21 load sensor B 23b
22 unload1 sensor A
23 unload1 sensor B
24 unload2 sensor A
25 unload2 sensor B
26 E.STOP 23c
27 STOP 23d
28 START 23e
29 alarm silence
2A recipe1 24a
2B recipe2 24b
2C recipe3 24c
2D recipe4 24d
2E recipe5 24e
2F SLOW down 24f
15
17. 3.2 PLC OUTPUTS ( Y ) ADDRESS:
3.2.1 PLC NO. 1
Y remarks
0 CH0 rbt1 X axis FWD
1 CH0 rbt1 X axis REV
2 CH1 rbt1 Y axis UP
3 CH1 rbt1 Y axis DWN
4 CH2 rbt2 X axis FWD
5 CH2 rbt2 X axis REV
6 CH3 rbt2 Y axis UP
7 CH3 rbt2 Y axis DWN
8 rbt1 clyAB close
9 rbt1 clyAB open
A rbt2 clyAB close
B rbt2 clyAB open
C Vacant
D Vacant
E Vacant
F Vacant
20 Tank#1 lid cylinder on
21 Tank#1 lid cylinder off
22 rotation @tank2
23 rotation @tank3
24 rotation @tank4
25 rotation @tank5
26 rotation @tank6
27 rotation @tank7
28 rotation @tank10
29 rotation @tank11
2A rotation @tank13
2B rotation @tank14
2C spray@4 valave1
2D spray@4 valave2
2E spray@7 valave1
2F spray@7 valave2
16
18. 3.2.2 PLC NO. 2
Y remarks
0 CH0 rbt3 X axis FWD
1 CH0 rbt3 X axis REV
2 CH1 rbt3 Y axis UP
3 CH1 rbt3 Y axis DWN
4 rbt3 cylAB close
5 rbt3 cylAB open
6 Vacant
7 Vacant
8 rec#1 @unlod1
9 rec#2 @unlod1
A lamp recipe1
B lamp recipe2
C lamp recipe3
D lamp recipe4
E lamp recipe5
F rec#5 @unlod1
20 heat @2a
21 heat @2b
22 heat @3a
23 heat @3b
24 heat @5a
25 heat @5b
26 heat @6a
27 heat @6b
28 heat @10a
29 heat @10b
2A heat @17
2B ultrasonic @2
2C ultrasonic @3
2D ultrasonic @5
2E ultrasonic @6
2F ultrasonic @17
40 air blow @21
41 RBT3 @unloading pos int
42 spray @4
43 spray @7
44 spray @11
45 spray @14
46 soltank8,9
47 soltank12
48 soltank15,16
49 rectifier @10
4A rectifier @13
17
20. 3.3 ALARMS AND WARNINGS MESSAGES @
EVENT LOG SCREEN:
Content Description / Action to be taken
Process ready! Machine at initial state and ready to start.
Process running! Machine is running normally.
Basket @unload 1! Remove basket that is present at station#23.
Basket @unload 2! Remove basket that is present at station#24.
Process hold! The machine is being paused. Press "Start" button to resume.
Robot #1 on-hold!
Robot#1 pause toggle switch is activated. Press same switch to
deactivate.
Robot #2 on-hold!
Robot#2 pause toggle switch is activated. Press same switch to
deactivate.
Robot #3 on-hold!
Robot#3 pause toggle switch is activated. Press same switch to
deactivate.
E.STOP is activated!
Emergency stop button is pressed. Turn it clockwise while pulling
it up to deactivate.
Robot #1 reset to initial position!
In manual mode. Robot#1 reset button is pressed thus having
the robot perform XY home and then go to its initial position,
which is in station#2.
Robot #2 reset to initial position!
In manual mode. Robot#2 reset button is pressed thus having
the robot perform XY home and then go to its initial position,
which is in station#10.
Robot #3 reset to initial position!
In manual mode. Robot#3 reset button is pressed thus having
the robot perform XY home and then go to its initial position,
which is in station#20.
Problem @unload1 sensors!
Basket has been unloaded at station#23 but not detected.
Please check sensors.
Problem @unload2 sensors!
Basket has been unloaded at station#24 but not detected.
Please check sensors.
Recipe #1 is selected! Recipe#1 will be processed when basket is loaded at station#1.
Recipe #2 is selected! Recipe#2 will be processed when basket is loaded at station#1.
Recipe #3 is selected! Recipe#3 will be processed when basket is loaded at station#1.
Recipe #4 is selected! Recipe#4 will be processed when basket is loaded at station#1.
Recipe #5 is selected! Recipe#5 will be processed when basket is loaded at station#1.
Basket @loading station!
Basket is present at loading station. Otherwise, please check
sensors.
Slow down is activated!
Slow down 3-position switch at front panel is flipped to the right.
Flipped it back to center position to deactivate.
Rbt1 claw did not close!
Robot#1 claw close sensor is not activated at close condition.
Please check sensor its alignment.
Rbt1 claw did not open!
Robot#1 claw open sensor is not activated at open condition.
Please check sensor its alignment.
Rbt2 claw did not close!
Robot#2 claw close sensor is not activated at close condition.
Please check sensor its alignment.
Rbt2 claw did not open!
Robot#2 claw open sensor is not activated at open condition.
Please check sensor its alignment.
19
21. Content Description / Action to be taken
Rbt3 claw did not close!
Robot#3 claw close sensor is not activated at close condition.
Please check sensor its alignment.
Rbt3 claw did not open!
Robot#3 claw open sensor is not activated at open condition.
Please check sensor its alignment.
RBT1 vert motor fail!
Robot#1 up and down movement has jammed. Please check
motor drivers for errors and robot mechanism.
RBT2 vert motor fail!
Robot#2 up and down movement has jammed. Please check
motor drivers for errors and robot mechanism.
RBT3 vert motor fail!
Robot#3 up and down movement has jammed. Please check
motor drivers for errors and robot mechanism.
RBT1 horz motor fail!
Robot#1 left - right movement has jammed. Please check motor
drivers for errors and robot mechanism.
RBT2 horz motor fail!
Robot#2 left - right movement has jammed. Please check motor
drivers for errors and robot mechanism.
RBT3 horz motor fail!
Robot#3 left - right movement has jammed. Please check motor
drivers for errors and robot mechanism.
20