
Recommended
More Related Content
What's hot
What's hot (20)
Similar to Deborah Owen Fall 2016 BYU-Idaho Visual Media Portfolio
Similar to Deborah Owen Fall 2016 BYU-Idaho Visual Media Portfolio (20)
Recently uploaded
Recently uploaded (20)
Deborah Owen Fall 2016 BYU-Idaho Visual Media Portfolio
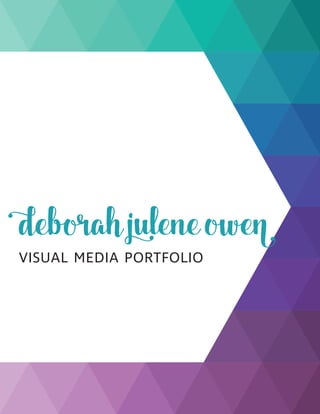
- 1. deborah julene owen VISUAL MEDIA PORTFOLIO
- 3. deborah julene owen VISUAL MEDIA PORTFOLIO
- 5. table of contents Magazine Cover Prezi Presentation Photodesign Montage Business Identity Infographic HTML & CSS Coding Web Design Brochure
- 6. magazine cover I had a couple of ideas in my head, both of real magazines and made up ones. I knew which photo I wanted, and ultimately in the process of brainstorming titles, I wound up picking the New Era. I sketched out some basic layouts that would work with a couple pictures I have. I put together my shape map in InDesign on an 8.5x11 page quickly, making sure that the different items all aligned. I put in my picture and titles but knew I needed to do something with the background, which was a bunch of grass. I opened up the picture in Photoshop and got to work removing the background. I tried to keep things clean and smooth, removing the grass and hair frizz. I updated the file in Photoshop and decided to add a subtle gradient background. I finalized the layout of the items and exported it as a 150 dpi JPG from InDesign.
- 7. NewEra NOT A MAGAZINE OF THE CHURCH OF JESUS CHRIST OF LATTER-DAY SAINTS THE SEPTEMBER 2017 SCRIPTURE CHASING TIPS FROM A CHAMPION P. 44 YOUNG WOMEN VALUE PROJECT IDEAS FROM DEBORAH OWEN THE PERSONAL PROGRESS HELPER p. 7 A HOUSE OF LEARNING: HOMESCHOOLING IN THE GOSPEL p. 18 A FAMILY OF MISSIONARIES WHY ONE GRANDDAUGHTER IS CHOOSING TO SERVE p. 36 WEIRD SUNDAY SCHOOL OBJECT LESSONS p. 11-12, 23
- 8. prezi I had no clue what I wanted to do for my how- to Prezi initially. Gradually, I started thinking about doing some sort of recipe, since that follows a pretty methodical process (usually), plus food makes for a great visual. I knew I didn’t want to include photos, and I didn’t have the time to create a really intricate vector, so eventually that lead me to an ice cream sundae. It’s easy to follow, fun, and wouldn’t take hours in Illustrator (though I did, admittedly, spend several hours creating and tweaking this illustration). Igotitallsketchedout,includingthegeneralflowIwanted. I envisioned a sort of “Magic School Bus” experience of zooming super close and being immersed in it. Then I went into Illustrator. I stuck with a flat design, adding each element on a new layer. Originally I exported each individual element as a .png file, but that both took a lot of time, and looked grainy when zoomed in a couple thousand percent. I added my text, and while I wasn’t super happy with the fonts, there were only so many options.
- 10. photodesign When I was taking my picture, I loved the contrast of the blue flowers amid the green and brown. Right away I thought about the phrase “bloom where you are planted” and got to work at home. I used Adobe Color to pick out a good color scheme for my photo, and then started playing around with things. I created a new 8.5×11 document in Photoshop and imported the photo. I adjusted the levels and saturation on the photo, and especially sharpened and brightened the blue flowers so they would really stand out. I knew I wanted to keep things really clean, but also a little unpredictable. I placed each word in front of its own block and intentionally misaligned them while keeping nice flow. The text blocks went on top of a blue rectangle on the left third that helped organize the flow of the content. I made the key words stand out in a bold cursive font and paired it was a neutral sans serif for balance. Overall I thought my design was really well balanced,butIknewitneededmorefinesse.
- 12. montage I found the quote I wanted to use for this project, and right away drew inspiration from it. The first layer was the rainbow photo. One patch of sky was a lot brighter than the rest, so I filled it with the gray sky around it and blended really well. . The next layer was the city. I masked out the sky and decided to gradually blend out the tops of the buildings to make sure the montage was kept sort of dreamlike. On the umbrella I increased the brightness a little bit more to compensate for the fact that it was taken at nighttime. Last, I found a grayscale image of rain against a window and then used a screen mask to make it transparent. For the text, I knew I wanted to use a sans serif with a thick script font. I found a great pair to use and decided to stagger the alignment of each line of text for some variation. I added a soft glow behindittohelpitstandoutonthebackground. I aligned the text box in the left two-thirds.
- 14. business identity Right away I knew what I wanted to do, I just didn’t have a clear vision of it. I started sketching logos like crazy, but nothing seemed to work. I knew that I wanted something minimalistic and abstract. After a lot of sketching, I still hadn’t come up with anything I really loved, and so I opened up Illustrator and started playing around with shapes. I figured if I have the shape of a saxophone and the shape of a piano, I’d be able to play around with it more freely. Pretty quickly I was able to come up with a concept design that I loved. I then incorporated my logo into a letterhead and business card design. In addition to the logo, I used repeating elements of piano keys and bold lines.
- 16. infographic I had a couple ideas for the layout, including using theframeworkofahouse,adeskinSanta’sworkshop, a Christmas tree, or the North Pole as the setting on my infographic. Ultimately I settled on a Christmas tree. I sketched out different basic illustrations to use as inspiration based off of the statistics I had gathered. Then I played around with the layout some more, with placing differentgraphsindifferentlayoutsIcoulduse.Whilesketching usually helps me out a lot, in this case it really wasn’t helpful. I got started in Illustrator once I’d finished sketching. I was able to quickly figure out my layout once I was in the software, and from there I was able to quickly figure out the flow of everything. I knew I wanted it to be pretty flat and minimal, but still playful. I used a lot of different shades of red and green for contrast I also wanted to play with different ways to use the illustration to demonstrate the statistics instead of just bar graphs, so I used a cookie pie chart, and stacked presents of different sizes.
- 17. the NORTH POLLwhat people actually believe about Santa Claus yes no not sure 43% 50% 7% Yes 72% No 12% are you on Santa’s Nice List? Not sure 16% DEMOCRAT 33% REPUBLICAN 20% OTHER/NOT SURE 47% do you believe in the WAR ON Christmas? not sure no yes41% 47% 12% Christmas YES NO NOT SURE Kwanzaa YES NO NOT SURE Hanukkah YES NO NOT SURE what is your holiday greeting of choice? Merry Christmas 51% 41% 8% yes 15% no 76% not sure 9% Source: "Polling the Holidays."Public Policy Polling.'December 19, 2013< http://www.publicpolicypolling.com/main/2013/12/polling-the-holidays.html>. Created by Deborah Julene Owen deborahjulene.wordpress.com
- 18. html coding Before even starting the coding, I wrote all the content for the webpage. From there, I glanced through the premade files and got to work in Notepad++. I decided I wanted to challenge myself and actually code the entire site without the premade files, and then check my files against the premade once and reconciled a couple differences for the sake of continuity. It was more challenging than just going through the template, but I’m glad I did it. I was able to leave out some things I didn’t want in the first place (like the rounded corners on the body) and add in some new things that I may not have thought of including otherwise (like the link colors). As far as the design goes, I stuck to the monochromatic scheme of the logo, incorporating different shades of the same hue. I wanted to make sure there was plenty of white space in the margins, and good leading between lines to make it easy on the eyes. And as much as I love system fonts (not really), I opted to use Google Fonts to make the design stand out.
- 20. web design I’ve created website mockups before in Illustrator, but never in Photoshop before, so this was a new, exciting challenge for me. I went into this without a clear idea of what I wanted to do beyond the brand itself. I found some photos which would work, and that gave me a better idea of where I was going with it. I sketched out a couple potential layouts, but there was only one I really wanted to pursue further. I opened up the grid template in Photoshop and started arranging elements like on my sketch. I ended up adjust things a little bit, but the concept was still mostly the same. From there, I started adding to the elements. In general, I was pretty happy with the final layout. I did several different layer comps to demonstrate how things would change when you’d hover, but kept it pretty basic.
- 22. brochure I wanted to take this opportunity to do something creative and create a fake brochure that could serve as publicity material for the event. I wanted to go beyond a traditional tri-fold, and so through trial and error I eventually wound up doing mine cut at an angle as a 4 fold, which would create triangles on the front when folded. I wanted it’s primary goal to be to tell the nativity story, with the secondary purpose of advertising the festival, so I had each element on the front tell a different part of the story. Once I had solidified my vision as a sketch, I was able to quickly assemble it in InDesign on an 8×12 page. I created each icon in Illustrator, as well as the triangularbackgroundlayout.Iusedaclippingmask to trim the picture of the wisemen in Photoshop. The printing and trimming process was luckily pretty quick and easy, and then I tried to make my folds as precise as possible.