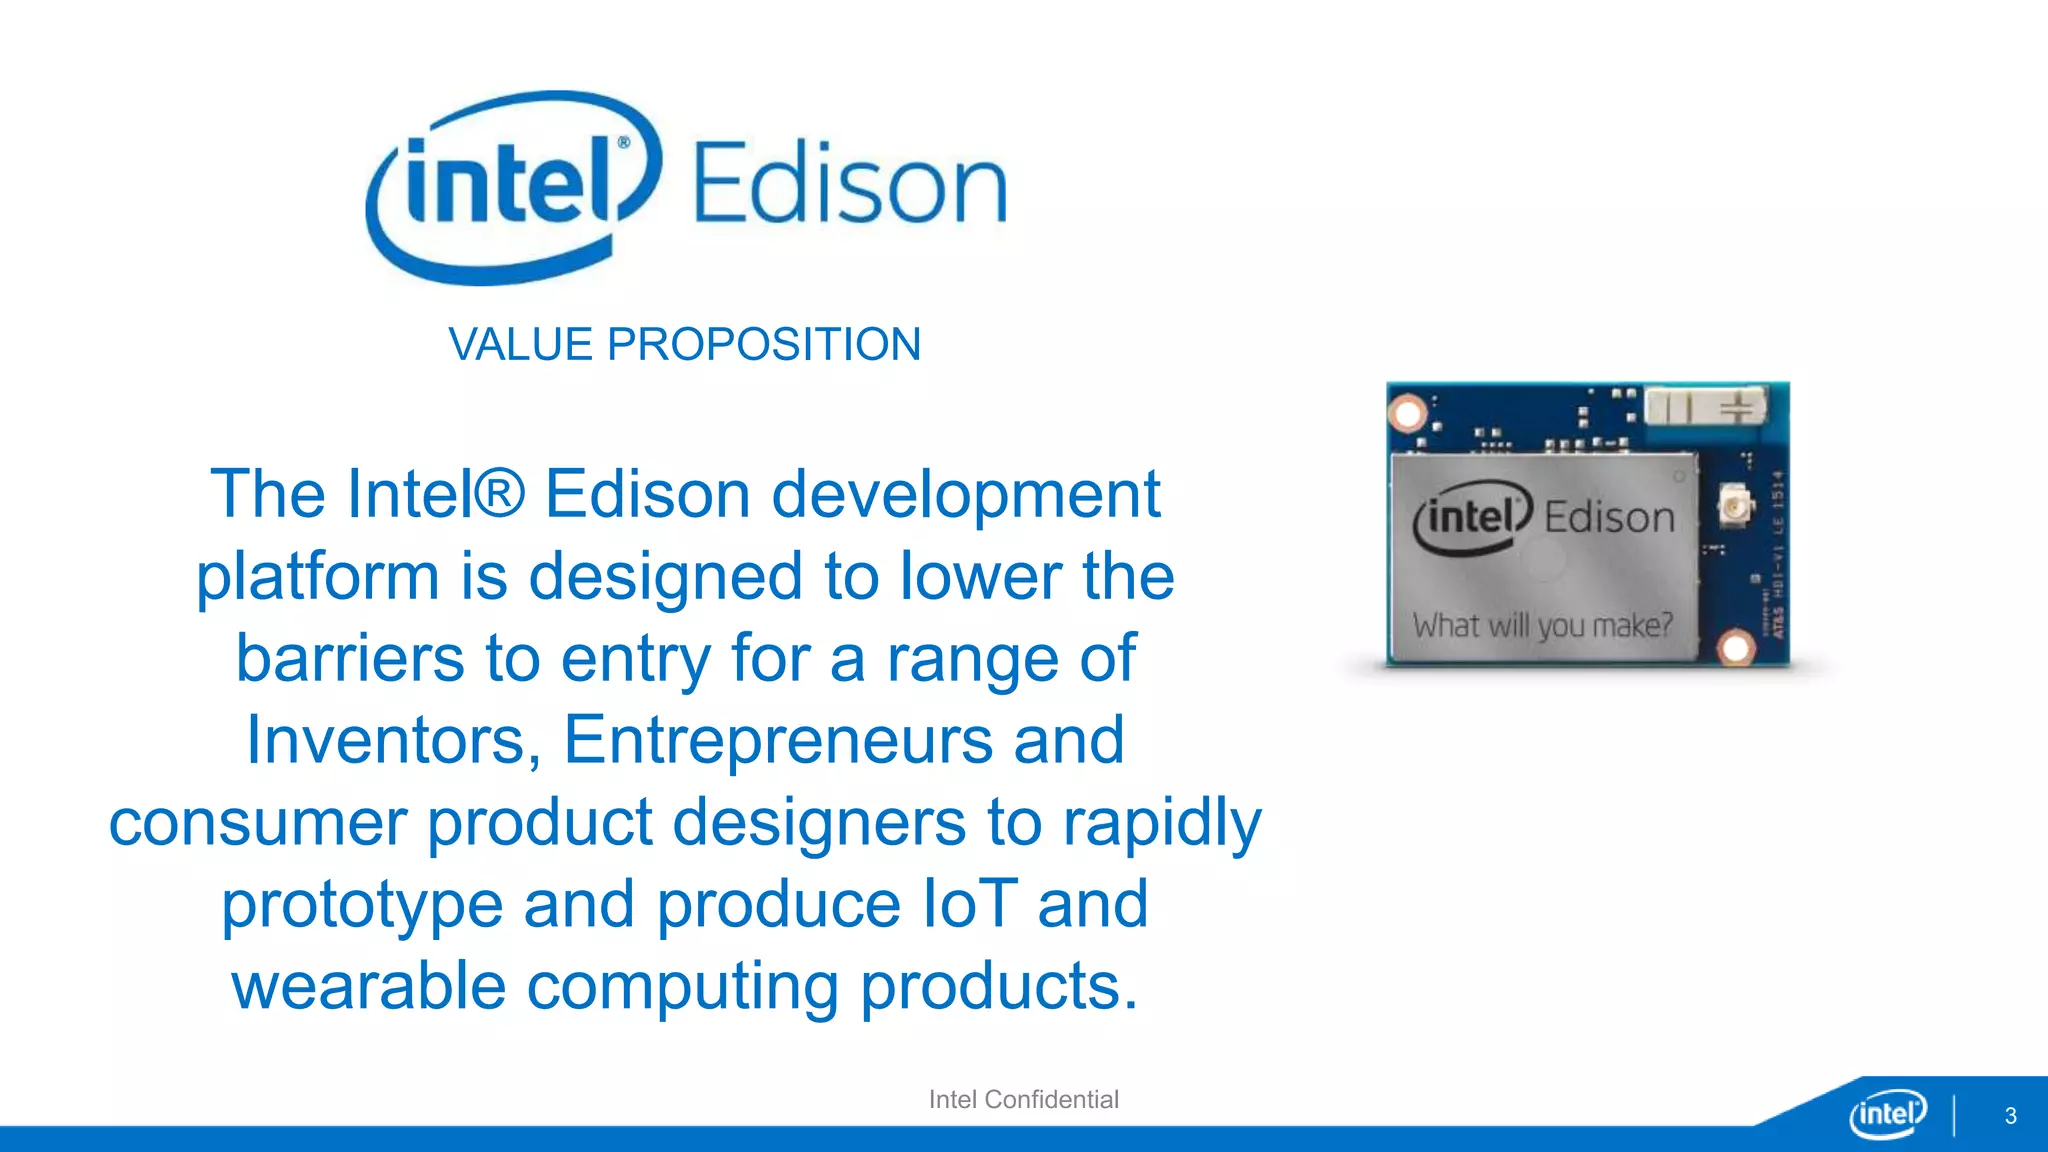
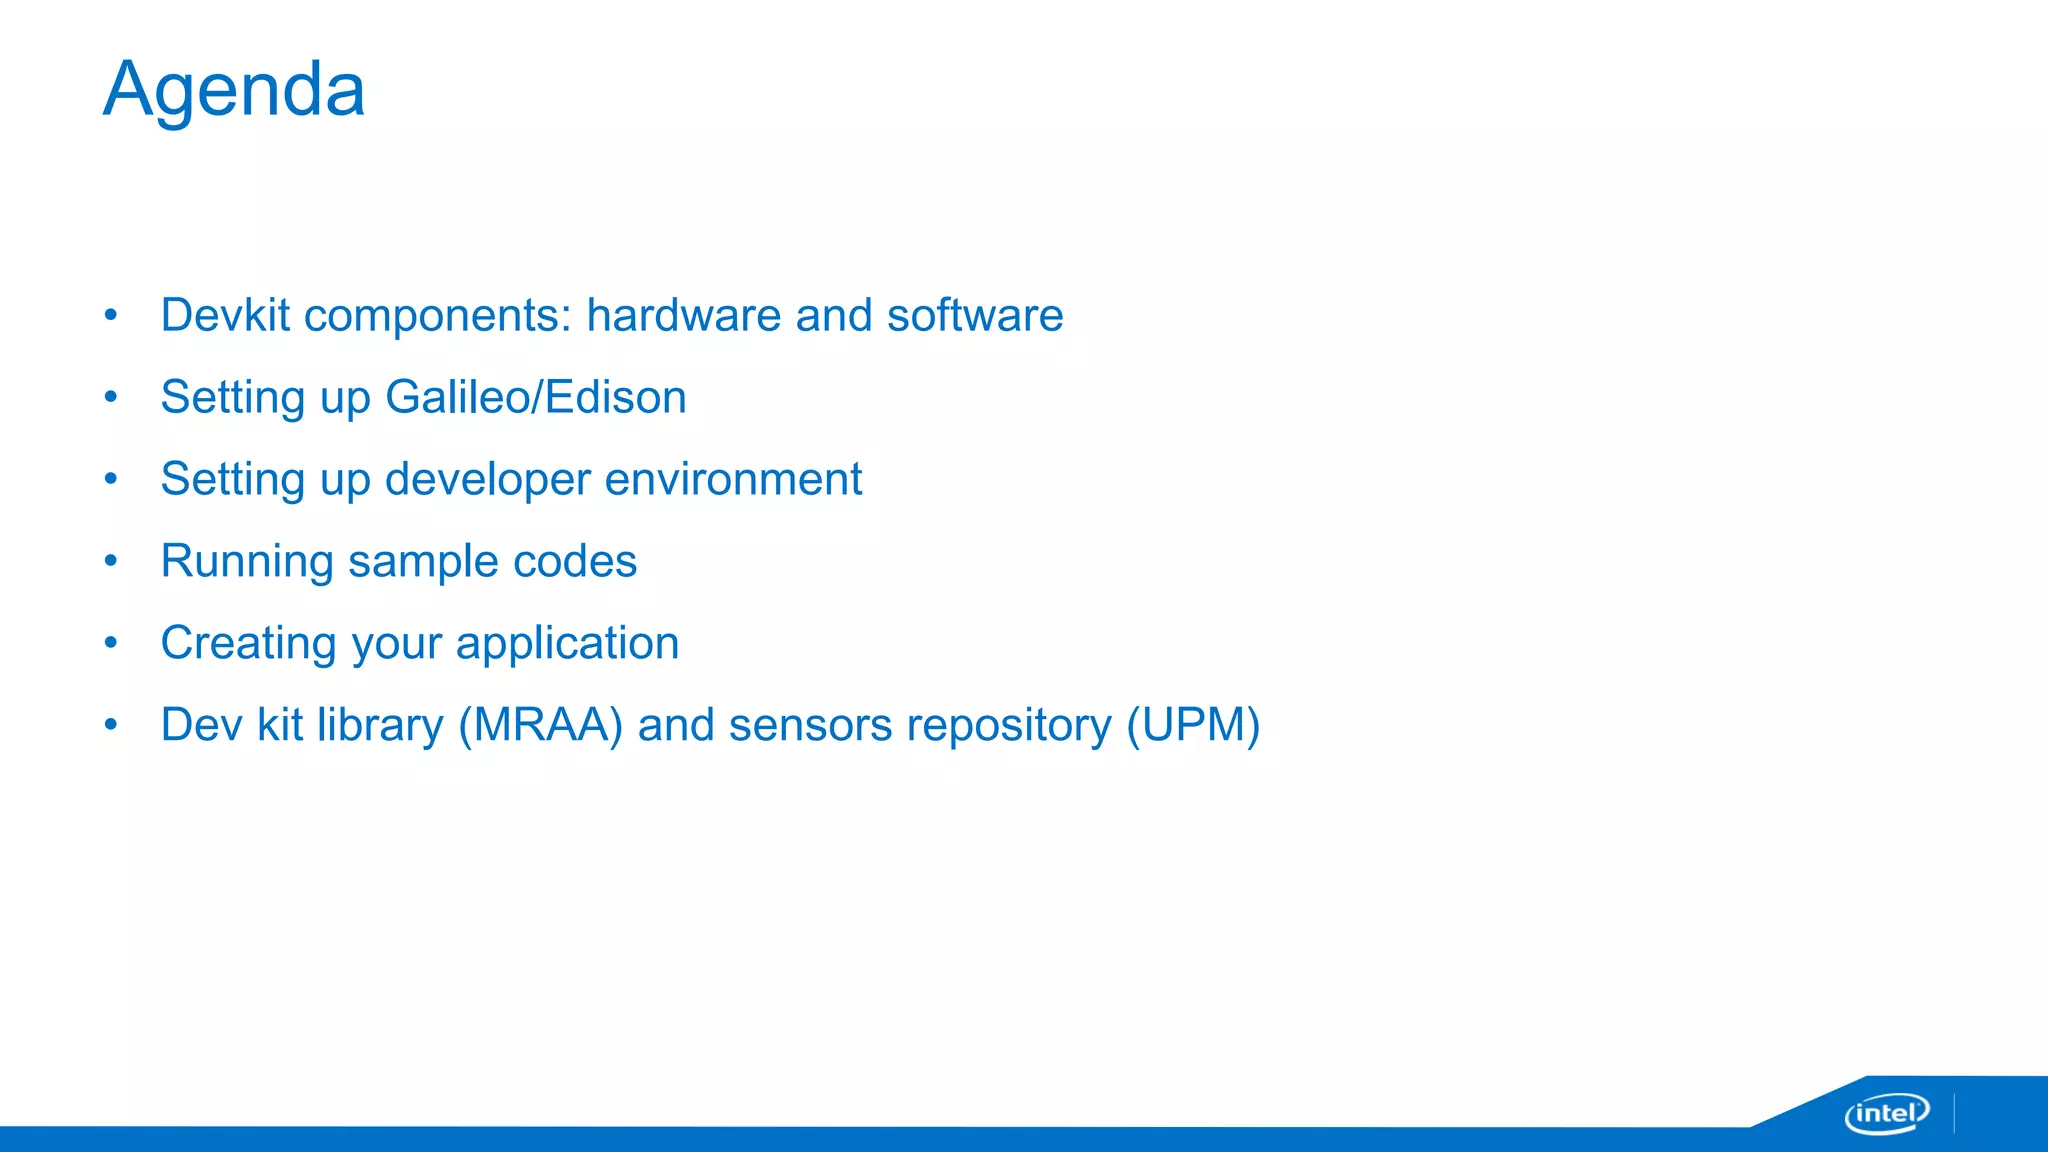
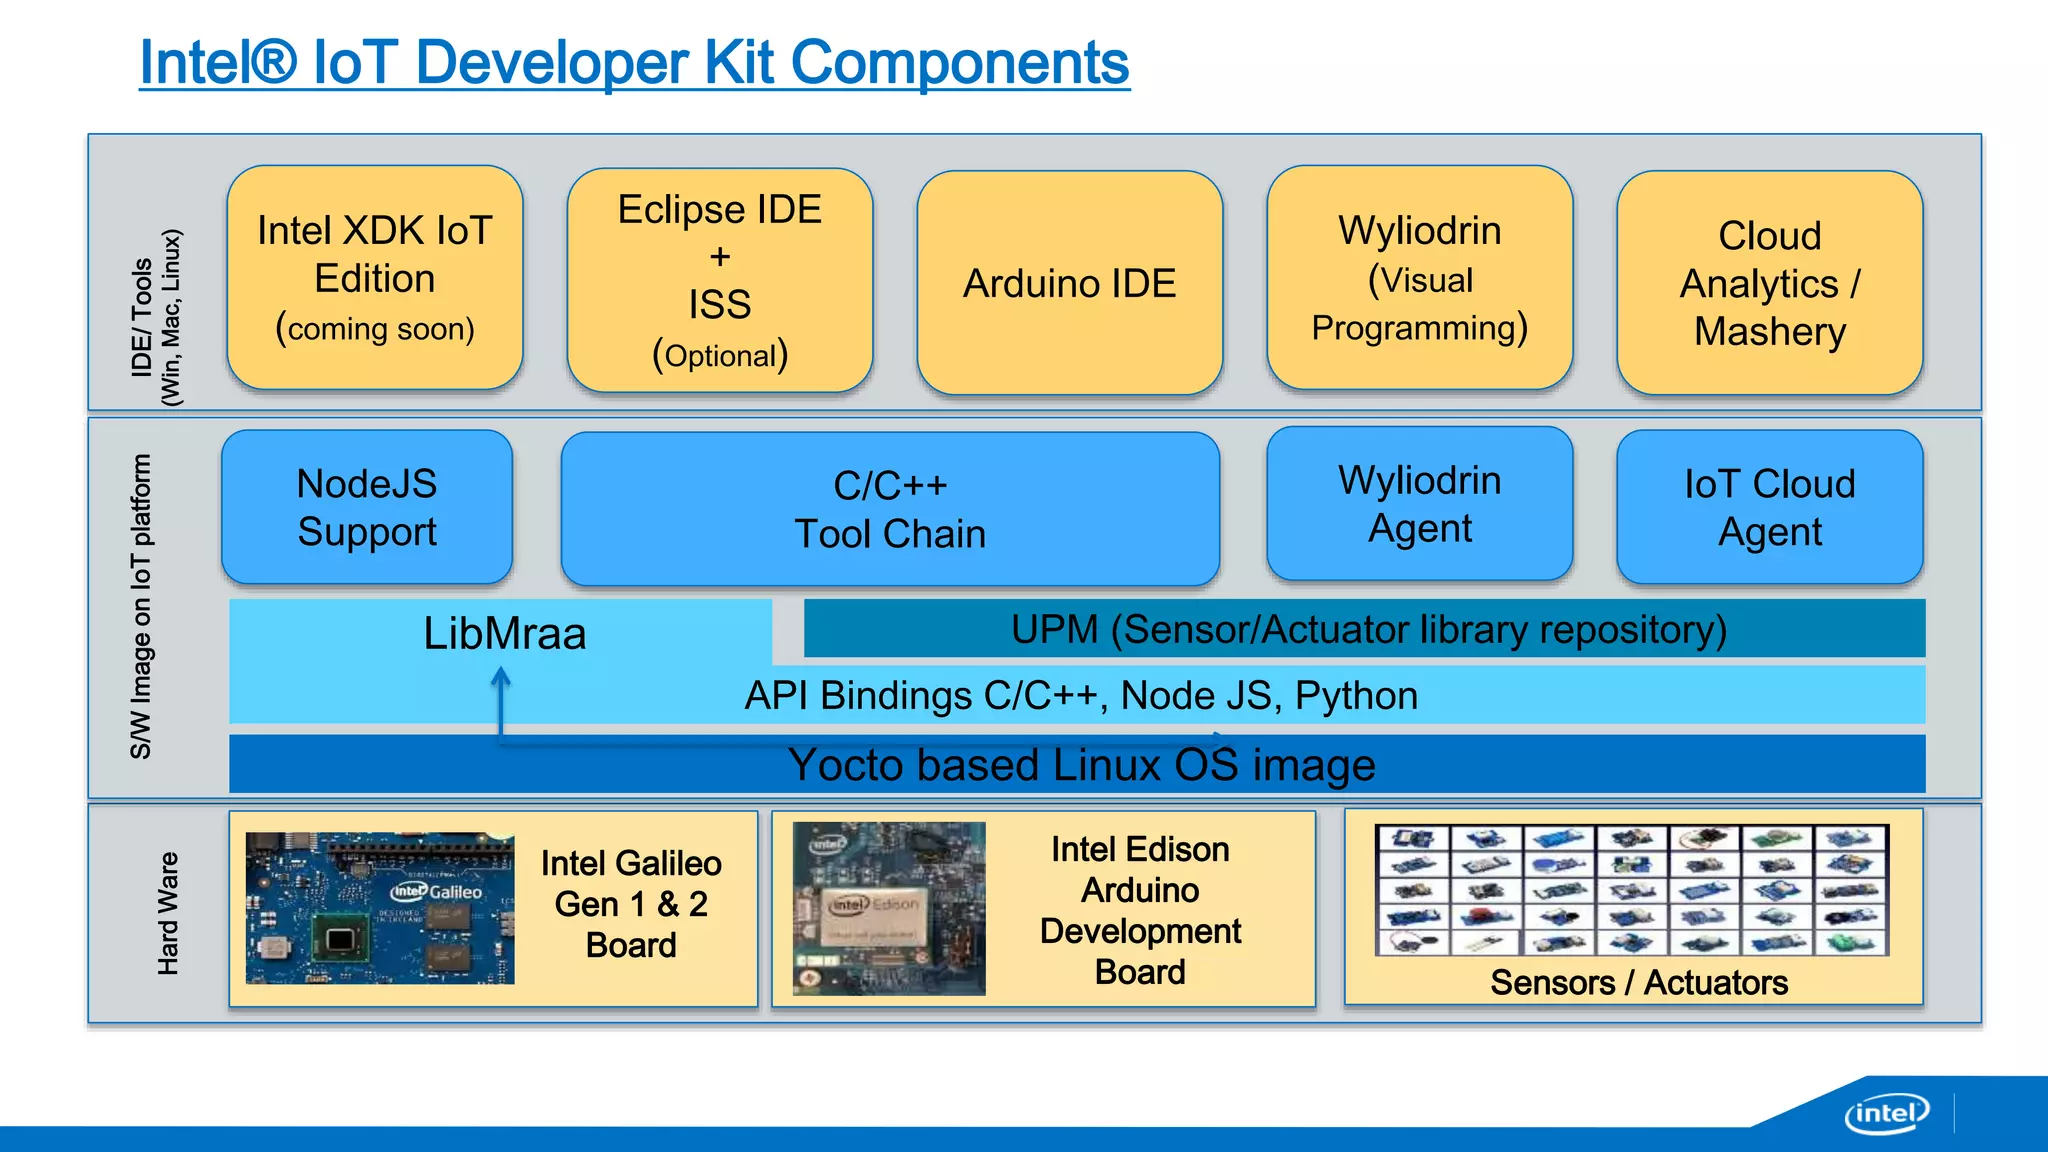
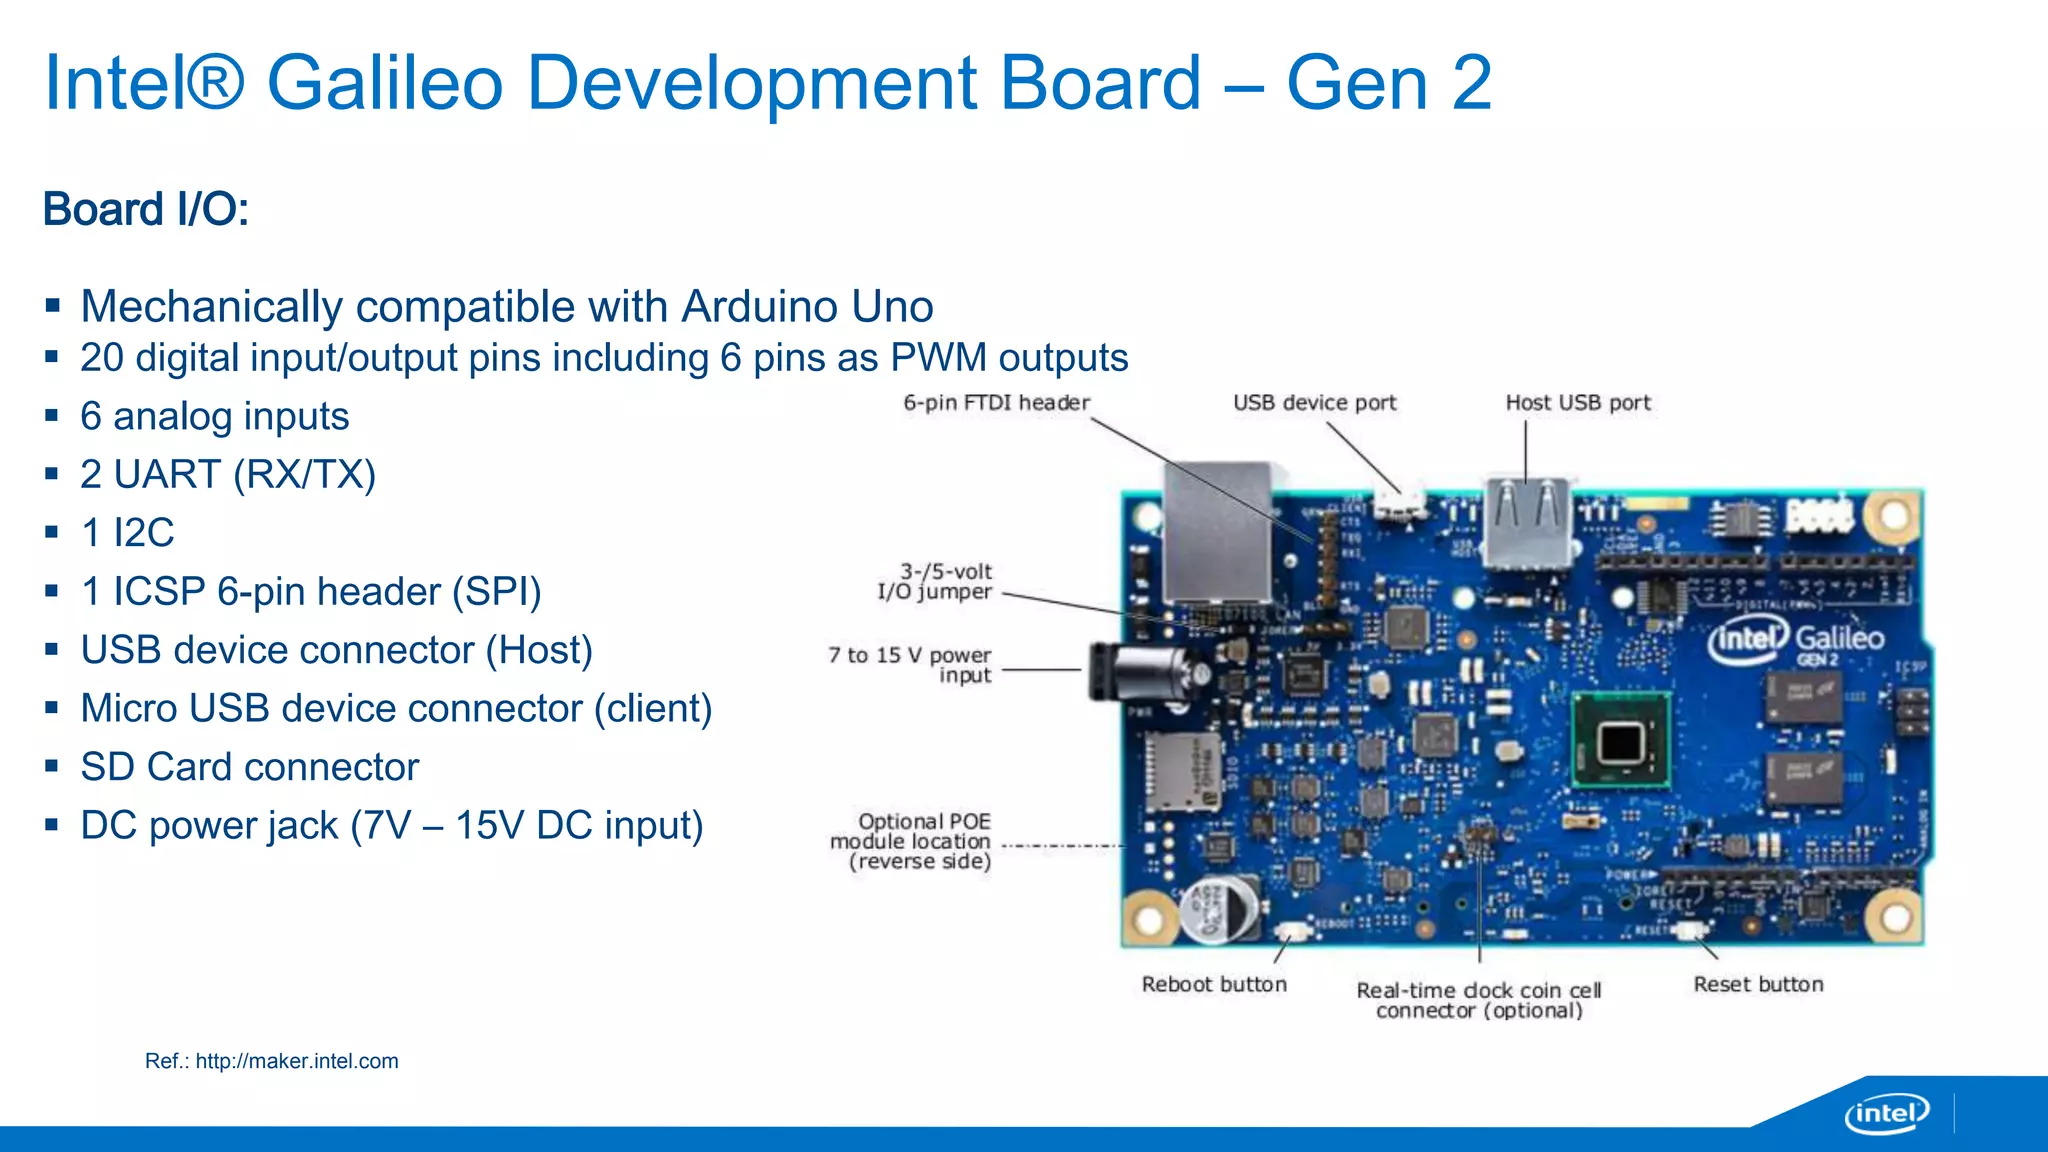
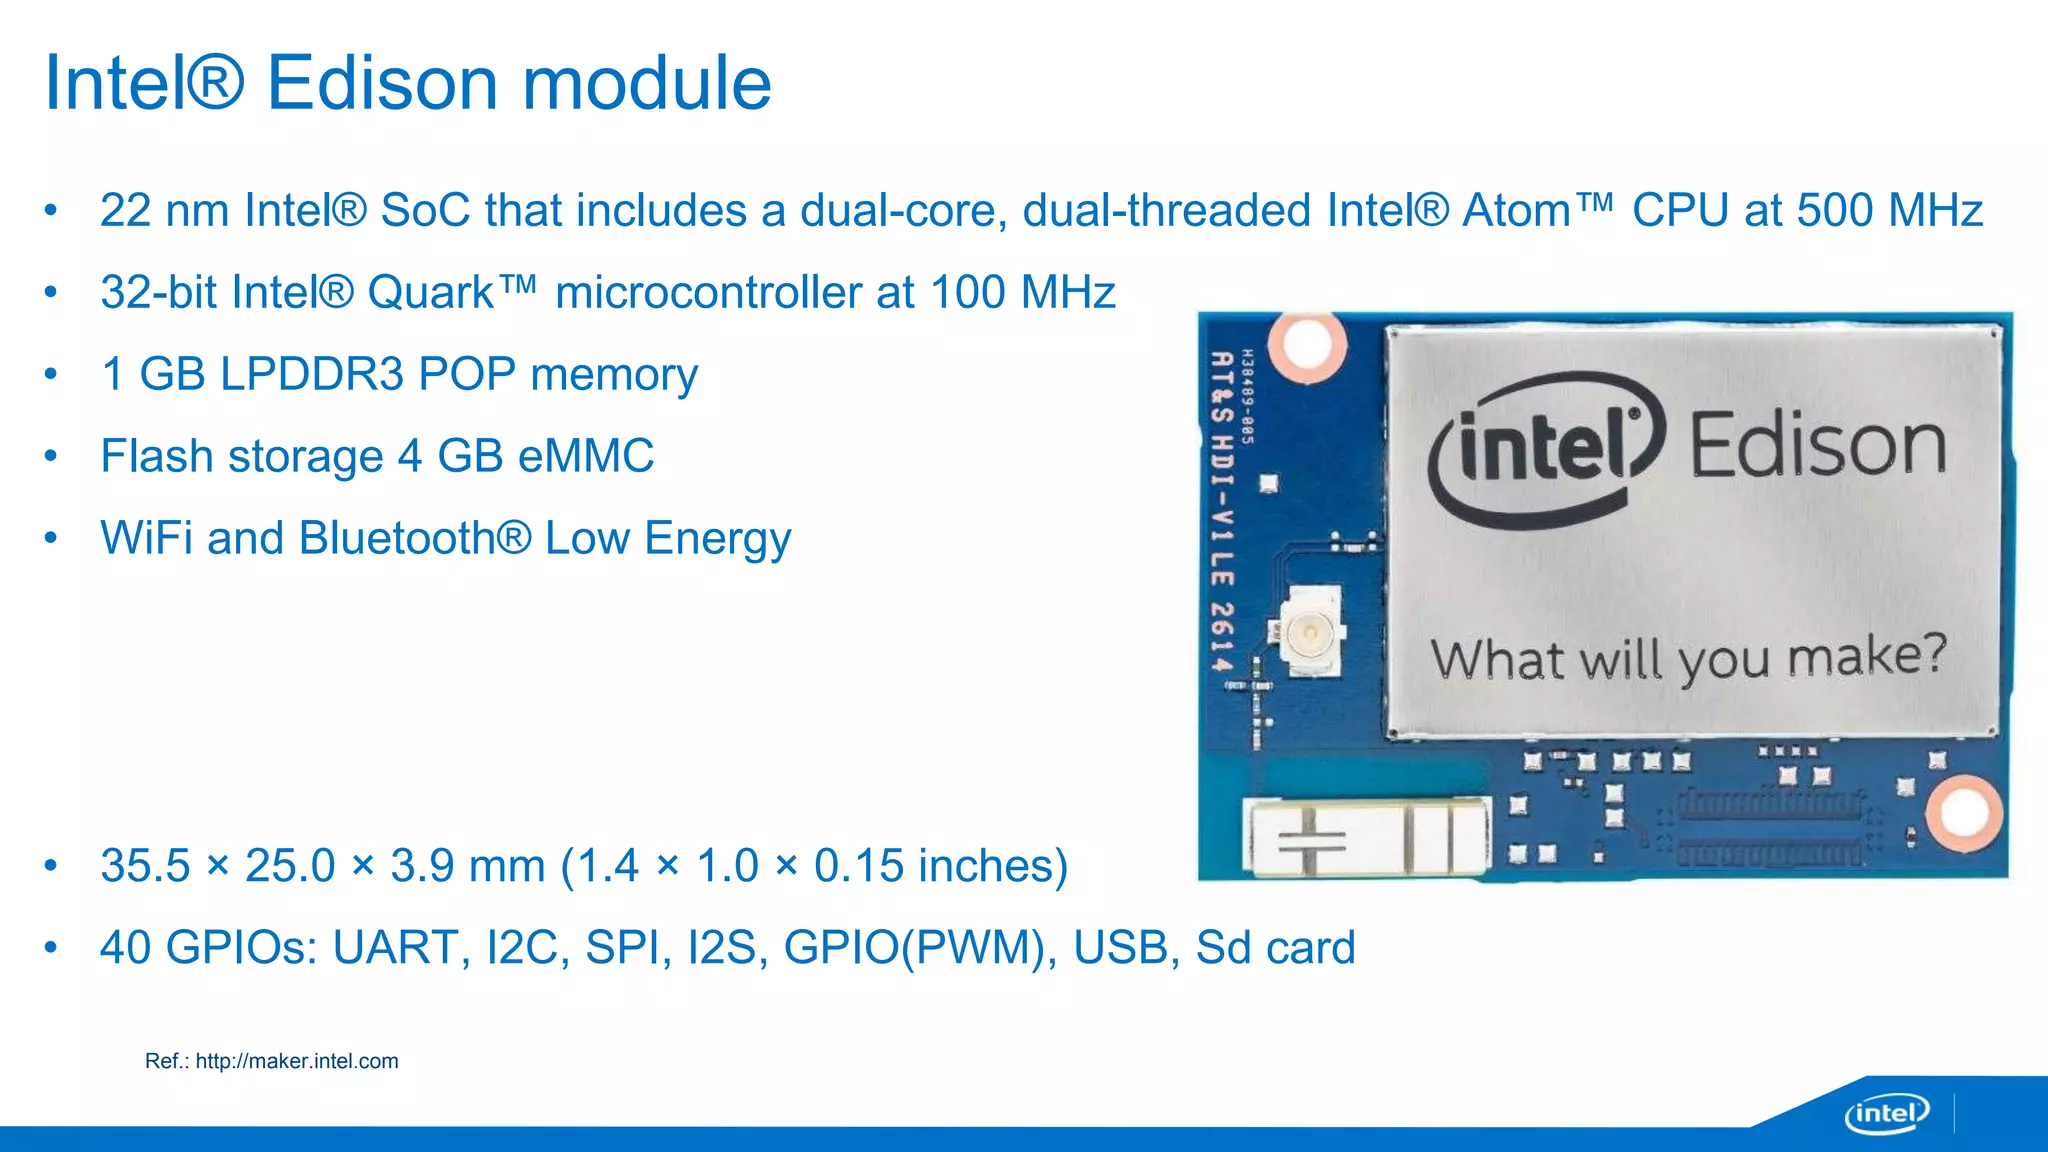
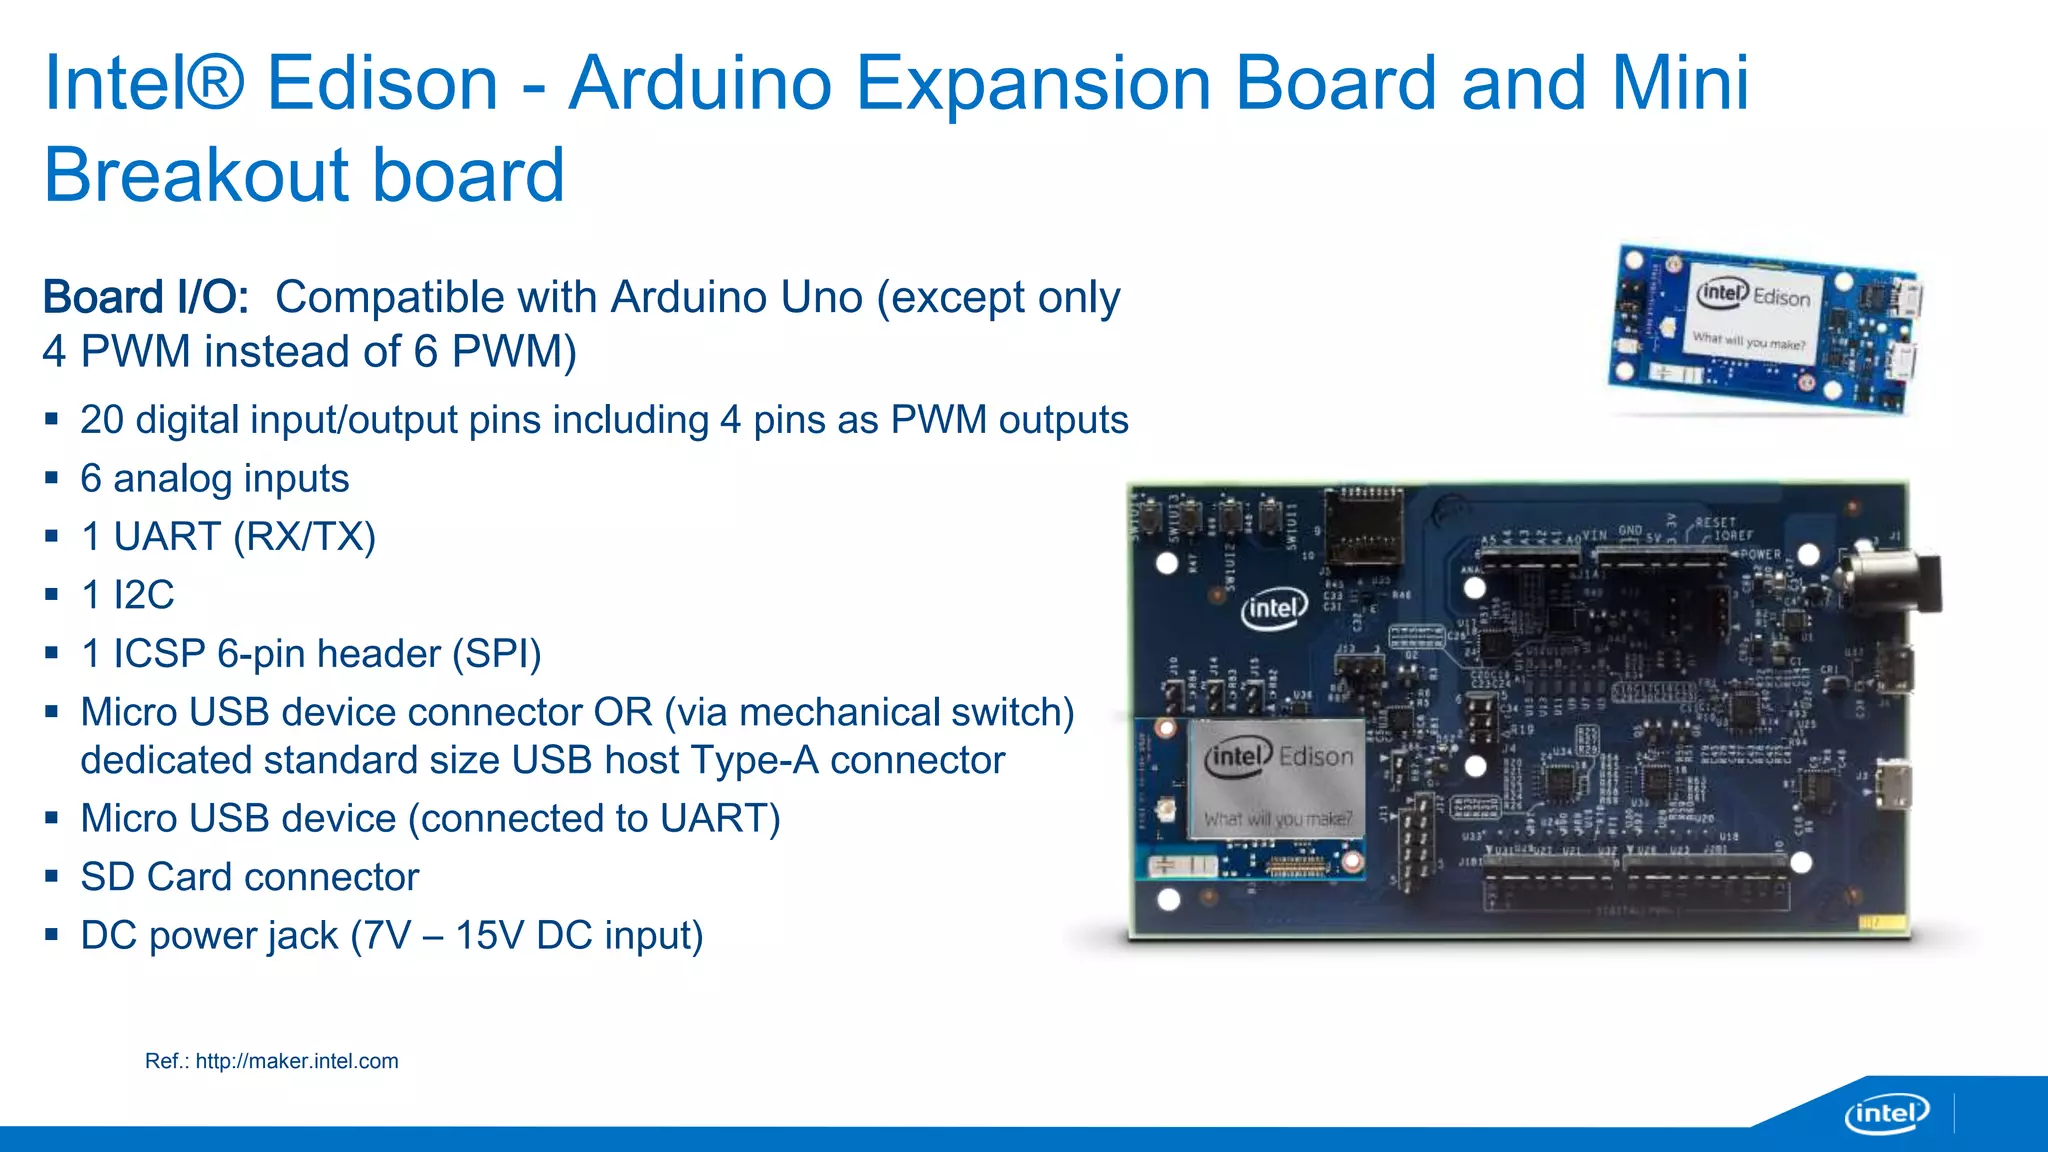
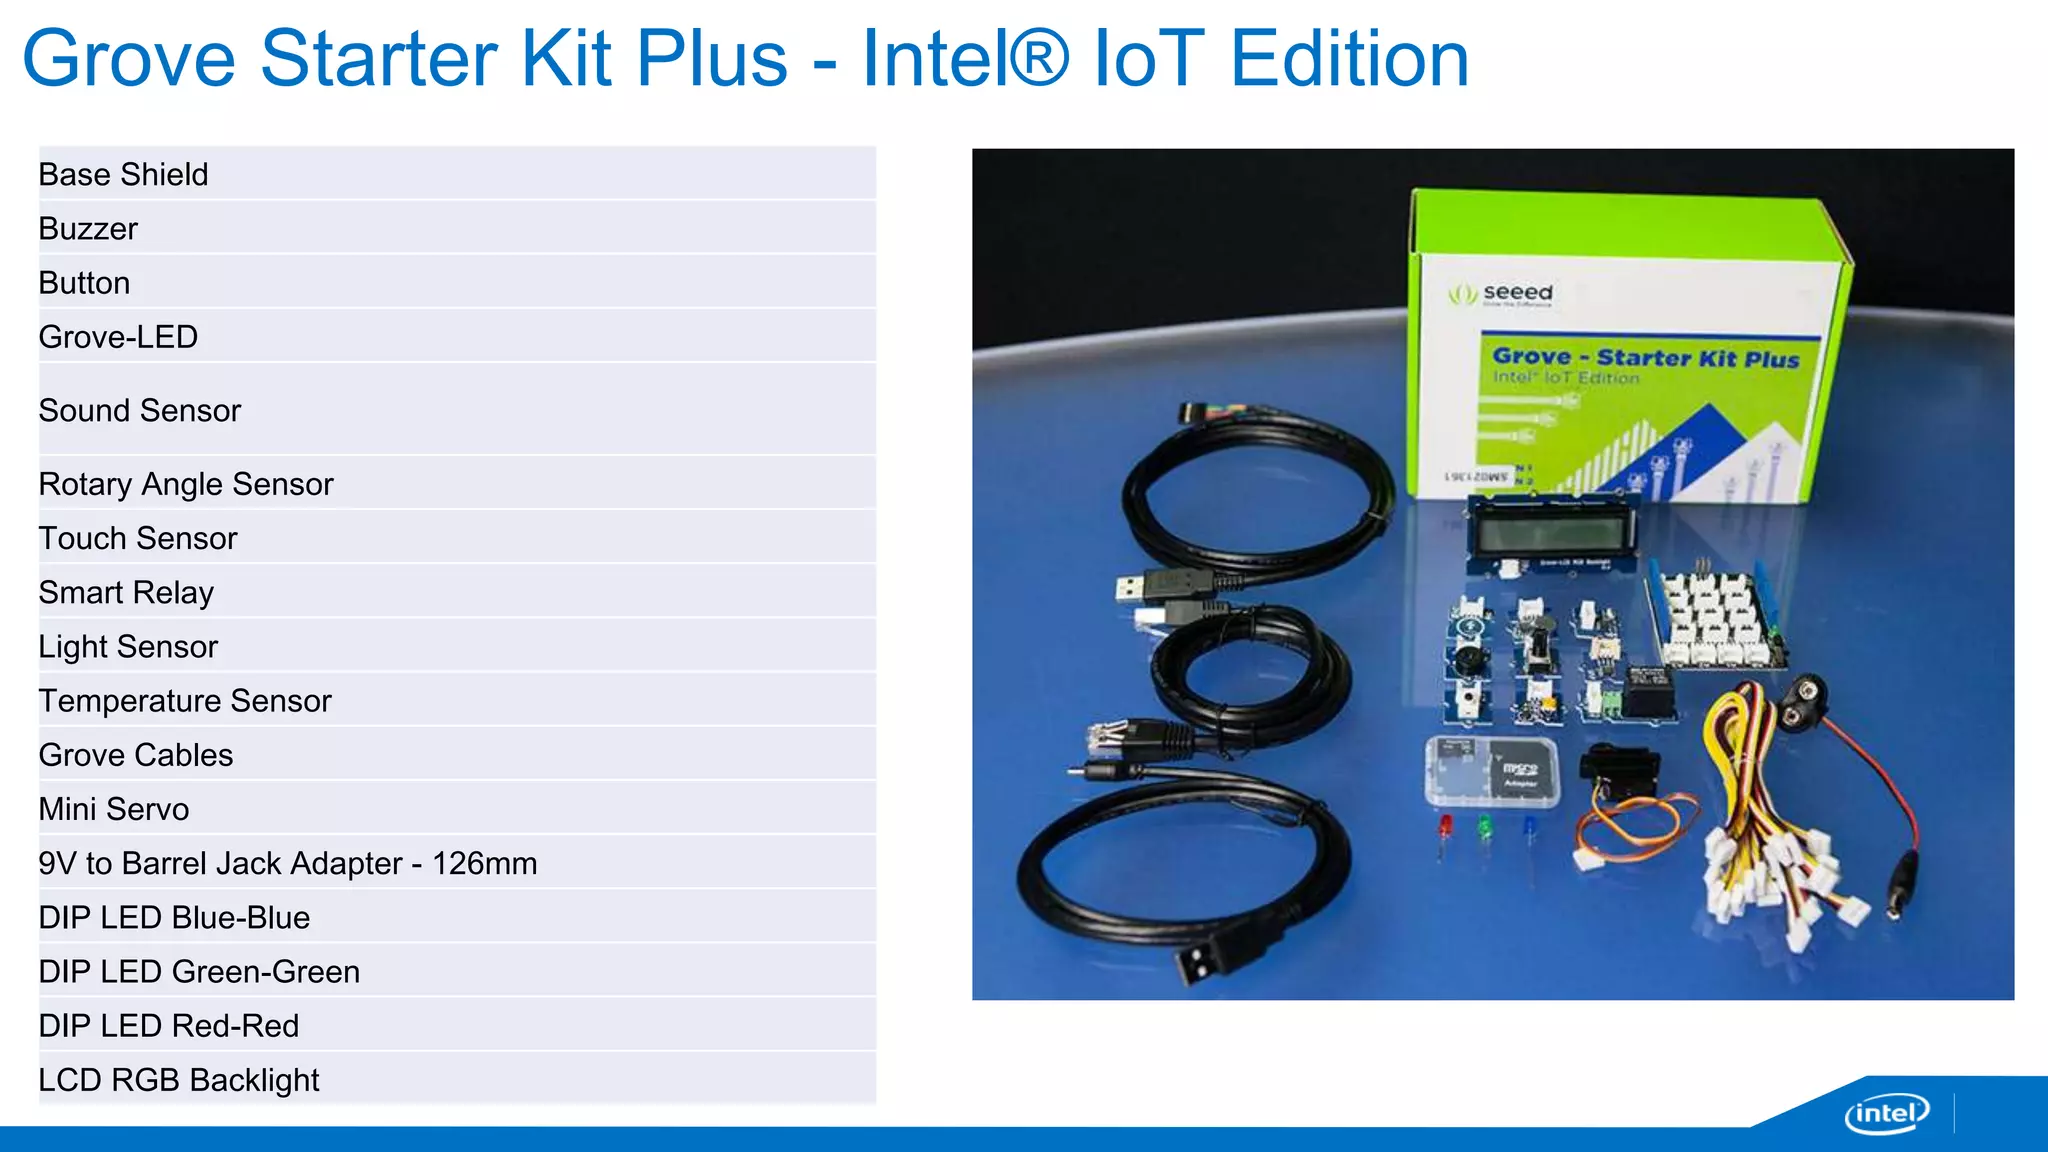
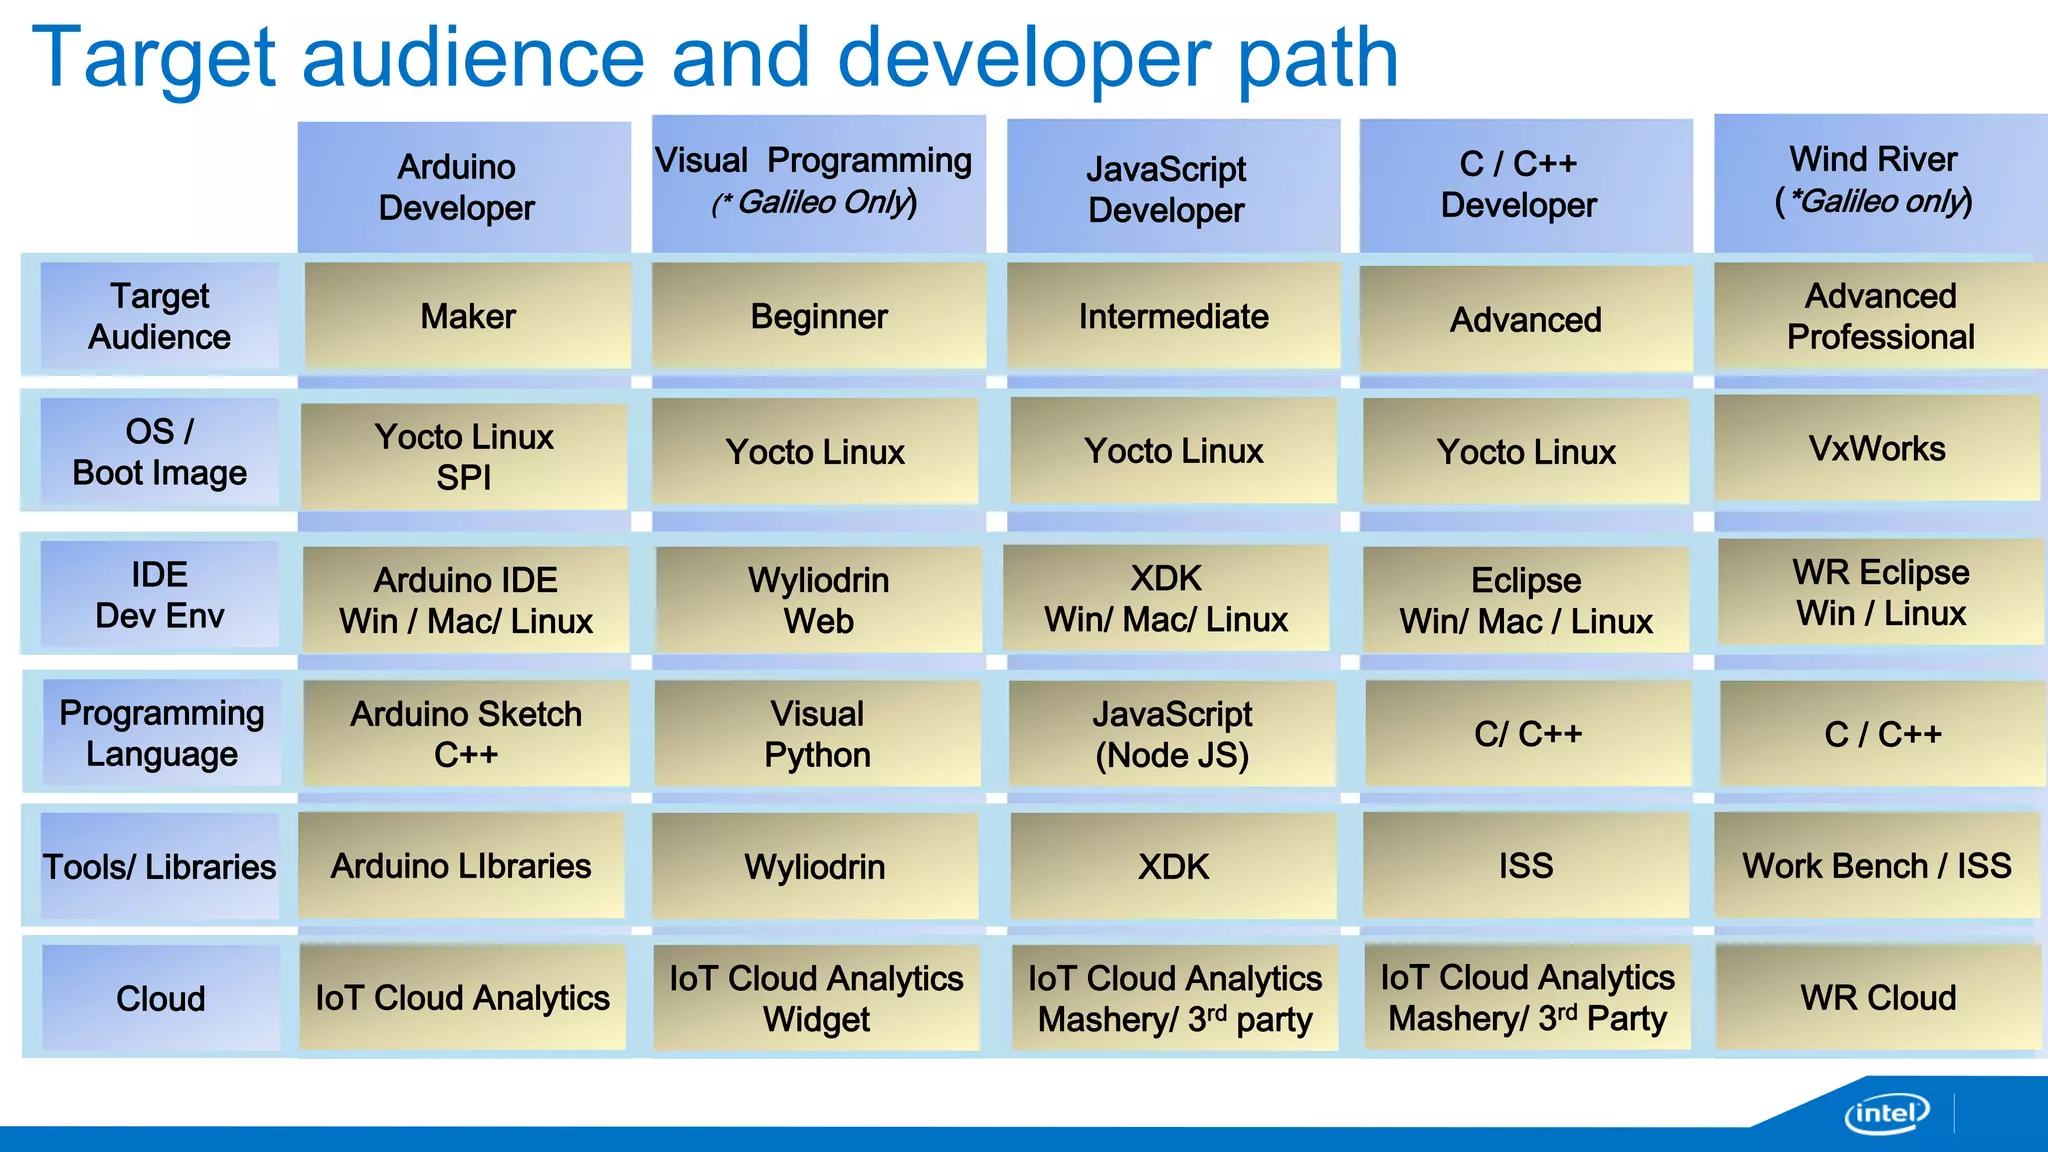
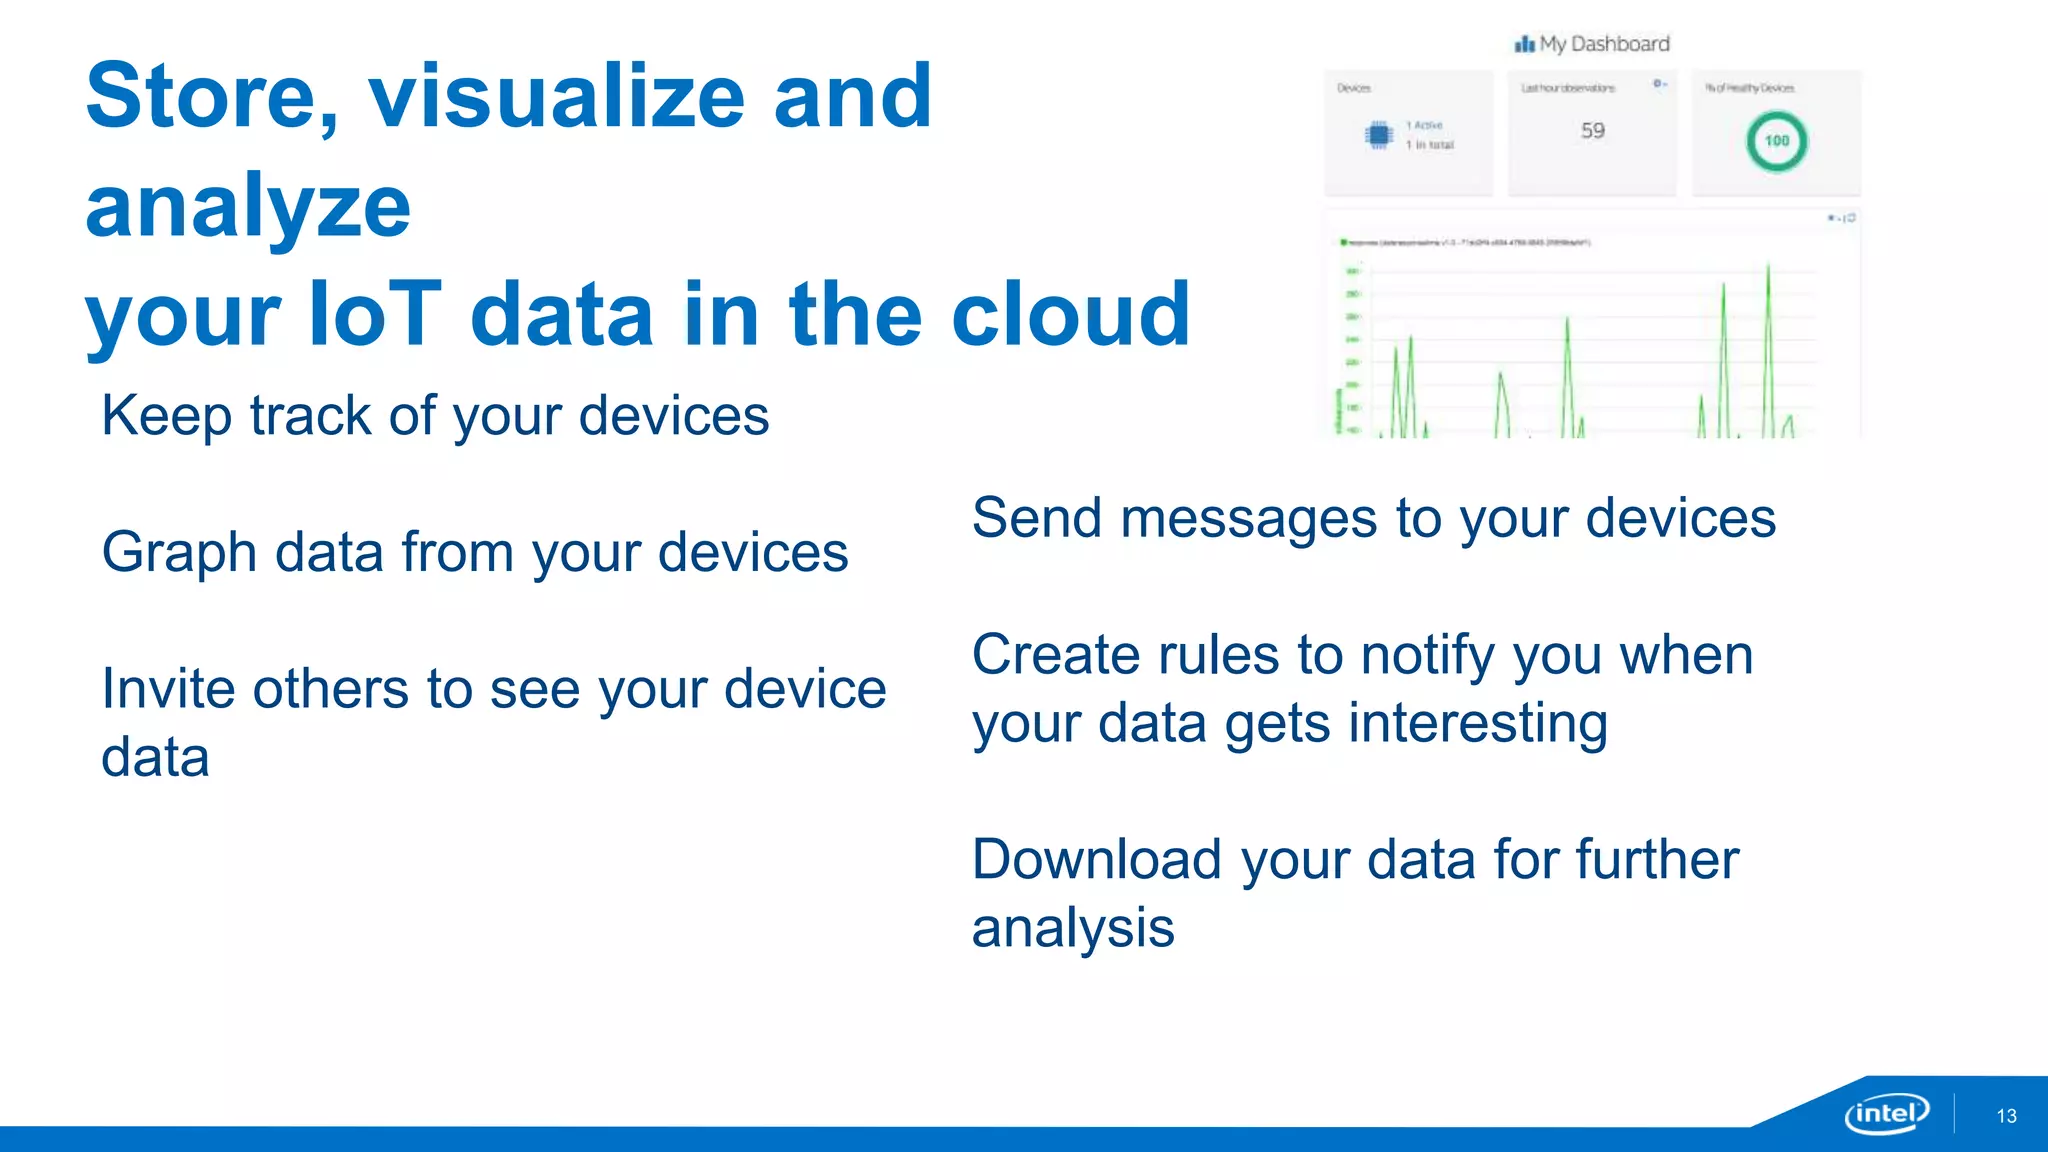
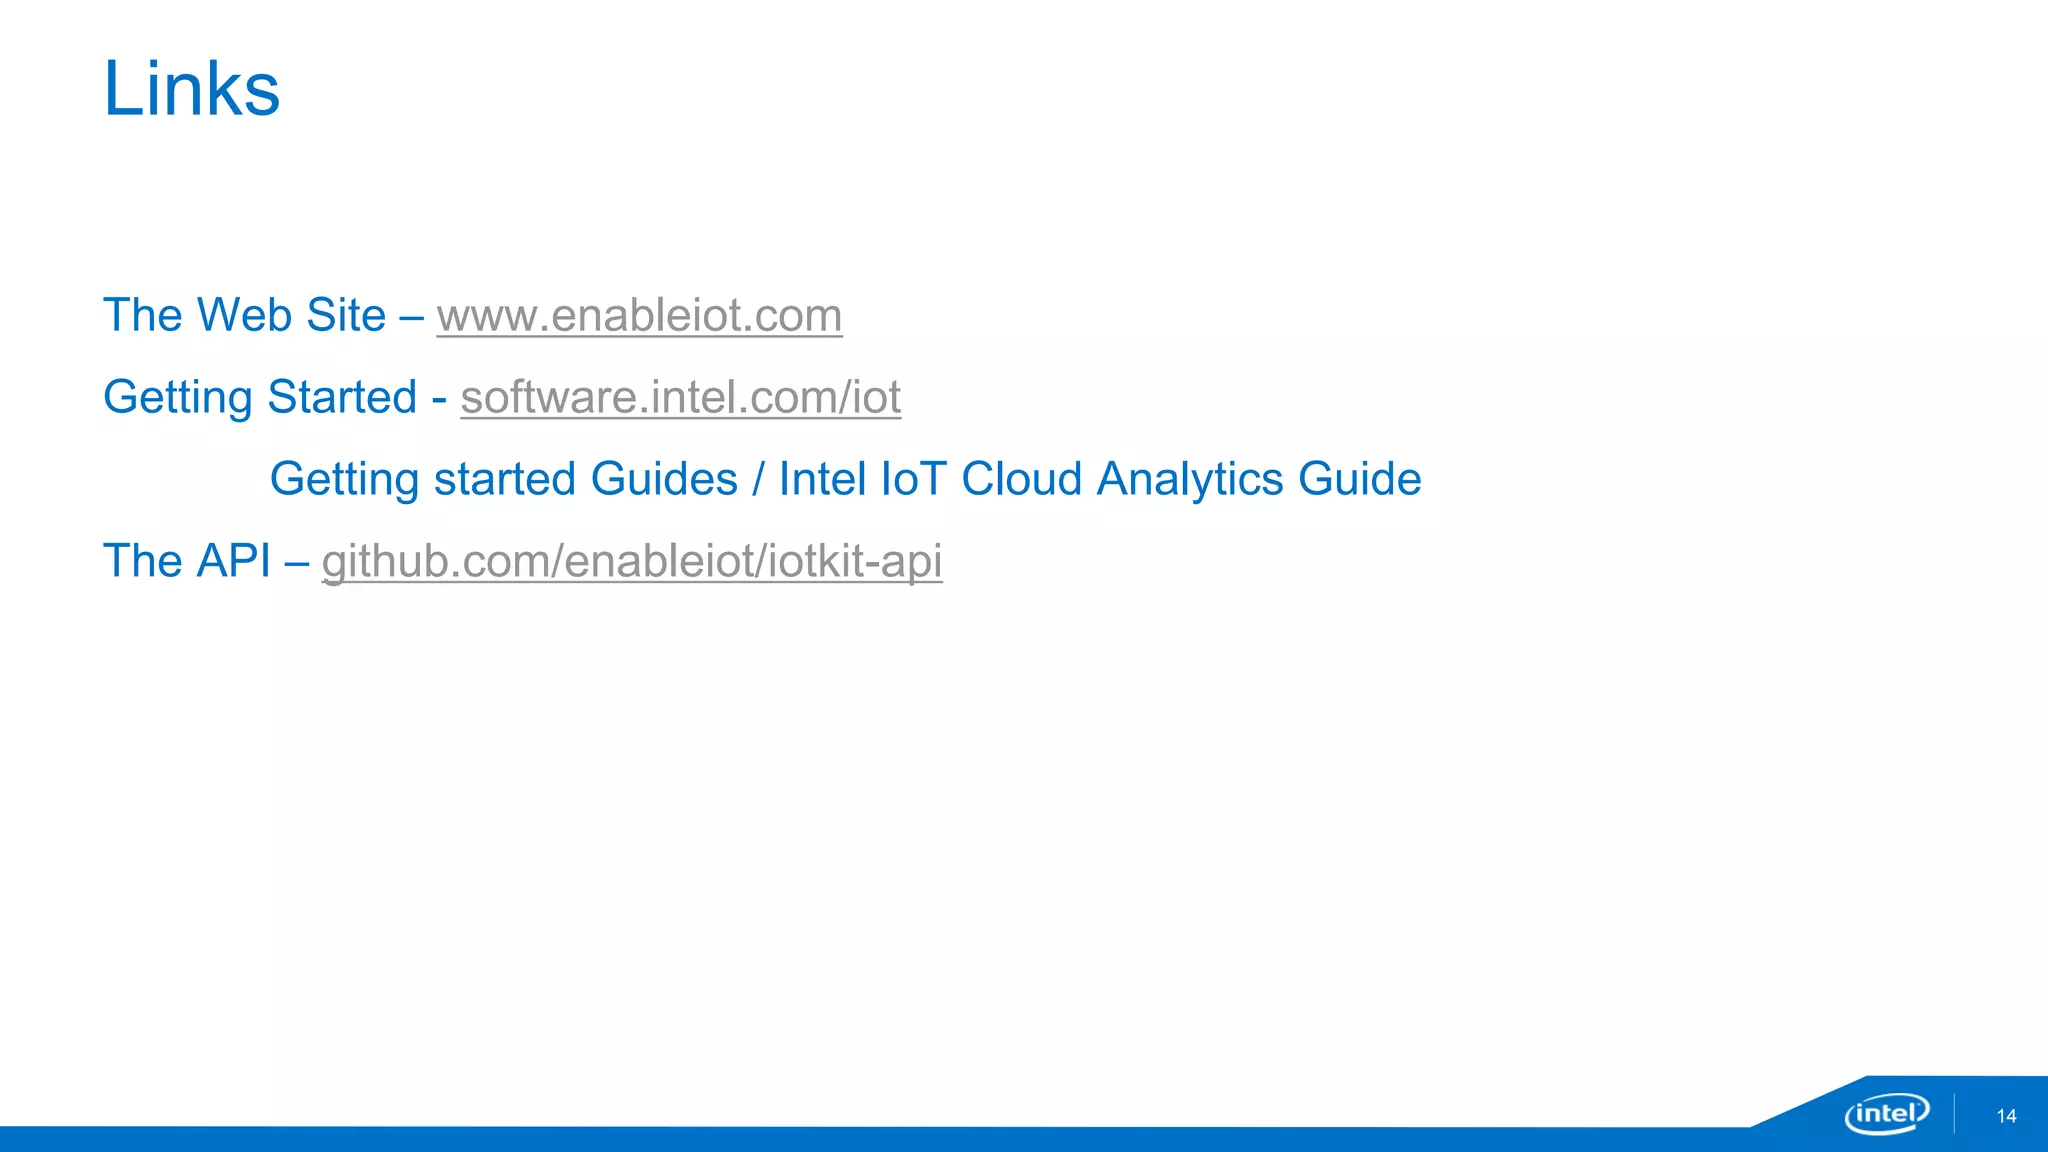
Getting Started with Intel IoT Developer Kit – Dev 
kit 
Sulamita Garcia – Developer Evangelist – Twitter @sulagarcia 
Milano, November 28 2014
“If we’re not a part of this, 
we’re going to miss where the 
future of computing is going.” 
Brian Krzanich, Intel CEO 
Rome Maker Faire Oct 2013
3 
VALUE PROPOSITION 
The Intel® Edison development 
platform is designed to lower the 
barriers to entry for a range of 
Inventors, Entrepreneurs and 
consumer product designers to rapidly 
prototype and produce IoT and 
wearable computing products. 
Intel Confidential
Agenda 
• Devkit components: hardware and software 
• Setting up Galileo/Edison 
• Setting up developer environment 
• Running sample codes 
• Creating your application 
• Dev kit library (MRAA) and sensors repository (UPM)
Devkit components
Intel® IoT Developer Kit Components 
LibMraa UPM (Sensor/Actuator library repository) 
Intel Galileo 
Gen 1 & 2 
Board 
API Bindings C/C++, Node JS, Python 
Yocto based Linux OS image 
Intel Edison 
Arduino 
Development 
Board 
NodeJS 
Support 
C/C++ 
Tool Chain 
Wyliodrin 
Agent 
IoT Cloud 
Agent 
Hard Ware 
S/W Image on IoT platform 
Intel XDK IoT 
Edition 
(coming soon) 
Eclipse IDE 
+ 
ISS 
(Optional) 
Wyliodrin 
(Visual 
Programming) 
Cloud 
Analytics / 
Mashery 
IDE/ Tools 
(Win, Mac, Linux) 
Sensors / Actuators 
Arduino IDE
Intel® Galileo Development Board – Gen 2 
Board I/O: 
 Mechanically compatible with Arduino Uno 
 20 digital input/output pins including 6 pins as PWM outputs 
 6 analog inputs 
 2 UART (RX/TX) 
 1 I2C 
 1 ICSP 6-pin header (SPI) 
 USB device connector (Host) 
 Micro USB device connector (client) 
 SD Card connector 
 DC power jack (7V – 15V DC input) 
Ref.: http://maker.intel.com
Intel® Edison module 
• 22 nm Intel® SoC that includes a dual-core, dual-threaded Intel® Atom™ CPU at 500 MHz 
• 32-bit Intel® Quark™ microcontroller at 100 MHz 
• 1 GB LPDDR3 POP memory 
• Flash storage 4 GB eMMC 
• WiFi and Bluetooth® Low Energy 
• 35.5 × 25.0 × 3.9 mm (1.4 × 1.0 × 0.15 inches) 
• 40 GPIOs: UART, I2C, SPI, I2S, GPIO(PWM), USB, Sd card 
Ref.: http://maker.intel.com
Intel® Edison - Arduino Expansion Board and Mini 
Breakout board 
Board I/O: Compatible with Arduino Uno (except only 
4 PWM instead of 6 PWM) 
 20 digital input/output pins including 4 pins as PWM outputs 
 6 analog inputs 
 1 UART (RX/TX) 
 1 I2C 
 1 ICSP 6-pin header (SPI) 
 Micro USB device connector OR (via mechanical switch) 
dedicated standard size USB host Type-A connector 
 Micro USB device (connected to UART) 
 SD Card connector 
 DC power jack (7V – 15V DC input) 
Ref.: http://maker.intel.com
Grove Starter Kit Plus - Intel® IoT Edition 
Base Shield 
Buzzer 
Button 
Grove-LED 
Sound Sensor 
Rotary Angle Sensor 
Touch Sensor 
Smart Relay 
Light Sensor 
Temperature Sensor 
Grove Cables 
Mini Servo 
9V to Barrel Jack Adapter - 126mm 
DIP LED Blue-Blue 
DIP LED Green-Green 
DIP LED Red-Red 
LCD RGB Backlight
Target audience and developer path 
Arduino 
Developer 
Arduino 
Developer 
Visual Programming 
(* Galileo Only) 
JavaScript 
Developer 
Wind River 
(*Galileo only) 
C / C++ 
Developer 
Target 
Audience 
Maker Beginner Intermediate Advanced 
Advanced 
Professional 
OS / 
Boot Image 
Tools/ Libraries 
Yocto Linux 
SPI 
Yocto Linux Yocto Linux Yocto Linux VxWorks 
Arduino LIbraries Wyliodrin XDK ISS 
IDE 
Dev Env 
Arduino IDE 
Win / Mac/ Linux 
Wyliodrin 
Web 
XDK 
Win/ Mac/ Linux 
Eclipse 
Win/ Mac / Linux 
WR Eclipse 
Win / Linux 
Programming 
Language 
Arduino Sketch 
C++ 
Visual 
Python 
JavaScript 
(Node JS) 
C/ C++ C / C++ 
Work Bench / ISS 
Cloud IoT Cloud Analytics 
IoT Cloud Analytics 
Widget 
IoT Cloud Analytics 
Mashery/ 3rd party 
IoT Cloud Analytics 
Mashery/ 3rd Party 
WR Cloud
Intel Cloud Analytics
13 
Store, visualize and 
analyze 
your IoT data in the cloud 
Keep track of your devices 
Graph data from your devices 
Invite others to see your device 
data 
Send messages to your devices 
Create rules to notify you when 
your data gets interesting 
Download your data for further 
analysis
Links 
14 
The Web Site – www.enableiot.com 
Getting Started - software.intel.com/iot 
Getting started Guides / Intel IoT Cloud Analytics Guide 
The API – github.com/enableiot/iotkit-api
Online documentation for reference 
This presentation: http://slidesha.re/1uuFgBH 
https://software.intel.com/en-us/iot/getting-started 
http://intel.com/edison/getstarted
Demos
Connecting your environment 
microUSB <-> USB 
Ref.: https://communities.intel.com/docs/DOC-23147 
Power / Arduino / flashing 
OS 
Serial port
Arduino for Galileo/Edison
Arduino for Galileo or Edison 
https://communities.intel.com/docs/DOC-23242
Setting up other developer environments
Connect board via serial – discover port on Windows 
Ref.: https://software.intel.com/en-us/iot-c-eclipse
Connect board via serial – discover port on MacOS 
After connecting the serial cable, check if you have /dev/cu.usbserial(*) 
LINUX - /dev/ttyUSB0 
If not, you may need to install a serial-USB FTDI driver. 
Example: 
Ref.: https://software.intel.com/en-us/iot-c-eclipse
Connect via serial – putty, goSerial or minicom 
Linux – minicom –D /dev/ttyUSB0 –s 115200 
User: root, no password 
Ref.: https://software.intel.com/en-us/iot-c-eclipse
Connecting Edison – configure_edison --setup 
Configure password 
Configure wifi 
Galileo should automatically set up an IP address.
Find your Galileo/Edison IP address and write it down: 
command `ip a` 
Ping between board and your laptop to 
check connectivity 
Ref.: https://software.intel.com/en-us/iot-c-eclipse
Shortcut – if you feel comfortable with vi 
If you have experience coding directly from the command line, you have: 
• Busybox/vi 
• Gcc 
• Python 
• Node.js 
But we will continue with the IDEs, keep paying attention 
Time to chose your path: 
C/C++: 
• Eclipse 
Javascript: 
• XDK 
Arduino 
• Arduino IDE for Galileo 
Visual Programming (Blocky) 
• Wyliodrin
Python and Node.js demo
C/C++/Eclipse
Eclipse(C/C++) – setting up 
Copy to your computer 
Extract the file you copied previously (iotdk-ide-${yourOS}.7z) with 7z 
 Treats long paths better, needed for this file. 
 If you need to download: http://www.7-zip.org/ 
Note: Better to extract the file to C: on Windows 
Execute devkit-launcher.bat 
Ref.: https://software.intel.com/en-us/iot-c-eclipse
Click on Remote System Explorer 
Ref.: https://software.intel.com/en-us/iot-c-eclipse
Fill the IP address on (3) 
Ref.: https://software.intel.com/en-us/iot-c-eclipse
Running a sample - Click back on C/C++ 
Ref.: https://software.intel.com/en-us/node/519969
Galileo - Right click 4_cpp_onboard_led 
Ref.: https://software.intel.com/en-us/node/519969
Click Run, select 4_cpp_onboard_led 
Ref.: https://software.intel.com/en-us/node/519969
JavaScript/Node.js/XDK
Install the file copied from the SD card, XDK directory 
Ref.: http://xdk.intel.com/iot
Login/create your account
Start with a Sample (under IoT Projects) – click on “Use this 
Template”
Should look like this
Select Galileo/Edison board
Toggle the console
Click Manage your daemon/IoT device menu in the bottom 
taskbar. Select sync PC time w/ clock on target board to 
avoid computer and device timing issues.
Click Install/Build to fetch node modules specified in 
package.json and install them on device; 1st time click Build
Click Upload to upload the current project to the Galileo 
board
Click Run to run the project on the device. The LED should 
be blinking.
Devkit library (MRAA) and sensor repository (UPM)
MRAA lib - https://github.com/intel-iot-devkit/mraa 
MRAA – random letters, doesn’t mean anything 
API documentation available - http://iotdk.intel.com/docs/master/mraa/ 
Examples directory 
Minimum code sample: 
mraa_gpio_context gpio; 
gpio = mraa_gpio_init(6); 
mraa_gpio_dir(gpio, MRAA_GPIO_IN); 
for (;;) { 
fprintf(stdout, "Gpio is %dn", mraa_gpio_read(gpio)); 
sleep(1); 
} 
mraa_gpio_close(gpio);
UPM repository - https://github.com/intel-iot-devkit/upm 
List of supported sensors in C++ 
API documentation - http://iotdk.intel.com/docs/master/upm/ 
Examples directory 
Minimum code example: 
upm::GroveTemp* s = new upm::GroveTemp(0); 
std::cout << s->name() << std::endl; 
for (int i=0; i < 10; i++) { 
std::cout << s->value() << std::endl; 
sleep(1); 
}
Just remember to use the correspondent library 
Project name (right click) 
-> Settings -> C/C++ 
Build -> Settings -> Tool 
Settings -> Cross G++ 
Linker -> Miscelaneous
UPM API documentation – which library to use?
Recap – navigating IDZ IoT - https://software.intel.com/iot
Creating new app
If using Eclipse
Create your first app – copy&paste an existing sample
Creating your first app – if you use UPM repository 
Project name (right click) 
-> Settings -> C/C++ 
Build -> Settings -> Tool 
Settings -> Cross G++ 
Linker -> Miscelaneous
If using XDK
Node.js 
MRAA 
var mraa = require(“mraa”) 
UPM 
Find the library name – example: libupm-grove 
-> replace “lib” for “js” and you have it: jsupm_grove 
Code: 
require(“jsupm_grove”);
If using Python
Python 
MRAA 
import mraa 
UPM 
Find the library name – example: libupm-grove 
-> replace “lib” for “py” and you have it: pyupm-grove 
Code: 
import pyupm_grove
If using Arduino
Go to IDZ IoT page, find your sensor
Under References, follow Grove Wiki
//Load i2clcd module 
var LCD = require('jsupm_i2clcd'); 
//Initialize Jhd1313m1 at 0x62 (RGB_ADDRESS) and 0x3E (LCD_ADDRESS) 
var myLcd = new LCD.Jhd1313m1 (0, 0x3E, 0x62); 
myLcd.setCursor(0,0); 
myLcd.write('Hello World');
Now, who has problems??? 

Lab Handson: Power your Creations with Intel Edison!

  • 1.
    Getting Started withIntel IoT Developer Kit – Dev kit Sulamita Garcia – Developer Evangelist – Twitter @sulagarcia Milano, November 28 2014
  • 2.
    “If we’re nota part of this, we’re going to miss where the future of computing is going.” Brian Krzanich, Intel CEO Rome Maker Faire Oct 2013
  • 3.
    3 VALUE PROPOSITION The Intel® Edison development platform is designed to lower the barriers to entry for a range of Inventors, Entrepreneurs and consumer product designers to rapidly prototype and produce IoT and wearable computing products. Intel Confidential
  • 4.
    Agenda • Devkitcomponents: hardware and software • Setting up Galileo/Edison • Setting up developer environment • Running sample codes • Creating your application • Dev kit library (MRAA) and sensors repository (UPM)
  • 5.
  • 6.
    Intel® IoT DeveloperKit Components LibMraa UPM (Sensor/Actuator library repository) Intel Galileo Gen 1 & 2 Board API Bindings C/C++, Node JS, Python Yocto based Linux OS image Intel Edison Arduino Development Board NodeJS Support C/C++ Tool Chain Wyliodrin Agent IoT Cloud Agent Hard Ware S/W Image on IoT platform Intel XDK IoT Edition (coming soon) Eclipse IDE + ISS (Optional) Wyliodrin (Visual Programming) Cloud Analytics / Mashery IDE/ Tools (Win, Mac, Linux) Sensors / Actuators Arduino IDE
  • 7.
    Intel® Galileo DevelopmentBoard – Gen 2 Board I/O:  Mechanically compatible with Arduino Uno  20 digital input/output pins including 6 pins as PWM outputs  6 analog inputs  2 UART (RX/TX)  1 I2C  1 ICSP 6-pin header (SPI)  USB device connector (Host)  Micro USB device connector (client)  SD Card connector  DC power jack (7V – 15V DC input) Ref.: http://maker.intel.com
  • 8.
    Intel® Edison module • 22 nm Intel® SoC that includes a dual-core, dual-threaded Intel® Atom™ CPU at 500 MHz • 32-bit Intel® Quark™ microcontroller at 100 MHz • 1 GB LPDDR3 POP memory • Flash storage 4 GB eMMC • WiFi and Bluetooth® Low Energy • 35.5 × 25.0 × 3.9 mm (1.4 × 1.0 × 0.15 inches) • 40 GPIOs: UART, I2C, SPI, I2S, GPIO(PWM), USB, Sd card Ref.: http://maker.intel.com
  • 9.
    Intel® Edison -Arduino Expansion Board and Mini Breakout board Board I/O: Compatible with Arduino Uno (except only 4 PWM instead of 6 PWM)  20 digital input/output pins including 4 pins as PWM outputs  6 analog inputs  1 UART (RX/TX)  1 I2C  1 ICSP 6-pin header (SPI)  Micro USB device connector OR (via mechanical switch) dedicated standard size USB host Type-A connector  Micro USB device (connected to UART)  SD Card connector  DC power jack (7V – 15V DC input) Ref.: http://maker.intel.com
  • 10.
    Grove Starter KitPlus - Intel® IoT Edition Base Shield Buzzer Button Grove-LED Sound Sensor Rotary Angle Sensor Touch Sensor Smart Relay Light Sensor Temperature Sensor Grove Cables Mini Servo 9V to Barrel Jack Adapter - 126mm DIP LED Blue-Blue DIP LED Green-Green DIP LED Red-Red LCD RGB Backlight
  • 11.
    Target audience anddeveloper path Arduino Developer Arduino Developer Visual Programming (* Galileo Only) JavaScript Developer Wind River (*Galileo only) C / C++ Developer Target Audience Maker Beginner Intermediate Advanced Advanced Professional OS / Boot Image Tools/ Libraries Yocto Linux SPI Yocto Linux Yocto Linux Yocto Linux VxWorks Arduino LIbraries Wyliodrin XDK ISS IDE Dev Env Arduino IDE Win / Mac/ Linux Wyliodrin Web XDK Win/ Mac/ Linux Eclipse Win/ Mac / Linux WR Eclipse Win / Linux Programming Language Arduino Sketch C++ Visual Python JavaScript (Node JS) C/ C++ C / C++ Work Bench / ISS Cloud IoT Cloud Analytics IoT Cloud Analytics Widget IoT Cloud Analytics Mashery/ 3rd party IoT Cloud Analytics Mashery/ 3rd Party WR Cloud
  • 12.
  • 13.
    13 Store, visualizeand analyze your IoT data in the cloud Keep track of your devices Graph data from your devices Invite others to see your device data Send messages to your devices Create rules to notify you when your data gets interesting Download your data for further analysis
  • 14.
    Links 14 TheWeb Site – www.enableiot.com Getting Started - software.intel.com/iot Getting started Guides / Intel IoT Cloud Analytics Guide The API – github.com/enableiot/iotkit-api
  • 15.
    Online documentation forreference This presentation: http://slidesha.re/1uuFgBH https://software.intel.com/en-us/iot/getting-started http://intel.com/edison/getstarted
  • 16.
  • 17.
    Connecting your environment microUSB <-> USB Ref.: https://communities.intel.com/docs/DOC-23147 Power / Arduino / flashing OS Serial port
  • 18.
  • 19.
    Arduino for Galileoor Edison https://communities.intel.com/docs/DOC-23242
  • 20.
    Setting up otherdeveloper environments
  • 21.
    Connect board viaserial – discover port on Windows Ref.: https://software.intel.com/en-us/iot-c-eclipse
  • 22.
    Connect board viaserial – discover port on MacOS After connecting the serial cable, check if you have /dev/cu.usbserial(*) LINUX - /dev/ttyUSB0 If not, you may need to install a serial-USB FTDI driver. Example: Ref.: https://software.intel.com/en-us/iot-c-eclipse
  • 23.
    Connect via serial– putty, goSerial or minicom Linux – minicom –D /dev/ttyUSB0 –s 115200 User: root, no password Ref.: https://software.intel.com/en-us/iot-c-eclipse
  • 24.
    Connecting Edison –configure_edison --setup Configure password Configure wifi Galileo should automatically set up an IP address.
  • 25.
    Find your Galileo/EdisonIP address and write it down: command `ip a` Ping between board and your laptop to check connectivity Ref.: https://software.intel.com/en-us/iot-c-eclipse
  • 26.
    Shortcut – ifyou feel comfortable with vi If you have experience coding directly from the command line, you have: • Busybox/vi • Gcc • Python • Node.js But we will continue with the IDEs, keep paying attention 
  • 27.
    Time to choseyour path: C/C++: • Eclipse Javascript: • XDK Arduino • Arduino IDE for Galileo Visual Programming (Blocky) • Wyliodrin
  • 28.
  • 29.
  • 30.
    Eclipse(C/C++) – settingup Copy to your computer Extract the file you copied previously (iotdk-ide-${yourOS}.7z) with 7z  Treats long paths better, needed for this file.  If you need to download: http://www.7-zip.org/ Note: Better to extract the file to C: on Windows Execute devkit-launcher.bat Ref.: https://software.intel.com/en-us/iot-c-eclipse
  • 31.
  • 32.
    Click on RemoteSystem Explorer Ref.: https://software.intel.com/en-us/iot-c-eclipse
  • 33.
    Fill the IPaddress on (3) Ref.: https://software.intel.com/en-us/iot-c-eclipse
  • 34.
    Running a sample- Click back on C/C++ Ref.: https://software.intel.com/en-us/node/519969
  • 35.
    Galileo - Rightclick 4_cpp_onboard_led Ref.: https://software.intel.com/en-us/node/519969
  • 36.
    Click Run, select4_cpp_onboard_led Ref.: https://software.intel.com/en-us/node/519969
  • 37.
  • 38.
    Install the filecopied from the SD card, XDK directory Ref.: http://xdk.intel.com/iot
  • 39.
  • 40.
    Start with aSample (under IoT Projects) – click on “Use this Template”
  • 41.
  • 42.
  • 43.
  • 44.
    Click Manage yourdaemon/IoT device menu in the bottom taskbar. Select sync PC time w/ clock on target board to avoid computer and device timing issues.
  • 45.
    Click Install/Build tofetch node modules specified in package.json and install them on device; 1st time click Build
  • 46.
    Click Upload toupload the current project to the Galileo board
  • 47.
    Click Run torun the project on the device. The LED should be blinking.
  • 48.
    Devkit library (MRAA)and sensor repository (UPM)
  • 49.
    MRAA lib -https://github.com/intel-iot-devkit/mraa MRAA – random letters, doesn’t mean anything API documentation available - http://iotdk.intel.com/docs/master/mraa/ Examples directory Minimum code sample: mraa_gpio_context gpio; gpio = mraa_gpio_init(6); mraa_gpio_dir(gpio, MRAA_GPIO_IN); for (;;) { fprintf(stdout, "Gpio is %dn", mraa_gpio_read(gpio)); sleep(1); } mraa_gpio_close(gpio);
  • 50.
    UPM repository -https://github.com/intel-iot-devkit/upm List of supported sensors in C++ API documentation - http://iotdk.intel.com/docs/master/upm/ Examples directory Minimum code example: upm::GroveTemp* s = new upm::GroveTemp(0); std::cout << s->name() << std::endl; for (int i=0; i < 10; i++) { std::cout << s->value() << std::endl; sleep(1); }
  • 51.
    Just remember touse the correspondent library Project name (right click) -> Settings -> C/C++ Build -> Settings -> Tool Settings -> Cross G++ Linker -> Miscelaneous
  • 52.
    UPM API documentation– which library to use?
  • 53.
    Recap – navigatingIDZ IoT - https://software.intel.com/iot
  • 54.
  • 55.
  • 56.
    Create your firstapp – copy&paste an existing sample
  • 57.
    Creating your firstapp – if you use UPM repository Project name (right click) -> Settings -> C/C++ Build -> Settings -> Tool Settings -> Cross G++ Linker -> Miscelaneous
  • 58.
  • 59.
    Node.js MRAA varmraa = require(“mraa”) UPM Find the library name – example: libupm-grove -> replace “lib” for “js” and you have it: jsupm_grove Code: require(“jsupm_grove”);
  • 60.
  • 61.
    Python MRAA importmraa UPM Find the library name – example: libupm-grove -> replace “lib” for “py” and you have it: pyupm-grove Code: import pyupm_grove
  • 62.
  • 63.
    Go to IDZIoT page, find your sensor
  • 64.
  • 65.
    //Load i2clcd module var LCD = require('jsupm_i2clcd'); //Initialize Jhd1313m1 at 0x62 (RGB_ADDRESS) and 0x3E (LCD_ADDRESS) var myLcd = new LCD.Jhd1313m1 (0, 0x3E, 0x62); myLcd.setCursor(0,0); myLcd.write('Hello World');
  • 66.
    Now, who hasproblems??? 