Balancing an aco lifestyle health and safety by choice, not by chance webber1
•
1 like•501 views


Recommended
More Related Content
Similar to Balancing an aco lifestyle health and safety by choice, not by chance webber1
Similar to Balancing an aco lifestyle health and safety by choice, not by chance webber1 (20)
More from 2013_21
More from 2013_21 (20)
Recently uploaded
Recently uploaded (16)
Balancing an aco lifestyle health and safety by choice, not by chance webber1
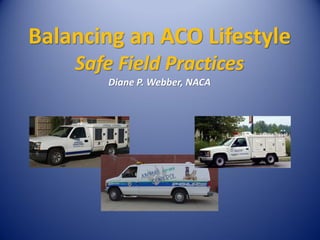
- 1. Balancing an ACO Lifestyle Safe Field Practices Diane P. Webber, NACA
- 2. Vehicle Safety Begins BEFORE you leave on a call. Take care of your equipment and it will take care of you! •Oil and oil filter changes •Fuel filters •Coolant and radiator flushes, air conditioning/ heating systems •Transmission fluid changes •Inspect all belts and hoses •Inspect tires, replace as needed •Check brakes and brake fluid •Batteries and power steering fluids •Windshield wiper blades and fluid •Headlights, brake, warning and directional lights
- 3. Checking Your Oil • Park on level ground. Be sure area is well lit. • Wait a few minutes after turning off the engine for your oil to settle. • Dipstick is a long rod that goes deep into your engine to check the oil level. It should have an orange handle. • Pull the dipstick out, wipe the end clean with a towel, reinsert dipstick into the engine, pull out to read level (where the oily part ends and dry part begins). • Don't add more than a quart of oil at once.
- 4. Checking Your Oil A level between the two dipstick lines means you're level is A-OK.
- 5. Checking / Filling Your Coolant / Antifreeze • Look for white opaque plastic overflow tank next to the radiator • Note markings on side indicating low and high levels. • Always check coolant when vehicle is cold. • If low, top off with 50/50 mix of coolant/water. • Unscrew/pop off cap of reservoir, add mixture to full mark. Tightly replace cap.
- 6. Checking / Filling Your Coolant Add coolant to the white reservoir.
- 7. Tire Pressure Should be checked at least monthly, if not more frequently. • Crucial to safety next to brakes • Incorrect pressure can compromise cornering, braking and stability • Improper pressure can lead to tire failure and possible serious accident • Improper pressure will affect your comfort, fuel economy and tire life
- 8. Tire Pressure If pressure is too high • less tire touches the ground causing vehicle to bounce around on road • traction suffers, alters braking ability Too low • too much tire surface touches ground, increasing friction between road and tire • tires wear prematurely, and can overheat leading to tire separation and accident • tire squeals is a sign of low pressure
- 9. Tire Pressure • Tire pressure also changes with temperature fluctuation. - pressure decreases by approx 1 lb per sq inch for every 10 drop in outside air temp Quiz: How many lbs per sq inch are your tires underinflated if the last time you checked your tire pressure was July (80), and now it’s January (-20)?
- 10. How do you determine the correct tire pressure for your vehicle's tires? • Correct pressure can be found on the driver's door pillar, the glove compartment door or sometimes on the gas filler door. • Pressure listed on tires is actually the MAXIMUM allowable air pressure – not the recommended! • Recommended pressure is almost always LOWER than the maximum.
- 11. Checking the Pressure • Use an accurate tire gauge – analog or dial-type (see photo) – pencil-style gauges are often inaccurate. • Check pressure when the tire is cold. • Check air in all 4 tires – not just one or two! • Remember to check the spare periodically.
- 12. Checking Your Tires Tires should be checked seasonally or BEFORE you head off on a road trip. TIP: Check tire pressure even if tires look fine. Radial tires can be deceiving and can be down 10 lbs of air or overinflated 10 lbs and still look normal.
- 13. How to Change a Tire Step 1: Choose your spot well • Pull off the road so that you are safely out of the flow of traffic • Apply the parking brake, put car into "Park" position. • Step 2: Place a heavy object (e.g., rock, concrete, spare wheel, etc.) in front of the front and back tires.
- 14. How to Change a Tire Step 3: Take out the spare tire and the jack. • Locate the jack plate - usually located just in front of the rear tires, and just behind the front tires • Raise the jack until it is supporting (but not lifting) the car. • Loosen the lug nuts by turning counterclockwise - Do not remove the lug nuts, only loosen them! • Remove the hubcap, if necessary
- 15. How to Change a Tire Step 4: Pump the jack to lift tire off the ground. Step 5: Remove the flat tire • NOW remove the lug nuts from the bolts, and put them aside • Grab the wheel – it is easiest to grab the tire at the "nine o'clock" and "three o'clock" positions • Pull the wheel straight toward you, and off the car
- 16. How to Change a Tire Step 6: Put on the spare tire • Position the spare tire directly in front of the wheel well, aligning the hole in the center of the spare tire with the bolts on the car • Position the tire on the threaded bolts, and push tire onto the car completely. • Replace the lugnuts on the bolts and tighten them, but not too tight...just enough to hold the tire in place while you lower the car
- 17. How to Change a Tire Step 7: Lower the vehicle • Lower the car with the jack until the car is again resting on all four tires • Tighten the lugnuts, starting with one, then moving to the one opposite it, and so on...
- 18. How to Change a Tire Step 8: Put the tools away • Place the flat tire where the spare was located, and replace the jack and lug wench in their proper locations • Carefully inspect your work area making sure that you're not leaving anything behind. • Continue on to your destination, and have the flat tire repaired ASAP!
- 19. Keep Your Brakes at Full Force Check for clean brake fluid levels to keep system operating correctly… Easy as 1 – 2 – 3! • Always clean the area around the cap. • Add brake fluid slowly. • Recheck in a few days. • NEVER shake brake fluid bottle!
- 20. Top Off Your Washer Fluid • Use only real windshield washer fluid – it doesn’t freeze! • Locate opaque white plastic bottle with windshield wiper symbol on cap – usually blue. • Unscrew and fill Check to be sure that your windshield wipers are working and can clear debris from the windshield!
- 21. AC System Look for warning signs of trouble: • • • • • • • • • Loud noises when the air conditioner is turned on. AC not cooling like it should. Water on vehicle’s floor mats. Blower makes noises or doesn't blow at all. Unusual odors coming from vehicle when it is running. Defroster doesn't work. Moisture on front or side windows. Vehicle starts to run hot. EXTRA moisture under the front of your vehicle when it is parked.
- 22. Headlights and Brake lights • All lights on your vehicle should be working at all times. • Always check headlight operation at night or in a dark garage. • Inspect the headlight lens and other lenses for cracks and clarity (dull or milky). • Turn the headlights on - the headlights should shine bright.
- 24. Tail Lights, Side Marker, Reverse, Running Light & Stop Light Bulbs • Check operation at night or in dark garage. • Step on brake pedal to check brake lights. • Make sure all brake lights illuminate, including the middle third brake light. • Turn headlight switch to first selection. • Inspect all side marker, front running lights, and tail lights.
- 25. Third or Upper Brake Lights To check on this light operation: • Turn key to the "on" position (do not start). • Step on brake pedal • All brake lights should illuminate, including the third or upper brake light.
- 26. Emergency Flashers or Hazard Lights • Locate the emergency switch and activate. • Check around vehicle to make sure all lights are functioning properly. • Deactivate emergency flasher switch to stop flasher operation.
- 27. Directional Arrow Bars Directional Arrow Bars alert drivers to changing traffic patterns or an emergency incident.
- 28. Vehicle Equipment •Tool Kit and Emergency Kit •Leash / Catch pole / Snappy Snare / Nets •Clip board / report forms / pen / Citation Book •Camera / Radio •First Aid Kit / Roadside safety items •Local street directory and Atlas •Animal transport items
- 29. Animal Transport Area Heating and cooling systems •Service regularly •Clean or change filters •Test system once a week! Fresh Air System •Dual fan, reversible flow system •Check vent fan covers for leaks, worn/broken gaskets •Clean vent cover screens of dust, hair and lint •Test weekly
- 30. Animal Transport Boxes With all the bells and whistles. Without.
- 31. Check each cage •Look for loose screws, broken brackets, etc •Confirm all cages latch securely •Cages are cleaned, sanitized and ready to receive animals Replace/replenish supplies immediately! •Leashes, nets, control poles •Fresh news paper •Clean towels and blankets •Food and water bowls •Forms, citation book, pens, clipboard, etc. Clean /decontaminate the ENTIRE vehicle each day! •Everything cage , anything used or touched, needs to be decontaminated!
- 32. Safety on the Road Keep a current “Next Exit” book in your vehicle •This will give you the location and types of a fuel/service stations, hotels, restaurants and rest areas along all major highways.
- 33. Roadside Safety • Flares, Reflectors, Safety cones • Weather Alert Radio • Emergency Road Service agreement • Flashlight (2) Batteries (lots) • Chains, shovel
- 34. Driver Safety Know your limitations •If you feel uncomfortable or unsafe about what you are be asked to do, speak up! •Know and obey the law! •Wear your seatbelts •Drive at or just under the speed limit •Use turn signals •Laws differ from state to state for commercial vehicles Drive with headlights and running lights on •In daylight hours also! Be well-rested!
- 35. Distractions
- 36. Basic Safe Driving Tips to Remember • Proper use of lights and emergency signals • Consistent use of directional lights, rear/side mirrors • Safe passing and lane change practices • Safe speeds for road conditions • Staying with the traffic tempo • Follow at safe distances – “2 second rule” • Yield the right-of-way • Full and gradual stops at all traffic stops, railroads, and when required • SLOW DOWN!!!!
- 37. Represent Your Agency Well! • In a marked vehicle, your vehicle is a moving billboard • Keep vehicle (and uniform) clean and presentable • Be courteous; allow others to cut in • Maintain extra distance between vehicles • People will be interested in what you are doing! • Bring flyers/pamphlets to hand out