1. Edits in progress
Throughout the editing of our music video we had to change the speed of many of our shots. This is
because we used many close-up shots that showed the main character singing. As a result of this we
had to sync the mouth of the character up with the lyrics of the song. We found this very difficult as
the speed of the miming by the character was different at different points of the shot. To overcome
this we also cut some of the shots so that we could slow down or speed up different parts of the
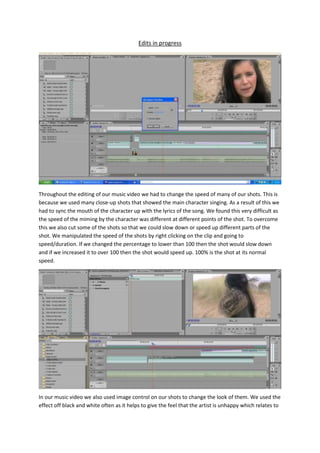
shot. We manipulated the speed of the shots by right clicking on the clip and going to
speed/duration. If we changed the percentage to lower than 100 then the shot would slow down
and if we increased it to over 100 then the shot would speed up. 100% is the shot at its normal
speed.
In our music video we also used image control on our shots to change the look of them. We used the
effect off black and white often as it helps to give the feel that the artist is unhappy which relates to
2. the lyrics of the song. We changed the shot to black and which by going to effects on Adobe
premiere and then going to image control and clicking black and white.
To make sure that our music video has more of a smooth flowing feel we added many dissolves
which dissolves two shots together. By doing this it gets rid of any jumps that could be between two
shots.
As we recorded our shots in standard definition we had to change the width of our shots so that
they are widescreen. To do this we had to go to effect controls and then video effects. We changed
each shot that we took so that the width was 133.0 after we had unclicked the uniform scale option