3. Textile printing is the process of applying colour to fabric in definite patterns or designs. In
properly printed fabrics the colour is bonded with the fiber, so as to resist washing and
friction. Textile printing is related to dyeing but, whereas in dyeing proper the whole fabric
is uniformly covered with one colour, in printing one or more colours are applied to it in
certain parts only, and in sharply defined patterns.
Nowadays print is a very very important thing for this textile sector. Print makes clothes
attractive. We can’t imagine a dress or clothes without print. Printing sector is also
expanding and changing every day with the fashion trend. We are discovering new
technique and qualities of print day by day. Print technology is growing up with the Clothes
industry. 99% fashion clothes are now must have any print on it.
There are many kinds of print we can do on the clothes or fabric. Some print very basic and
normal, these prints are very cheap also. But some print is very critical and rare. These
kinds of print are more costly than basic normal print. But print makes a dress or clothes
attractive and salable.
The following article contains with a rare, critical and costly print. The name of this print is
Burnout print. This is a rare quality print. Burnout print is also very expensive too. It's a very
nice quality print.
INTRODUCTION
4. Burn-out textiles is a technique used to develop raised designs on fabric surface. This is
primarily being done in fabrics with at least 2 different fibre content i.e. Cotton-
Polyester, Silk-Rayon etc. Here one fibre component is being dissolved thru chemical
reactions while the other content remains intact giving away raised illusion designs.
The printing factory makes this print with the flat bed printing machine. The printing
way of this print is same as a normal flat bed print, just printer’s use acid type chemical
instead of color.
We can do this print only some selected fabric. This print is not possible on 100%
cotton fabric. The best composition for this burn out print is 60% polyester and 40%
cotton fabric. This print is also possible on 60% cotton and 40% polyester.
The main technique of burnout print is destroys the cotton portion of the fabric with
Acid / Chemical. When the chemical flows over the fabric and contact with cotton
portion, then it burn out the cotton by chemical reaction. Actually cotton is the victim
here.
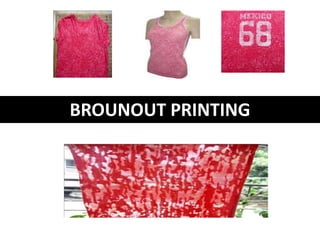
BURNOUT PRINTING
5. In the image of the print we will clearly see the Polyester and cotton part.
BURNOUT PRINTING
6. Cotton Portion had blue where as polyester is having no color. So, during burn out cotton burns
down leaving only polyester portion resultantly only white shade on burnt region and a
wonderful pattern appears.
The technology uses cotton/polyester blended fabric where cotton portion from the blended
fabric is burned leaving behind the polyester portion only, according to the desired designs by
means of rotary printing machine and thus providing the fabric a textured look.
7. Step by step printing process of burn out print
1st Step: Develop the print design and screen with the buyer provided artwork.
2nd Step: Knit the fabric with the yarn of following composition
a) 60% polyester 40% cotton OR
b) b) 40% polyester 60% cotton Or similar like that.
3rd Step: After complete the kitting of fabric send the gray or scouring fabric to printing factory.
4th Step: Perform the print on this fabric. Here, the cotton part will be destroyed by the acid but
polyester portion will be remaining same.
5th Step: Then we will dye and finished the fabric as per our require color.
8. Synthrapol
Sodium bisulfate
Guar gum
PRO Dye Activator or Soda Ash
Glycerin & Water
Chemicals other than Sodium Bisulfate were also tested for this experiment. e.g.
1.Sulfuric acid Full Black Effect (No Burning)
2.Sodium Hydrosulfite (No Burning)
3.Sodium Bisulfite (No Burning)
Chemicals of Burn out Printing
9. 1. Scour the fabric by machine washing in HOT 140oF (60oC) water, or by hand in a pot
on the stove with (2 gm) PRO Dye Activator and (2.5 ml) Synthrapol per pound of fabric
(454 gm, or 3 to 4 yards cotton muslin, or 8 yards 8mm China Silk, or 3 Medium T-
shirts, or 1 sweatshirt). Rinse thoroughly. This step does not add the dye fixative to the
fabric; it prepares the fabric for dyeing by removing any dirt, oil or sizing.
2. Mix the thickener paste a few hours, or even the day before use it. In a large plastic or
stainless steel bowl, measure 2 cups (500 ml) of room temperature 75o to 95oF (24o
to 35oC) water. In a separate dry container measure a 1/3 cup (50 gm) of guar gum.
Using a blender or hand mixer, starts blending just the water, then gradually add the
guar gum. Continue blending until well mixed. Allow to stand several hours or
overnight for a smooth paste.
Procedure
Equipment
Blender or hand mixer
10. 3. Make the burn-out paste just before you are ready to use it. Measure cup plus 2 Tbl
(220 ml) of 100oF (38oC) water and dissolve cup (200 gm) of sodium bisulfate in the
water. Remember to always add the acid to the water, as a safety precaution. Once the
sodium bisulfate is dissolved, add a cup (80 ml) of glycerin and the thickener paste
made in step 2. Mix thoroughly using your blender or hand mixer. Discard the burn out
paste after three days.
4. Prepare a padded surface to print on. If we do not have a padded print table, we can
create a padded surface by laying down a terry cloth towel on your work table and
taping it in place with masking tape. Cover the terry cloth towel with plastic or a canvas
drop cloth. Then secure your fabric with masking tape on the plastic, or with T-pins on
the canvas drop cloth.
5. Apply the burn-out paste to the fabric. Screen print, stencil, or apply the burn-out paste
freehand, with foam or bristle brush. Make sure the burn-out paste penetrates through
to the back of the fabric. The best paste penetration is achieved by screen printing,
followed by stenciling, and then freehand applications. When working on silk/rayon
velvet, it is best to print on the back side of the fabric rather than the pile. It is
important to sample your method of application before working on large projects, to
make sure the fabric will burn-out successfully.
11. 6. Allow the fabric to air dry thoroughly. We can also speed up the drying by using a hair
dryer.
7. Carefully remove the burned out (carbonized) areas of your fabric by one of the
methods listed below. This part can be messy, so work outside if possible and always
wear a cartridge respirator to avoid inhaling the small fibers.
Gently hands wash the fabric.
Gently brush off the burned out fiber by hand.
Use a small hand held vacuum.
8. Wash thoroughly with warm 110oF (44oC) water by hand or machine wash on gentle
cycle with tsp (2.5ml) Synthrapol per pound (454 gm) of fabric. Rinse thoroughly and
hang to dry.
NOTE :
* Curing time and temperature are needed to be pre tested (Lab Trial), some time while using
light blends, Polyester portion also get damaged. So, consequently no good print. One can
choose one of these temperatures and times
1. 160C @ 5Min
2. 180C @ 2Min
3. 200C @ 1Min
12. 1. Burnout print is not possible on 100% cotton fabric. Clothes should be PC or CVC
2. 60% polyester 40% cotton is the best composition for Burnout print.
3. Process loss is very high. More than 35%
4. Single jersey construction is the best construction for Burnout print.
5. If you need the finished fabric with 120 to 130 GSM then you should knit the fabric
with 160 to 170 GSM.
6. Burnout print is not only expensive but also lucrative with nice feelings.
Some important points regarding the Burnout print
14. Burnout is a great effect. It is adorable and seems pretty. Synthetic thickeners are usually
polysaccharide based and normally used in disperse printing of Polyester Fabrics. This
thickener is readily available in market. It is not something like special thickener.
Remarks