Download as ODP, PPTX


The document provides information and guidelines for laser cutting different materials like plexiglass and plywood. Some key points covered include: - The thickness of materials should generally not exceed 8mm for plexiglass or 10mm for plywood for best results with laser cutting. Thicker materials can be made by gluing thinner layers. - Factors like focused vs out of focus laser, file preparation and optimization, joint and corner design, and nesting of pieces can influence cut quality and efficiency. - Various tricks like foldable patterns, T-slots, and laser origami bending are described that allow for more flexible or reinforced designs.
Introduction to laser cutting and tutorial focus.
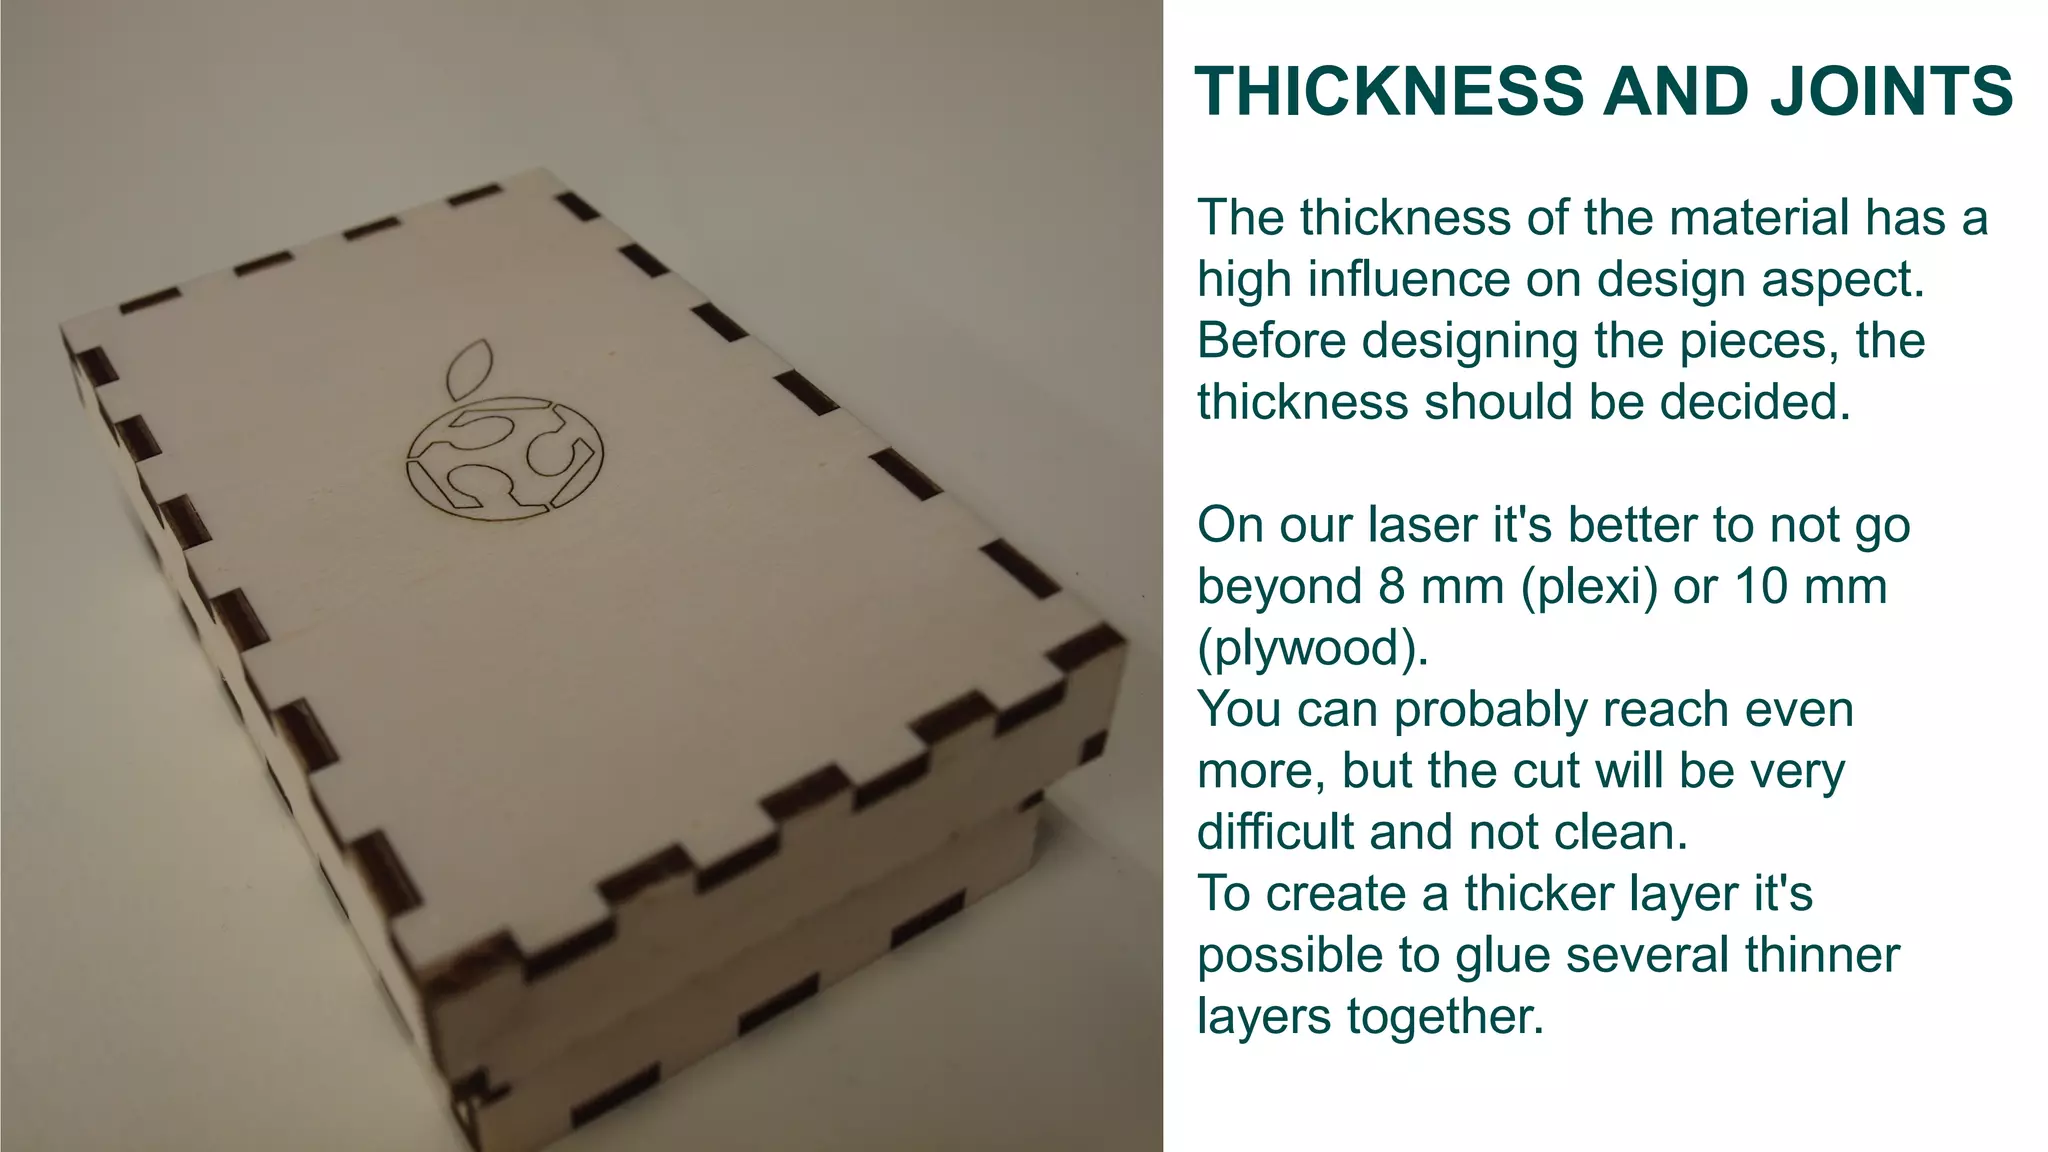
Importance of material thickness for design; max thickness: 8mm (plexi), 10mm (plywood); layering thinner pieces is an option.
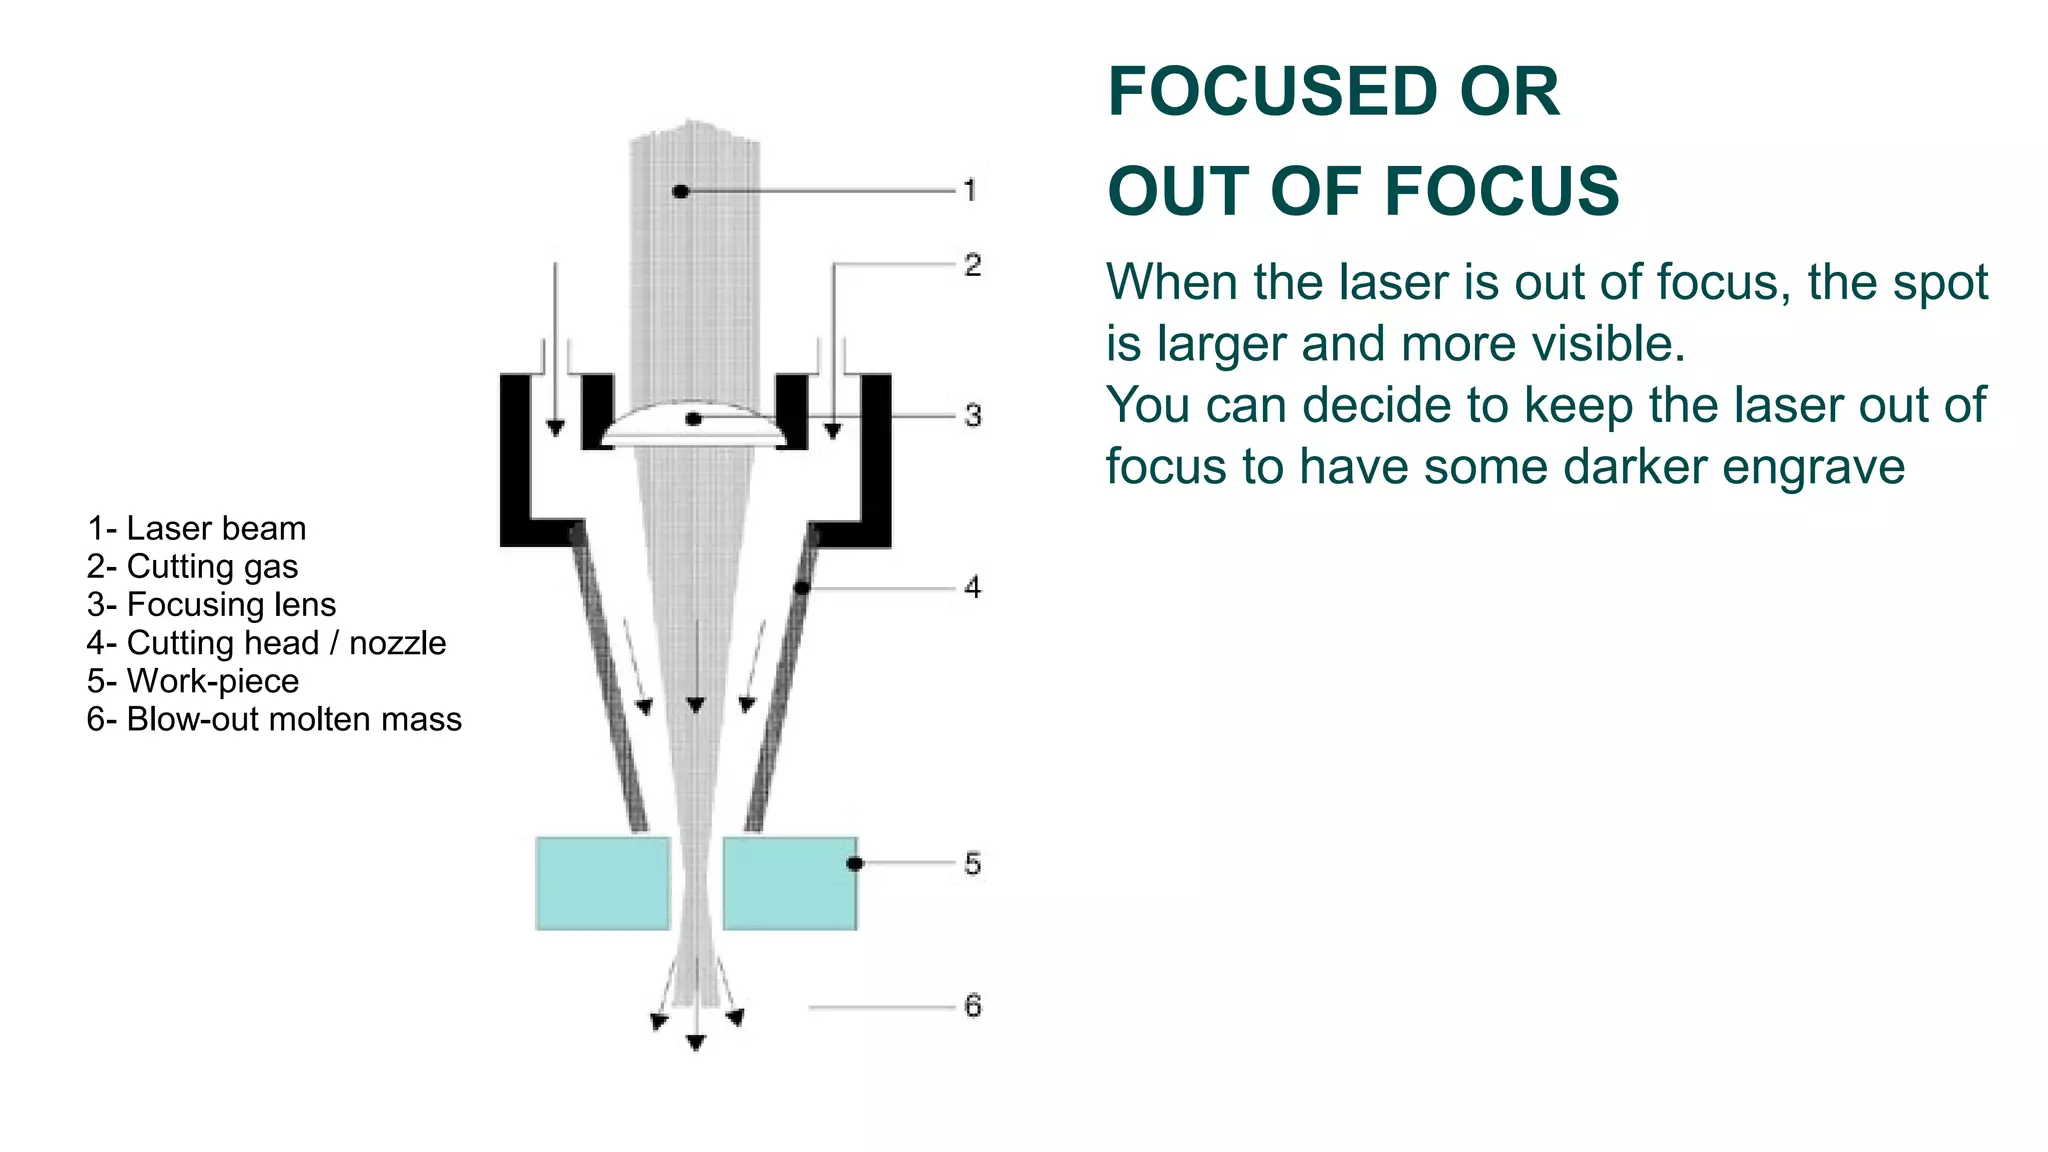
Impact of focus on the laser's cut quality; out of focus results in darker engravings.
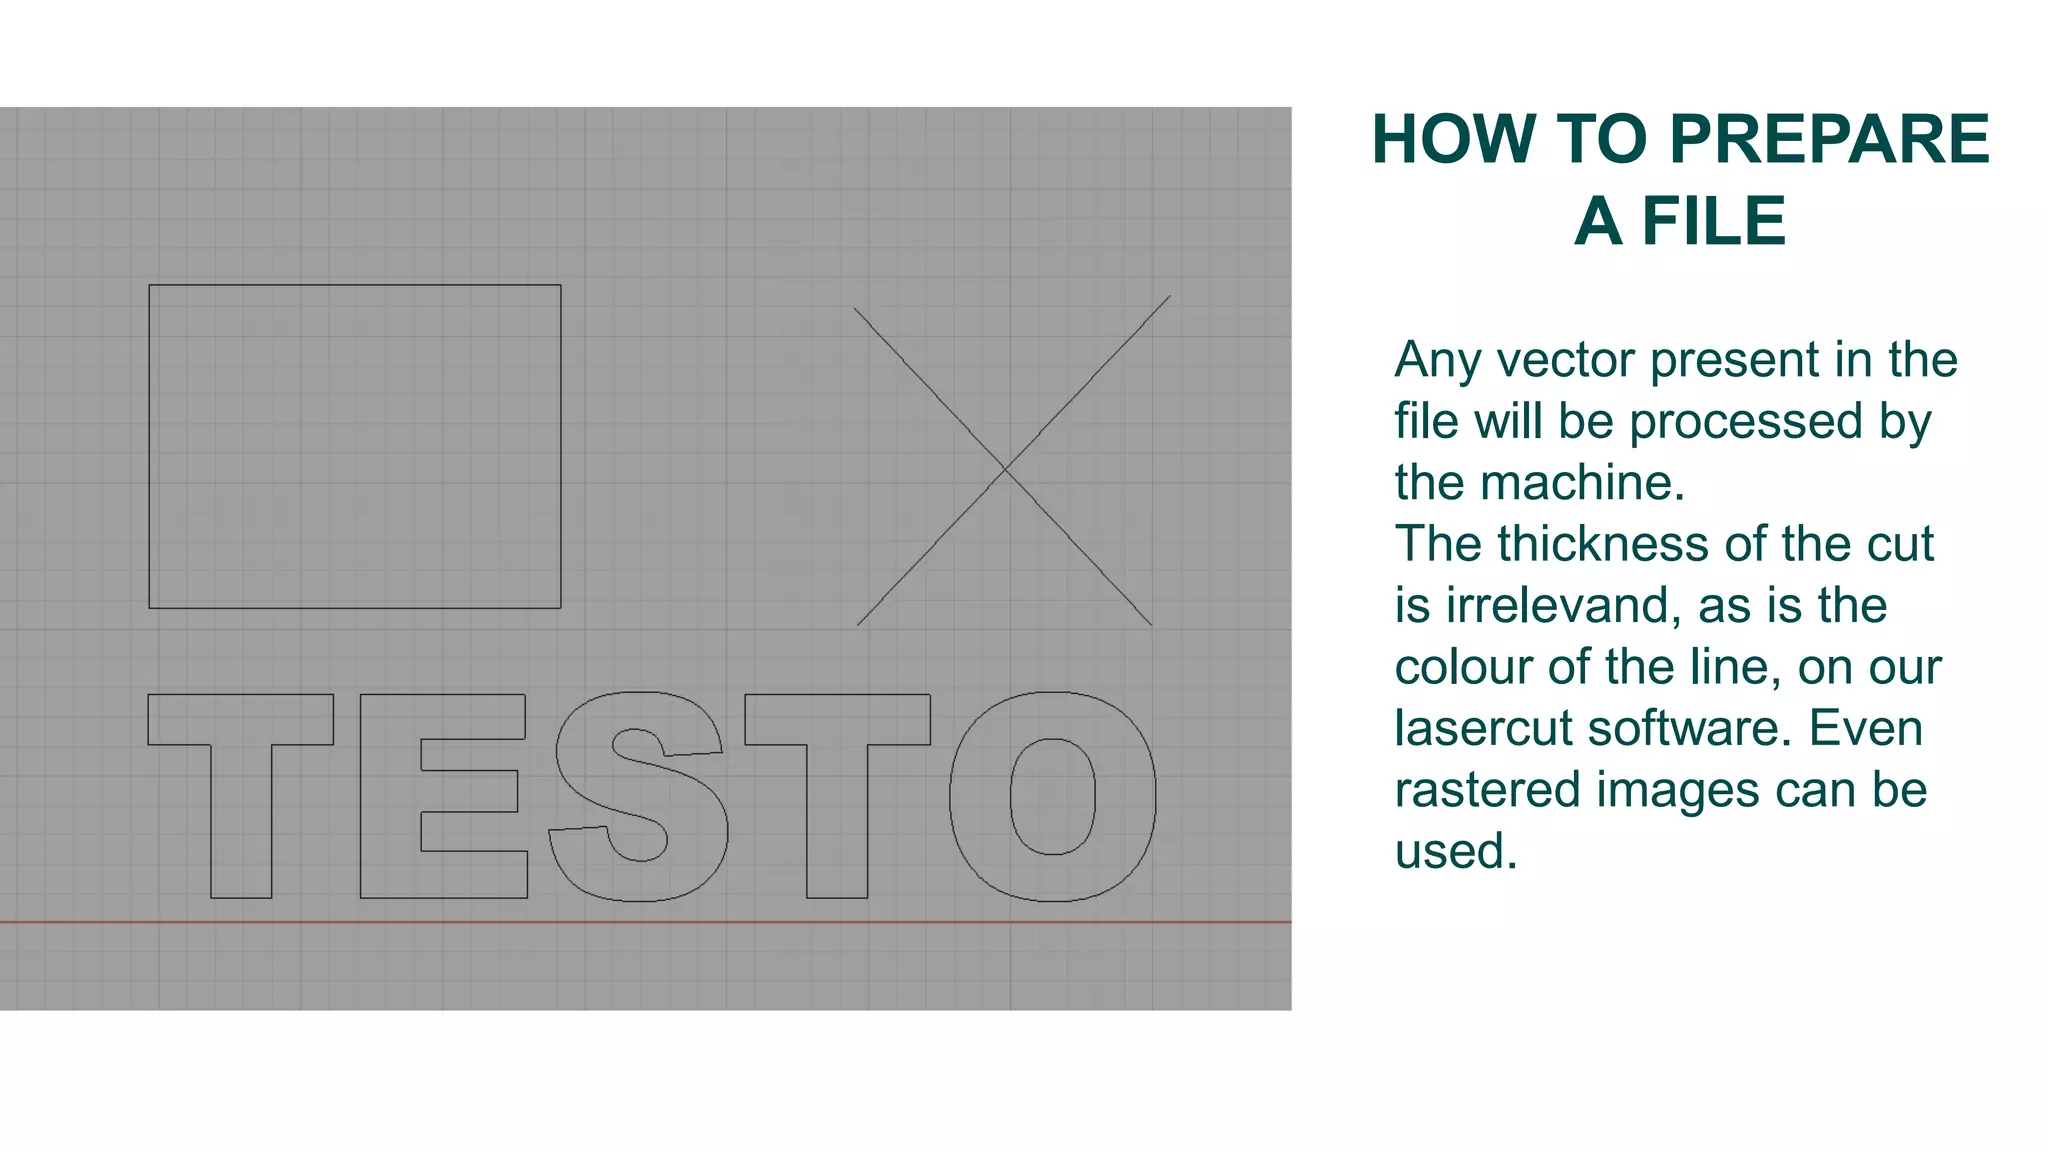
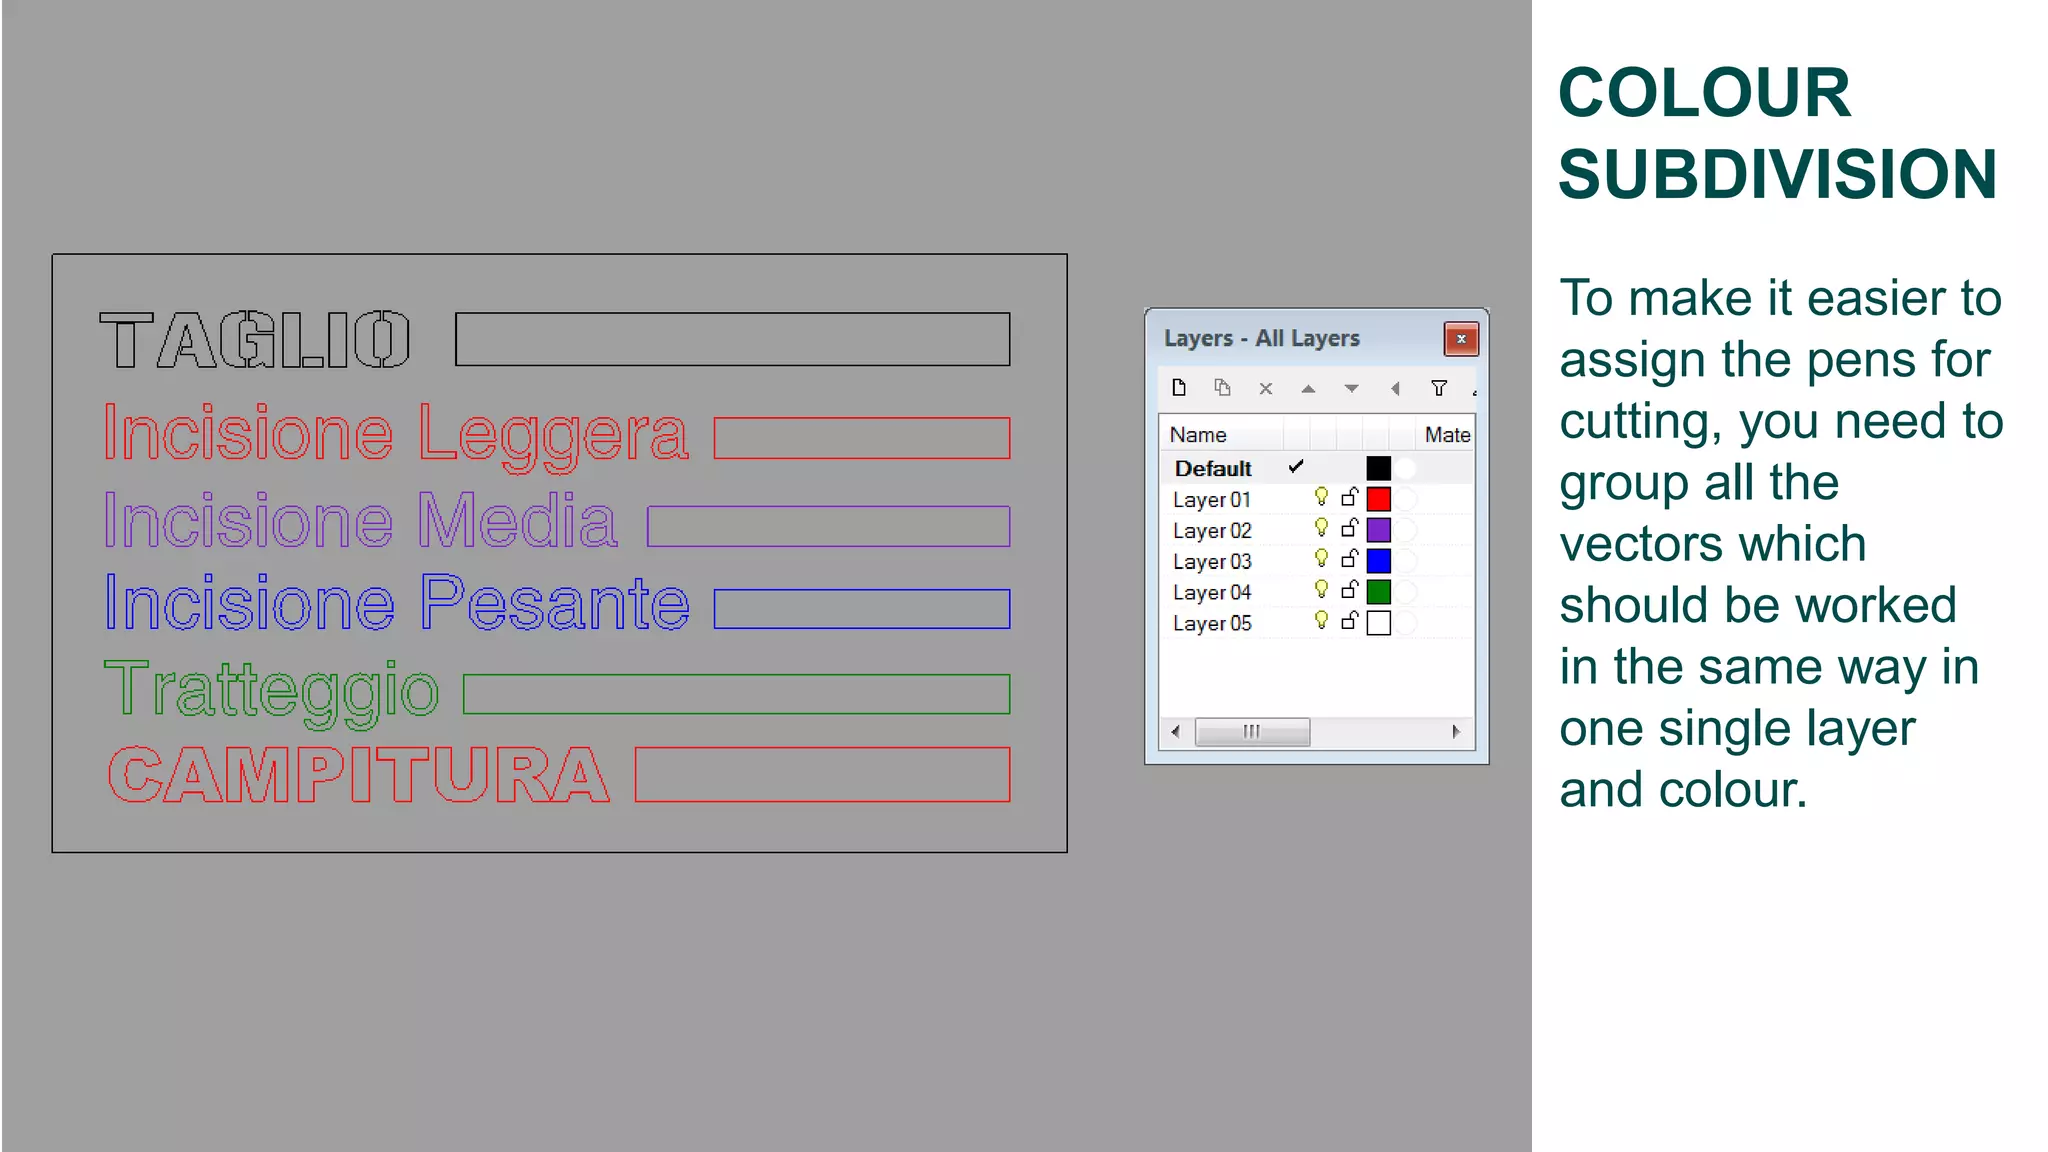
Vectors processed by the machine; thickness and color of lines are insignificant in software.
Group vectors in a single layer/color for cutting efficiency.
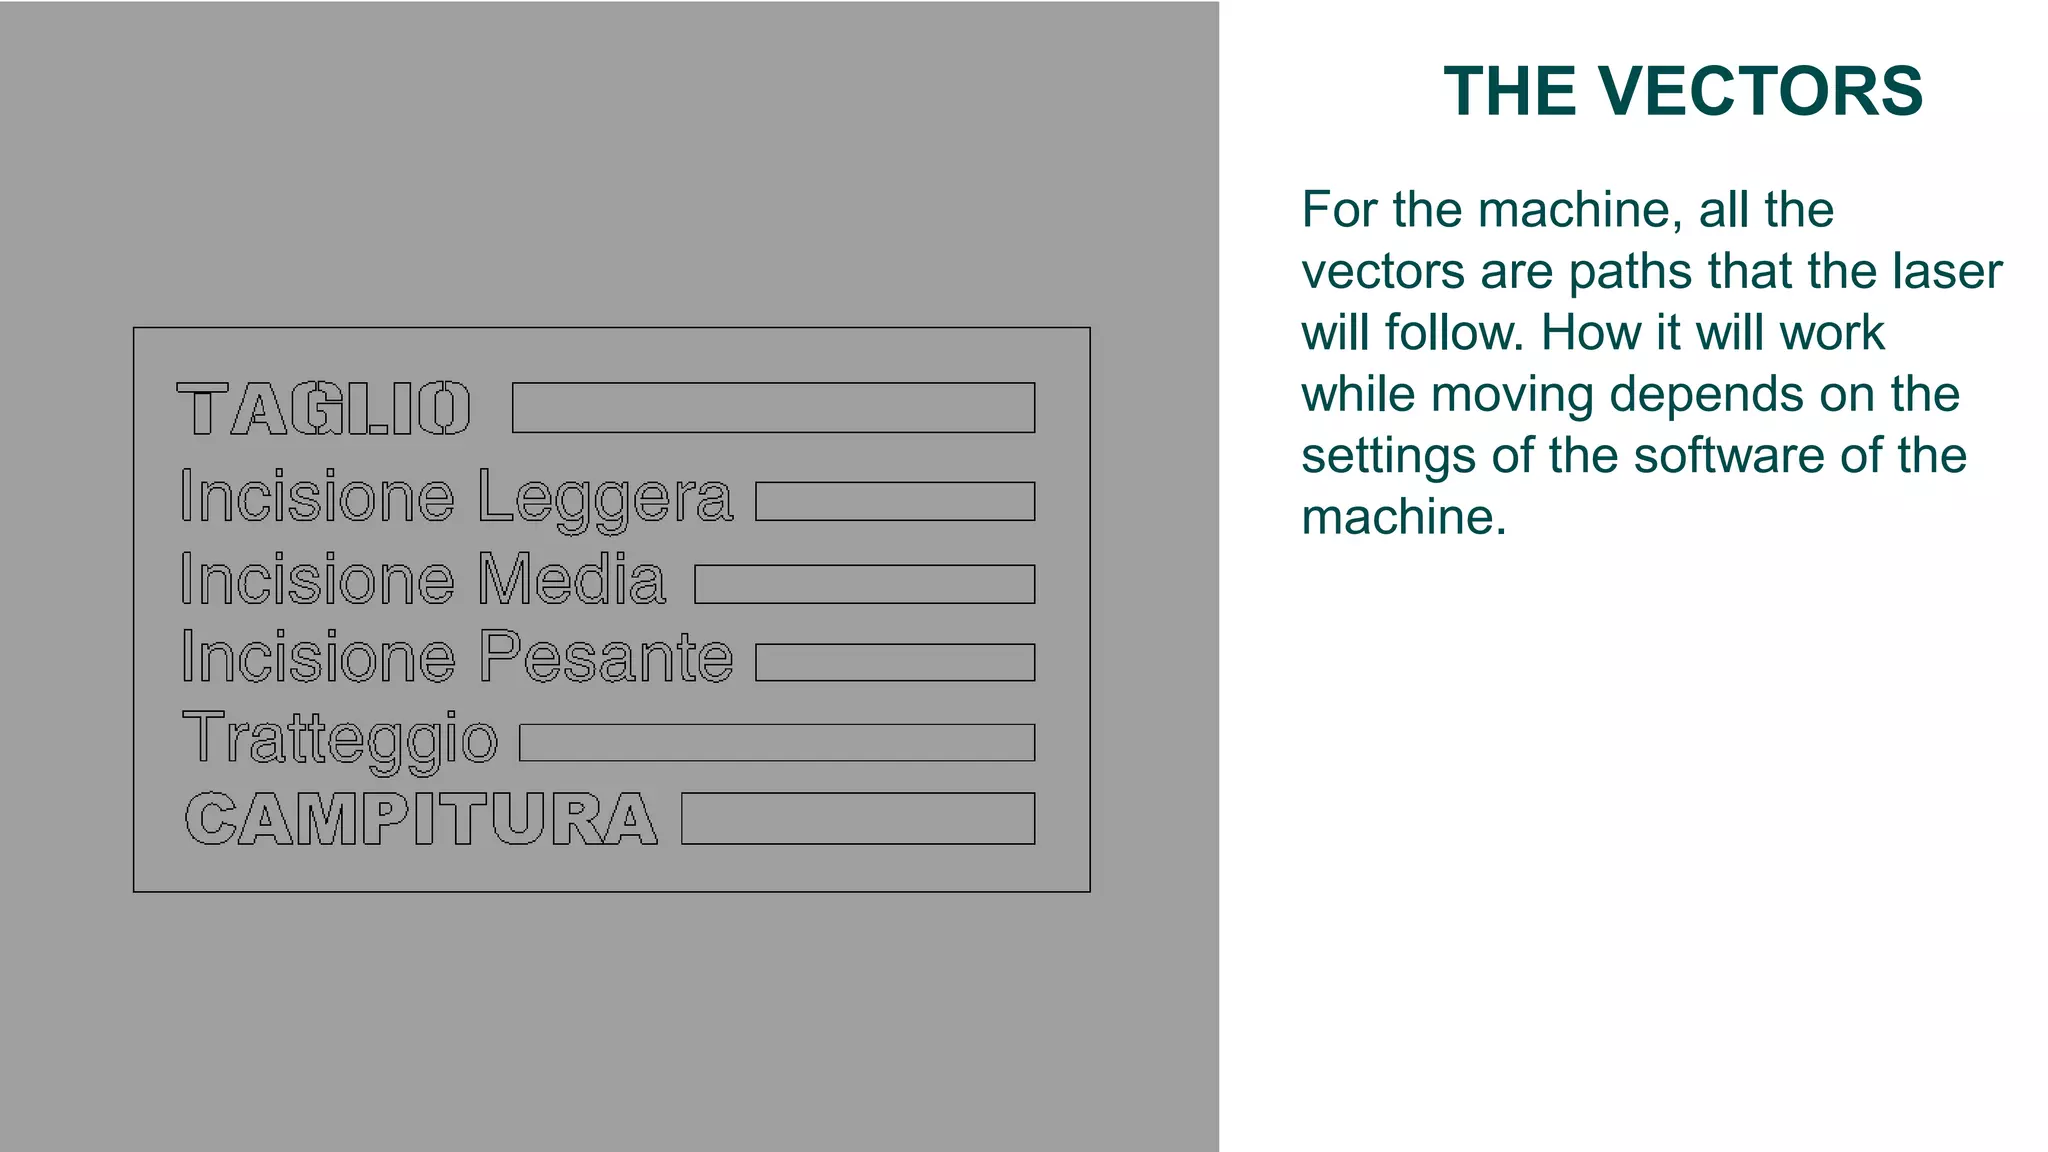
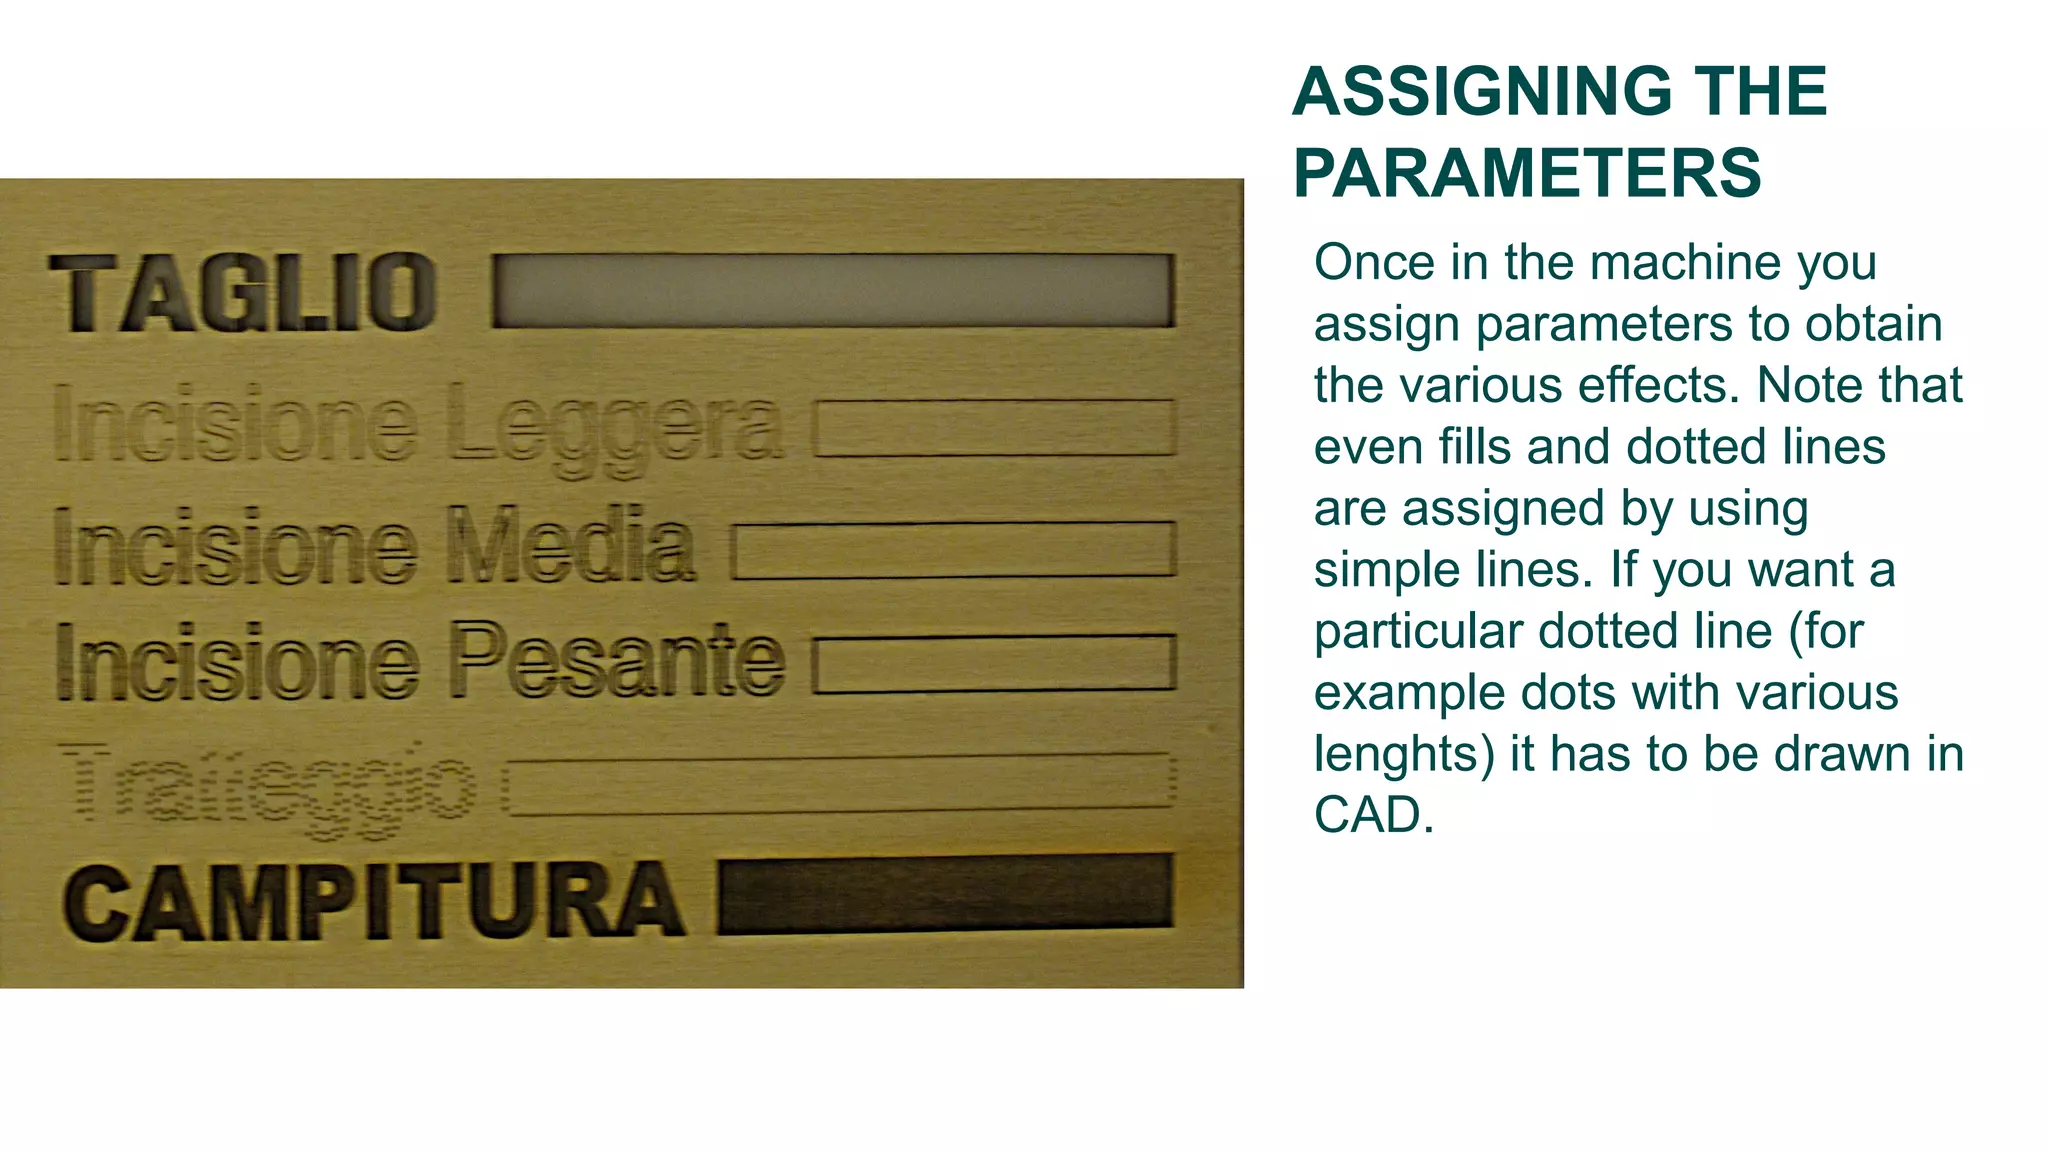
Assigning parameters for different cutting effects; uses simple lines for fills and dotted lines.
Ensuring strong joints in wood designs; interference fit recommendations.
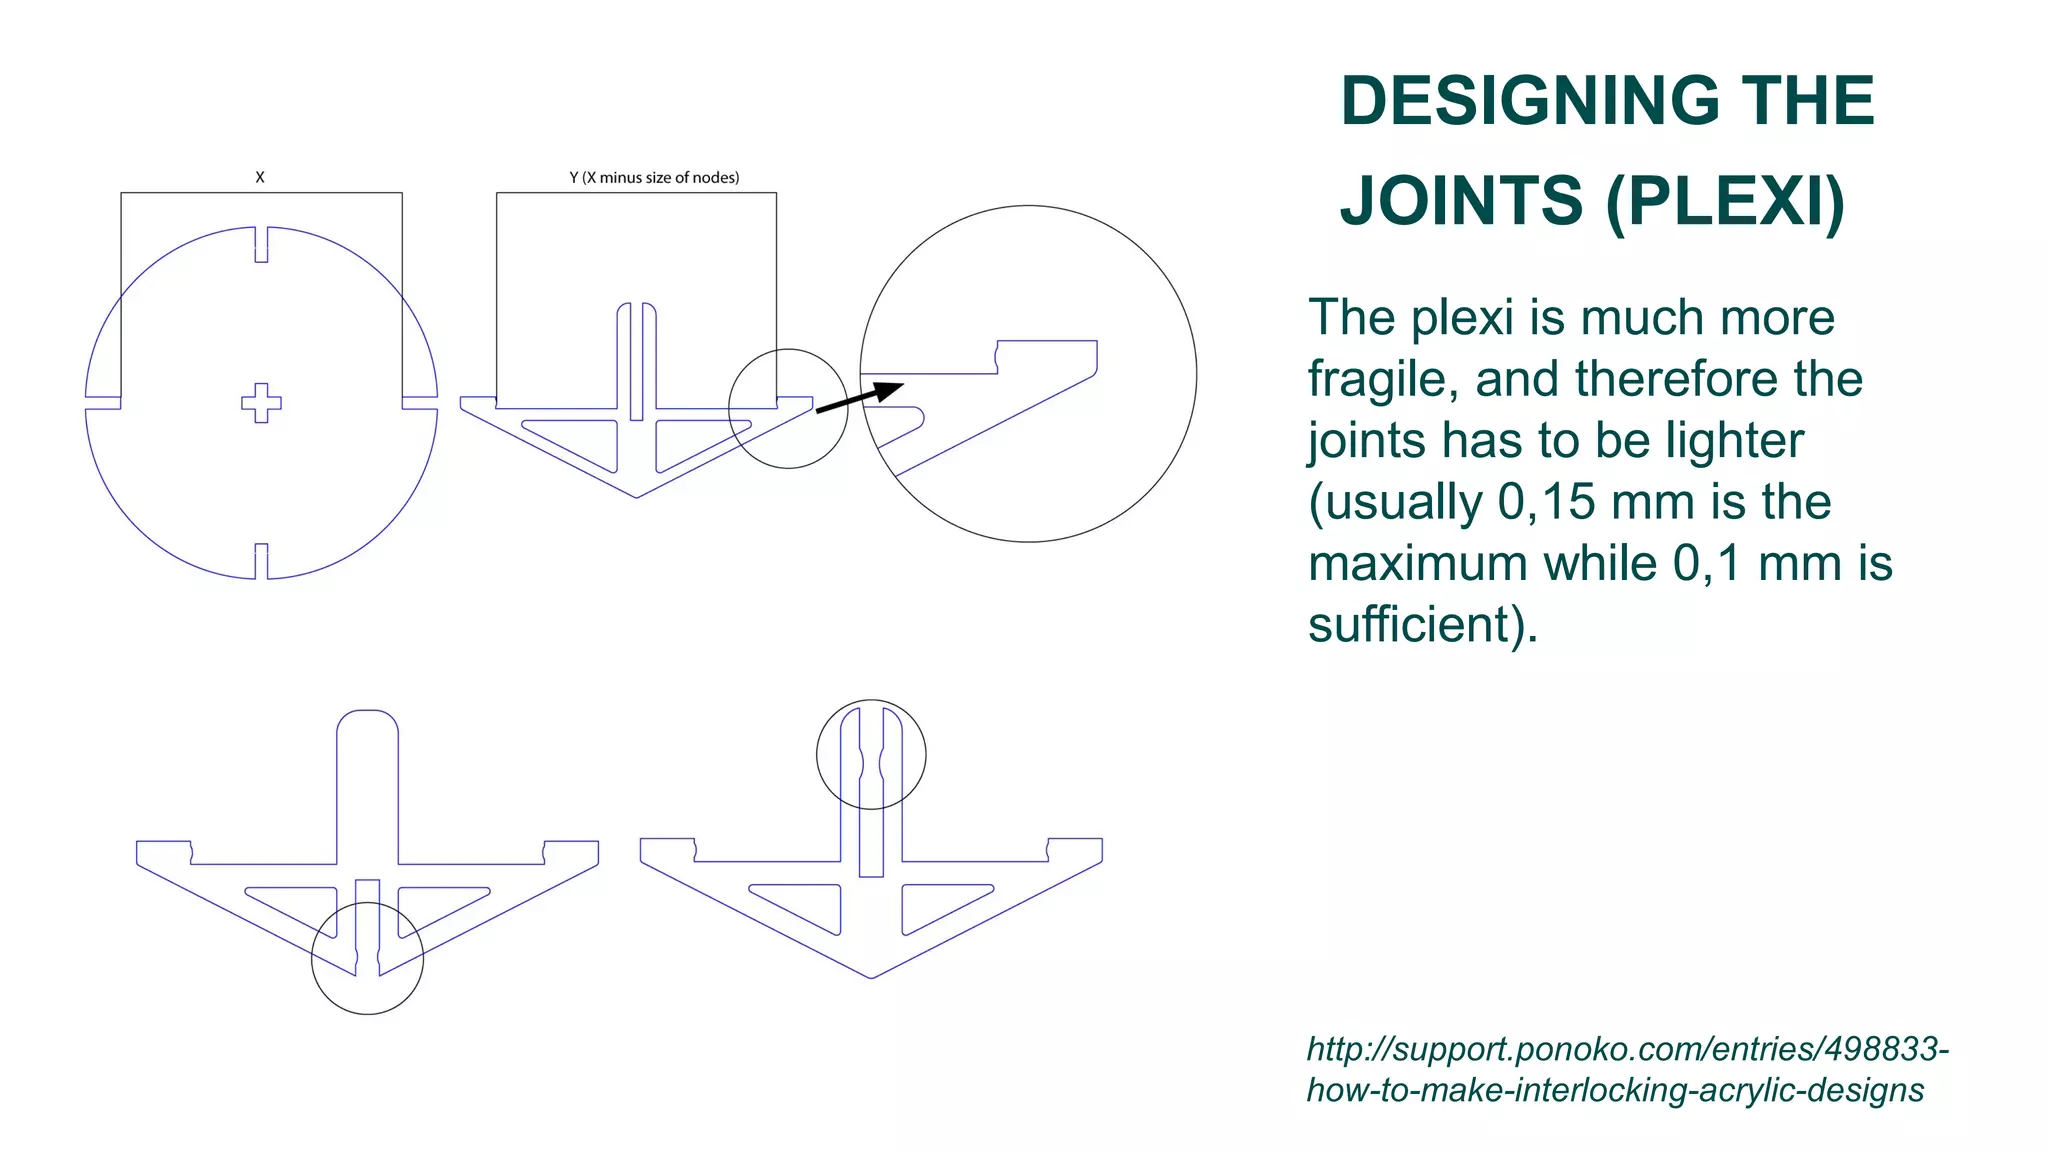
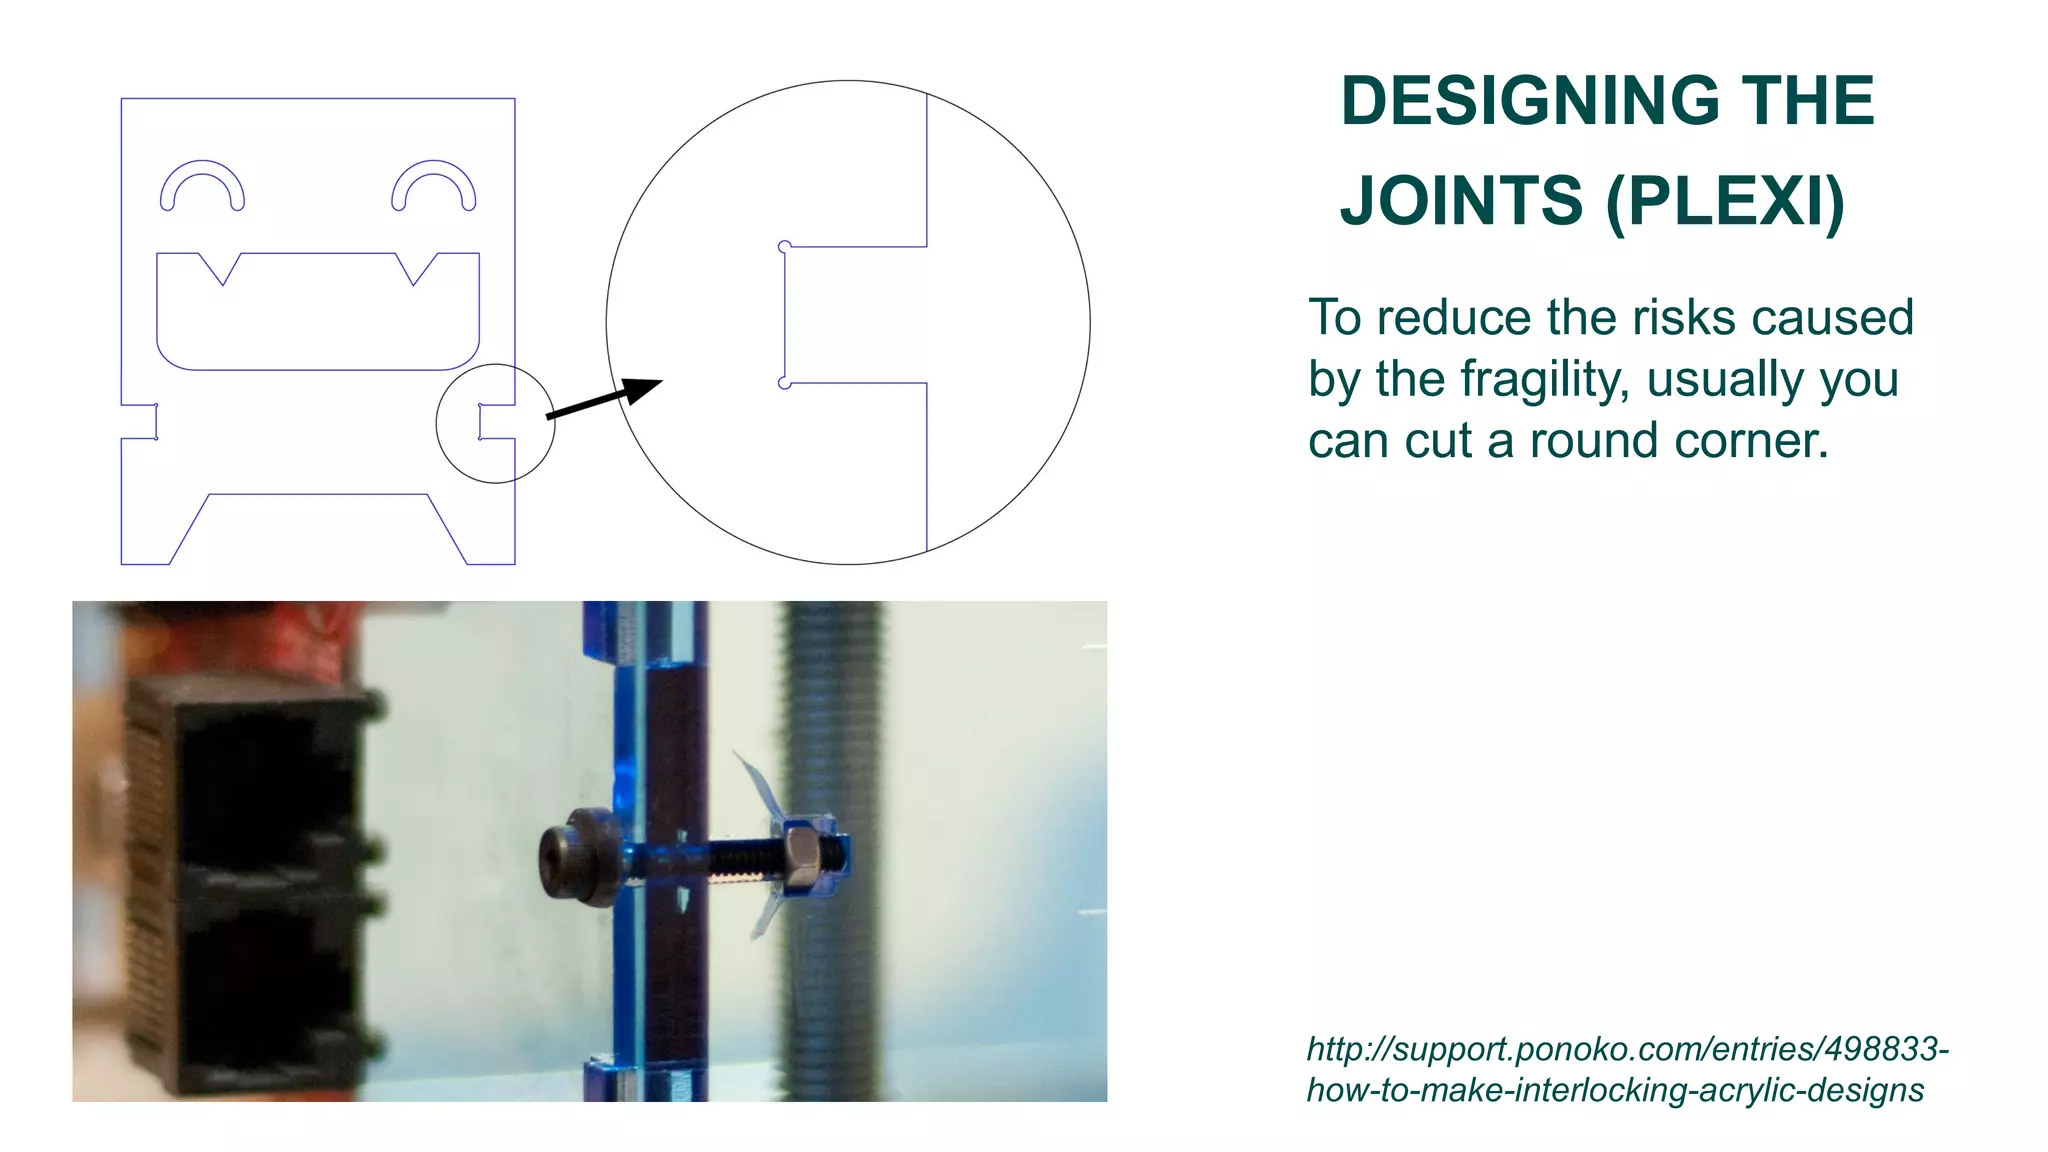
Plexi joint design nuances; lighter joints recommended due to fragility.
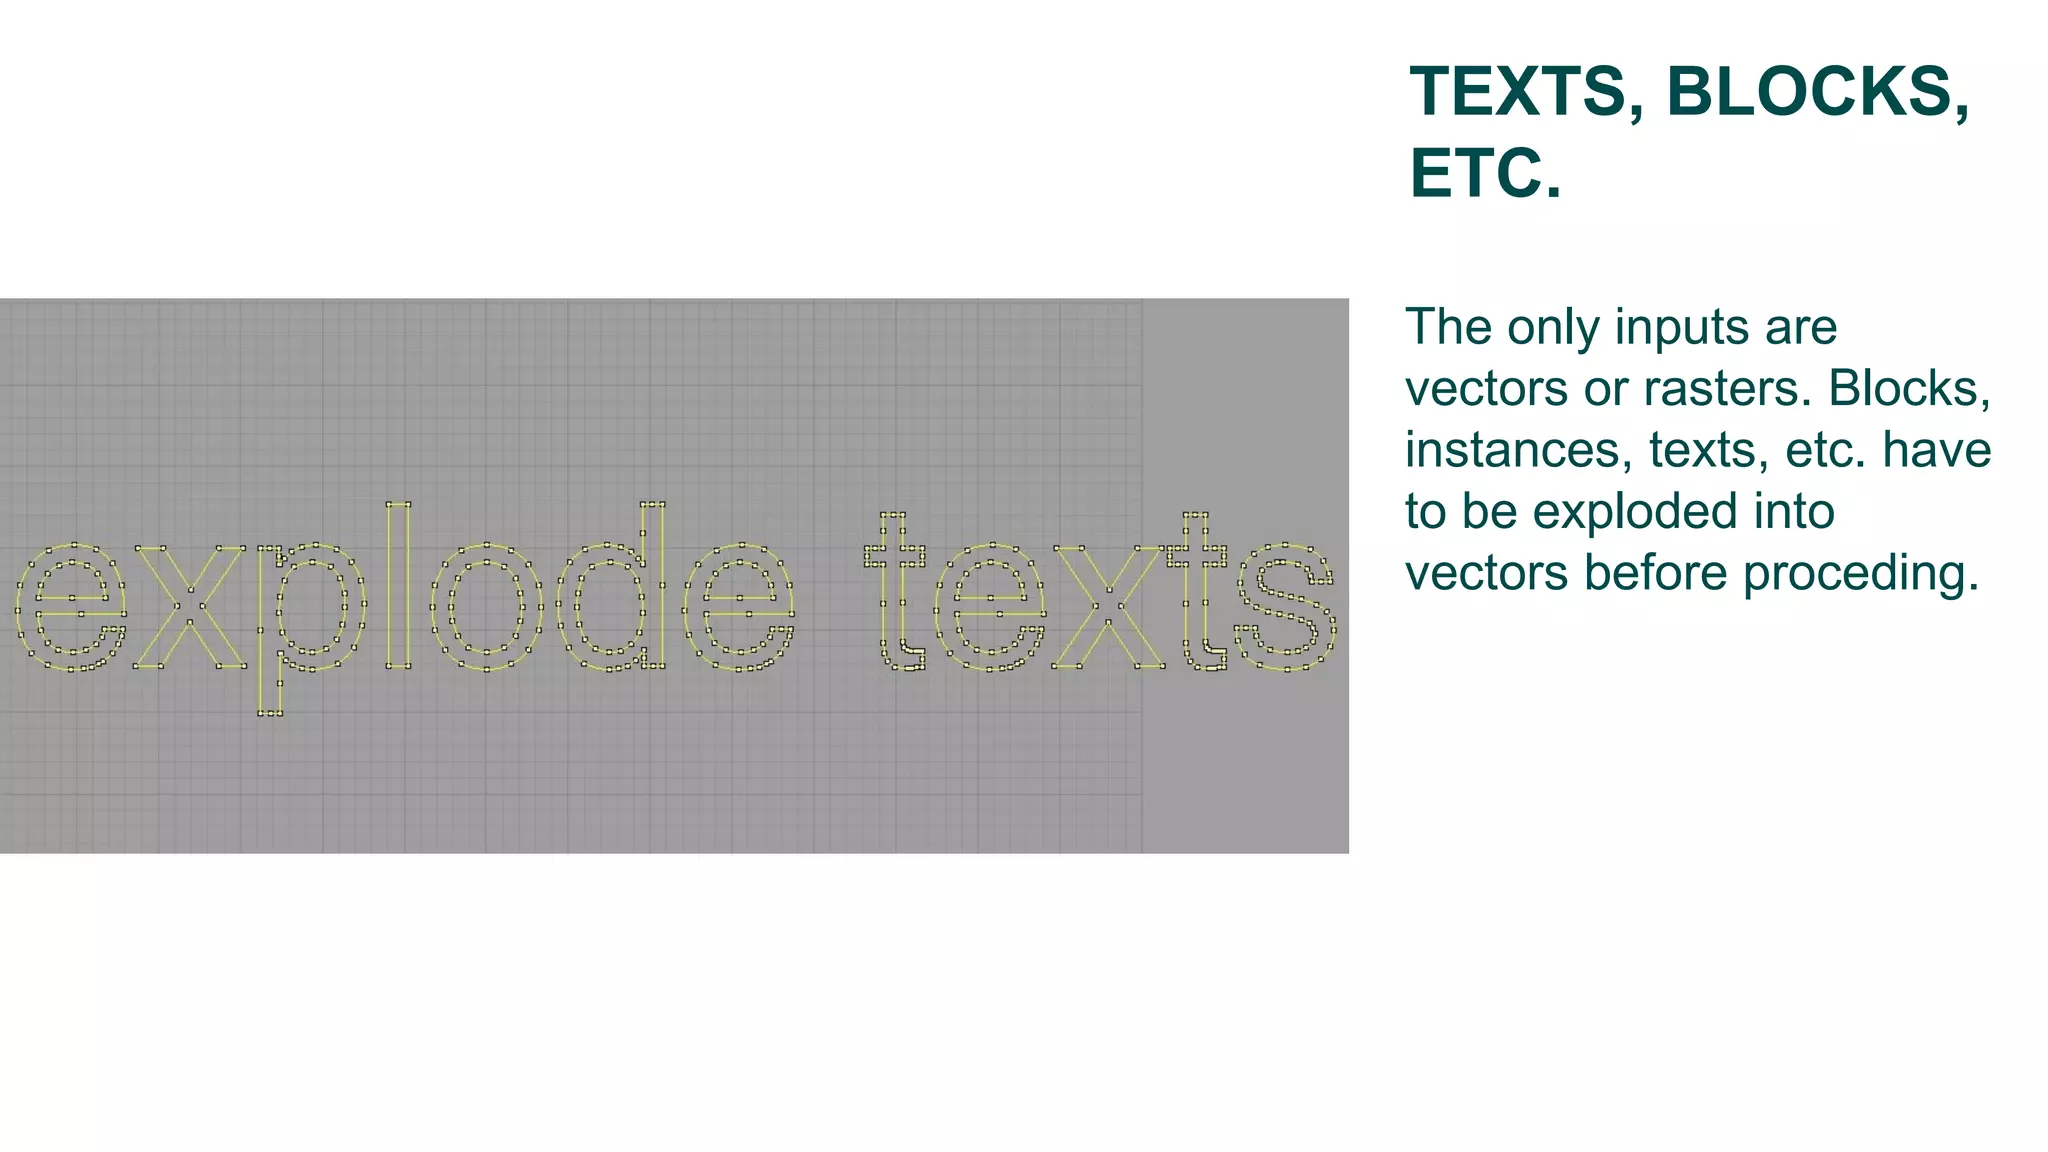
Only vectors and rasters accepted; texts must be exploded into vectors.
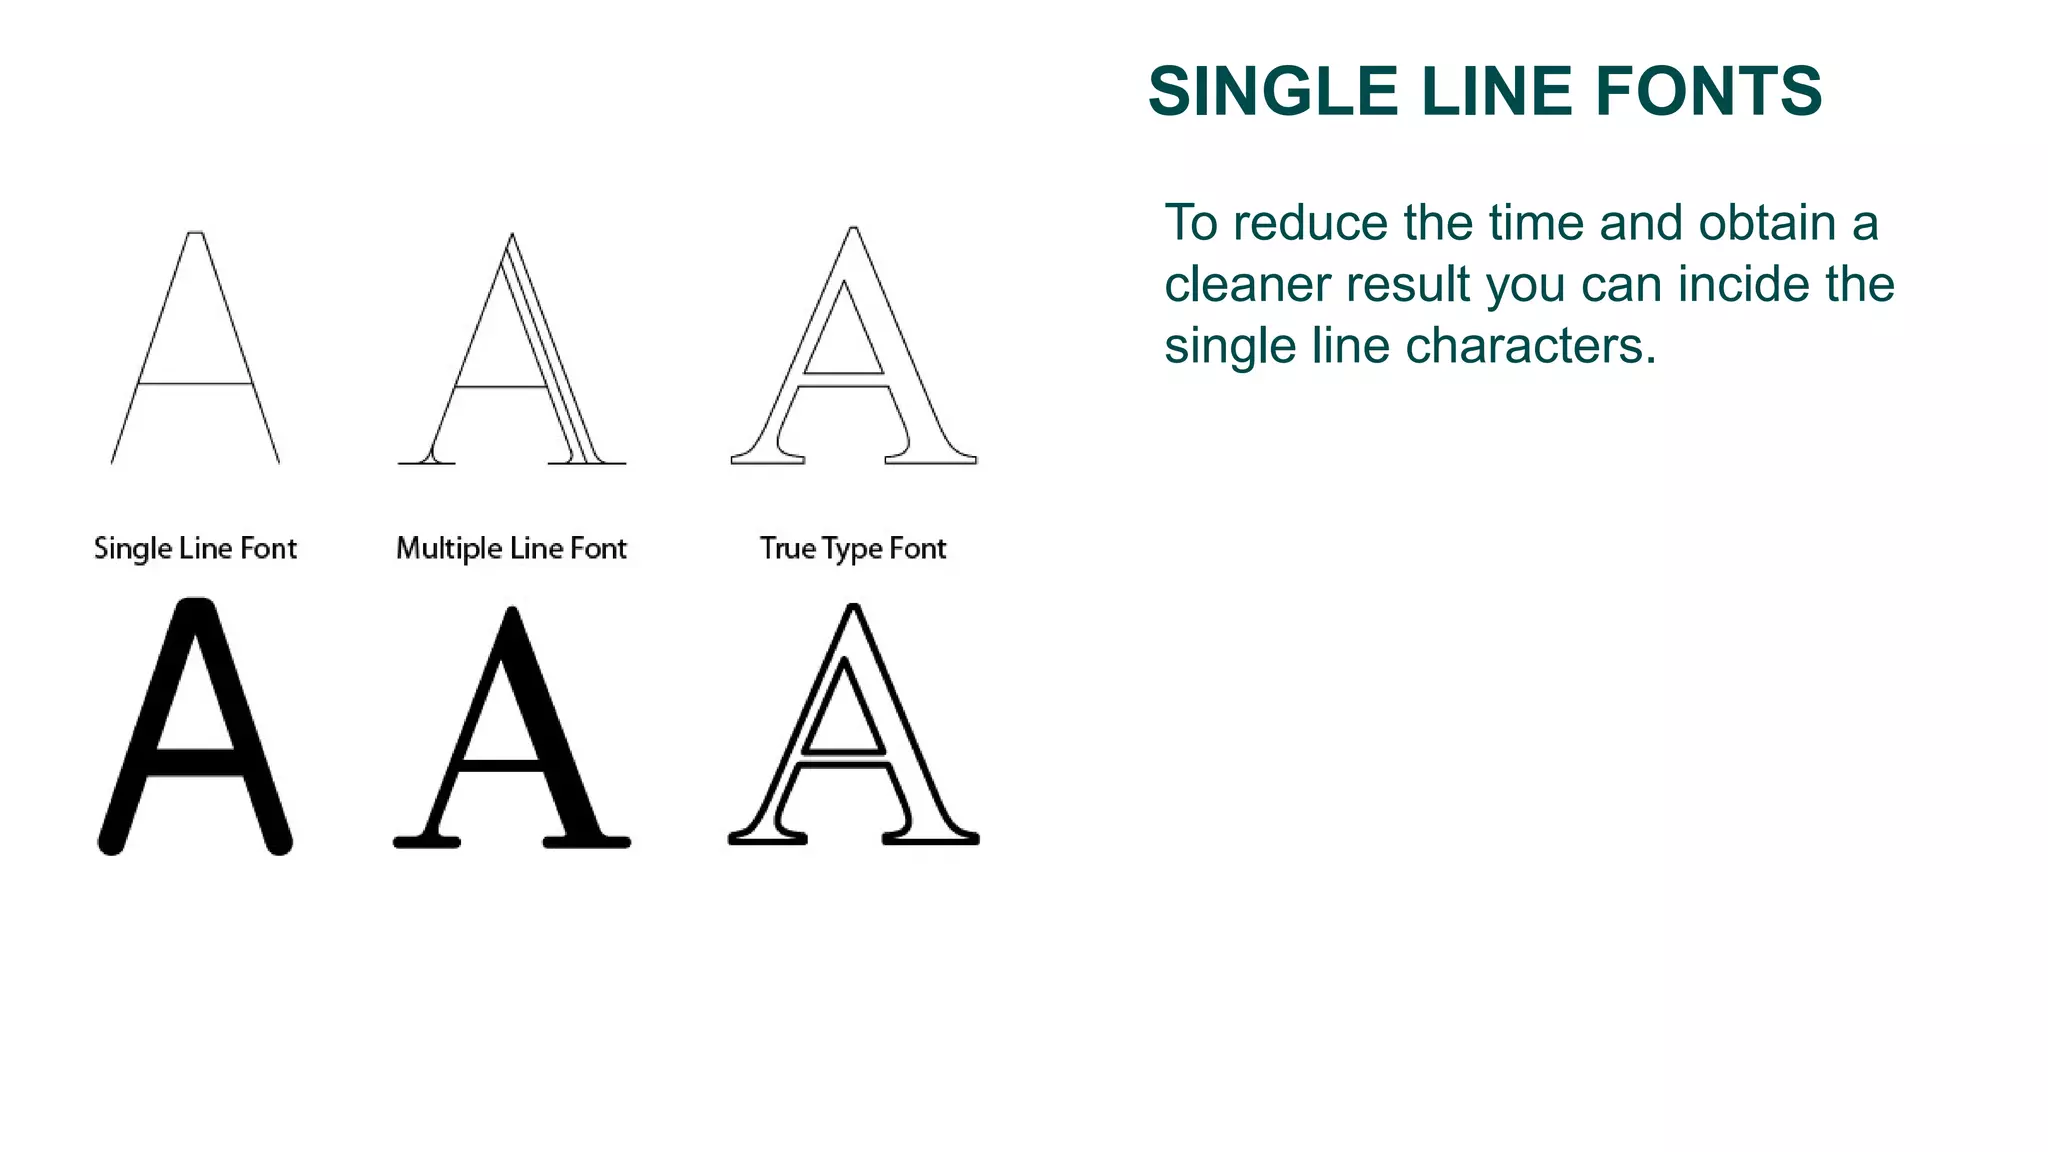
Incising single line characters to enhance clarity and reduce cutting time.
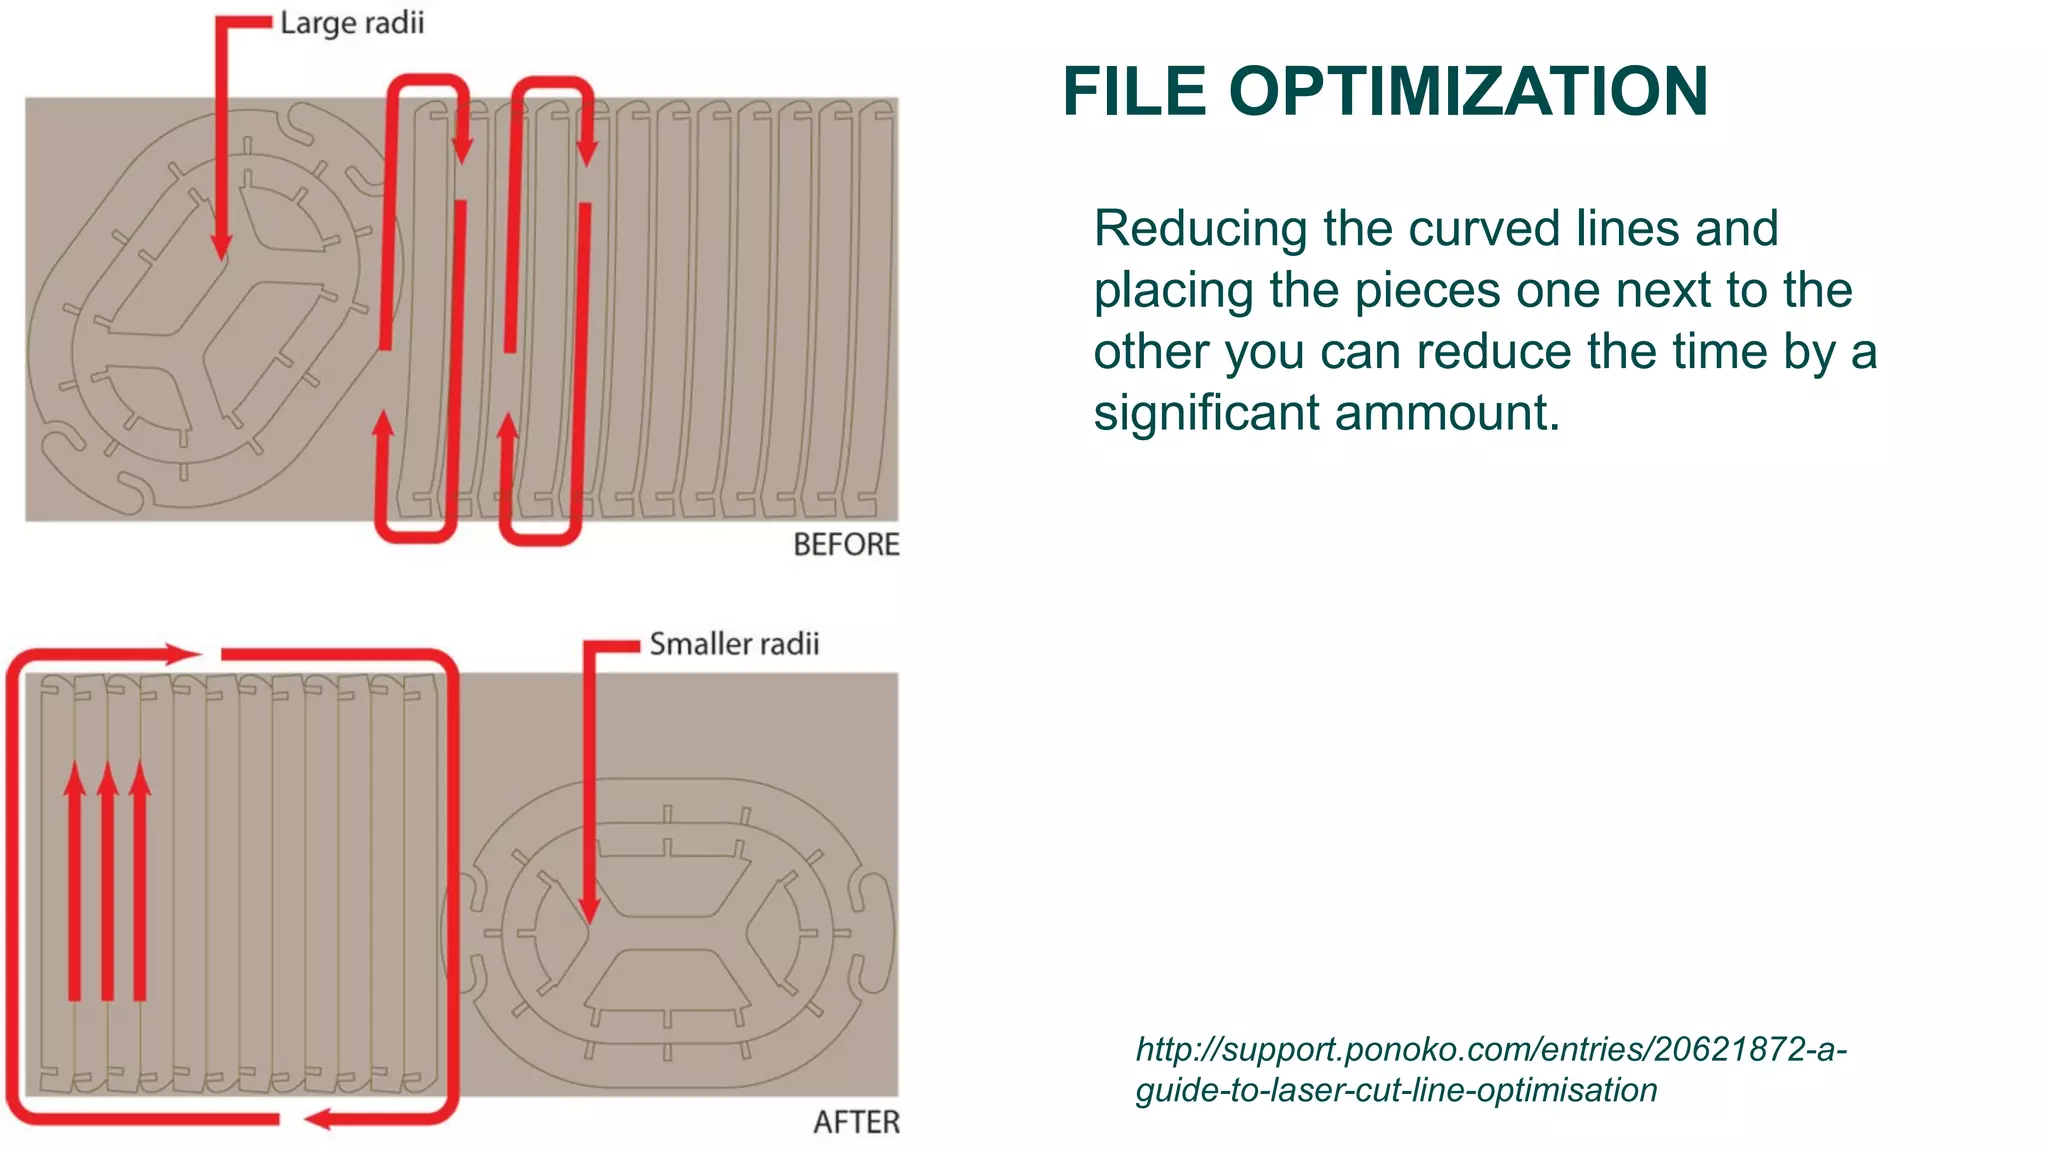
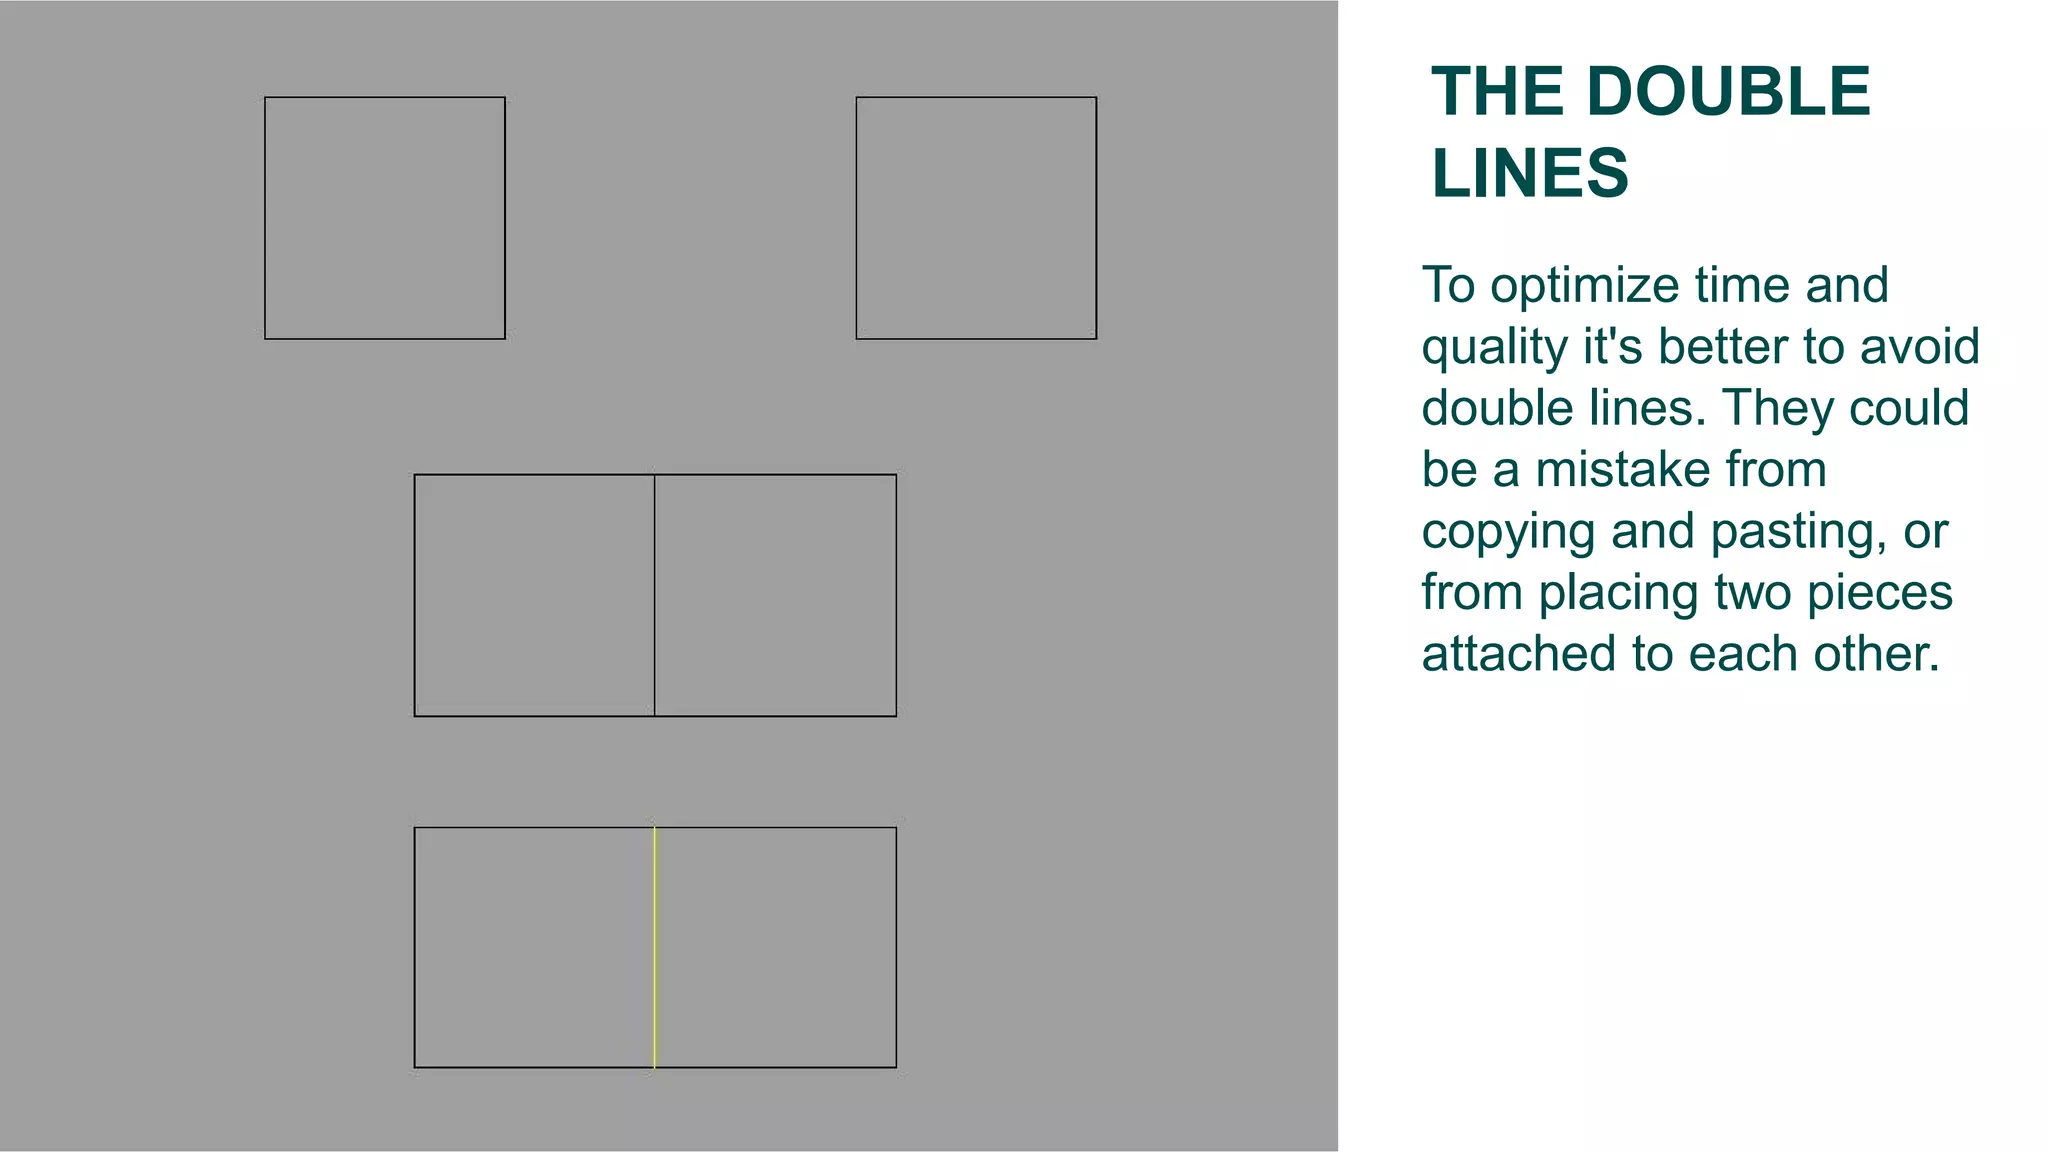
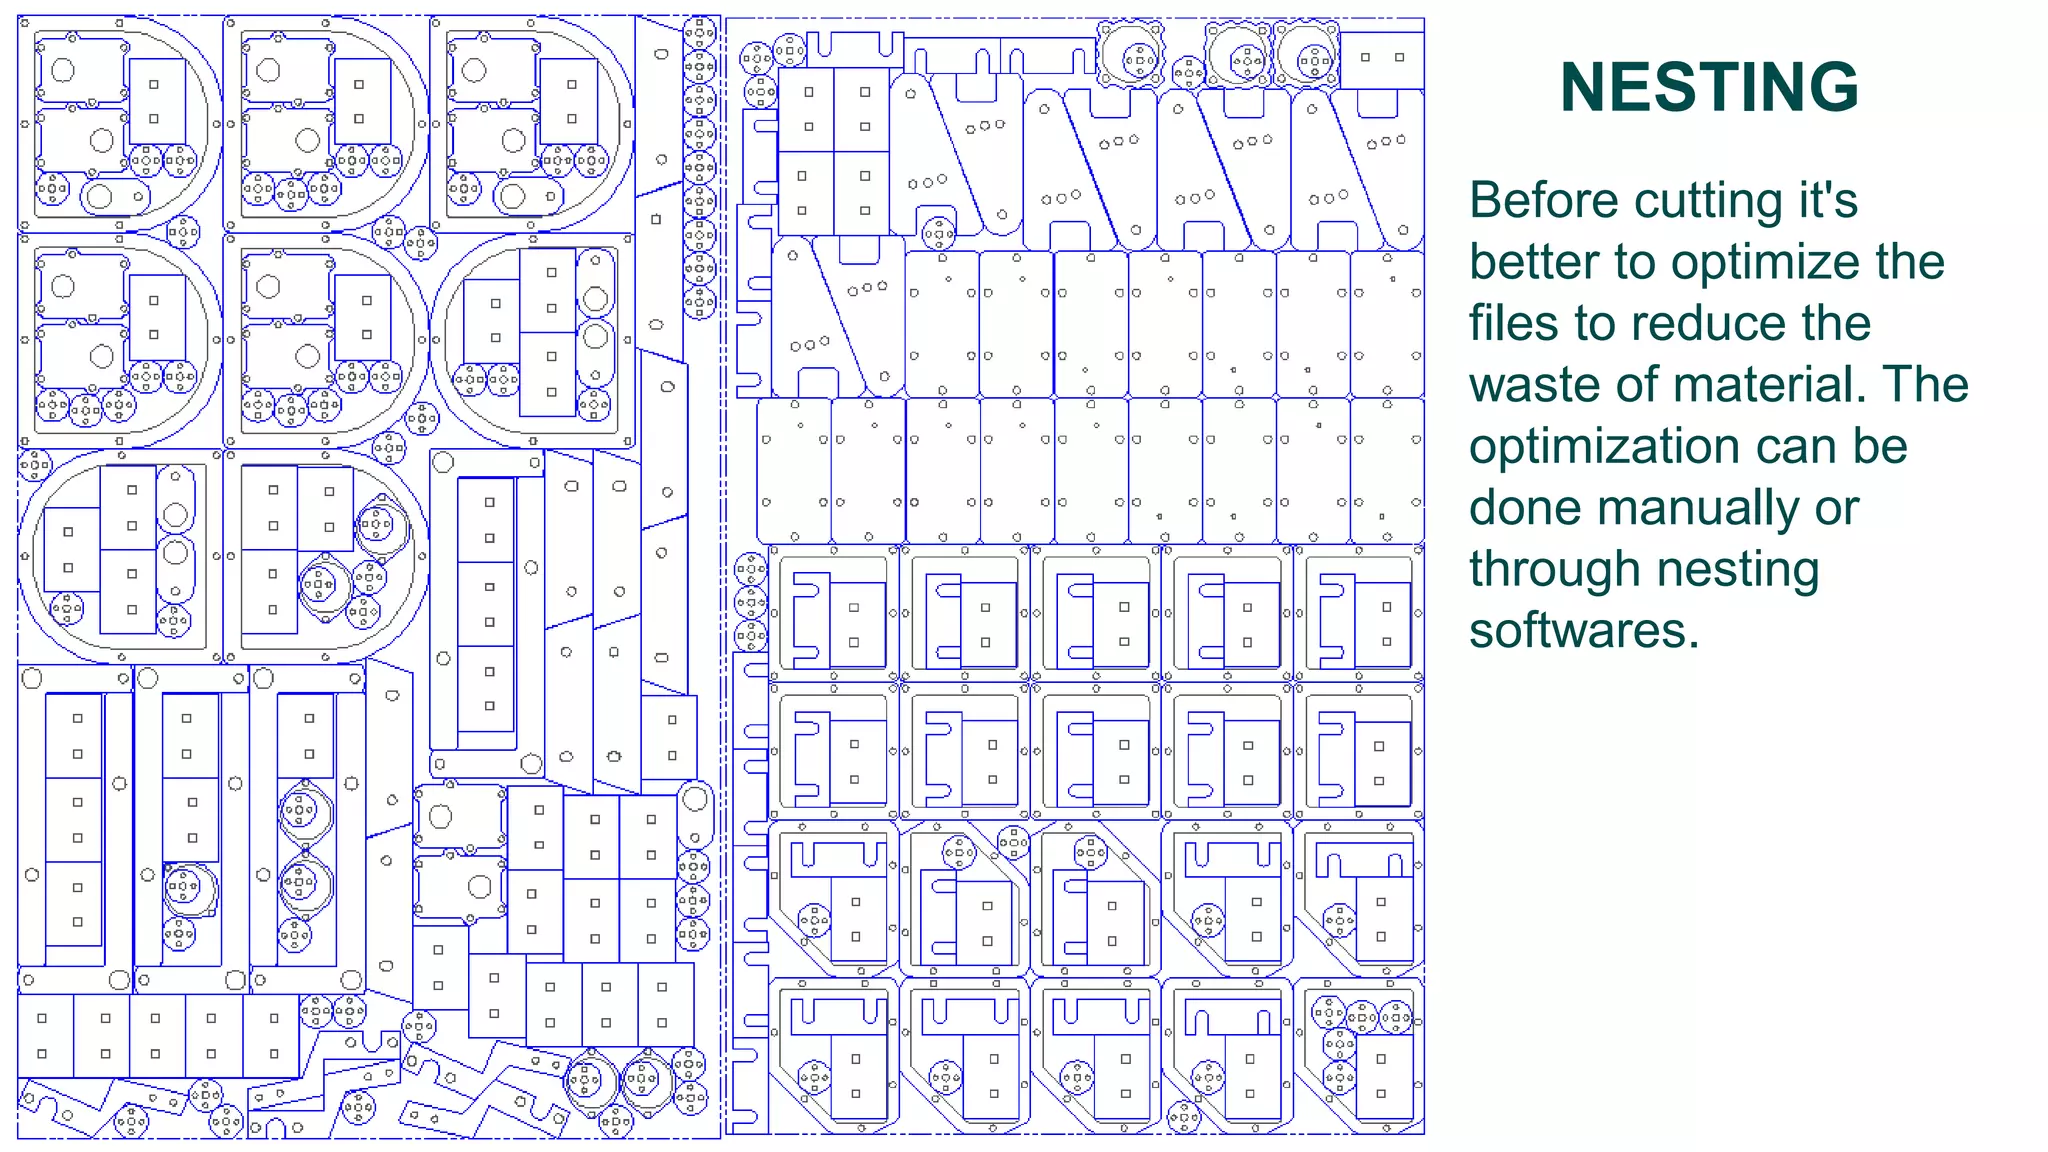
Techniques to reduce cutting time and material waste; importance of avoiding double lines.
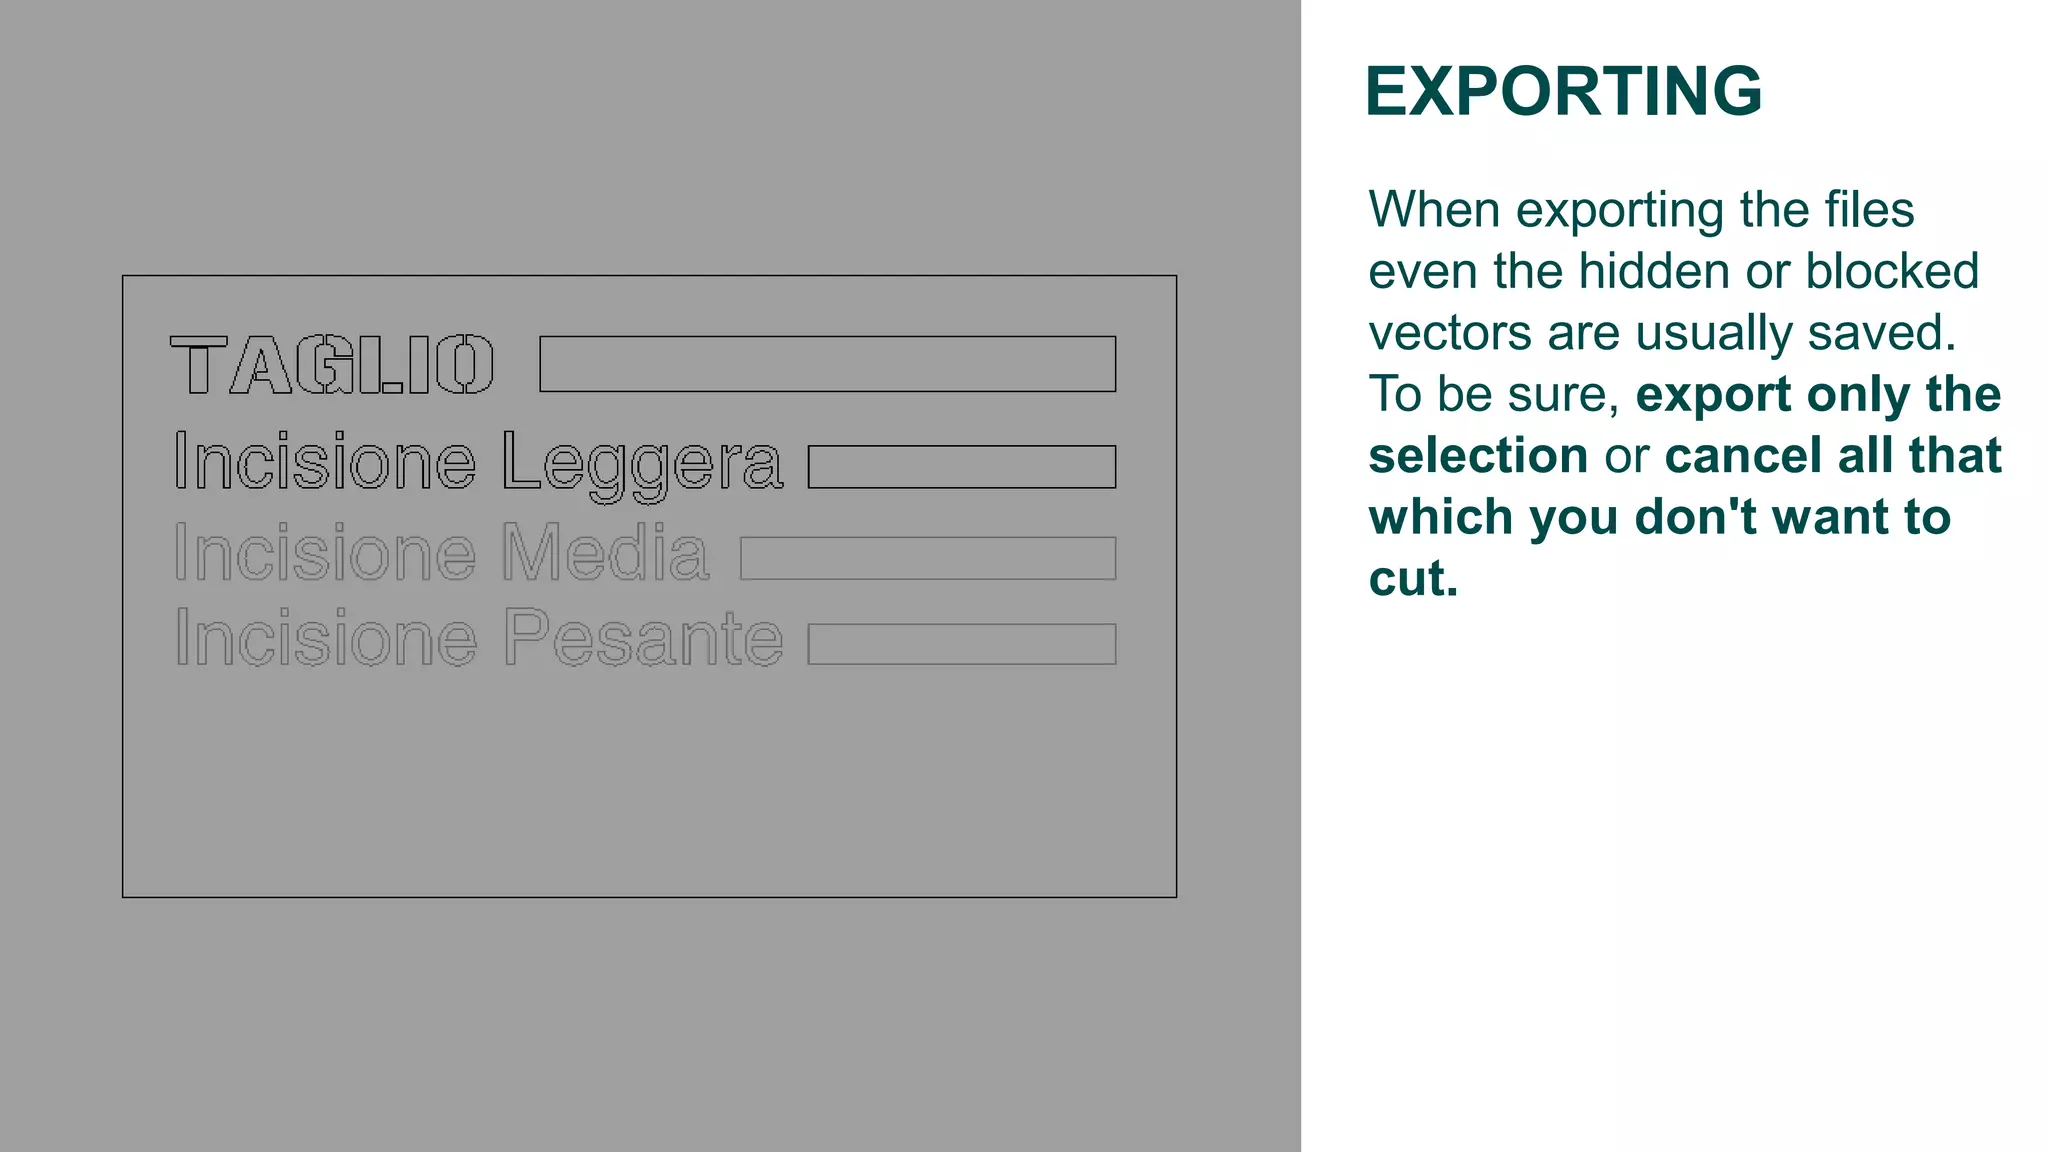
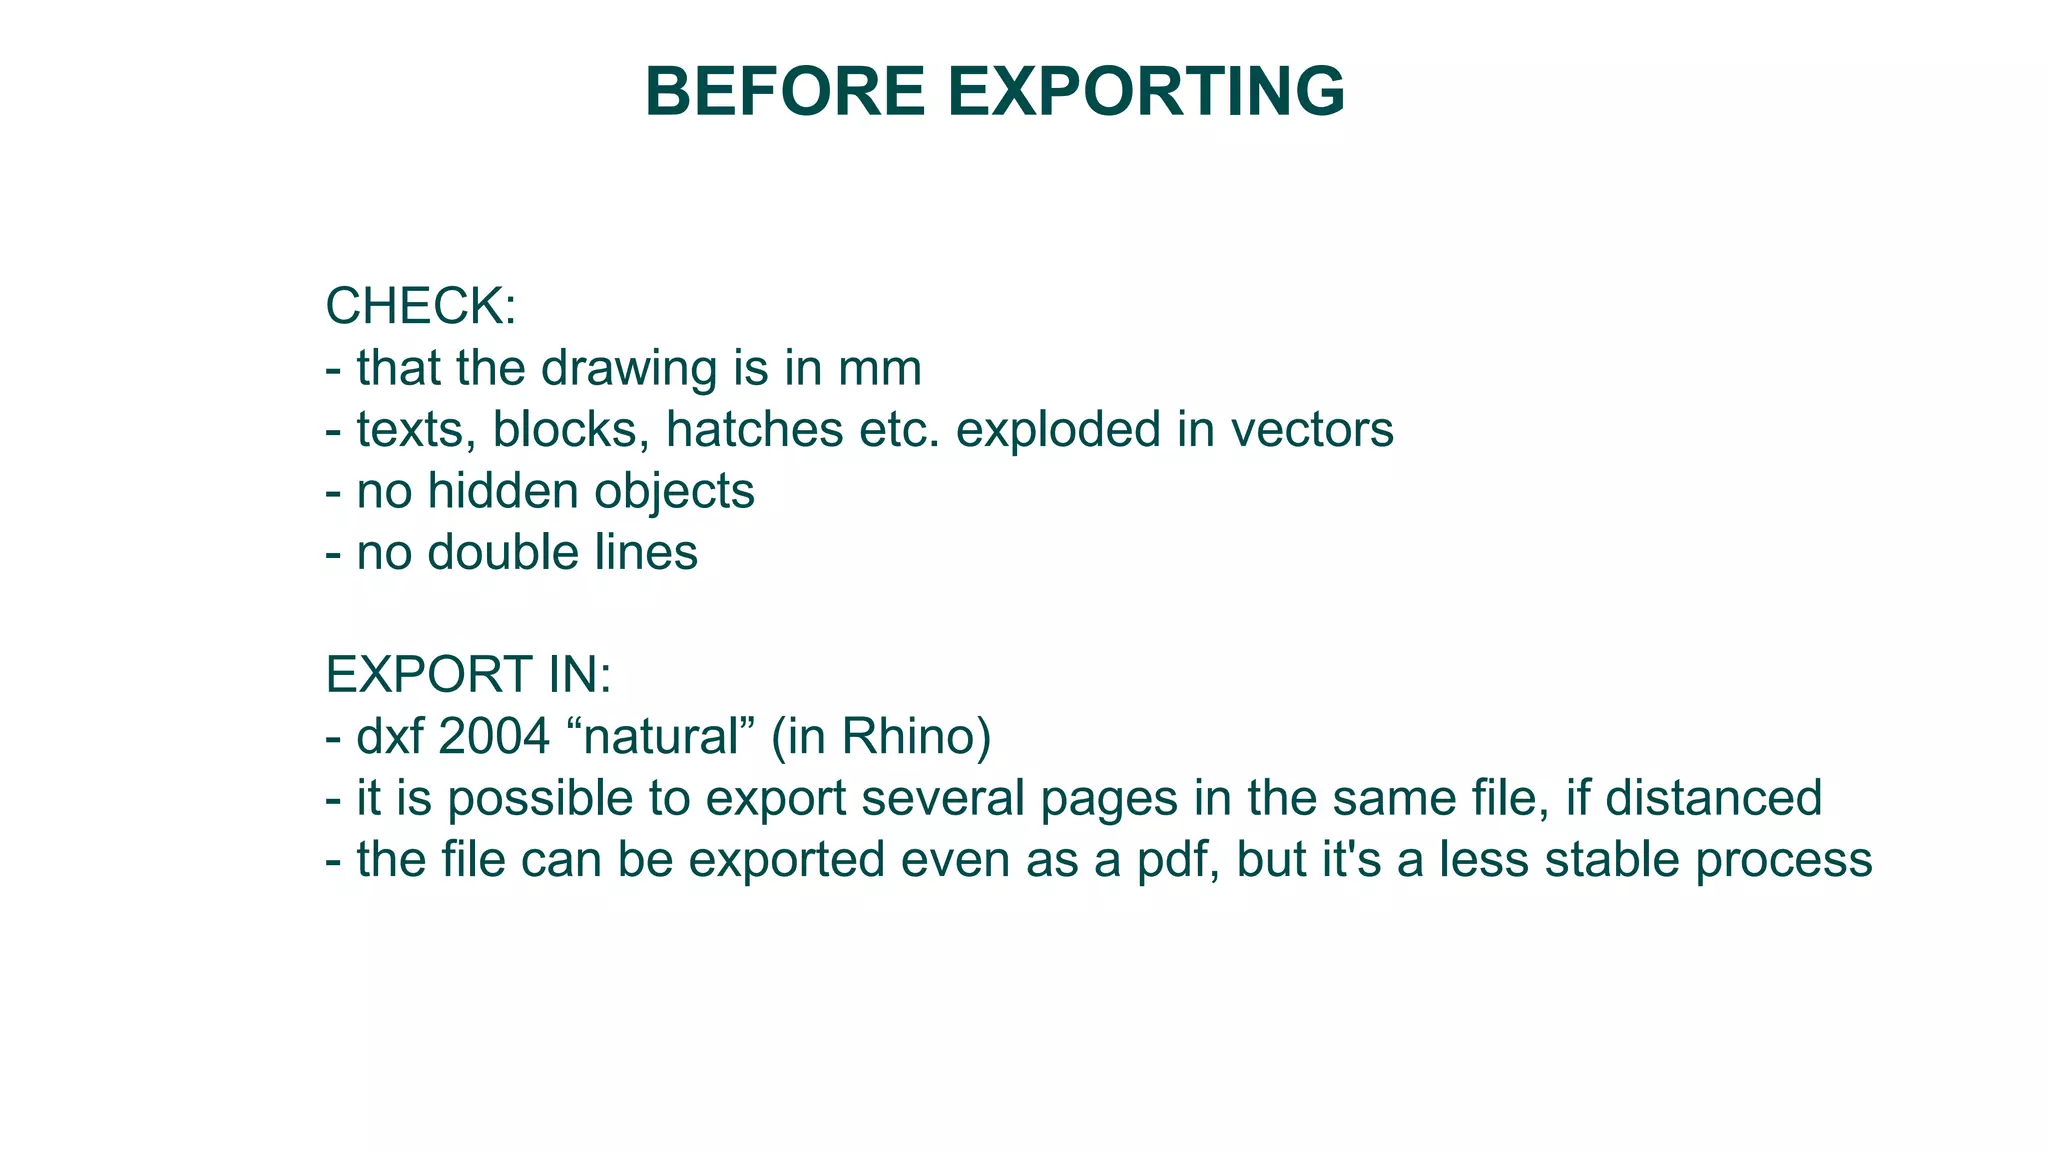
Exporting files correctly; checking for hidden objects and ensuring proper formats.
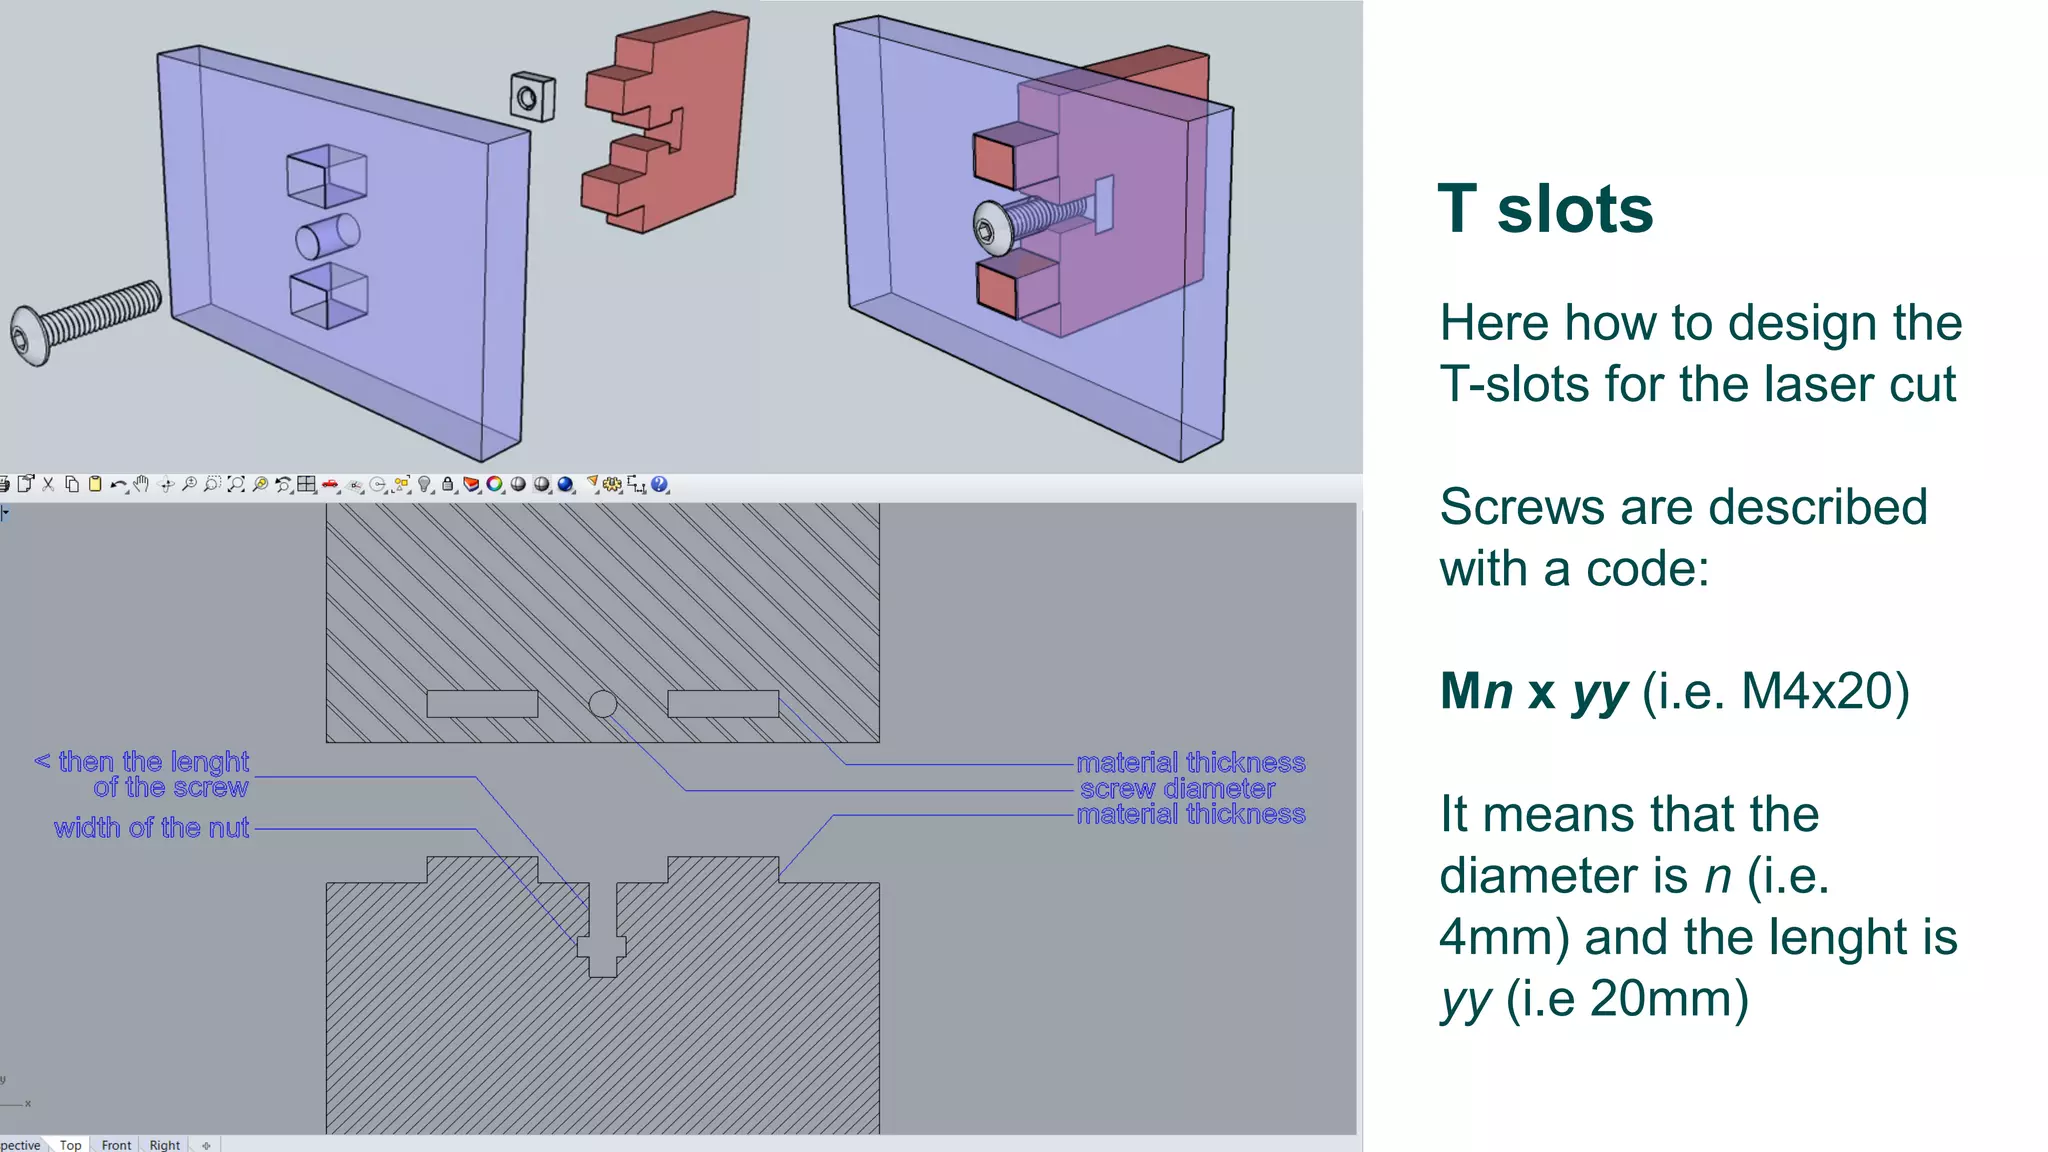
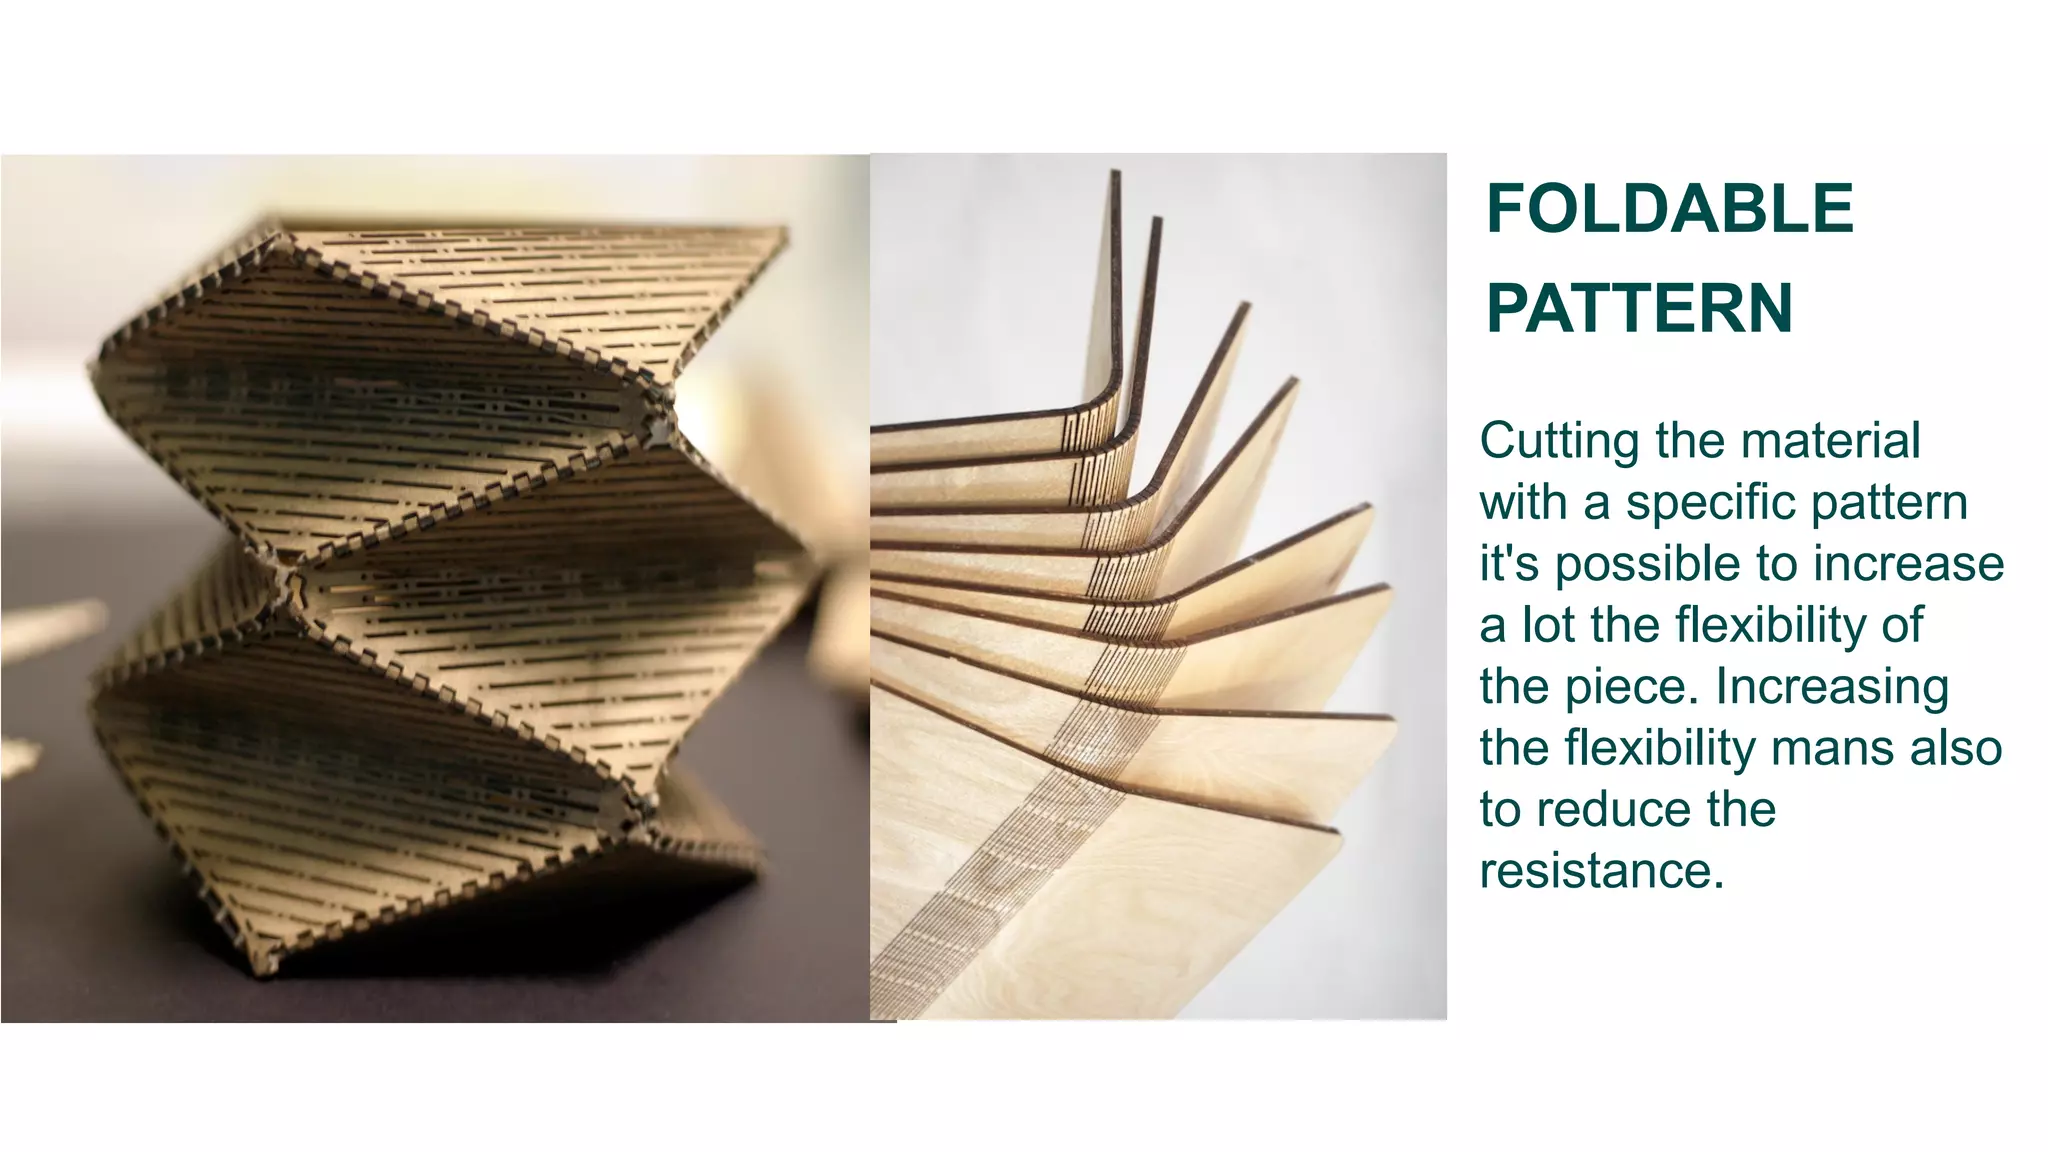
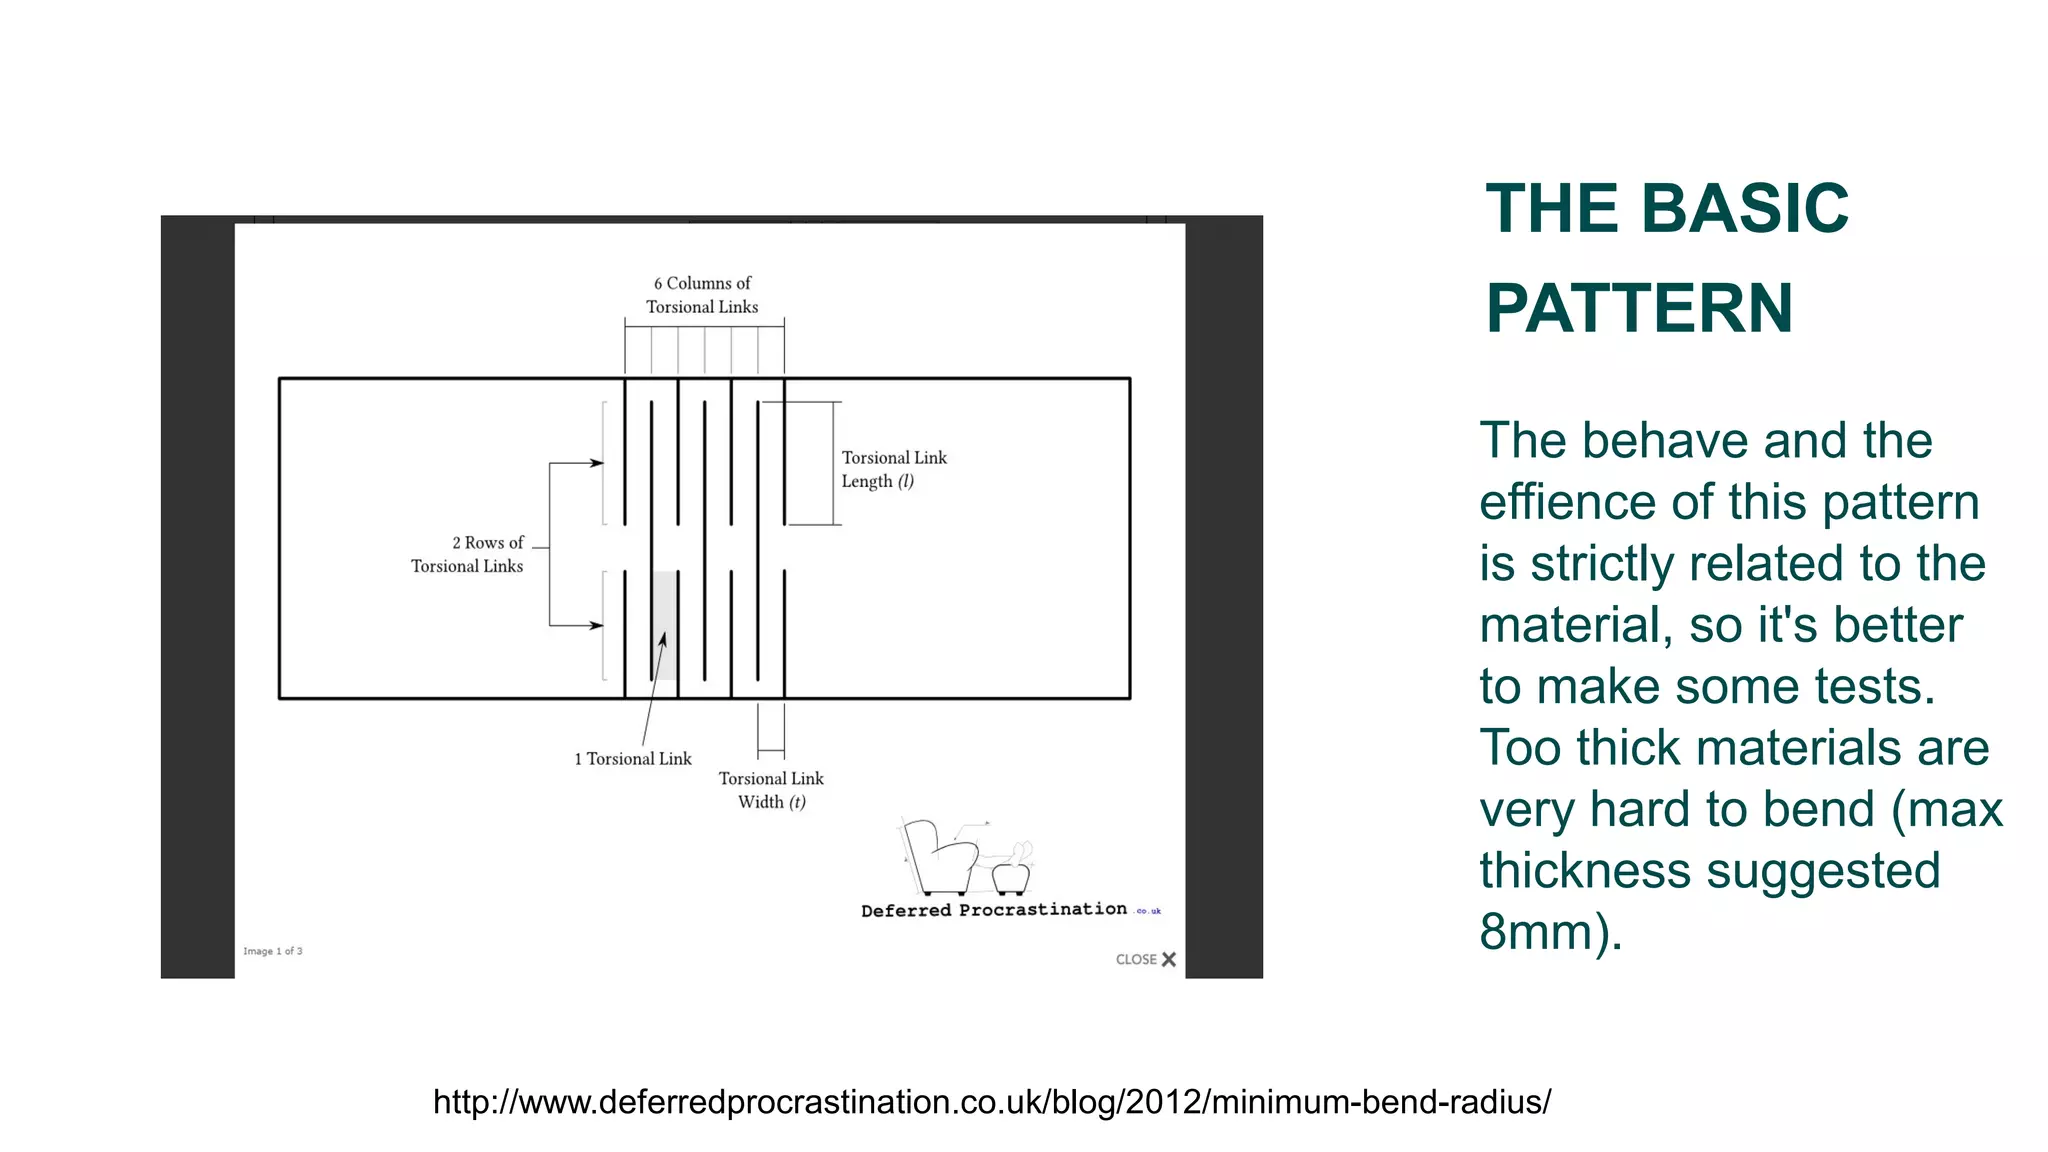
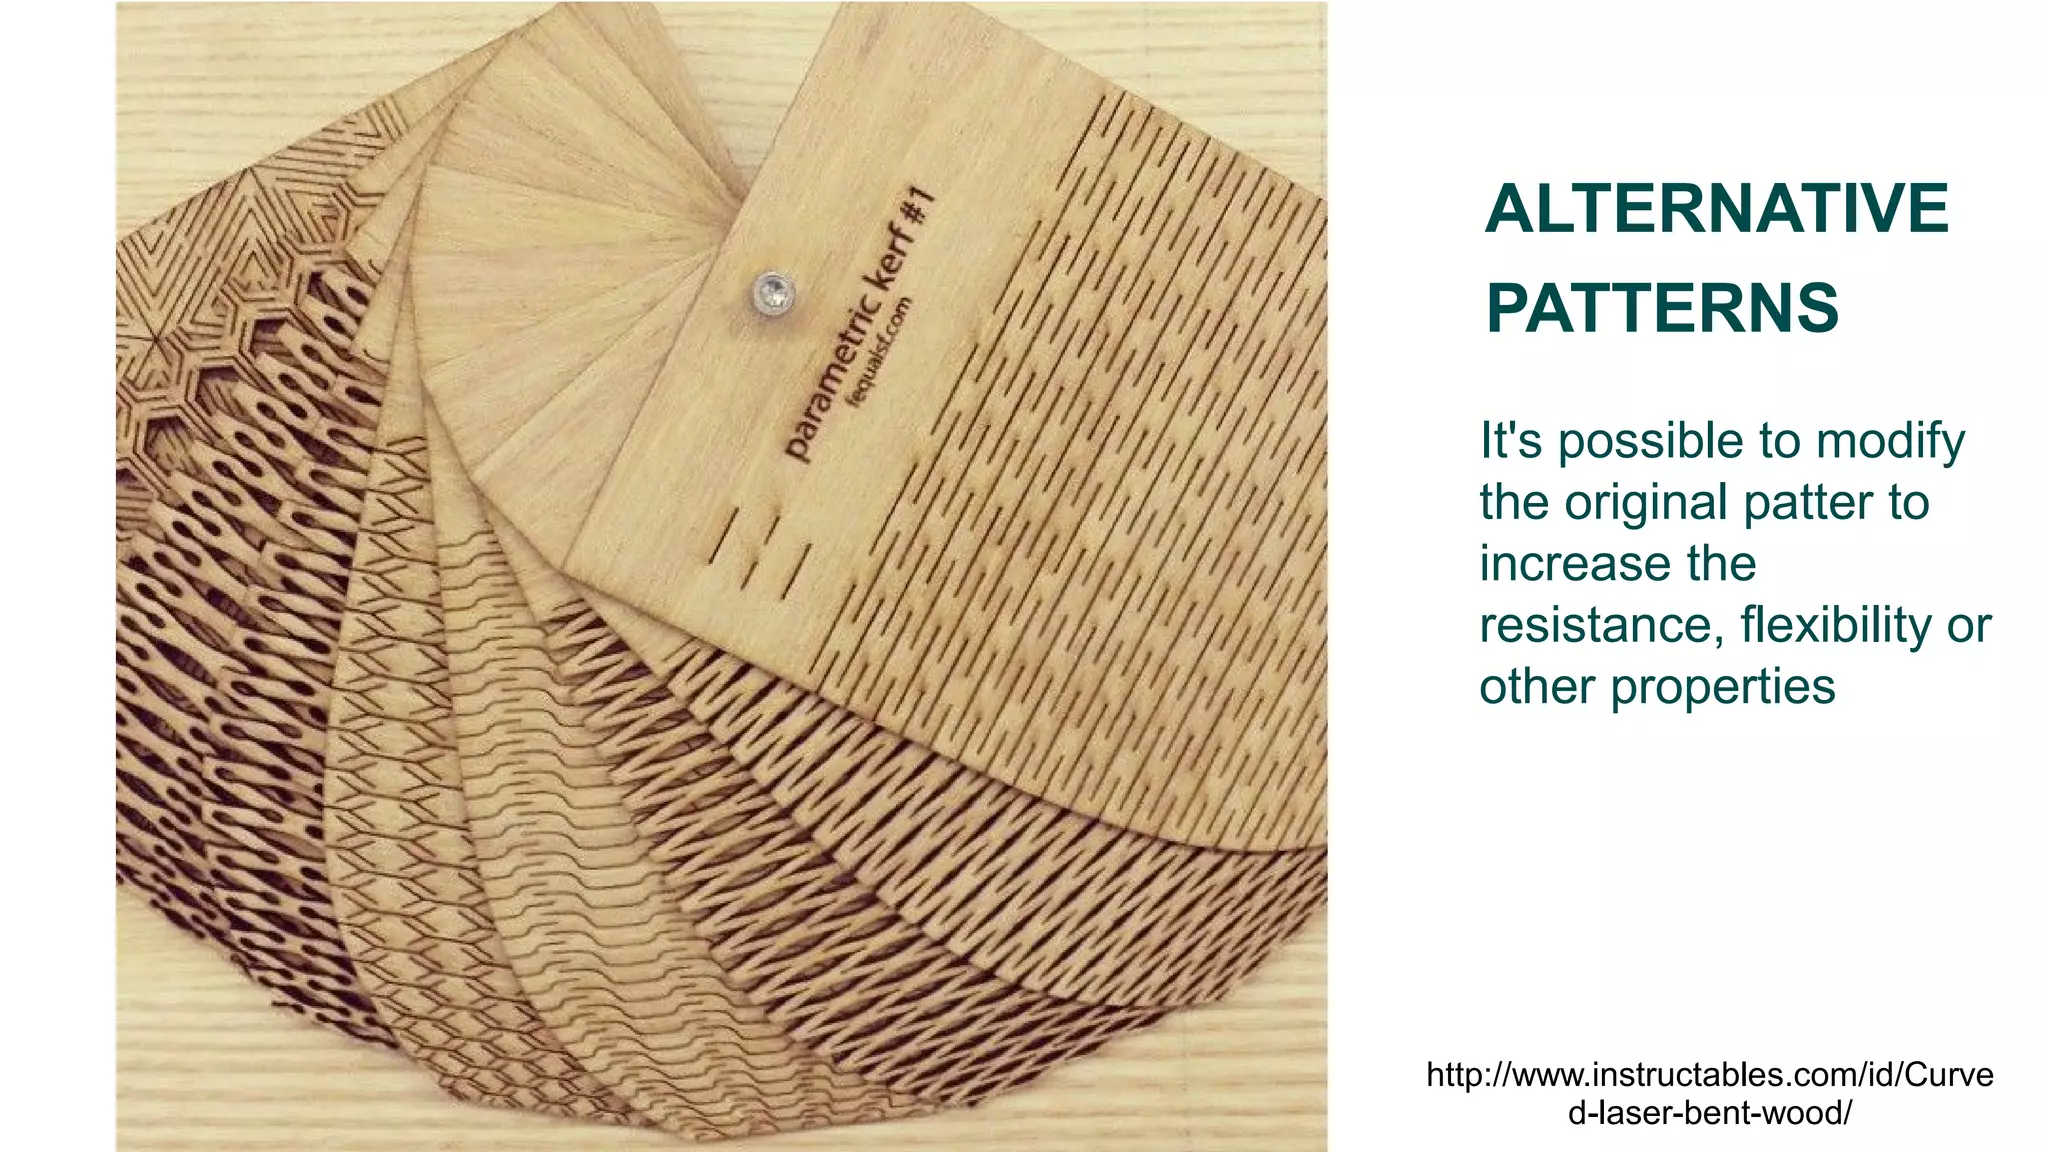
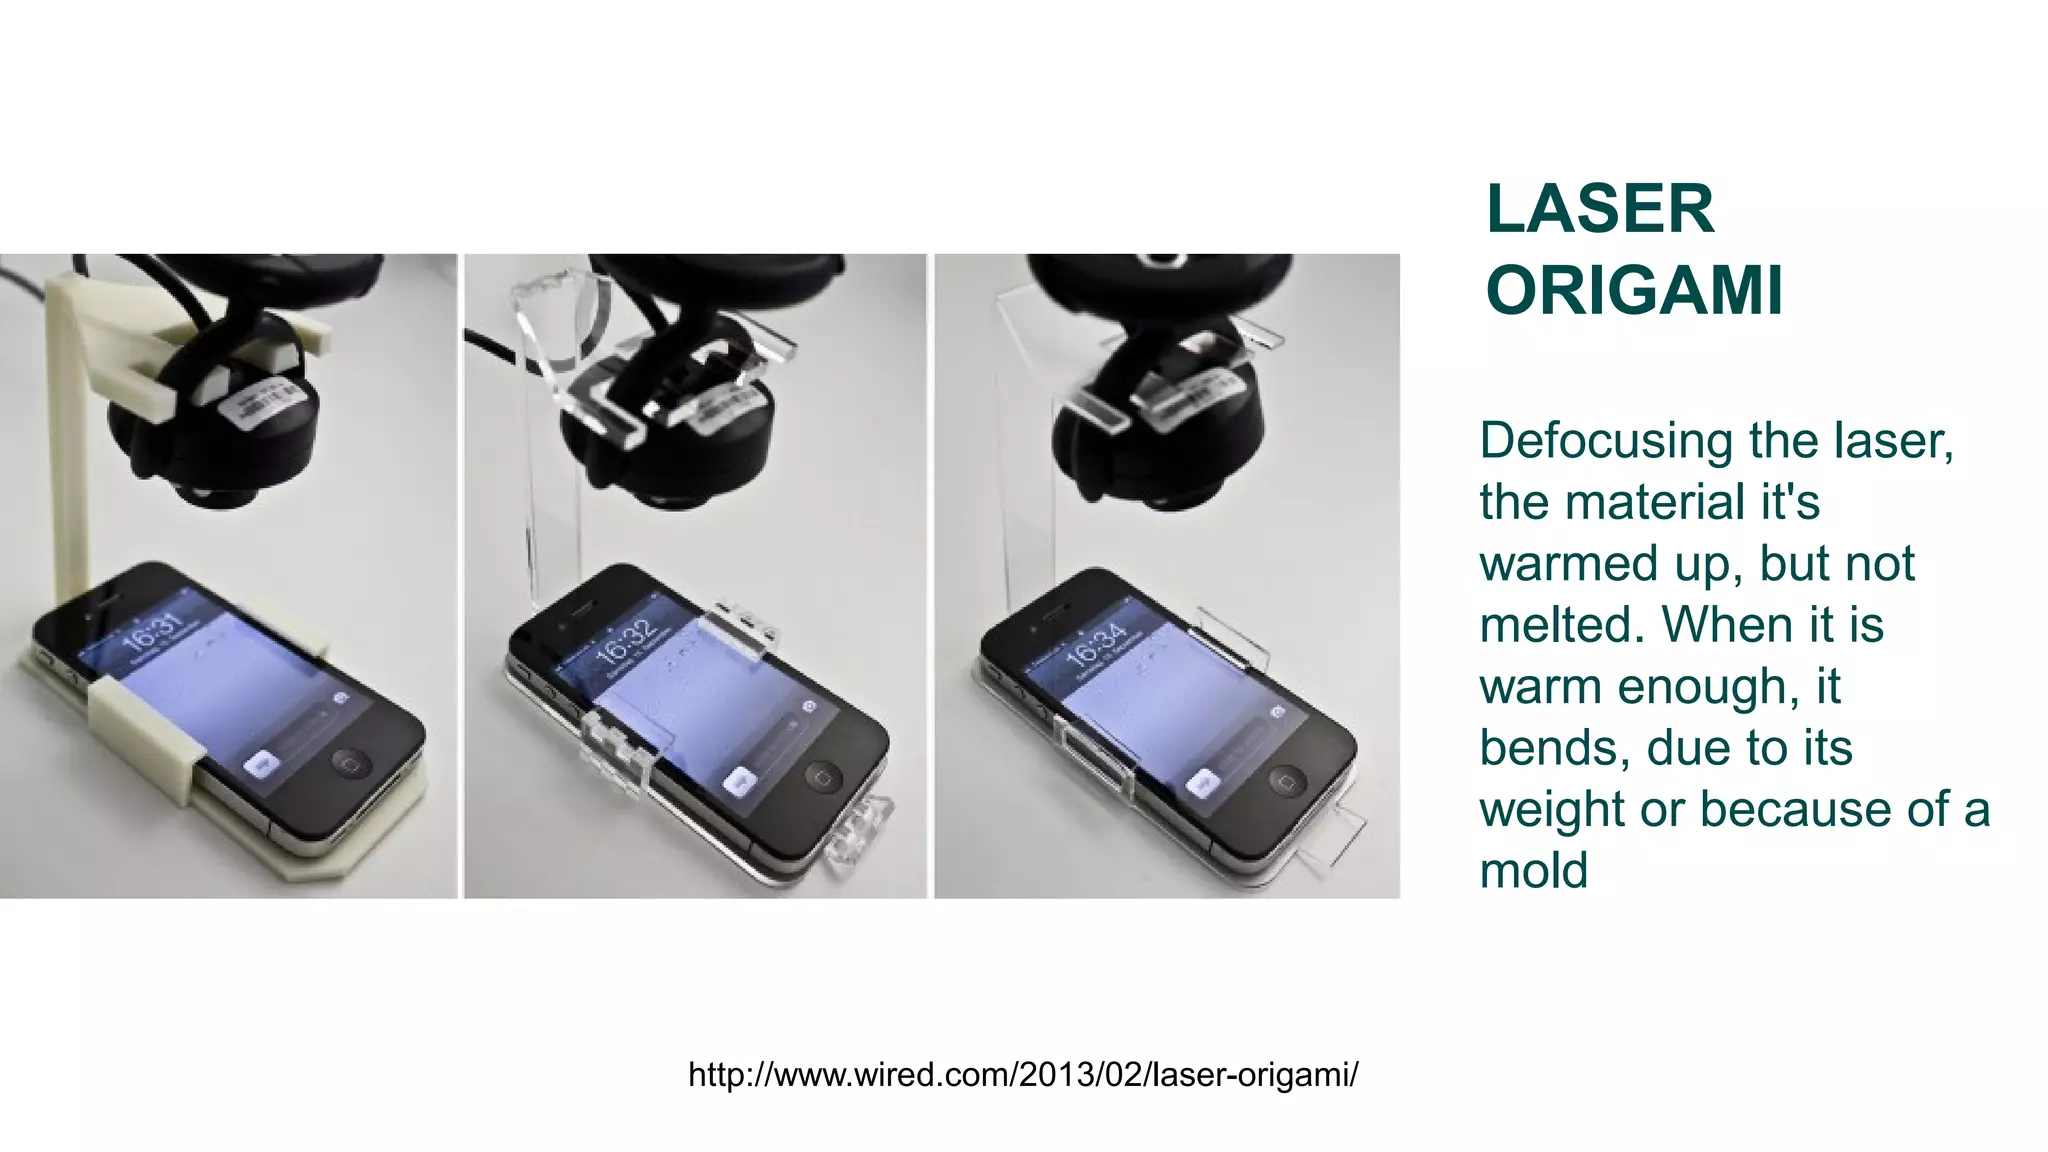
Practical tips for design; T-slots, foldable patterns, material testing, and laser origami techniques.


![[Workshop] cnc router ver 0.4](https://cdn.slidesharecdn.com/ss_thumbnails/workshopcncrouterver0-160830113607-thumbnail.jpg?width=640&height=640&fit=bounds)


![WinRAR Crack 7.13 Final Mac Keygen 2026 Download [Latest] Software.pptx](https://cdn.slidesharecdn.com/ss_thumbnails/software-251207185858-eb450678-thumbnail.jpg?width=640&height=640&fit=bounds)


![Soundtoys Mac v5.5.5.0 Crack for MacOS Full Version [Latest] pptx](https://cdn.slidesharecdn.com/ss_thumbnails/softwareoverview-251207193711-91d8ae6b-thumbnail.jpg?width=640&height=640&fit=bounds)


