Download to read offline
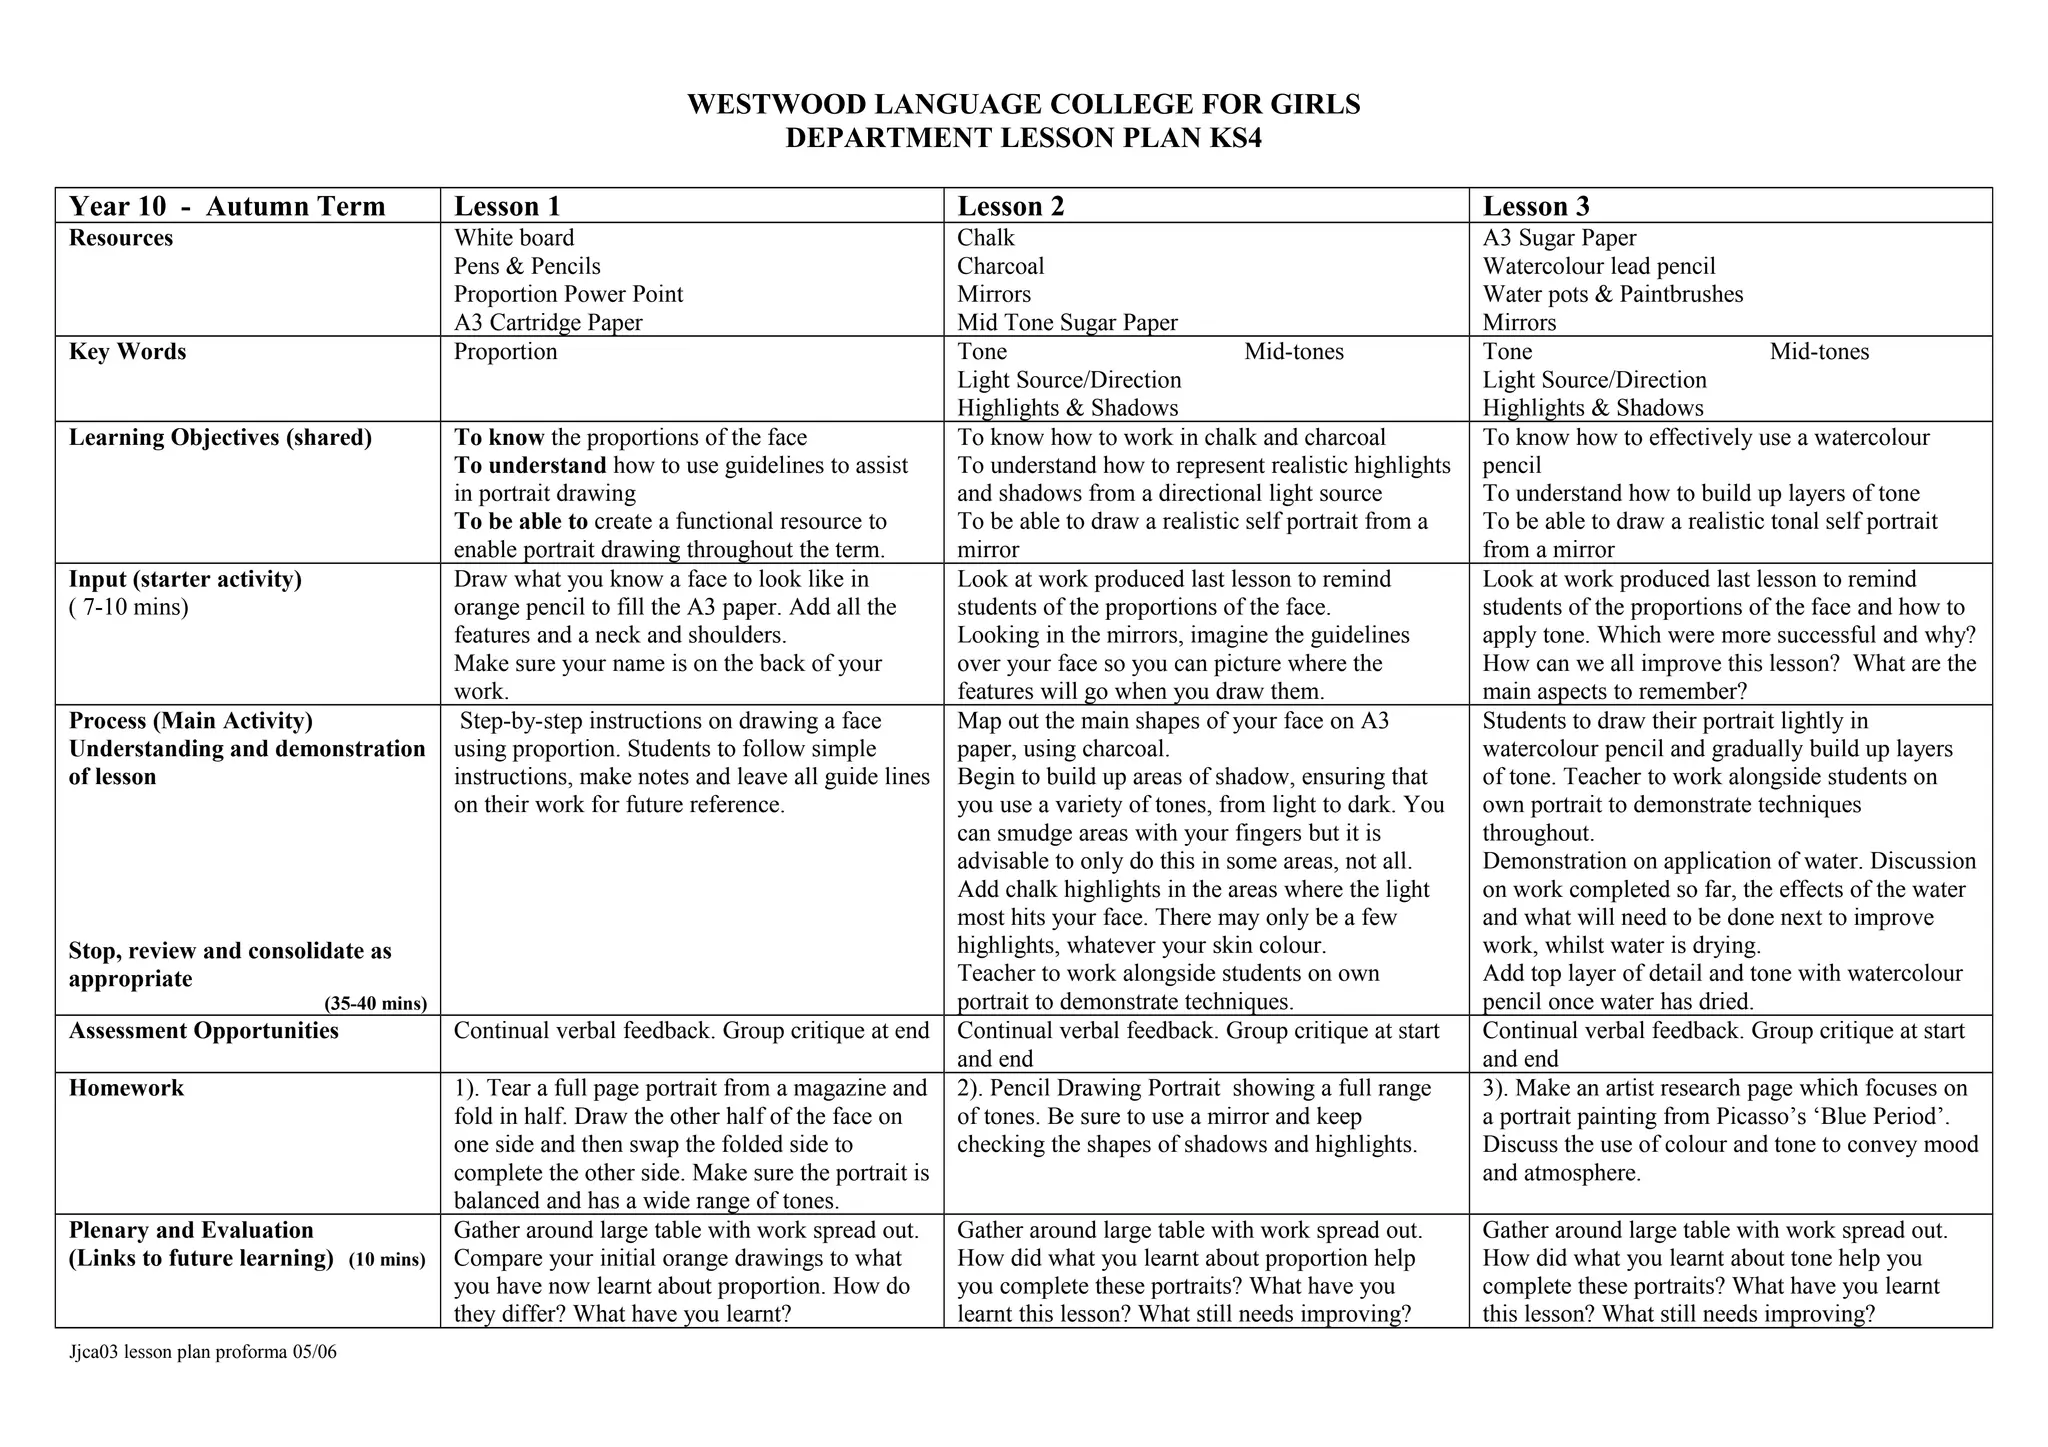
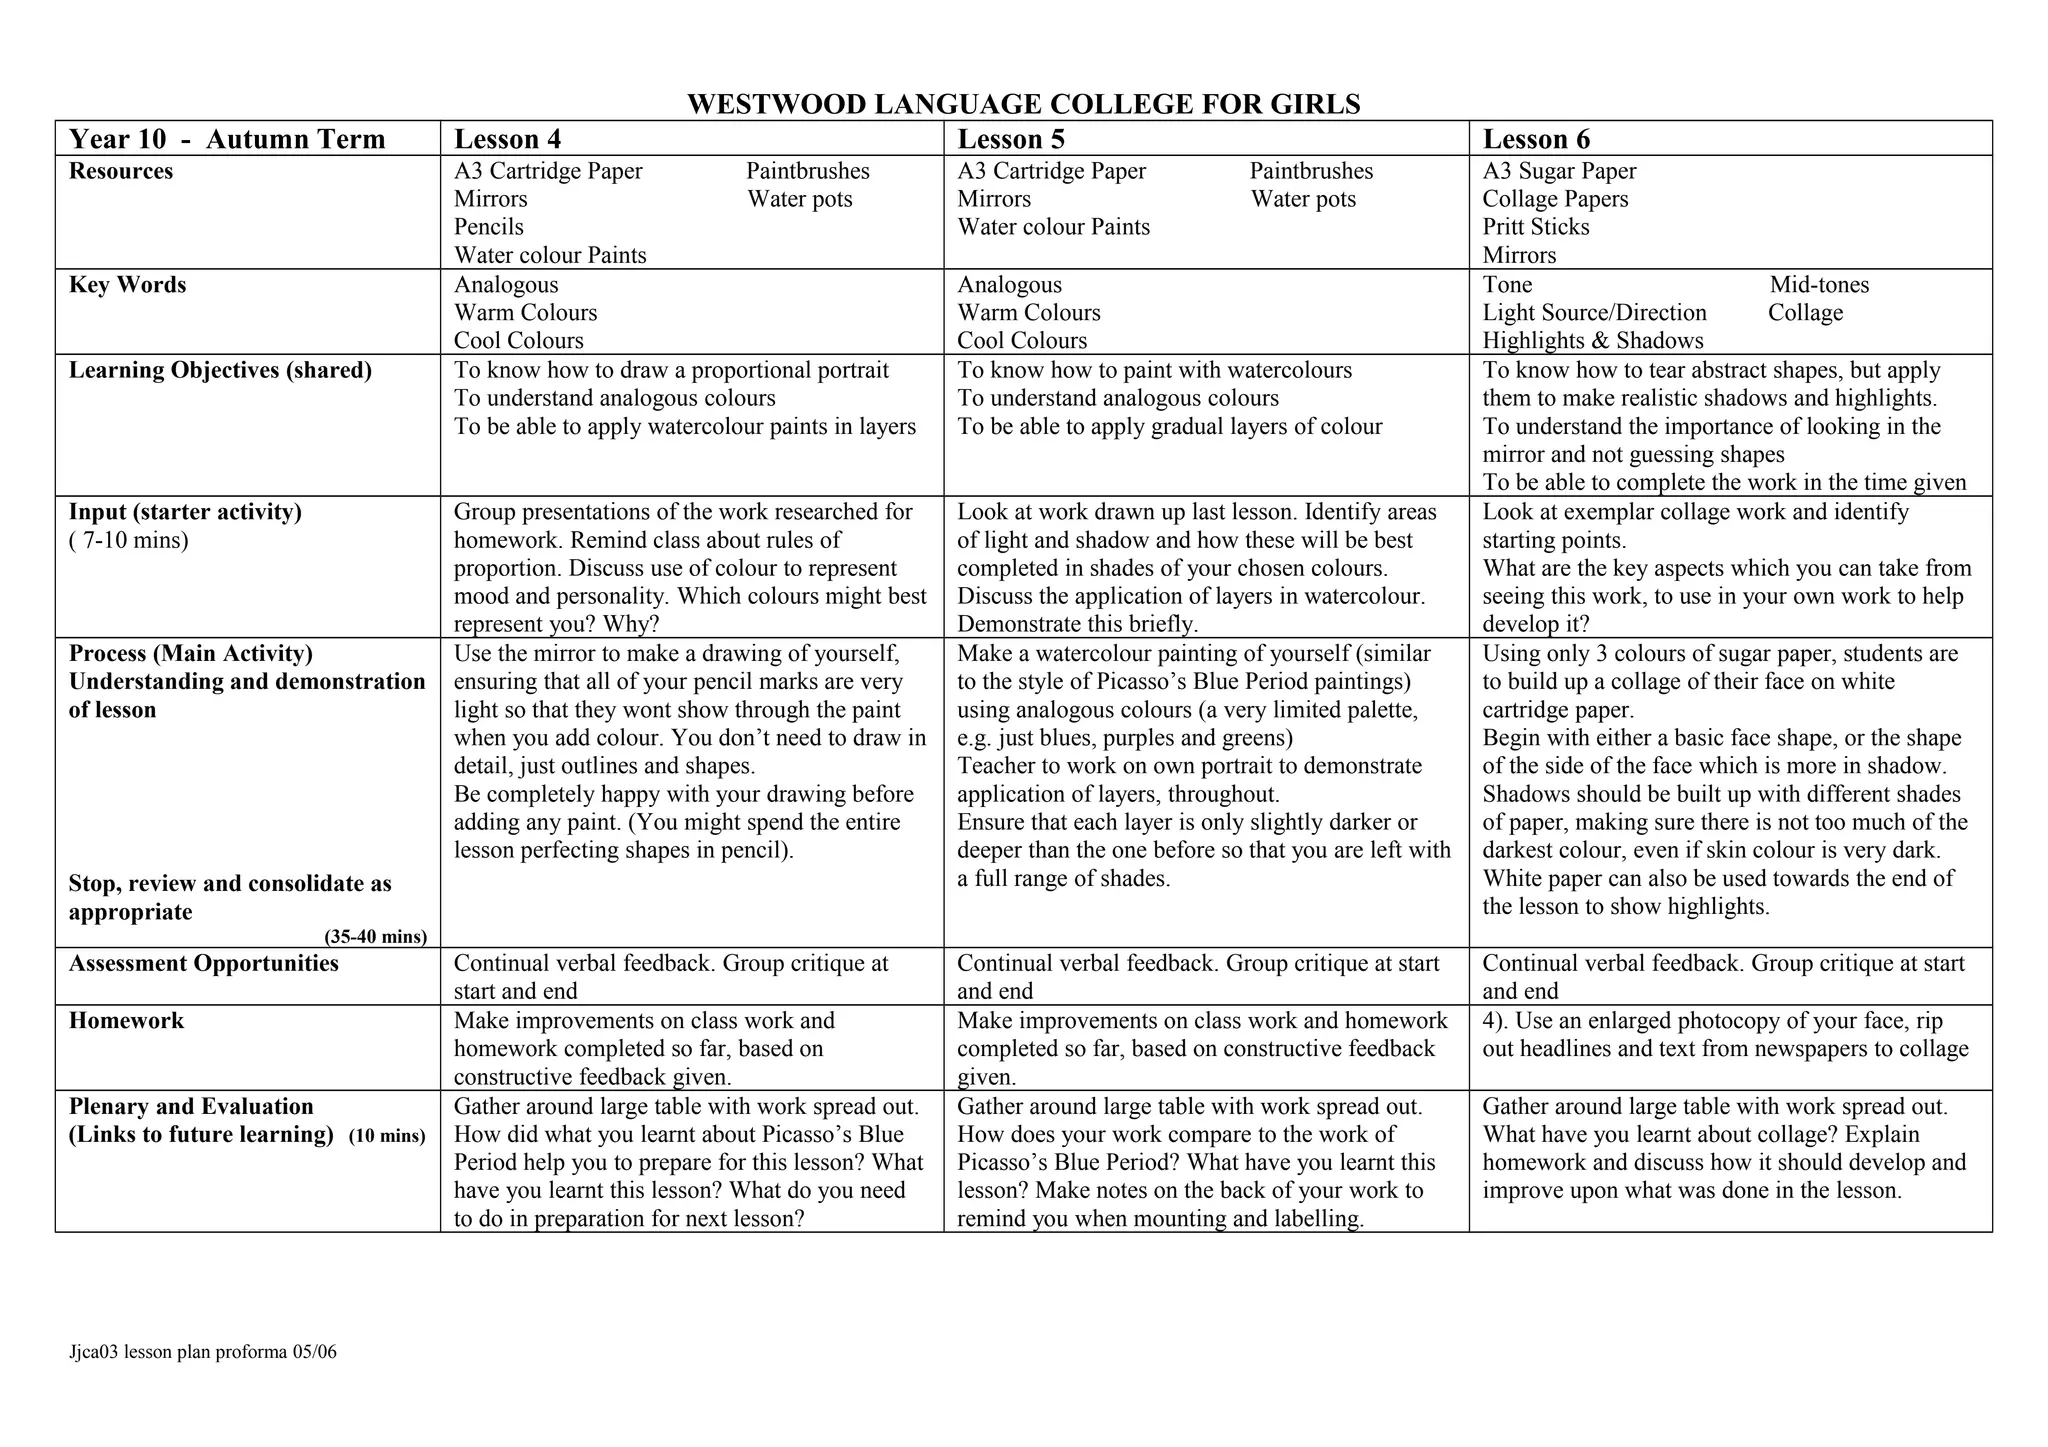
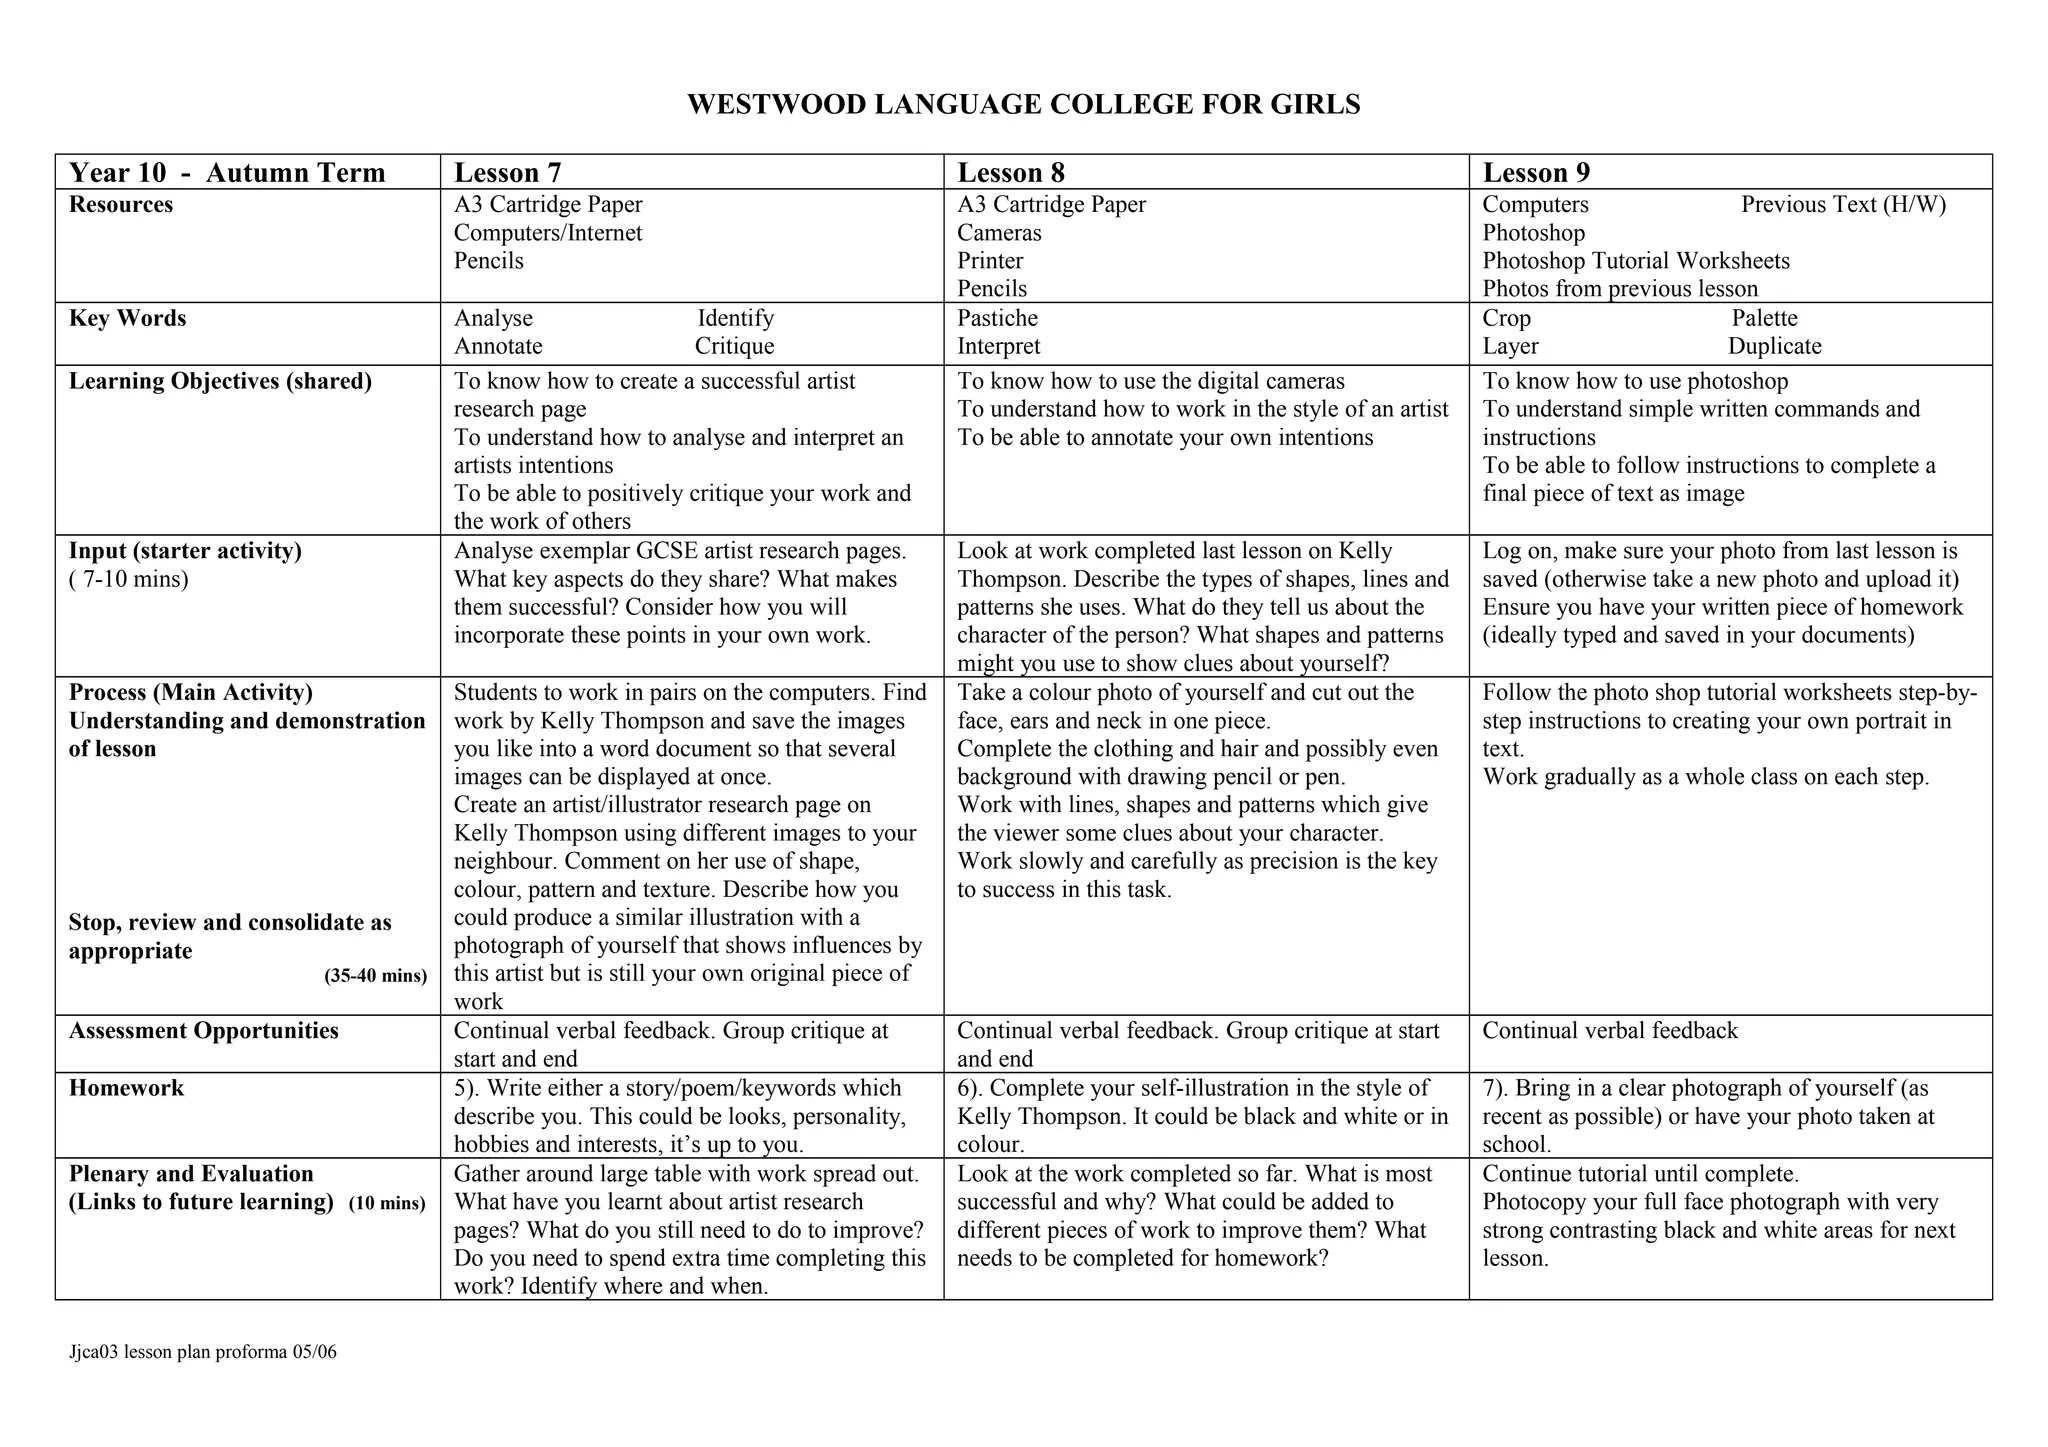

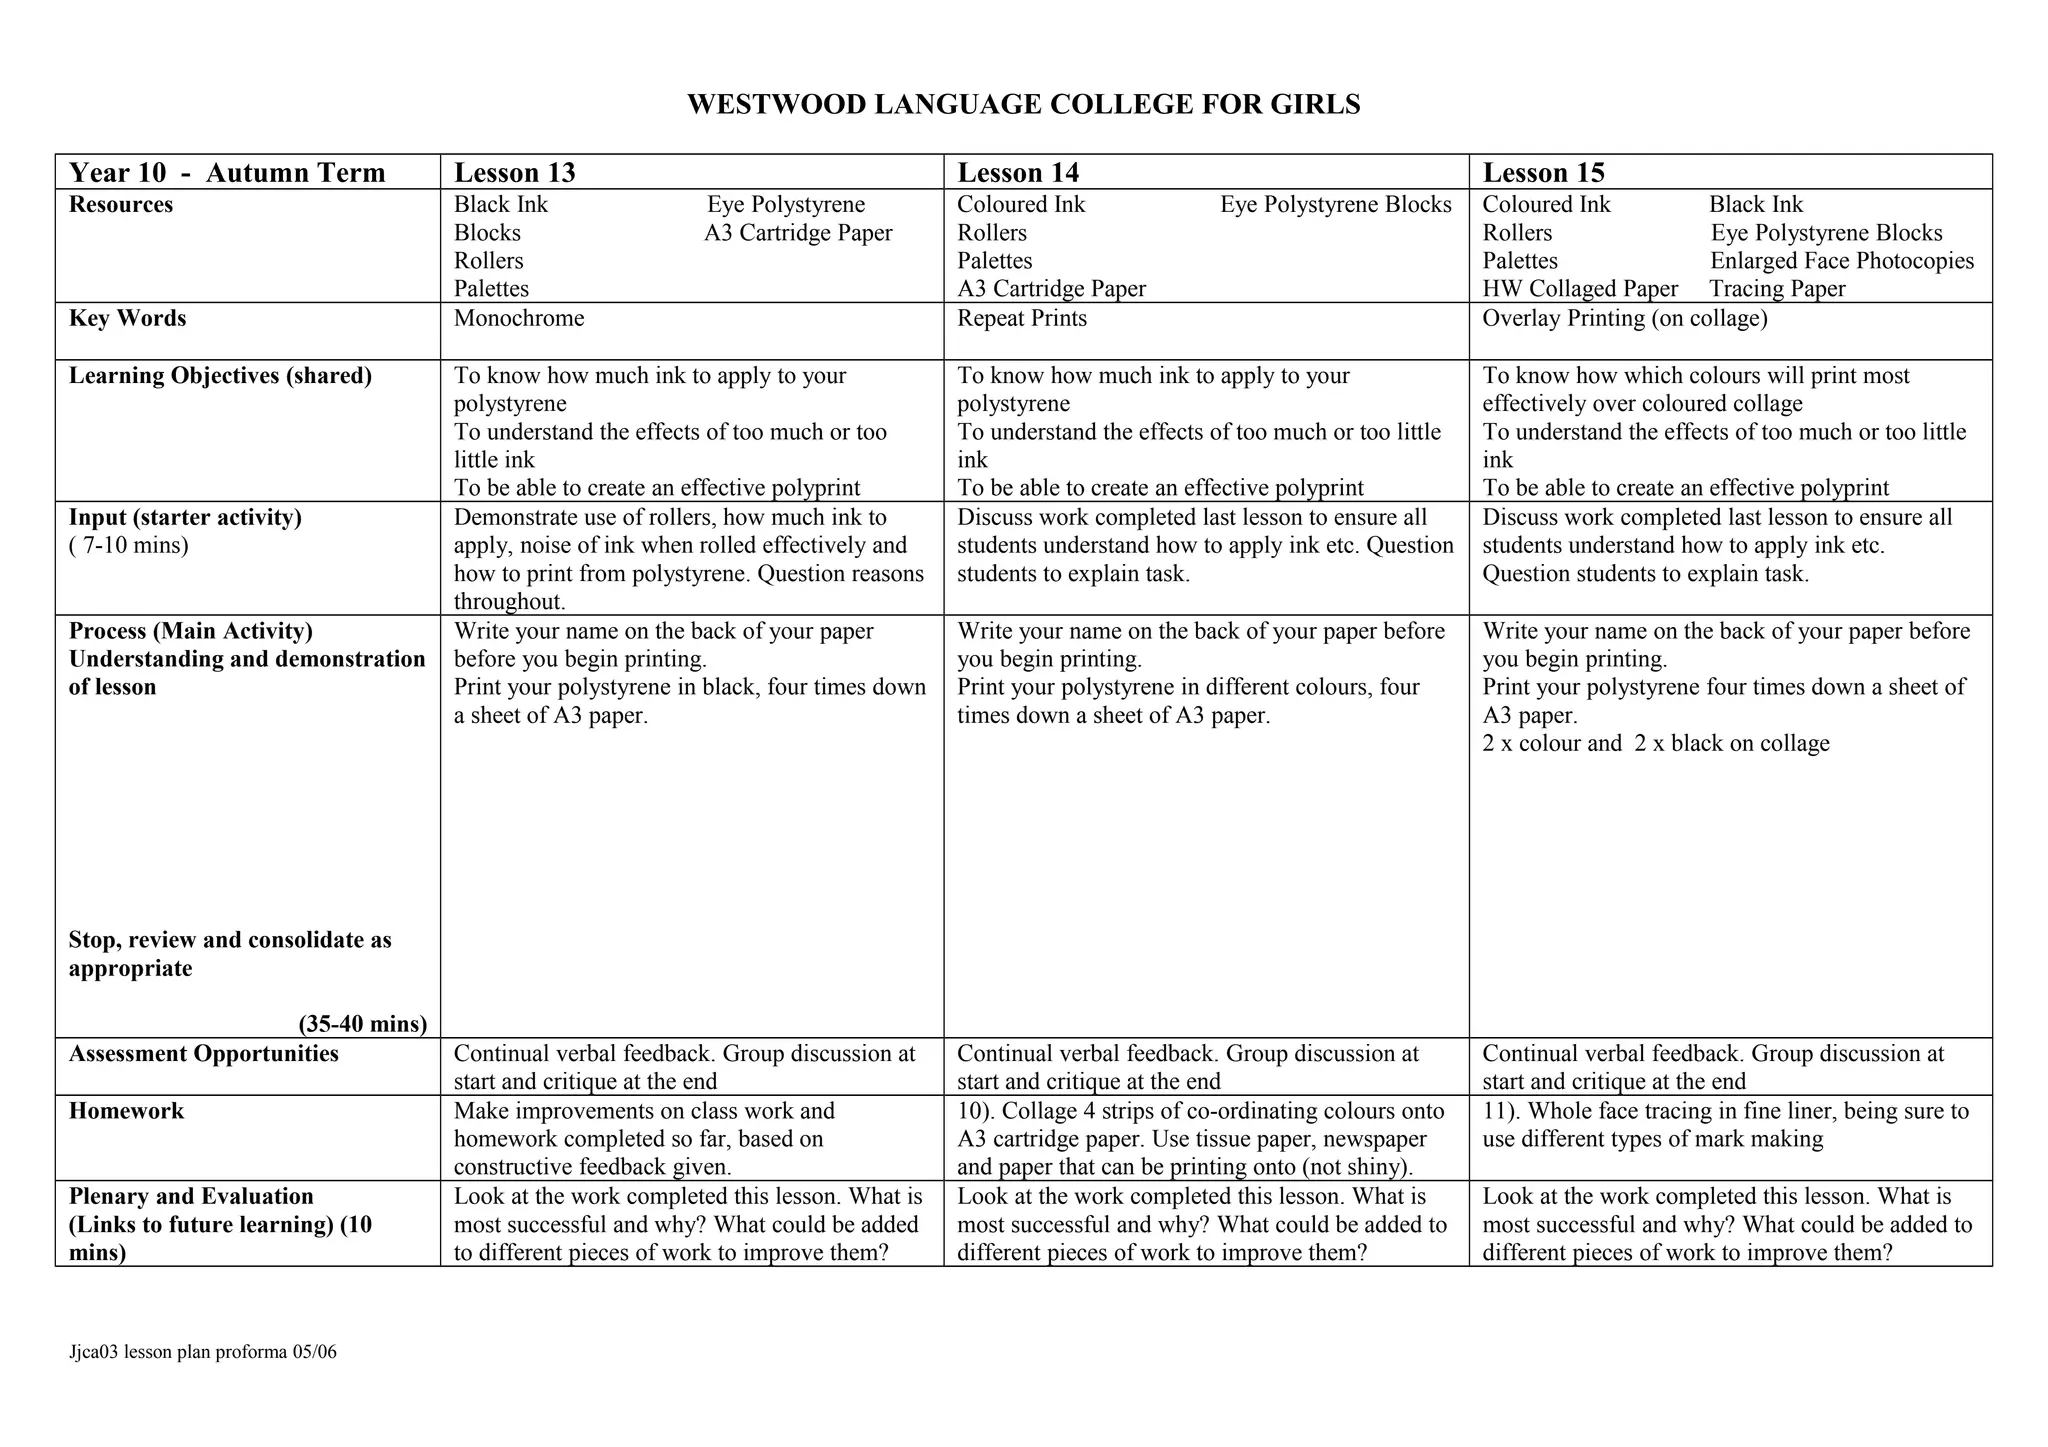
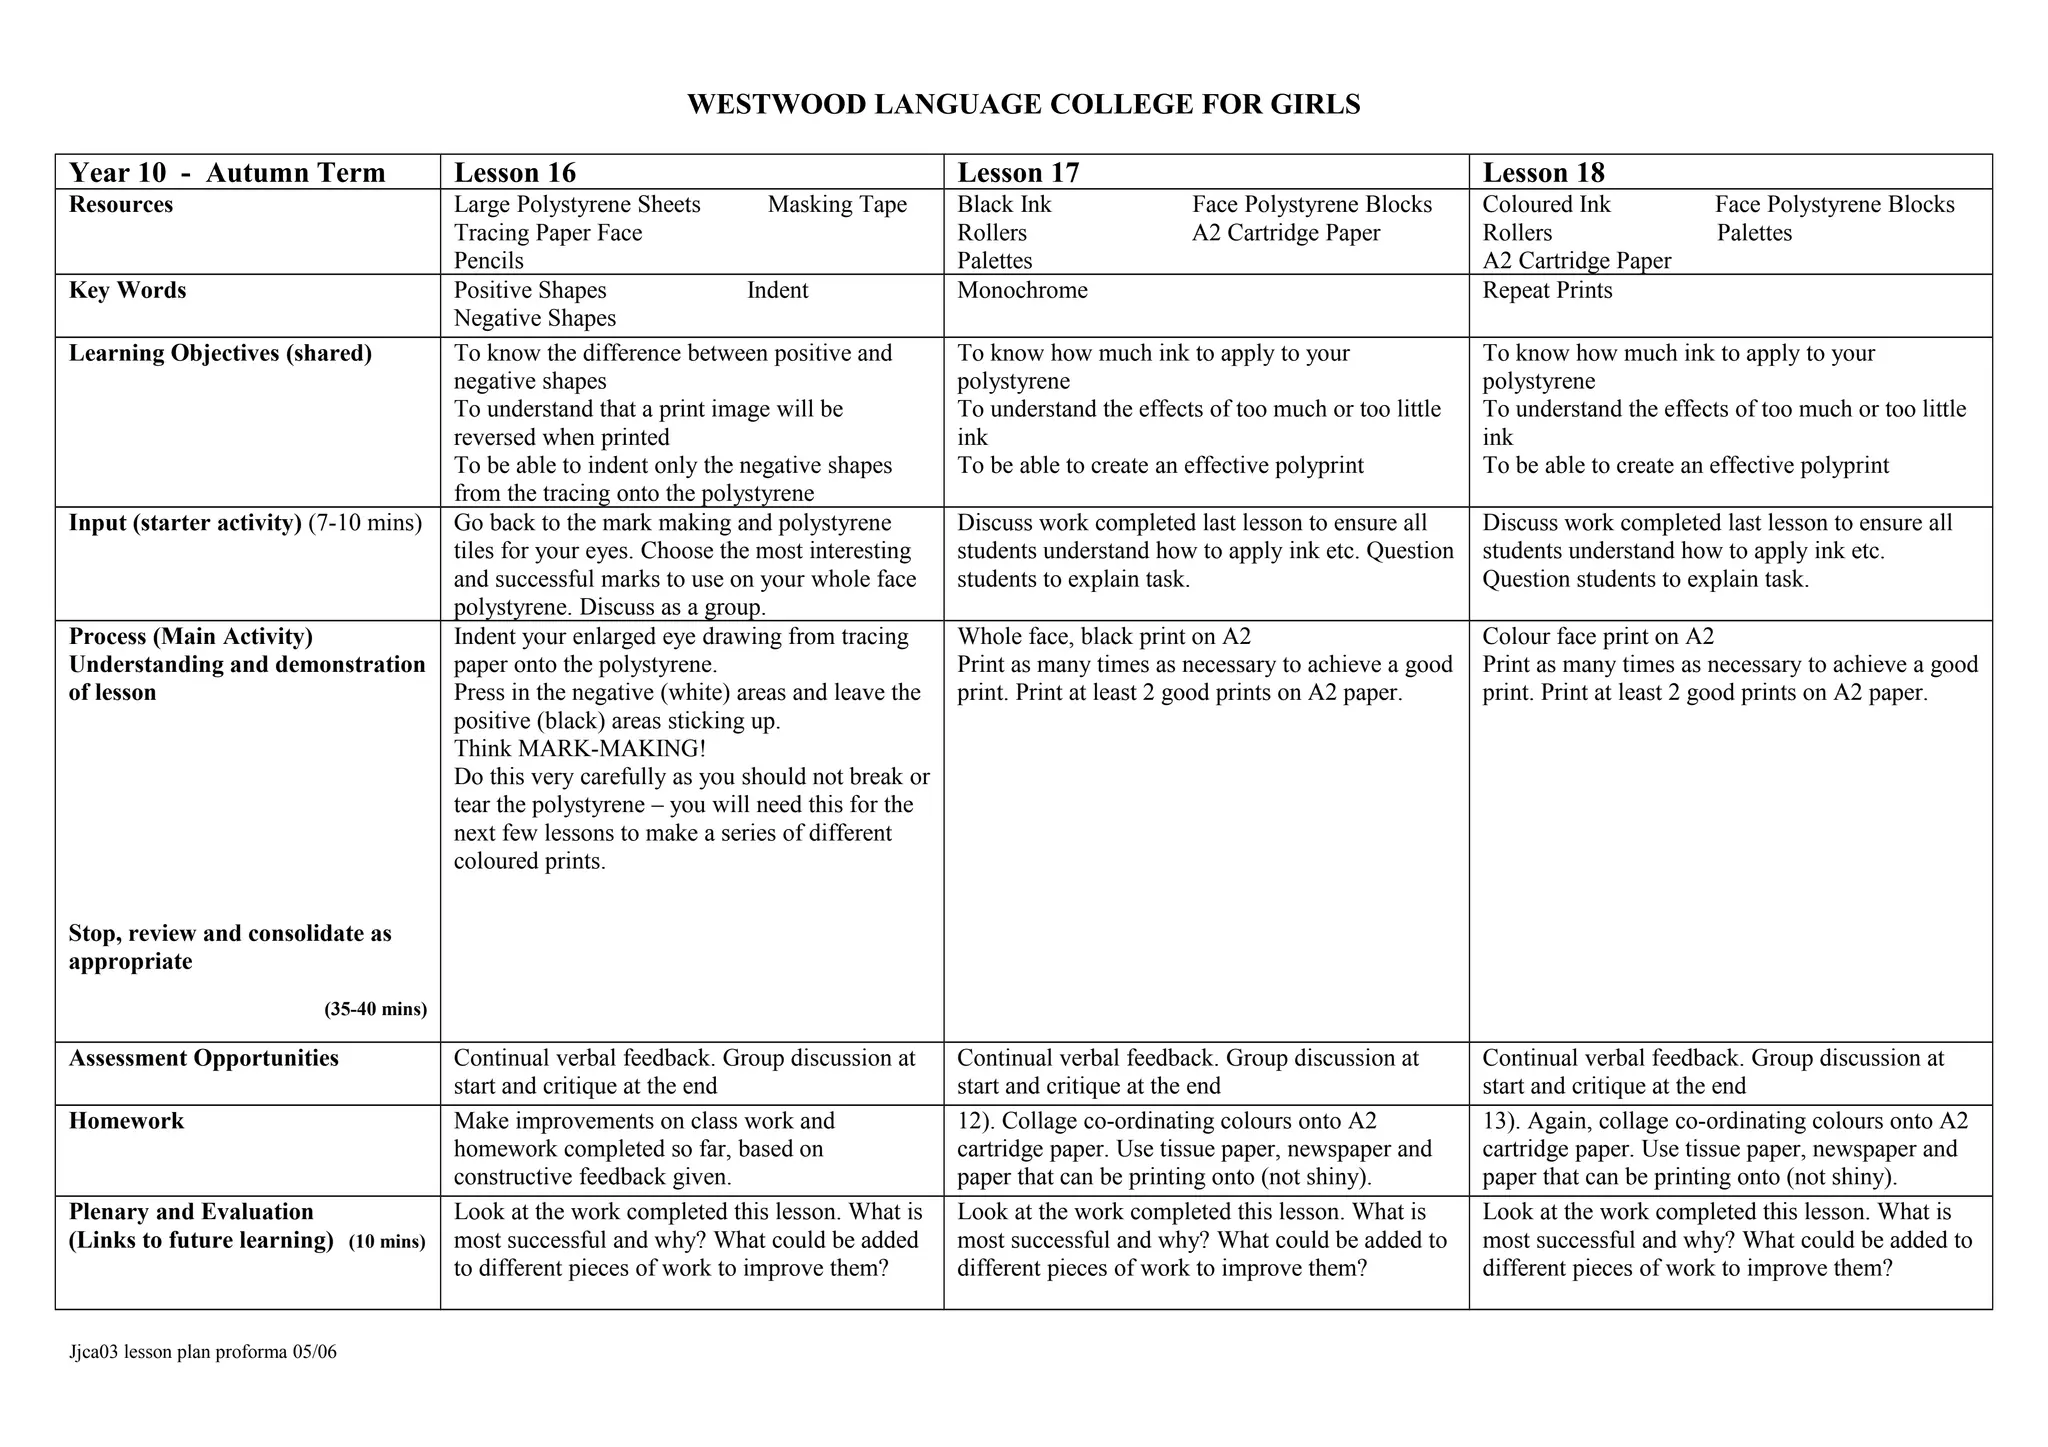
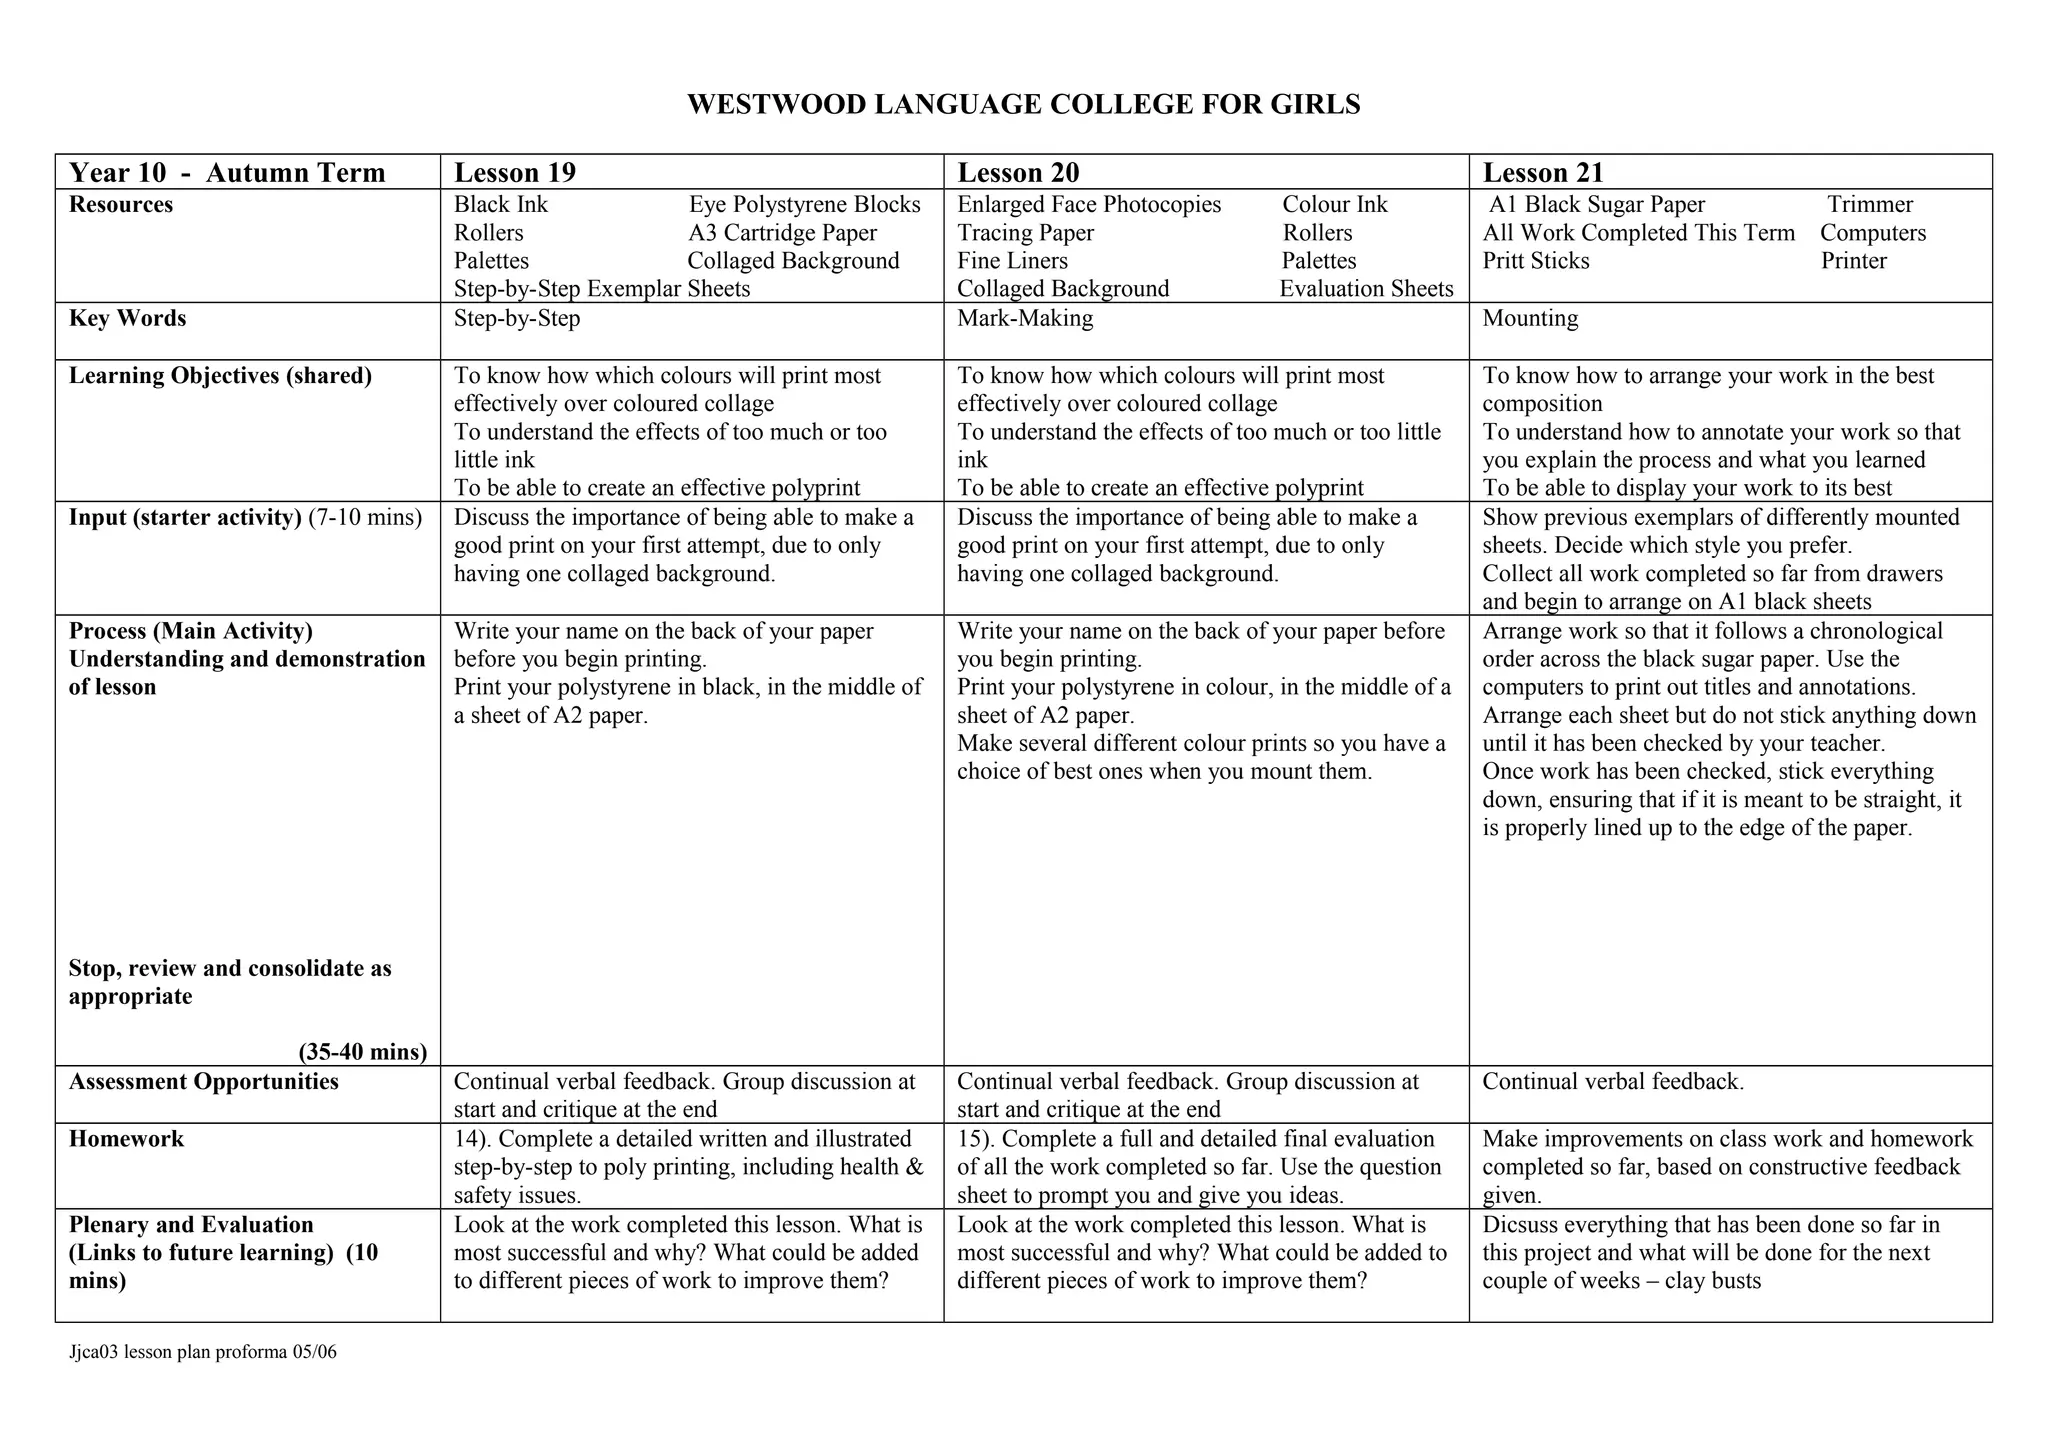
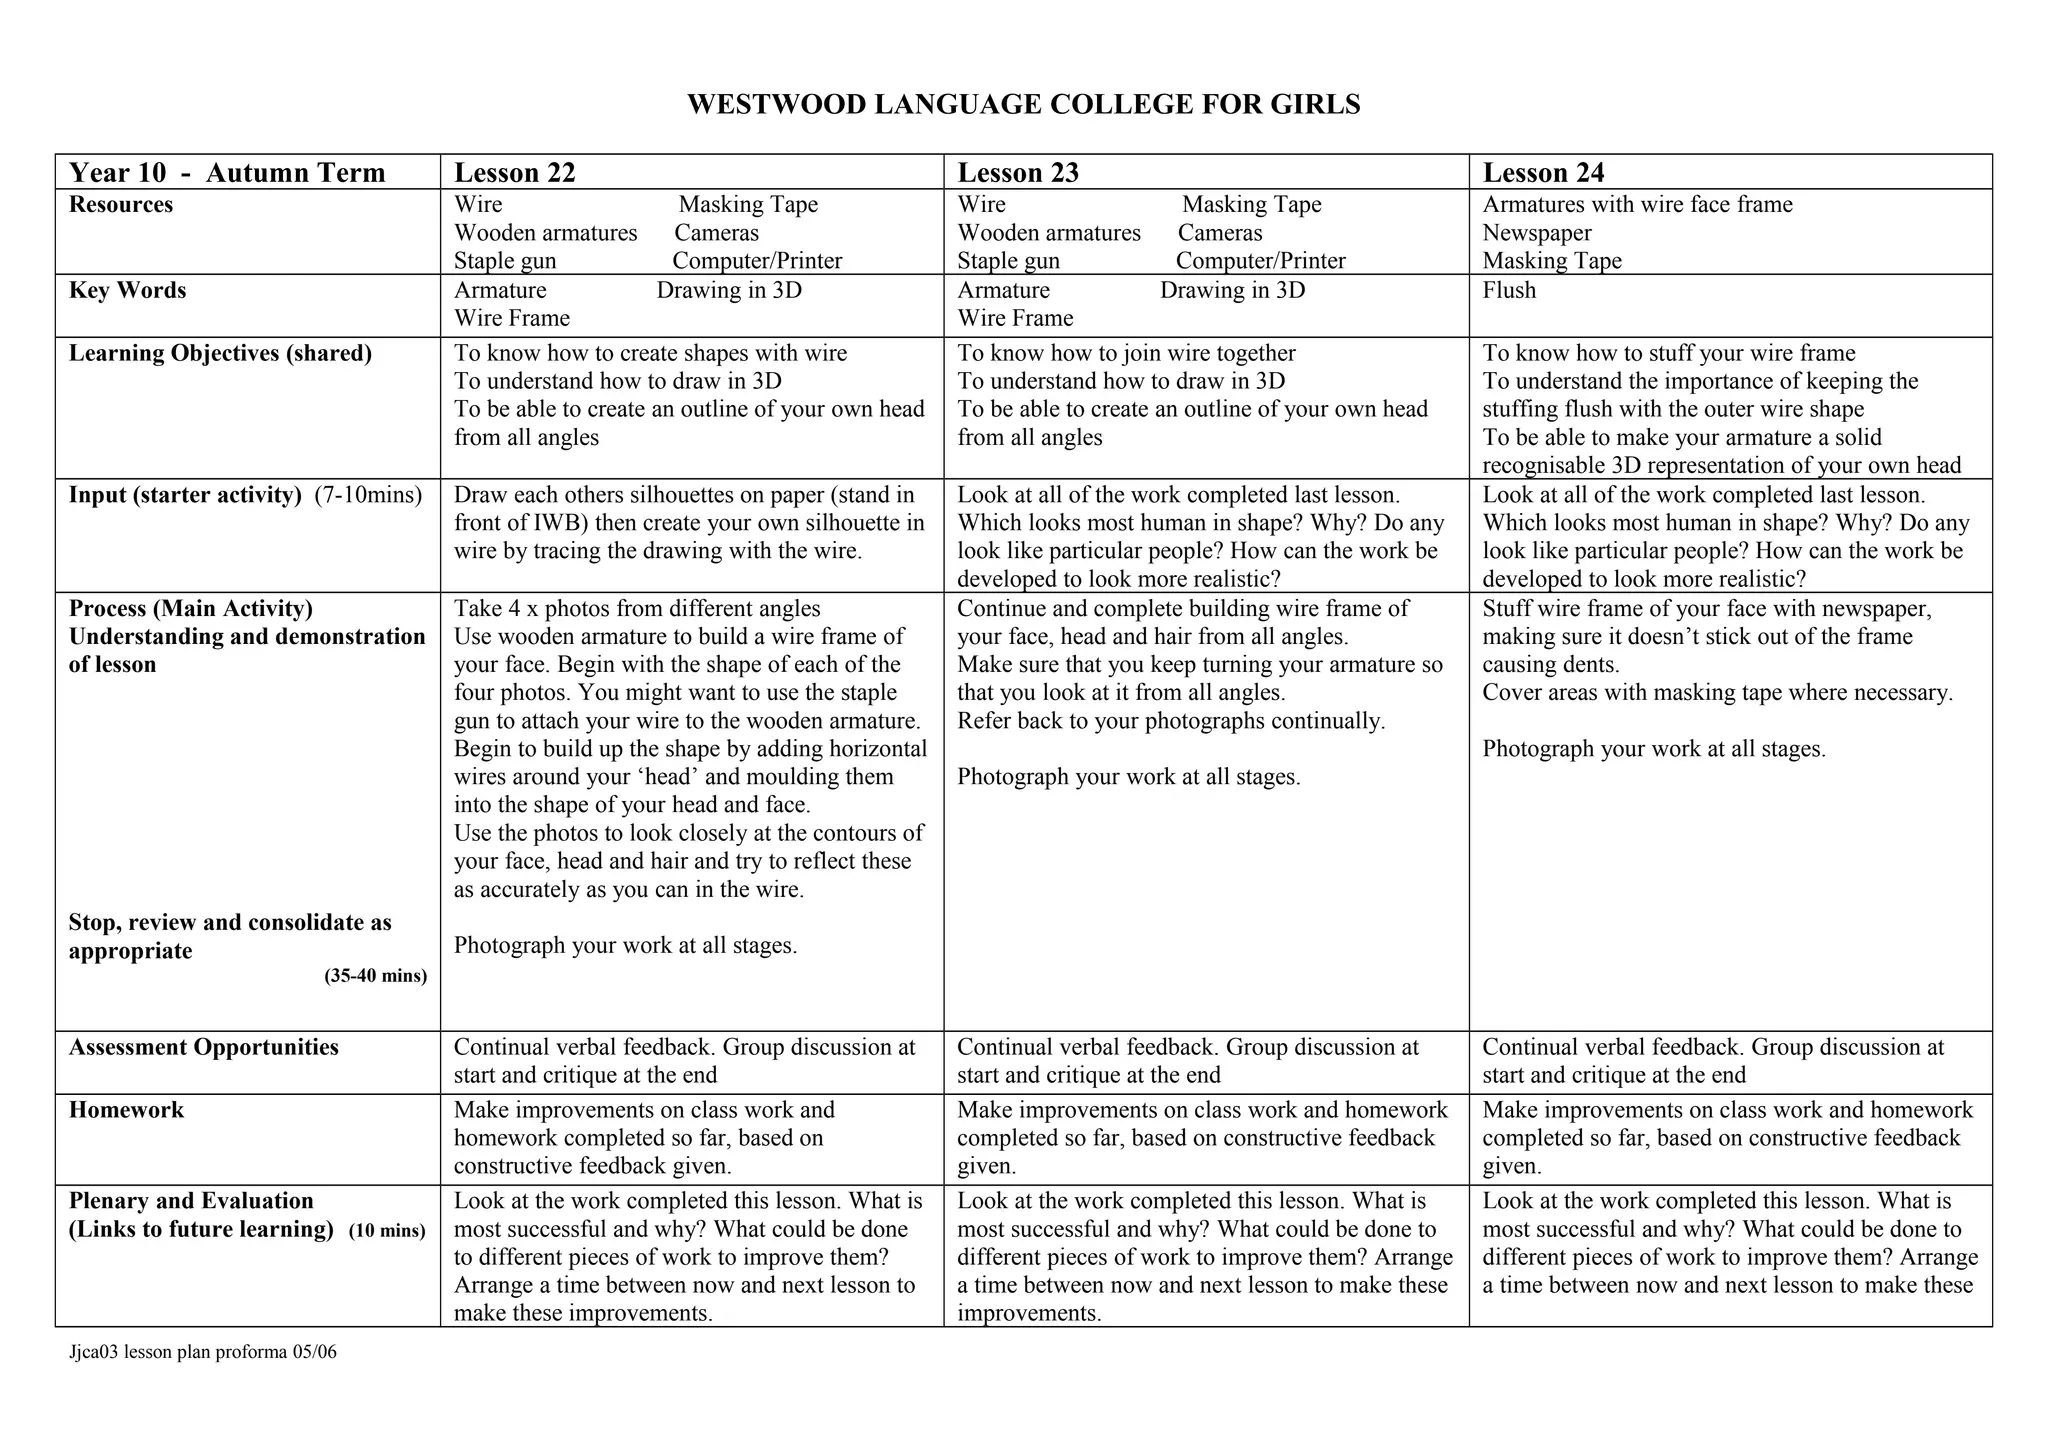
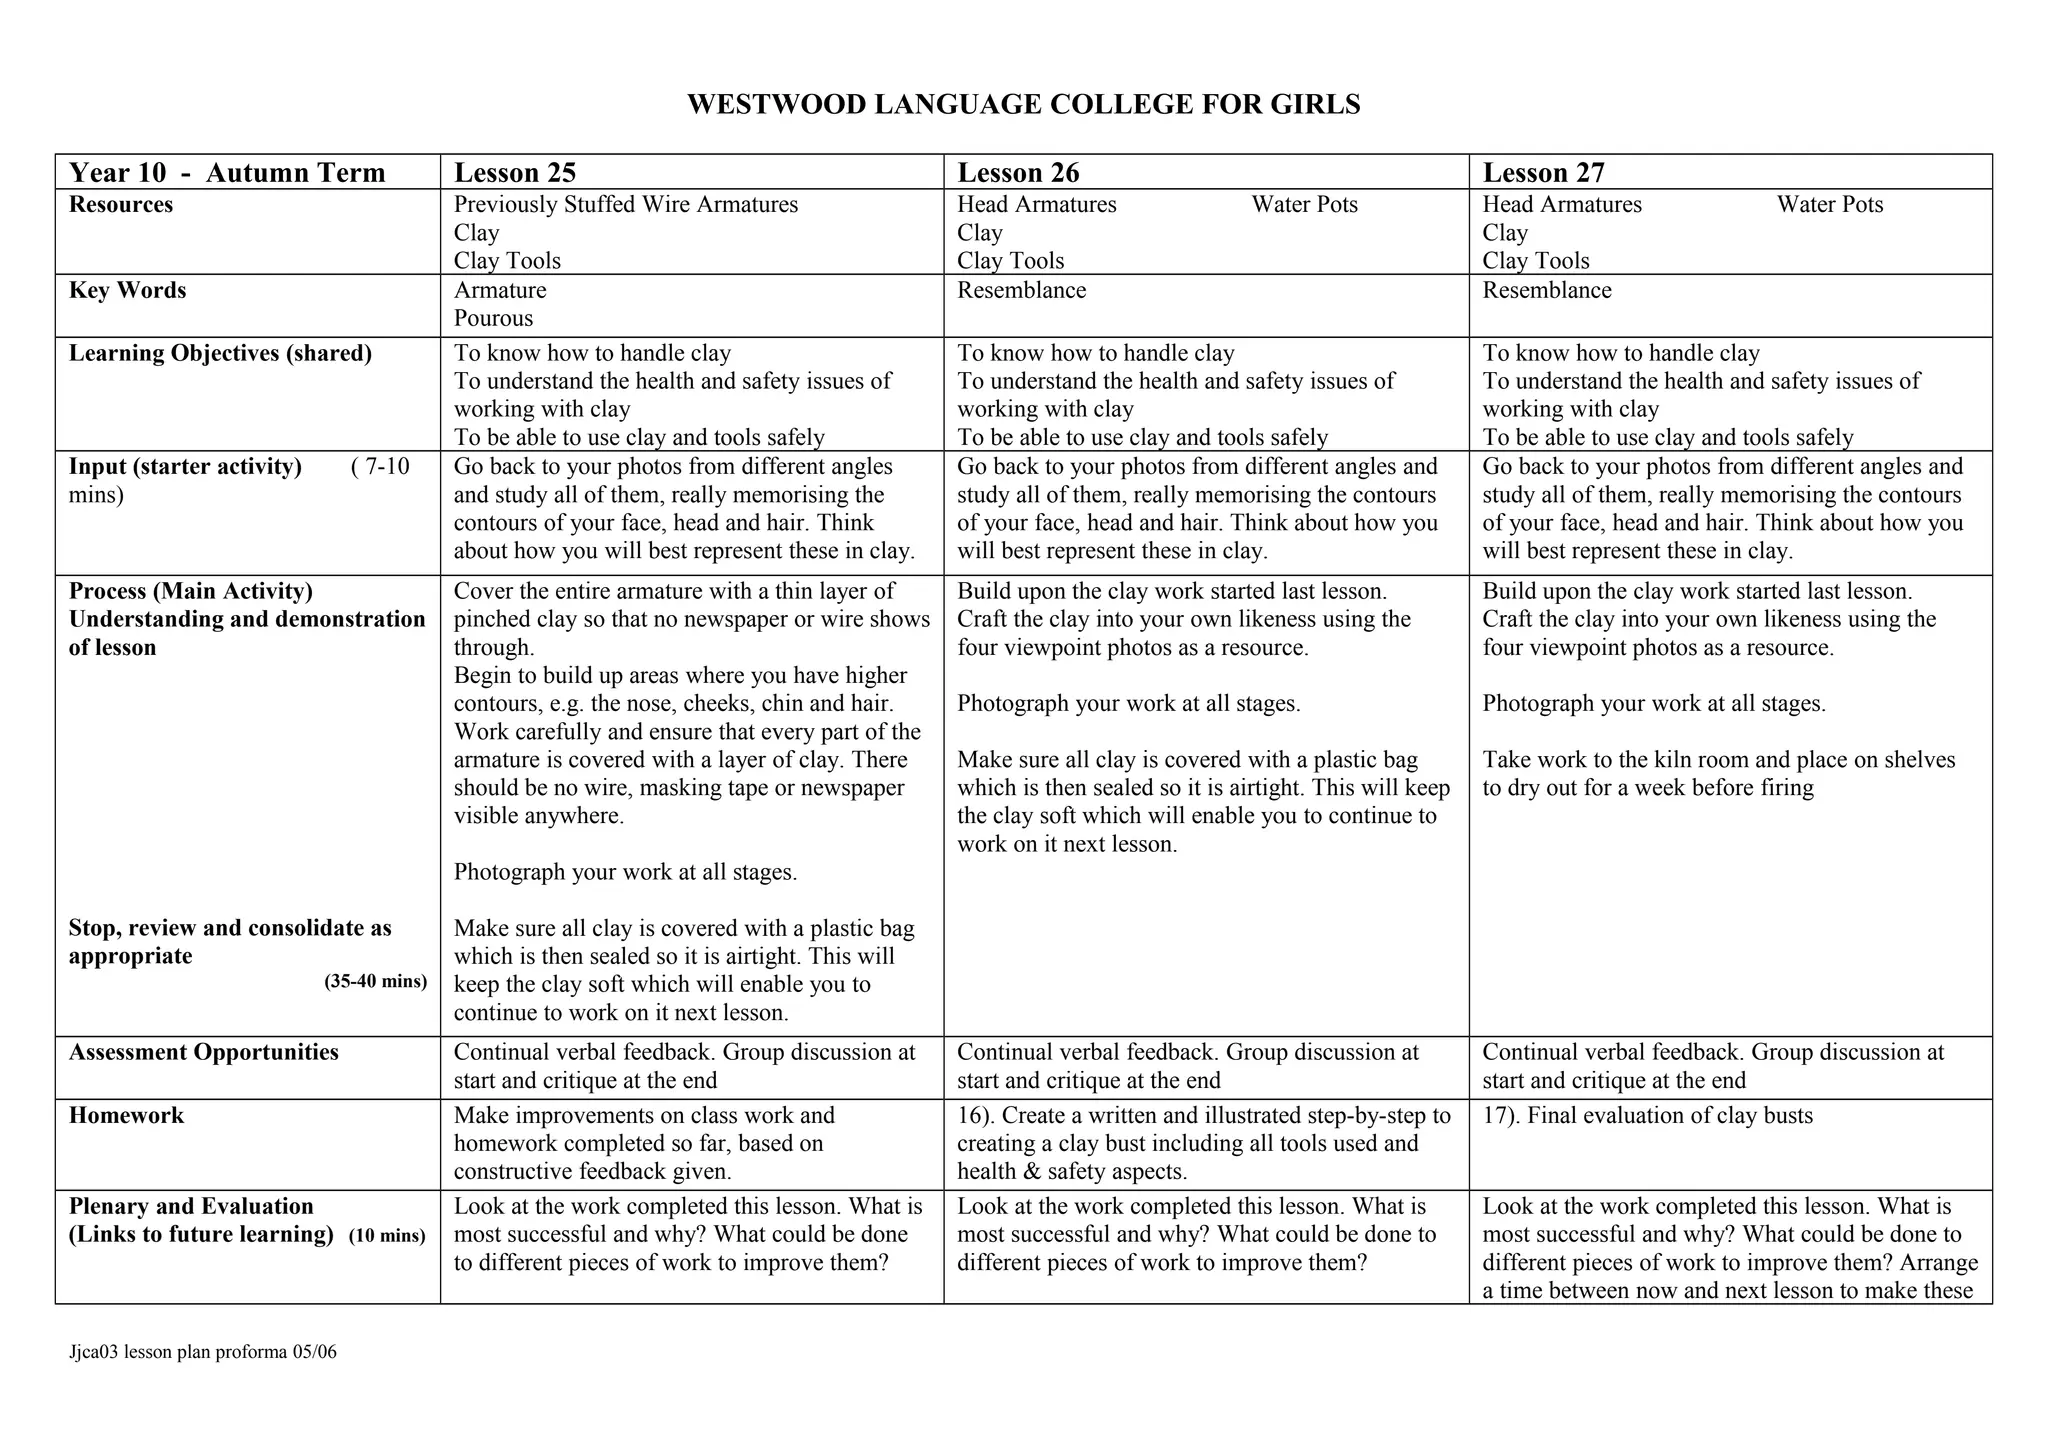
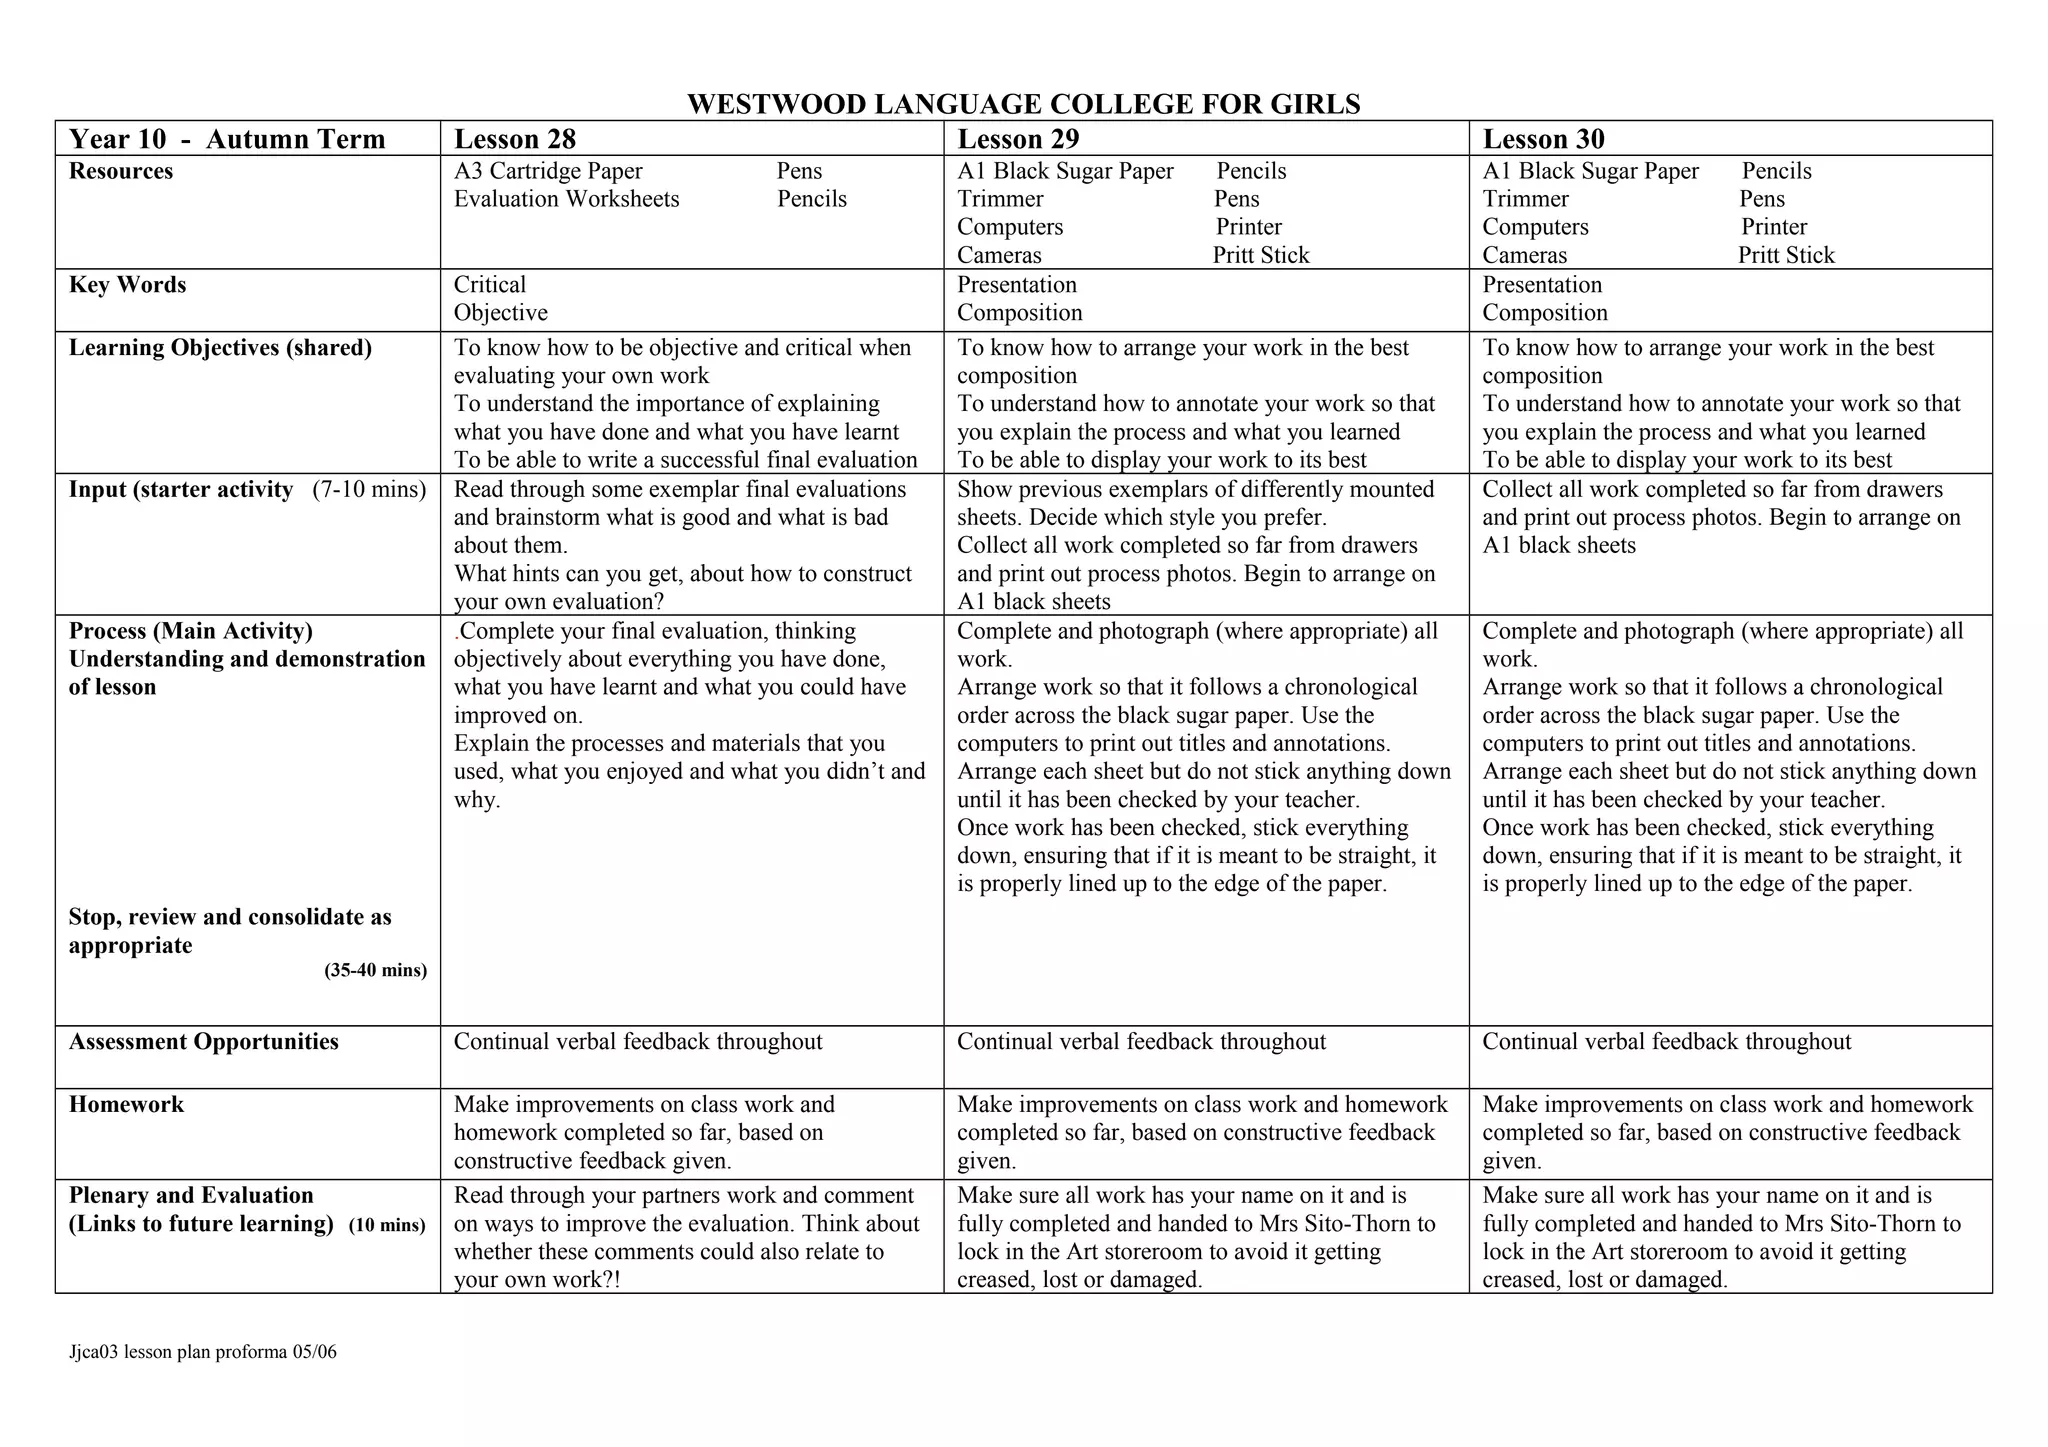

This document contains lesson plans for an art class at Westwood Language College for Girls. The plans cover 15 lessons over an autumn term. Lesson 1 introduces drawing proportions of the face and using guidelines. Lesson 2 focuses on representing realistic highlights and shadows using charcoal and chalk. Lesson 3 builds on applying tone and layering with watercolor pencil. Later lessons introduce techniques like collage, watercolor painting using analogous colors, digital manipulation using Photoshop, and printmaking inspired by German Expressionist woodcuts. The plans provide learning objectives, materials, demonstrations, student activities and assessments for each lesson.