Download to read offline

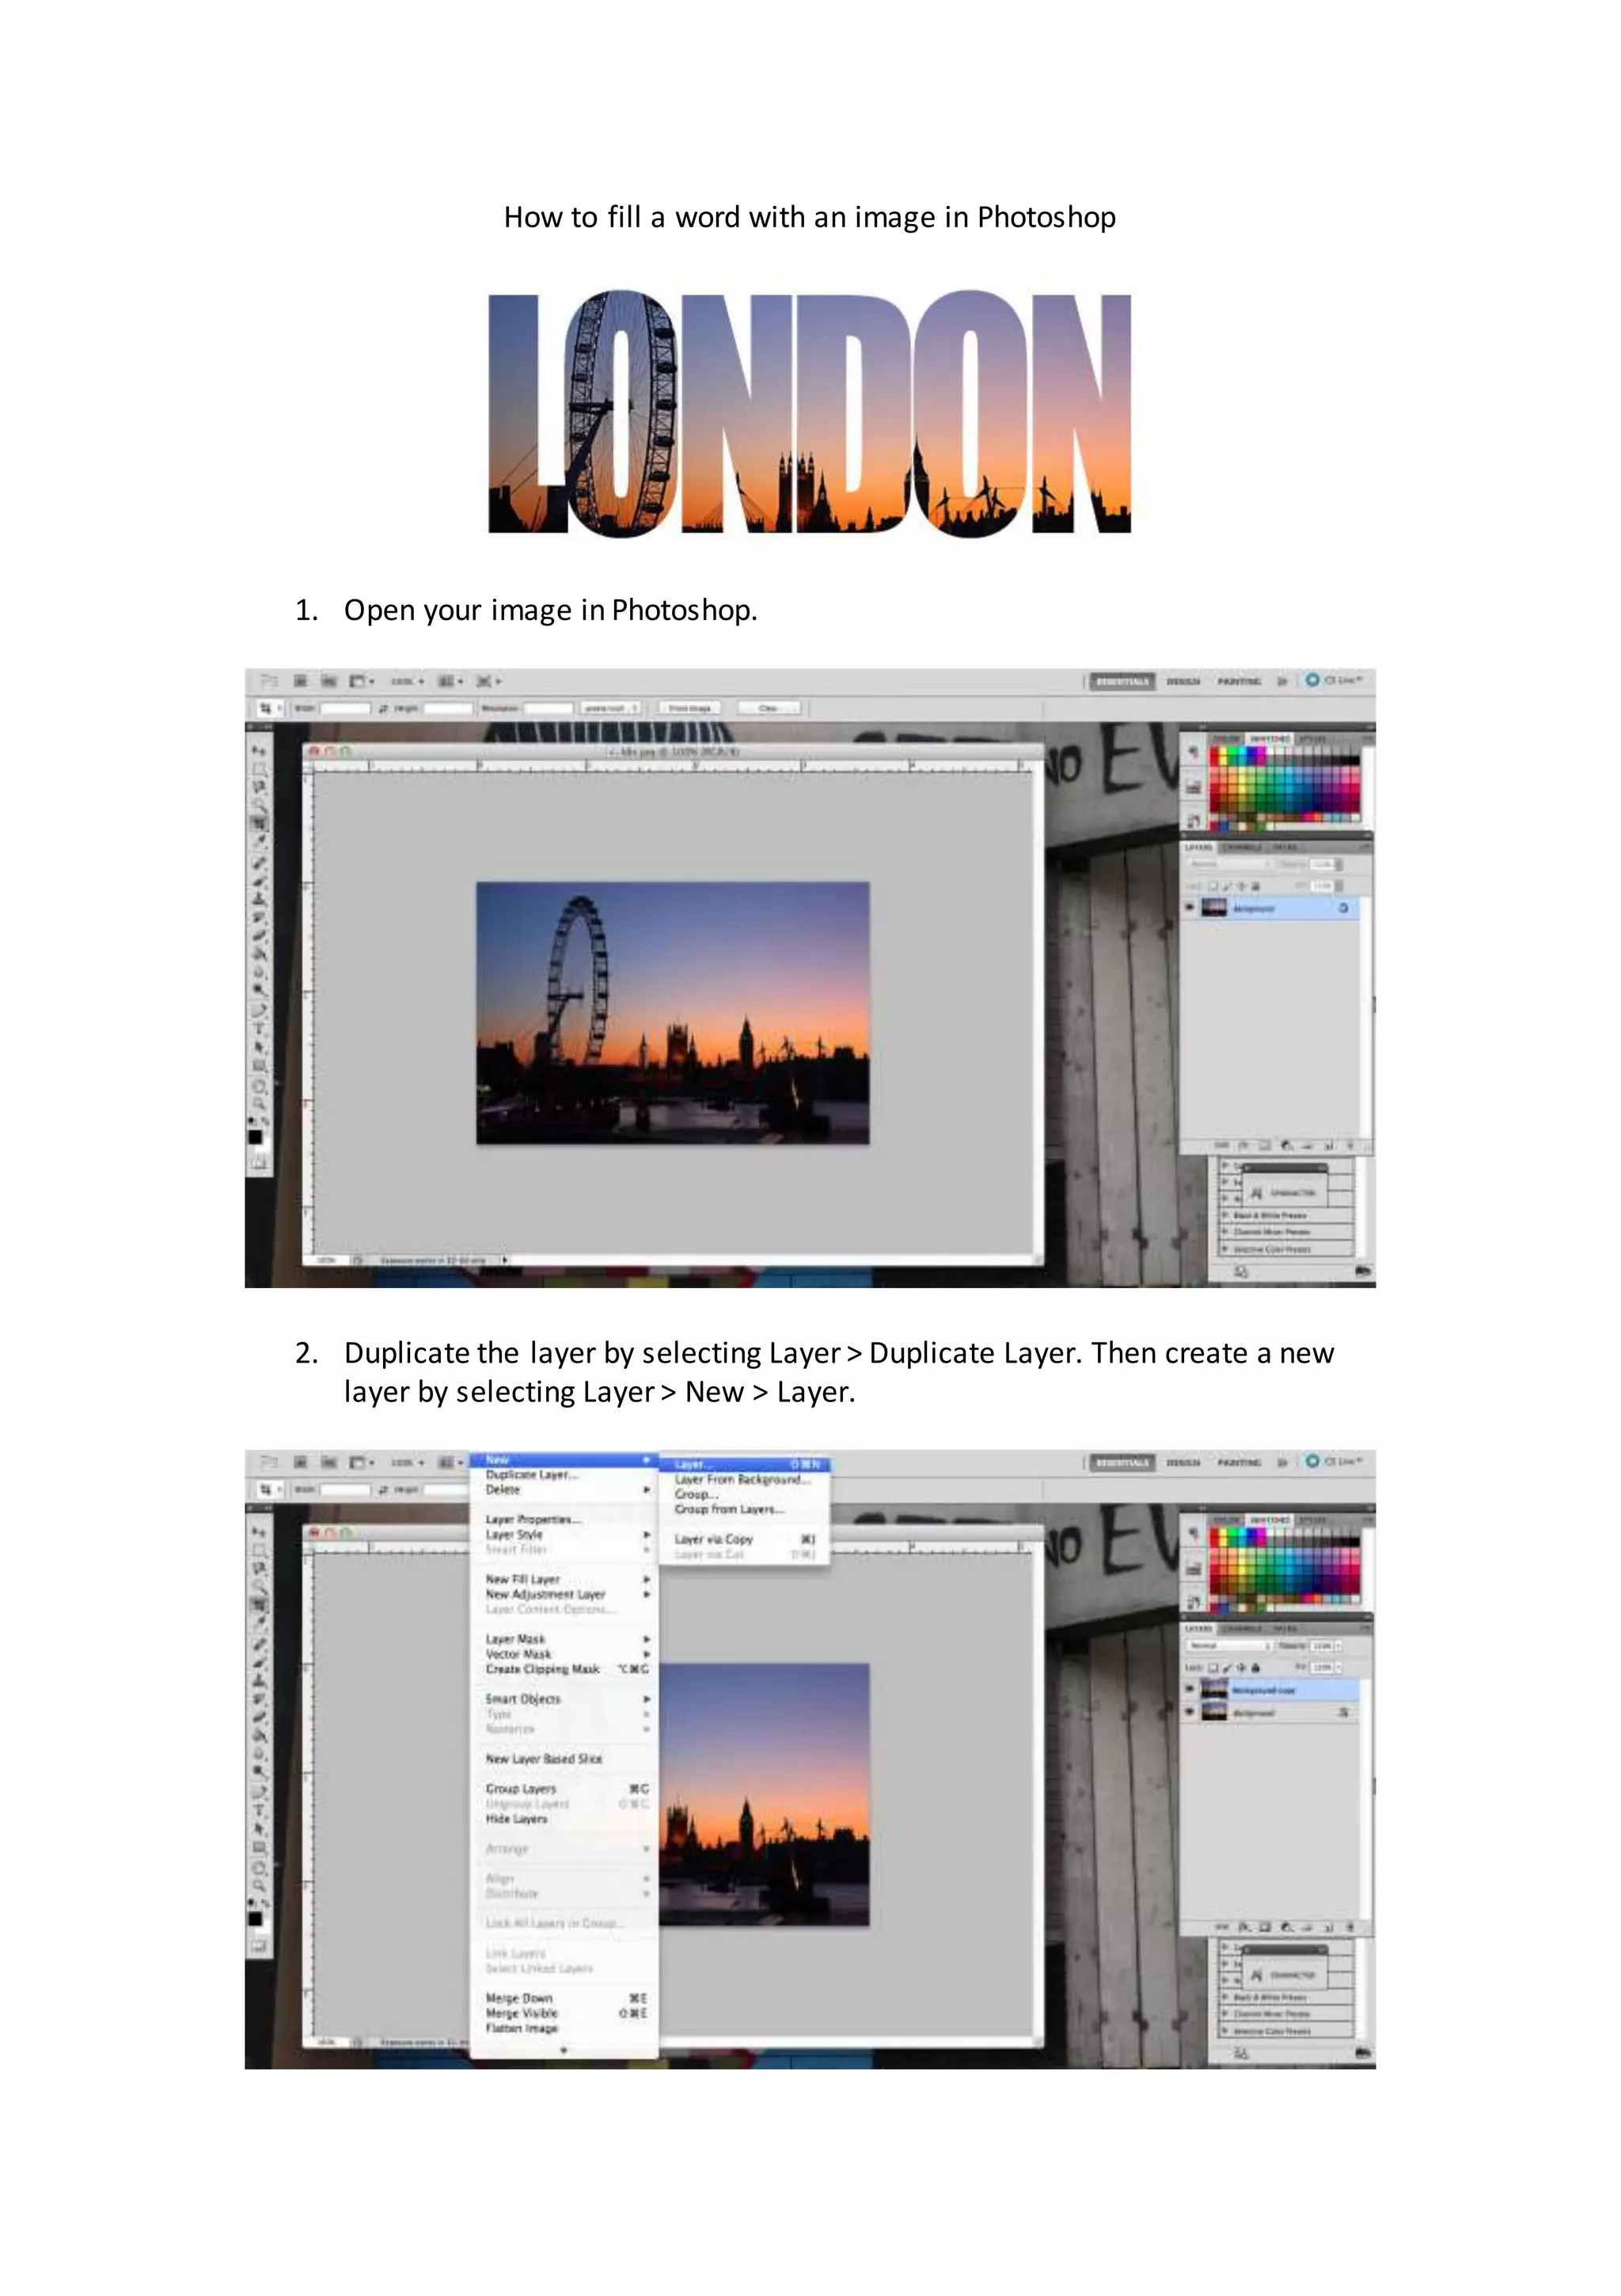
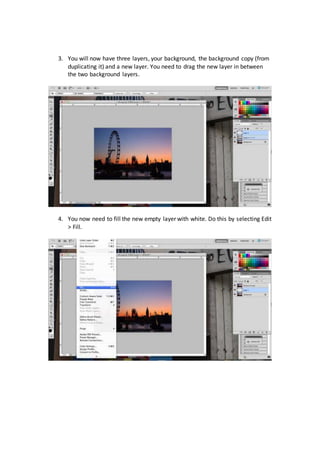
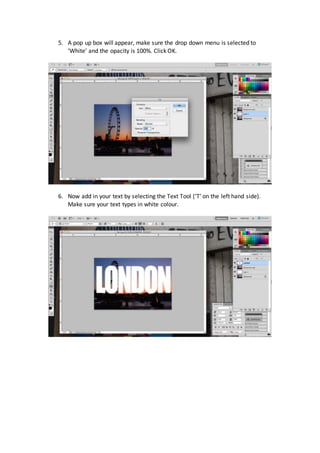
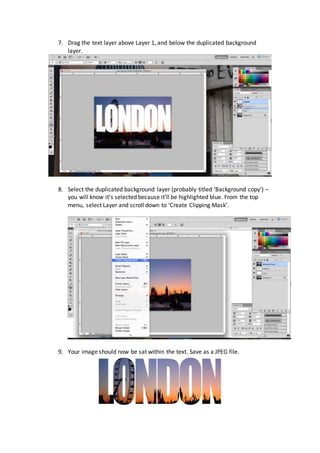

To fill text with an image in Photoshop, duplicate the background layer, add a new layer between them, fill the new layer with white, add white text on its own layer between the background copy and filled layers, then make the background copy layer a clipping mask for the text layer so the image shows through the text shape.


![Christine rose nd. tipones [gr. 11 abm, caritas]](https://cdn.slidesharecdn.com/ss_thumbnails/christinerosend-190129074921-thumbnail.jpg?width=640&height=640&fit=bounds)


