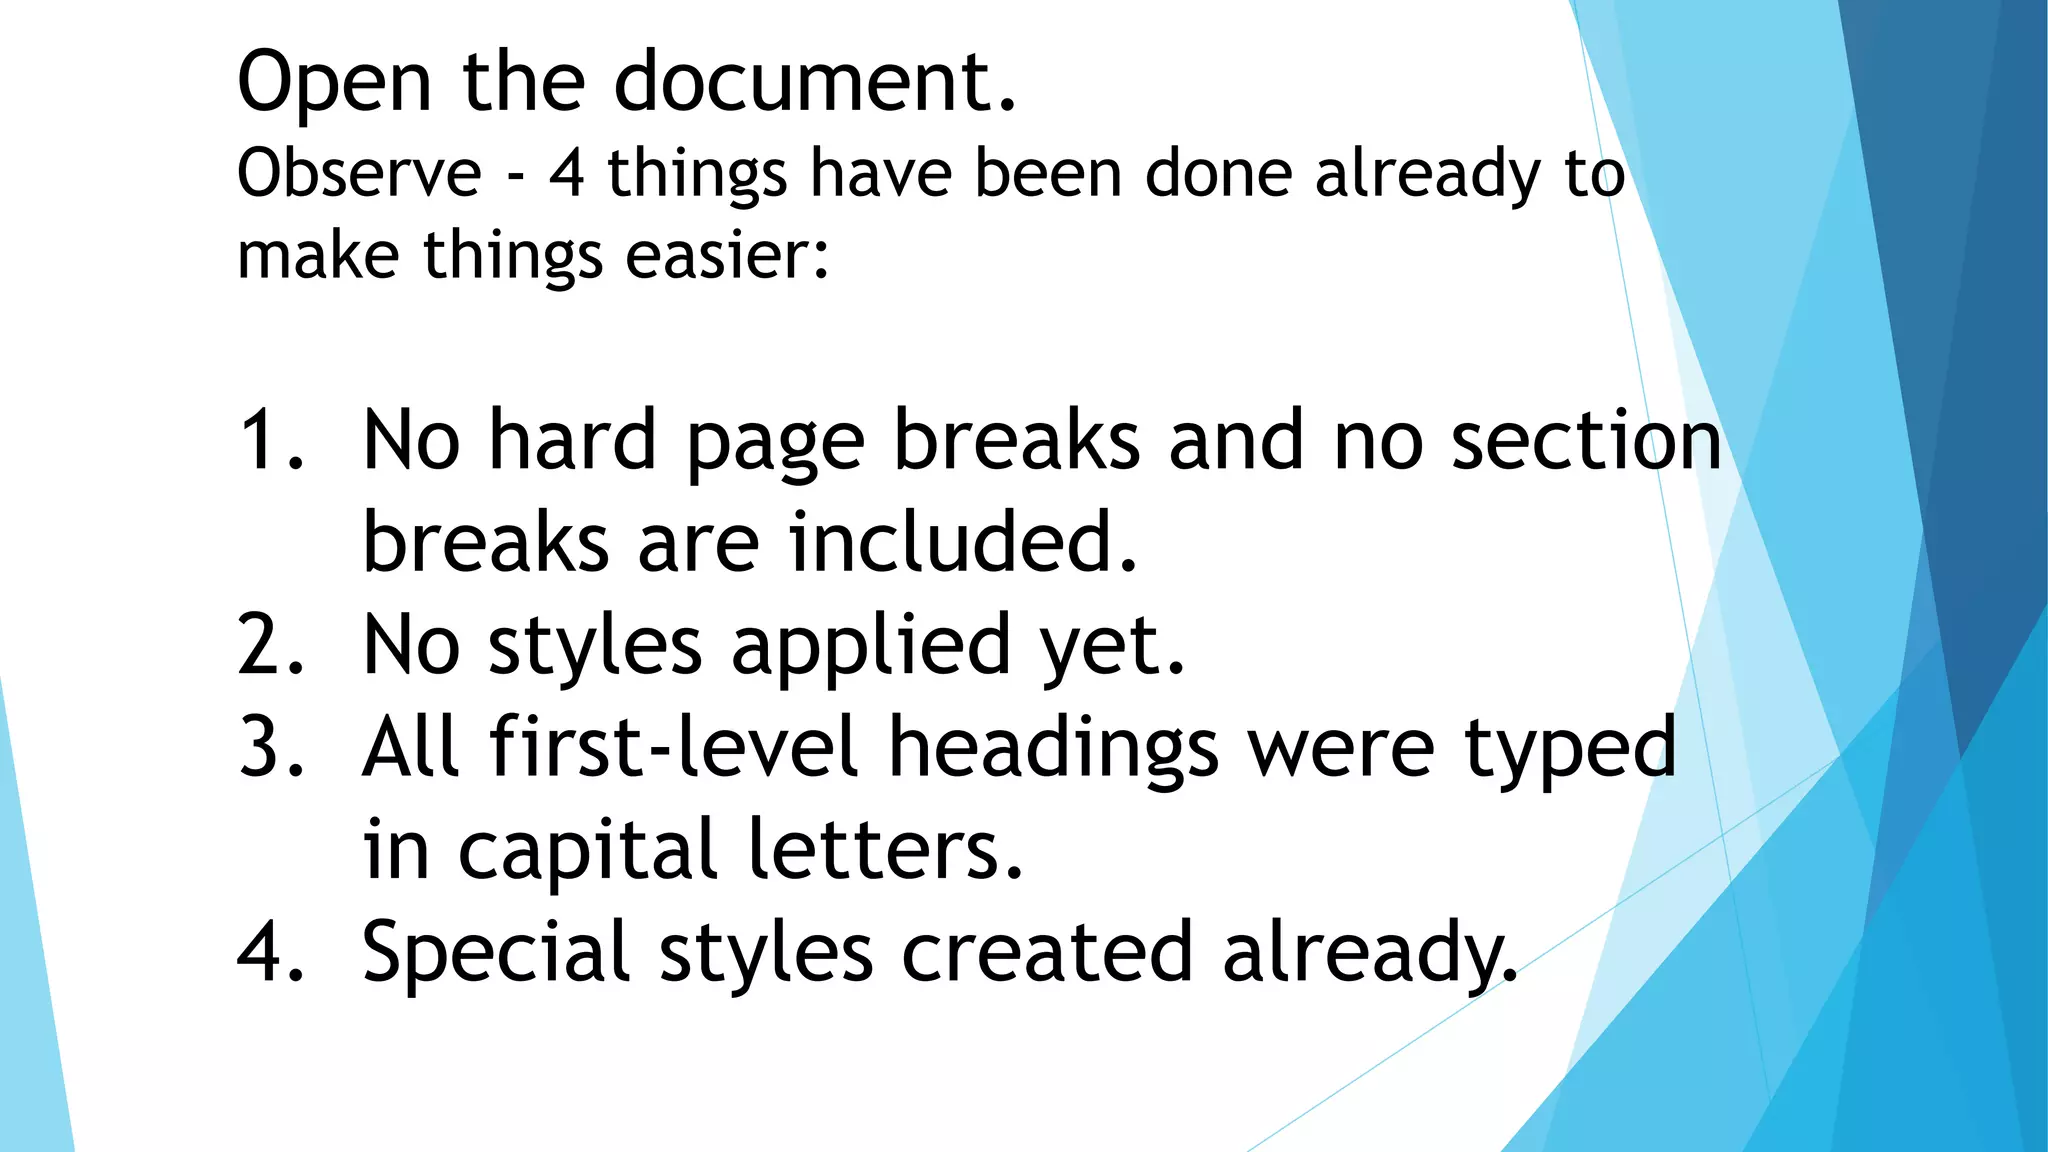
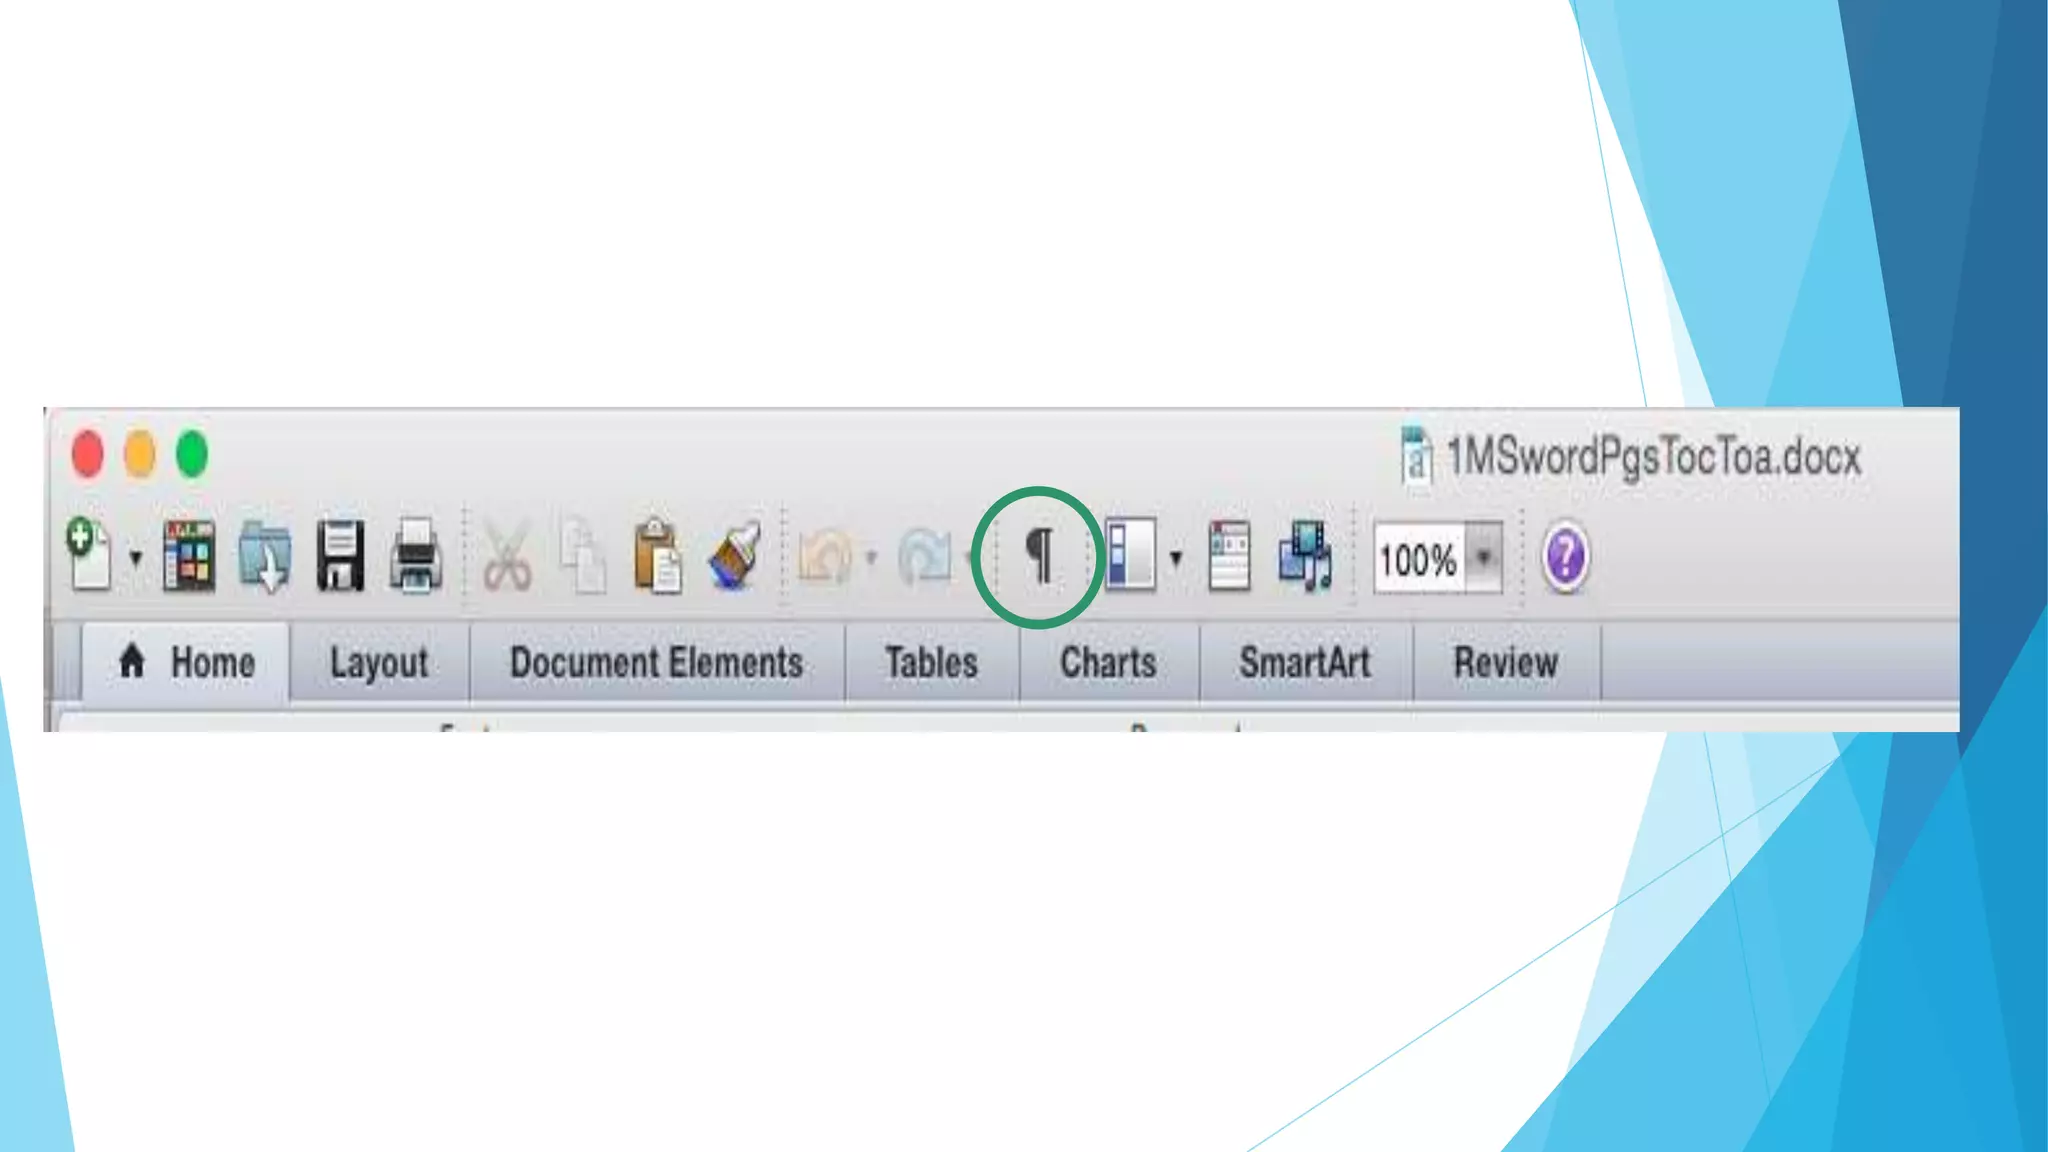
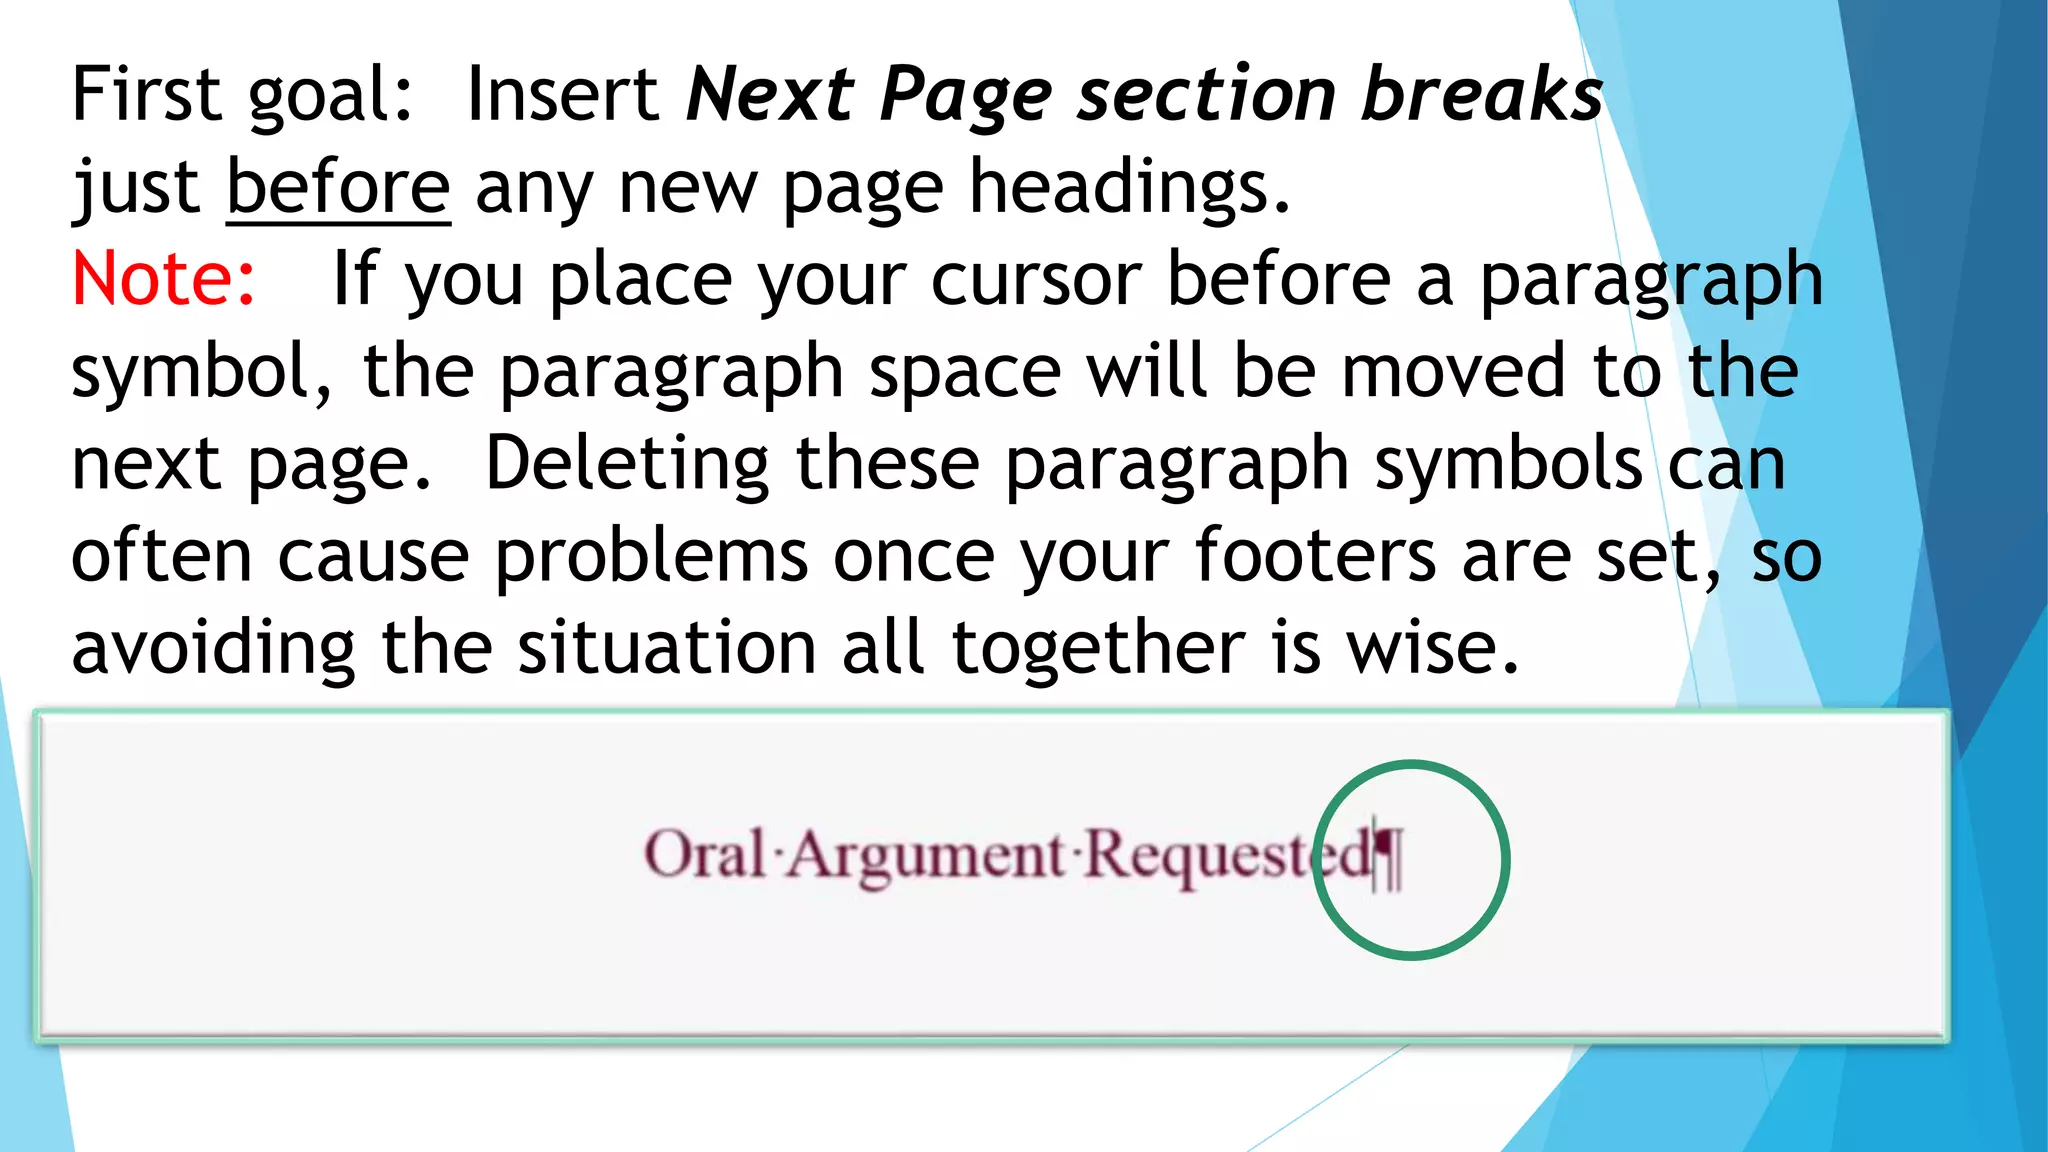
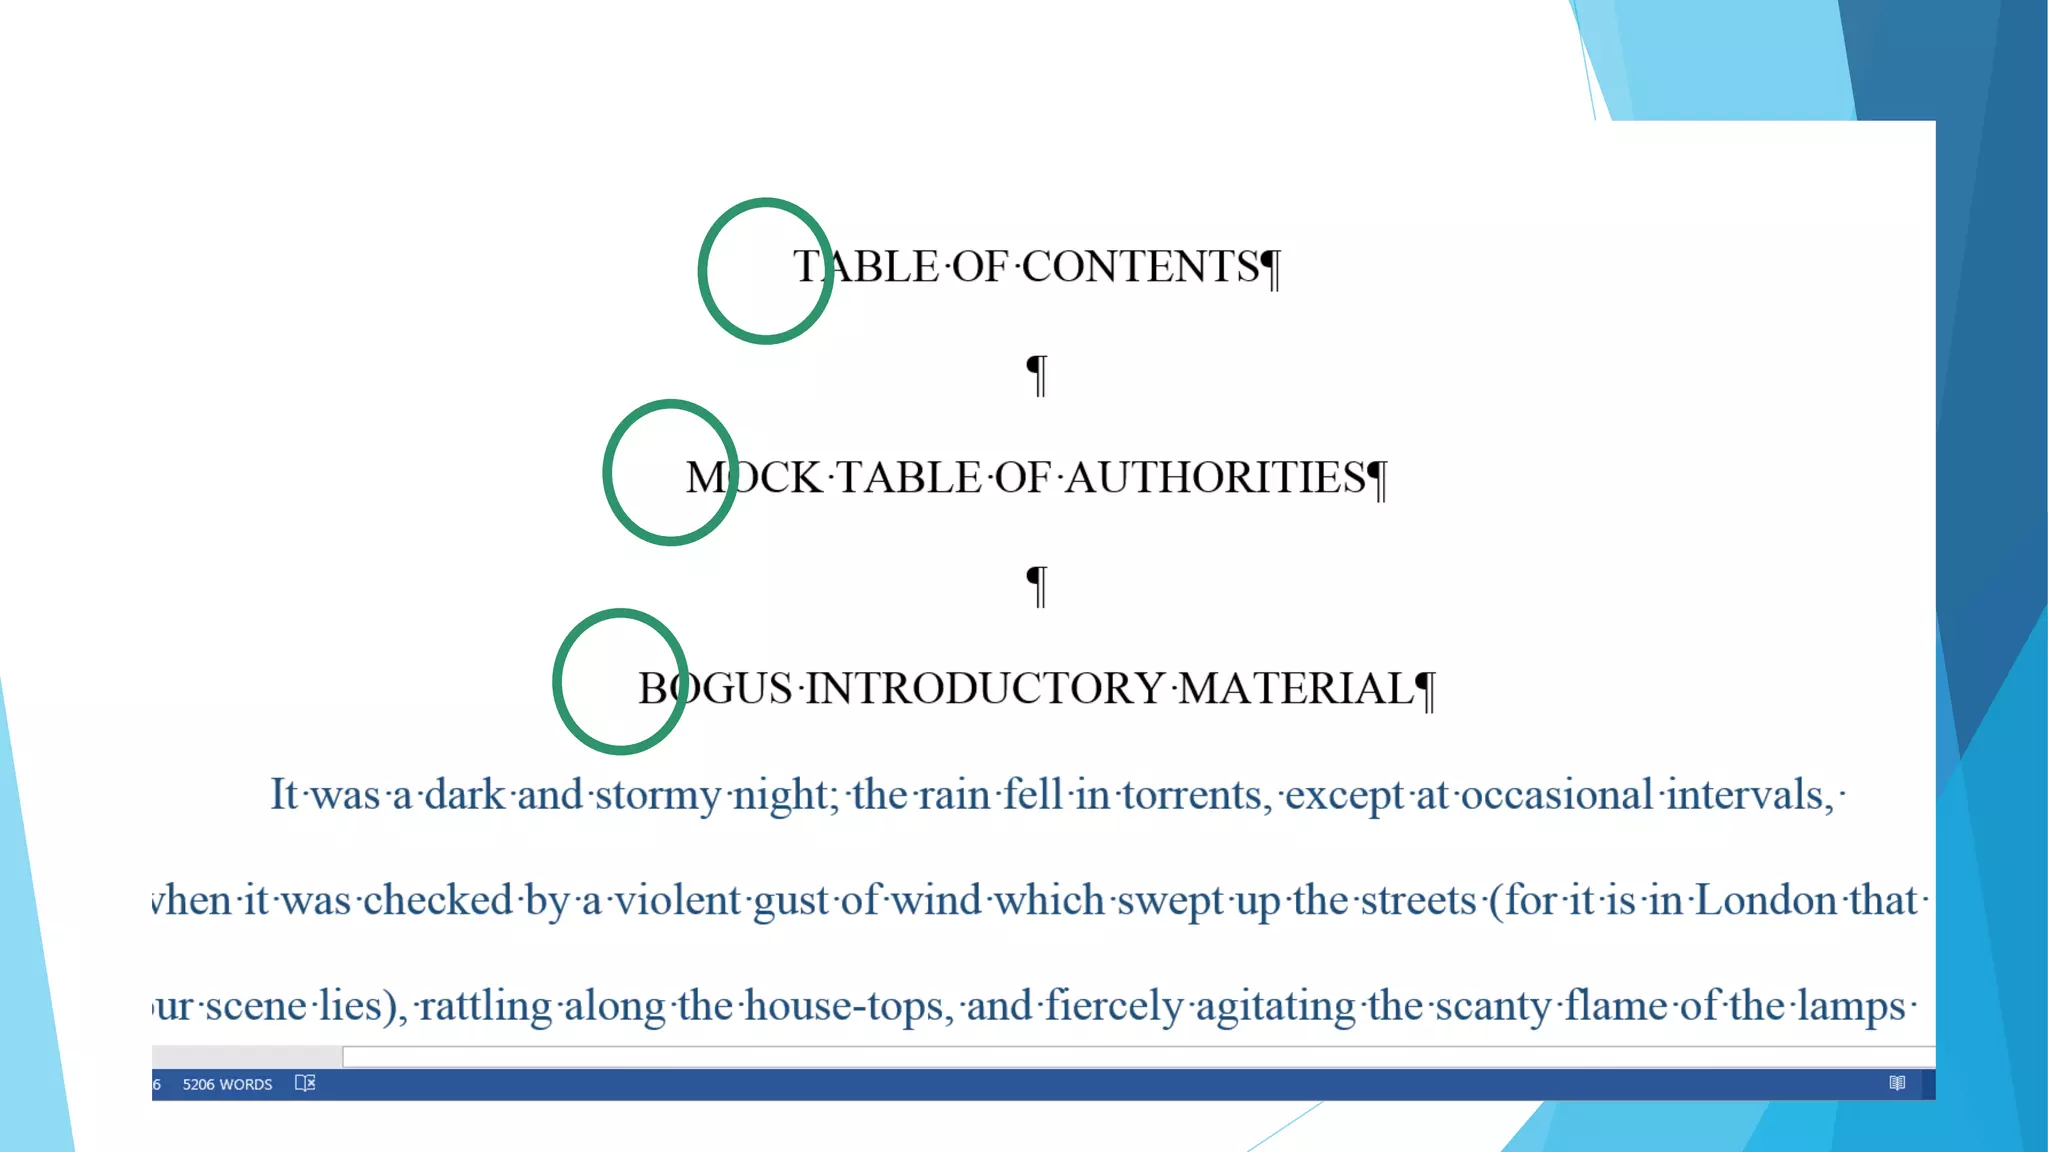
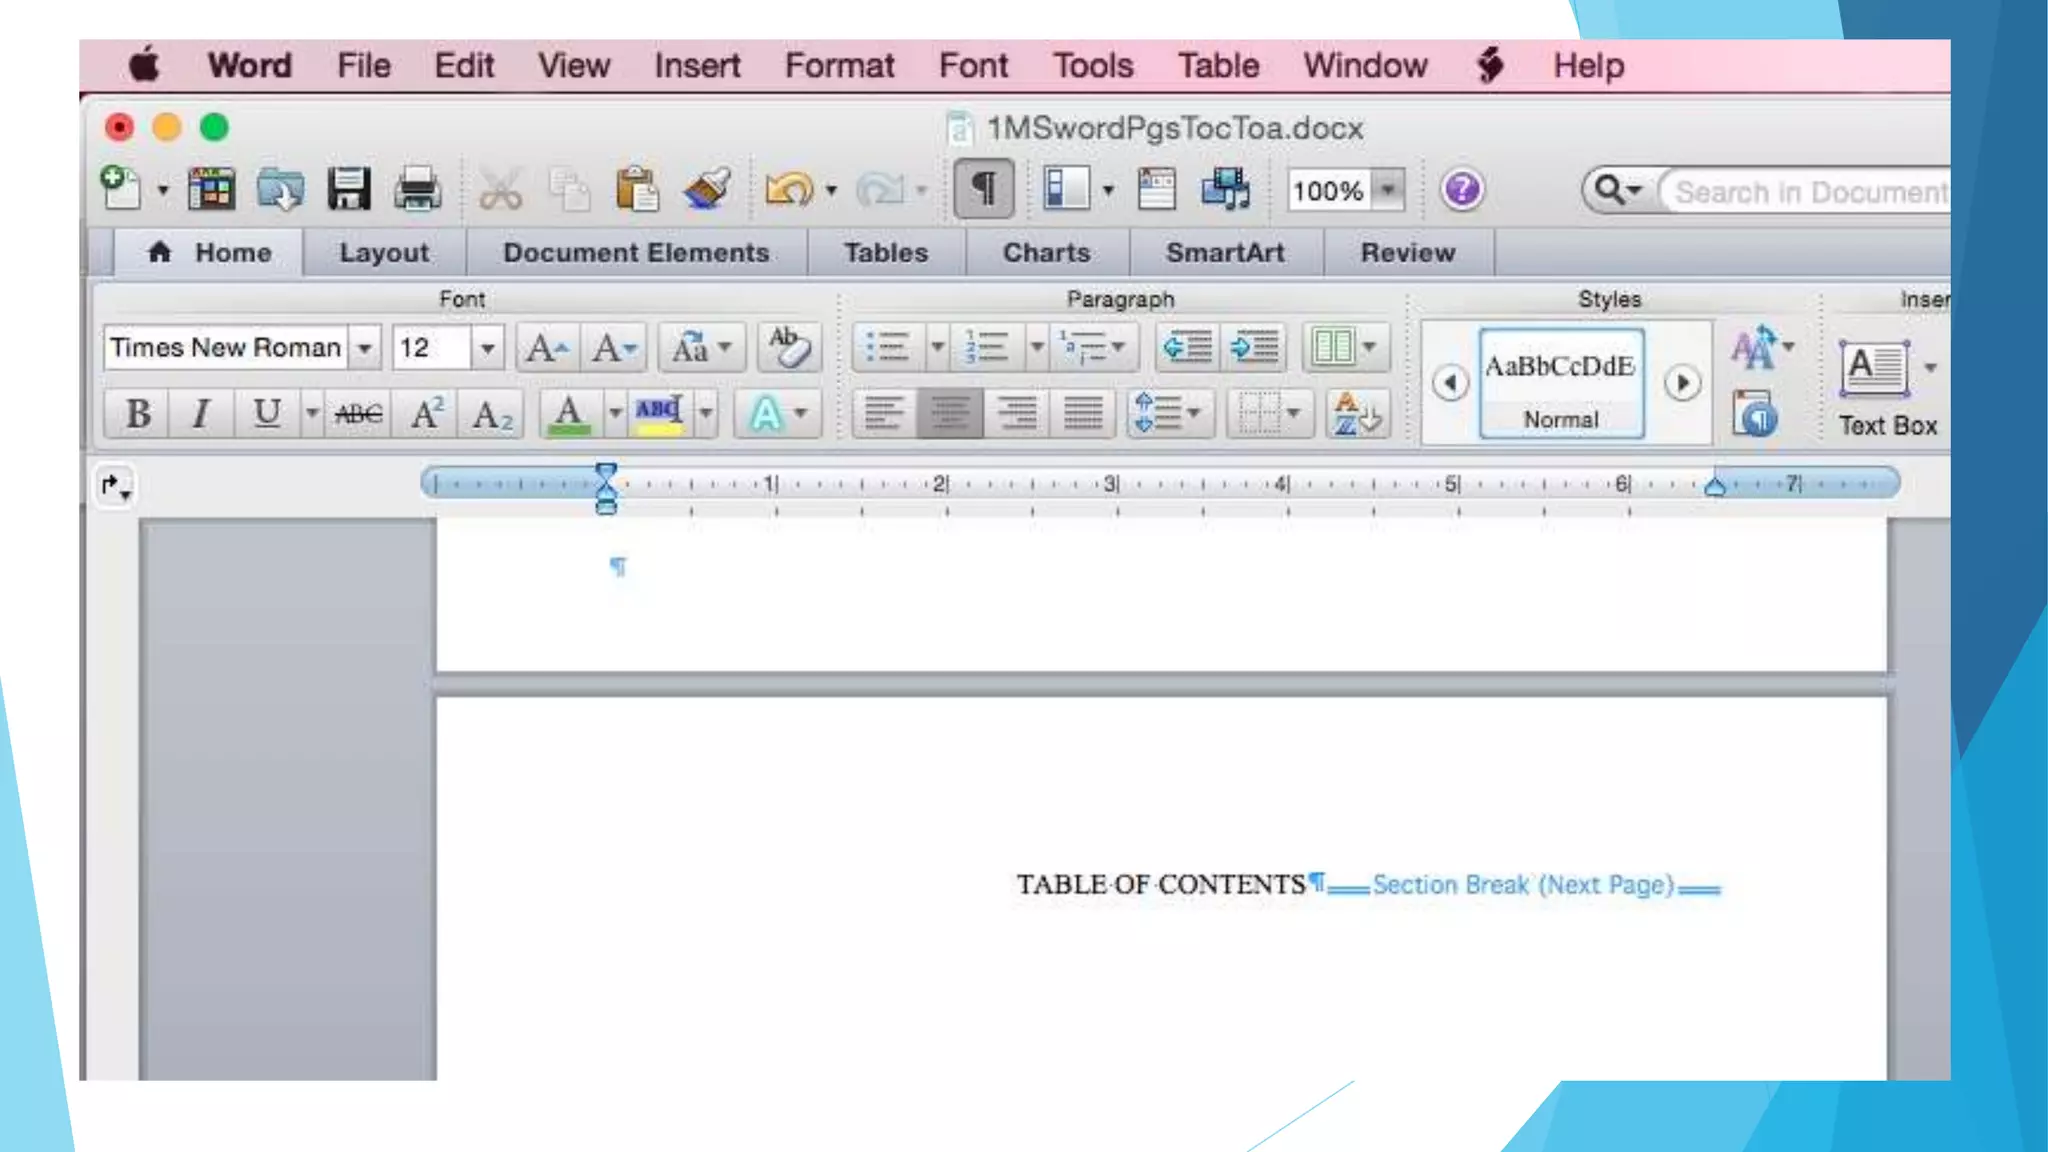
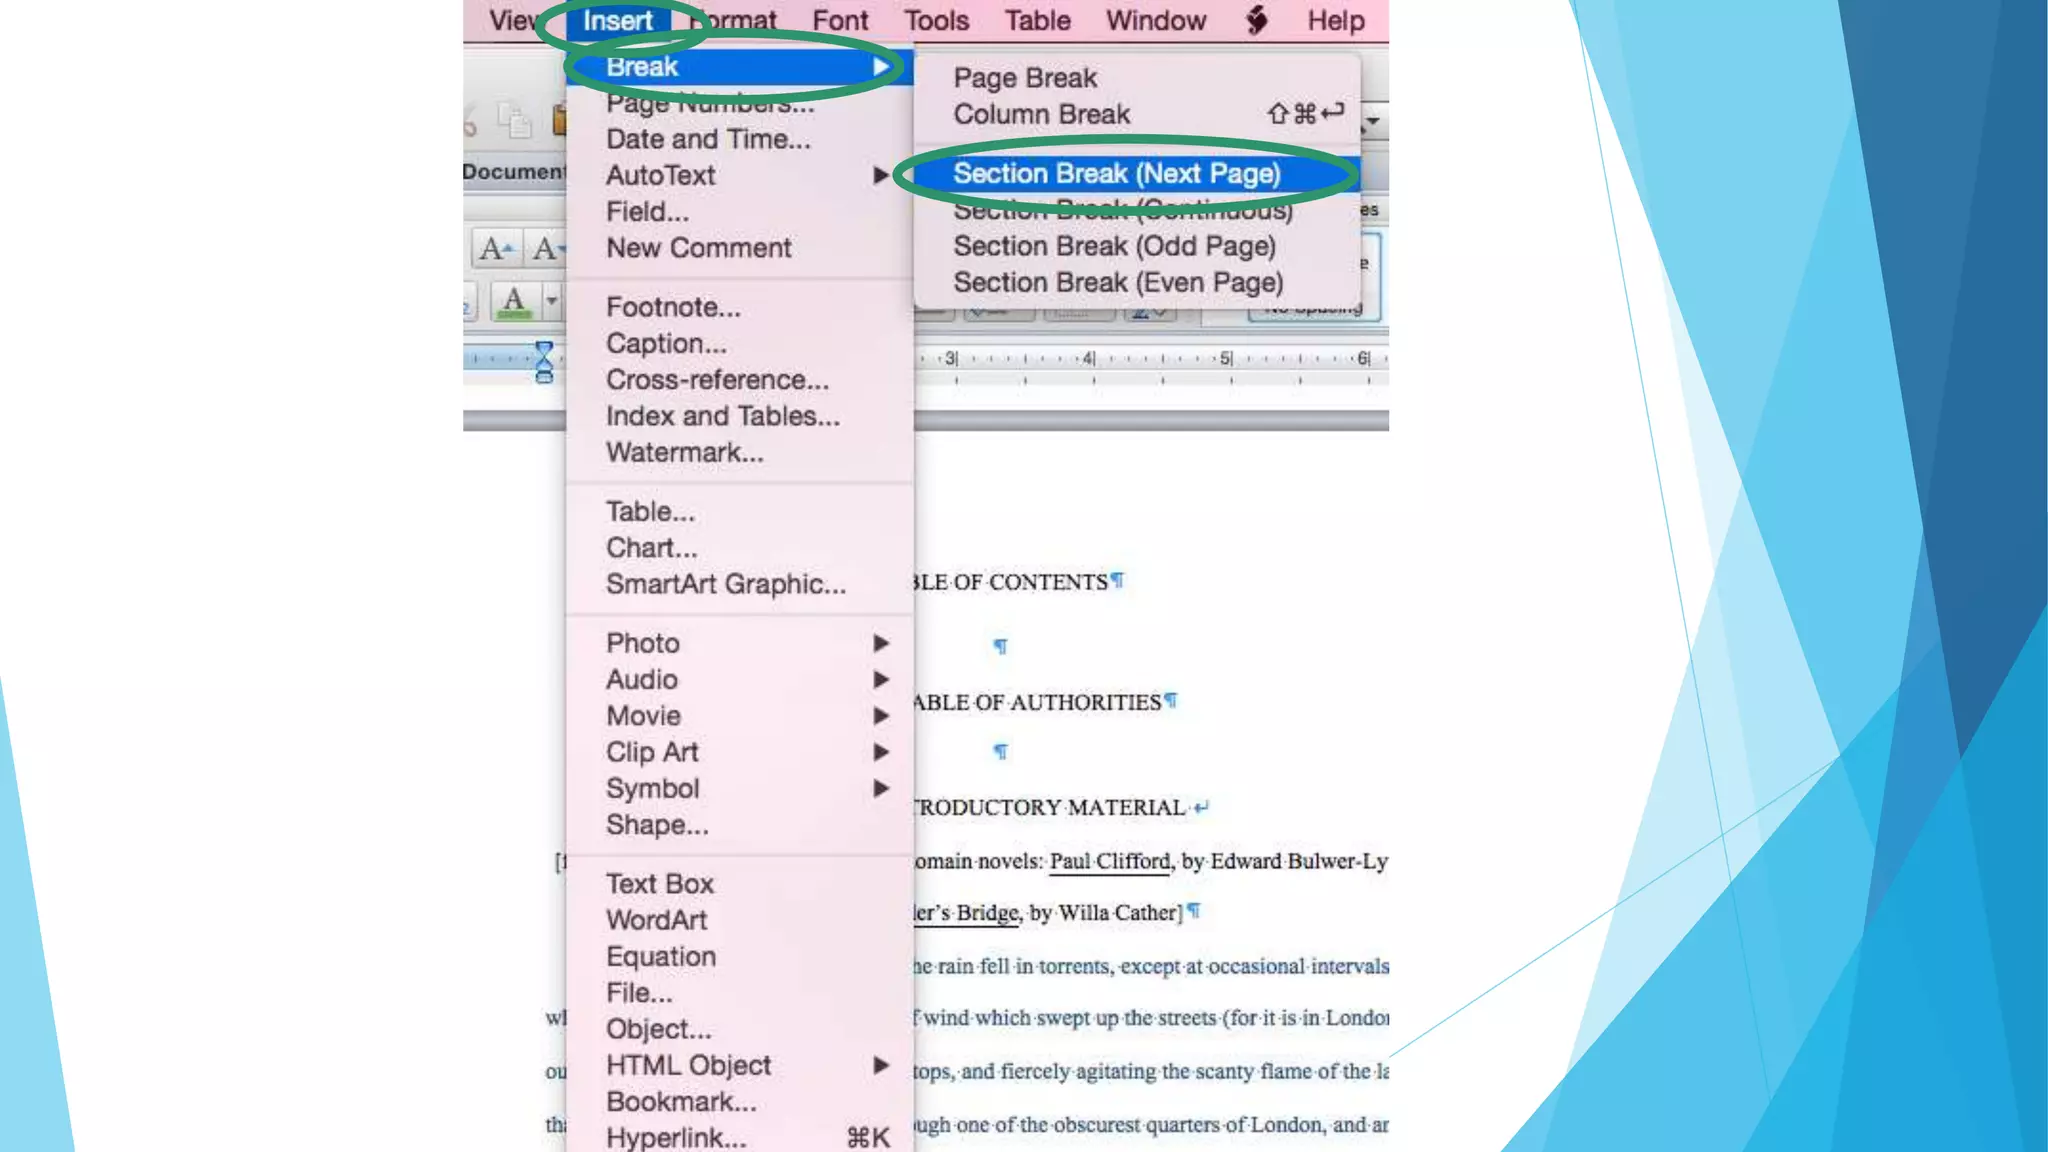
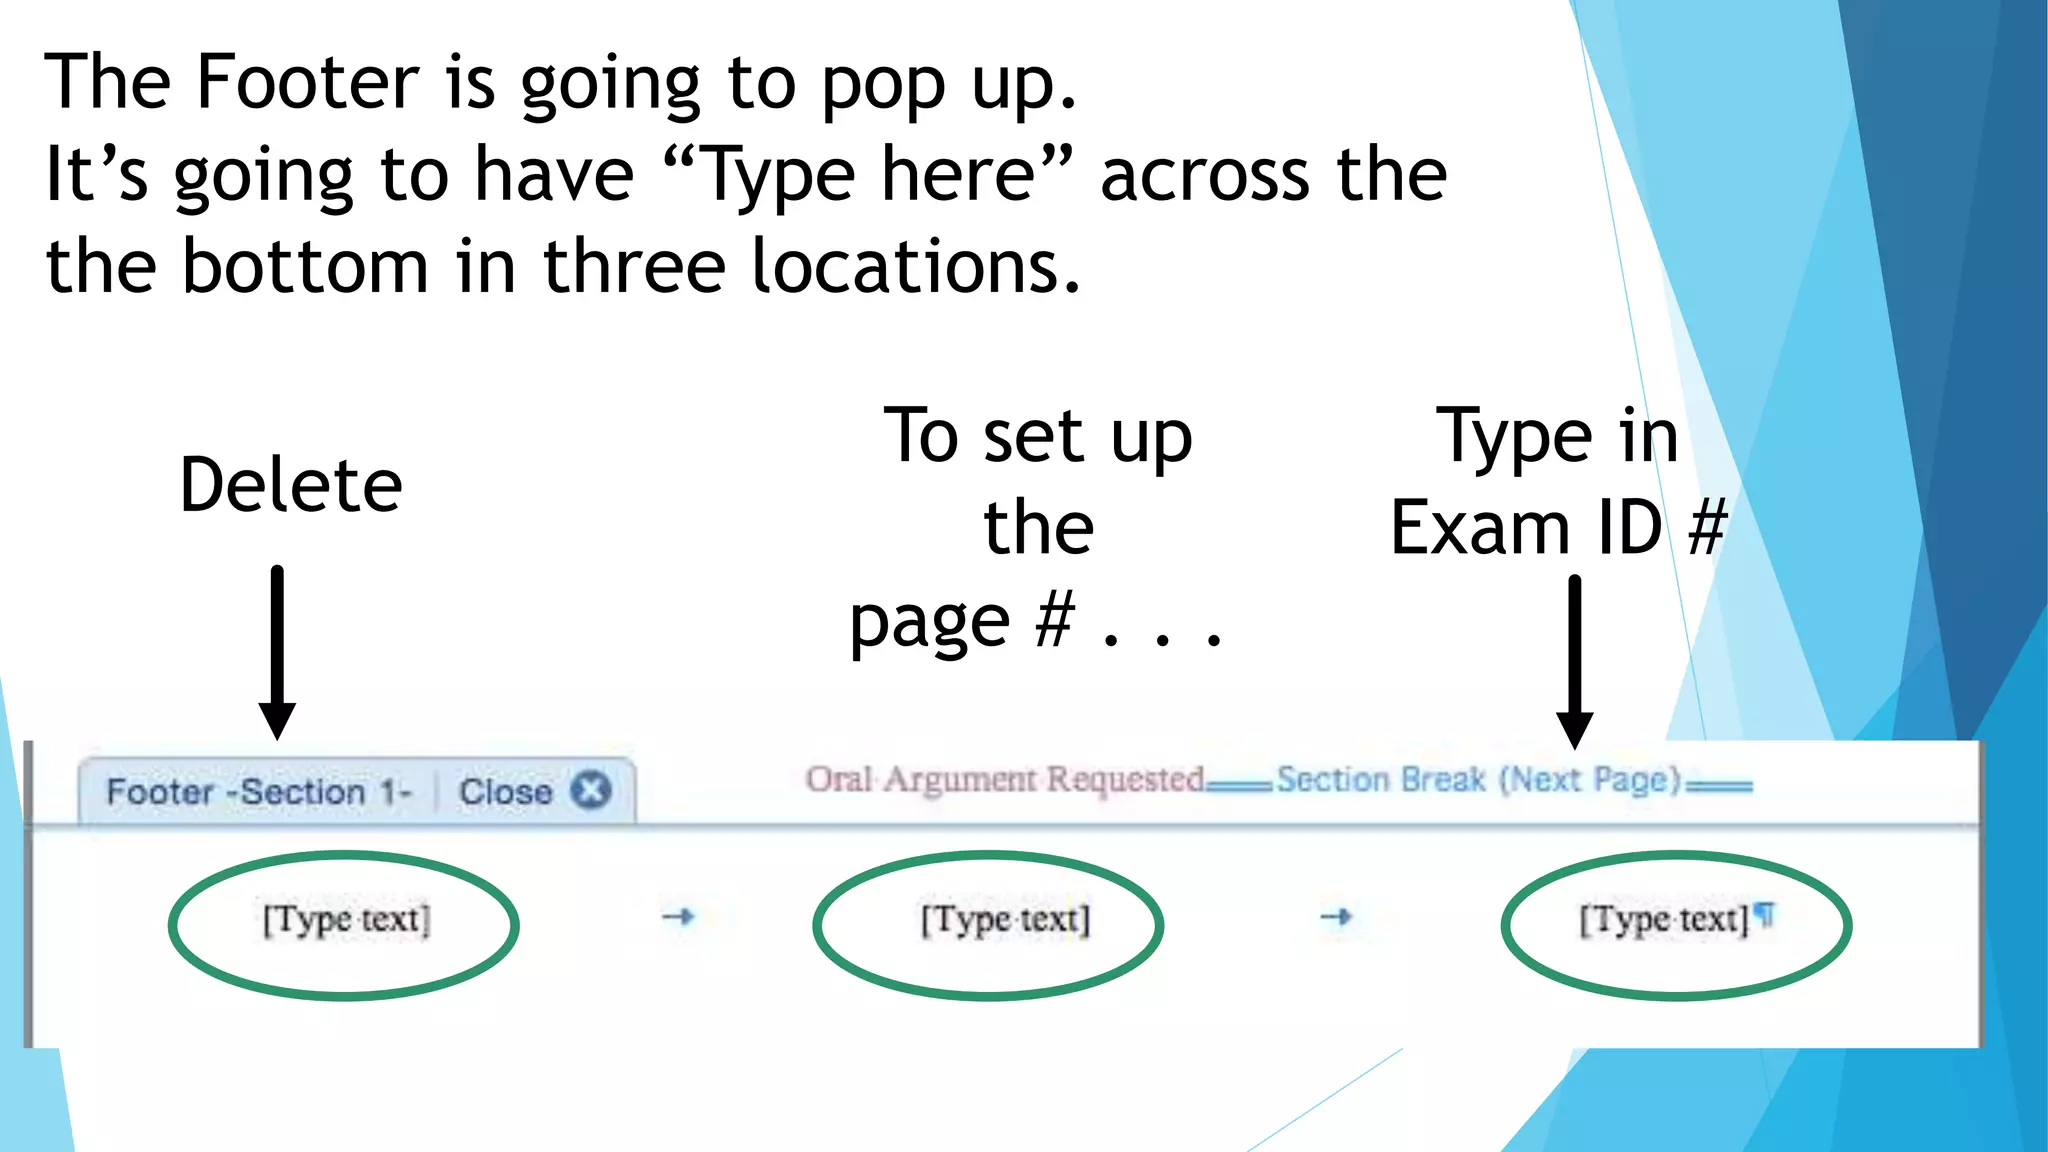
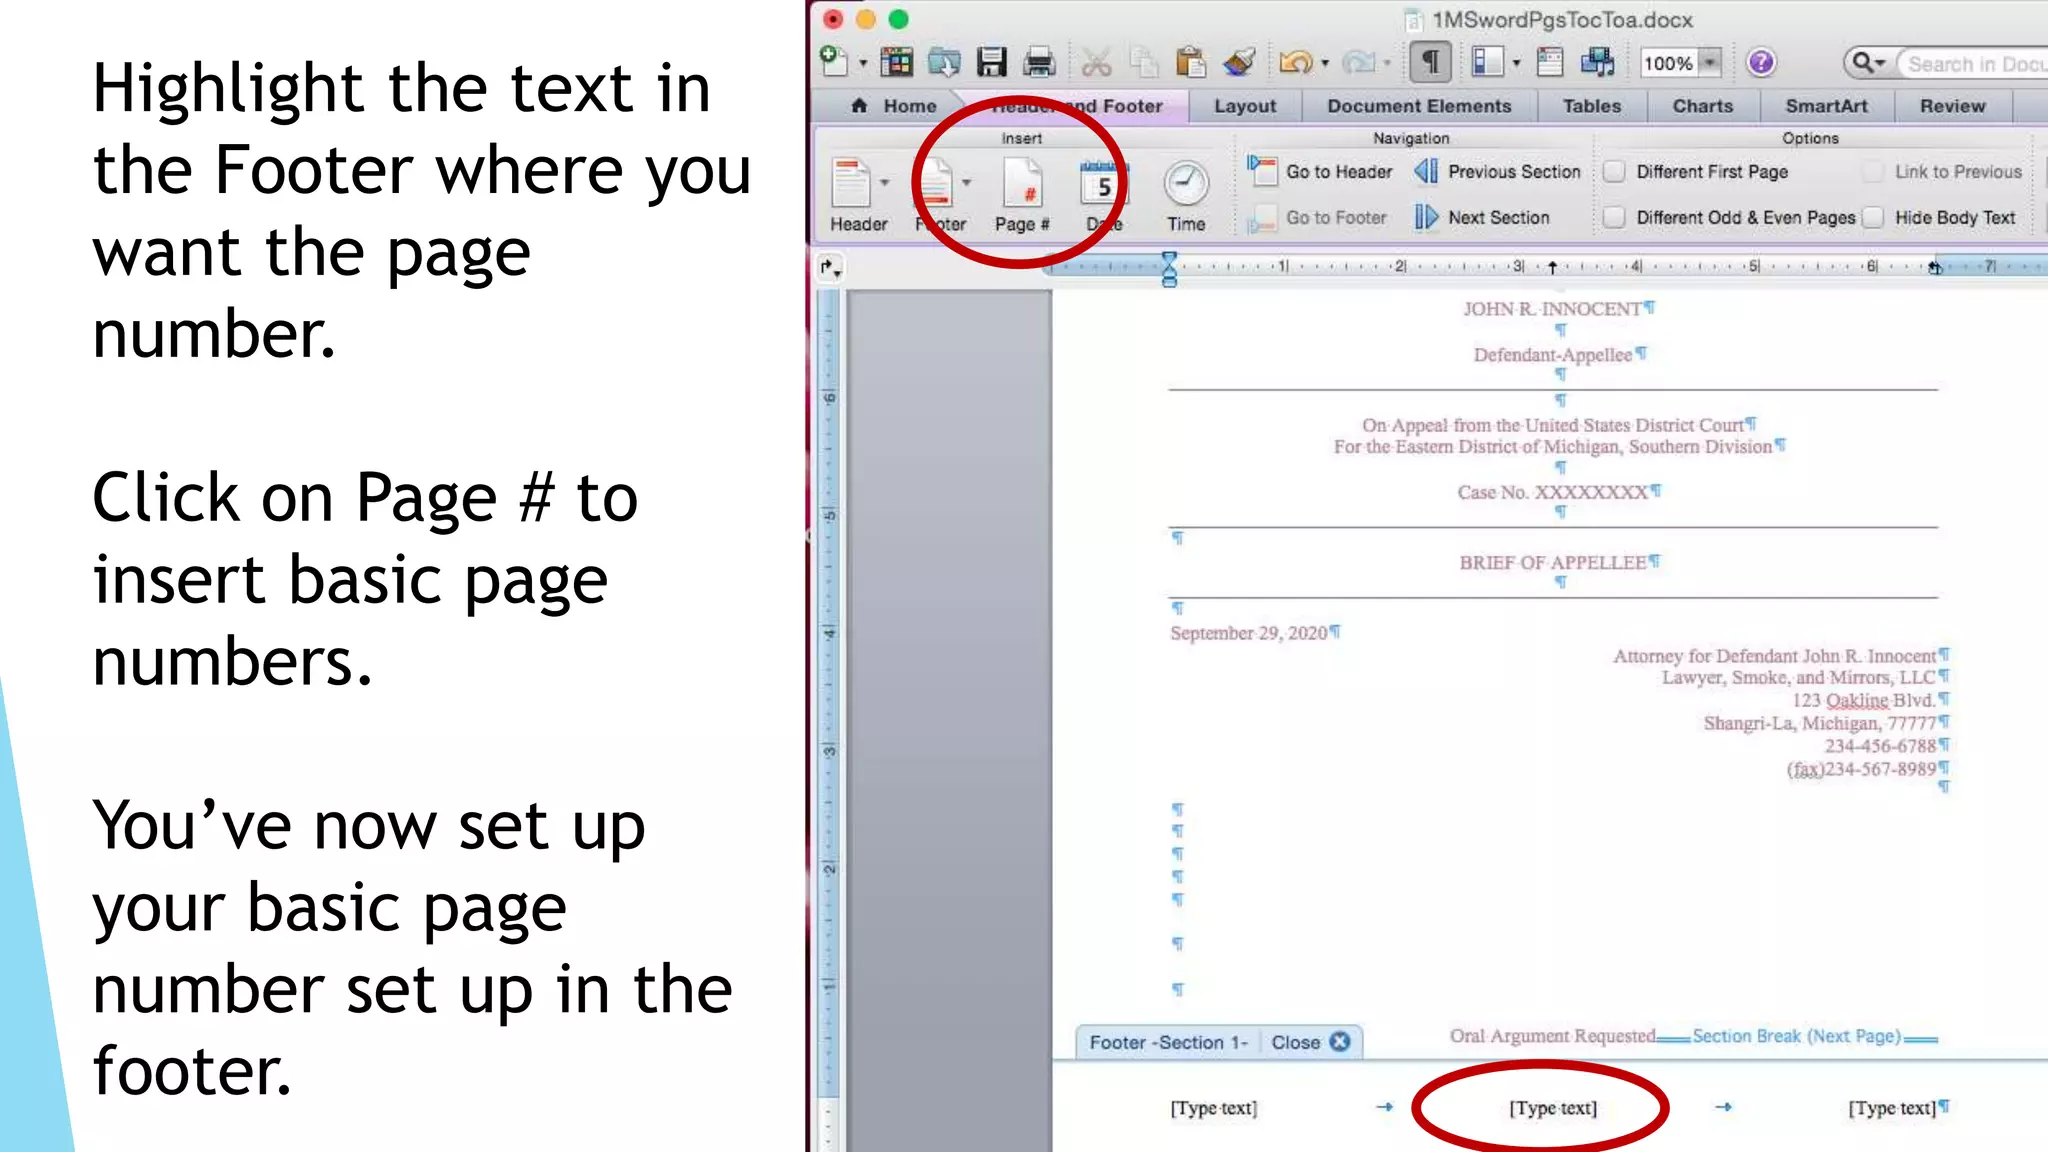
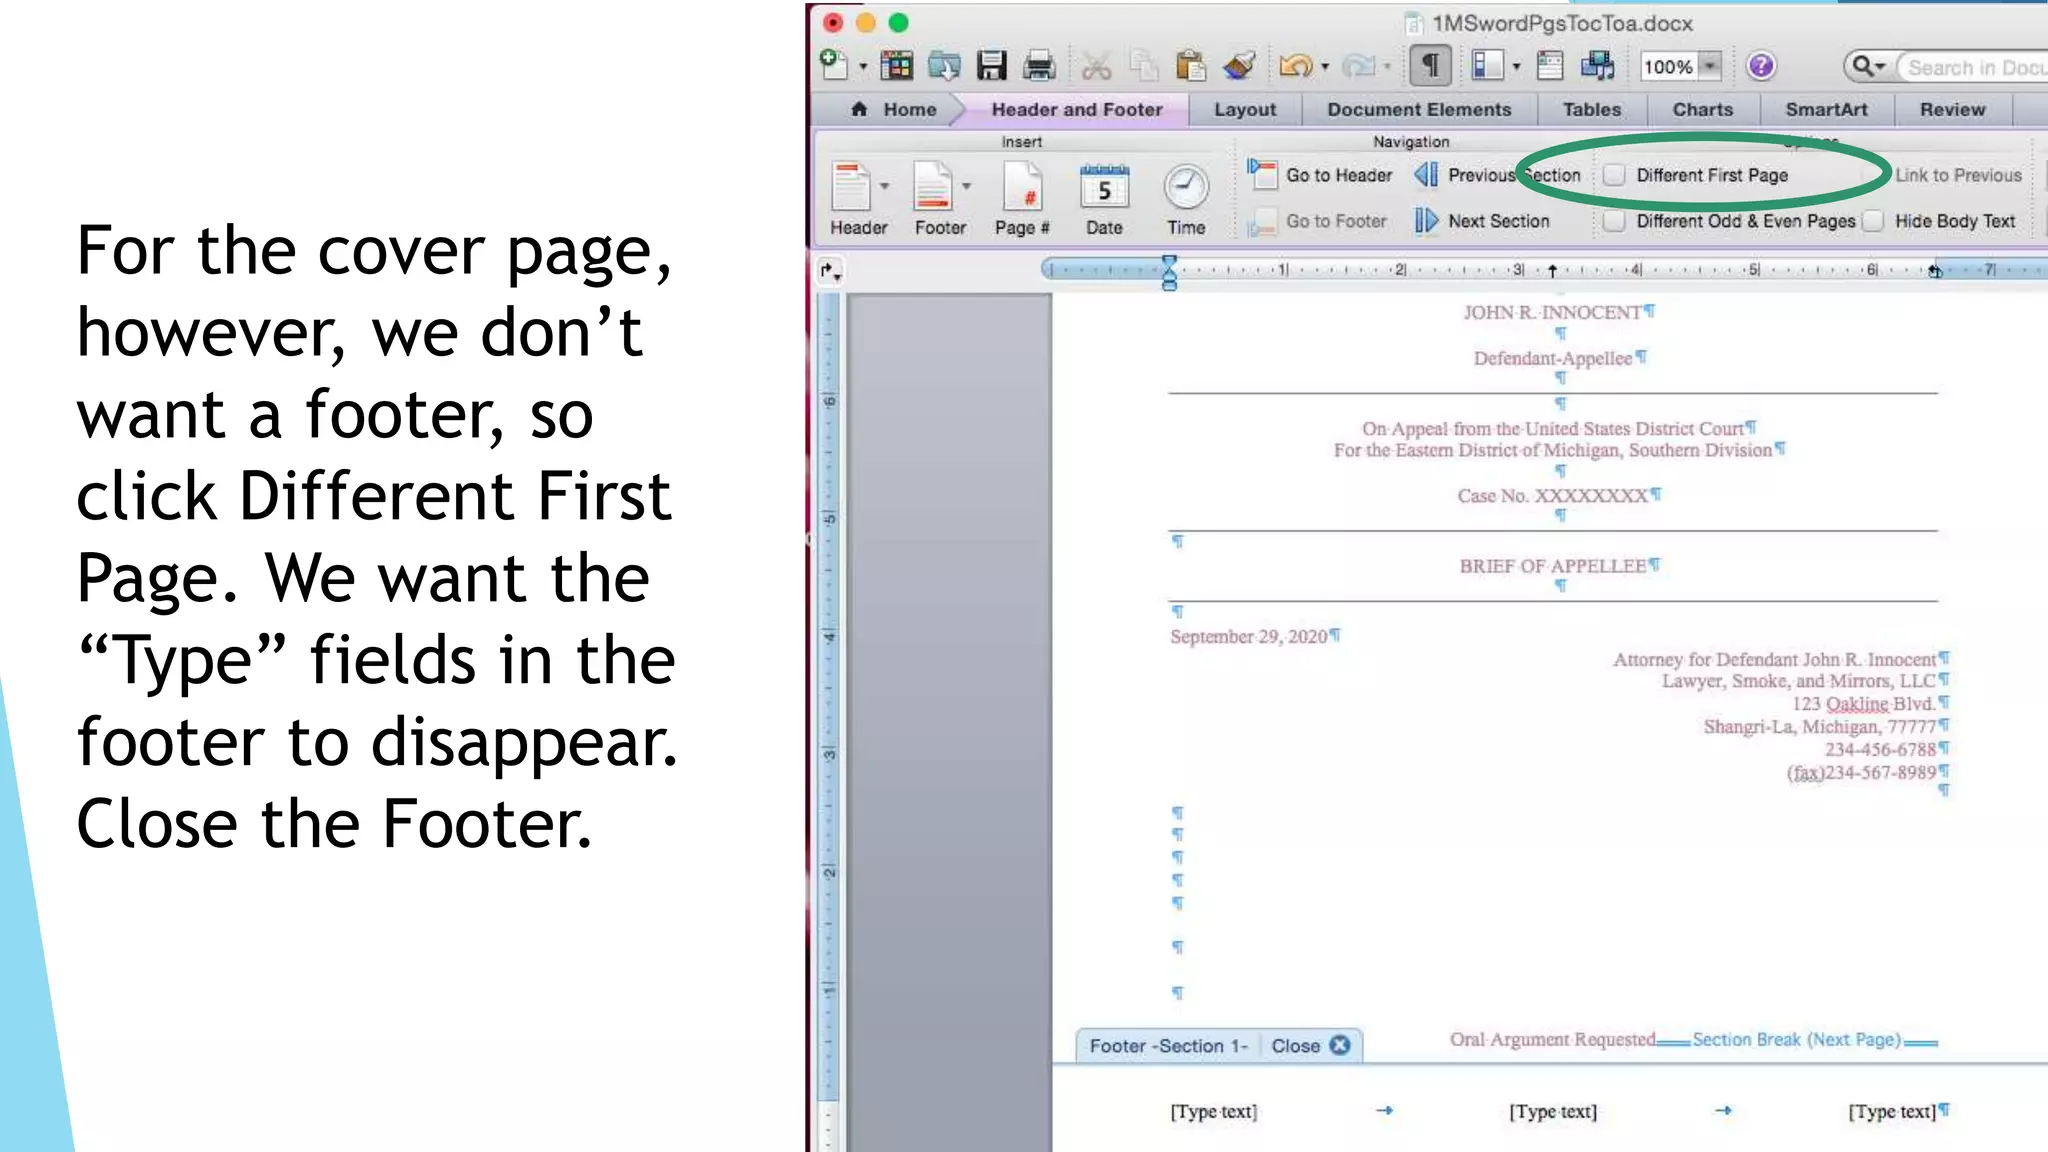
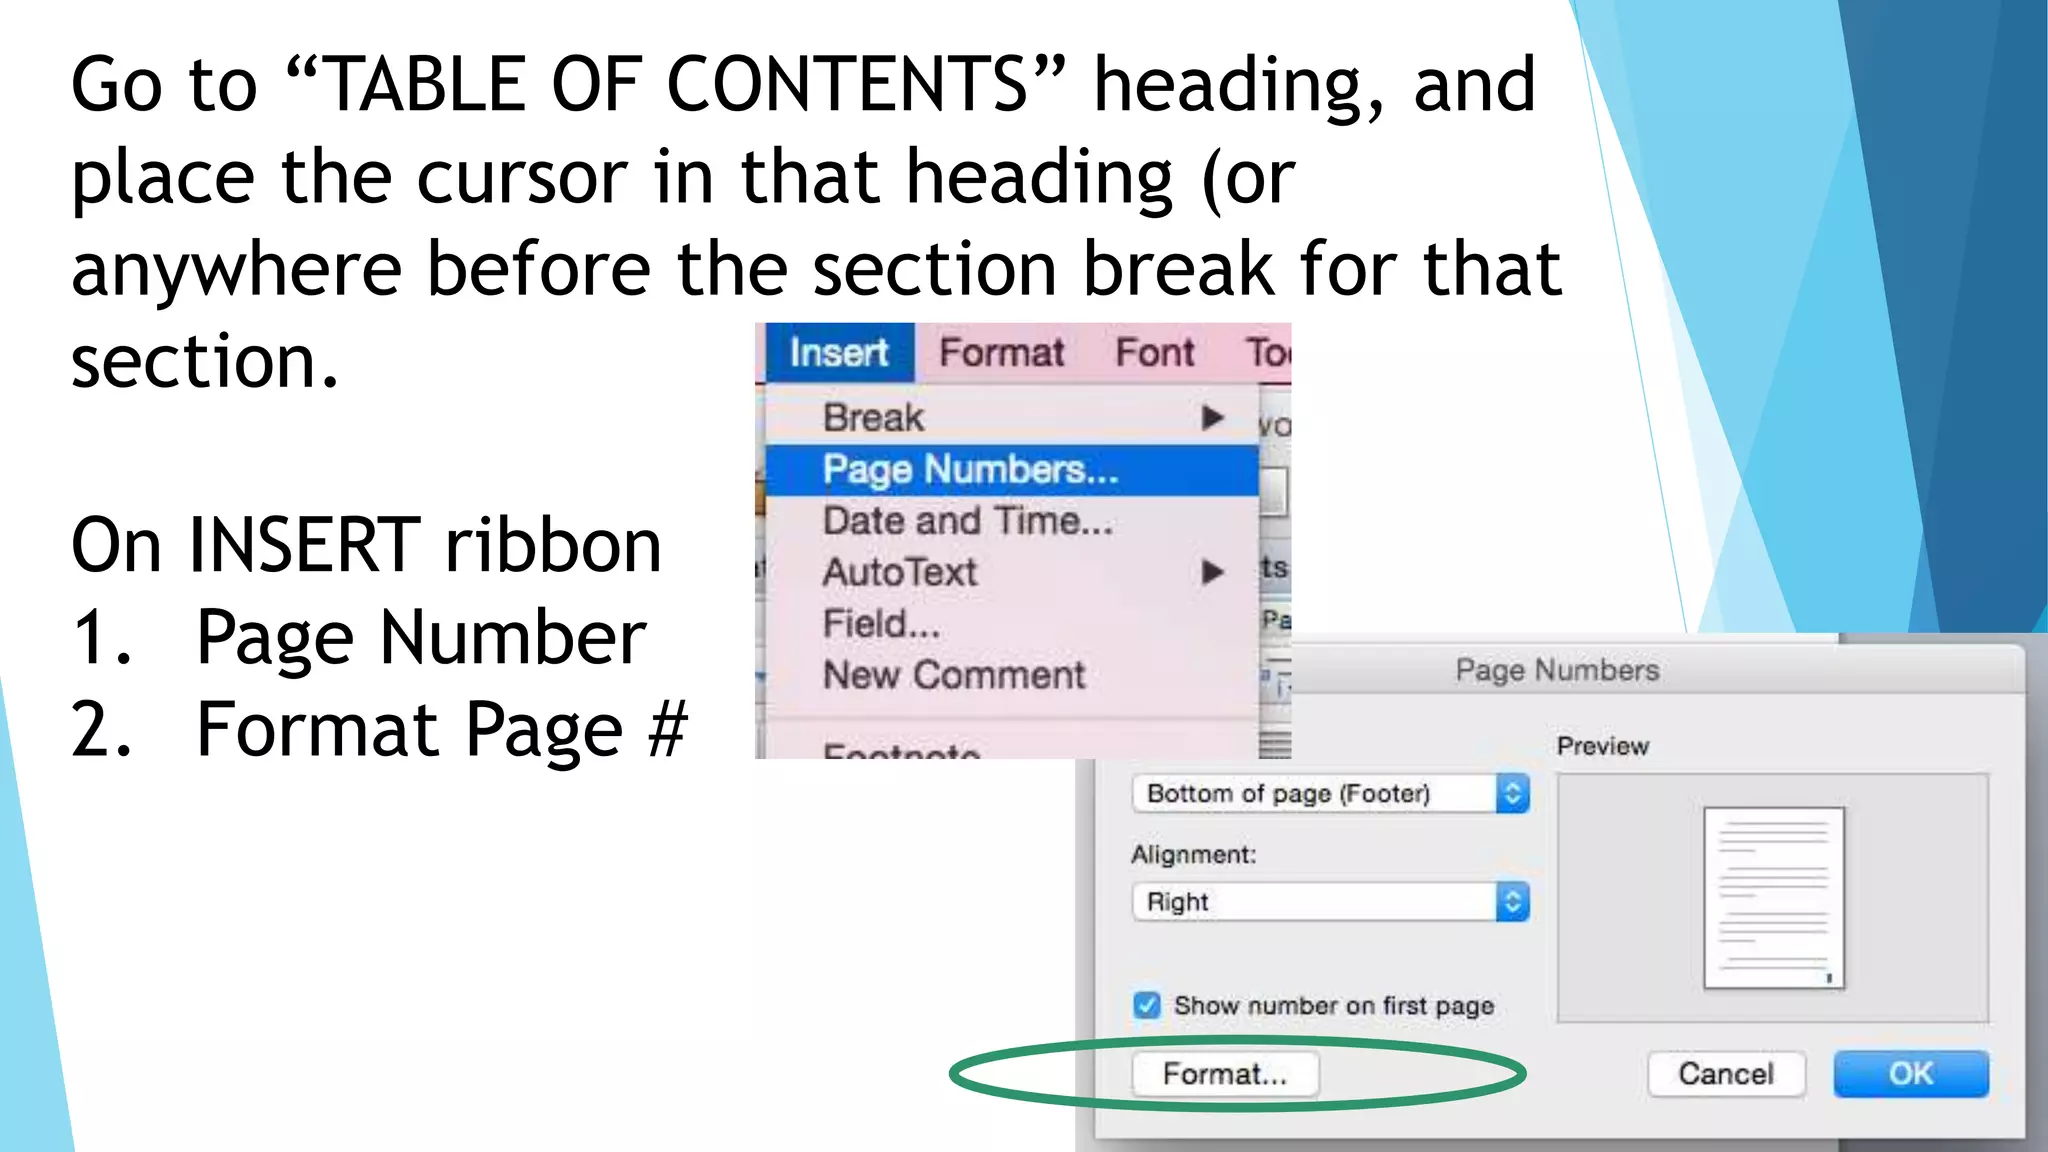
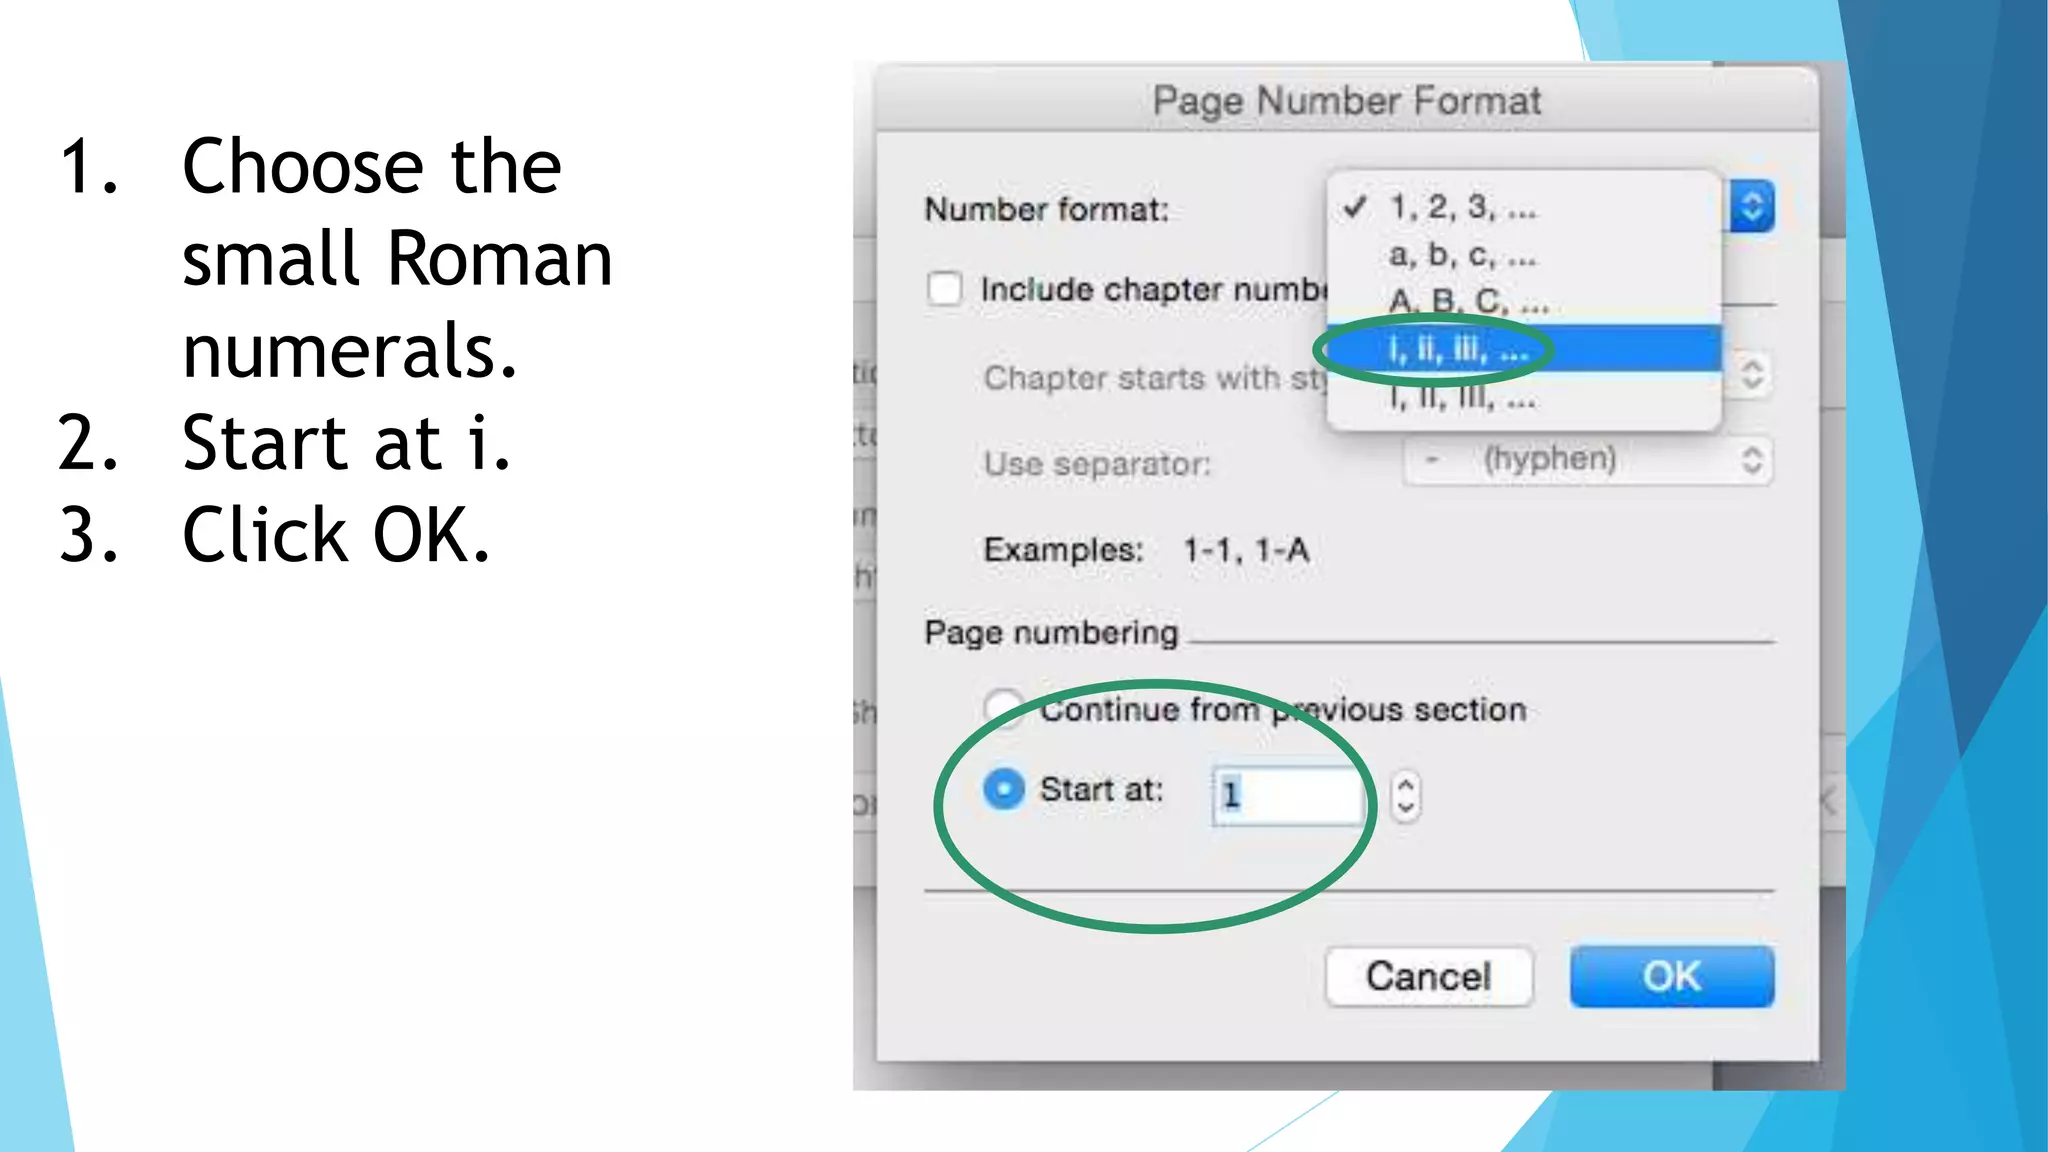
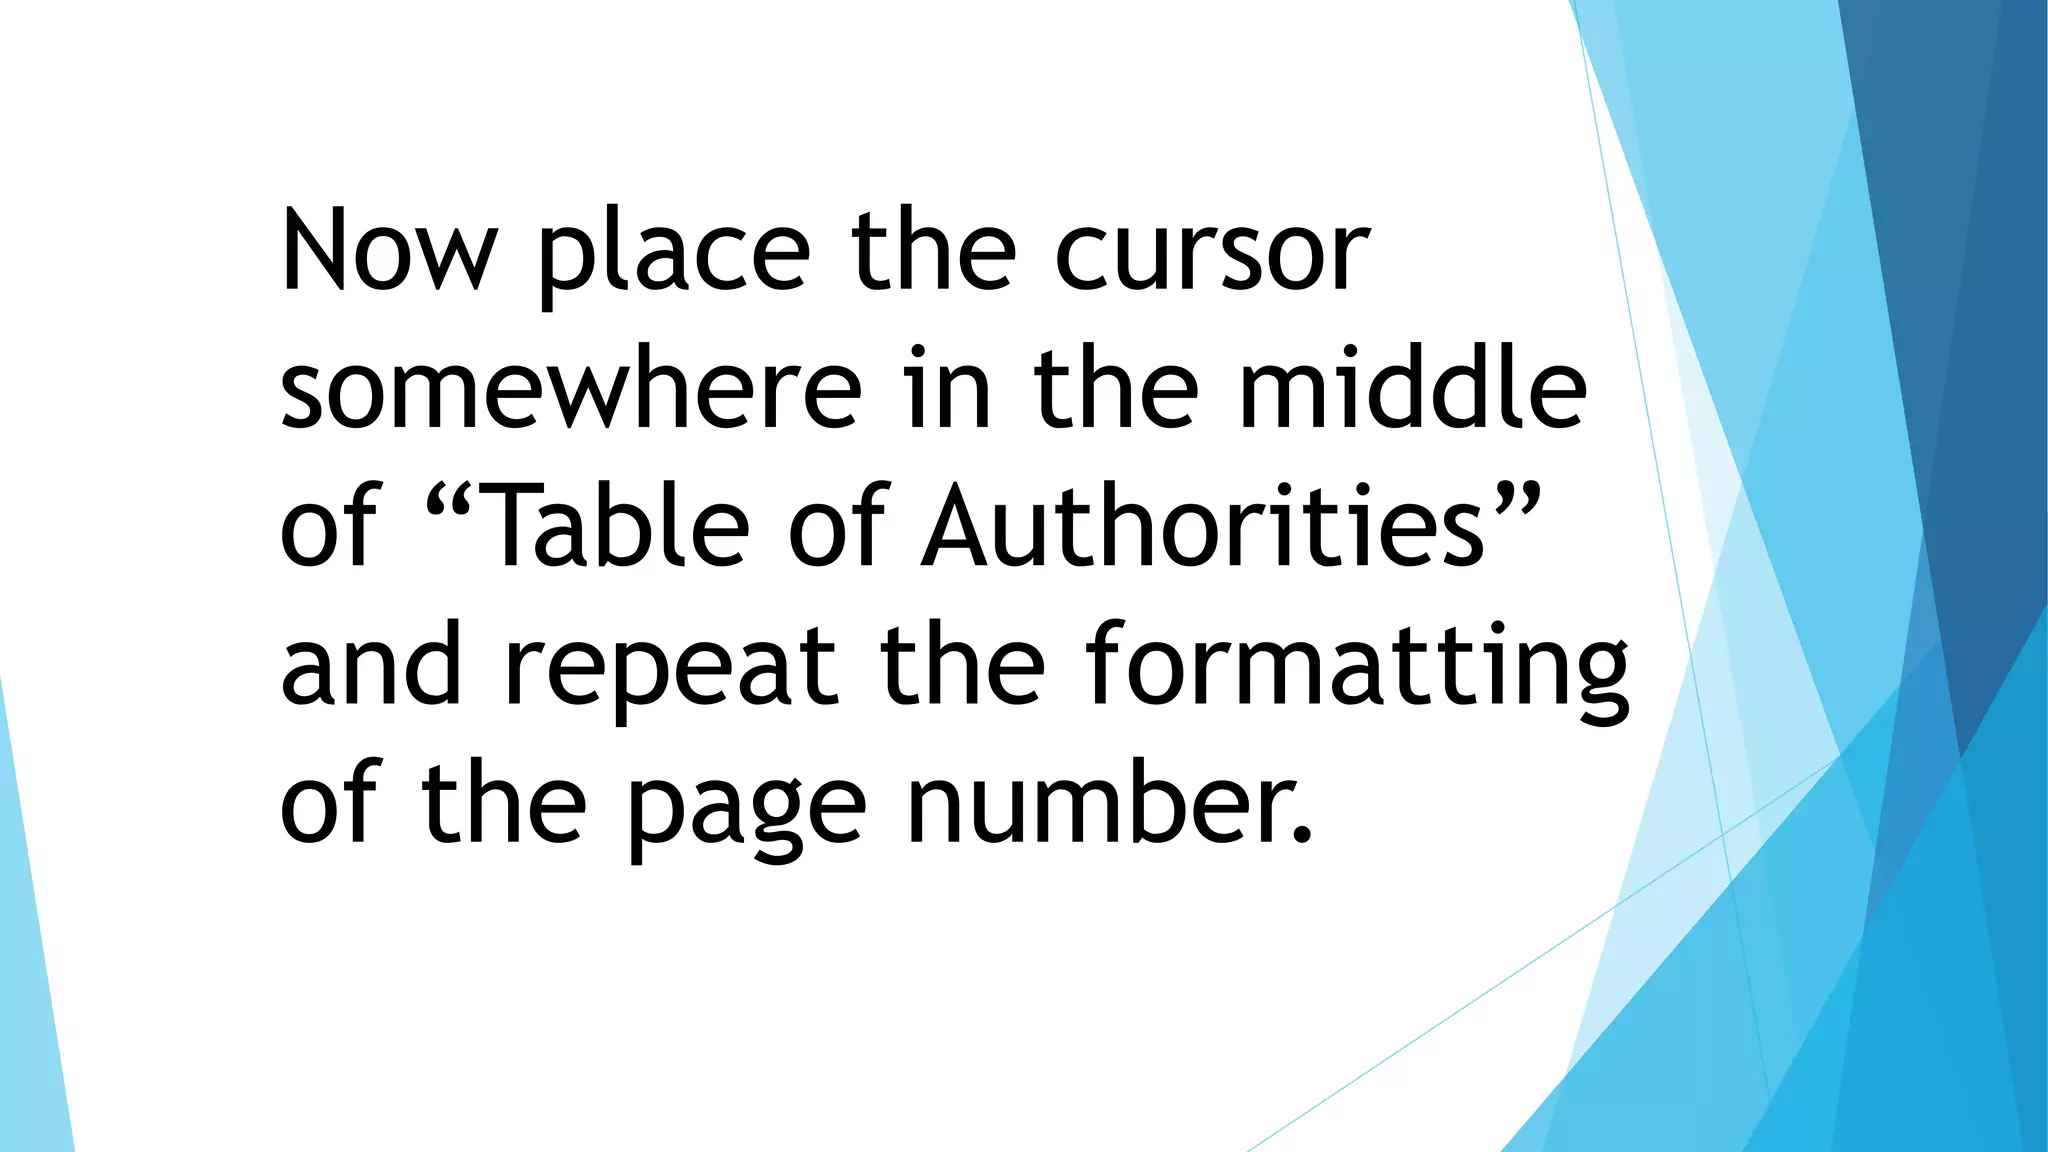
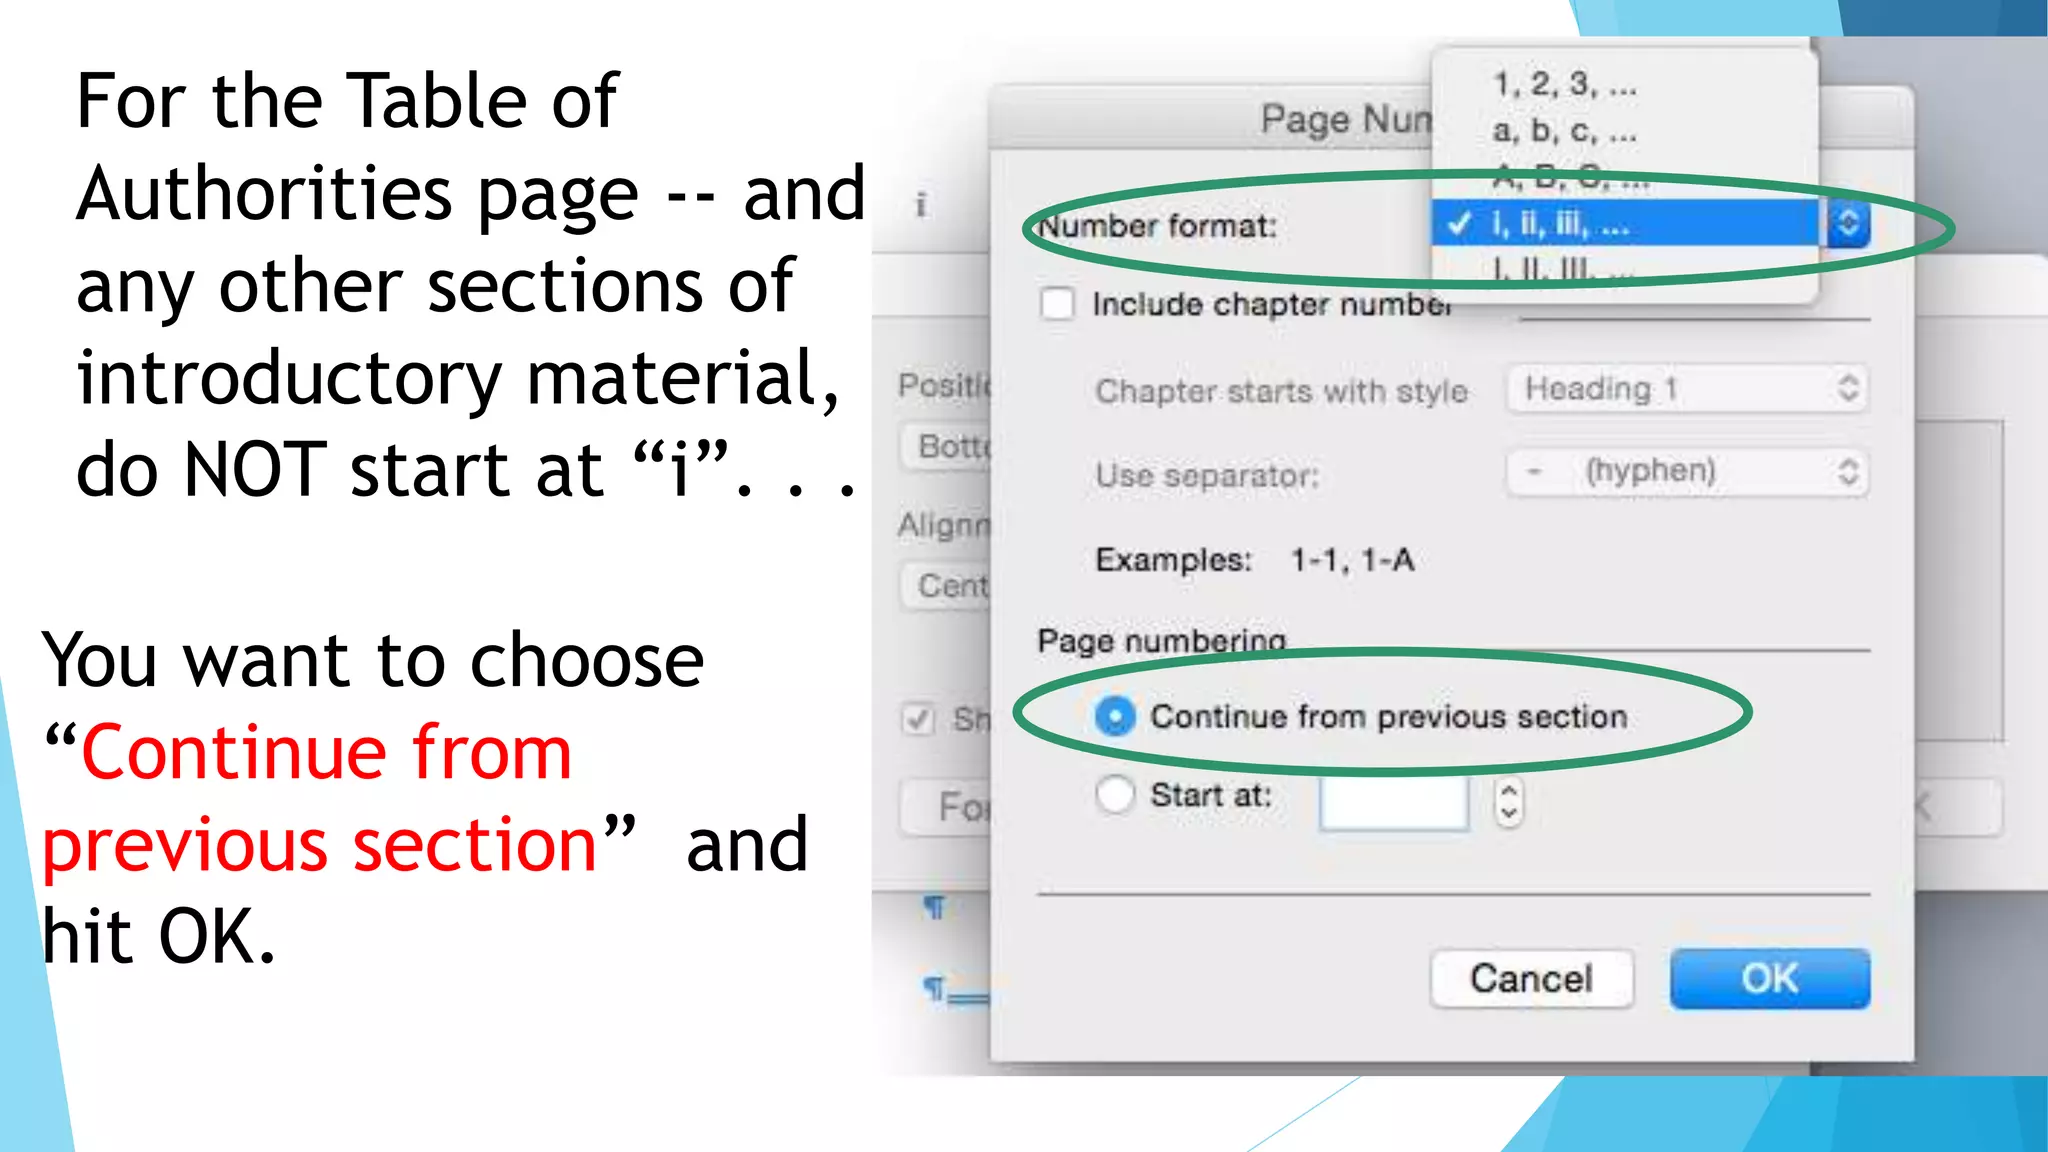
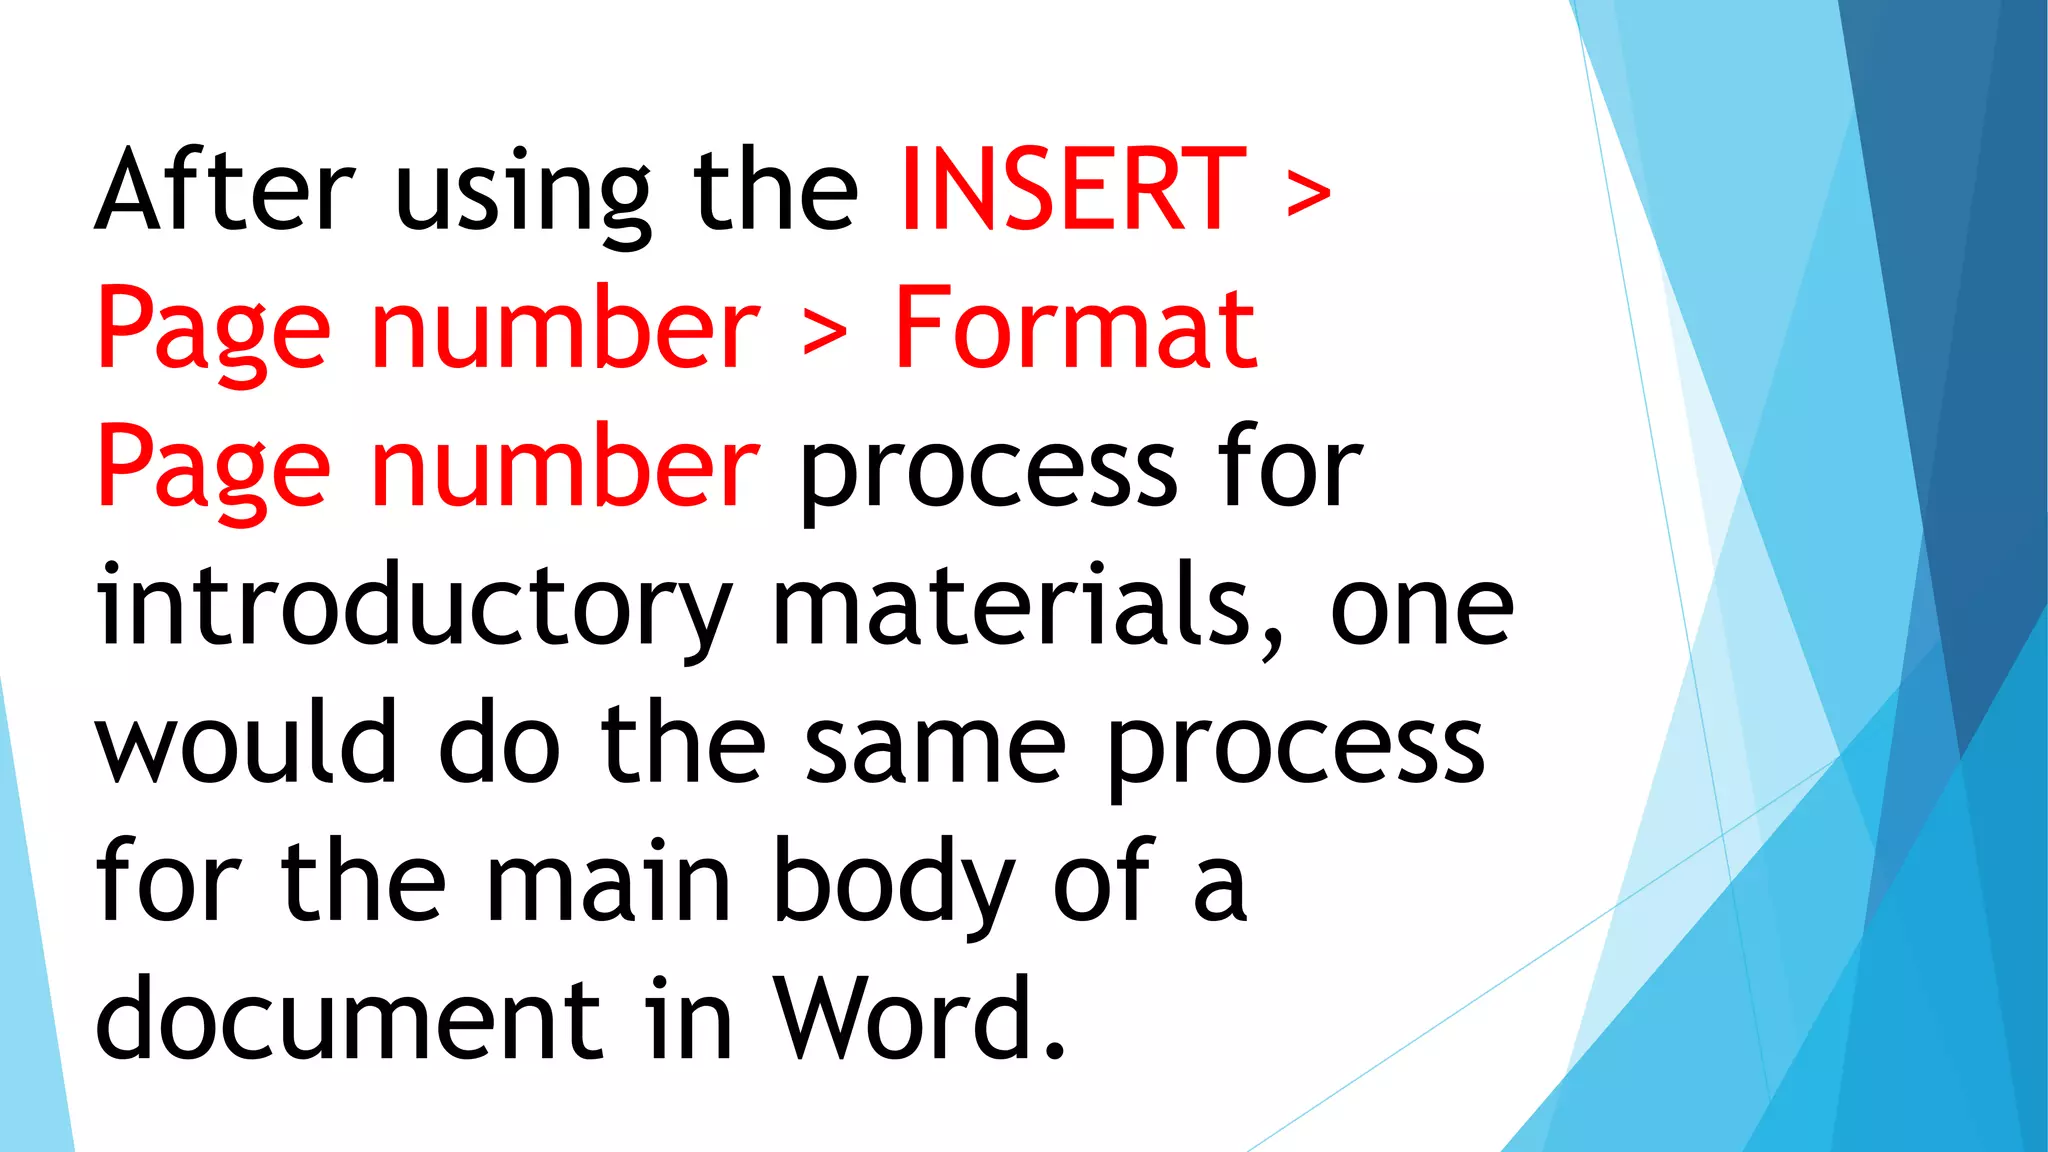
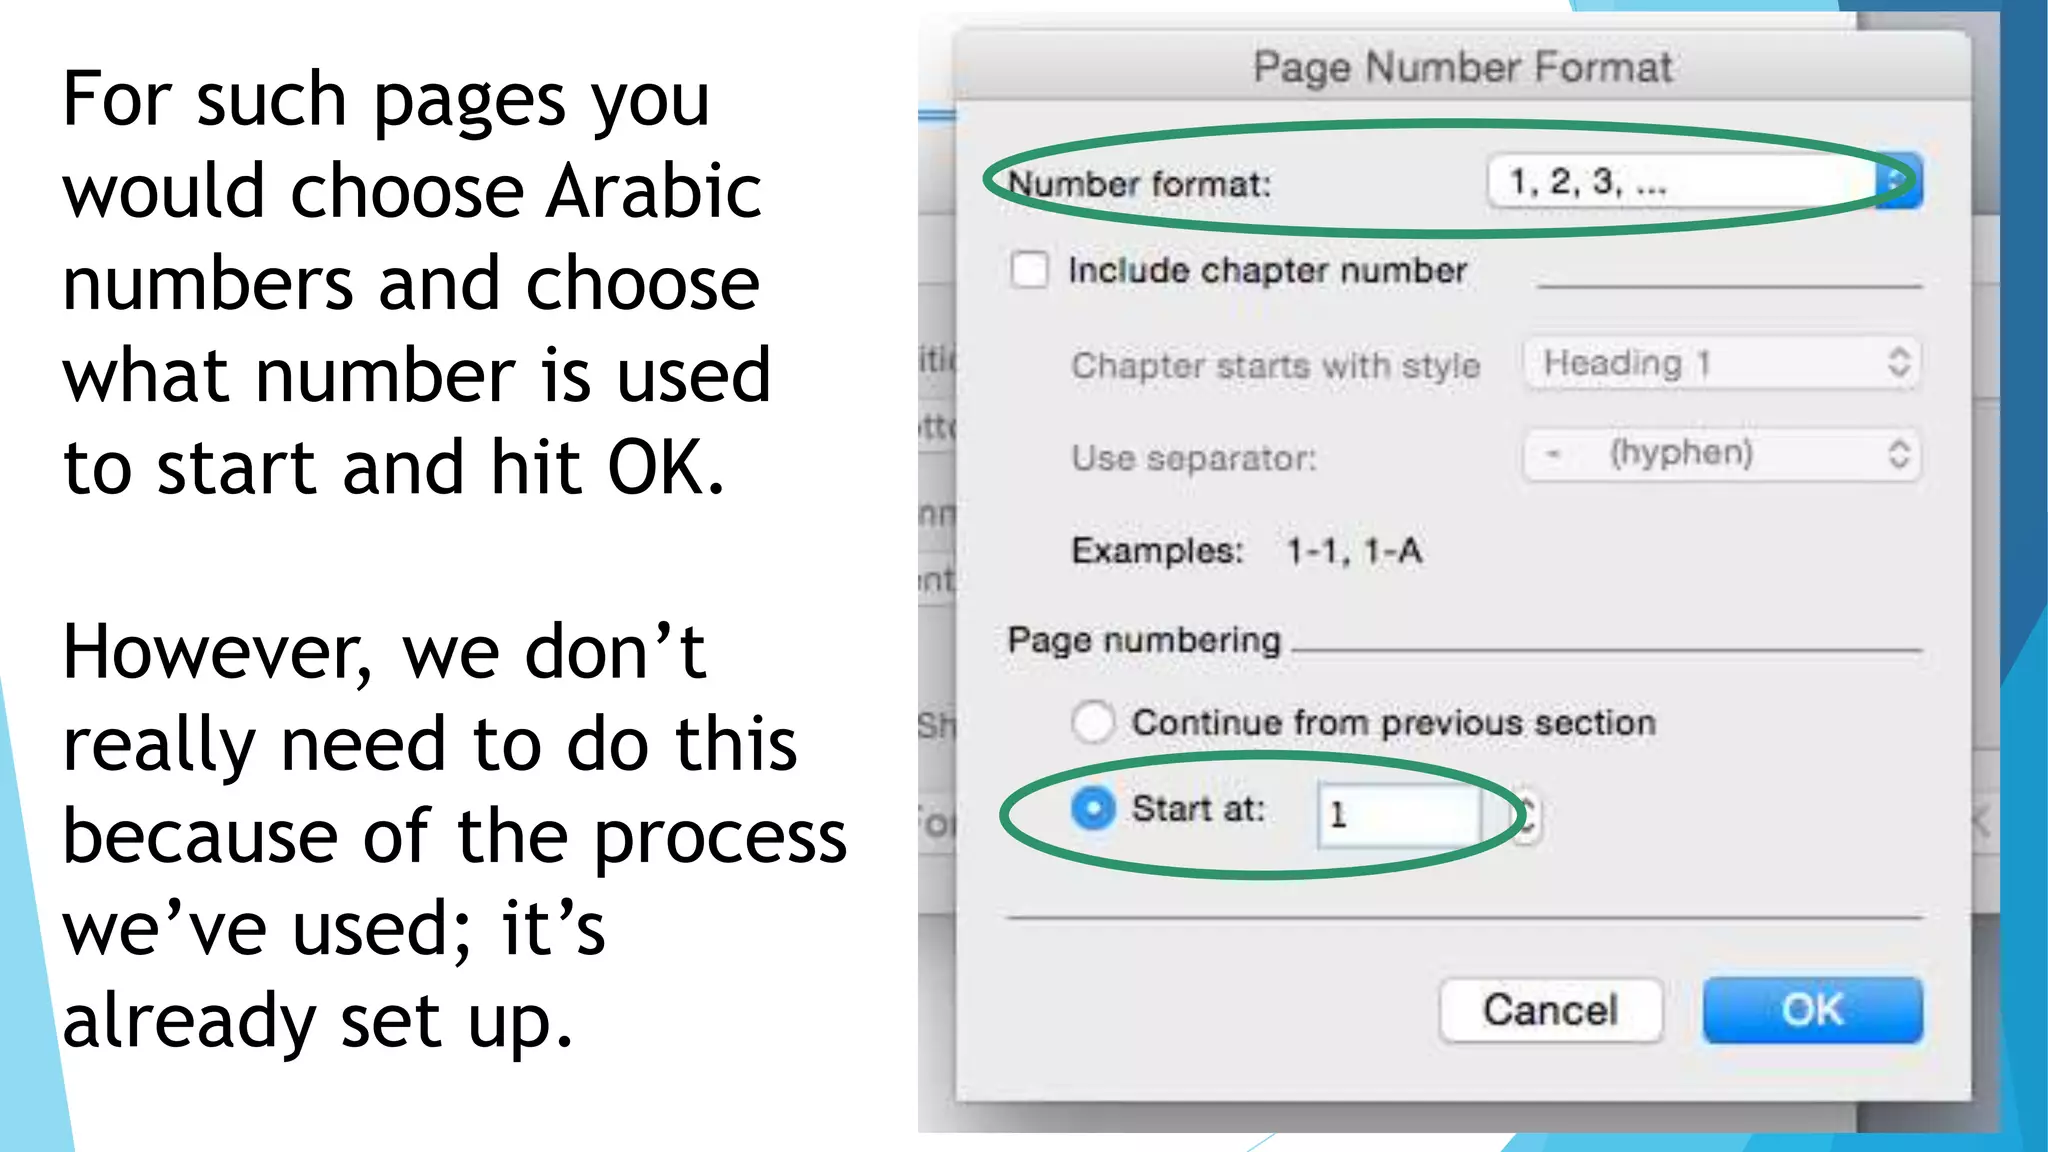
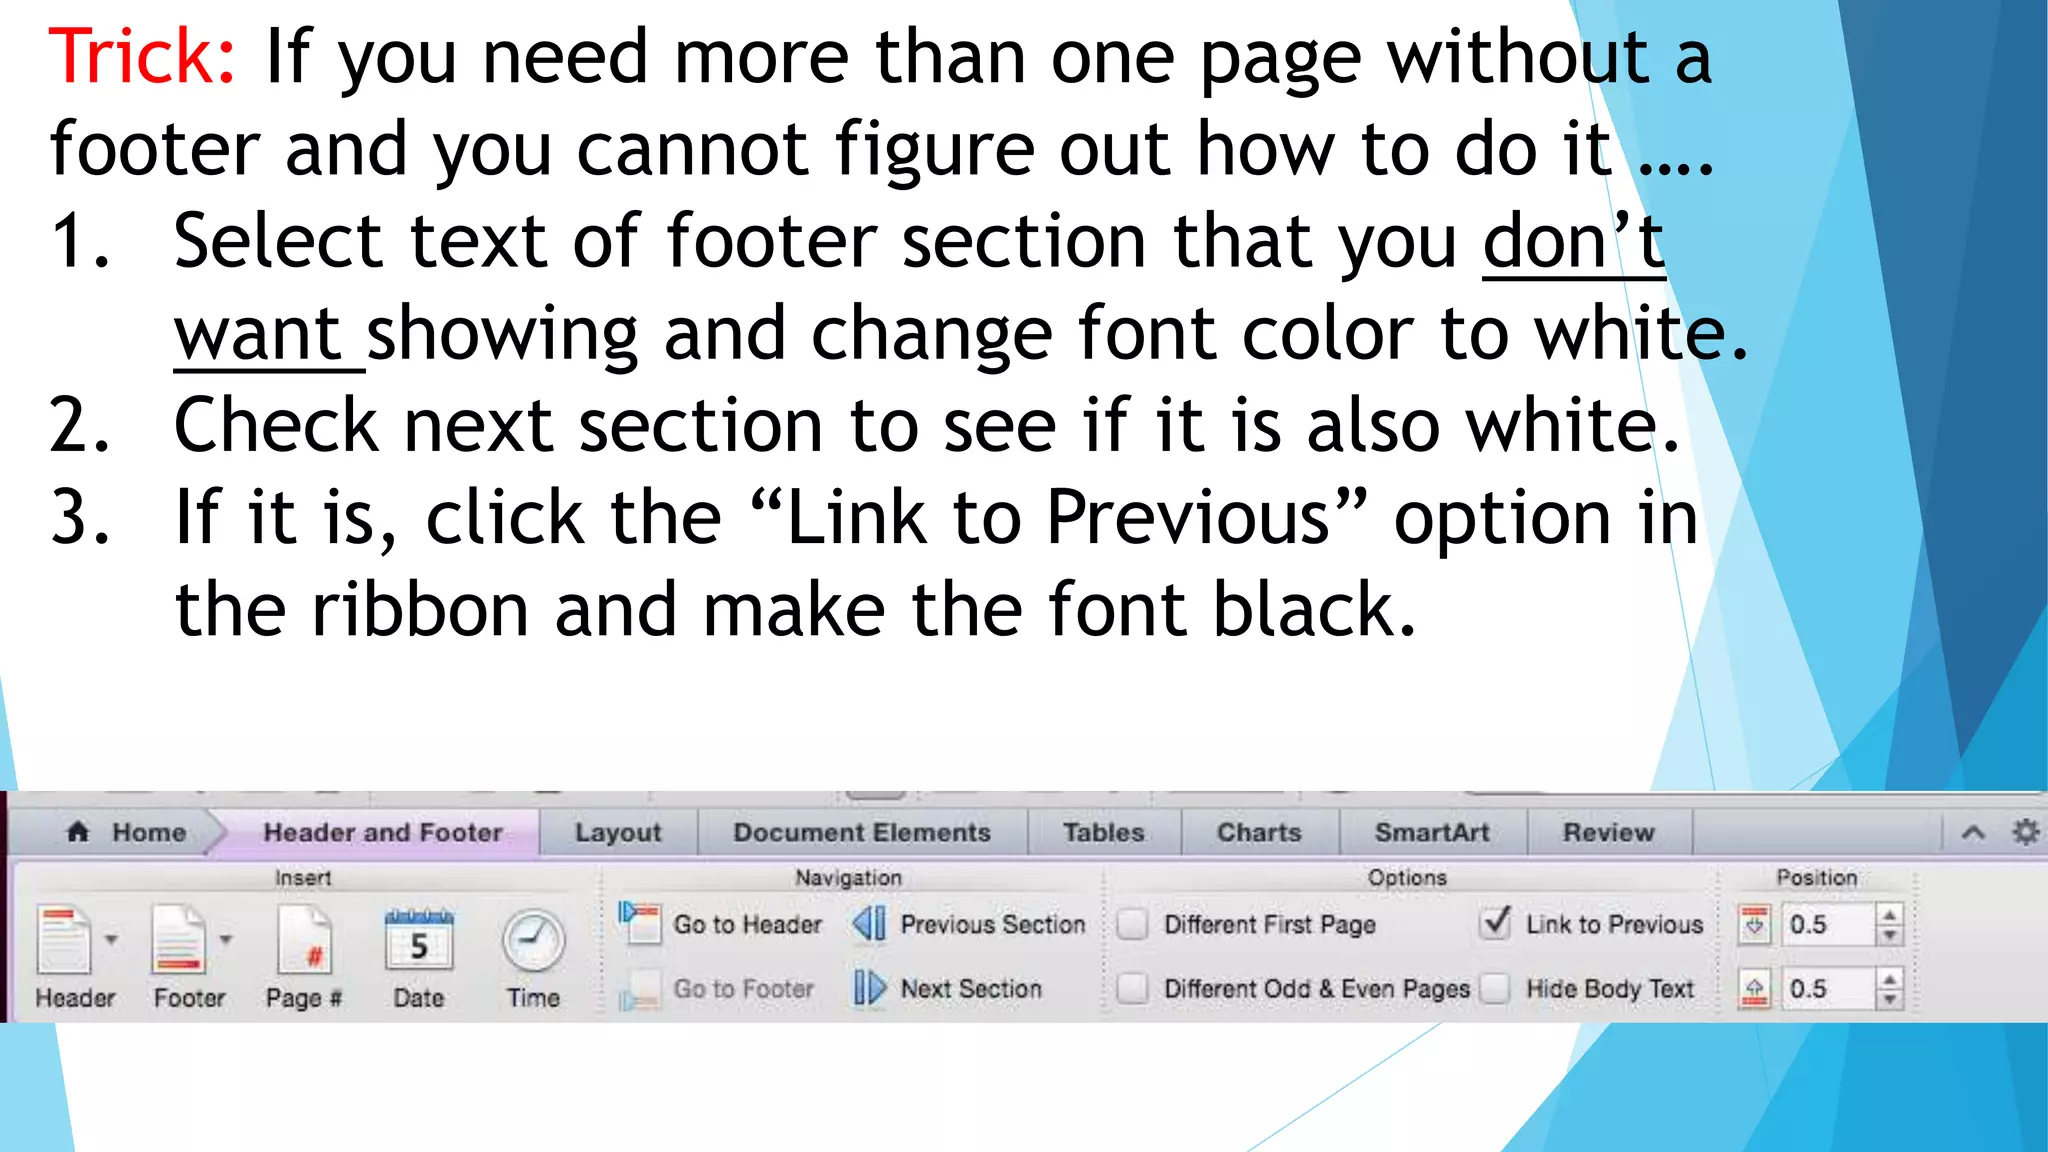
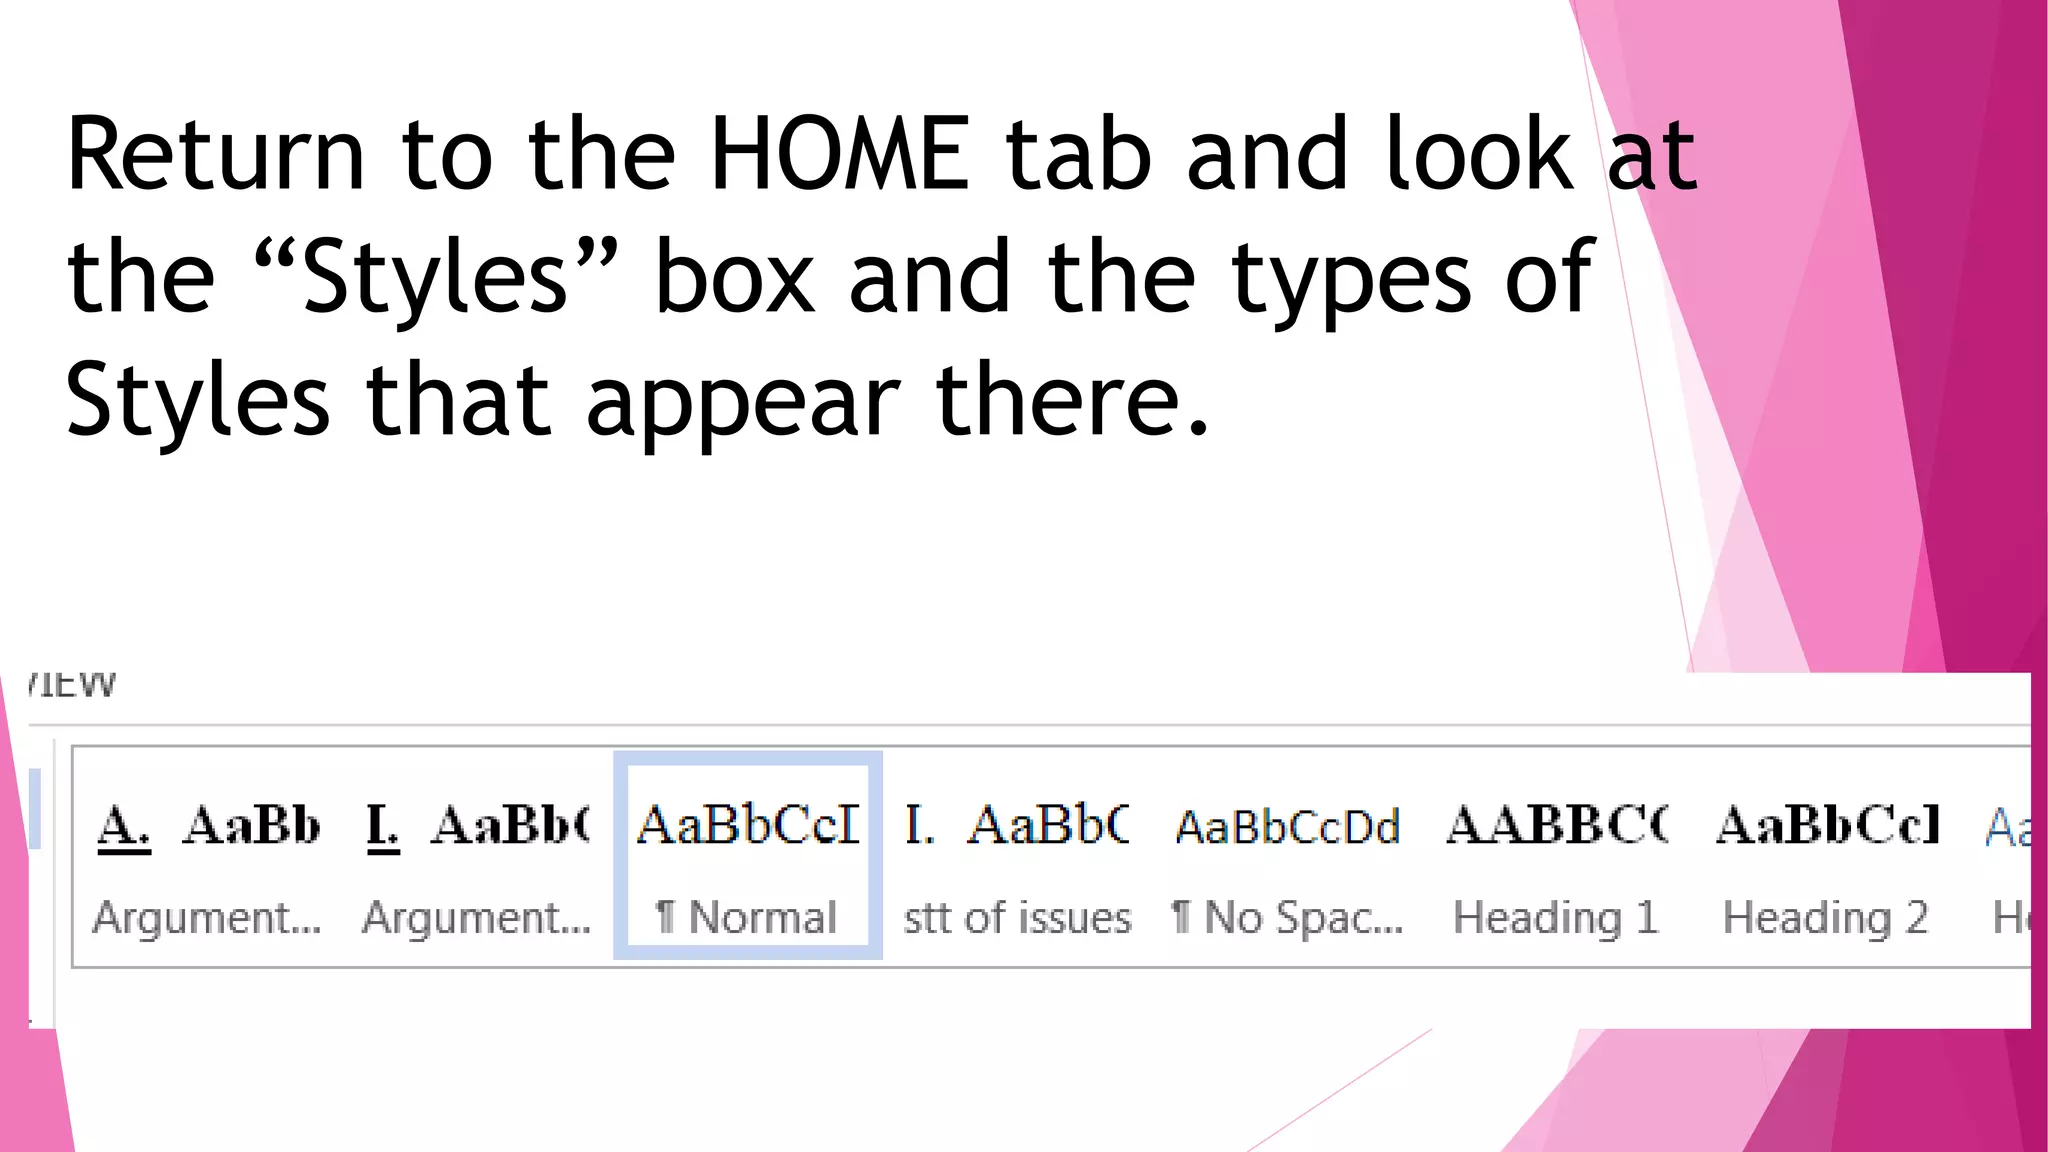
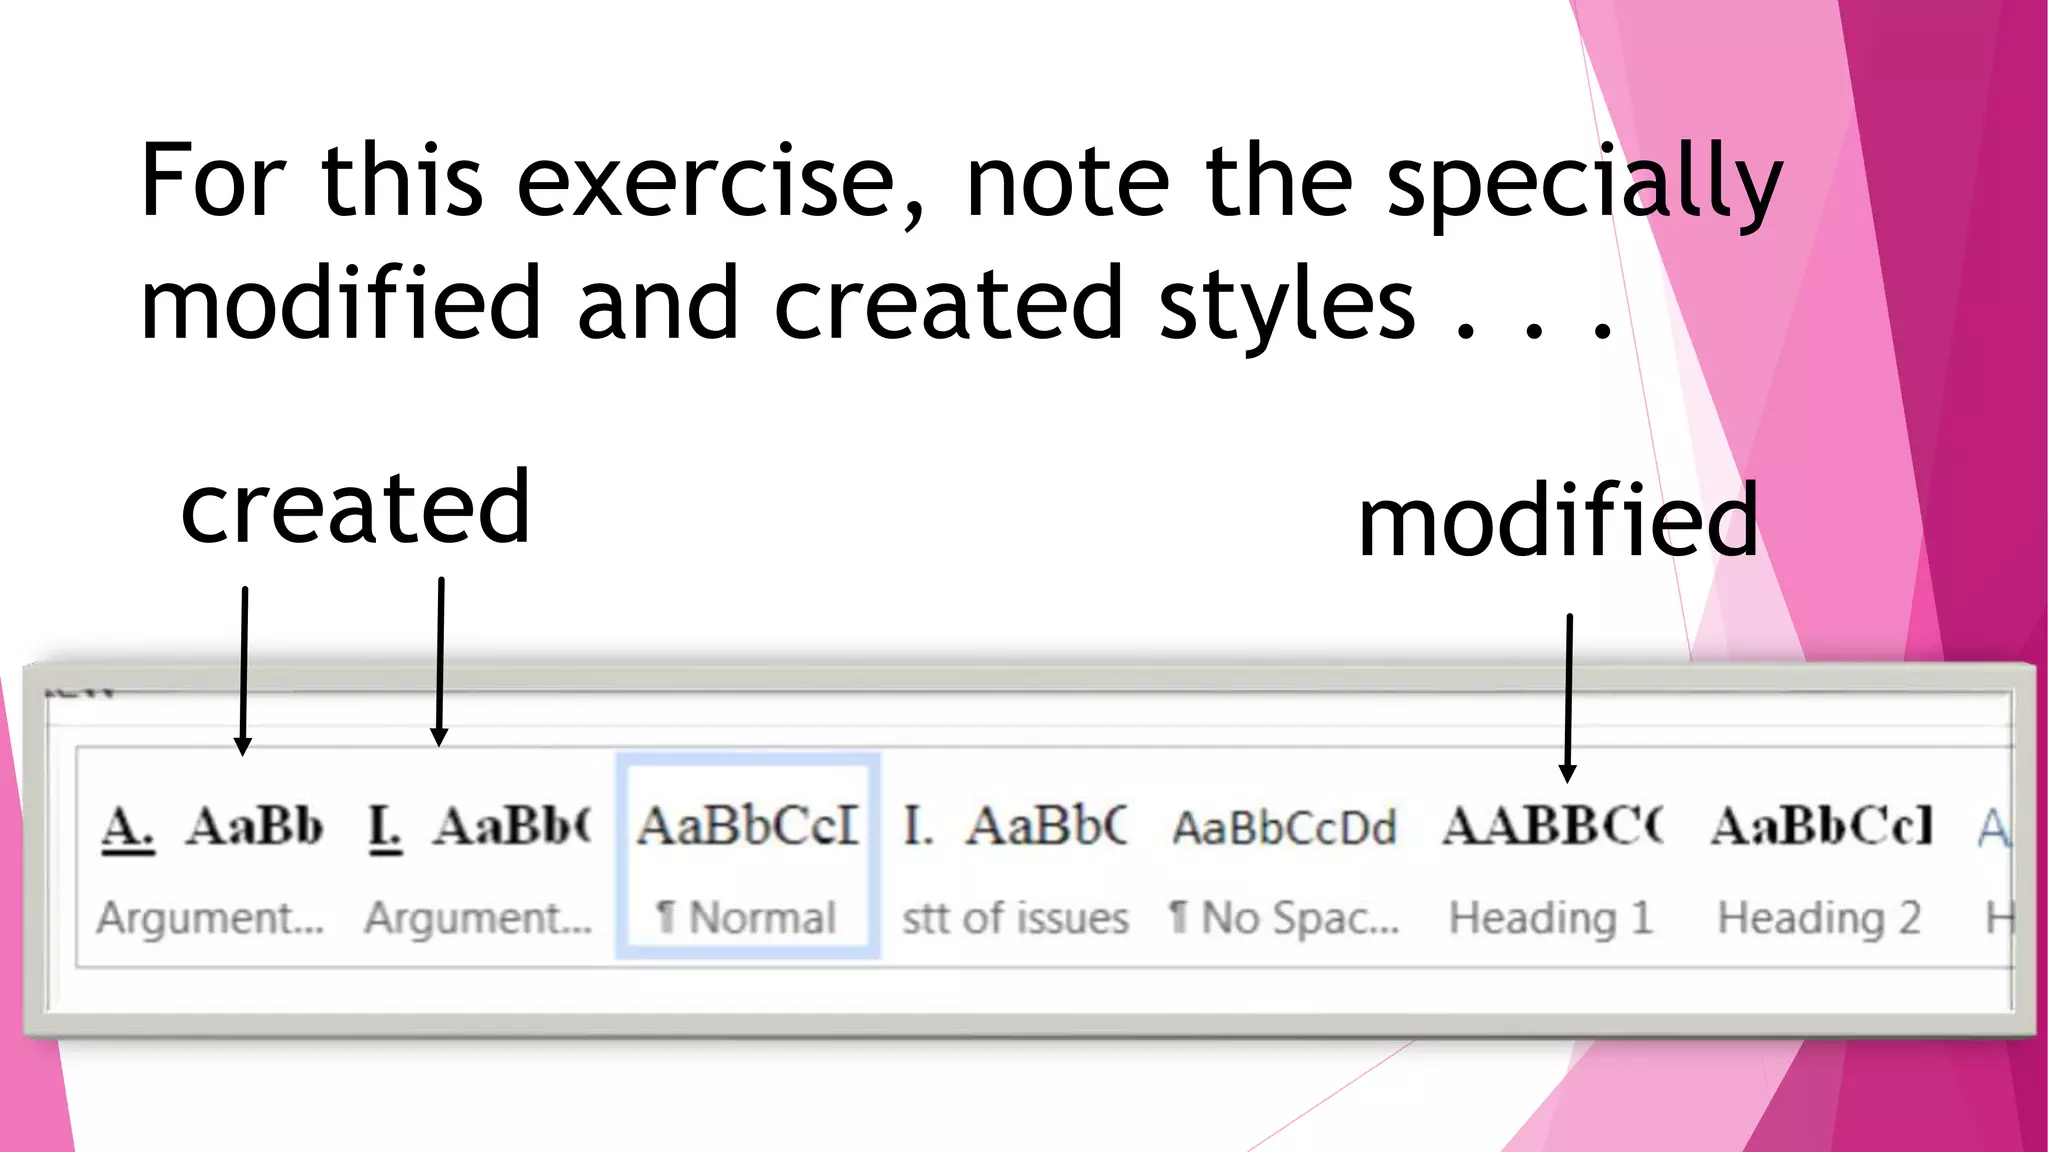
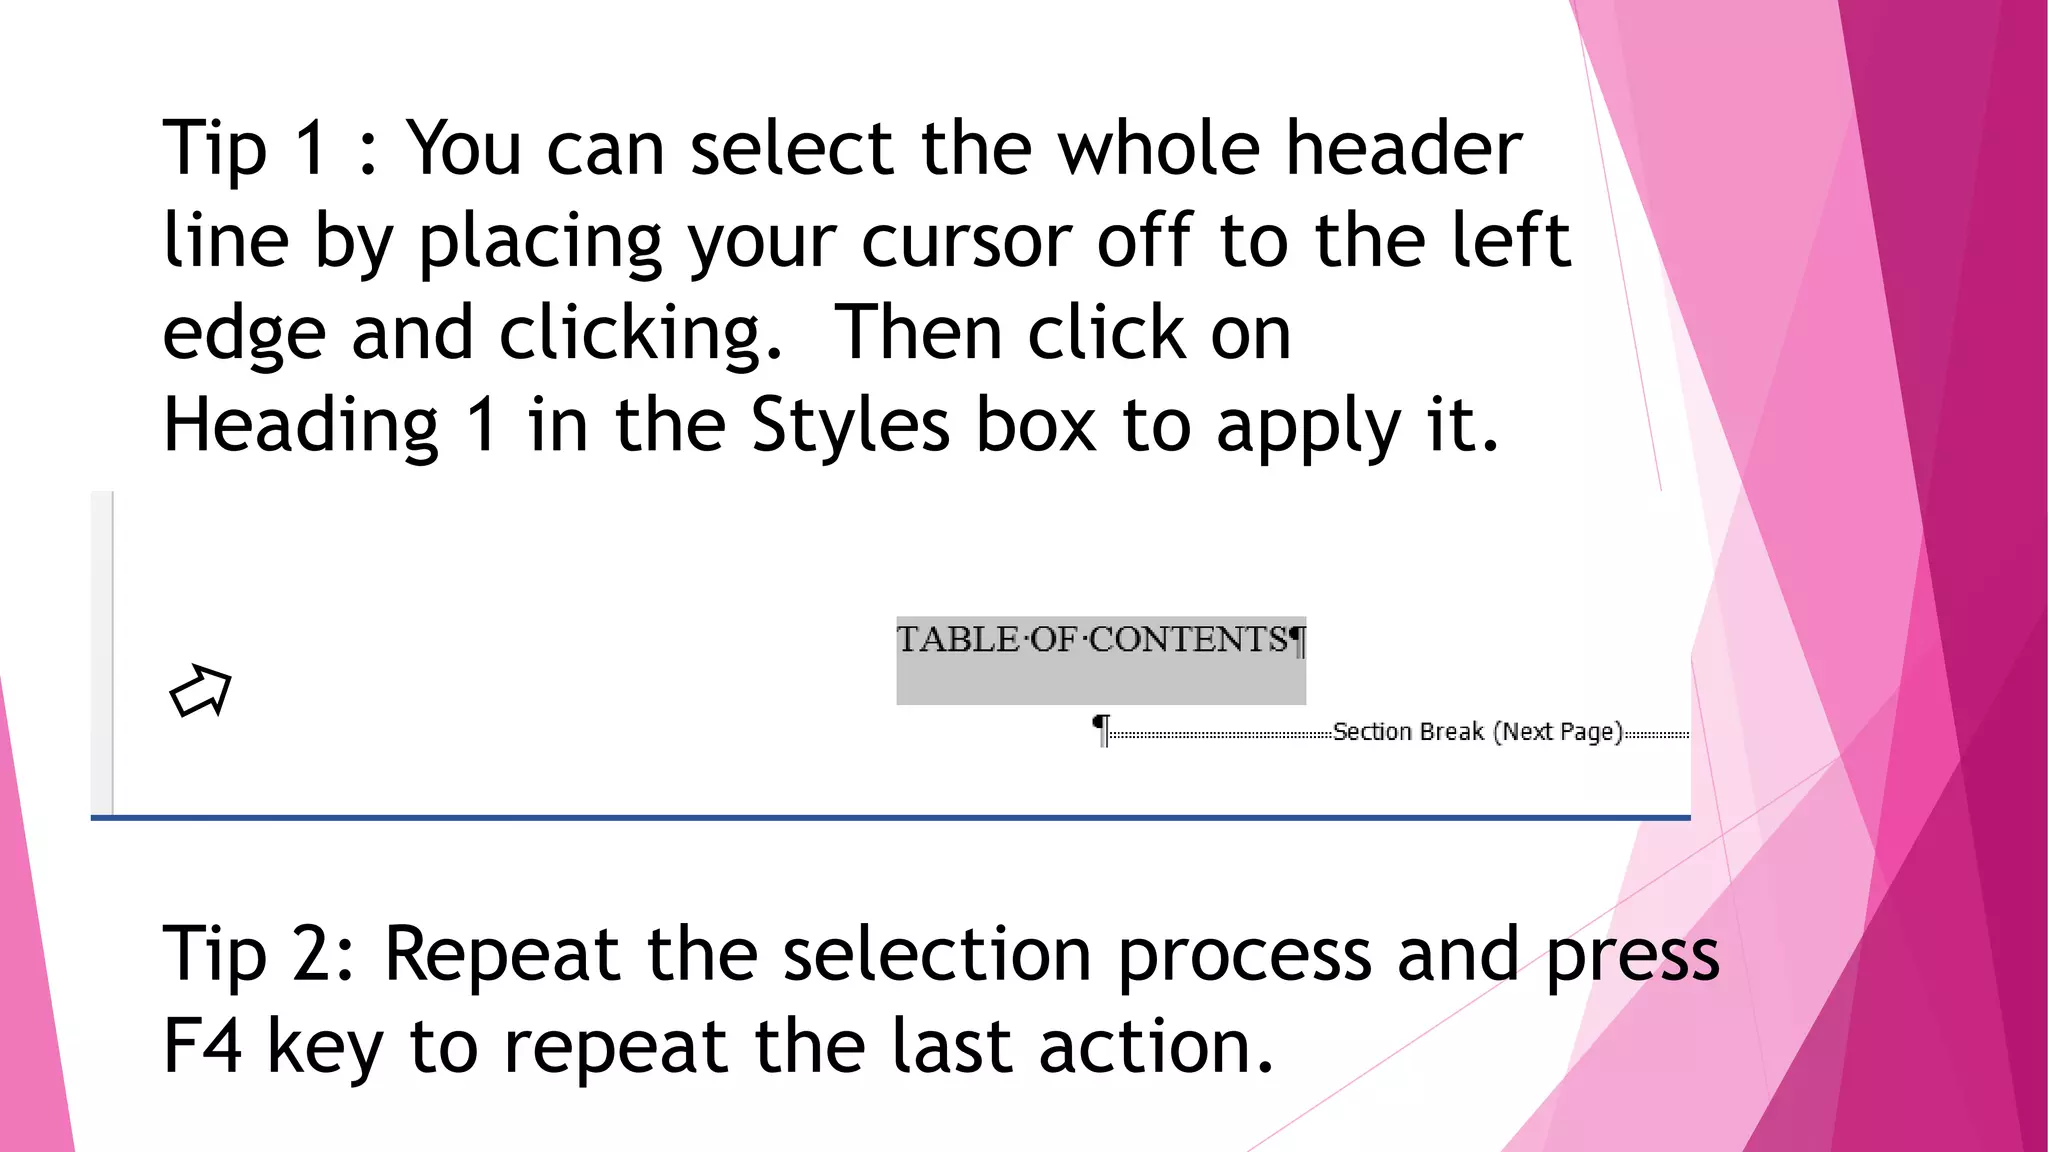
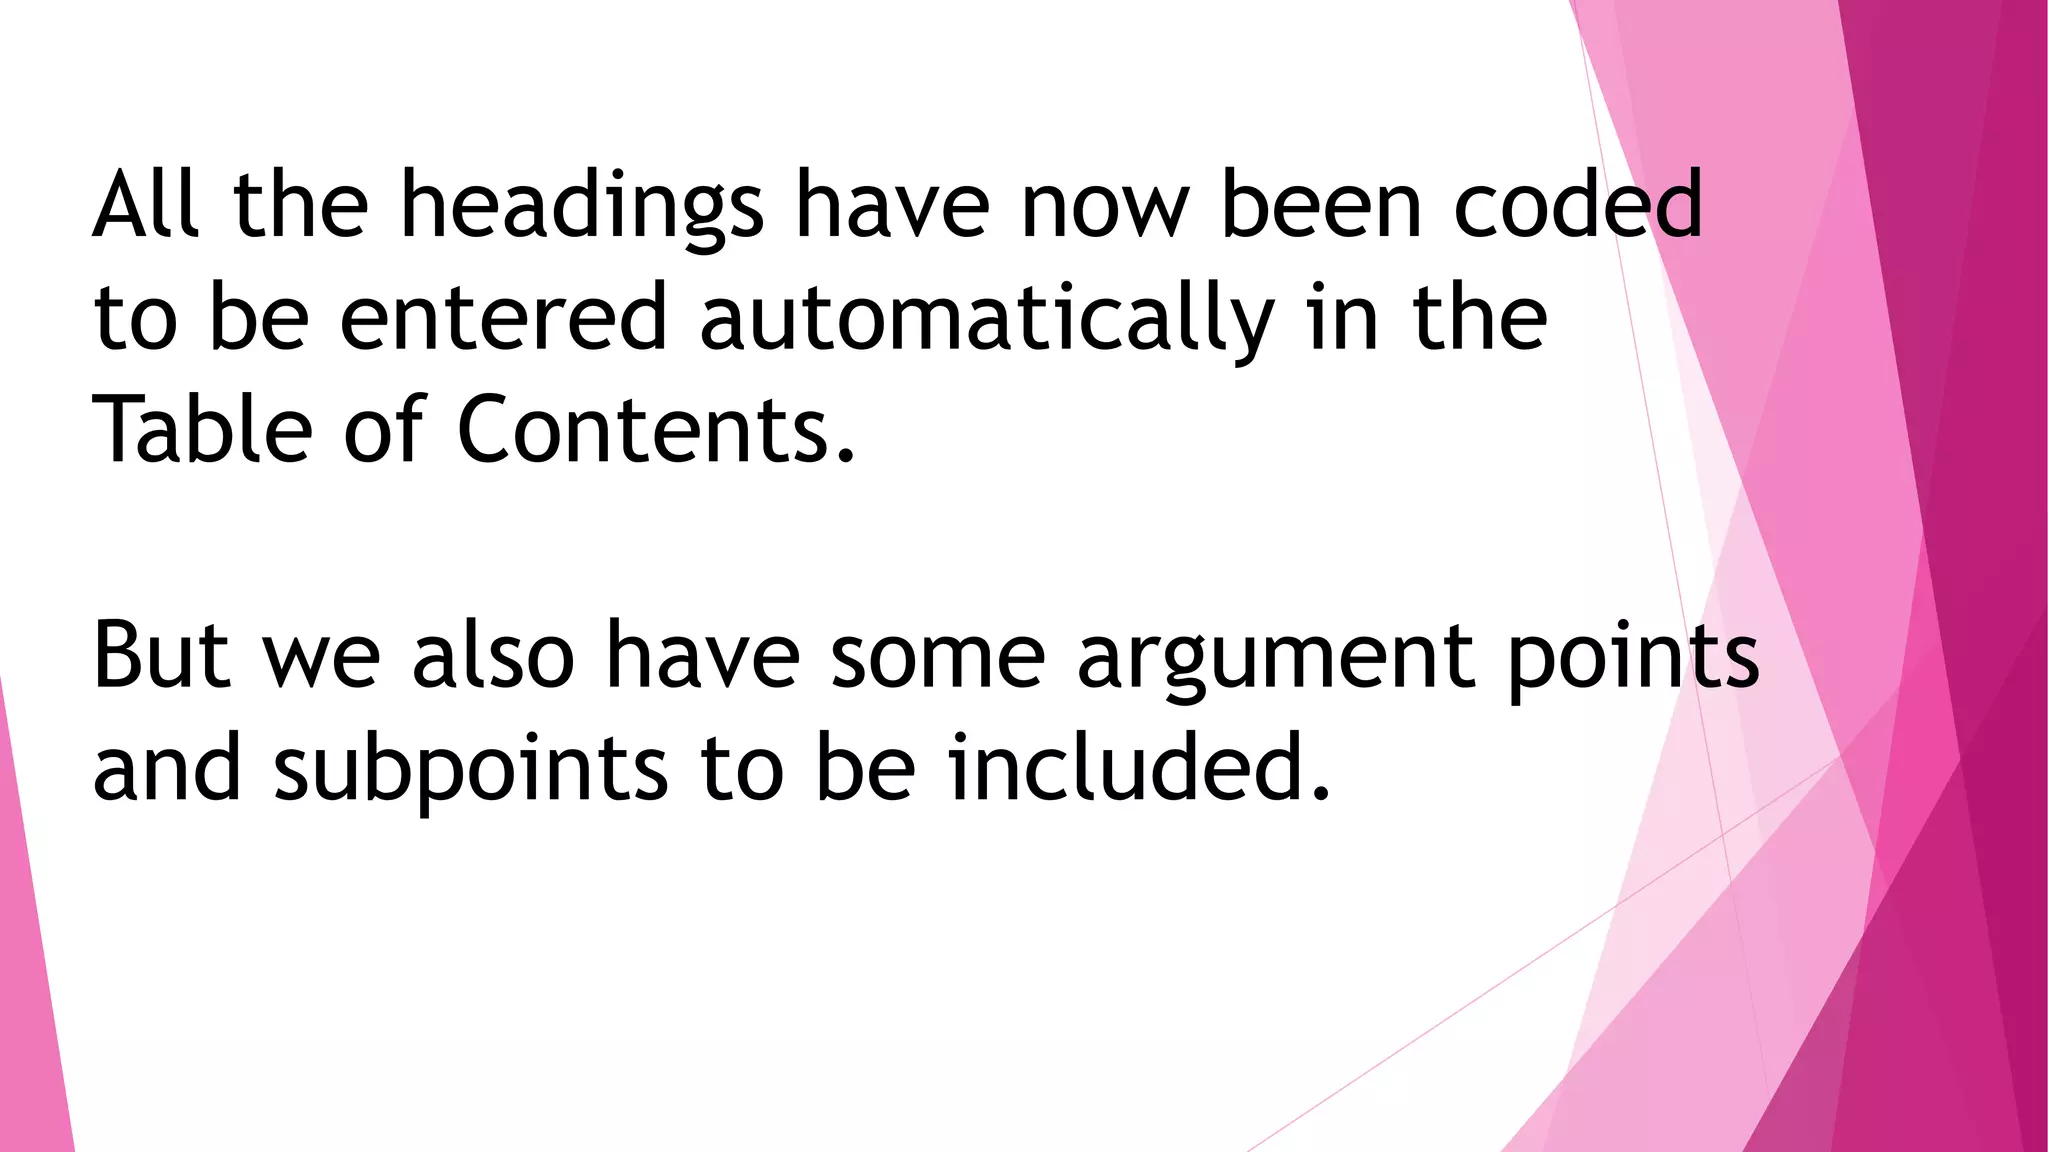
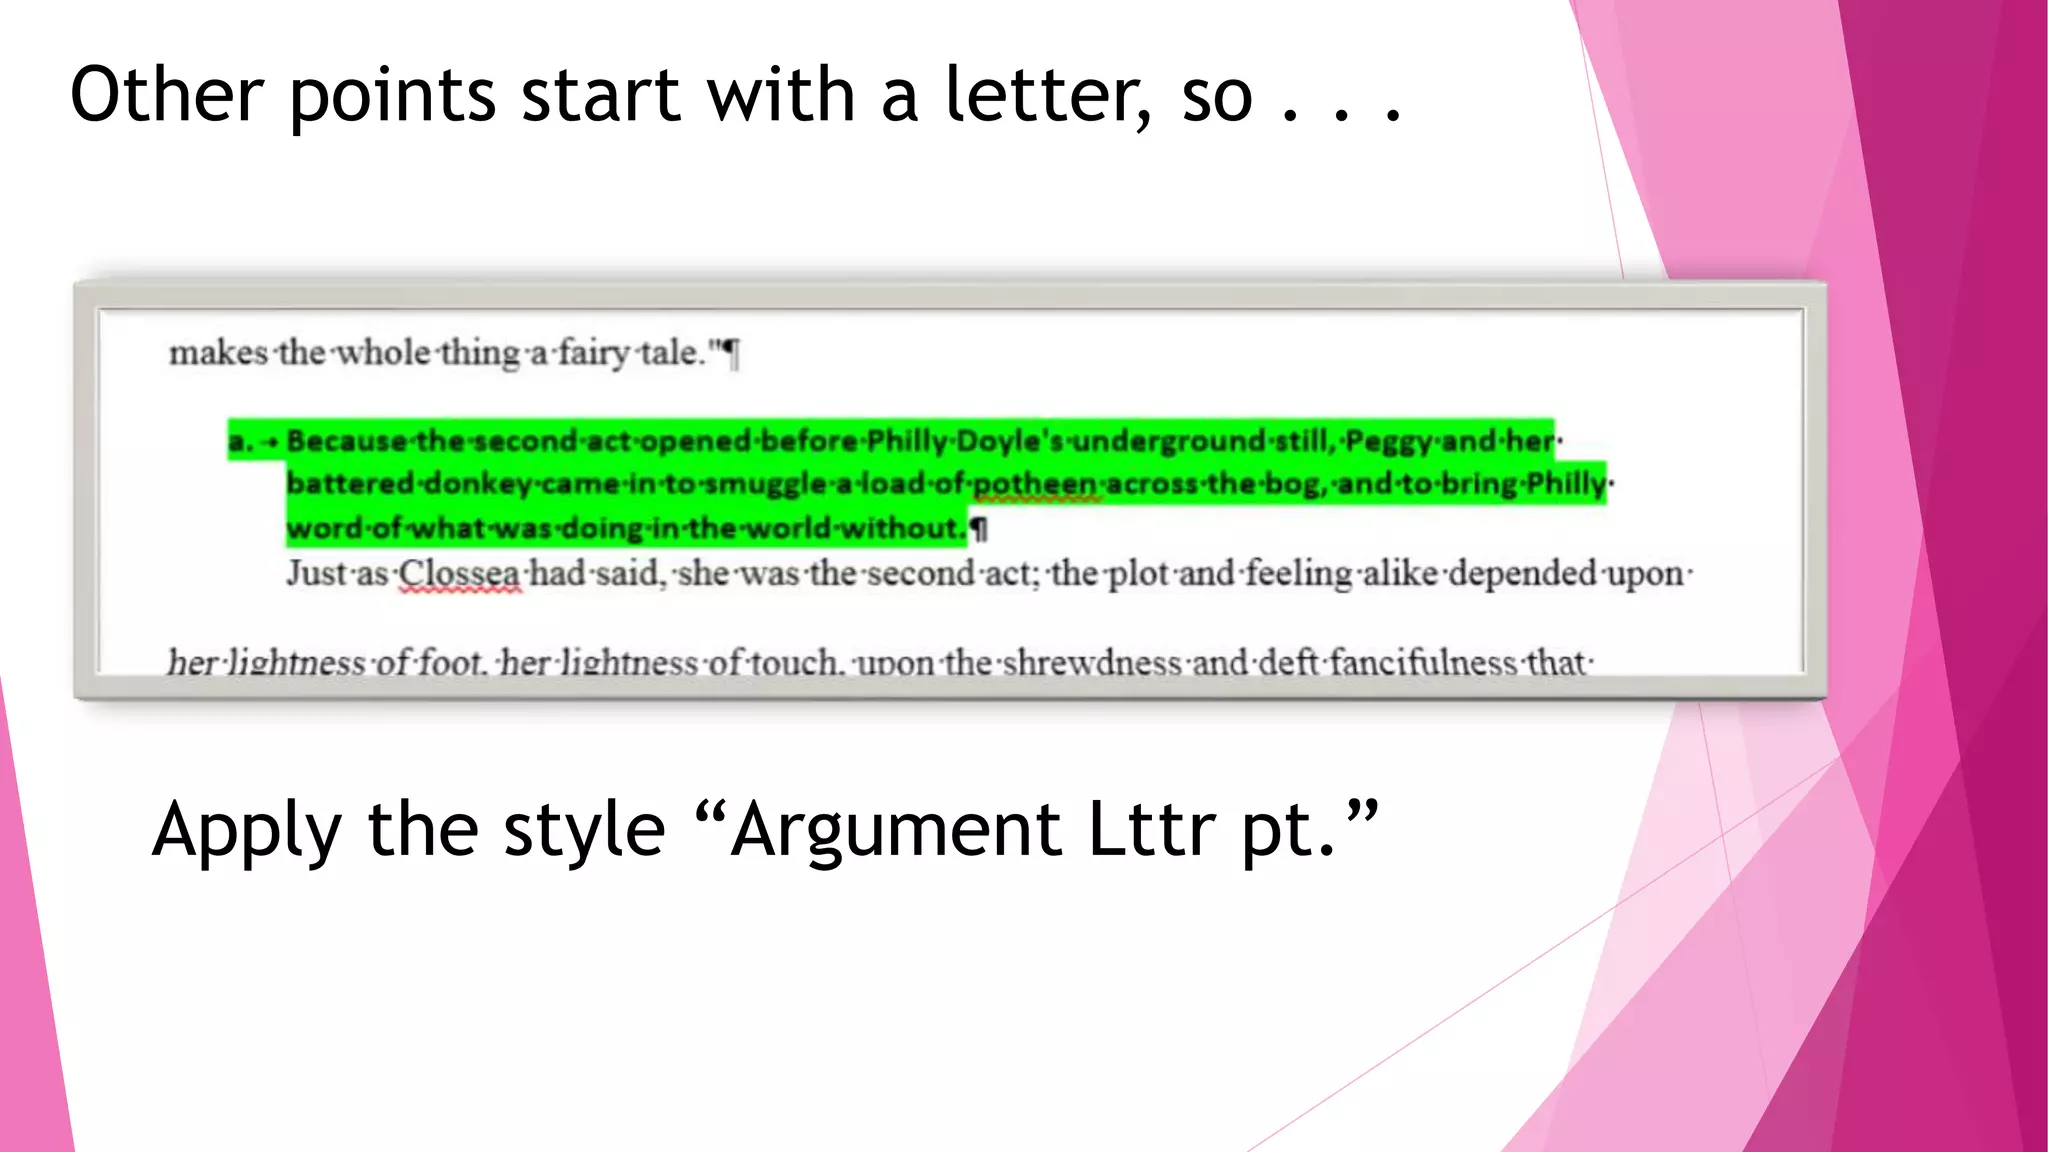
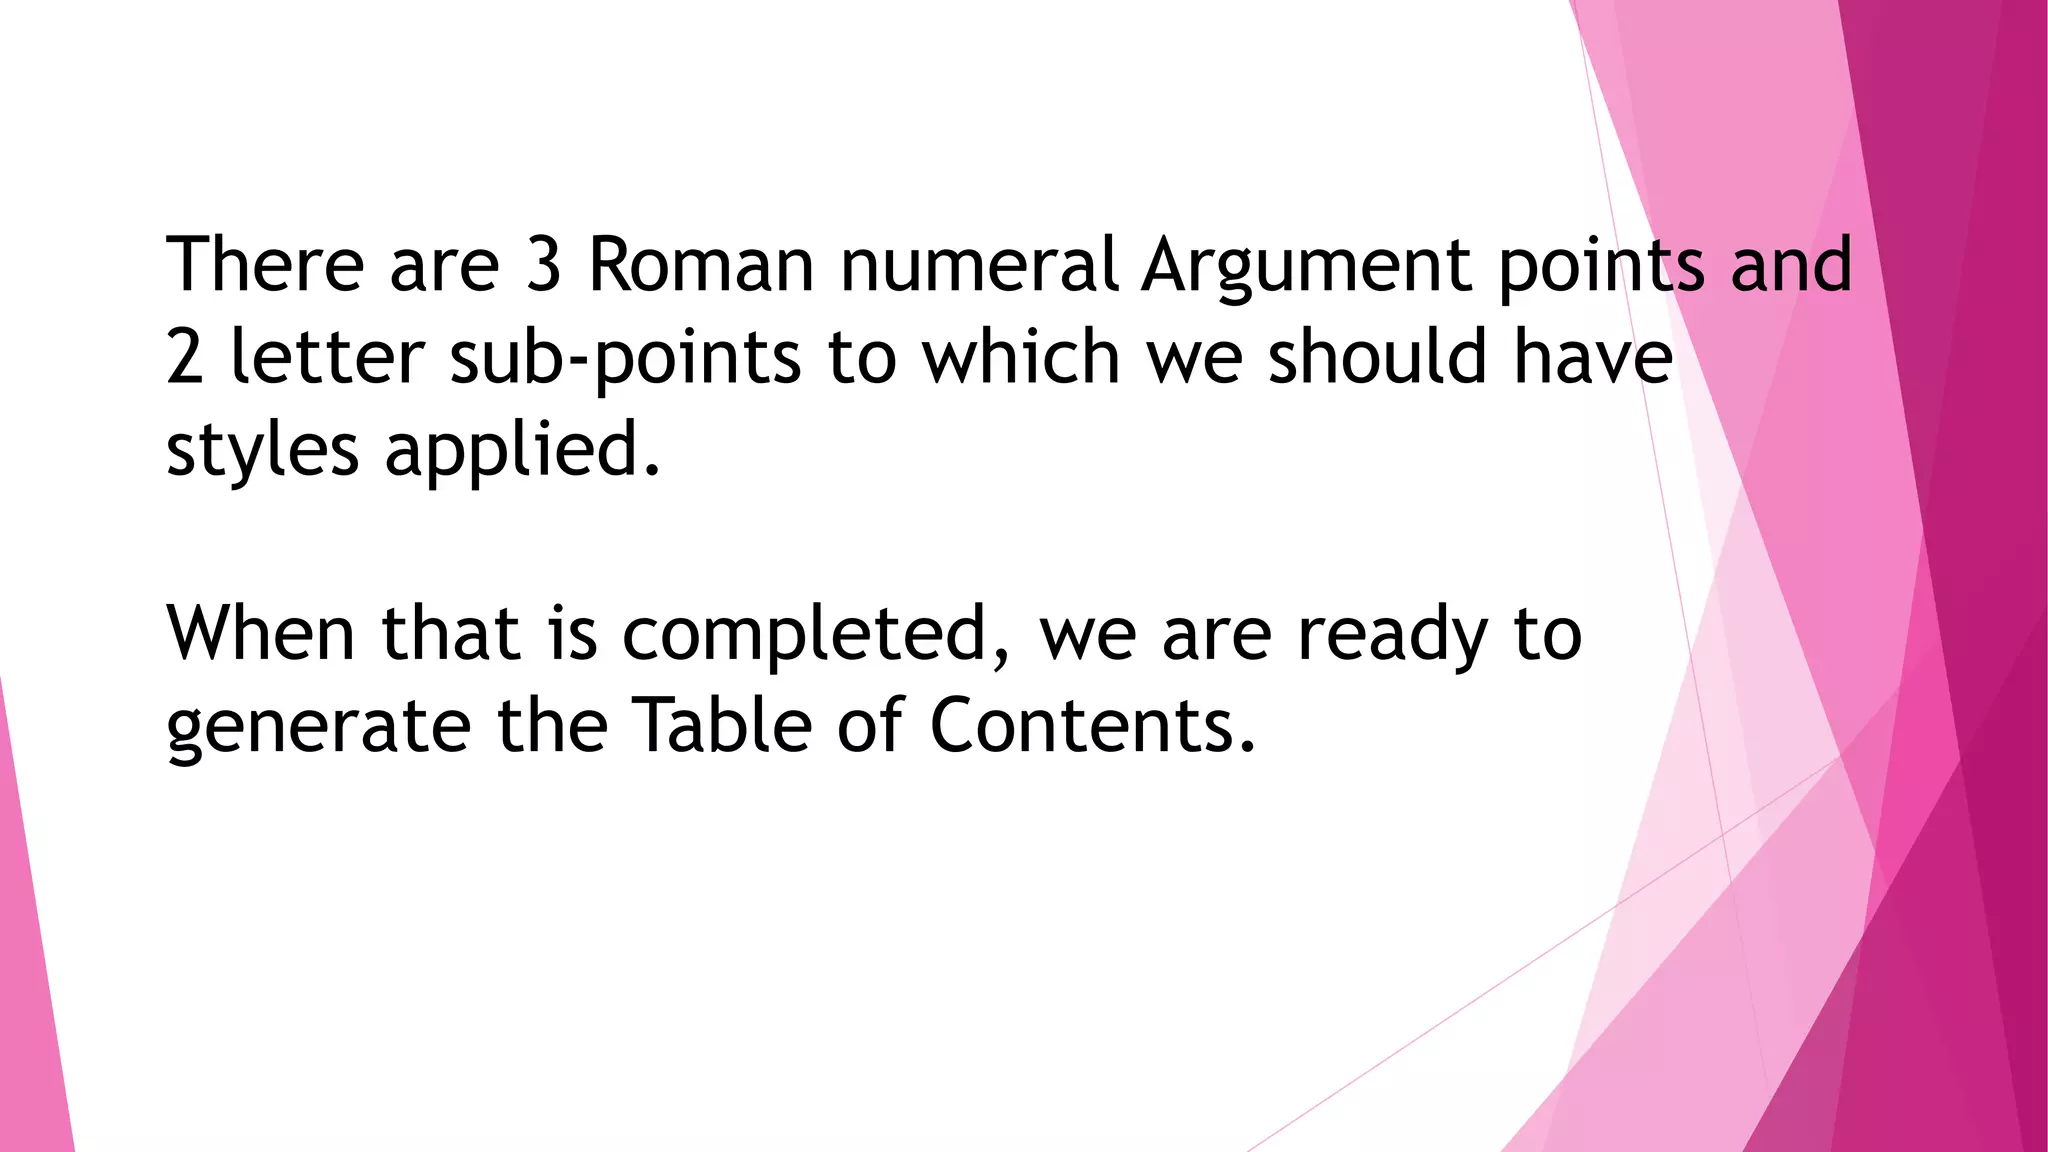
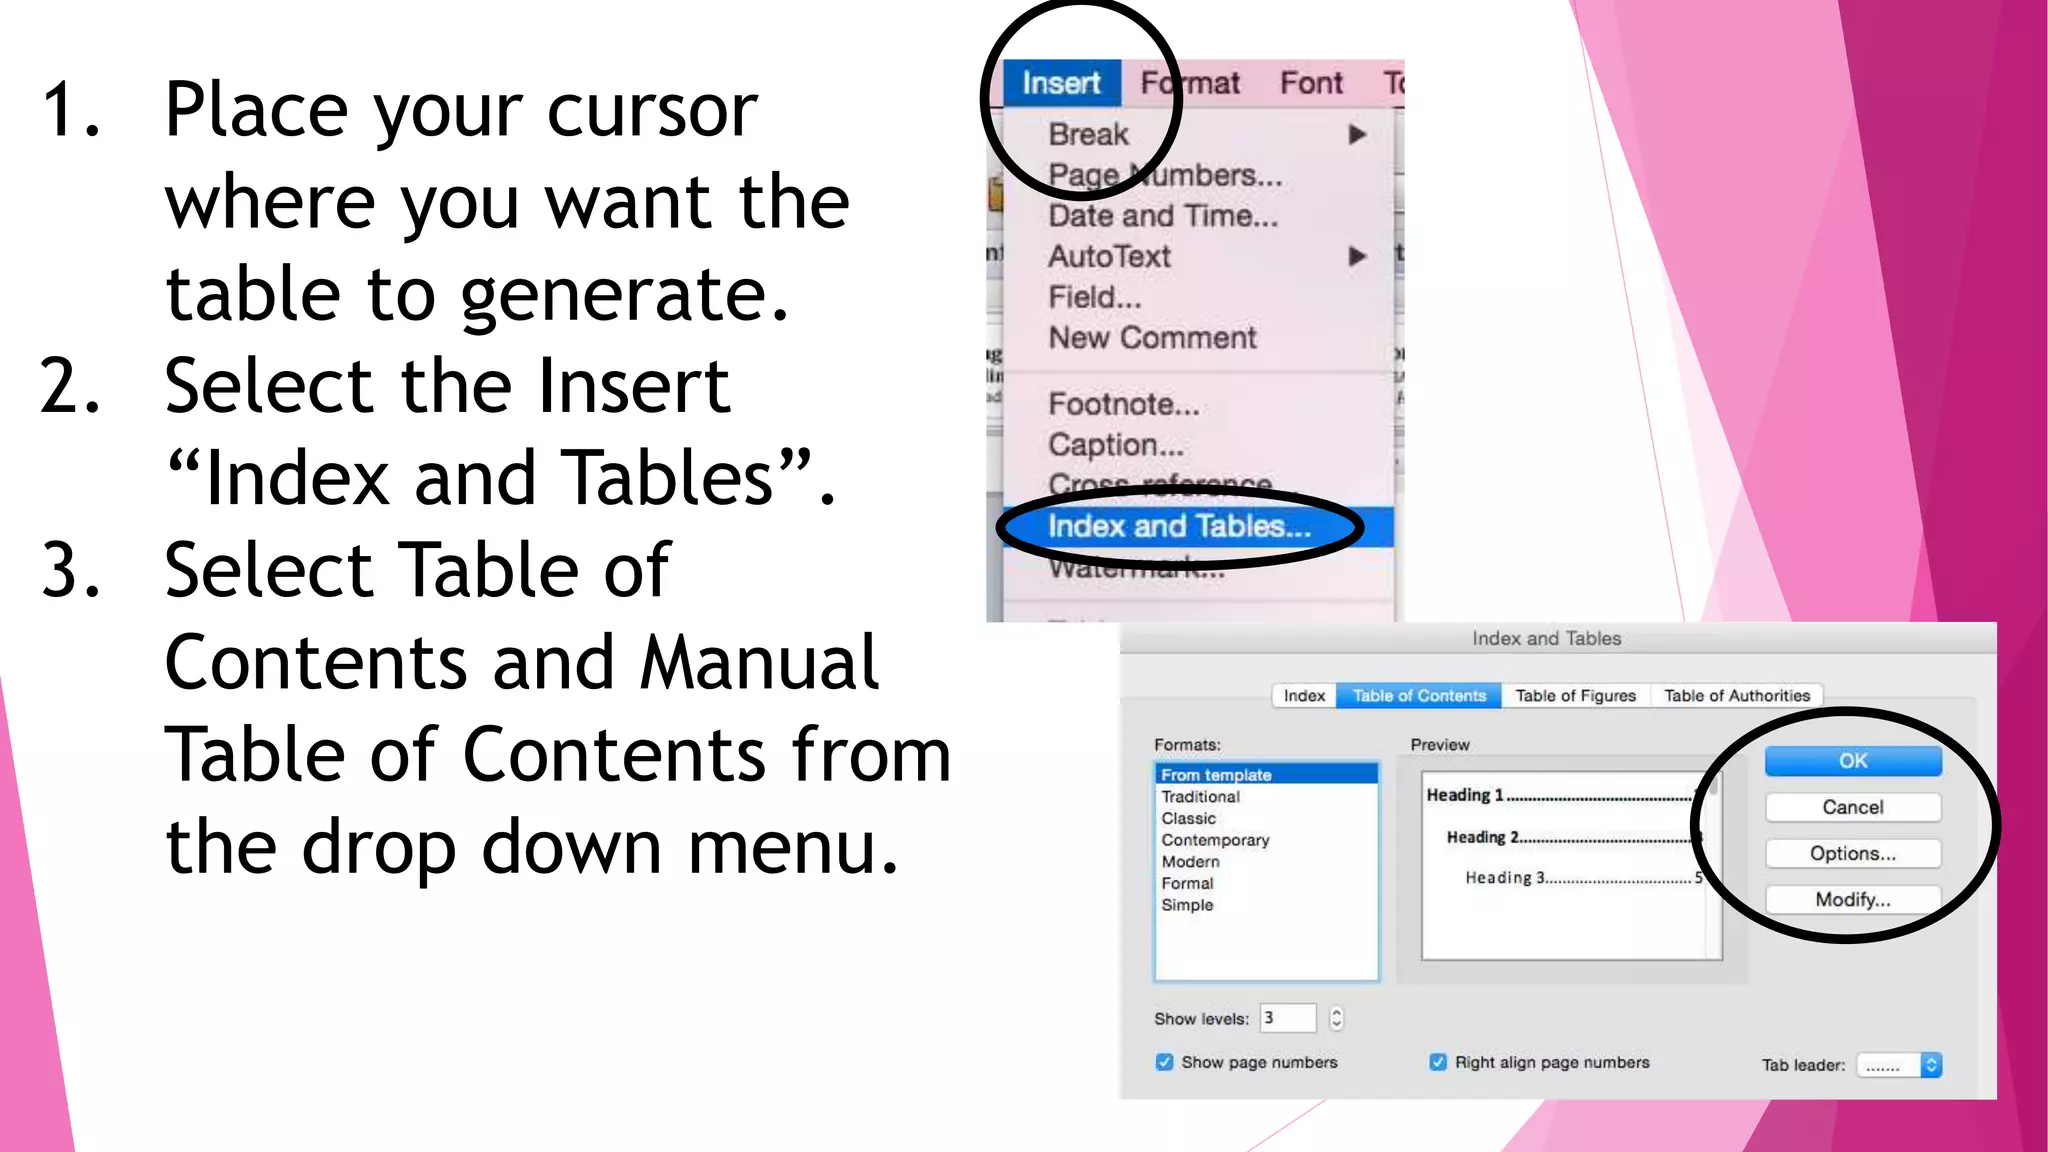
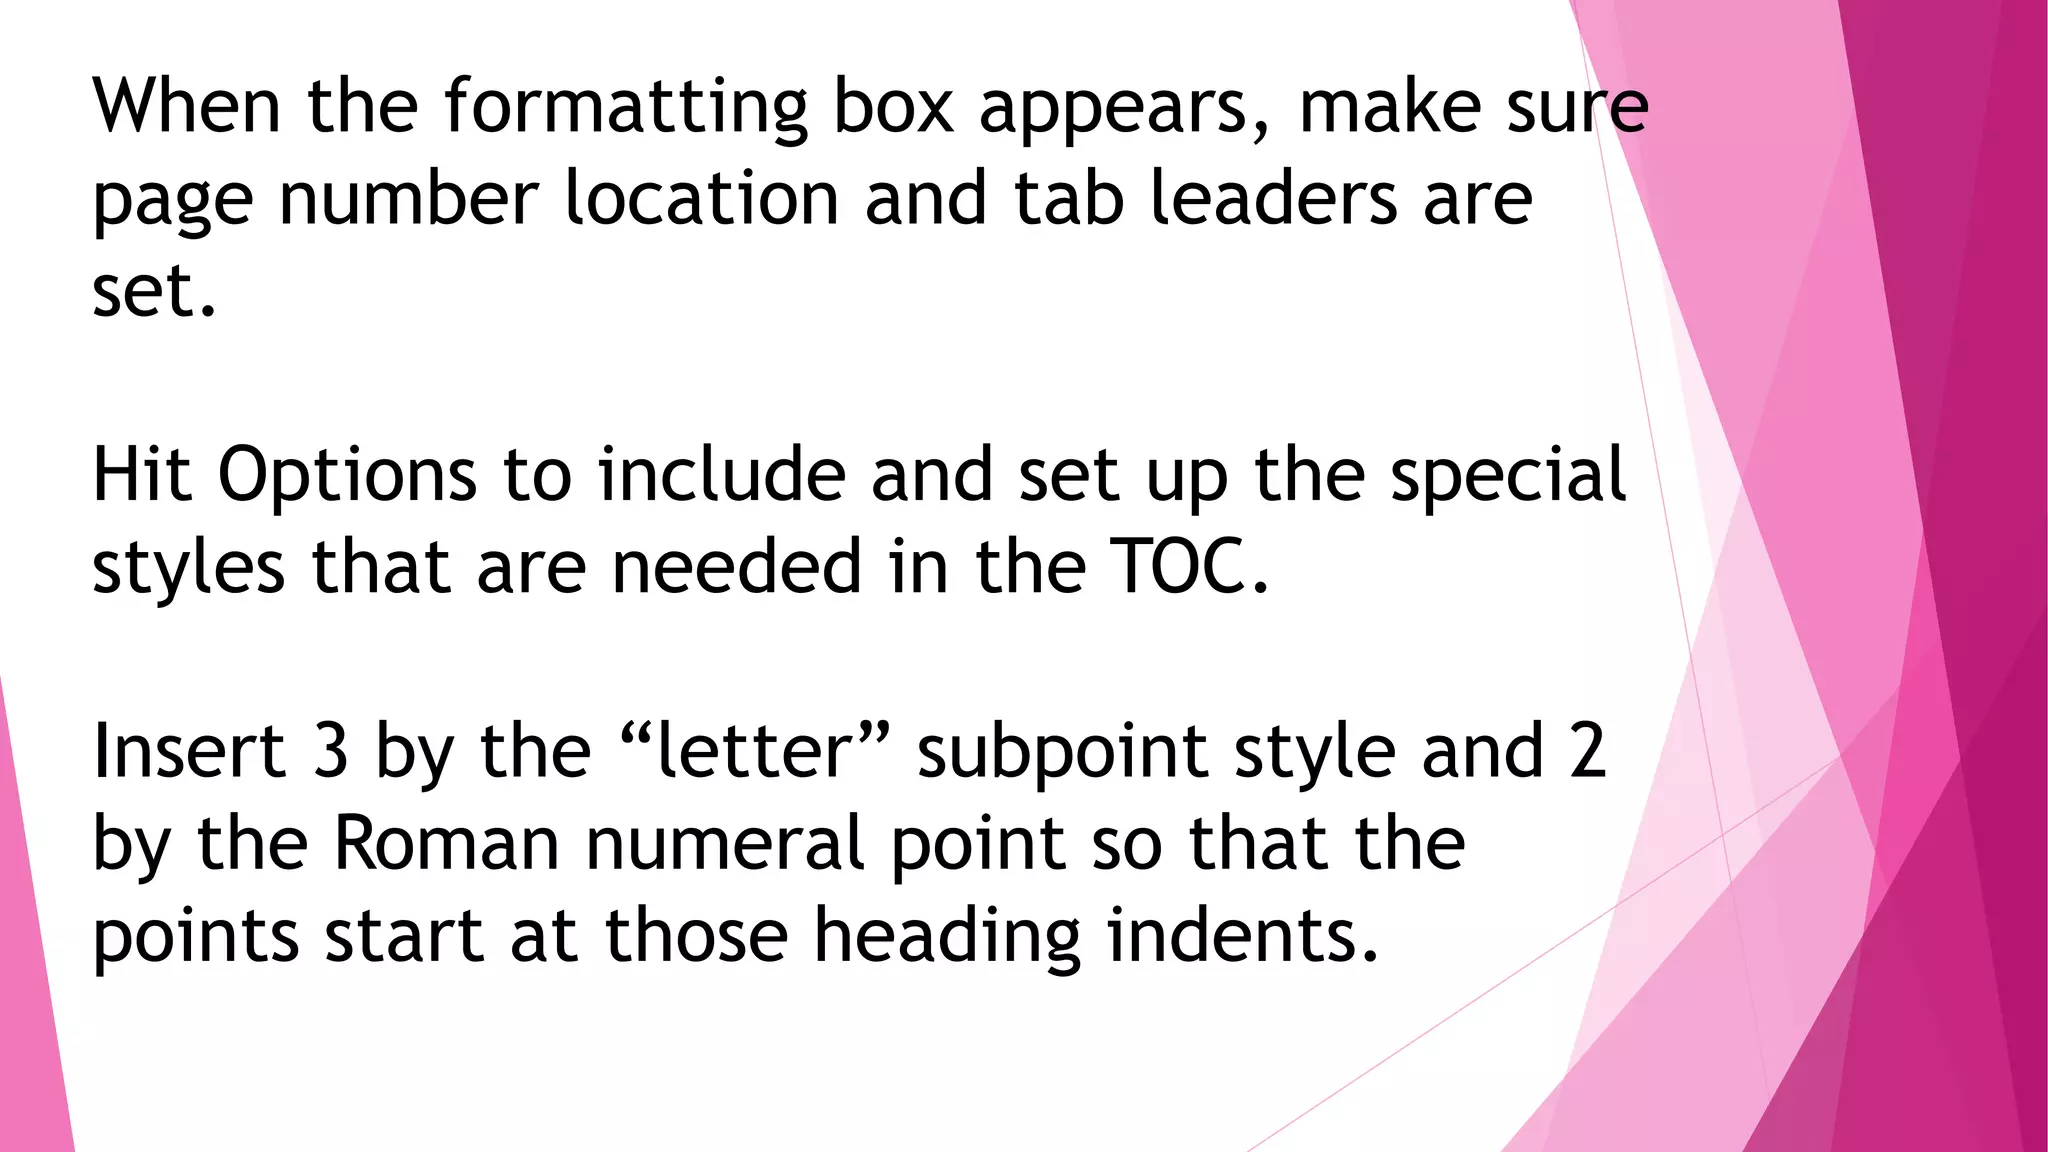
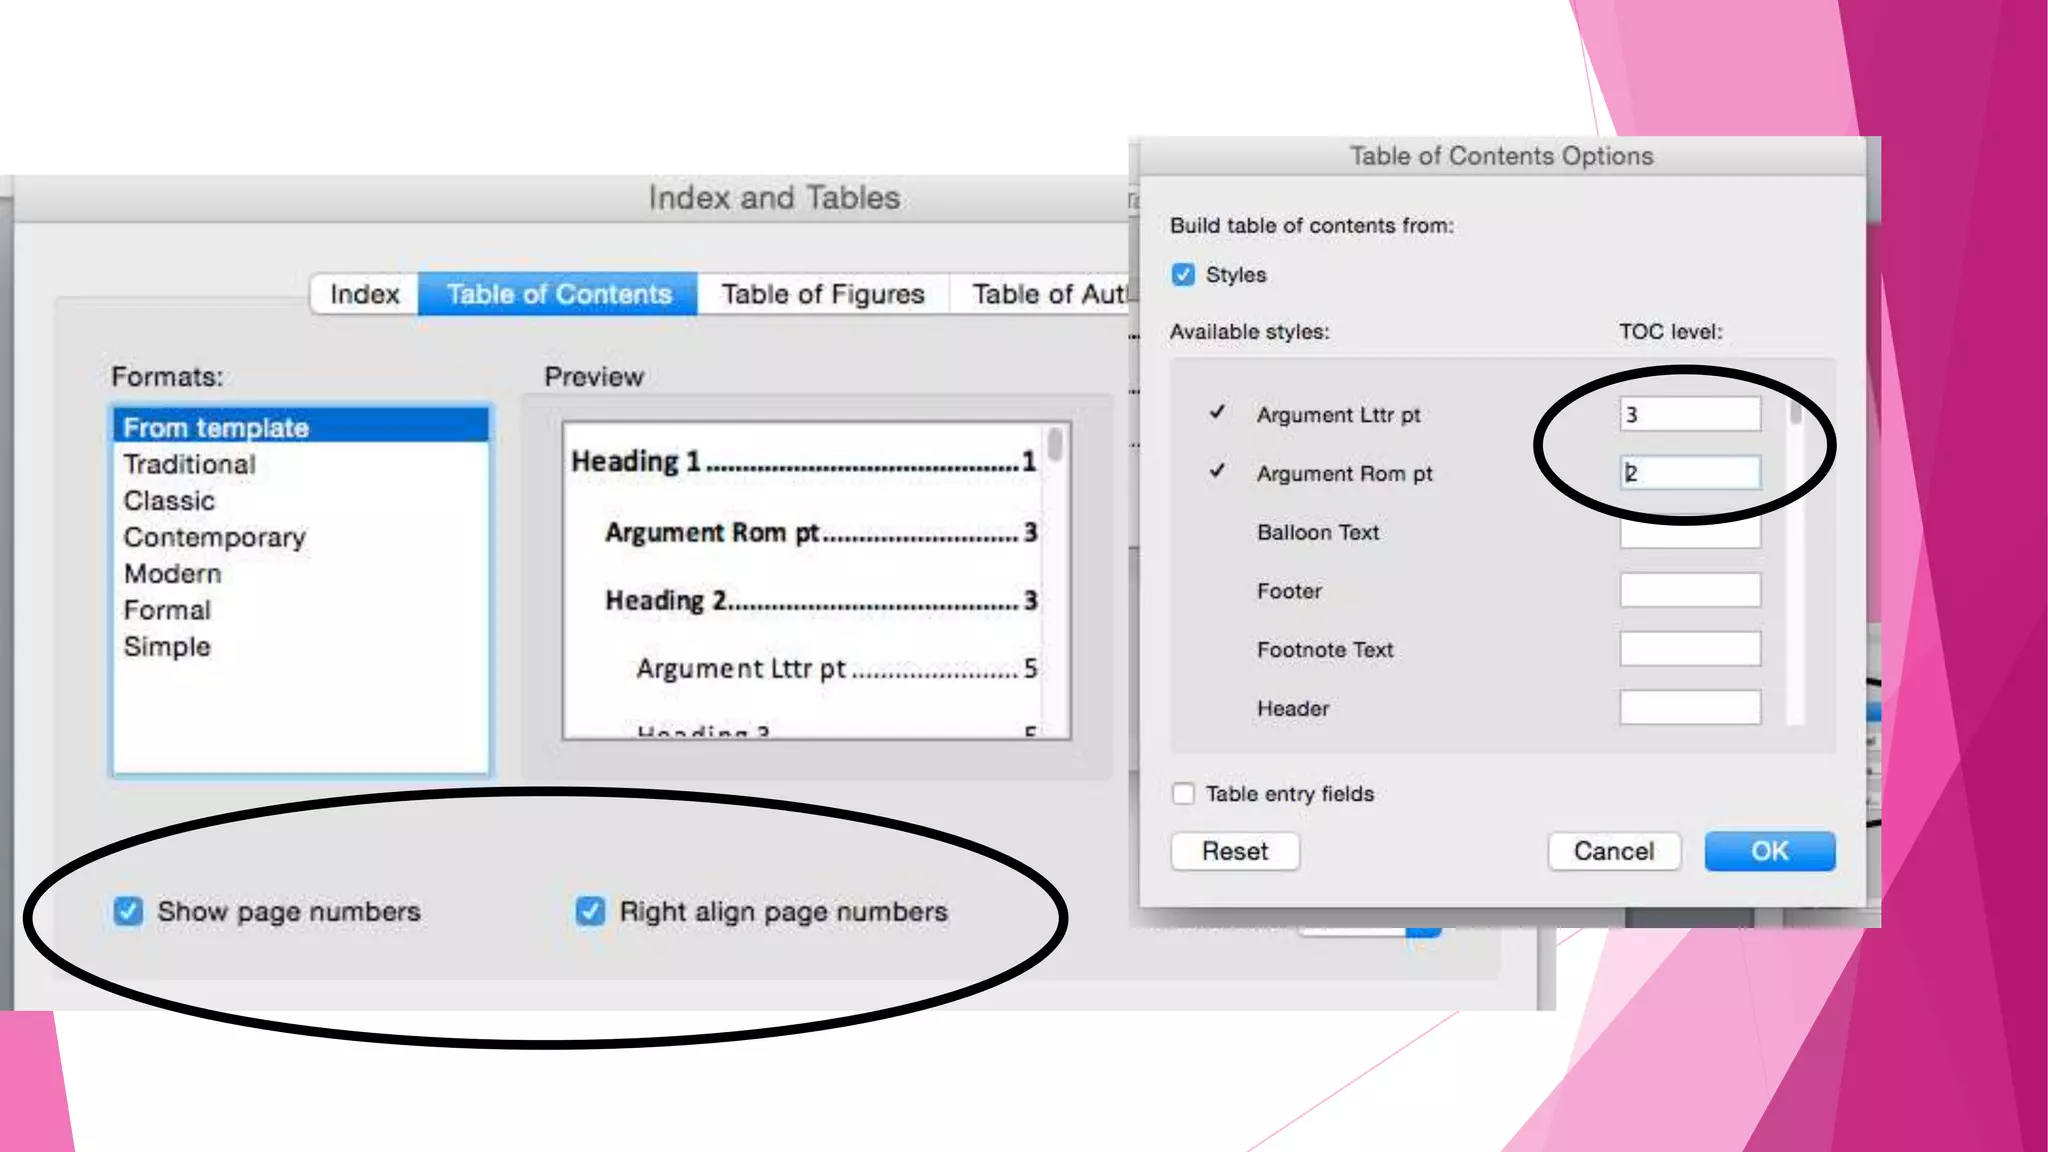
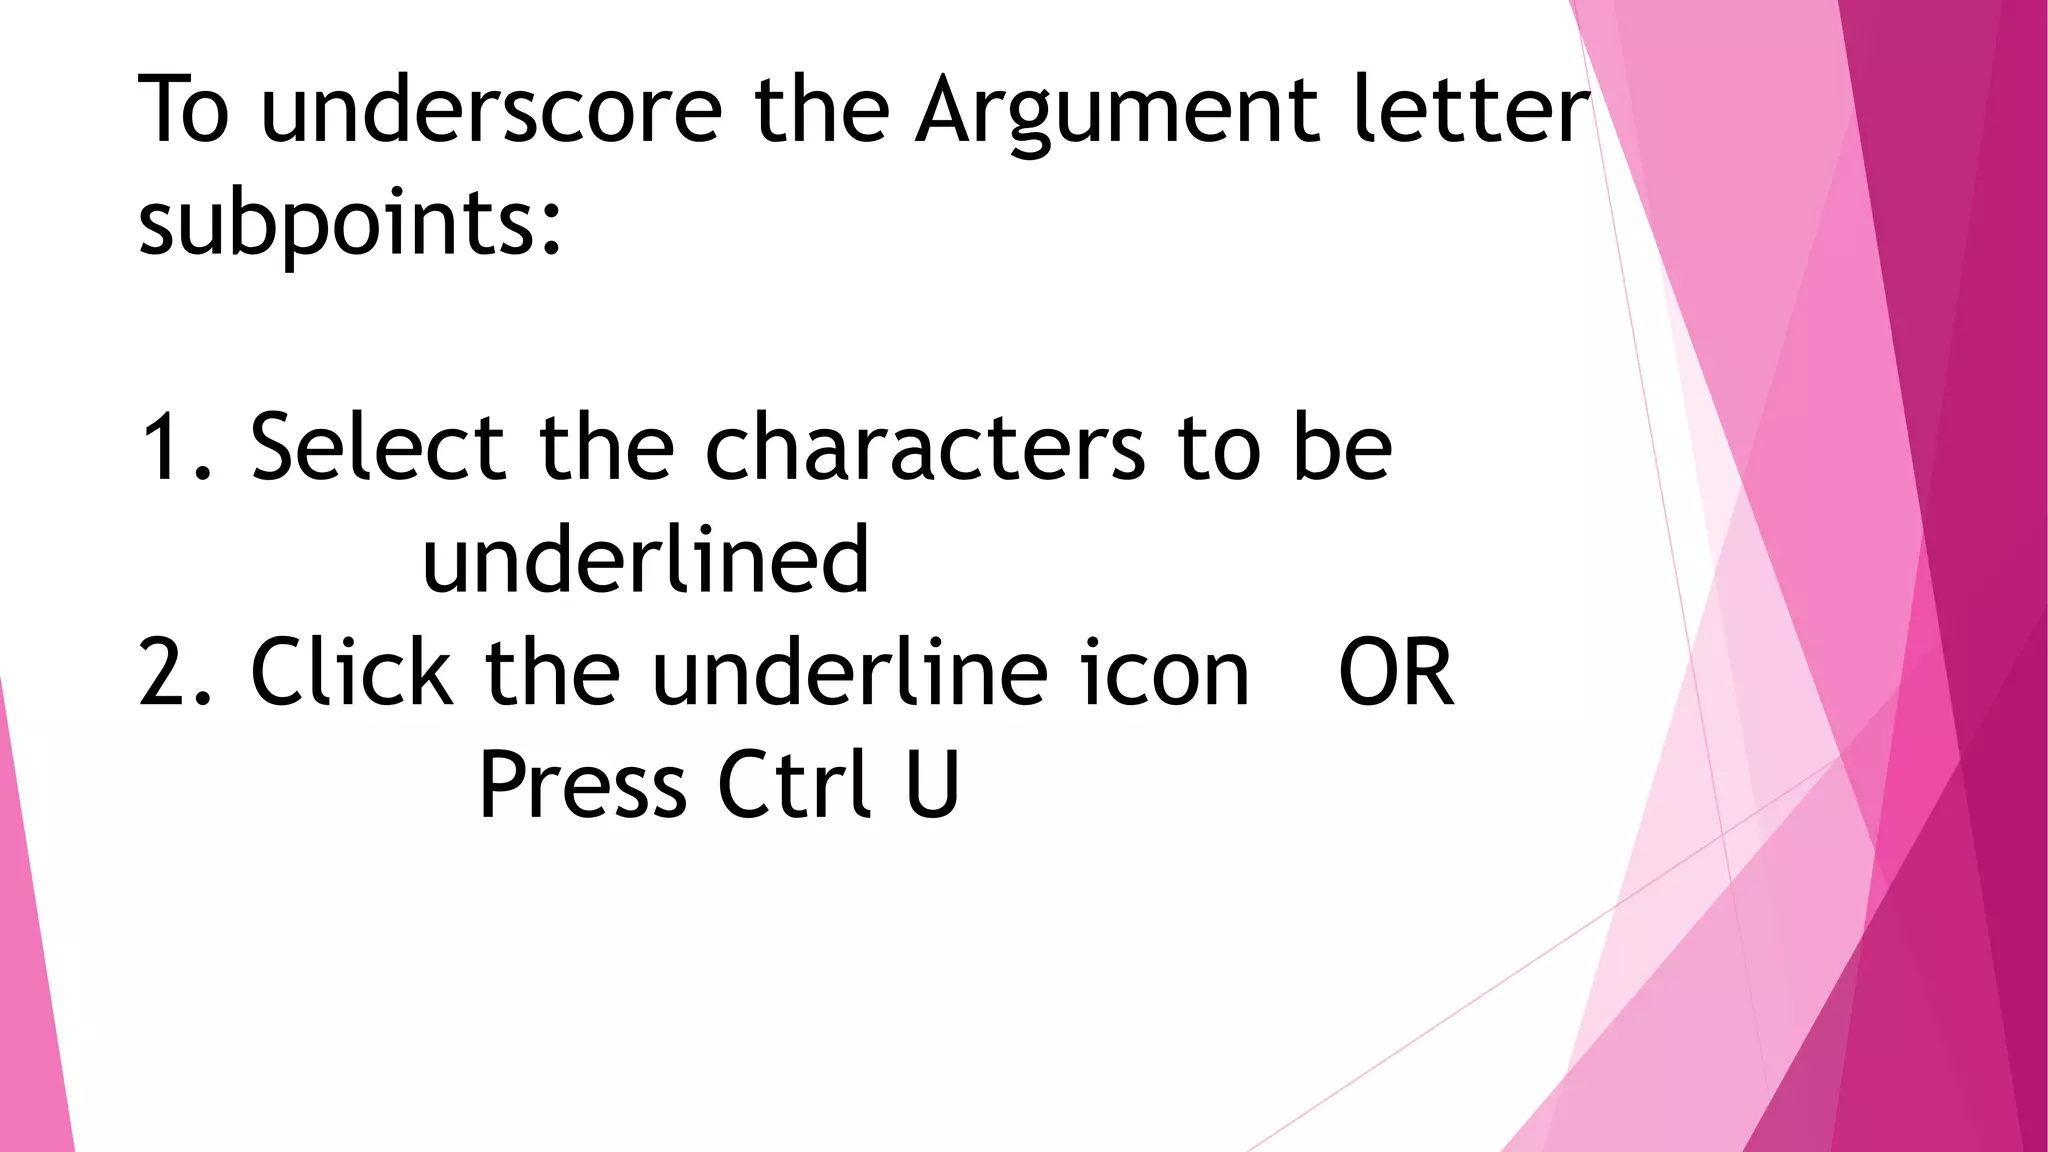
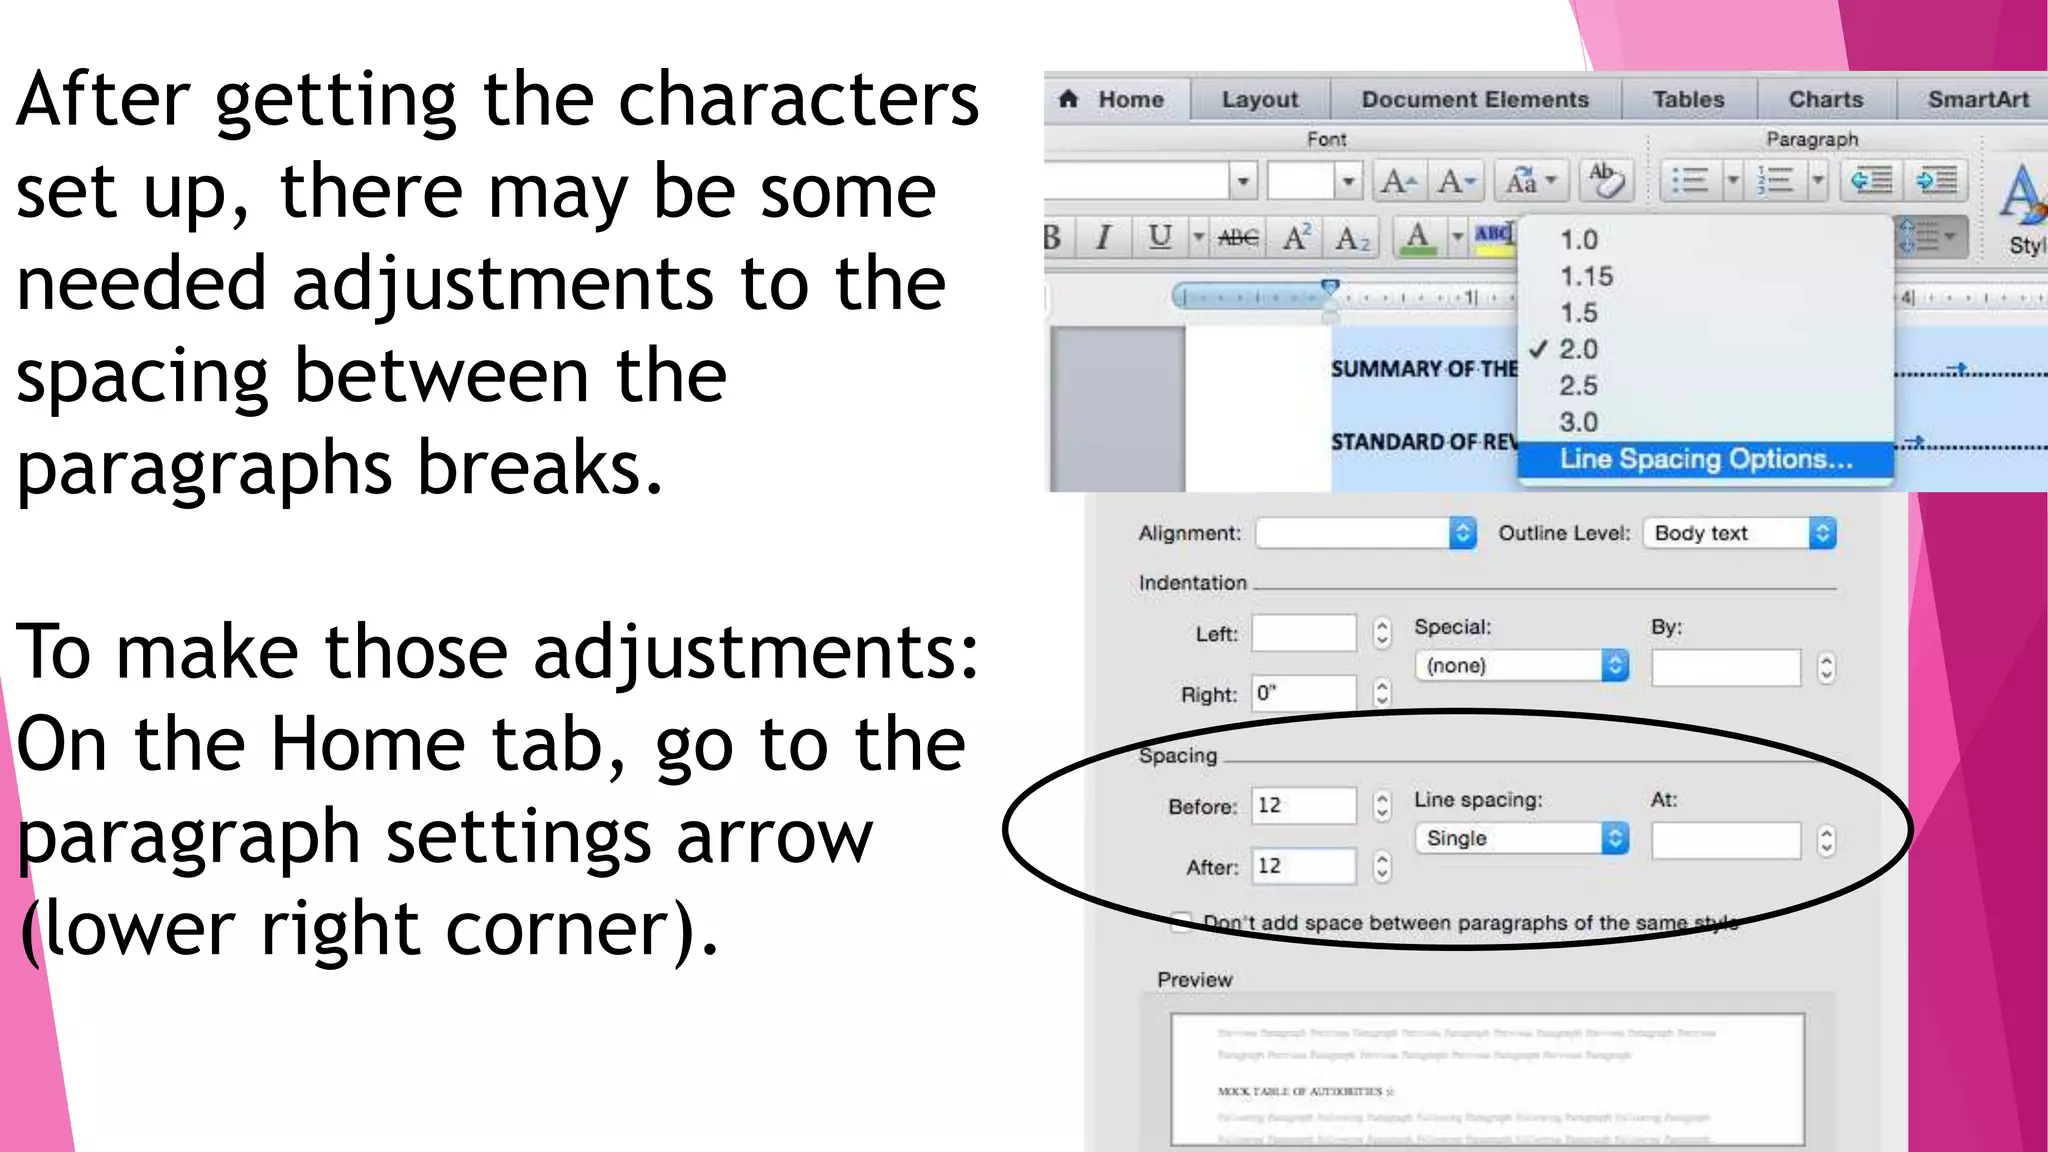
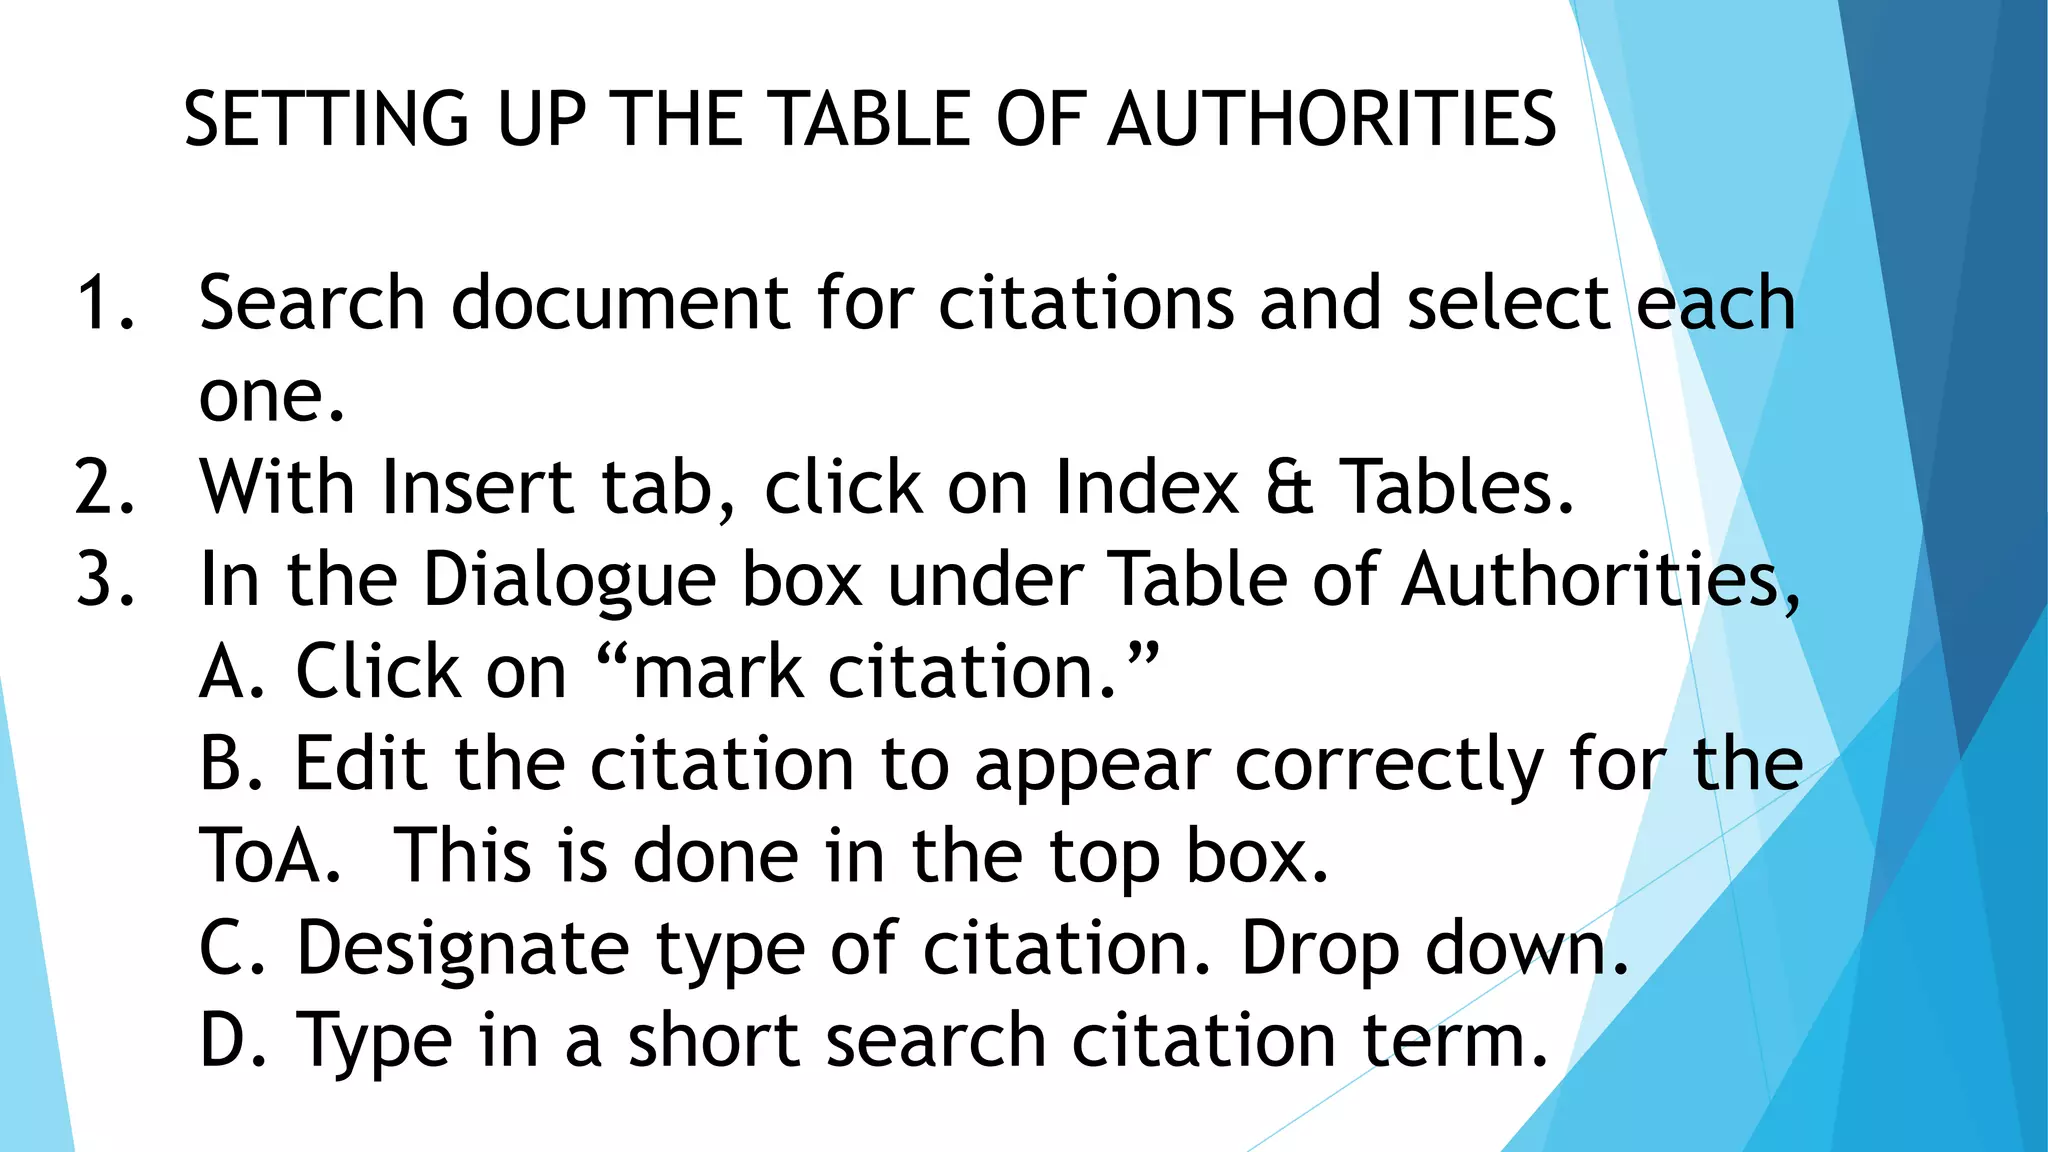
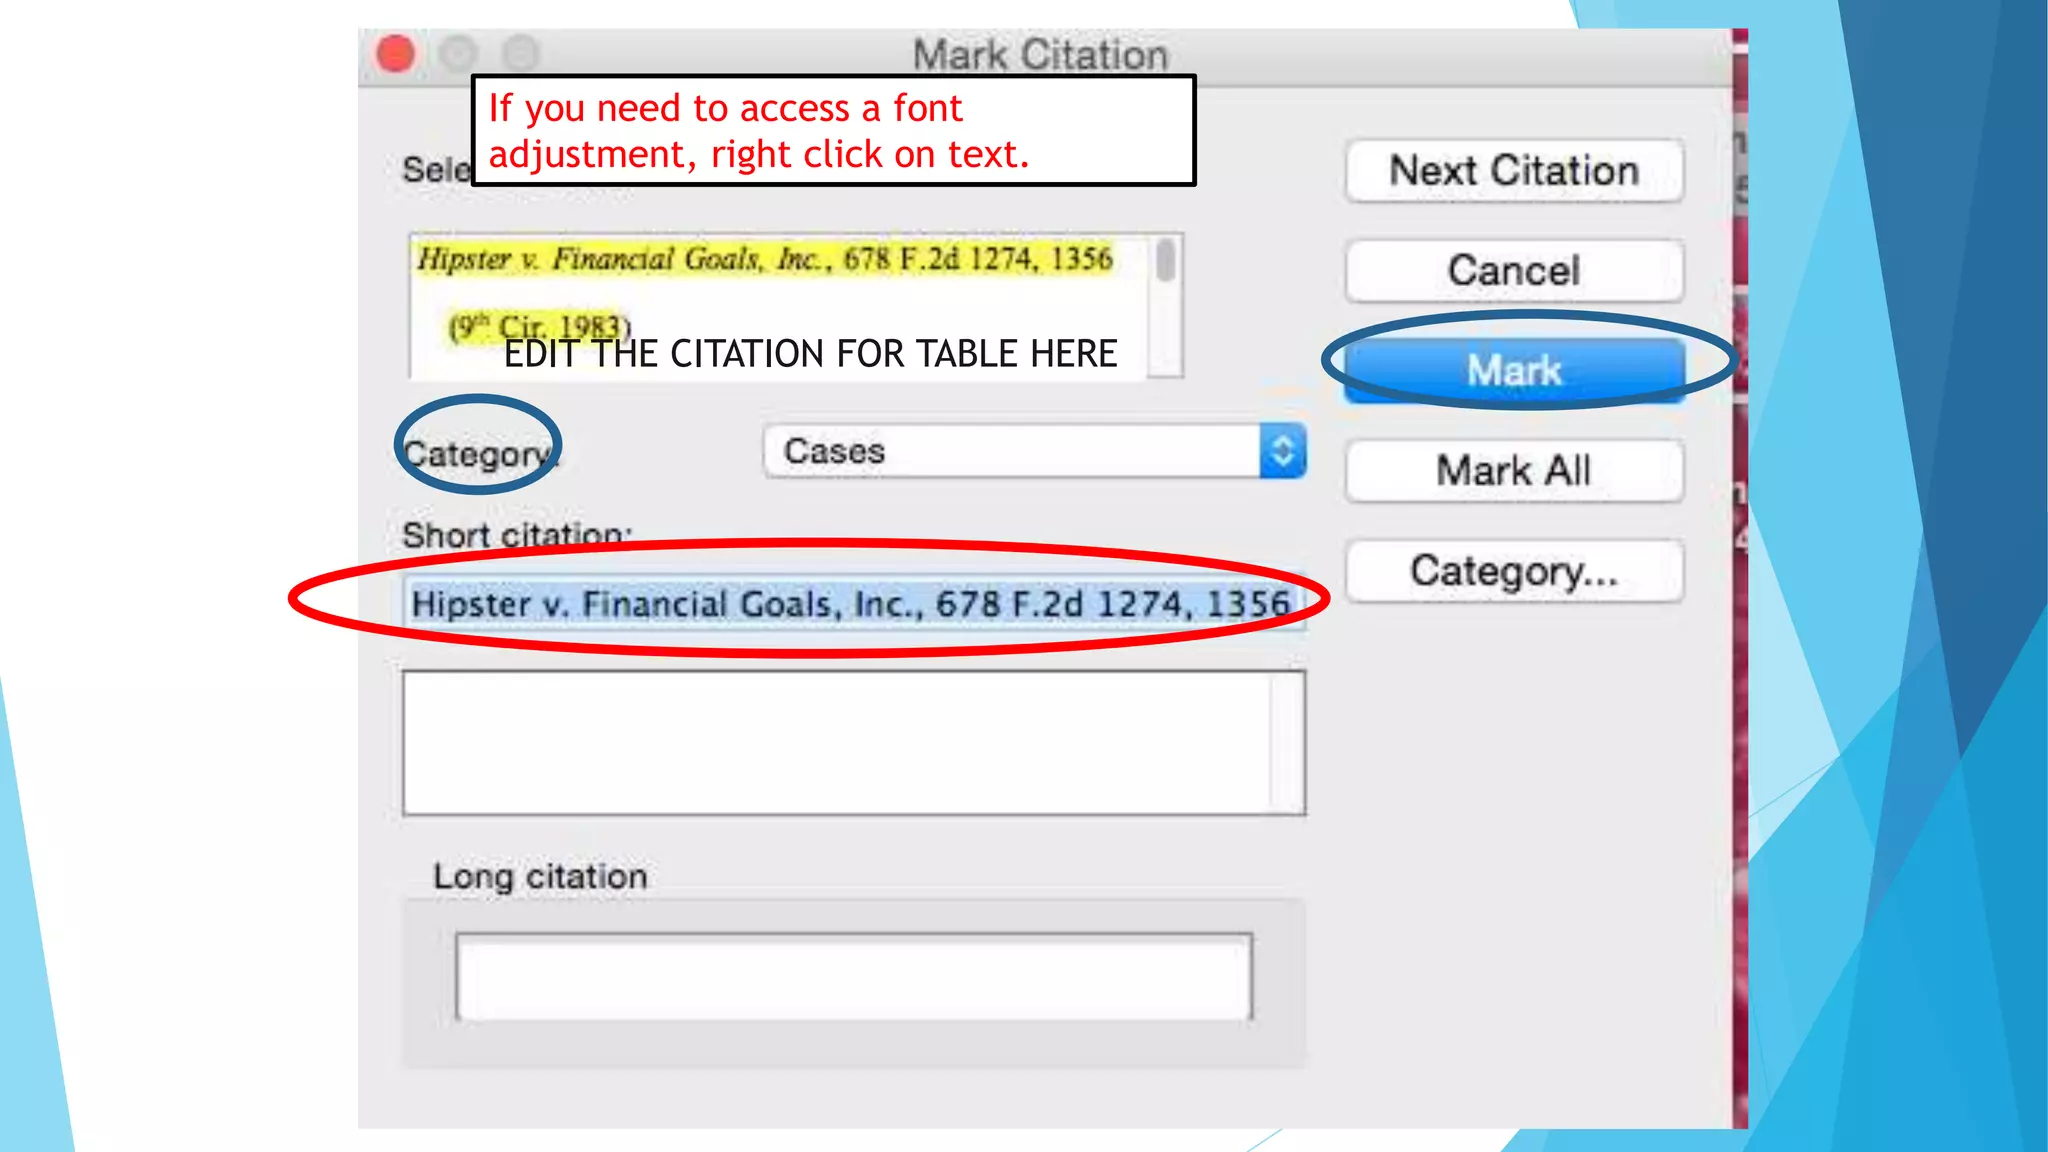
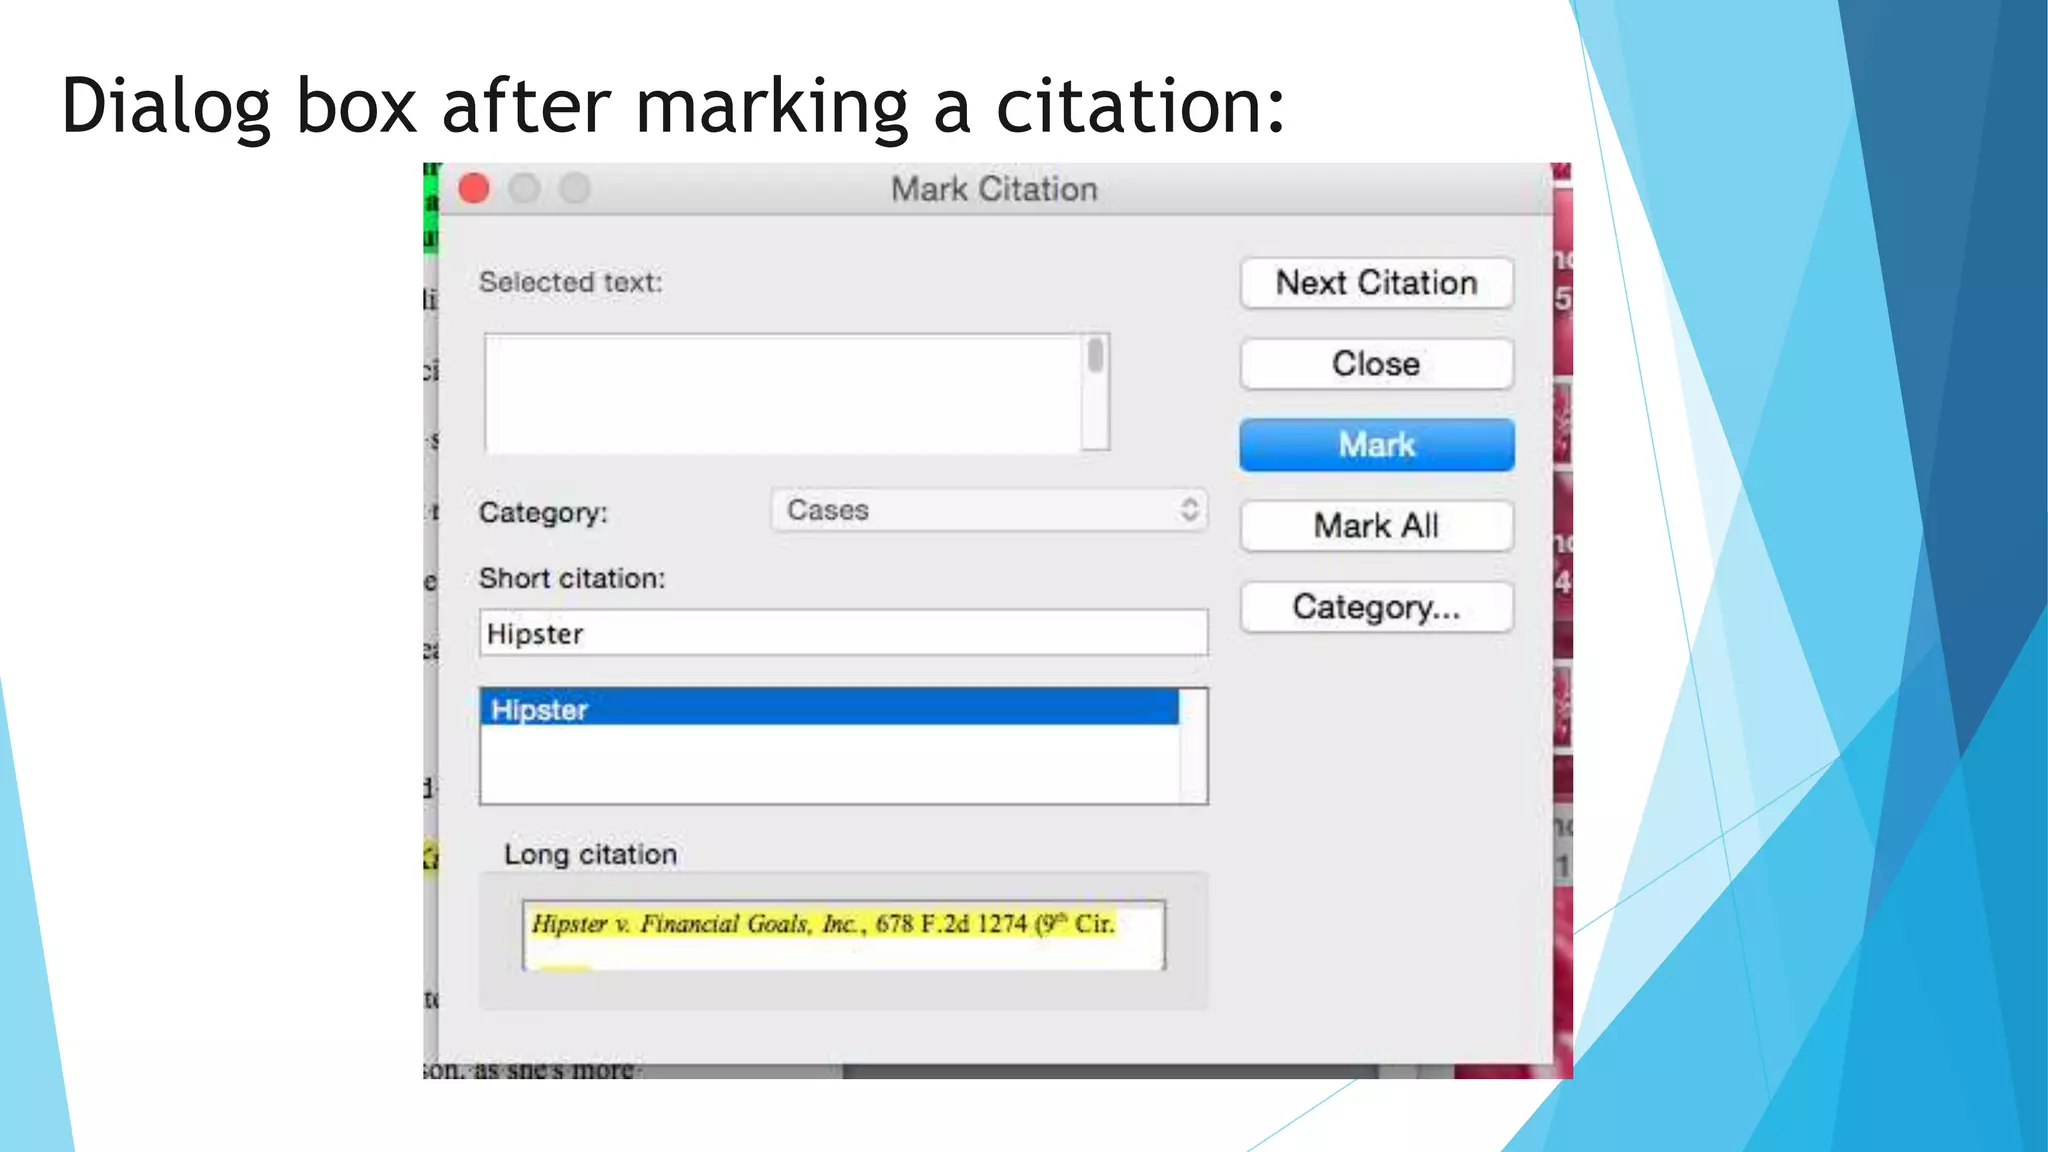
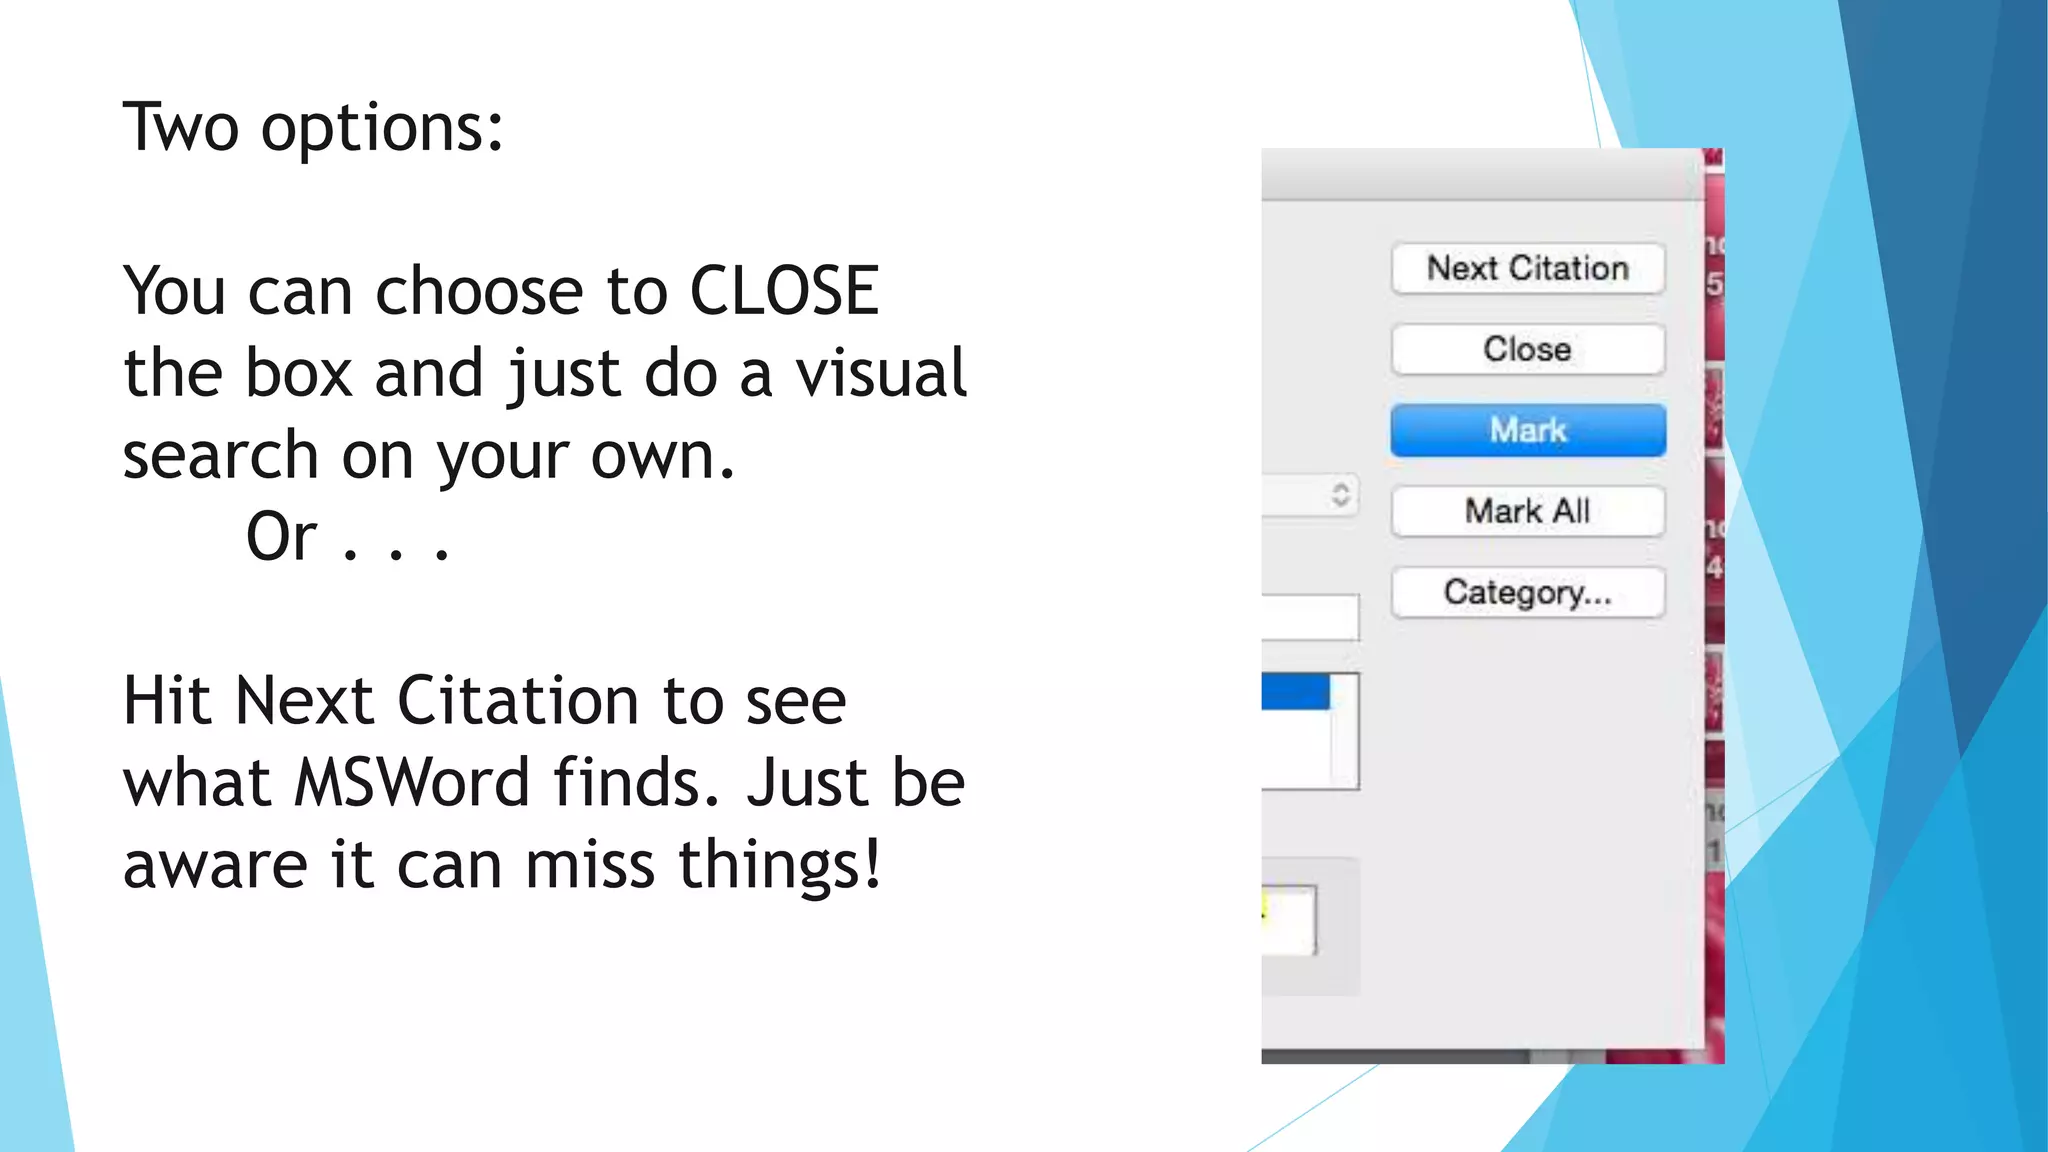
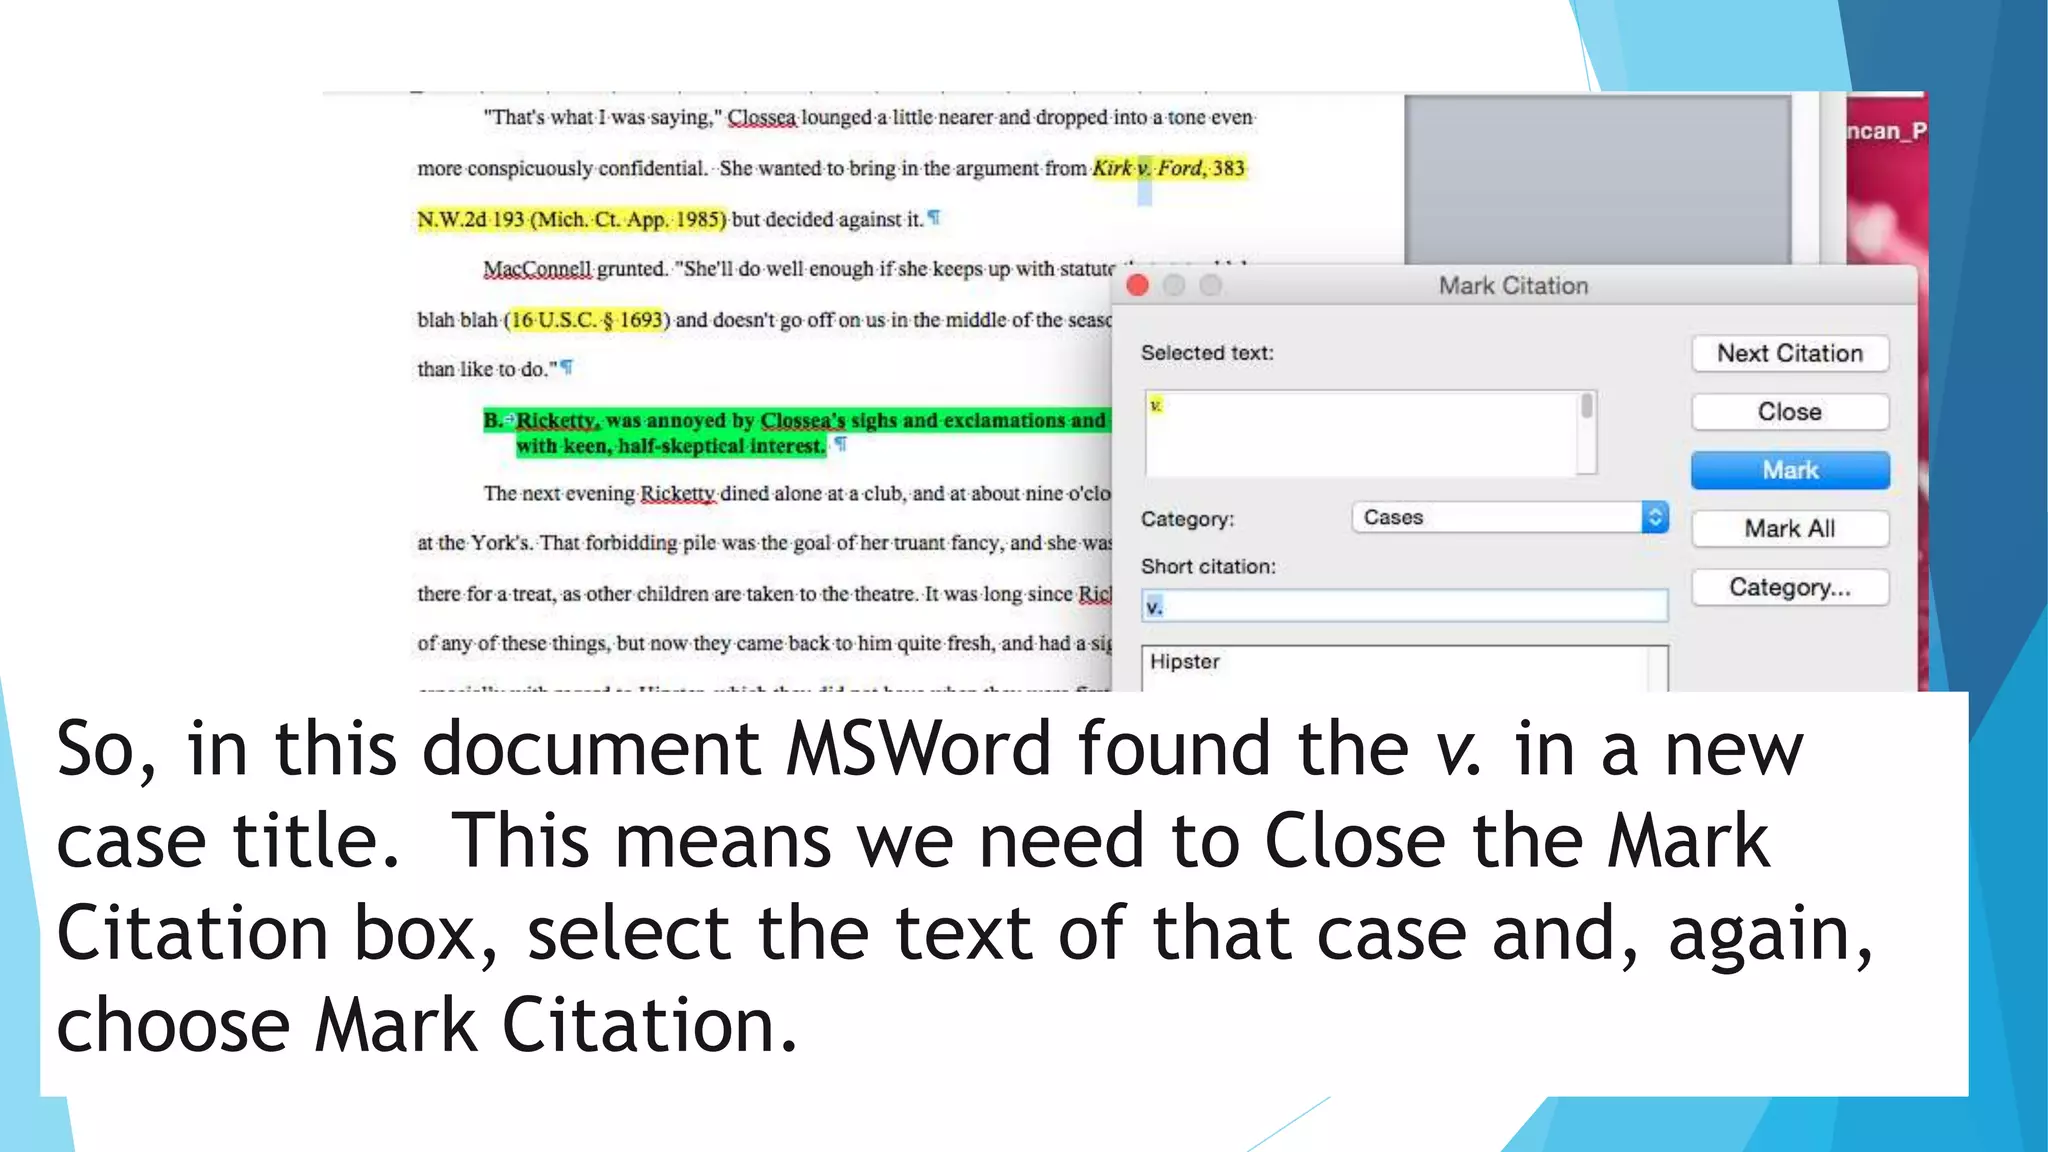
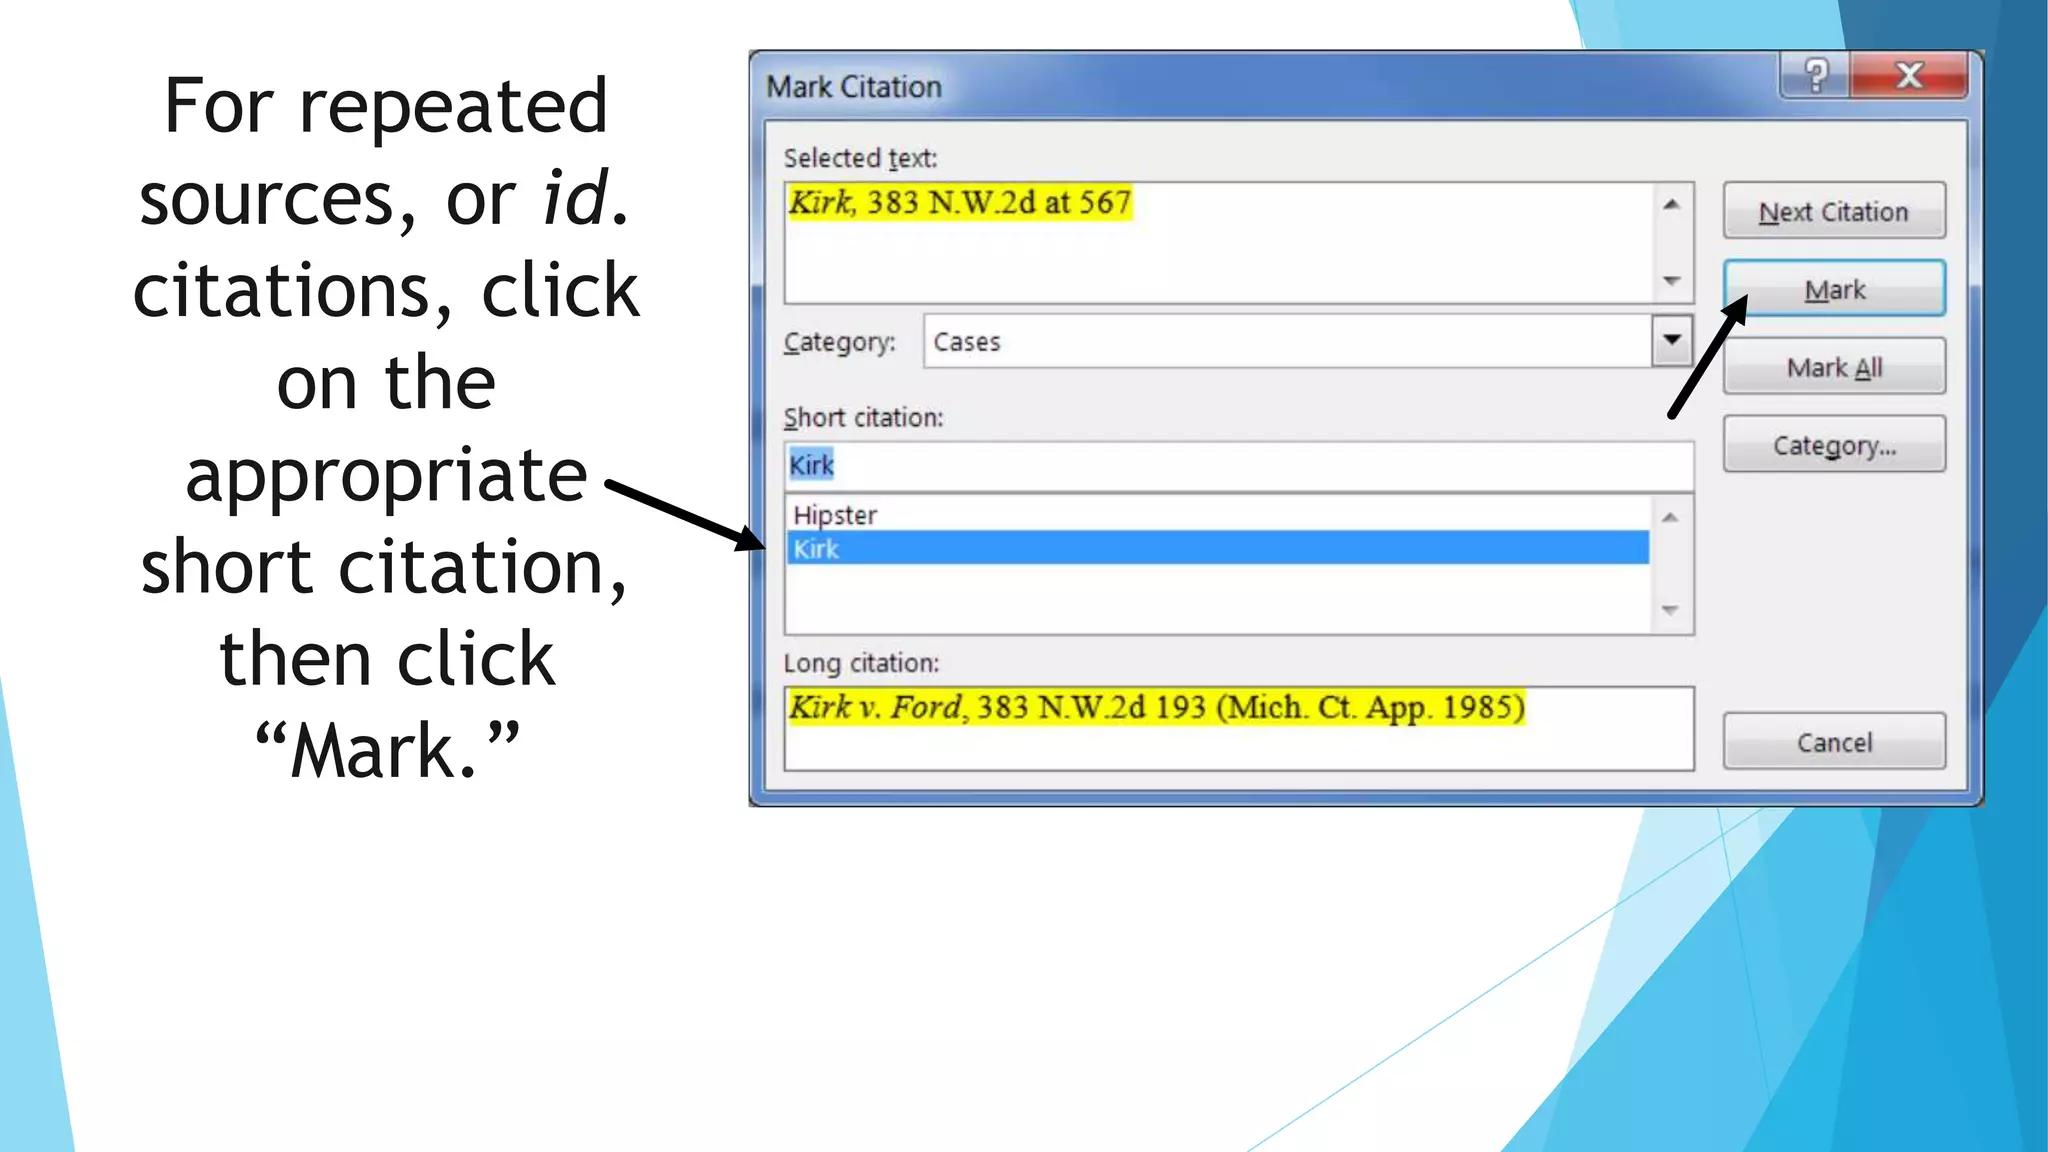
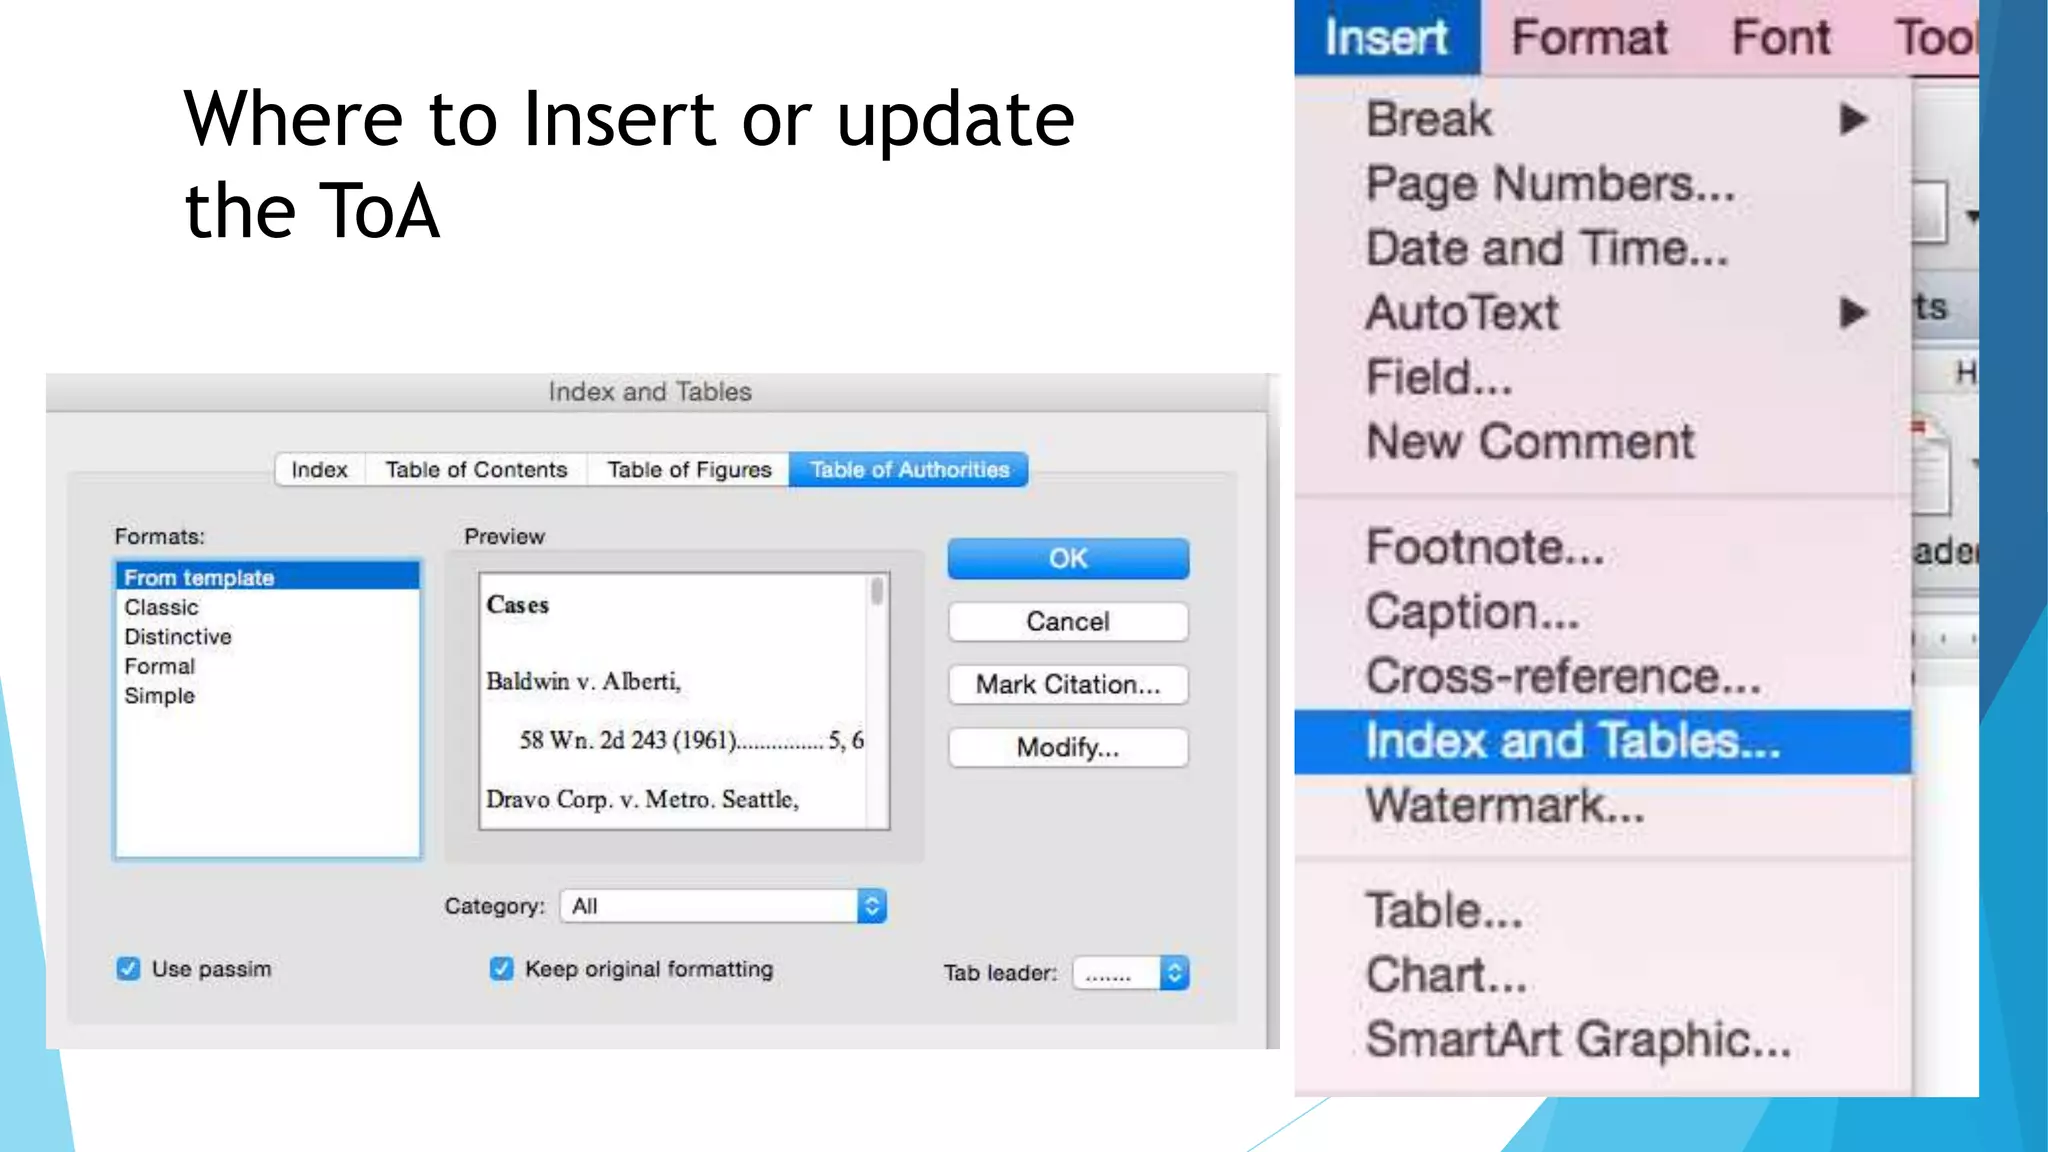
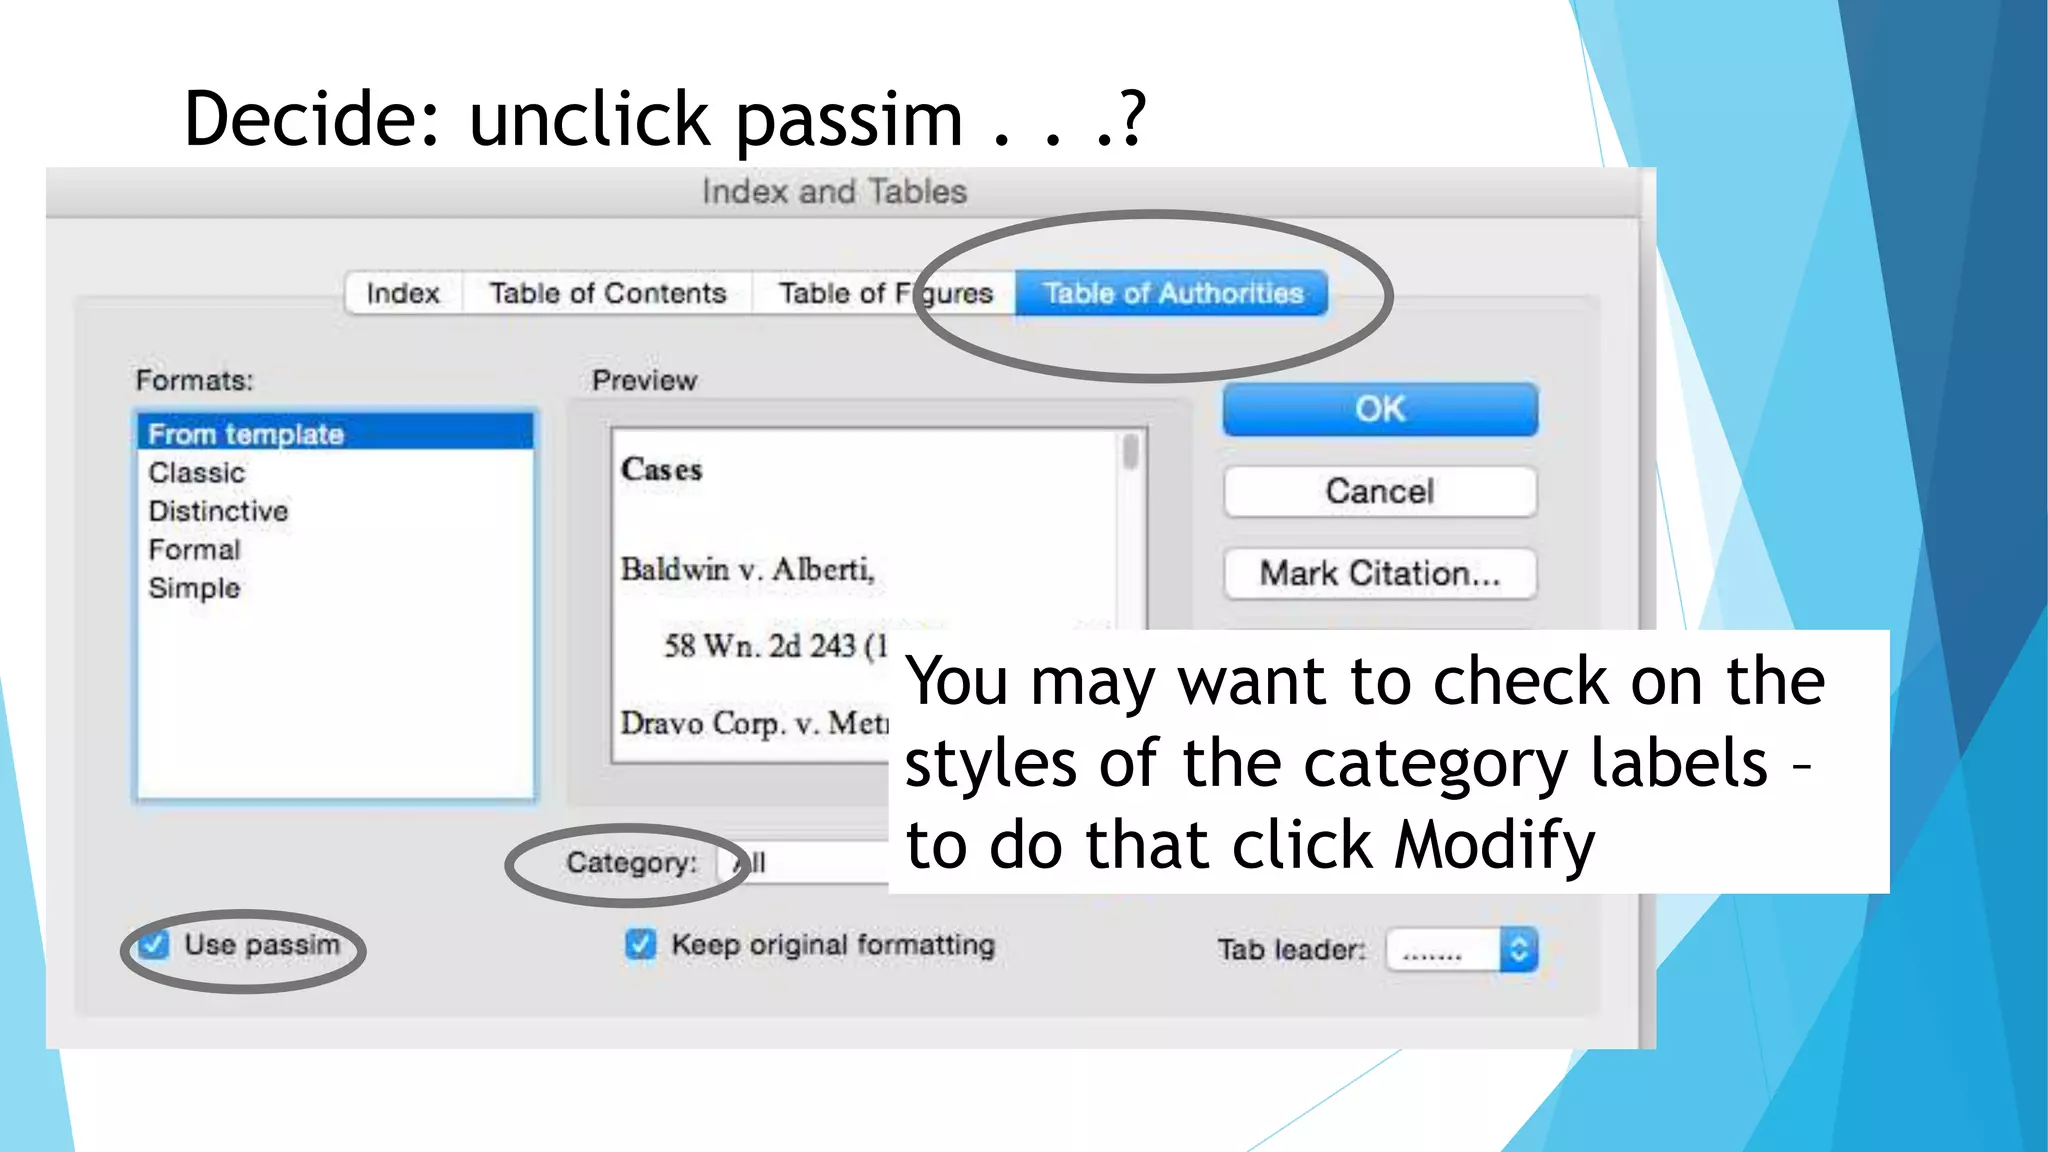
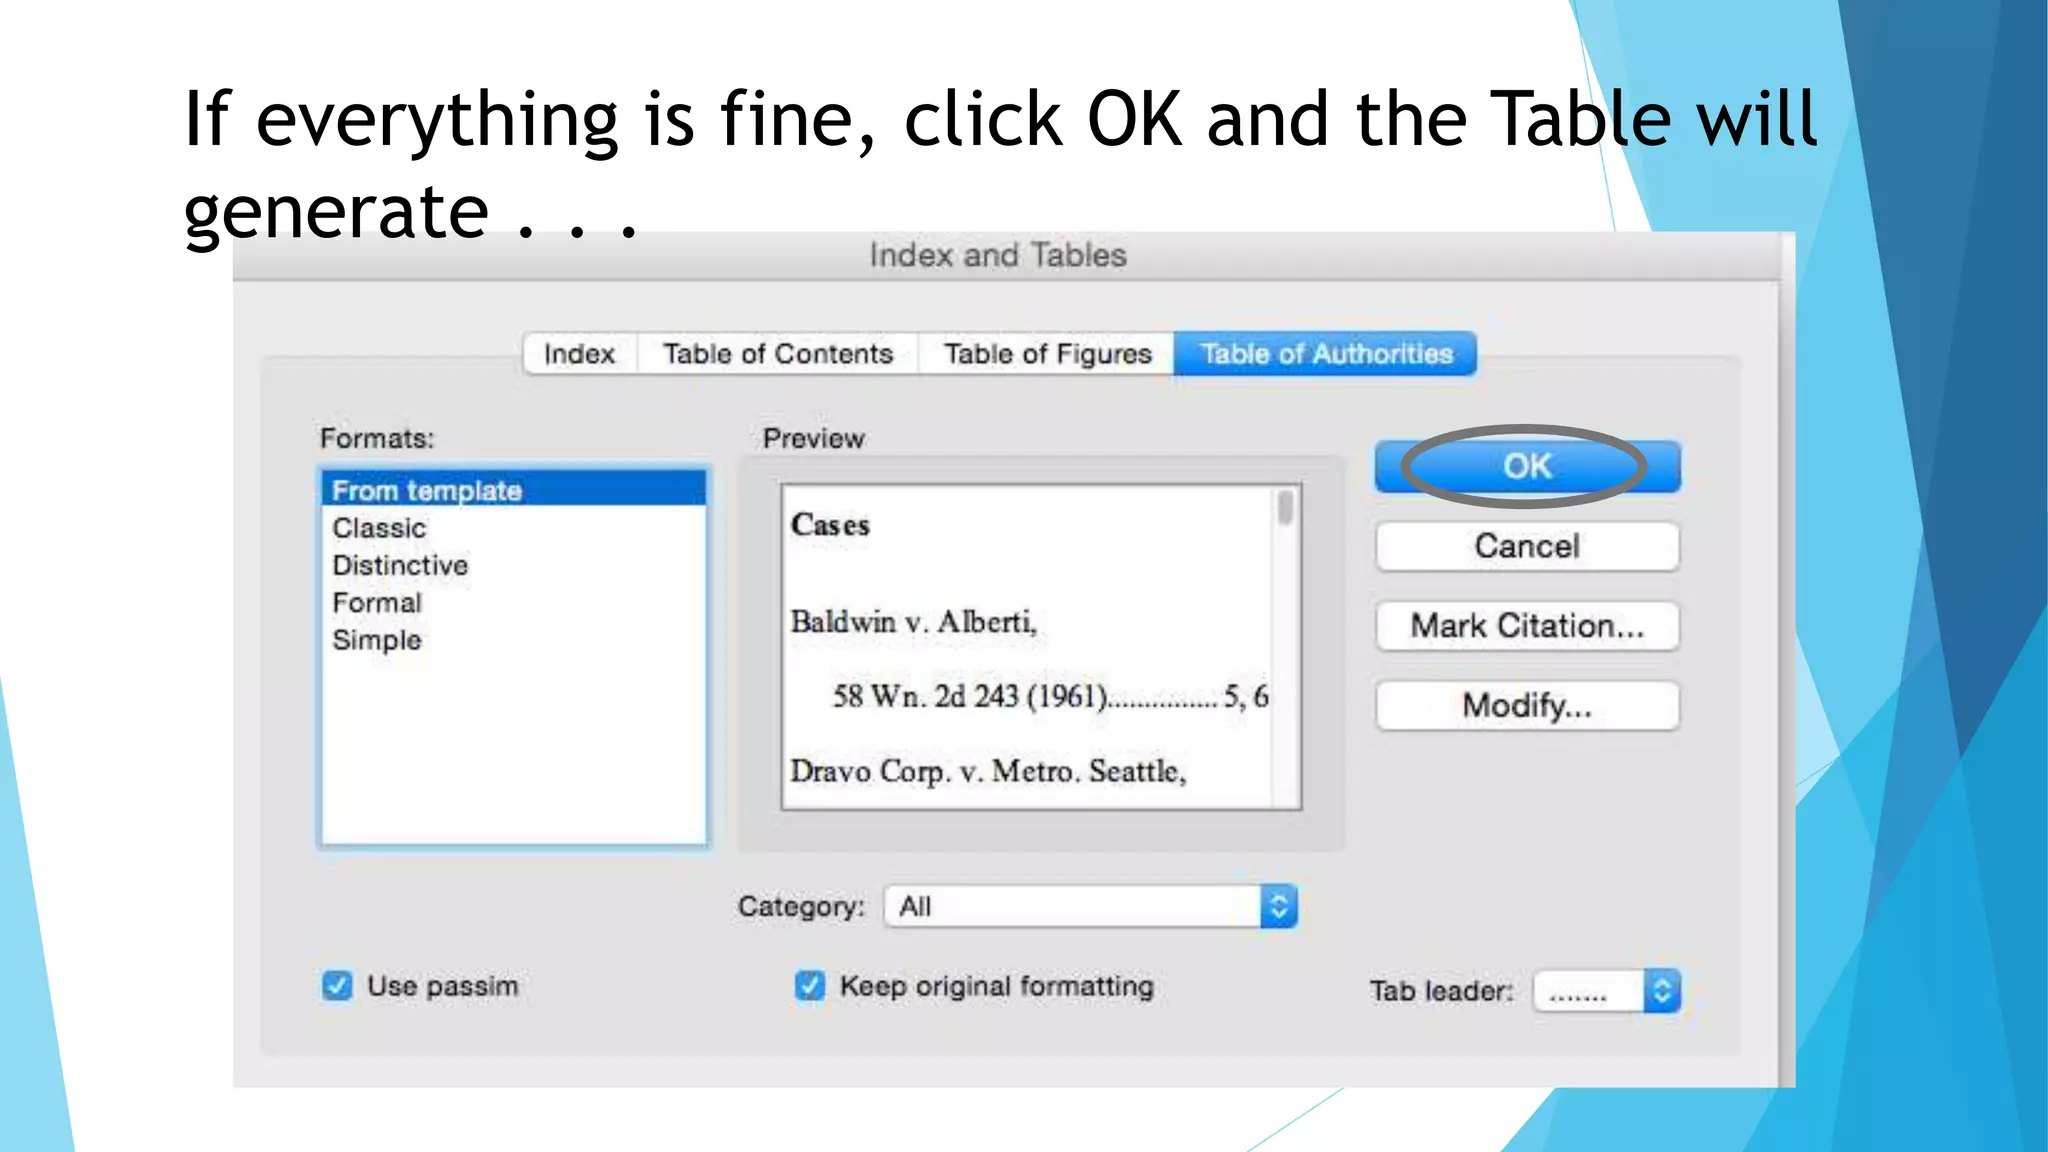
This document provides instructions for setting up pagination, a table of contents, and a table of authorities in Microsoft Word. It describes inserting section breaks, formatting page numbers, applying styles to headings, generating the table of contents automatically, marking citations, and generating the table of authorities. The steps include setting up headers, footers, page numbers, applying heading styles, generating the table of contents, searching for and marking citations, and generating the table of authorities.
How to manage the table of contents with one click (Microsoft Word 2007) - fo...Chia Siew Lian
You might be pissed off when you need to keep editing the Table of Contents manually in report or thesis when using Microsoft Word 2007. This slides will guide you in creating table of contents word easily and edit all with one click. If you want to create table contents word, this is a MUST READ guideline. Hope this help you and ease your work.
Change user name and initials. Open the Word Preference.docxsleeperharwell
Change user name and initials.
Open the
Word Preferences
dialog box .
In the
User Information
area, type your first and last name in the
Name
text box and your first and last initials in lowercase letters in the
Initials
text box.
Check the
Always use these values regardless of sign in to Office
box and close the
Word Options
dialog box.
Change
Display for Review
view, review and delete a comment, and turn on
Track Changes
.
Change the
Display for Review
view to
All Markup
and review tracked changes in the document.
Read the comment on the first page and then
delete
the comment.
Accept All Changes
in the document and stop tracking changes.
Change the left and right margins to
1"
.
NOTE:
Mac users if you receive a message saying the margins are out of the printable area, click the
Ignore
button.
Apply styles to the title and headings.
Apply the
Title
style to the title on the first page.
Apply the
Heading 1
style to all the bold headings.
Apply the
Heading 2
style to all the underlined headings.
Apply the
Heading 3
style to all the italicized headings.
Insert and customize footnotes.
Insert a footnote after the “Skiing Procedures” heading on the first page.
Type
Skiing procedures vary depending on the clients’ needs.
as the footnote text.
Insert a footnote after the “Guiding Techniques” heading on the second page.
Type
A minimum of two guides is required for all clients.
as the footnote text.
Change the footnote
Number format
to
A, B, C
and change
Numbering
to
Continuous
.
Insert a custom table of contents.
Place your insertion point at the beginning of the document and insert a
page break
.
Type
Table of Contents
on the first line on the new first page and press
Enter
.
Apply the
Title
style to “
Table of Contents
” on the new first page.
Place the insertion point on the blank line below the
"Table of Contents"
heading and before the page break.
Insert a
Custom Table of Contents
, use
Fancy
format, show
2
levels of headings, show page numbers, right align page numbers, and do not include a tab leader.
HINT
: Click the
Table of Contents
button and then select
Custom Table of Contents...
to insert the Custom Table of Contents.
Insert header and footer.
Edit the header on the first page (table of contents) and insert a right-aligned
Page Number
at the top of page.
If necessary, remove the blank line below the page numbers.
Go to the footer on the same page and insert the
Title
document property field on the left. Use the right arrow key to deselect the document property field.
Press
Tab
two times and insert the
Company
field on the right.
Bold
the text in the footer and close the footer.
Insert page breaks to keep headings with the text below.
Insert a
page break
before the “Beginning Wedge Christie Turns” heading (page 4).
Insert a
page break
before the “Introduction to Equipment” heading .
it a pdf document about APA style for microsoft 2007 just open your doc word and follow the instructions in this document and you will have the necessary setup
In this PowerPoint presentation, we will explore creating tables in Microsoft Word. Whether you are a student working on a research paper, a professional creating reports, or simply want to improve your document formatting skills, tables are an essential tool to master.
In 2020, the Ministry of Home Affairs established a committee led by Prof. (Dr.) Ranbir Singh, former Vice Chancellor of National Law University (NLU), Delhi. This committee was tasked with reviewing the three codes of criminal law. The primary objective of the committee was to propose comprehensive reforms to the country’s criminal laws in a manner that is both principled and effective.
The committee’s focus was on ensuring the safety and security of individuals, communities, and the nation as a whole. Throughout its deliberations, the committee aimed to uphold constitutional values such as justice, dignity, and the intrinsic value of each individual. Their goal was to recommend amendments to the criminal laws that align with these values and priorities.
Subsequently, in February, the committee successfully submitted its recommendations regarding amendments to the criminal law. These recommendations are intended to serve as a foundation for enhancing the current legal framework, promoting safety and security, and upholding the constitutional principles of justice, dignity, and the inherent worth of every individual.
How to Obtain Permanent Residency in the NetherlandsBridgeWest.eu
You can rely on our assistance if you are ready to apply for permanent residency. Find out more at: https://immigration-netherlands.com/obtain-a-permanent-residence-permit-in-the-netherlands/.
Responsibilities of the office bearers while registering multi-state cooperat...Finlaw Consultancy Pvt Ltd
Introduction-
The process of register multi-state cooperative society in India is governed by the Multi-State Co-operative Societies Act, 2002. This process requires the office bearers to undertake several crucial responsibilities to ensure compliance with legal and regulatory frameworks. The key office bearers typically include the President, Secretary, and Treasurer, along with other elected members of the managing committee. Their responsibilities encompass administrative, legal, and financial duties essential for the successful registration and operation of the society.
ALL EYES ON RAFAH BUT WHY Explain more.pdf46adnanshahzad
All eyes on Rafah: But why?. The Rafah border crossing, a crucial point between Egypt and the Gaza Strip, often finds itself at the center of global attention. As we explore the significance of Rafah, we’ll uncover why all eyes are on Rafah and the complexities surrounding this pivotal region.
INTRODUCTION
What makes Rafah so significant that it captures global attention? The phrase ‘All eyes are on Rafah’ resonates not just with those in the region but with people worldwide who recognize its strategic, humanitarian, and political importance. In this guide, we will delve into the factors that make Rafah a focal point for international interest, examining its historical context, humanitarian challenges, and political dimensions.
NATURE, ORIGIN AND DEVELOPMENT OF INTERNATIONAL LAW.pptxanvithaav
These slides helps the student of international law to understand what is the nature of international law? and how international law was originated and developed?.
The slides was well structured along with the highlighted points for better understanding .
A "File Trademark" is a legal term referring to the registration of a unique symbol, logo, or name used to identify and distinguish products or services. This process provides legal protection, granting exclusive rights to the trademark owner, and helps prevent unauthorized use by competitors.
Visit Now: https://www.tumblr.com/trademark-quick/751620857551634432/ensure-legal-protection-file-your-trademark-with?source=share
Synopsis On Annual General Meeting/Extra Ordinary General Meeting With Ordinary And Special Businesses And Ordinary And Special Resolutions with Companies (Postal Ballot) Regulations, 2018
Wordsmith - toc toa-page numbers -- mac edition (1)
1. Using MS Word to set
up:
•Pagination (page
numbers)
•Table of Contents
•Table of Authorities
2. Go to the Library Portal Page and
copy onto your desktop this
document if you have not already:
1MSWord.PgsTocToA.docx
3. Open the document.
Observe - 4 things have been done already to
make things easier:
1. No hard page breaks and no section
breaks are included.
2. No styles applied yet.
3. All first-level headings were typed
in capital letters.
4. Special styles created already.
4.
5. First goal: Insert Next Page section breaks
just before any new page headings.
Note: If you place your cursor before a paragraph
symbol, the paragraph space will be moved to the
next page. Deleting these paragraph symbols can
often cause problems once your footers are set, so
avoiding the situation all together is wise.
6.
7.
8.
9.
10. The final “next-page section
break” to be inserted should be
just before the heading that will
start the main body of text.
11. AT THIS TIME:
Make sure top-of-page headers really are at
the top of their pages.
They should
look like this:
Note there is NO
paragraph icon
before T in Table
12. Setting up the Footer & page numbers.
Double-click somewhere on the Cover page in
the Footer area.
13. It’s easiest to choose
Blank (Three columns)
as it will give you a
place for your centered
page number and, if
you need it, a place to
enter your Exam ID and
course section ID.
14. The Footer is going to pop up.
It’s going to have “Type here” across the
the bottom in three locations.
Delete
Type in
Exam ID #
To set up
the
page # . . .
15. Highlight the text in
the Footer where you
want the page
number.
Click on Page # to
insert basic page
numbers.
You’ve now set up
your basic page
number set up in the
footer.
16. For the cover page,
however, we don’t
want a footer, so
click Different First
Page. We want the
“Type” fields in the
footer to disappear.
Close the Footer.
17. We now have the location for the page
numbers and ID information set, but
we to go into the next sections to format:
1. Consecutive small Roman numerals for
introductory material.
2. Consecutive Arabic numbers for main
body.
18. Go to “TABLE OF CONTENTS” heading, and
place the cursor in that heading (or
anywhere before the section break for that
section.
On INSERT ribbon
1. Page Number
2. Format Page #
20. Now place the cursor
somewhere in the middle
of “Table of Authorities”
and repeat the formatting
of the page number.
21. For the Table of
Authorities page -- and
any other sections of
introductory material,
do NOT start at “i”. . .
You want to choose
“Continue from
previous section” and
hit OK.
22. After using the INSERT >
Page number > Format
Page number process for
introductory materials, one
would do the same process
for the main body of a
document in Word.
23. For such pages you
would choose Arabic
numbers and choose
what number is used
to start and hit OK.
However, we don’t
really need to do this
because of the process
we’ve used; it’s
already set up.
24. Tip: Avoid inserting other material later.
If you do need to do so, however?
Remove from the text to be inserted all section
breaks and footer formatting, so you aren’t
inserting conflicting formats into the document.
Theoretically these won’t necessarily carry over
but better safe than sorry.
25. Trick: If you need more than one page without a
footer and you cannot figure out how to do it ….
1. Select text of footer section that you don’t
want showing and change font color to white.
2. Check next section to see if it is also white.
3. If it is, click the “Link to Previous” option in
the ribbon and make the font black.
26. With this process we have
completed setting up our page
numbers.
Now we want to set up our
Table of Contents so it will
generate automatically.
27. To set up the Table of Contents,
we need to apply “styles” to the
parts of the document we want
to appear in the Table of
Contents – e.g., headers.
28. Return to the HOME tab and look at
the “Styles” box and the types of
Styles that appear there.
29. For this exercise, note the specially
modified and created styles . . .
modifiedcreated
30. For the purposes of this
exercise: Select all the text for
headings beginning with “Table
of Contents” and apply to them
the Heading 1 style.
31. Tip 1 : You can select the whole header
line by placing your cursor off to the left
edge and clicking. Then click on
Heading 1 in the Styles box to apply it.
Tip 2: Repeat the selection process and press
F4 key to repeat the last action.
32. All the headings have now been coded
to be entered automatically in the
Table of Contents.
But we also have some argument points
and subpoints to be included.
33. Look for points highlighted in green . . .
Note that this starts with a Roman numeral,
so apply the style “Argument Rom pt.”
34. Other points start with a letter, so . . .
Apply the style “Argument Lttr pt.”
35. There are 3 Roman numeral Argument points and
2 letter sub-points to which we should have
styles applied.
When that is completed, we are ready to
generate the Table of Contents.
36. 1. Place your cursor
where you want the
table to generate.
2. Select the Insert
“Index and Tables”.
3. Select Table of
Contents and Manual
Table of Contents from
the drop down menu.
37. When the formatting box appears, make sure
page number location and tab leaders are
set.
Hit Options to include and set up the special
styles that are needed in the TOC.
Insert 3 by the “letter” subpoint style and 2
by the Roman numeral point so that the
points start at those heading indents.
38.
39. After hitting OK twice to get through the
dialog boxes, we are going to see the Table of
Contents is generated.
At this point we want to go through and check
the formatting on the Table and make
adjustments –
e.g. via the Home tab > Font area, we can get
rid of the green highlighting.
40. To underscore the Argument letter
subpoints:
1. Select the characters to be
underlined
2. Click the underline icon OR
Press Ctrl U
41. After getting the characters
set up, there may be some
needed adjustments to the
spacing between the
paragraphs breaks.
To make those adjustments:
On the Home tab, go to the
paragraph settings arrow
(lower right corner).
42. SETTING UP THE TABLE OF AUTHORITIES
1. Search document for citations and select each
one.
2. With Insert tab, click on Index & Tables.
3. In the Dialogue box under Table of Authorities,
A. Click on “mark citation.”
B. Edit the citation to appear correctly for the
ToA. This is done in the top box.
C. Designate type of citation. Drop down.
D. Type in a short search citation term.
43. EDIT THE CITATION FOR TABLE HERE
If you need to access a font
adjustment, right click on text.
45. Two options:
You can choose to CLOSE
the box and just do a visual
search on your own.
Or . . .
Hit Next Citation to see
what MSWord finds. Just be
aware it can miss things!
46. So, in this document MSWord found the v. in a new
case title. This means we need to Close the Mark
Citation box, select the text of that case and, again,
choose Mark Citation.
47. For repeated
sources, or id.
citations, click
on the
appropriate
short citation,
then click
“Mark.”
48. Once you’ve found all your citations,
editing them and categorizing them for
your Table of Authorities:
Go to the Table of Authorities page.
Place your cursor where you want the
table to generate.
50. Decide: unclick passim . . .?
You may want to check on the
styles of the category labels –
to do that click Modify
51. If everything is fine, click OK and the Table will
generate . . .
52. Now: Do any categories out of order? If a
citation is incorrectly categorized, you will
need to search the document for it and change
the ToA field code.
For this exercise “Select All” on the Home tab
and get rid of all highlighting & make sure
everything is in a black font.
Update the page numbers on your Table of
Contents.