Download free for 30 days
Sign in
Upload
Language (EN)
Support
Business
Mobile
Social Media
Marketing
Technology
Art & Photos
Career
Design
Education
Presentations & Public Speaking
Government & Nonprofit
Healthcare
Internet
Law
Leadership & Management
Automotive
Engineering
Software
Recruiting & HR
Retail
Sales
Services
Science
Small Business & Entrepreneurship
Food
Environment
Economy & Finance
Data & Analytics
Investor Relations
Sports
Spiritual
News & Politics
Travel
Self Improvement
Real Estate
Entertainment & Humor
Health & Medicine
Devices & Hardware
Lifestyle
Change Language
Language
English
Español
Português
Français
Deutsche
Cancel
Save
EN
Uploaded by
虎の穴 開発室
262 views
Webアプリケーション開発者のためのDockerハンズオン20210519
Webアプリケーション開発者のためのDockerハンズオン の資料です。
Engineering
◦
Read more
0
Save
Share
Embed
Embed presentation
Download
Download to read offline
1
/ 45
2
/ 45
3
/ 45
4
/ 45
5
/ 45
6
/ 45
7
/ 45
8
/ 45
9
/ 45
10
/ 45
11
/ 45
12
/ 45
13
/ 45
14
/ 45
15
/ 45
16
/ 45
17
/ 45
18
/ 45
19
/ 45
20
/ 45
21
/ 45
22
/ 45
23
/ 45
24
/ 45
25
/ 45
26
/ 45
27
/ 45
28
/ 45
29
/ 45
30
/ 45
31
/ 45
32
/ 45
33
/ 45
34
/ 45
35
/ 45
36
/ 45
37
/ 45
38
/ 45
39
/ 45
40
/ 45
41
/ 45
42
/ 45
43
/ 45
44
/ 45
45
/ 45
More Related Content
PDF
Webアプリケーション開発者のためのDockerハンズオン
by
虎の穴 開発室
PDF
【とらラボLT】go言語でのweb apiの作り方3選
by
虎の穴 開発室
PDF
Dockerを活用したリクルートグループ開発基盤の構築
by
Recruit Technologies
PDF
2015-07-27 Docker Introduction 〜Dockerの基礎とユースケースに関する考察〜
by
Shuji Yamada
PDF
2014年を振り返る 今年の技術トレンドとDockerについて
by
Masahito Zembutsu
PDF
Docker と ECS と WebSocket で最強のマルチプレイ・ゲームサーバを構築
by
gree_tech
PDF
Deno の node 互換モードと ソケット
by
虎の穴 開発室
PPTX
マンガボックスのiOS10プッシュ通知導入事例
by
Fukaya Akifumi
Webアプリケーション開発者のためのDockerハンズオン
by
虎の穴 開発室
【とらラボLT】go言語でのweb apiの作り方3選
by
虎の穴 開発室
Dockerを活用したリクルートグループ開発基盤の構築
by
Recruit Technologies
2015-07-27 Docker Introduction 〜Dockerの基礎とユースケースに関する考察〜
by
Shuji Yamada
2014年を振り返る 今年の技術トレンドとDockerについて
by
Masahito Zembutsu
Docker と ECS と WebSocket で最強のマルチプレイ・ゲームサーバを構築
by
gree_tech
Deno の node 互換モードと ソケット
by
虎の穴 開発室
マンガボックスのiOS10プッシュ通知導入事例
by
Fukaya Akifumi
What's hot
PDF
第37回「Dockerのユースケースと将来」(2014/10/30 on しすなま!)
by
System x 部 (生!) : しすなま! @ Lenovo Enterprise Solutions Ltd.
PDF
Docker Chronicle 2021.09
by
Masahito Zembutsu
PPTX
Dockerの基本的な話
by
gree_tech
PDF
2015-01-27 Introduction to Docker
by
Shuji Yamada
PDF
DeNA流cocos2d xとの付き合い方
by
dena_study
PDF
Docker入門-基礎編 いまから始めるDocker管理【2nd Edition】
by
Masahito Zembutsu
PPTX
BuildKitによる高速でセキュアなイメージビルド
by
Akihiro Suda
PDF
DockerとDocker Hubの操作と概念
by
Masahito Zembutsu
PDF
Dockerイメージ管理の内部構造
by
Etsuji Nakai
PDF
DeNAのゲーム開発を支える技術 (クライアントサイド編)
by
denatech2016
PDF
Dockerfileを改善するためのBest Practice 2019年版
by
Masahito Zembutsu
PDF
オトナのDocker入門
by
Tsukasa Kato
PDF
CoreOS OEM on NIFTY Cloud - CoreOS Meetup Tokyo #1 #coreosjp
by
雄也 日下部
PPTX
今さら聞けない人のためのDocker超入門 – OpenStack最新情報セミナー 2015年4月
by
VirtualTech Japan Inc.
PDF
Docker hands on nifty sakura jul19
by
Masahito Zembutsu
PDF
Docker道場オンライン#1 Docker基礎概念と用語の理解
by
Masahito Zembutsu
PDF
アプリ屋もDockerをドカドカ使おう ~ Docker入門
by
Hori Tasuku
PDF
[1C5] Docker Comose & Swarm mode Orchestration (Japan Container Days - Day1)
by
Masahito Zembutsu
PDF
DeNA の新しいネイティブ開発(パズル戦隊デナレンジャー)
by
dena_study
PDF
Dockerの基本と応用~快適コンテナライフを実現するArukas~
by
Masahito Zembutsu
第37回「Dockerのユースケースと将来」(2014/10/30 on しすなま!)
by
System x 部 (生!) : しすなま! @ Lenovo Enterprise Solutions Ltd.
Docker Chronicle 2021.09
by
Masahito Zembutsu
Dockerの基本的な話
by
gree_tech
2015-01-27 Introduction to Docker
by
Shuji Yamada
DeNA流cocos2d xとの付き合い方
by
dena_study
Docker入門-基礎編 いまから始めるDocker管理【2nd Edition】
by
Masahito Zembutsu
BuildKitによる高速でセキュアなイメージビルド
by
Akihiro Suda
DockerとDocker Hubの操作と概念
by
Masahito Zembutsu
Dockerイメージ管理の内部構造
by
Etsuji Nakai
DeNAのゲーム開発を支える技術 (クライアントサイド編)
by
denatech2016
Dockerfileを改善するためのBest Practice 2019年版
by
Masahito Zembutsu
オトナのDocker入門
by
Tsukasa Kato
CoreOS OEM on NIFTY Cloud - CoreOS Meetup Tokyo #1 #coreosjp
by
雄也 日下部
今さら聞けない人のためのDocker超入門 – OpenStack最新情報セミナー 2015年4月
by
VirtualTech Japan Inc.
Docker hands on nifty sakura jul19
by
Masahito Zembutsu
Docker道場オンライン#1 Docker基礎概念と用語の理解
by
Masahito Zembutsu
アプリ屋もDockerをドカドカ使おう ~ Docker入門
by
Hori Tasuku
[1C5] Docker Comose & Swarm mode Orchestration (Japan Container Days - Day1)
by
Masahito Zembutsu
DeNA の新しいネイティブ開発(パズル戦隊デナレンジャー)
by
dena_study
Dockerの基本と応用~快適コンテナライフを実現するArukas~
by
Masahito Zembutsu
Similar to Webアプリケーション開発者のためのDockerハンズオン20210519
PDF
Docker handson
by
koda3
PDF
今だからこそ知りたい Docker Compose/Swarm 入門
by
Masahito Zembutsu
PPTX
Docker超入門
by
VirtualTech Japan Inc.
PPTX
20230128.pptx
by
ssuserdad311
PDF
Docker講習会資料
by
teruyaono1
PPTX
Docker & Kubernetes基礎
by
Daisuke Hiraoka
PDF
Docker入門: コンテナ型仮想化技術の仕組みと使い方
by
Yuichi Ito
PDF
Docker/Aarukas入門ハンズオン資料~第1回さくらとコンテナの夕べ #さくらの夕べ 番外編
by
Masahito Zembutsu
PDF
Docker実践入門
by
hiro nemu
PDF
Dockerライフサイクルの基礎 地雷を踏み抜けろ!
by
Masahito Zembutsu
PDF
Rancher/Kubernetes入門ハンズオン資料~第2回さくらとコンテナの夕べ #さくらの夕べ 番外編
by
Masahito Zembutsu
PDF
Introduce that Best practices for writing Dockerfiles
by
Yukiya Hayashi
PPTX
コンテナの基本 ~Docker実践~
by
Ryosuke Uchiyama
PPTX
Newcomer2020 Docker研修
by
Suguru Yazawa
PDF
Dockerで遊んでみよっかー YAPC::Asia Tokyo 2014
by
Masahiro Nagano
PDF
20170124 linux basic_2
by
YUSUKE MORIZUMI
PDF
Dockerでらくらく開発・運用を体感しよう
by
Takashi Makino
PDF
Docker Compose入門~今日から始めるComposeの初歩からswarm mode対応まで
by
Masahito Zembutsu
PDF
Dockerを使ったローカルでの開発から本番環境へのデプロイまで
by
Ryo Nakamaru
PPTX
ラズパイ2で動く Docker PaaS
by
npsg
Docker handson
by
koda3
今だからこそ知りたい Docker Compose/Swarm 入門
by
Masahito Zembutsu
Docker超入門
by
VirtualTech Japan Inc.
20230128.pptx
by
ssuserdad311
Docker講習会資料
by
teruyaono1
Docker & Kubernetes基礎
by
Daisuke Hiraoka
Docker入門: コンテナ型仮想化技術の仕組みと使い方
by
Yuichi Ito
Docker/Aarukas入門ハンズオン資料~第1回さくらとコンテナの夕べ #さくらの夕べ 番外編
by
Masahito Zembutsu
Docker実践入門
by
hiro nemu
Dockerライフサイクルの基礎 地雷を踏み抜けろ!
by
Masahito Zembutsu
Rancher/Kubernetes入門ハンズオン資料~第2回さくらとコンテナの夕べ #さくらの夕べ 番外編
by
Masahito Zembutsu
Introduce that Best practices for writing Dockerfiles
by
Yukiya Hayashi
コンテナの基本 ~Docker実践~
by
Ryosuke Uchiyama
Newcomer2020 Docker研修
by
Suguru Yazawa
Dockerで遊んでみよっかー YAPC::Asia Tokyo 2014
by
Masahiro Nagano
20170124 linux basic_2
by
YUSUKE MORIZUMI
Dockerでらくらく開発・運用を体感しよう
by
Takashi Makino
Docker Compose入門~今日から始めるComposeの初歩からswarm mode対応まで
by
Masahito Zembutsu
Dockerを使ったローカルでの開発から本番環境へのデプロイまで
by
Ryo Nakamaru
ラズパイ2で動く Docker PaaS
by
npsg
More from 虎の穴 開発室
PDF
FizzBuzzで学ぶJavaの進化
by
虎の穴 開発室
PDF
Railsのデバッグ どうやるかを改めて確認する
by
虎の穴 開発室
PDF
虎の穴ラボ エンジニア採用説明資料 .pdf
by
虎の穴 開発室
PDF
Deno Deployと組み合わせるのに Upstashをおすすめしたい.pdf
by
虎の穴 開発室
PDF
toranoana.deno #6 アジェンダ 採用説明
by
虎の穴 開発室
PDF
Deno 向け WEB 開発用のツールを作ったので 紹介します
by
虎の穴 開発室
PDF
Supabase Edge Functions と Netlify Edge Functions を使ってみる – 機能とその比較 –
by
虎の穴 開発室
PDF
GCPの画像認識APIの紹介
by
虎の穴 開発室
PDF
【エンジニアの勉強法ハックLT- vol.7】ゲームから学んだ勉強のこと
by
虎の穴 開発室
PDF
GitHub APIとfreshで遊ぼう
by
虎の穴 開発室
PDF
通販開発部の西田さん「通販開発マネジメントの5ルール」
by
虎の穴 開発室
PDF
社内DX推進!非エンジニア向けにプログラミング講座を実施してみた!
by
虎の穴 開発室
PDF
セキュリティを強化しよう!CloudArmorの機能解説
by
虎の穴 開発室
PDF
JavaScript LT会 〜 React.js Node.js歓迎 〜 Deno で やってみるweb開発
by
虎の穴 開発室
PDF
Amplify Studioを使ってみた
by
虎の穴 開発室
PDF
いいテスト会 (スプリントレビュー) をやろう!
by
虎の穴 開発室
PDF
【Saitama.js】Denoのすすめ
by
虎の穴 開発室
PDF
虎の穴ラボ Tech day#3 チームで戦う!とらのあな通販冬の大感謝祭でのフロント開発について
by
虎の穴 開発室
PDF
【とらのあなラボ Tech Day #3】新規システムにおける技術選定〜GoとgRPCを採用した話〜
by
虎の穴 開発室
PDF
虎の穴ラボ TechDay#3 フルリモート率100%!リモートワークを可能にするマネージメント
by
虎の穴 開発室
FizzBuzzで学ぶJavaの進化
by
虎の穴 開発室
Railsのデバッグ どうやるかを改めて確認する
by
虎の穴 開発室
虎の穴ラボ エンジニア採用説明資料 .pdf
by
虎の穴 開発室
Deno Deployと組み合わせるのに Upstashをおすすめしたい.pdf
by
虎の穴 開発室
toranoana.deno #6 アジェンダ 採用説明
by
虎の穴 開発室
Deno 向け WEB 開発用のツールを作ったので 紹介します
by
虎の穴 開発室
Supabase Edge Functions と Netlify Edge Functions を使ってみる – 機能とその比較 –
by
虎の穴 開発室
GCPの画像認識APIの紹介
by
虎の穴 開発室
【エンジニアの勉強法ハックLT- vol.7】ゲームから学んだ勉強のこと
by
虎の穴 開発室
GitHub APIとfreshで遊ぼう
by
虎の穴 開発室
通販開発部の西田さん「通販開発マネジメントの5ルール」
by
虎の穴 開発室
社内DX推進!非エンジニア向けにプログラミング講座を実施してみた!
by
虎の穴 開発室
セキュリティを強化しよう!CloudArmorの機能解説
by
虎の穴 開発室
JavaScript LT会 〜 React.js Node.js歓迎 〜 Deno で やってみるweb開発
by
虎の穴 開発室
Amplify Studioを使ってみた
by
虎の穴 開発室
いいテスト会 (スプリントレビュー) をやろう!
by
虎の穴 開発室
【Saitama.js】Denoのすすめ
by
虎の穴 開発室
虎の穴ラボ Tech day#3 チームで戦う!とらのあな通販冬の大感謝祭でのフロント開発について
by
虎の穴 開発室
【とらのあなラボ Tech Day #3】新規システムにおける技術選定〜GoとgRPCを採用した話〜
by
虎の穴 開発室
虎の穴ラボ TechDay#3 フルリモート率100%!リモートワークを可能にするマネージメント
by
虎の穴 開発室
Webアプリケーション開発者のためのDockerハンズオン20210519
1.
Copyright © 2021
Toranoana Inc. All Rights Reserved. Webアプリケーション開発者のための Docker, Docker Composeハンズオン 虎の穴ラボ はっとり 1
2.
Copyright © 2021
Toranoana Inc. All Rights Reserved. 2 目次 ● はじめに・事前準備 ● Dockerについて(5分) ● Dockerを使ってみる(15分) ○ HelloWorld ○ 仕組み説明 ○ Nginx建ててみるDocker編 ● Docker Composeを使ってみる(15分) ○ Nginx建ててみるDocker Compose編 ○ MySQLを建ててみる ● Railsアプリケーション構築(15分)
3.
Copyright © 2021
Toranoana Inc. All Rights Reserved. 3 はじめに ● このハンズオンはDockerを体験することを重視しているので解説は 短めです。そのため、すべてを理解することはできないかもしれませ ん。 ● どんな事ができるかを体験していただくことがこのハンズオンでは重 要だと考えています。
4.
Copyright © 2021
Toranoana Inc. All Rights Reserved. 4 はじめに ● 途中、マシンのトラブルやダウンロードに時間がかかる等でついてい けなくなることがあるかもしれません。その場合は見学に切り替えて いただくか、YouTubeの停止や巻き戻しをご利用ください。 ○ YouTube配信のアーカイブは数日中に削除する可能性があり ますので振り返りでご覧になる方はお早めに。 ● dockerコマンドやdocker-composeコマンドがご用意できていない場 合も見学に切り替えてご参加ください。
5.
Copyright © 2021
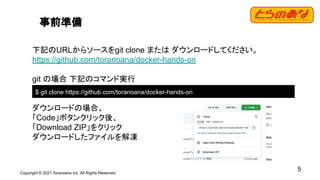
Toranoana Inc. All Rights Reserved. 5 事前準備 下記のURLからソースをgit clone または ダウンロードしてください。 https://github.com/toranoana/docker-hands-on git の場合 下記のコマンド実行 ダウンロードの場合、 「Code」ボタンクリック後、 「Download ZIP」をクリック ダウンロードしたファイルを解凍 $ git clone https://github.com/toranoana/docker-hands-on
6.
Copyright © 2021
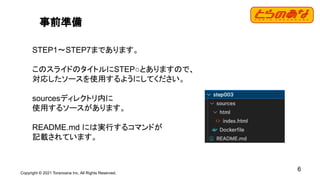
Toranoana Inc. All Rights Reserved. 6 事前準備 STEP1〜STEP7まであります。 このスライドのタイトルにSTEP○とありますので、 対応したソースを使用するようにしてください。 sourcesディレクトリ内に 使用するソースがあります。 README.md には実行するコマンドが 記載されています。
7.
Copyright © 2021
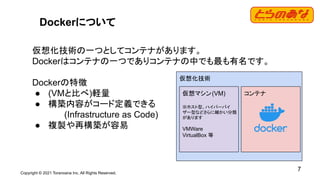
Toranoana Inc. All Rights Reserved. 7 Dockerについて 仮想化技術の一つとしてコンテナがあります。 Dockerはコンテナの一つでありコンテナの中でも最も有名です。 Dockerの特徴 ● (VMと比べ)軽量 ● 構築内容がコード定義できる (Infrastructure as Code) ● 複製や再構築が容易 仮想化技術 仮想マシン(VM) ※ホスト型、ハイパーバイ ザー型などさらに細かい分類 があります VMWare VirtualBox 等 コンテナ
8.
Copyright © 2021
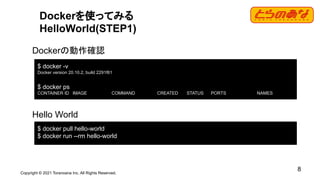
Toranoana Inc. All Rights Reserved. 8 Dockerを使ってみる HelloWorld(STEP1) Dockerの動作確認 Hello World $ docker -v Docker version 20.10.2, build 2291f61 $ docker ps CONTAINER ID IMAGE COMMAND CREATED STATUS PORTS NAMES $ docker pull hello-world $ docker run --rm hello-world
9.
Copyright © 2021
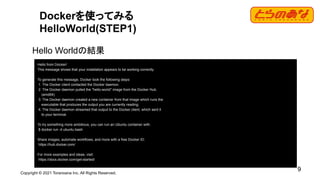
Toranoana Inc. All Rights Reserved. 9 Dockerを使ってみる HelloWorld(STEP1) Hello Worldの結果 Hello from Docker! This message shows that your installation appears to be working correctly. To generate this message, Docker took the following steps: 1. The Docker client contacted the Docker daemon. 2. The Docker daemon pulled the "hello-world" image from the Docker Hub. (amd64) 3. The Docker daemon created a new container from that image which runs the executable that produces the output you are currently reading. 4. The Docker daemon streamed that output to the Docker client, which sent it to your terminal. To try something more ambitious, you can run an Ubuntu container with: $ docker run -it ubuntu bash Share images, automate workflows, and more with a free Docker ID: https://hub.docker.com/ For more examples and ideas, visit: https://docs.docker.com/get-started/
10.
Copyright © 2021
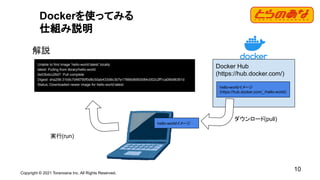
Toranoana Inc. All Rights Reserved. 10 Dockerを使ってみる 仕組み説明 解説 Unable to find image 'hello-world:latest' locally latest: Pulling from library/hello-world 0e03bdcc26d7: Pull complete Digest: sha256:31b9c7d48790f0d8c50ab433d9c3b7e17666d6993084c002c2ff1ca09b96391d Status: Downloaded newer image for hello-world:latest Docker Hub (https://hub.docker.com/) hello-worldイメージ (https://hub.docker.com/_/hello-world) hello-worldイメージ ダウンロード(pull) 実行(run)
11.
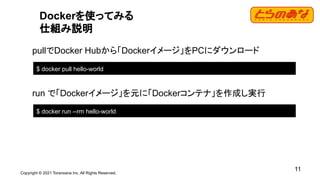
Copyright © 2021
Toranoana Inc. All Rights Reserved. 11 Dockerを使ってみる 仕組み説明 pullでDocker Hubから「Dockerイメージ」をPCにダウンロード run で「Dockerイメージ」を元に「Dockerコンテナ」を作成し実行 $ docker pull hello-world $ docker run --rm hello-world
12.
Copyright © 2021
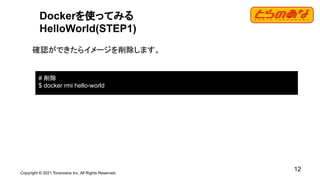
Toranoana Inc. All Rights Reserved. 12 Dockerを使ってみる HelloWorld(STEP1) 確認ができたらイメージを削除します。 # 削除 $ docker rmi hello-world
13.
Copyright © 2021
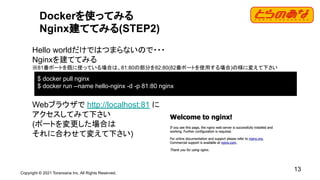
Toranoana Inc. All Rights Reserved. 13 Dockerを使ってみる Nginx建ててみる(STEP2) Hello worldだけではつまらないので・・・ Nginxを建ててみる ※81番ポートを既に使っている場合は、81:80の部分を82:80(82番ポートを使用する場合)の様に変えて下さい Webブラウザで http://localhost:81 に アクセスしてみて下さい (ポートを変更した場合は それに合わせて変えて下さい) $ docker pull nginx $ docker run --name hello-nginx -d -p 81:80 nginx
14.
Copyright © 2021
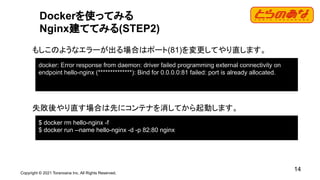
Toranoana Inc. All Rights Reserved. 14 Dockerを使ってみる Nginx建ててみる(STEP2) もしこのようなエラーが出る場合はポート(81)を変更してやり直します。 失敗後やり直す場合は先にコンテナを消してから起動します。 $ docker rm hello-nginx -f $ docker run --name hello-nginx -d -p 82:80 nginx docker: Error response from daemon: driver failed programming external connectivity on endpoint hello-nginx (**************): Bind for 0.0.0.0:81 failed: port is already allocated.
15.
Copyright © 2021
Toranoana Inc. All Rights Reserved. 15 Dockerを使ってみる Nginx建ててみる(STEP2) 確認ができたらコンテナを停止・削除します。 # 停止 $ docker stop hello-nginx # 削除 $ docker rm hello-nginx
16.
Copyright © 2021
Toranoana Inc. All Rights Reserved. 16 Dockerを使ってみる Nginx建ててみる(STEP2) なぜこんなに簡単にnginxが立てられたか ⇒Nginxをセットアップ済みのイメージをNginx公式がDocker Hubに用意してくれ ているから Docker Hubには様々なOS、ミドルウェア、データベース、アプリケーションが用 意されていて、コマンド1つだけでそれらをすぐに使うことが出来ます。 確かに簡単ですがこのままだと使い物になりません。
17.
Copyright © 2021
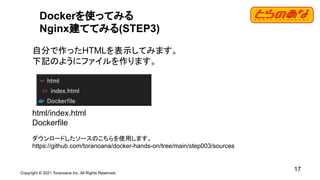
Toranoana Inc. All Rights Reserved. 17 Dockerを使ってみる Nginx建ててみる(STEP3) 自分で作ったHTMLを表示してみます。 下記のようにファイルを作ります。 html/index.html Dockerfile ダウンロードしたソースのこちらを使用します。 https://github.com/toranoana/docker-hands-on/tree/main/step003/sources
18.
Copyright © 2021
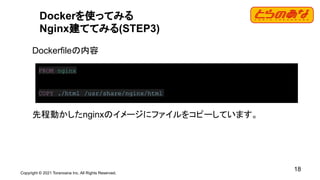
Toranoana Inc. All Rights Reserved. 18 Dockerを使ってみる Nginx建ててみる(STEP3) Dockerfileの内容 先程動かしたnginxのイメージにファイルをコピーしています。 FROM nginx COPY ./html /usr/share/nginx/html
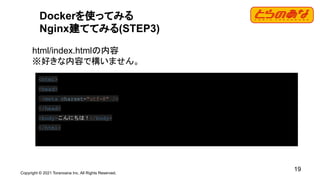
19.
Copyright © 2021
Toranoana Inc. All Rights Reserved. 19 Dockerを使ってみる Nginx建ててみる(STEP3) html/index.htmlの内容 ※好きな内容で構いません。 <html> <head> <meta charset="utf-8" /> </head> <body>こんにちは!</body> </html>
20.
Copyright © 2021
Toranoana Inc. All Rights Reserved. 20 Dockerを使ってみる Nginx建ててみる(STEP3) Dockerfileの内容でコンテナイメージを作成します。 Dockerfileがあるディレクトリで下記を実行します。 イメージが作成できたらそのイメージを実行します。 Webブラウザで http://localhost:81 にアクセスして用意したページが表示されれ ば成功です ※こちらもポートを変えた場合はそれに合わせて下さい。 $ docker build -t my-nginx . $ docker run --name hello-nginx -d -p 81:80 my-nginx
21.
Copyright © 2021
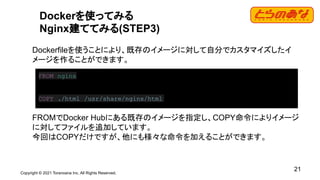
Toranoana Inc. All Rights Reserved. 21 Dockerを使ってみる Nginx建ててみる(STEP3) Dockerfileを使うことにより、既存のイメージに対して自分でカスタマイズしたイ メージを作ることができます。 FROMでDocker Hubにある既存のイメージを指定し、COPY命令によりイメージ に対してファイルを追加しています。 今回はCOPYだけですが、他にも様々な命令を加えることができます。 FROM nginx COPY ./html /usr/share/nginx/html
22.
Copyright © 2021
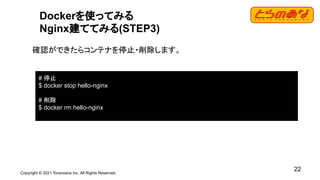
Toranoana Inc. All Rights Reserved. 22 Dockerを使ってみる Nginx建ててみる(STEP3) 確認ができたらコンテナを停止・削除します。 # 停止 $ docker stop hello-nginx # 削除 $ docker rm hello-nginx
23.
Copyright © 2021
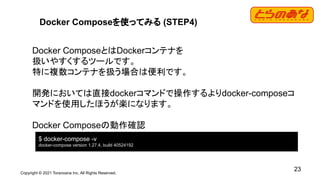
Toranoana Inc. All Rights Reserved. 23 Docker Composeを使ってみる (STEP4) Docker ComposeとはDockerコンテナを 扱いやすくするツールです。 特に複数コンテナを扱う場合は便利です。 開発においては直接dockerコマンドで操作するよりdocker-composeコ マンドを使用したほうが楽になります。 Docker Composeの動作確認 $ docker-compose -v docker-compose version 1.27.4, build 40524192
24.
Copyright © 2021
Toranoana Inc. All Rights Reserved. 24 Docker Composeを使ってみる Nginx建ててみる(STEP5) 下記のようにファイルを配置・作成します。 html/index.html 、Dockerfile は DockerでNginxを建てたときと同じものです。今 回はdocker-compose.ymlが追加されています。 ダウンロードしたソースのこちらを使用します。 https://github.com/toranoana/docker-hands-on/tree/main/step005-1/sources
25.
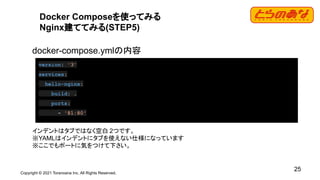
Copyright © 2021
Toranoana Inc. All Rights Reserved. 25 Docker Composeを使ってみる Nginx建ててみる(STEP5) docker-compose.ymlの内容 インデントはタブではなく空白 2つです。 ※YAMLはインデントにタブを使えない仕様になっています ※ここでもポートに気をつけて下さい。 version: '3' services: hello-nginx: build: . ports: - '81:80'
26.
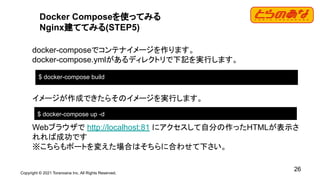
Copyright © 2021
Toranoana Inc. All Rights Reserved. 26 Docker Composeを使ってみる Nginx建ててみる(STEP5) docker-composeでコンテナイメージを作ります。 docker-compose.ymlがあるディレクトリで下記を実行します。 イメージが作成できたらそのイメージを実行します。 Webブラウザで http://localhost:81 にアクセスして自分の作ったHTMLが表示さ れれば成功です ※こちらもポートを変えた場合はそちらに合わせて下さい。 $ docker-compose build $ docker-compose up -d
27.
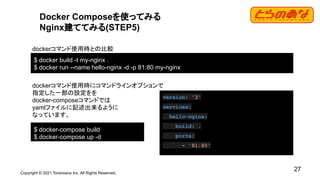
Copyright © 2021
Toranoana Inc. All Rights Reserved. 27 Docker Composeを使ってみる Nginx建ててみる(STEP5) dockerコマンド使用時との比較 dockerコマンド使用時にコマンドラインオプションで 指定した一部の設定をを docker-composeコマンドでは yamlファイルに記述出来るように なっています。 version: '3' services: hello-nginx: build: . ports: - '81:80' $ docker build -t my-nginx . $ docker run --name hello-nginx -d -p 81:80 my-nginx $ docker-compose build $ docker-compose up -d
28.
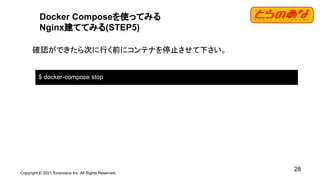
Copyright © 2021
Toranoana Inc. All Rights Reserved. 28 Docker Composeを使ってみる Nginx建ててみる(STEP5) 確認ができたら次に行く前にコンテナを停止させて下さい。 $ docker-compose stop
29.
Copyright © 2021
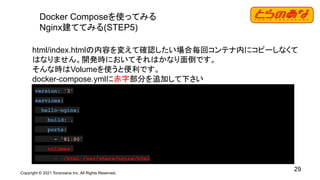
Toranoana Inc. All Rights Reserved. 29 Docker Composeを使ってみる Nginx建ててみる(STEP5) html/index.htmlの内容を変えて確認したい場合毎回コンテナ内にコピーしなくて はなりません。開発時においてそれはかなり面倒です。 そんな時はVolumeを使うと便利です。 docker-compose.ymlに赤字部分を追加して下さい version: '3' services: hello-nginx: build: . ports: - '81:80' volumes: - ./html:/usr/share/nginx/html
30.
Copyright © 2021
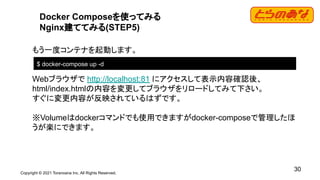
Toranoana Inc. All Rights Reserved. 30 Docker Composeを使ってみる Nginx建ててみる(STEP5) もう一度コンテナを起動します。 Webブラウザで http://localhost:81 にアクセスして表示内容確認後、 html/index.htmlの内容を変更してブラウザをリロードしてみて下さい。 すぐに変更内容が反映されているはずです。 ※Volumeはdockerコマンドでも使用できますがdocker-composeで管理したほ うが楽にできます。 $ docker-compose up -d
31.
Copyright © 2021
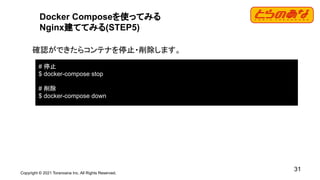
Toranoana Inc. All Rights Reserved. 31 Docker Composeを使ってみる Nginx建ててみる(STEP5) 確認ができたらコンテナを停止・削除します。 # 停止 $ docker-compose stop # 削除 $ docker-compose down
32.
Copyright © 2021
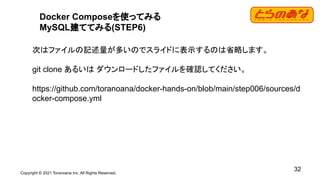
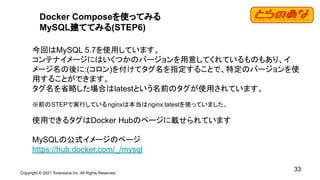
Toranoana Inc. All Rights Reserved. 32 Docker Composeを使ってみる MySQL建ててみる(STEP6) 次はファイルの記述量が多いのでスライドに表示するのは省略します。 git clone あるいは ダウンロードしたファイルを確認してください。 https://github.com/toranoana/docker-hands-on/blob/main/step006/sources/d ocker-compose.yml
33.
Copyright © 2021
Toranoana Inc. All Rights Reserved. 33 Docker Composeを使ってみる MySQL建ててみる(STEP6) 今回はMySQL 5.7を使用しています。 コンテナイメージにはいくつかのバージョンを用意してくれているものもあり、イ メージ名の後に:(コロン)を付けてタグ名を指定することで、特定のバージョンを使 用することができます。 タグ名を省略した場合はlatestという名前のタグが使用されています。 ※前のSTEPで実行しているnginxは本当はnginx:latestを使っていました。 使用できるタグはDocker Hubのページに載せられています MySQLの公式イメージのページ https://hub.docker.com/_/mysql
34.
Copyright © 2021
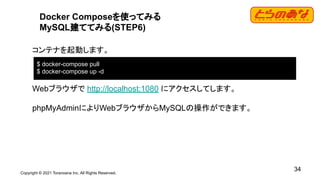
Toranoana Inc. All Rights Reserved. 34 Docker Composeを使ってみる MySQL建ててみる(STEP6) コンテナを起動します。 Webブラウザで http://localhost:1080 にアクセスしてします。 phpMyAdminによりWebブラウザからMySQLの操作ができます。 $ docker-compose pull $ docker-compose up -d
35.
Copyright © 2021
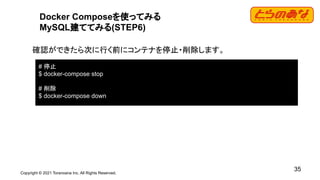
Toranoana Inc. All Rights Reserved. 35 Docker Composeを使ってみる MySQL建ててみる(STEP6) 確認ができたら次に行く前にコンテナを停止・削除します。 # 停止 $ docker-compose stop # 削除 $ docker-compose down
36.
Copyright © 2021
Toranoana Inc. All Rights Reserved. 36 Railsアプリケーション構築(STEP7) 次もファイルの記述量が多いのでスライドに表示するのは省略します。 git clone あるいは ダウンロードしたファイルを確認してください。 https://github.com/toranoana/docker-hands-on/blob/main/step007/sources/d ocker-compose.yml https://github.com/toranoana/docker-hands-on/blob/main/step007/sources/ Dockerfile
37.
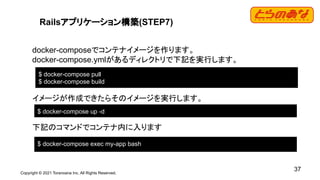
Copyright © 2021
Toranoana Inc. All Rights Reserved. 37 Railsアプリケーション構築(STEP7) docker-composeでコンテナイメージを作ります。 docker-compose.ymlがあるディレクトリで下記を実行します。 イメージが作成できたらそのイメージを実行します。 下記のコマンドでコンテナ内に入ります $ docker-compose pull $ docker-compose build $ docker-compose up -d $ docker-compose exec my-app bash
38.
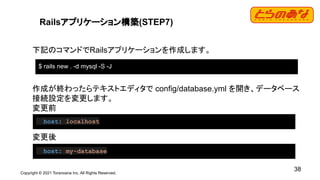
Copyright © 2021
Toranoana Inc. All Rights Reserved. 38 Railsアプリケーション構築(STEP7) 下記のコマンドでRailsアプリケーションを作成します。 作成が終わったらテキストエディタで config/database.yml を開き、データベース 接続設定を変更します。 変更前 変更後 $ rails new . -d mysql -S -J host: localhost host: my-database
39.
Copyright © 2021
Toranoana Inc. All Rights Reserved. 39 Railsアプリケーション構築(STEP7) docker-composeで管理しているコンテナ同士は docker-compose.ymlで定義した名前のサービス名をホストとして接続できます。 先程、localhostをmy-databaseに変えたのはアプリケーションの外に作った別のコンテナの DBへ接続するためです。 version: '3' services: my-app: # ... my-database: # ...
40.
Copyright © 2021
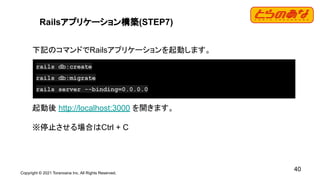
Toranoana Inc. All Rights Reserved. 40 Railsアプリケーション構築(STEP7) 下記のコマンドでRailsアプリケーションを起動します。 起動後 http://localhost:3000 を開きます。 ※停止させる場合はCtrl + C rails db:create rails db:migrate rails server --binding=0.0.0.0
41.
Copyright © 2021
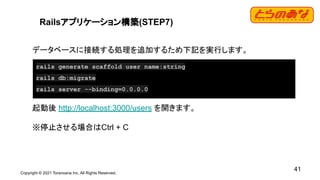
Toranoana Inc. All Rights Reserved. 41 Railsアプリケーション構築(STEP7) データベースに接続する処理を追加するため下記を実行します。 起動後 http://localhost:3000/users を開きます。 ※停止させる場合はCtrl + C rails generate scaffold user name:string rails db:migrate rails server --binding=0.0.0.0
42.
Copyright © 2021
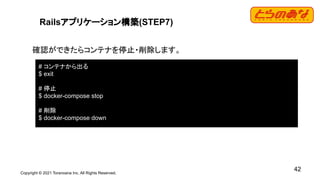
Toranoana Inc. All Rights Reserved. 42 Railsアプリケーション構築(STEP7) 確認ができたらコンテナを停止・削除します。 # コンテナから出る $ exit # 停止 $ docker-compose stop # 削除 $ docker-compose down
43.
Copyright © 2021
Toranoana Inc. All Rights Reserved. youtube宣伝 虎の穴ラボでは 採用説明や勉強会などのオンラインイベントを youtubeから配信していきます。 よろしければ「いいね!」やチャンネル登録を お願い致します。 https://www.youtube.com/channel/UC2LQCTWBg7da5JHxQ dGNGyw 43
44.
Copyright © 2021
Toranoana Inc. All Rights Reserved. youtube宣伝 虎の穴ラボのエンジニアが業務や技術・働き方についてざっくばらんにお届けする配信番組です。 感想やフィードバックをTwitterのハッシュタグ「#ToraLab_fm」でお待ちしています! Youtubeチャンネルと下記のPodcastで配信しています。 https://anchor.fm/toranoanalab 44
45.
Copyright © 2021
Toranoana Inc. All Rights Reserved. 質問受付 45
Download


![[1C5] Docker Comose & Swarm mode Orchestration (Japan Container Days - Day1)](https://cdn.slidesharecdn.com/ss_thumbnails/1c5dockercomposeorchestration-181206021928-thumbnail.jpg?width=640&height=640&fit=bounds)


