
Recommended
More Related Content
Similar to W181 User manual-.pdf
Similar to W181 User manual-.pdf (20)
Recently uploaded
Recently uploaded (20)
W181 User manual-.pdf
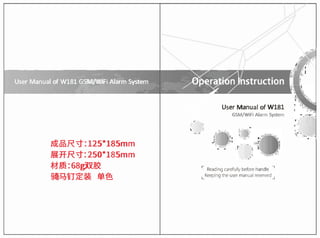
- 1. User Manual of W181GSM/WiFi Alarm System Operation lnstruction � ' - User Manual o f W181 GSM/WiFi Alarm System ' , ' 1 " /Jxdf!R "i" : 1 2 5 * 1 8 5 m m � H R "i" : 2 5 0 * 1 8 5 m m t ;J- � : 68g��� �ij:QiiJ'.(E'.� �ts r Readmo carefully b e fo r e handle 7 L Keepmq the user manual reserved _J
- 2. CONTENTS Explanation 2 Chapter 1 lntroduction 6 Chapter 2 lnstallation 8 Chapter 3 Operation a n d Setting 9 Chapter 4 SMS C o m m a n d 25 Chapter 5 APP Remote Control 28 Chapter 6 Alarm a n d remote operation 32 Chapter 7 Technical Parameters 33 Chapter 8 lnstallation of Detectors 34 Chapter 9 Troubleshooting 36 P 1 Product Explanation The Host: The receiver a n d control center of a l a r m system Remete Control: Swtich the mode of Host i n Arm/Disarm/Home a r m . Or for emergency a l a r m , but needs to connect with the host first. Detector: lnstall in the area needs to be detected, send the a l a r m signal to the host, with P I R /Motion detector, Door window detector, Smoke detector, Gas/CO detector, etc. Need to connect with host first. Arm: in arm mode, any detectors are triggered, the host will make an alarm Diarm: i n disarm mode, only the detector in emergency zone a n d e l d e r h e l p i n g zone is triggered, the host will make an a l a r m . Others not. Home arm: i n arm mode, the host will not make a n a l a r m if the detector i n home zone is triggered. But detectors i n other zone still can trigger a n a l a r m in this m o d e . Alarm number: a n auto-dail phone n u m b e r w h i l e the host a l a r m s . CID number: the p h o n e n u m b e r of a l a r m center, the host send a l a r m message to this n u m b e r address. Help number: the auto - d a i l phone n u m b e r w h i l e the detector i n e l d e r h e l p i n g zone is triggered. SMS n u m b e r : The phone n u m b e r of s e n d i n g a l a r m message to the user w h e n the host a l a r m s Voice call: use the a l a r m host as a m o b i l e phone to make calls Delay arm: after the user arm the system by host button or remote control, the host will delay a w h i l e before enter into arm mode. Delay a l a r m : after the host receive the a l a r m signal from the detector, it will delay a w h i l e before a l a r m s . Remete control: Use the p h o n e or m o b i l e phone to d i a l the S I M n u m b e r bound to the host. Then control the host after it answered. APP control: Use the TUYA a p p in your smart phone to control the host. System password: when locking the keyboard, i n p u t the password of the keyboard; When c a l l i n g to the host for remote control, needs to be i n p u t is fo u r digits, the factory password setting is 1234. P2
- 3. System vol u me: the vol u me of the system voice p ro m p t when operating the host System voice: whether voice prompt is required w h e n operating on the host Alarm time: the ti m e of siren gives a l a r m , i n m i n u t e s SMS reply: refers to whether the host automatically replies to the SMS after receiving the SMS when the user sets the host parameters by s e n d i n g SMS Alarm output: when the host a l a r m , whether to output relay short circuit at the same time Remote Control Voice Setting: when using the remate control to arm or disarm the host, the host voice prompts the system in a l a r m mode a n d gives " D I " notification s o u n d . Timing Arm & Disarm: set a group of Arm and Disarm time, so the host will enter into the arm or disarm state automatically at the set time. User serial code: w h i l e connect to network, the n u m b e r of the host in the networking center, composed of fo u r digits. Center precision: the requirement of h a n d s h a k e signal precision when the host interacts with the network center computer Arm/Disarm upload: w h e n the host changes the Arm/Disarm status, whether to u p l o a d the Arm/Disarm information to the network center Self inspection time: i n order to keep connection with the network center, the detection information s h a l l be u p l o a d e d to the network center regularly Self inspection in week: i n order to keep connection with the network center, it is necessary to regularly u p l o a d the detection i n fo r m a ti o n to the network center Backlight power saving: whether the display screen s h o u l d be t u rn e d off to save power w h e n the host is u n a tt e n d e d Anti Tamper switch: the host with a switch to prevent d i s m a n t li n g , choose to a l a r m when the host is d i s m a n t l e d or not lllegal Arm: set the illegal arm function, which can prompt you whether the doors a n d windows are closed w h e n you go out. Recording: users can record a s o u n d by the host i n advance. When there is a n a l a r m , the host d i a l s the a l a r m p h o n e . After the p h o n e is connected, you can h e a r the recording on the phone, such as "XX has a n a l a r m " a n d so on P3 Networking event code: it is used to define the alarm information attribute of the zone a rea, such as theft a l a r m , gas alarm, etc., which is represented by 3 digits Alarm siren: when the detector in a certain zone area a l a r m s , turn on the siren of the host or not. Type of zone area: the attribute of zone a rea. There are 8 options. Common zone area: the host o n l y works when it is armed or in home arm status, a n d there is no response when it is d i s a r m e d . Home zone: when the host enters the home arm status (press the home key on the host keyboard or the h o m e key on the remate control), the type of zone is that the detector in the home zone will not a l a r m if it is triggered. Note: if a user is e q u i p p e d with two accessories, one is a door magnet, the other is a n infrared detector, the door magnet is in zone 1, and the infrared detector is in zone 60 home zone), At this time, the user presses the home key of the remate control to make the host enter the home arm state. When the user walks a ro u n d the home, the infrared detector w i l l detect the movement of the h u m a n body a n d send out a s i g n a l , but the host w i l l not respond. However, when the door magnet of zone 1 ( o r d i n a r y zone) is opened, the host will immediately give an a l a r m . lntelligent zone: in the status of arm, when the detector i n the zone is triggered once, the system w i l l not give a n a l a r m immediately. lt will give a n a l a r m o n l y if it is triggered again within 5 ~ 30 seconds after the first trigger. Emergency zone: no matter i n Arm or Disarm status, as l o n g as the detector is triggered, it w i l l a l a r m . lt is generally used to connect smoke sensor, gas detector a n d emergency button. Shut down zone: no matter i n arm or disarm status, the detector w i l l not a l a r m w h e n it is triggered. Chime zone: no matter in Arm or Disarm status, as long as the transmitter in c h i m e zone is triggered, the host will give a c h i m e sound "DingDong". Welcome zone: I n d i s a r m status, the transmitter i n welcome zone is triggered, the host will give a sound "Welcome". I n arm status, the host w i l l a l a r m when the transmitter is triggered. Elder helping zone: no matter the in arm or d i s a r m status, the transmitter of the e l d e r h e l p i n g zone is triggered, the host will voice prompt P4
- 4. " e l d e r h e l p i n g in a zone", a n d d i a l three groups of h e l p i n g n u m b e r s . Dial the number of the zone: w h e n setting the a l a r m n u m b e r of a zone, it defined which groups of a l a r m n u m b e r s s h o u l d be d i a l e d , a n d three groups of h e l p n u m b e r s s h o u l d be d i a l e d far the e l d e r h e l p i n g zo n e . System time: the system time a n d date of the a l a r m . Alarm record: the information of each a l a r m of the host is recorded, i n cl u d i n g the zone n u m b e r a n d the a l a r m date, far the user to query, a n d it can record u p to 102 groups. Arm/Disarm record: each arm a n d disarm of the host will be recorded, i n cl u d i n g arm a n d disarm action, time, date,method, etc., it can record u p to 72 g ro u p s . P5 Chapter 1 lntroduction 1.1 System introduction This is a high-end G S M / W I F l ( 2 .4 G ) a l a r m system with 1. 7 - i n c h TFT color screen, touch keyboard, and built-in powerful CPU master, more stable and r e li a b l e i n performance. The p a n e l supports wireless connection with P I R motion sensors, door contacts, smoke detectors, gas detectors, remate controls, emergency buttons, a n d other accessories. When the panel host received any alarm notification, the host screen w i l l d i s p l a y the a l a r m zone immediately, with 80 d B siren s o u n d on site, u p to 110 d B siren s o u n d by connecting externa! h o rn . at the same time the panel will push a l a r m message by GSM card and c a l l the user's n u m b e r s by preset in the system. By p u s h i n g the a l a r m notices to the bound m o b i l e p h o n e through W i F i. lt is widely used in fa m i l i e s , factories, schools, shops, convenience stores, fi n a n ci a ! rooms, villas, residential areas a n d other places that need to be protected to ensure the safety of people a n d property. 1.2 Feature ■ Colorful TFT color display, h u m a n i z e d m e n u a n d voice prompt, easy to use ■ Support 99 zones and 8 zone types optional i n each zone; ON/OFF siren i n each zone ■ 8 groups ti m i n g Arm/Disarm function, weekly ti m i n g optional far each g ro u p to avoid m a n u a l l y arm a n d disarm frequently, truly realizes smartly a n d automatic control. ■ The p a n e l will d a i l 6 g ro u p s of preset p h o n e n u m b e r when a l a r m a n d no p h o n e n u m b e r s lost even power off ■ 10s automatic message recording function, Embedded artificial voice, the user will know the a l a r m location a n d a l a r m zones remotely. ■ Remate arm and disarm, monitoring, speaking, switch alarm, switch intelligent socket function. ■ Wireless intelligent connecting 1527 full range of accessories, support to connect 100 remate controls a n d 100 detectors ■ Telephone (mobile phone) or sending SMS to control the host system remotely, innovative c o m p a ti b l e with C h i n a M o b i l e Feixin function, P6
- 5. □ 2 3 Ar m / H o m e A r m Key 4 5 6 Disarm Key 9 Return key 7 8 D o ., Confirm Key * - 1 M e n u Host Touch Keypad and Side View , ...... □ 1 2 3 .. 4 5 6 .. 7 8 9 !) * o - ✓ � Front View S I M Card Slot On/off button Chapter 2 lnstallation USB Port Horn interface--,.A■ The p a n e l s h o u l d be installed in the central position of the g u a r d a rea to receive a ll signals from detectors. Keep away from large metal objects or a p p l i a n c e s with high-frequency interference, m e a n w h i l e , avoid the reinforced concrete w a l l s a n d tire doors barriers, etc. in arder to save costs users send S M S to the host system settings a n d S M S . ■ Can use a p p to set a n d manage the p a n e l host, support IOS / A n d ro i d operating system. The host can be used a s a n o r d i n a r y m o b i l e phone, which can make calls directly. ■ One way of alarm linkage wireless relay, one way of linkage wireless sound and light siren, can be connected to the wired horn to expand the a l a r m v o l u m e . ■ lntegration of high-precision clock c h i p , time will not be disrupted d u e t o power fa i l u r e . ■ The u n i q u e b l a c k box function can display the latest 72 a r m i n g a n d d i s a r m i n g records a n d 102 latest a l a r m records. Display the a l a r m ti m e a n d area code accurately. ■ 2 sets of C I D numbers, can be connected with large central computers, a n d co m p a ti b l e with l n t e rn a ti o n a l network a l a r m Contact I D protocols. ■ with low power r e m i n d e r a n d anti tamper function. ■ B u i l t in rechargeable high-capacity li t h i u m battery, automatically switch to stand by s u p p l y w hen power fa i l u r e . ■ with SMS r e m i n d e r a n d c a l l i n g when power-off. ■ The panel host adopts 850/900/1800/1900MHz GSM / GPRS module. P7 P8
- 6. /Anti-tamper key � '/' = = = = = 8= = & ==z= � , w Panel Back View Prompt Display"Disarm" Host in disarming status information Display"Arm" Host in arming status display Display"Home Arm" Host in home arming status Display"XX Zone is Host in alarming status with specific defense zone alarming" Display"97 Zone is 97 Zone is alarming cause manual disassembly or moving alarming" the Host. Anti-tamper a l a r m . W I F I connect Host Keypad connect WIFI SIM icon is blinking Host did not detect SIM card Chapter 3 Operation & Setting 3 . 1 lnitial Power-on According to the installation method, insert the S I M card to the card slot of the host panel, t h e n connect host with power a n d long press [ON/OFF] button. Now then, host voice prompts "Welcome to smart voice alarm". At the same ti m e the host starts self-testing GSM network, "GSM signal LED" flashing (flash once for 15) when searching the GSM S i g n a l. U n ti l network working properly, S I M Card icon w i l l disappear, means GSM signals and S I M card working normal. lf it keeps fl a s h i n g m e a n s not detecting S I M card or something is wrong with S I M card. Host Keypad shows not connect with W I F I. pg 3.2 Arm Arm refers to a full range of on-site alarm detection alert when nobody at home; AII detectors are i n working state, w h e n there is danger (theft, tire, gas l e a k etc) trigger the detectors, the host alarms immediately. After a r m i n g operation, it displays a n d locks "ARM" icon. Remate Control operation: press key [ARM] once. Keyboard operation: press key [ARM] once. 3.3 Disarm Disarm refers to host panel stops the a l a r m or make the alarm system in a non-alert state. After d i s a r m i n g , when detectors are triggered, but host doesn't alarm (except the detectors of emergency zones and the emergency button on remate control). After d i s a r m i n g operation, it displays and locks "Disarm" icon. Remate Control operation: press key [ D i s a r m ] . Keyboard operation: press key [ D i s a r m ] . 3.4 Home Arm H o m e Arm refers to w h e n s o m e o n e at home, a n d for safety, the detectors i n the perimeter area like doors, windows, balconies are in working state but the detectors i n d o o r don't work i n case of the false a l a r m i f triggered by user himself, t h e n the user chooses H o m e Arm to let sorne detectors work a n d other detectors not work. H o m e Arm function needs to be set that is the defense zones of the interior detectors s h o u l d be changed to be H o m e Arm zones in order to work properly. After H o m e Arm operation, it displays and locks " H o m e Arm" icon. Remate Control operation: press key [STAY]. Keyboard operation: press key [ARM] twice. 3.5 Emergency Alarm When a n emergency occurs, press p a n i c key on the remate control to enter emergency a l a r m state. Note: if the host password keyboard protection function is turned on, the password needs to be input befare the operation to the keyboard, and the initial password is 1234. P 1 0
- 7. N u m b e r Settings Number Settings � tri @ o l .Alarm numbers 1 6 : 3 0 2 . C I D numbers 3 . H e l p numbers 1 3 - 1 1 - 0 8 THU � � � [i) 4 . S M S numbers Arming 5.Voice calls O K . E n t e r E S C . Return O K . E n t e r E S C . Return 3.6 Set Phone No. The host can m a x i m u m set 6 groups a l a r m N o . , 2 groups C I D No., 3 groups H e l p No., 6 groups SMS message No. The m a x i m u m length of every g ro u p p h o n e N o . is 30 digits. Please fi n d settings as below: 3.6.2 Set C I D No. As shown in picture 3-1, press key [ UP/DOWN l to select [ 2. CI D N o . ] a n d press key [ O K ] or input 2, t h e n i n p u t g ro u p n u m b e r (1-2), then i n p u t CID n u m b e r like 88889999 a n d press key [ O K ] to save. Then press key [ BACK] to return to desk page. 3.6.5 Phone Call As shown i n picture 3-1, press key [UP/DOWN] to select [5. P h o n e Call] a n d press key [OK] , then i n p u t p h o n e n u m b e r like 10086. Press key [OK] to start c a ll i n g . Press key [BACK] to h a n g u p . 3.6.4 Set SMS Phone No. As shown i n picture 3-1, press key[UP/DOWN]to select [4. SMS P h o n e No.] a n d press key [OK] or i n p u t 4, then i n p u t g ro u p n u m b e r (1-6), t h e n i n p u t p h o n e n u m b e r like 13812345678 press key [OK] to save. User can set 6 groups a l a r m p h o n e n u m b e r s at most. Then press key [BACK] to return to desk page. Delete SMS Phone No. As shown i n picture 3-1, after entering to the settings of SMS P h o n e No., press key [ M e n u ] to delete H e l p P h o n e No. a n d press key [OK] to save, then press key [BACK] to return to desk page. 3.6.3 Set Help Phone No. As shown i n picture 3-1, press key [UP/DOWN]to select [3. H e l p P h o n e No.] a n d press key [OK] or i n p u t 3, then i n p u t g ro u p n u m b e r (1-3), t h e n i n p u t p h o n e n u m b e r like 13812345678 press key [OK] to save. User can set 3 groups a l a r m p h o n e n u m b e r s at most. Then press key [BACK] to return to desk page. Delete Help Phone No. As shown i n picture 3-1, after entering to the settings of H e l p Phone No., press key [ M e n u ] to delete H e l p P h o n e No. a n d press key [OK] to save, then press key [BACK] to return to desk page. Delete CID No. As shown i n picture 3-1, after entering to the settings of C I D numbers, press key [ M e n u ] to delete a ll the C I D N o . a n d press key [OK] to save, then press key [BACK] to return to desk page. Emergency Disarm Arm Stay Picture 3 - 1 3 . 6 . 1 Set Alarm Phone No. As shown in picture 3-1, press key [ UP/DOWN l to select [ 1. Alarm Phone N o . ] a n d press key [ O K ] or i n p u t 1, t h e n i n p u t g ro u p n u m b e r (1-6), then i n p u t p h o n e n u m b e r like 13812345678. User can set 6 groups a l a r m p h o n e n u m b e r s at most. Then press key [ BACK] to return to desk page. Delete Alarm Phone No. As shown in picture 3-1, after entering to the settings of a l a r m p h o n e numbers, press key [ M e n u ] to delete the a l a r m p h o n e n u m b e r a n d press key [ O K ] to save, then press key [ BACK] to return to desk page. P 1 1 P 1 2
- 8. Add Accessories 1 .Add Remole Control 2.Add Detector 3.Del Remole Control 4. Delete Detector 5.Smort Accessories O K . E n t e r E S C . Return Add Remote Control Enter Numberl00-991 Ioto! · nn1 O K . E n t e r E S C . Return Add Detector Enter Numberi00-991 Total · nnn O K . E n t e r E S C . Return 3 . 7 . 5 lntelligent Accessories As shown i n picture 3-2, press key [1. Add Remate Controls] . With the voice prompt "Please i n p u t n u m b e r s : " { O means siren, 9 m e a n s a l a r m relay), t h e n press key [Arm] a n d host s e n d open signals; press key [Disarm] a n d host send clase signals. 3. 7 .4 Delete Detectors As shown in picture 3-2, press key [4. Delete Detectors] . With the voice p ro m p t "Please i n p u t n u m b e r s {01-99)"{ e.g. delete Zone N o . 1 remate control, t h e n i n p u t 01; delete Zone N o . 22 remate control, i n p u t 22; delete a ll by pressing key [ARM] ), t h e n press key [OK] . 3. 7 .2 Delete Re mote Control As shown in picture 3-2, press key [3. Delete Remate Control] . With the voice prompt "Please i n p u t n u m b e r s { 0 1 - 9 9 ) " { e.g. delete No. 1 remate control, t h e n i n p u t 01; delete N o . 22 remate control, i n p u t 22; delete a l l by pressing key [ARM] ), then press key [ O K ] . 3. 7 .3 Add Detectors As shown in picture 3-2, press key [2. Add Detectors] . With the voice p ro m p t "Please i n p u t zone n u m b e r s {01-99)"{ e.g. Study Zone No. 1 remate control, t h e n input 01, study Zone No. 22 remate control, i n p u t 22), t h e n press key [OK] . At t h i s moment, trigger detectors to s e n d a signal to host. Host voice prompts "Add Successfully" with [Add Successfully] on display, which m e a n s detector has been programmed to the host. lf voice prompts add repeatedly, it mea ns detector has been a d d e d to the host already a n d couldn't be programmed repeatedly. T o l e a rn more detectors, trigger other detectors. The host can study as most as 150 different detectors. Solar Strobe Siren J1 Siren J009 3. 7 . 5 . 1 Code Match between Host & Wireless Strobe Siren Code Match M e t h o d : I n strobe siren standby mode, long press key SET u n ti l the a l a r m indicator lit constantly to enter l e a rn i n g state; Then on intelligent accessories page, i n p u t N o . O, press key [ARM] or [DISARM] , host will send signal as shown in picture 3-2; wireless strobe siren will beep twice a n d indicator fl a s h e s twice after receiving the signa 1, which mea ns the code match successfully, t h e n press the SET key of strobe siren to exit the l e a rn i n g state. Check the Success of Code Match: after wireless strobe siren exit l e a rn i n g state, press key [ARM] or [ D I S A R M ] to switch [Wireless Strobe Siren] ON or OFF, if it's OFF, strobe siren will beep "di d i " ; if it' s O N , siren w i ll a l a r m , whi ch m eans the host match code successfully with wireless strobe s i r e n . Send OK Smart Accessories Enter Number : O K . E n t e r E S C . Return Disarm Key.OFF Arming Key.ON 0.Siren 9.Alarm Outlet Picture 3 - 2 Smart Accessories Enter Number : O K . E n t e r E S C . Return Disarm Key.OFF Arming Key.ON 0.Siren 9.Alarm Outlet O K . E n t e r E S C . Return Disarm Key.OFF Arming Key.ON 0.Siren 9.Alorm Outlet Smart Accessories Enter Number : P 1 3 P 1 4
- 9. 3. 7 .5.2 Code Match between Host and Smart Socket Code Match Method: I n smart socket standby mode, long press key SET for Ss u n ti l the socket indicator light t u rn s out to enter l e a rn i n g state; Then on intelligent accessories page, press key [ARM] or [DISARM] to switch smart socket ON or OFF, host will send slgnal : Smart socket indicator light flashes twice, w h ic h m e a n s the code match successfully, then press the SET key of smart socket to exit the l e a rn i n g state. Check the Success of Code Match: after smart socket exit l e a rn i n g state, press key [ARM] or [DISARM] to switch smart socket ON or OFF, if it's OFF, smart socket lit RED; if it's ON, socket lit BLUE, w h i c h means the host match code successfully with smart socket. System Settings l .Del ay Settings 2.Password Settings 3. Volee Settings 4.Siren Settings 5.Phone&SMS Settings O K . E n t e r E S C . Return Picture 3 - 3 Delay Settings Arming delov.Dü] Alarm delay:00 O K . E n t e r E S C . Return Picture 3 - 4 Password Settings Password: 1 2 3 4 Keypad Lock:OFF O K . E n t e r E S C . Return Picture 3 - 5 3.8.2 Password Set On system setting page, press key [UP/DOWN] to move the cursor behind [Password Set], then press key [OK] or n u m b e r 2 to enter password set page, as shown i n picture 3-4. 3 . 8 . 1. 2 Delay Alarm Set On del ay set page, press key [DOWN] to move cursor b e h i n d [Delay Alarm T i m e ] , i n p u t the delay period(00-99s), 00 mea ns without de lay, a l a r m i n g immediately, then press key [OK] to save the setting. Smart Socket 3.8 System Set On main page, press key [UP/DOWN] to move the cursor behind [System Set] , then press key [OK] or n u m b e r 3 to enter system set page, as shown in picture 3-3. 3.8.1 Delay Set On system set page, put cursor on [Delay Set] , a n d press key [OK] or n u m b e r 1 to enter delay set page, as shown i n picture 3-3. 3 . 8 . 1 . 1 Delay Arm Set On delay set page, put cursor on [Del ay Arm T i m e ] , i n p u t the delay time (00-99s), 00 m e a n s without delay, a r m i n g immediately, then press key [OK] to save setting, as shown in picture 3-4. P 1 5 3 . 8 . 2 . 1 System Password On password setting page, input to u r digits new passwords i n System Password (original password is 1234), press key [OK] to save. 3.8.2.2 Keypad Password On password setting page, press key [DOWN] to move the cursor b e h i n d [Keypad Password Set], press key [ M E N U ] to switch it ON or O F F a n d press key [OK] to save setting. lf the lock function of keypad is open, host w i l l lock w h e n it enters into d o r m a n c y or a l a r m state. U n l o c k the keypad by i n p u tti n g the password. The factory default is unlocked. 3.8.3 Voice Setting On system setting page, press key [UP/DOWN]to move the cursor b e h i n d [Voice Setting], then press key [OK]or n u m b e r 3 to enter Voice Setting page, as shown i n picture 3-6. P 1 6
- 10. System Settings 1.Delay Settings 2.Password Settings '3'.voice Settings 4.Siren Settings 5. Phone&SMS Settings O K . E n t e r ESC. Return Picture 3 - 6 Voice Settings System volume:5 System voice:ON O K . E n t e r ESC. Return Picture 3 - 7 Siren Settings Built-in volume : 05 Siren on time:01 O K . E n t e r ESC. Return Picture 3 - 8 3.8.5 Phone Message Setting On system setting page, press key [UP/DOWNho move the cursor b e h i n d [Phone Message Setting], then press key [OK] or n u m b e r 5 to enter phone message setting page, as shown in picture 3-8. 3 . 8 . 5 . 1 Message Reply On phone message setting page, press key [ M E N U ] to switch it ON or OFF a n d press key [OK] to save setting. lf switch on, the host w i l l s e n d message to advise whether settings are correct when users do settings by message. The factory default is on. 3.8.5.2 Alarm Output On p h o n e message setting page, press key [DOWN] to move the cursor b e h i n d [Alarm Output], press key [ M E N U ] to switch it ON or OFF a n d press key [OK] to save setting. lf switch on, re lay will shortcut output w h i l e the host a l a r m i n g , COM a n d NO shortcut. The factory default is o n . 3 . 8 . 3 . 1 System Volume On voice setting page, put the cursor on [System Vol u m e ] , input vol u me level 0-7, then press key[OKho save the setting. O m e a n s mute d u r i n g the operation to host, a n d 7 m e a n the largest volume, as shown i n picture 3-7. The factory default is level 5. 3.8.3.2 System Voice On voice setting page, press key [DOWN] to move the cursor b e h i n d [System Voice], press key [ M E N U ] to switch it O N or OFF a n d press key [OK] to save setting. lf switch it off, there is no voice prompt o n l y button voice d u r i n g operation. The factory default is o n . 3.8.4 Siren Setting On system setting page, press key [UP/DOWN] to move the cursor b e h i n d [Siren Setting], t h e n press key [OK] or n u m b e r 4 to enter Siren Setting page, as shown in picture 3-8. Phone&SMS Settings SMS reply:ON AlarmOutlet :ON O K . E n t e r ESC. Return Picture 3 - 9 Sound Settings Enter Numberl00-991: 01 O K . E n t e r ESC. Return Picture 3 - 1 O Sound Settings Siren Sound : ON O K . E n t e r ESC. Return Picture 3 - 1 1 3.8.4.1 lnternal Siren Volume On siren setting page, i n p u t v o l u m e level 0-7, then press key [OKho save the setting. O m e a n s mute a n d 7 m e a n s the largest volume, as shown i n picture 3-8. The factory default is level 5. 3.8.4.2 Siren Alarm Time On siren setting page, press key [DOWN] to move the cursor b e h i n d [Siren Alarm T i m e ] . The siren a l a r m ti m e is between 0-20 m i n u t e s , then press key [OK] to save setting. O mea ns mute, the factory default is 1 minute. P 1 7 3.8.6 Alarm Output On system setting page, press key [UP/DOWNho move the cursor b e h i n d [Re mote Control Voice Setting], t h e n press key [OK] or n u m b e r 6 to enter setting page, as shown in picture 3-10. With the voice prompt "Please i n p u t n u m b e r s : " ( No:01-99), t h e n press key [OKho enter next page; press key [ M E N U ] to switch it ON or O F F a n d press key [OKho save setting, as shown in picture 3 - 1 1. lf switch it on, it m e a n s the remote control w i l l s o u n d " D I D I " when using t h i s n u m b e r e d remote control to arm a n d d i s a r m . The factory default is o n . P 1 8
- 11. 3.8. 7 Scheduled Arm/Disarm On system setting page, press key [UP/DOWN] to move cursor b e h i n d [Scheduled Arm/Disarm], then press key [OK] or number 7 to enter setting page, as shown in picture 3 - 1 2 . With the voice prompt "Please i n p u t numbers:", enter No between 1-4; then press key [OK] to enter next page; with voice p ro m p t i n p u t s c h e d u l e d arm ti m e , s c h e d u l e d disarm ti m e . Move cursor b e h i n d s c h e d u l e d switch, press key [ M E N U ] to switch it ON or O F F a n d press key [OK]to save setting, as shown i n picture 3-11. lf switch it on, the host w i l l a u t o m a ti c a l l y arm a n d disarm i n preset ti m e . 3.8.8.4 Self Test Week On re mote control voice setting page, press key [DOWN] to move cursor b e h i n d [Self Test Week], i n p u t any week n o . 1234567, press key [OK] to save setting. 3.8.9 Low Battery and Anti-tamper Setting On system setting page, press key [UP/DOWN] to move cursor b e h i n d [Low Battery a n d Anti-tamper Setting], press key [OK] or n u m b e r 9 to enter setting page, as shown i n picture 3-15 .. 3.8.8.3 Self Test Time On remote control voice setting page, press key [DOWN] to move cursor b e h i n d [Self Test Time] , i n p u t self test time, press key [OK] to save setting. 3.8.8 Scheduled Arm/Disarm On system setting page, press key [UP/DOWN] to move cursor b e h i n d [Network Center Setting] , t h e n press key [OK] or n u m b e r 8 to enter setting page, as shown i n picture 3-14. 3.8.8.1 User Area Code On remote control voice setting page, i n p u t to u r C I D code i n [User Area Code] , press key [OK] to save setting. The factory default is 0000. 3.8.8.2 Arm/Disarm Upload On remote control voice setting page, press key [DOWN] to move cursor b e h i n d [Arm/Disarm U p l o a d ] , press key [ M E N U ] to switch [Not U p l o a d ] / [Arm U p l o a d ] / [Disarm U p l o a d ] / [Arm/Disarm U p l o a d ] , press key [OK] to save setting. The factory default is [Not U p l o a d ] . 3.8.9.1 Back Light Power Saving On low battery a n d anti-tamper setting page, on the item [Back Light Power Saving], press key [ M E N U ]t o switch on or off a n d press key [OK]to save setting. lf switch it on, TFT c o l o r display w i l l close to save power. The factory default is o p e n . Picture 3 - 1 7 OK.Enter ESC. Return F u l l recovery Please hoto <OK> key 1 O seconds! Picture 3 - 1 6 OK.Enter E S C . Return Restare Factory l .Part recovery 2.Full recovery Picture 3 - 1 5 LCD Saved&Tamper LCD Save: i5NI Tamoer : O N Ready t o Arm, OFF AC Failure:0 Language, English OK.Enter E S C . Return 3.8.9.3 lllegal Arm On low battery a n d anti-tamper setting page, press key [DOWN] to move cursor b e h i n d [lllegal Arm] , press key [ M E N U ] to switch on or off a n d press key [OK] to save setting. lf switch it on, the host cannot arm if it fa i l s to receive the signal sent by sensor closure. The factory d e fa u l t is close. 3.8.9.2 Anti-tamper Switch On low battery a n d anti-tamper setting page, press key [DOWN] to move cursor b e h i n d [Anti-tamper Switch] , press key [ M E N U ] to switch on or off a n d press key [OK] to save setting. lf switch it off, the host will not a l a r m i f anti-tamper switch is triggered. The factory default is open. Picture 3 - 1 4 OK.Enter ESC. Return Testweek: Test t i m e : Arm&Disarm : No send C I D Settings User code : 0000 Picture 3 - 1 3 O K . E n t e r ESC. Return T i m i n g : ON Week: Disarm time : Timing Settings Armina time : Picture 3 - 1 2 Timing Settings Enter N u m b e r l l - 4 1 : O K . E n t e r ESC. Return P 1 9 P20
- 12. 3.8.9.4 Power Off Setting On low battery a n d anti-tamper setting page, press key [DOWN] to move cursor b e h i n d [Power Off Setting] , i n p u t 0-5, press key [OK] to save setting. O m e a n s close prompt function, 1 means AC off, 2 m e a n s d i a li n g , 3 means dialing siren, 4 means dialing linkage, 5 means dialing+siren+linkage, The factory default is O. 3.8.10 Restare Factory Setting I n the system setting page, press [up/down] key to move cursor to the [Restare Factory Settings]. Then, press [OK] button or press key [O] directly to enter into the Restare Factory Setting page, as shown in Figure3-16. 3 . 8 . 1 0 . 1 Partial Restoration After entering into Restare Factory Setting page, press [OK] button, the host will remind whether to restare factory settings. After restoring factory setting, the remate controls a n d detectors added befare would not be deleted, but a l l the other parameters w i l l be restored to the factory state. 3.8.10.2 Full Restoration After entering into Restare Factory Setting page, press [2] key a n d then l o n g press [OK] key u n ti l a host reboot is completed. I n t h i s situation, a l l the remate controls a n d detectors w i l l b e deleted a n d a l l the parameters will be restored to factory state, as shown in Figure3-17. Zone Settings º tri @ o � 0 � [i] O K . E n t e r ESC. Return Zone Settings Enter Numberl00-991: 01 O K . E n t e r ESC. Return Zone Settings CID Event code: l 30 Siren : O N Types: A W A Y ARMED Zone dial : l 23456 OK.Enter E S C . Return On m a i n m e n u . as shown in picture 3-18, press [UP/DOWN] key to move the cursor at [Recording] , then press key [OK] or n u m b e r 4 directly to enter recording setting page, as shown in picture 3-19; On recording setting page, press key [BACK] to return to the m a i n m e n u ; Press any key to start recording. The recording time is 10s, as shown i n picture 3-20. The recording s h o u l d be brief, e.g. "This is XXX's house, it's intruded illegally, please help". Host w i l l exit a u t o m a ti c a l l y after 10s, a n d user can press any key to e n d recording d u r i n g recording process. 3.10 Zone Management On the m a i n m e n u page, as shown in Figure 3-21, press [ U p / Down] key to move the cursor to the zone management. Press [OK] button or press n u m b e r 5 directly to enter zone management page, as s h o u l d in Figure 3-22. Then i n p u t the zone n u m b e r (1-99) a n d press [OK] to enter the next level m e n u . Zone attribute setting m a i n l y includes networking feature code setting, built-in siren on/off s e tti n g , zone type setting, d i a li n g g ro u p w h e n a l a r m i n g a n d wired zones open/closed alarms, etc as shown in Figure 3-23. The setting is as follows: Message Record ii tti @ O � 0 � [i] O K . E n t e r ESC. Return Picture 3 - 1 8 Message Record Press l to stort recording O K . E n t e r ESC. Return Picture 3 - 1 9 Message Record Recording ...... 09 O K . E n t e r ESC. Return Picture 3 - 2 0 Picture 3 - 2 1 Picture 3 - 2 2 Picture 3 - 2 3 3.9 Recording Setting Host will play the preset recording after d i a l i n g the preset a l a r m number. And the recording setting method is as below: 3.10.2 lnternal Siren On/off After entering the next m e n u , press [Down] key to move the cursor to [Alarm alerting] .Press [ M e n u ] key to switch ON a n d O F F and t h e n press [OK] to save. lf you select Off, it indicates that host will not alert when the detectors in that Zone receives a l a r m s . 3.10.1 Network Even Code After entering next level menu, i n p u t event code in the Networking Event Code. 100 m e a n s m e d i c a l aid, 110 represents fire, 1 2 1 denotes robbery, 122 denotes a noiselessly rob, 130 represents burglary, 13 1 denotes the perimeter burglary, 1 5 1 denotes gas leakage. Press [OK] to save. P 2 1 P22
- 13. 3.10.3 Set Zone Type After entering the next level m e n u , press[DOWN] key to move cursor to [Zone Type]. Press [ M e n u ] key or press n u m b e r s directly to select: [1] N o r m a l , [2] Stay, [3] lntelligent, [4] Emergency, [s] Close, [6] doorbell, [7] Welcome, [8] H e l p the Senior, then press key[ OK] to save. WIFI Settings º tíi @ o � 0 � raJ O K . E n t e r ESC. Return Picture 3 - 2 7 WIFI Settings 0.APConfig l .W I F I C o n fi g 2 .W I F I R e s e t OK.Enter ESC. Return Picture 3 - 2 8 3.10.4 Set Sub Zone Dialing After entering the next m e n u , press [Down] key to move the cursor to [Zone D i a li n g ] . I n p u t user n u m b e r when t h i s Zone a l a r m s . lt can be any desired p h o n e groups a m o n g 123456, but if the zone type is for [ H e l p the senior], the g ro u p is fixed to h e l p n u m b e r and can't be set, then press [OK] to save. 3 . 13 Check Records On the m a i n page, press [ U p / Down] to [Version Records], then press [OK] button or n u m b e r 8 into checking version records page, as shown 3-29, 3-30 [Record query] i n cl u d e s a l a r m records a n d arm/disarm records, 3-31 [Version query] you can see the model, software version n u m b e r and I M E I code of GSM m o d u l e . 3 . 11 Clock Management On the m a i n page, press [ U p / Down] key to move the cursor to [clock management], then press the [OK] button or press n u m b e r 6 to enter clock m a n a g e m e n t page. Press [ M e n u ] button to switch the display format of the date, and press [ U p / Down] key to switch a m o n g year, month, date, hour, minute and second; Press n u m e r i c key to i n p u t the n u m b e r s t h e n press [OK] to save, as shown in Figure 3-26. Clock Settings vv-MM-dd 1 5 - 0 7 - 2 4 0 9 : 1 6 : 52 OK.Enter E S C . Return System&Version � tíi @ o � 0 � raJ OK.Enter E S C . Return Picture 3 - 2 9 History&Version l .Historylist 2.System Version O K . E n t e r ESC. Return Picture 3 - 3 0 History List l.Alarmllst 2.Arm&Disorm list O K . E n t e r ESC. Return Picture 3 - 3 1 3 . 1 3 . 1 Alarm Records On [Check Records] page, press [OK] key to enter [Alarm Records], as shown i n picture 3-32. Press key [UP/DOWN] to check a l a r m records. At most 102 records can be saved, and each record i n cl u d e s information like record number, a l a r m date, time, zones etc. Picture 3 - 2 6 3. 12 W I F I Configuration I n the m a i n page, press [ U p / Down] to [WIFI configuration], t h e n press [OK] button or press the n u m b e r 7 to enter W I F I configuration page, as shown 3-27, when configuring W I F I , Please press W181 keypad n u m b e r O (AP configuration) 1 (intelligent configuration), if you want to cancel a l i users, please press keypad n u m b e r 2, as shown 3-28. P 2 3 3 . 1 3 . 2 Arm/Disarm Records On [Check Records] page, press [UP/DOWN] key to move the cursor to [ Arm/Disarm Records] a n d press [OK] or n u m b e r 2 to enter [ Arm/Disarm Records] page, as shown in picture 3-33. Pres[UP/DOWN]to check Arm/ Disarm records. As most 72 records can be saved, a n d each record includes information like record number, Arm/Disarm date, ti m e a n d mode, etc. P24
- 14. Chapter 4: SMS Setting a n d C o m m a n d Chart 3 . 13 . 3 Check Product Version On m a i n m e n u page, as shown i n Figure 3-34, press [UP/DOWN] to move t h e cursor to [ Check Product Version] a n d then press [OK] or n u m b e r 8 directly to enter to the version checking page. Users can see the m o d e l n u m b e r of the product, software version a n d GSM m o d u l e I M E I code, as shown i n Figure 3-34. I n a d d i ti o n to set para meter t h ro u g h host m e n u , SMS or Faction Message can also set host parameters. The form is as below: [ System Password] + [ C o m m a n d N u m b e r l + para meter 1+para meter 2+parameter 3+ para meter 4. AII co m m a n d s begin with system password, a n d 1234 is system's i n i ti a l password. Users can c h a n g e system password a n d since t h e n , users s h o u l d use the modified password, or host will not response to t h e co m m a n d s . NO. Name Command Parameterl Para. 2 Para. 3 Para. 4 Example No. Disarm o # 12340# 1 Disarm Arm 1 # 12341# 2 Arm 3 S T A Y 2 12342# S T A Y RelayON 3 12344# 4 RelayON Relay OFF 4 12345# 5 Relay OFF Check host 11 123411# general # Check host voice volume, 6 parameters Siren's state, etc Set phone 3 1~9 13899998888 # 12343113899998888# No. Group 1-6 is (User can set 31 Set first group phone common as the number) number 7 number; 7-9 is the senior help number 8 Delete 3 1~9 # 123435# Phone No. Delete 5th Phone No. 9 Check 30 # 12343008# phone No. 01~09, Check 8th Phone Number 1-9 arouo 4 1~8; 13899998888 # 12344113899998888# SetSMS Group 1~6 is (User can set Set first group phone number SMS number: 31 as the number) number 10 and central 7~8 is central number number 11 Delete 4 1~8 # 1234435# Phone No. Delete 5 th Phone No. 12 Check 4 0 01~08, # 123443008# phone No. 1-8 group Check 8 th Phone Number 13 Set system 50 Four any # 1234509876# password figure among Set user password as 9876 0-9 14 Delay Arm 51 00-99 # 12345130# period Set Delay Arm Period as 30s setting 15 Delay 52 00-99 # 12345230# Alarm Set Delay Alarm Period as Period 305 setting 16 Set Alarm 53 00-20 12345305# Siren Minutes Set Alarm Siren Period as 5 Period Minutes 17 Date 56 20150520 203000 # 12345620150520203000# /Time Set time as setting 2015//20/20:30:00 18 Check 56 # 123456# system Check system time time 19 Arm/Disar 57 01-04; # 1234577017080018001234 m at fixed 01-04 group 5# time fixedtime Set the first fixed time, Arm automatically at 8:00 form Monday to Friday, disarm at 18:00 20 Check 57 01-04; # 12345701# Arm/Disarm 01-04 group Check the first group o f time at fixed time fixed time far Arm/Disarm 21 Set Zone 60 01~99; 1-Normal Zone 1-Sire # 1234601880# Attributes 01-99 Zone 2-STAY Zone n o n Set zone 18 as Help the 3-lntelligent Zone when Senior Zone, Siren doesn't 4-Emergency Zone alarming alert when alarming. 5-Close Zone 2-Siren 6-Doorbell Zone 7-Welcome Zone offwher 8-Help The Senior alarming Zone ESC. Return Picture 3 - 3 4 System Version V e r : ERDF1548645485 I M E I : 86719021261619 MAC :150206K6 O K . E n t e r ESC. Return O K . E n t e r Picture 3 - 3 3 Ti m e : D a t e : Arm&Disarm list 001 History Status: ESC. Return O K . E n t e r Picture 3 - 3 2 Alarm list 001 History Alarm zo n e : A l ar m t i m e : Alarm date: P 2 5 P26
- 15. " - • . ,_ _ '""""" - . ,...- °'""°'"'""""- - " • • . , .,., -- • u.... .. ., ,. - .,...,.,,,. , _ ...,_............ --- ·-� - m- m-- · · - ......,_ m = " • " '" • .,..,.... - ........,,,-,__.,. - " -- • . ,... . ~· • ,._,__� �- · � - - - - - , �.. .... ,. ...,_..,.,..., ...,_ - e- .. -.--� ,_, -· - " - " . ,... . • ,,,..,..., - ·�- °'"""""'"' ...'" · - - -- - - " •= • - • ,, _ - ·-· !otlCD-0. - _, • • " � • ,,...,.. -· .........,....., ......... - ' - " • " -- • """"' - ,__ --- ·- ,__ - - ·-� -·- • • " ��- • ,,...,_.. 00- -00 '"'°""""' .... - " • • - ,,,.,.., • ,,....,,.00,. �- - - ...-. .,,..._ - "°'""°"---- " · - - - ,,_ · - - • • Notice:"1234u i n a b ove chart indicates sys t e m password. Use r should u s e t h e n ew password i s t h e u se r has change t h e password. Chapter 5:APP remote control Sean t h e Q R c o d e , o r search f o r " T U Y A SMART" i n A p p s t o r e o r Android mobile phone market t o download and install. Register T o open the " T u y a smart" app fo r the fir s t time, users need t o register a n account: Network access configuration lntelligent co n n ecti o n l . connect the W1F1 router 1 n your h o m e fi rs t , make sure that the W1F1 router can connect t o t h e externa! network normally, enter the app (all devices] page, click the [ a d d device] r cc n , select t h e WiFi connector i n t h e other page, enter the WiFi input page, then enter !he WiFi s e c r e t c od e , and click (confirm) t o e n ter the start configuration page Smart connection l . Connect the mobne phone t o t h e W1Fi router a t home first, make s u r e that t h e W1Fi router a t home ca n connect t o the Internet normally, enter the app [all devices] page, click the ( a d d d ev ic e ) ic o n , select the (WiFi connector) i n t h e "other" page, enter the W1Fi mput page, then e n t e r t h e WiF1 code, and click (confirm) t o enter the start configuranon p a g e
- 16. "li 11' iil t'r .. • ....,_ ,. ,....,. ...., ,. - - "- a - 1 � - - ..ir..il& E'" . l)l � il'l 1. Please ensure that the equipment works normally (it i s not i n "alarm" o r "low power" state a t present), 2 . Enter the app [ali devices] page, click the [add device) icon, and select (WiFi connector] i n the "other" page, 3 . O n the [add device] page, click the [hot distribution network (compatibility mode)] i n the upper right cerner t o enter the A P configuration page. The app will jump t o the WiFi connection configuration page o f t h e mobile phone, press t h e host menu k e y t o enter the main page, and then press the [up / down] k e y t o move the cursor t o the [LAN), press the [OK] k e y o r directly press the number k e y 171 t o enter the LA N page. Press the number k e y [3] t o enter the A P network configuration state, and the Wifi module o f the host starts t o distribute a WiFi hotspot. According t o the prompt o n the app page, connect the Wifi hotspot distributed b y the host (the name ofthe WiFi hotspot distributed b y this button: smarlife-xxxx, n o password). After connecting the WiFi hotspot o f the button, return t o the app operation page and enter the A P connection page. Wl f l Settlngs ln-C0<111QuoQ!IOf1 O.APC0<1ft<l 1 Smor!Coo 2Wlfl- O.- ¡ n t o, ! i C � e tu , n Wl f l Se tn n g s OAPC 1SmortC0<1 2Wlfl R e "' ! 0.-!n.., H C • etiJ , n ....,.. ..;.""""'''' �=11 ___.,..,., • � ...,..., ,... • • o � - .. .¡¡,. ,. "' -�- �I 1 � J':" � 1,: � , . ¡ ,, � ...,., f • ,. n - l. � � 1 J-C , _ ,. � 1� lt.�I - .llÍ - ,x,.., l. _J ."'-1,. -·- � ¡¡ e ,, _ • '!! - "l ..,_.. . , ..� l. . • r�,, §.w - • , ,, AP connection First connect the mobile phone t o the h o t WiFi emanating fr o m the devtce, and then input the WiFi name and password that the device will b e connected t o , and then configure the device t o access the Internet. WIF1S01tlngs 2 . Press the main menu k e y t o enter the main page, then press the [up / down] k e y t o move the cursor t o the [LAN] , press the [OK] k e y o r directly press the number k e y [7] t o enter the LA N page. Press the number k e y [2] t o disconnect the connected WiFi network; Press the number k e y [1] t o enter the network configuration state. Note: network access configuration must b e carried out i n the same Wifi. P29 P 30
- 17. O n the app start configuration page, app and equipment are configured. When the equipment i s successfully configured, i t w ill automatically jump t o the [add equipment success] page, and select the name o f the equipment, such a s the living room. Cllck the "Arm/Disarml" o f the host o n the app page t o enter and operate the host, and query the operation history. 0 Chapter 6: Receiving Alarms and Remote Control 6.1 Handing method after receiving alarm: When there i s an alarm, the host w ill automatically dial the telephone number s e t before and alerting according t o the setting. J f the phone line ofthe owner i s busy o r cannot b e connected, the system will dial the next pre-set number automatically. The system will dial the preset phone number three times. After receiving the alarm call, i t will play the preset recording. The user doesn't need t o entera password. The following i s the corresponding operation when pressing the figures o n phone: K e y (1]: Arming Key[2]: Disarming K e y [3]: Monitoring O n Key[4): Monitoring O ff K e y [S]: Speaker O n Key[6): Speaker O ff K e y [7): Siren O n Key[8): Siren O ff K e y [9]: Ganged Socket O n Key[lO]: Ganged Socket O ff K e y ["']: Exit and hang up. The system would not dial next phone number. Note: both monitoring and speaking time a r e 2 0 seconds. Press (3) k e y t o continue monitoring. Press [S] t o continue speaking within 20s. o-...,.- , rn .. ,.,. . .. ,=·-- o P31 o 6.2 Remote control operation method User ca n use any phone t o call t h e phone number o f the phone card o n the host. After a ringing cycle the host will automatically g e t through. After hearing prompt, enter password (host factory default i s "1234", there would b e a prompt when imputing the wrong password. The system will automatically hang up i f the third time i s still incorrect). Y o u will hear a prompt when password i s correct. Then, press following keys t o control the corresponding functions: K e y [1]: Arming Key[2]: Disarming K e y [3]: Monitoring O n Key[4): Monitoring O ff K e y [S]: Speaker O n Key[6]: Speaker O ff K e y (7]: Siren O n Key[8): Siren O ff K e y [9]: Ganged Socket O n Key[lO]: Ganged Socket O ff K e y ["']: Ex i t and hang up. The system would not dial next phone number. P 32
- 18. Note: both monitoring a n d s p e a k i n g time are 20 seconds. Press [3] key to continue monitoring. Press [S] to continue speaking within 20s. Chapter 7:Technical Parameters 7 .1 Technical Parameters I n p u t Voltage: USB SV Standby Current . < 6 0 m A Alarm Current . <300mA Wireless F r e q u e n c y : 4 3 3 M H z GSM Standard : s u p p o r t GSM850/900/1800/1900MHz W I F I m o d u l e : Support 2.4G wireless W I F I Backup Battery: 3.7V 800mA Li t h i u m Battery Standby hours: 8h Alarm toudness: 80dB Wireless distance: 100 meters ( i n open area) 7 .2 Factory default zone type Normal S T A Y Zone lntelligent Help the Senior Doorbell Welcome Emergency Zone Zone Zone Zone Zone Zone 01-59 Zone 60-79 Zone 80-89 Zone 90 Zone 91 Zone 92 Zone 93-99 Zone 7 .3 System factory default System Password 1234 SMS Message ON Remote control ON Remote Alarm ON A l ertingtime 1 Minute Del ayAl ar m O Seconds Delay Arm O Seconds 1-99 Zone Alarm Alarm Alerting 1-99 Zone Alarm XX Zone Message Alarm P 3 3 Chapter 8 : lnstall Detectors 8 . 1 lnstallation and Usage of Door Sensor Door sensor is used for sensing the closing a n d o p e n i n g state of the door, a n d is consisted of transmitter and magnet two parts. lt can be installed on doors, windows or any object that can be closed a n d o p e n e d . W h e n transmitter is separated from the magnet, door sensor w i l l send a l a r m s i g n a l to a l a r m p a n e l , host will a l a r m . The door contact s h o u l d be installed on the movable door or windows. Firstly, make the installation position cl e a n . Take out wireless door sensor, a n d then stick the d o u b l e faced adhesive tape on the bottom. The installation s h o u l d note the following items: l.The door sensor part A (transmitter) and part B (magnet) s h o u l d be installed separately, that is, A on fixed door a n d B o n movable door. 2. A and B s h o u l d be in the s a m e vertical l i n e a n d the distance between A a n d B s h o u l d not be greater t h a n 1 cm. 3 . After the installation, the indicator light flashes for ls as the door open, that m e a n s the door sensor is installed successfully. 4. The indicator lighting for 1 second m e a n s a l a r m . The indicator in constant light is a suggestion of low power. 5 . A, B can a l s o be reinforced by screws, (A: remove the bottom cover, strengthen the screw a n d then cover the bottom a g a i n ; B can be directly fixed by the screw.) P34
- 19. 8.2 lnstallation and Use of P I R Motion Detector □ Before use, make sure the power switch of P I R motion sensors is o n . lnstallation height is about 2 . 2 meters above g ro u n d a n d it s h o u l d be installed in the corner of the room to get the best detection range. At the s a m e time, it s h o u l d fo r m a certain a n g l e with the w a l k i n g line (90 degree angle is best for detection). l n s t a ll a ti o n : Talk out the s u p p l i e d bracket; insert the bracket to the slot. Take out the pedestal a n d fix it with two screws on the wall. Press the P I R with bracket into the center hole of the pedestal. And t h e n adjust the best angle of detector. (This method is suitable for project installation) Attention: 1. The detector s h o u l d not face the outside of window directly. 2. There s h o u l d be no any big objects for obstruction within coverage of detection. 3. There s h o u l d be no two infrared detectors in the s a m e space as they will possibly intervene with each other. 4. Avoid facing window, cooling or warming m a c h i n e , stoves, or other a p p l i a n c e s that cause temperature c h a n g i n g sharply, w h i c h may cause false a l a r m . 5. lnfrared detector s h o u l d be used indoor only. P 3 5 Chapter 9:Troubleshooting Troubleshooting Reasons Methods 1,Nodialing for alarm l. Not arming l. do arming operation 2. alarm phone unset 2.re-set according to the 3.parts improperly installed, instruction book distance too far 3.adjust the location of parts 4. code not match 4. re-coding 2,Can't remote operate 1, input wrong password 1,Correct password or change to a new password 3, Host can't read S I M card 1, No SIM card 1, lnsert SIM card or don't dial and text to 2, PIN code is set for SIM card 2, Cancel PIN code preset alarm phone 3, bad GSM signal 3, change to a strong signal number 4, SIM card has scratched copper place 5, Alarm phone number unset 4, change to a normal SIM card 6, Message Alarm number unset 5, set alarm phone number 7, Card balance is insufficient or 6, set message alarm number out of date 7, charge SIM card 8, Message function is OFF 8, activate the message function 4, remote controller not 1.coding unmatched with the 1.re-coding work host 2. change battery of the same 2. insufficient power type 3. battery pieces poor contact or 3. eliminating the dirt on the corroded pieces caused by corrosion 4. unmatched with host 4. contact the local dealer to change the matched remote controller 5, remote controller not 1.coding unmatched with the host 1.re-coding work 2. insufficient power 2. change battery of the same 3. battery pieces poor contact or type corroded 3. eliminating the dirt on the 4. unmatched with host pieces caused by corrosion 4. contact the local dealer to change the matched remote controller 6, PIR sensor not work 1.coding unmatched with the host 1.re-coding 2. insufficient power 2. change battery of the same 3. battery pieces poor contact or type corroded 3. eliminating the dirt on the 4. unmatched with host pieces caused by corrosion 4. contact the local dealer to change the matched remote controller 7, no sound from siren l. Siren plug or jack have short 1.Fix or change the plug or jack circuit or disconnection 2.Change the plug cord 2. Plug cord has open circuit 3.Set siren a l a r m i n g time on 3. Siren is off the host P36
- 20. 8, The transmitter distance l. a nearby emitter is sending 1.find the interfering source for host is shortened signal and eliminate it 2. The host receiver stops work 2.send the host back to the 3. Power supply of stand by factory for repairing battery of the host is insufficient 3.check whether the power supply is plugged well 9, Keep alarming when Telephone line is not connected Connect the phone line and host is on and disconnection alarm function close the disconnection alarm is open function. P 3 7 P38