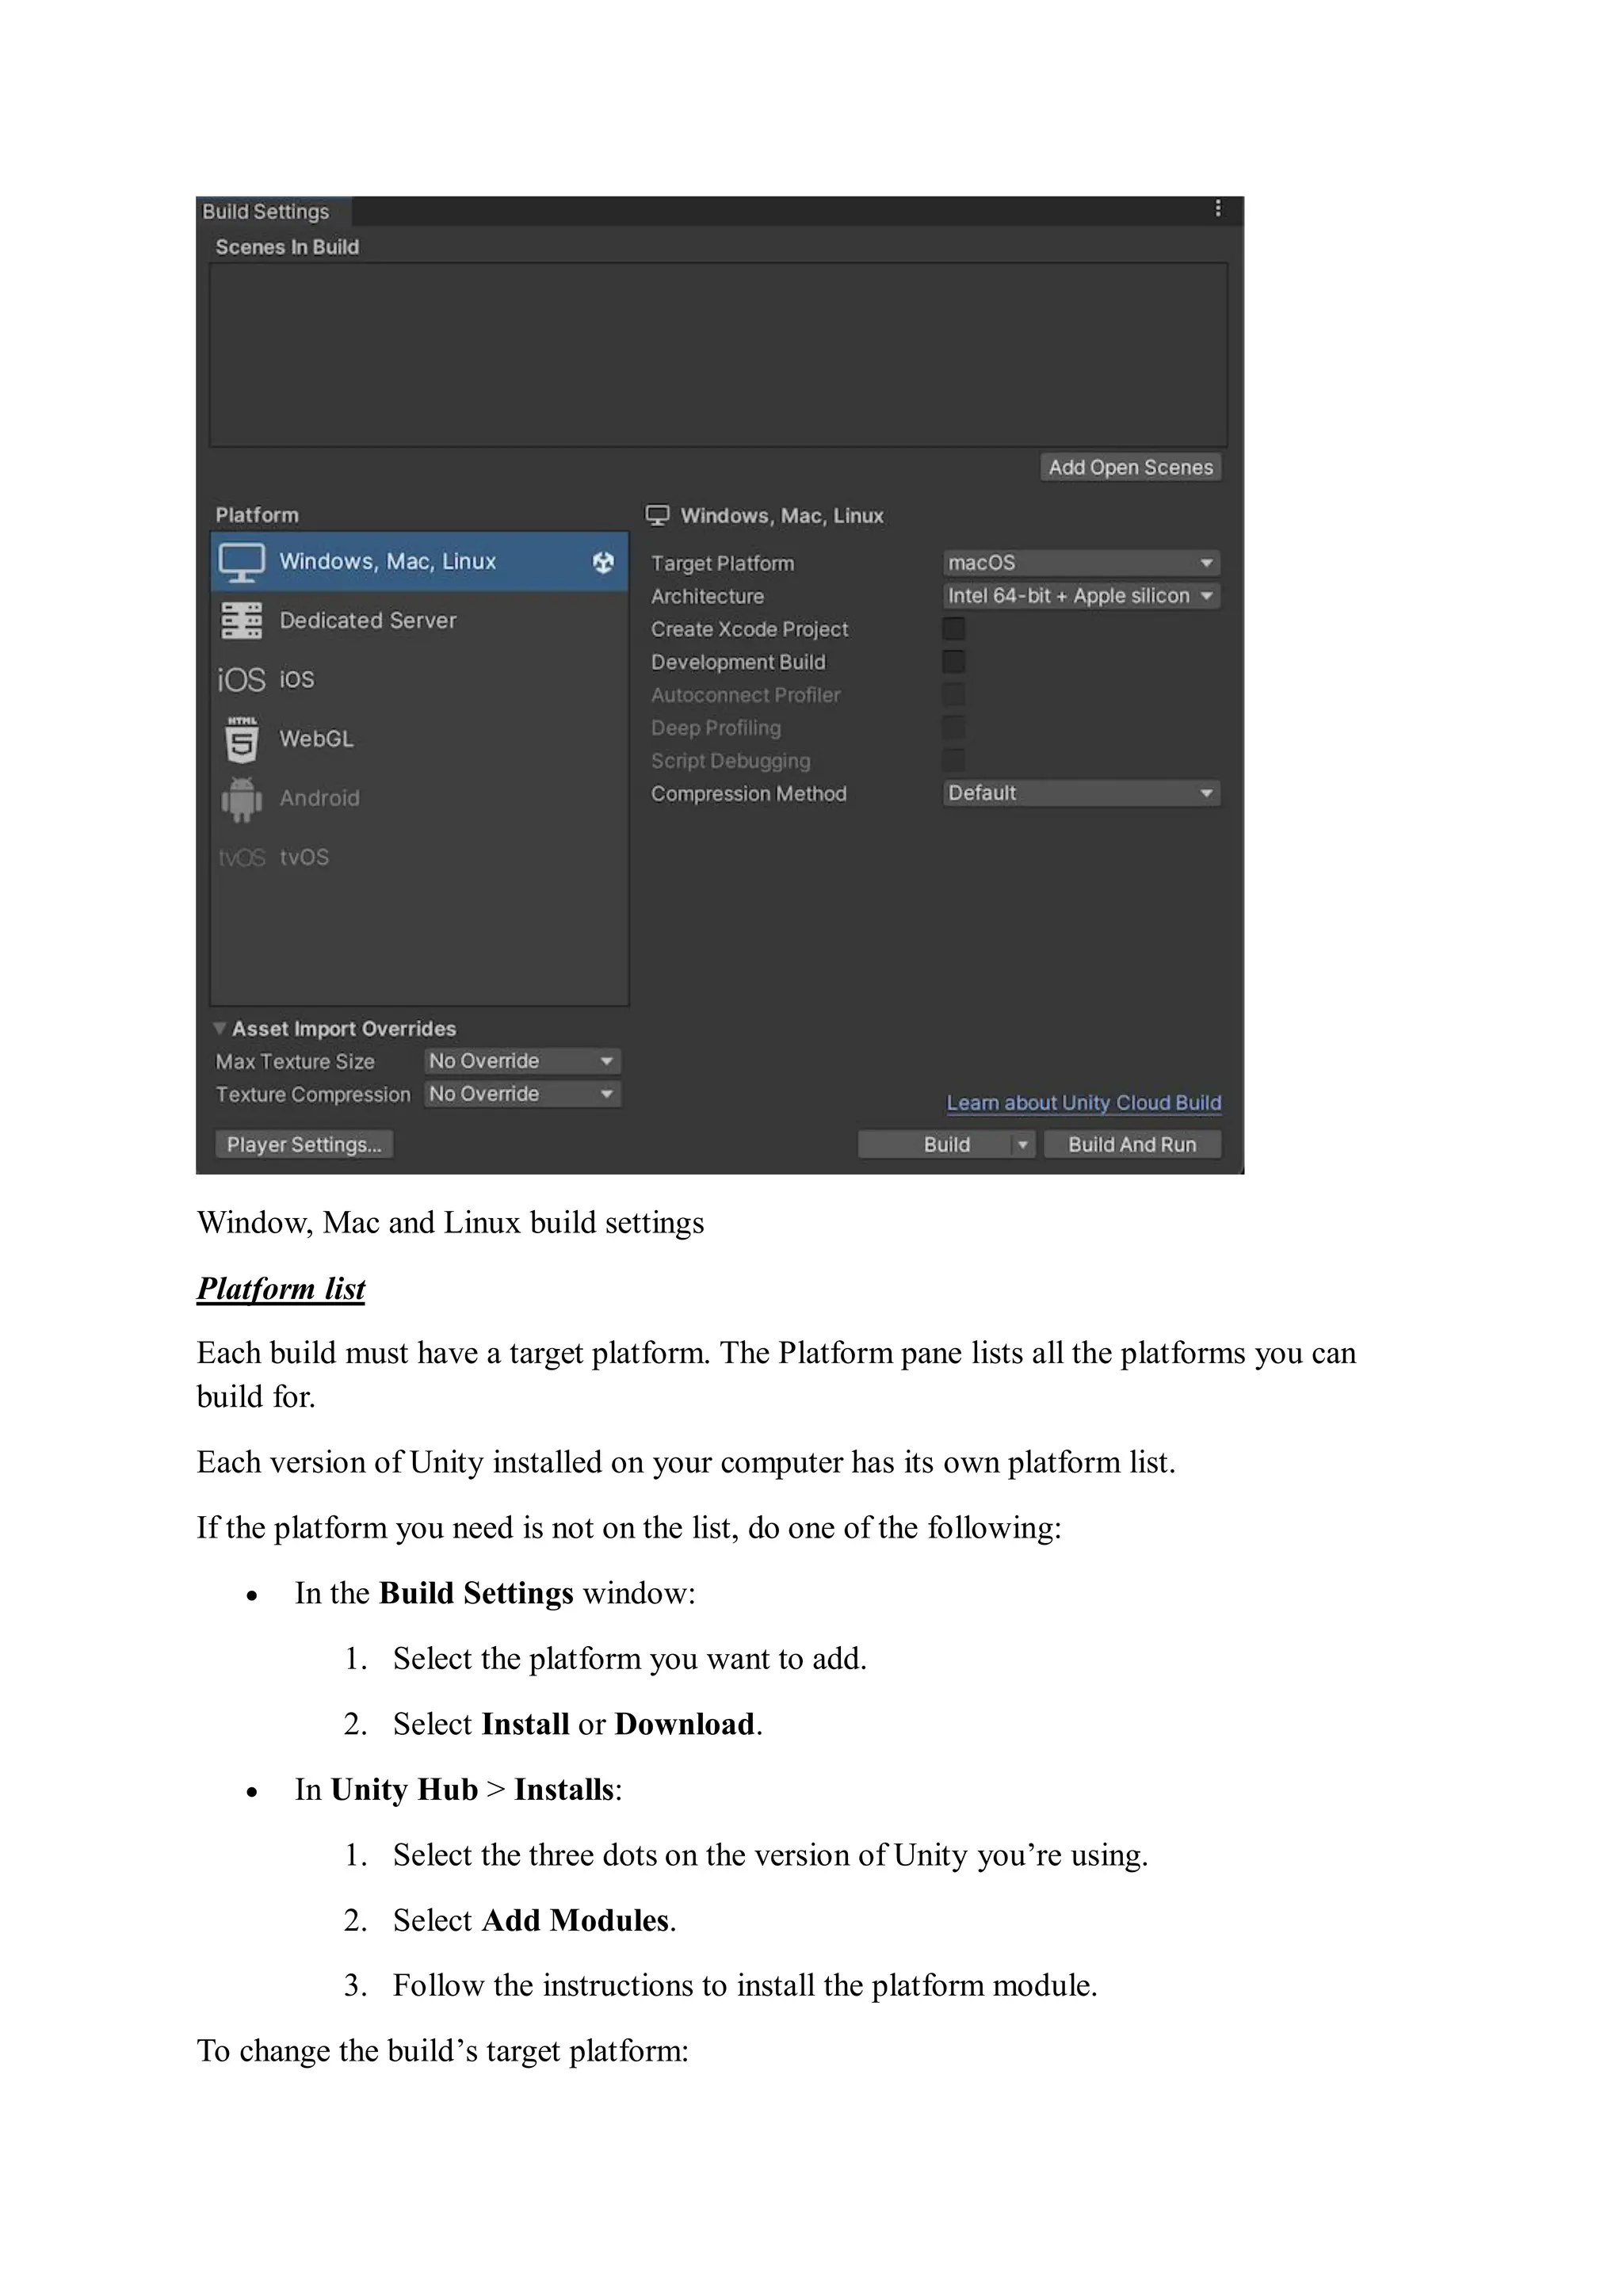
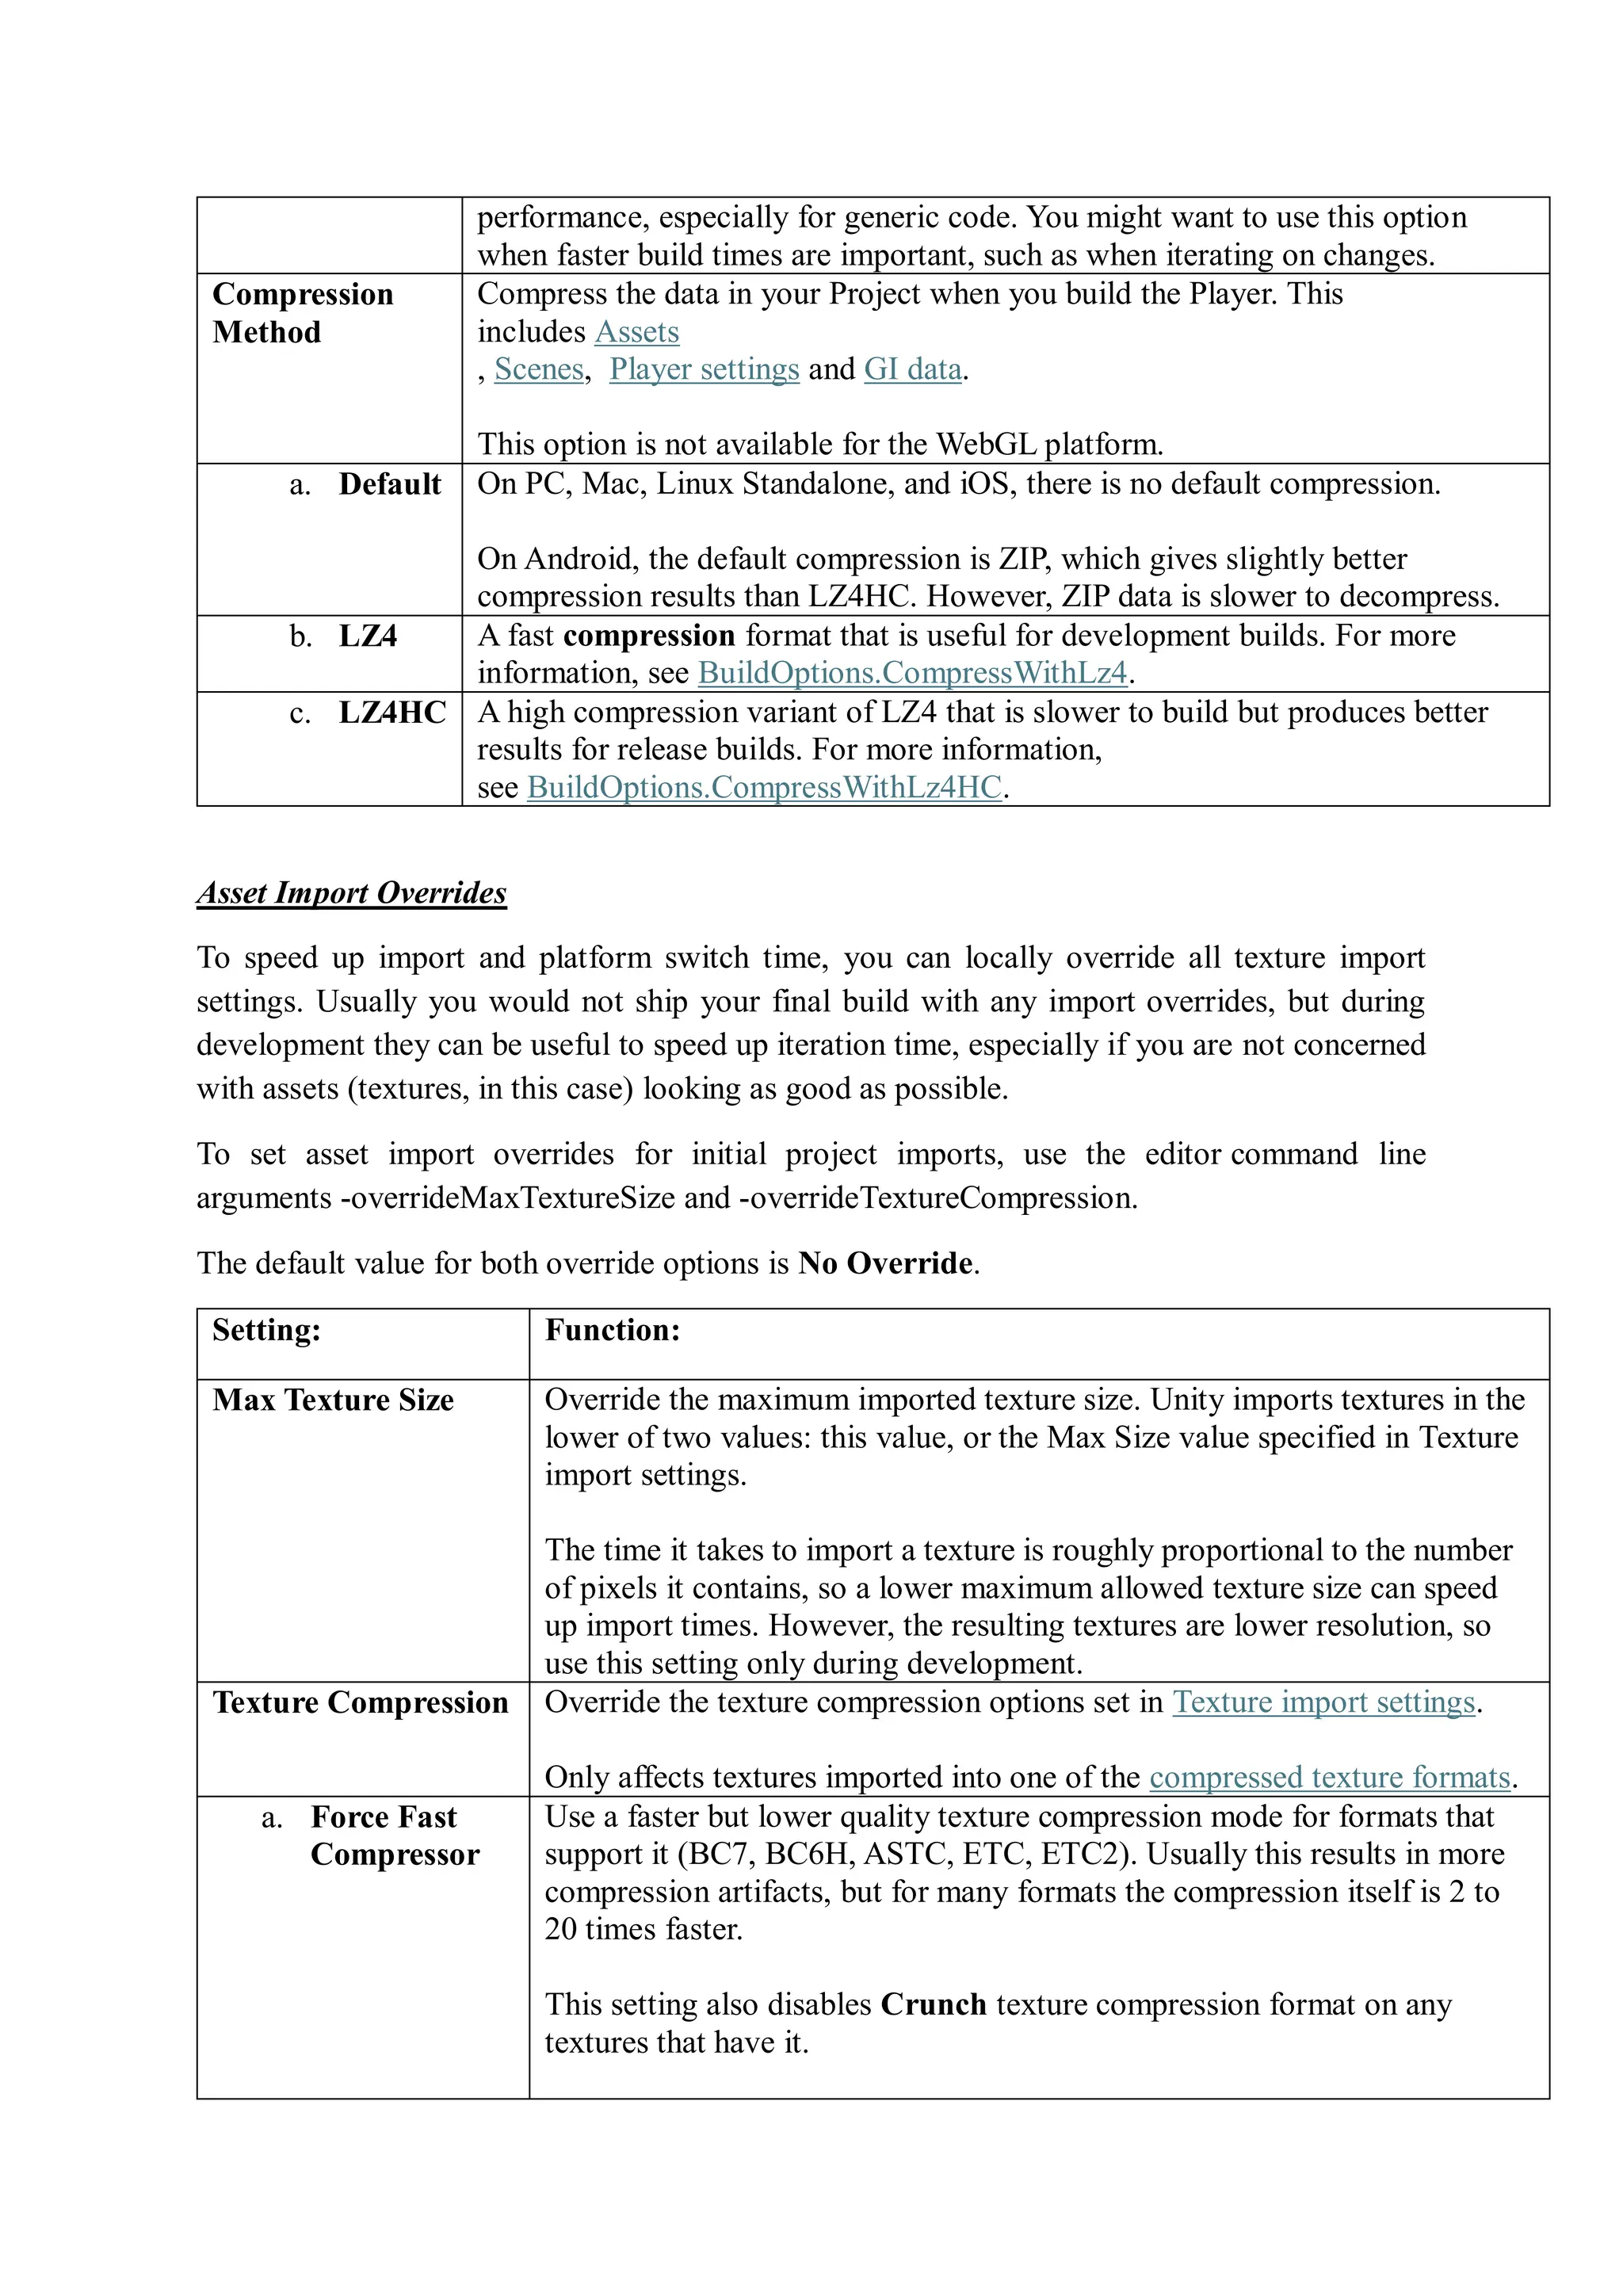
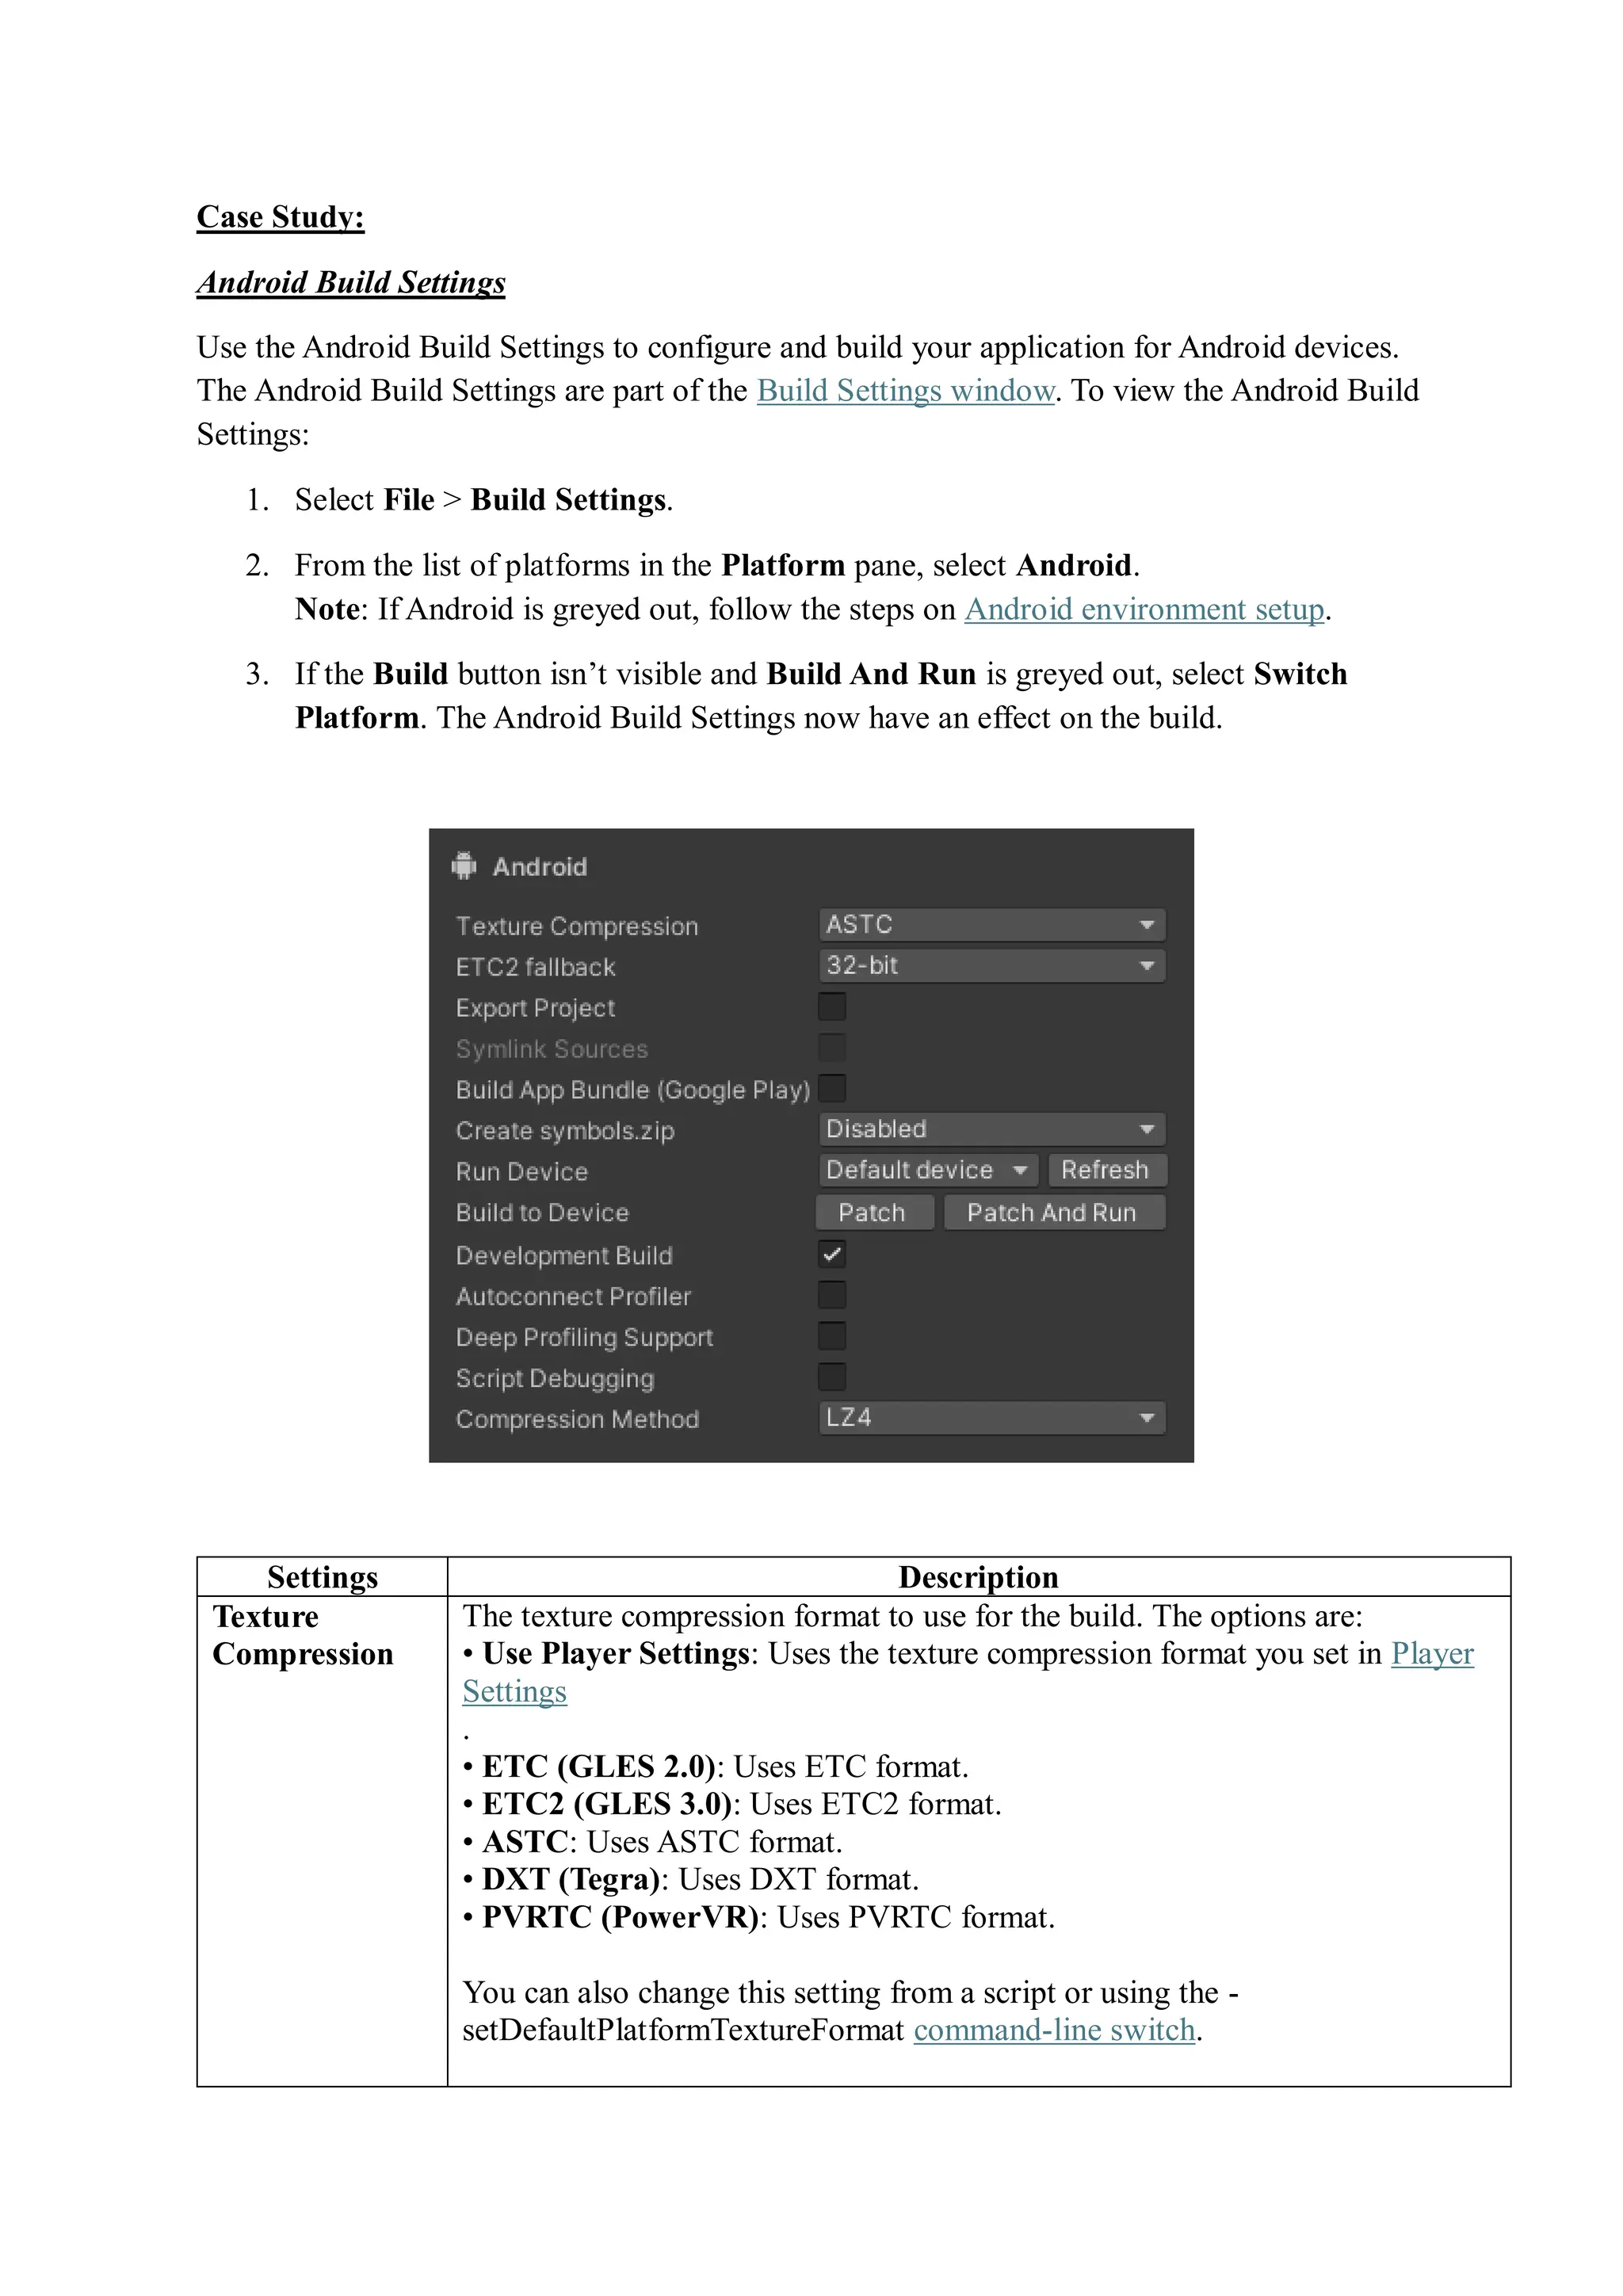
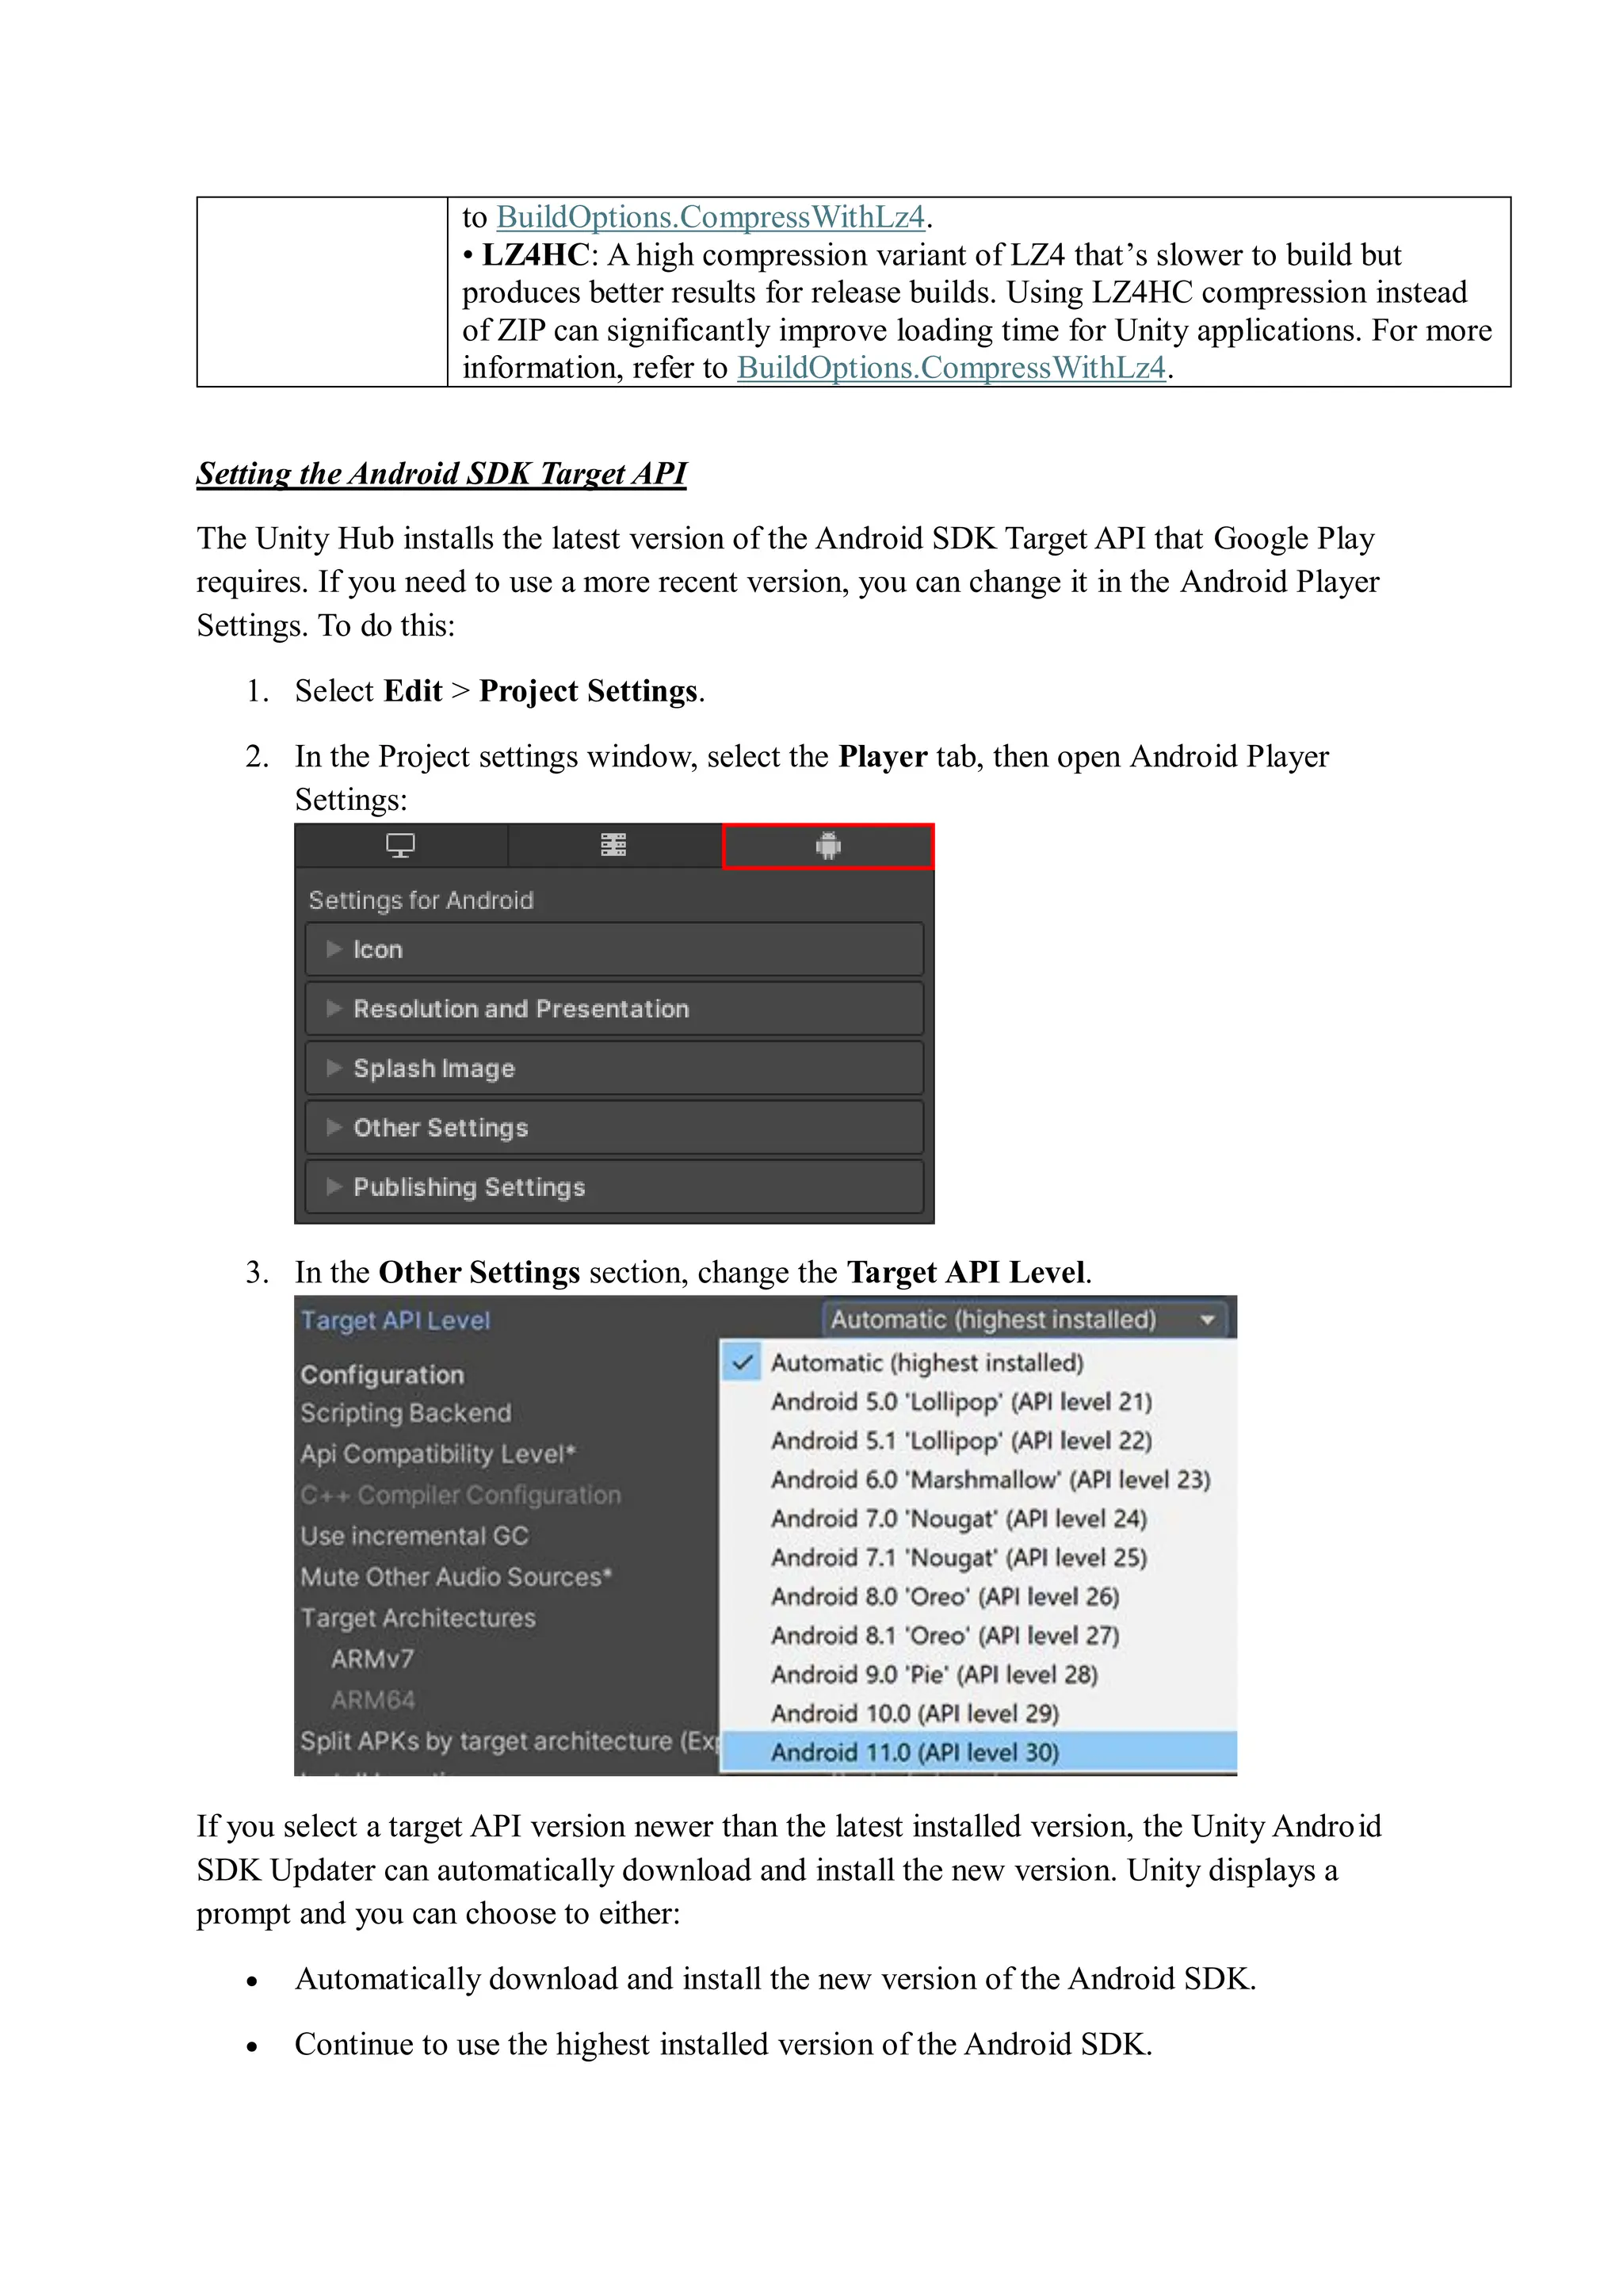
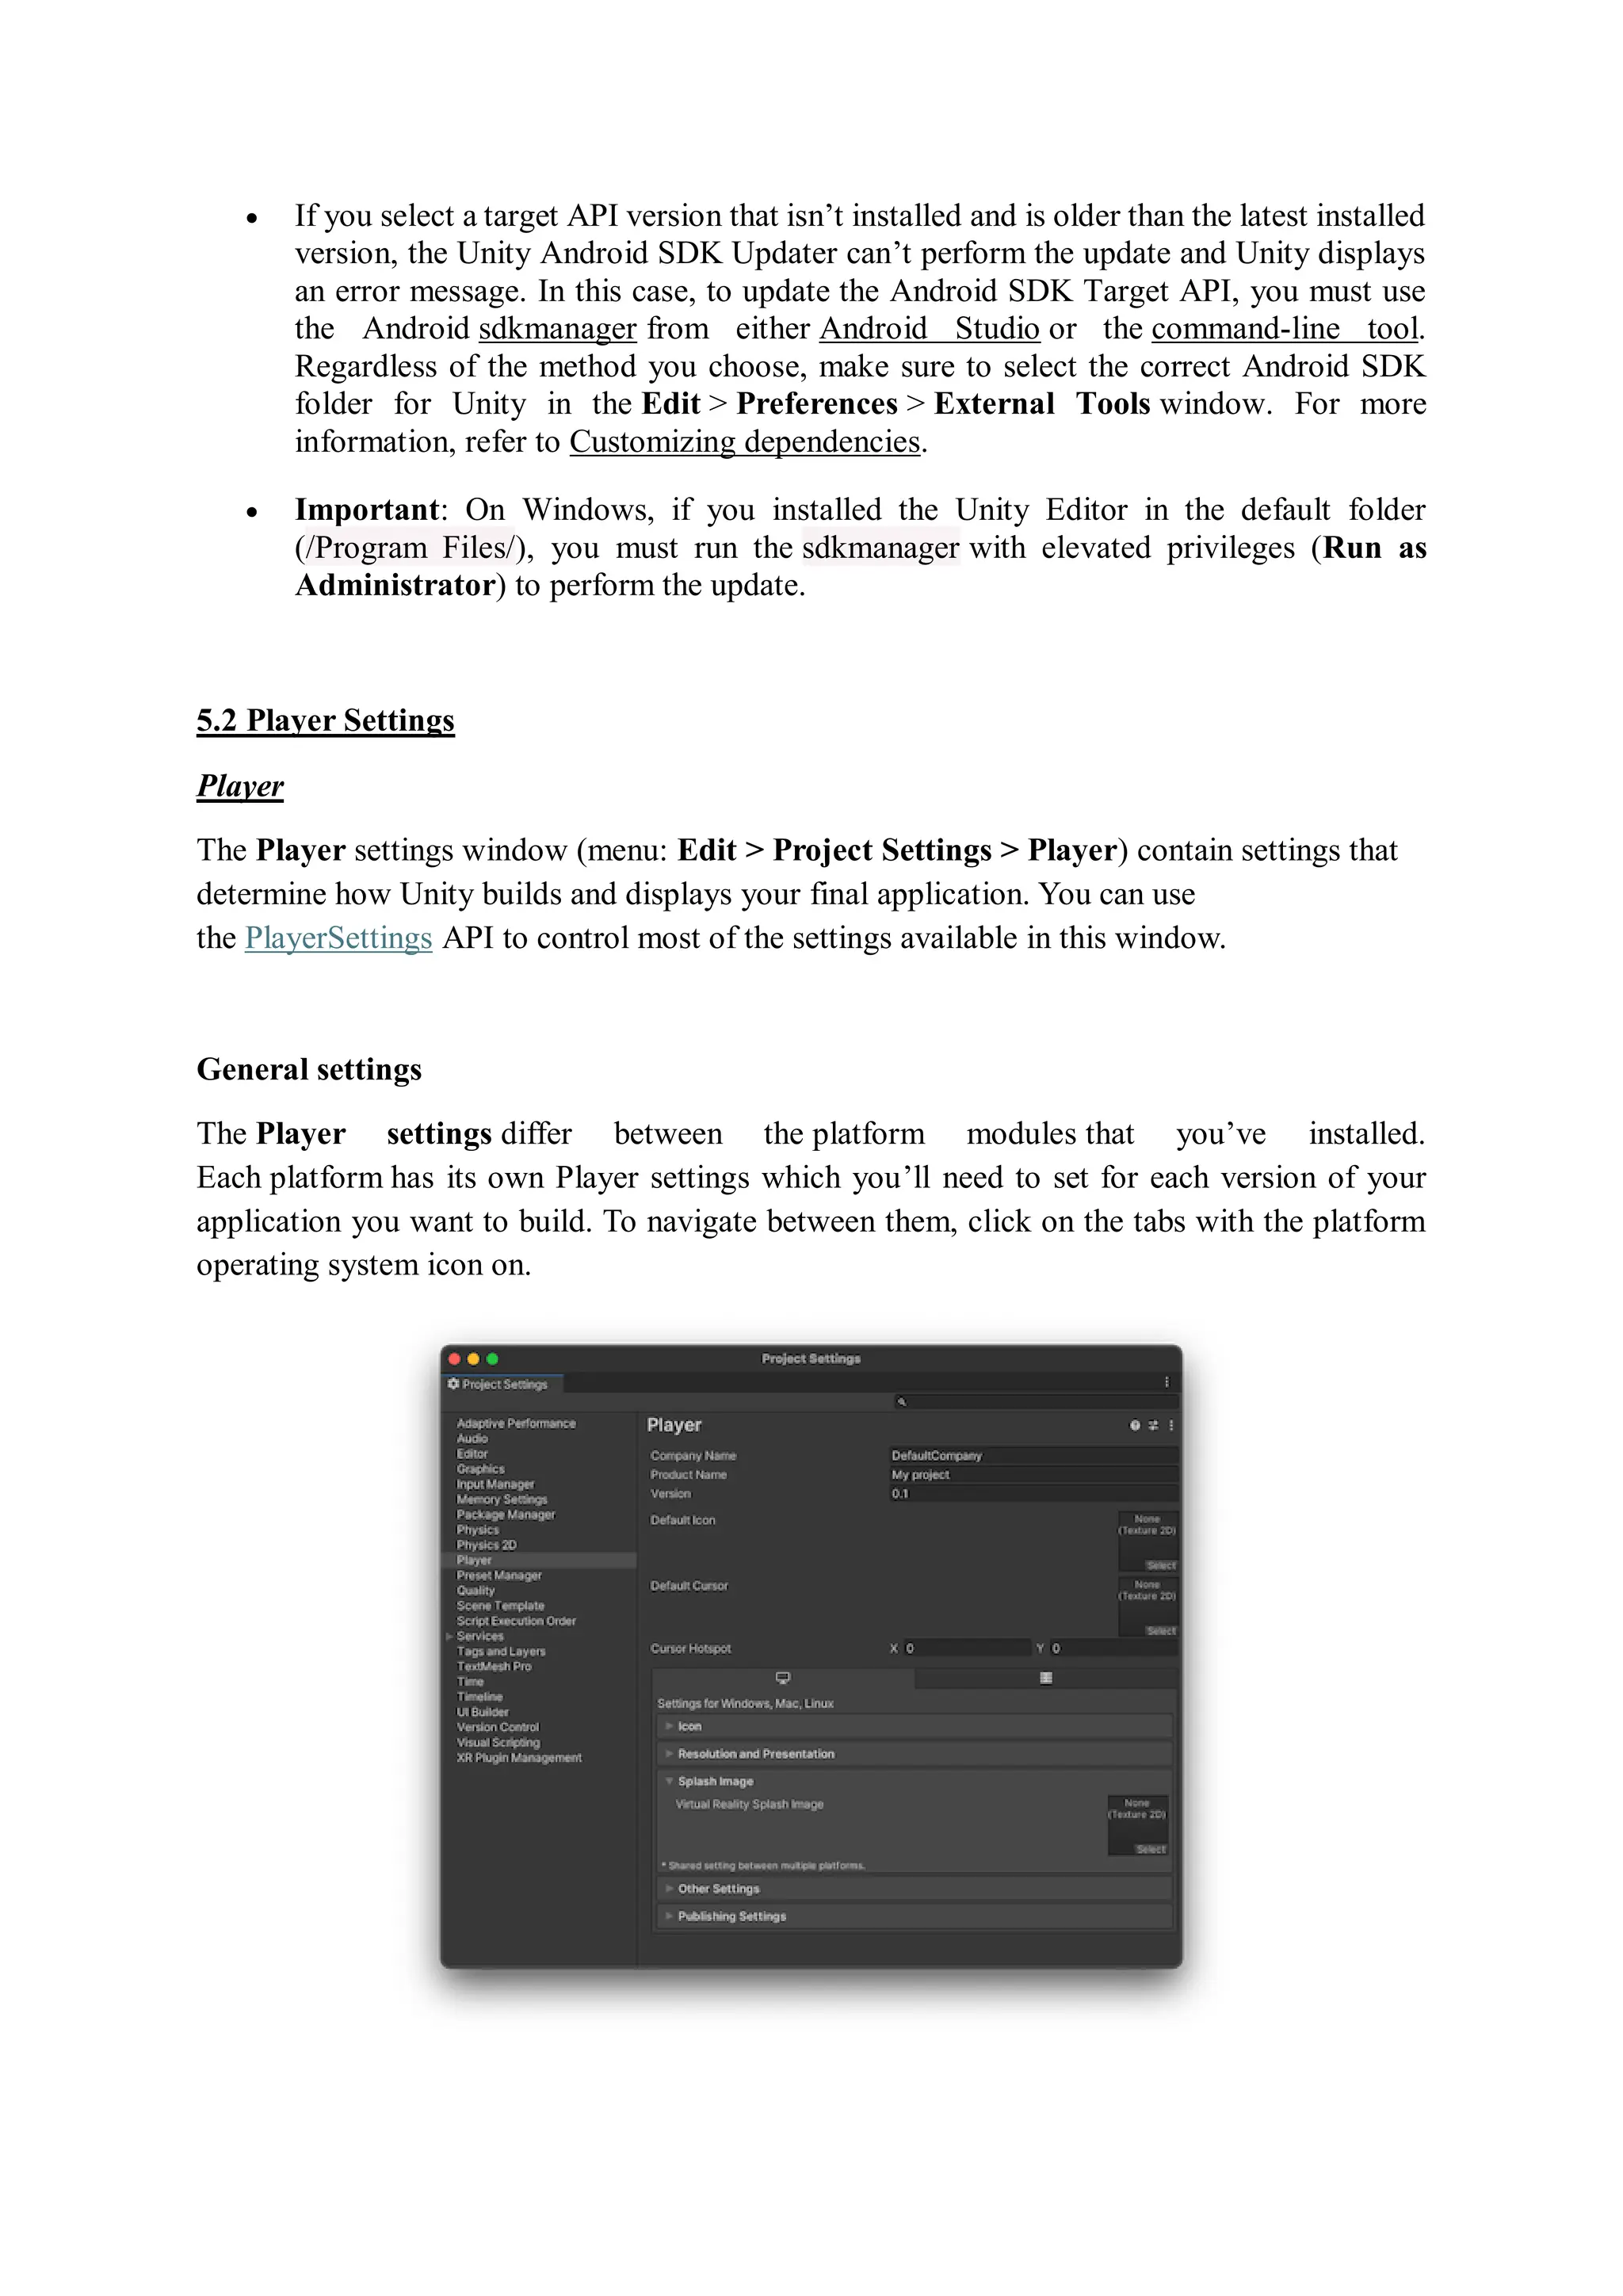
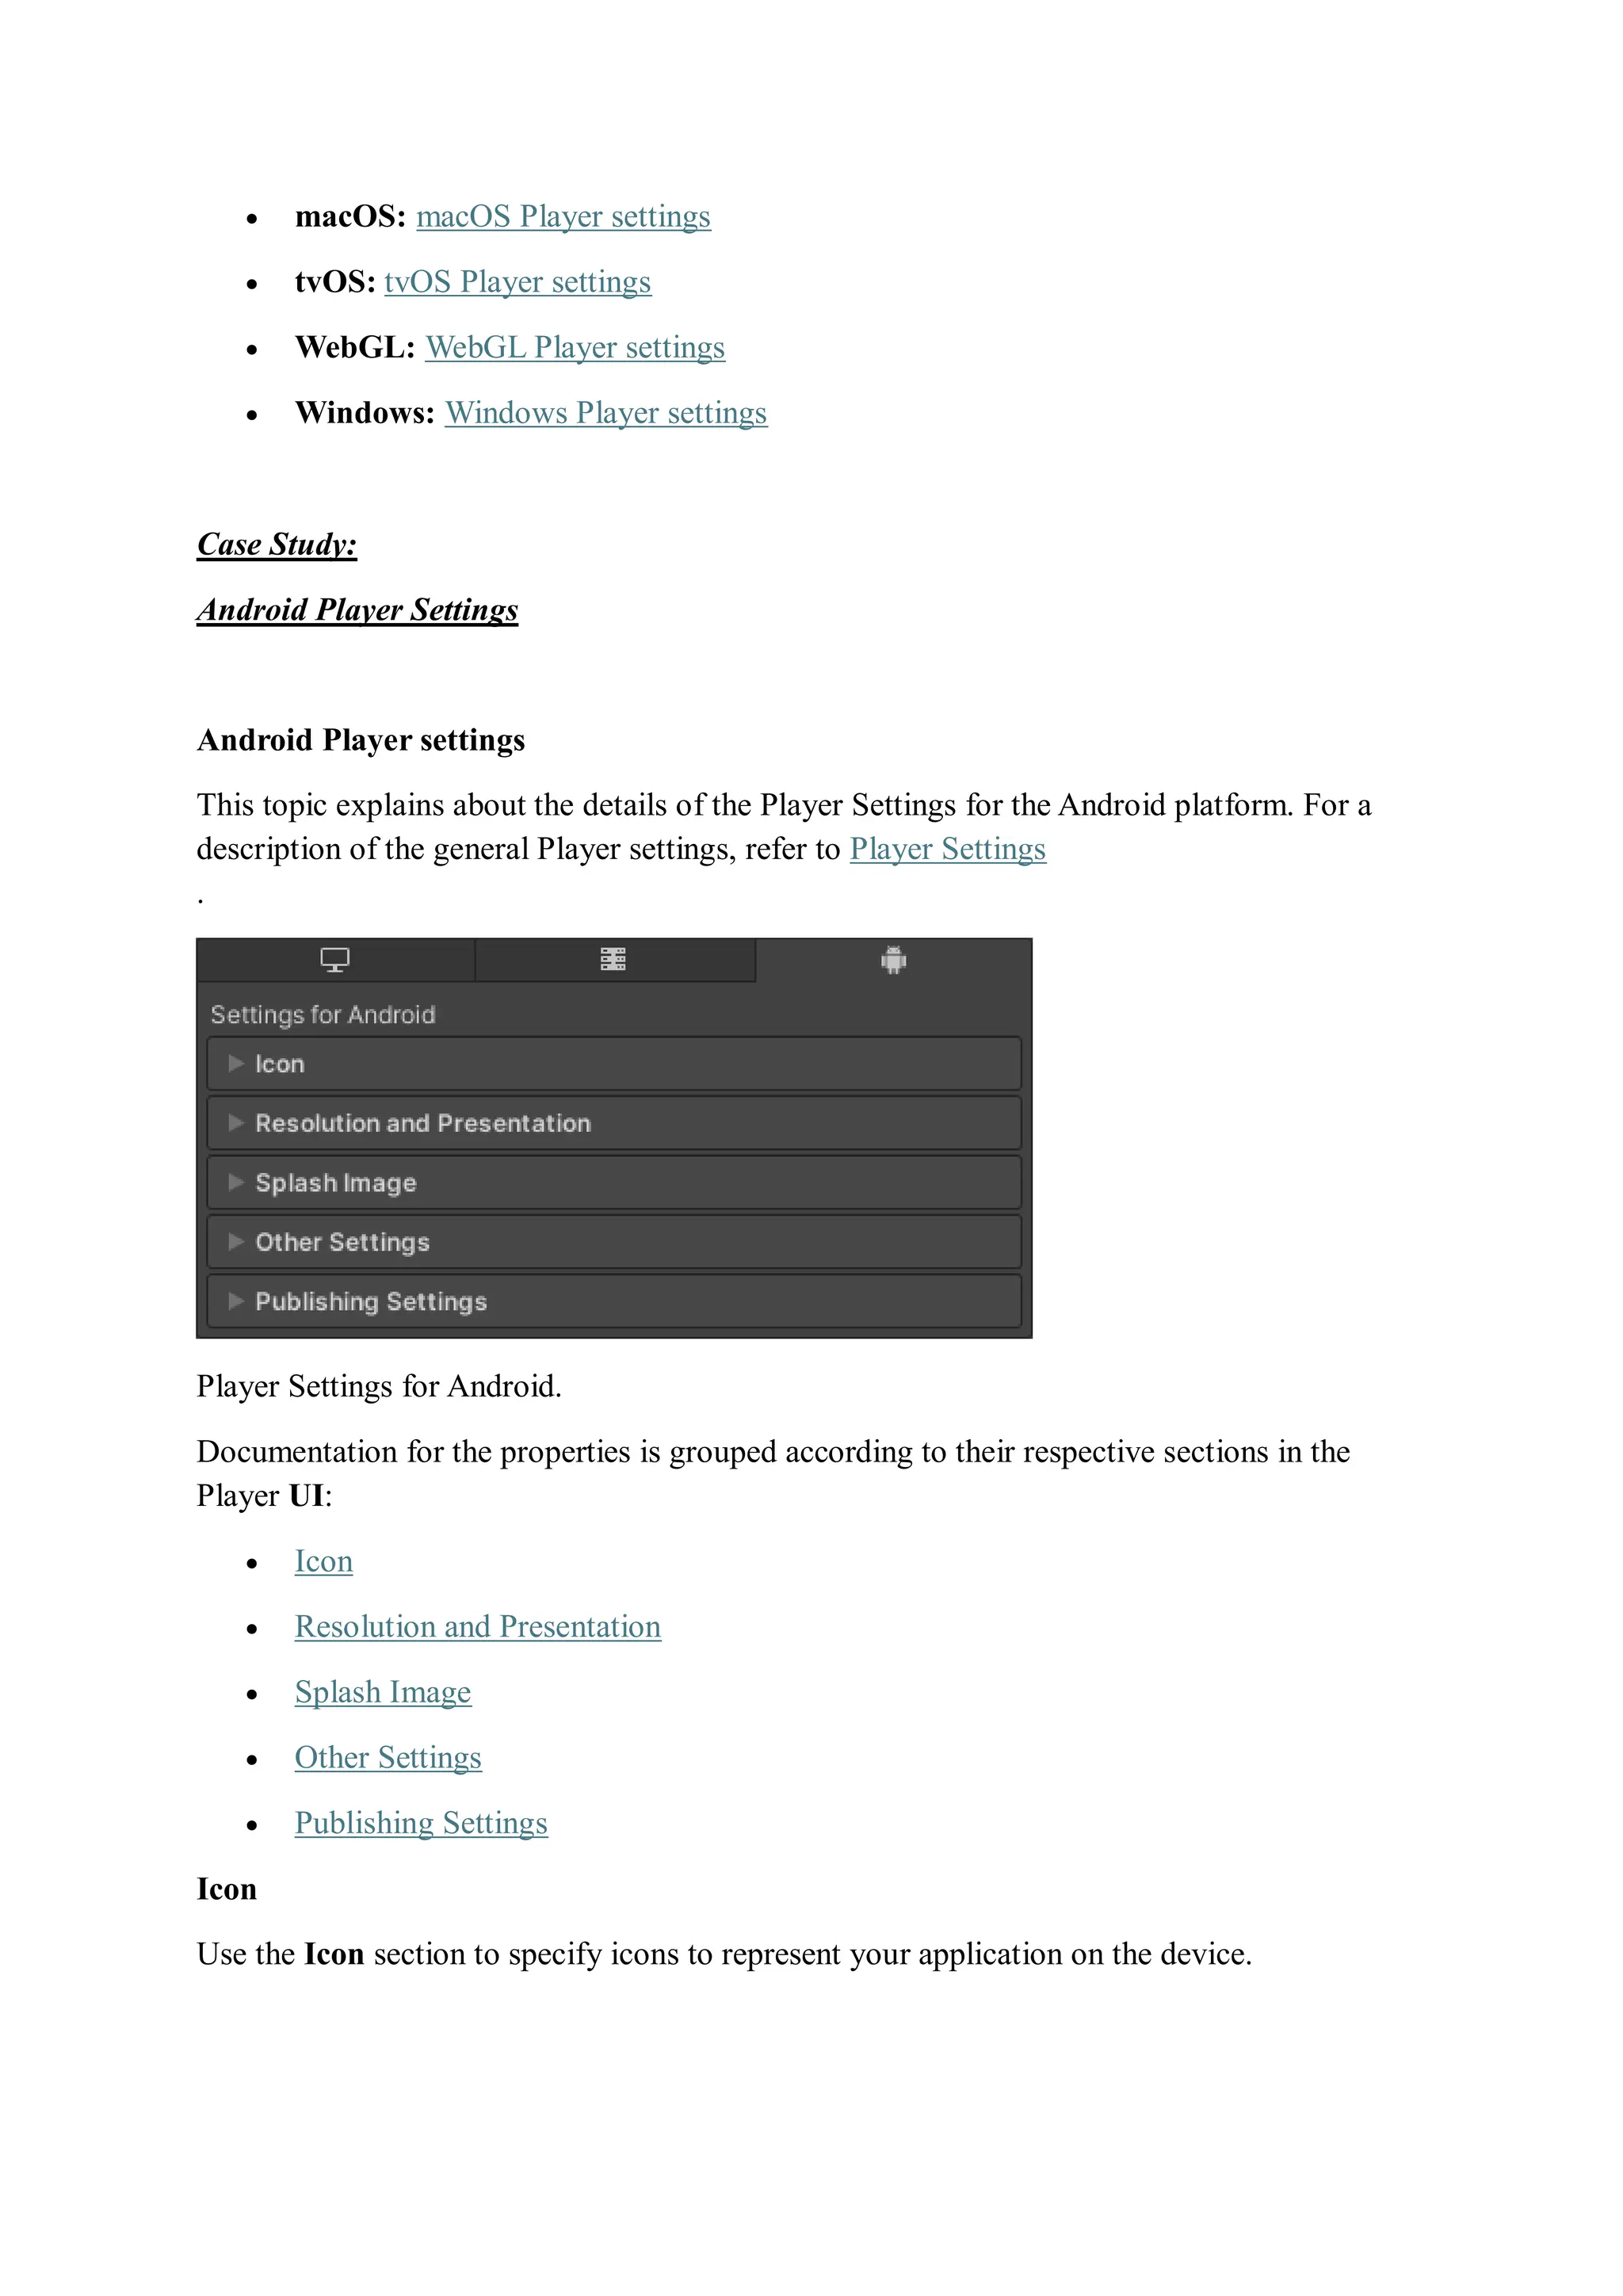
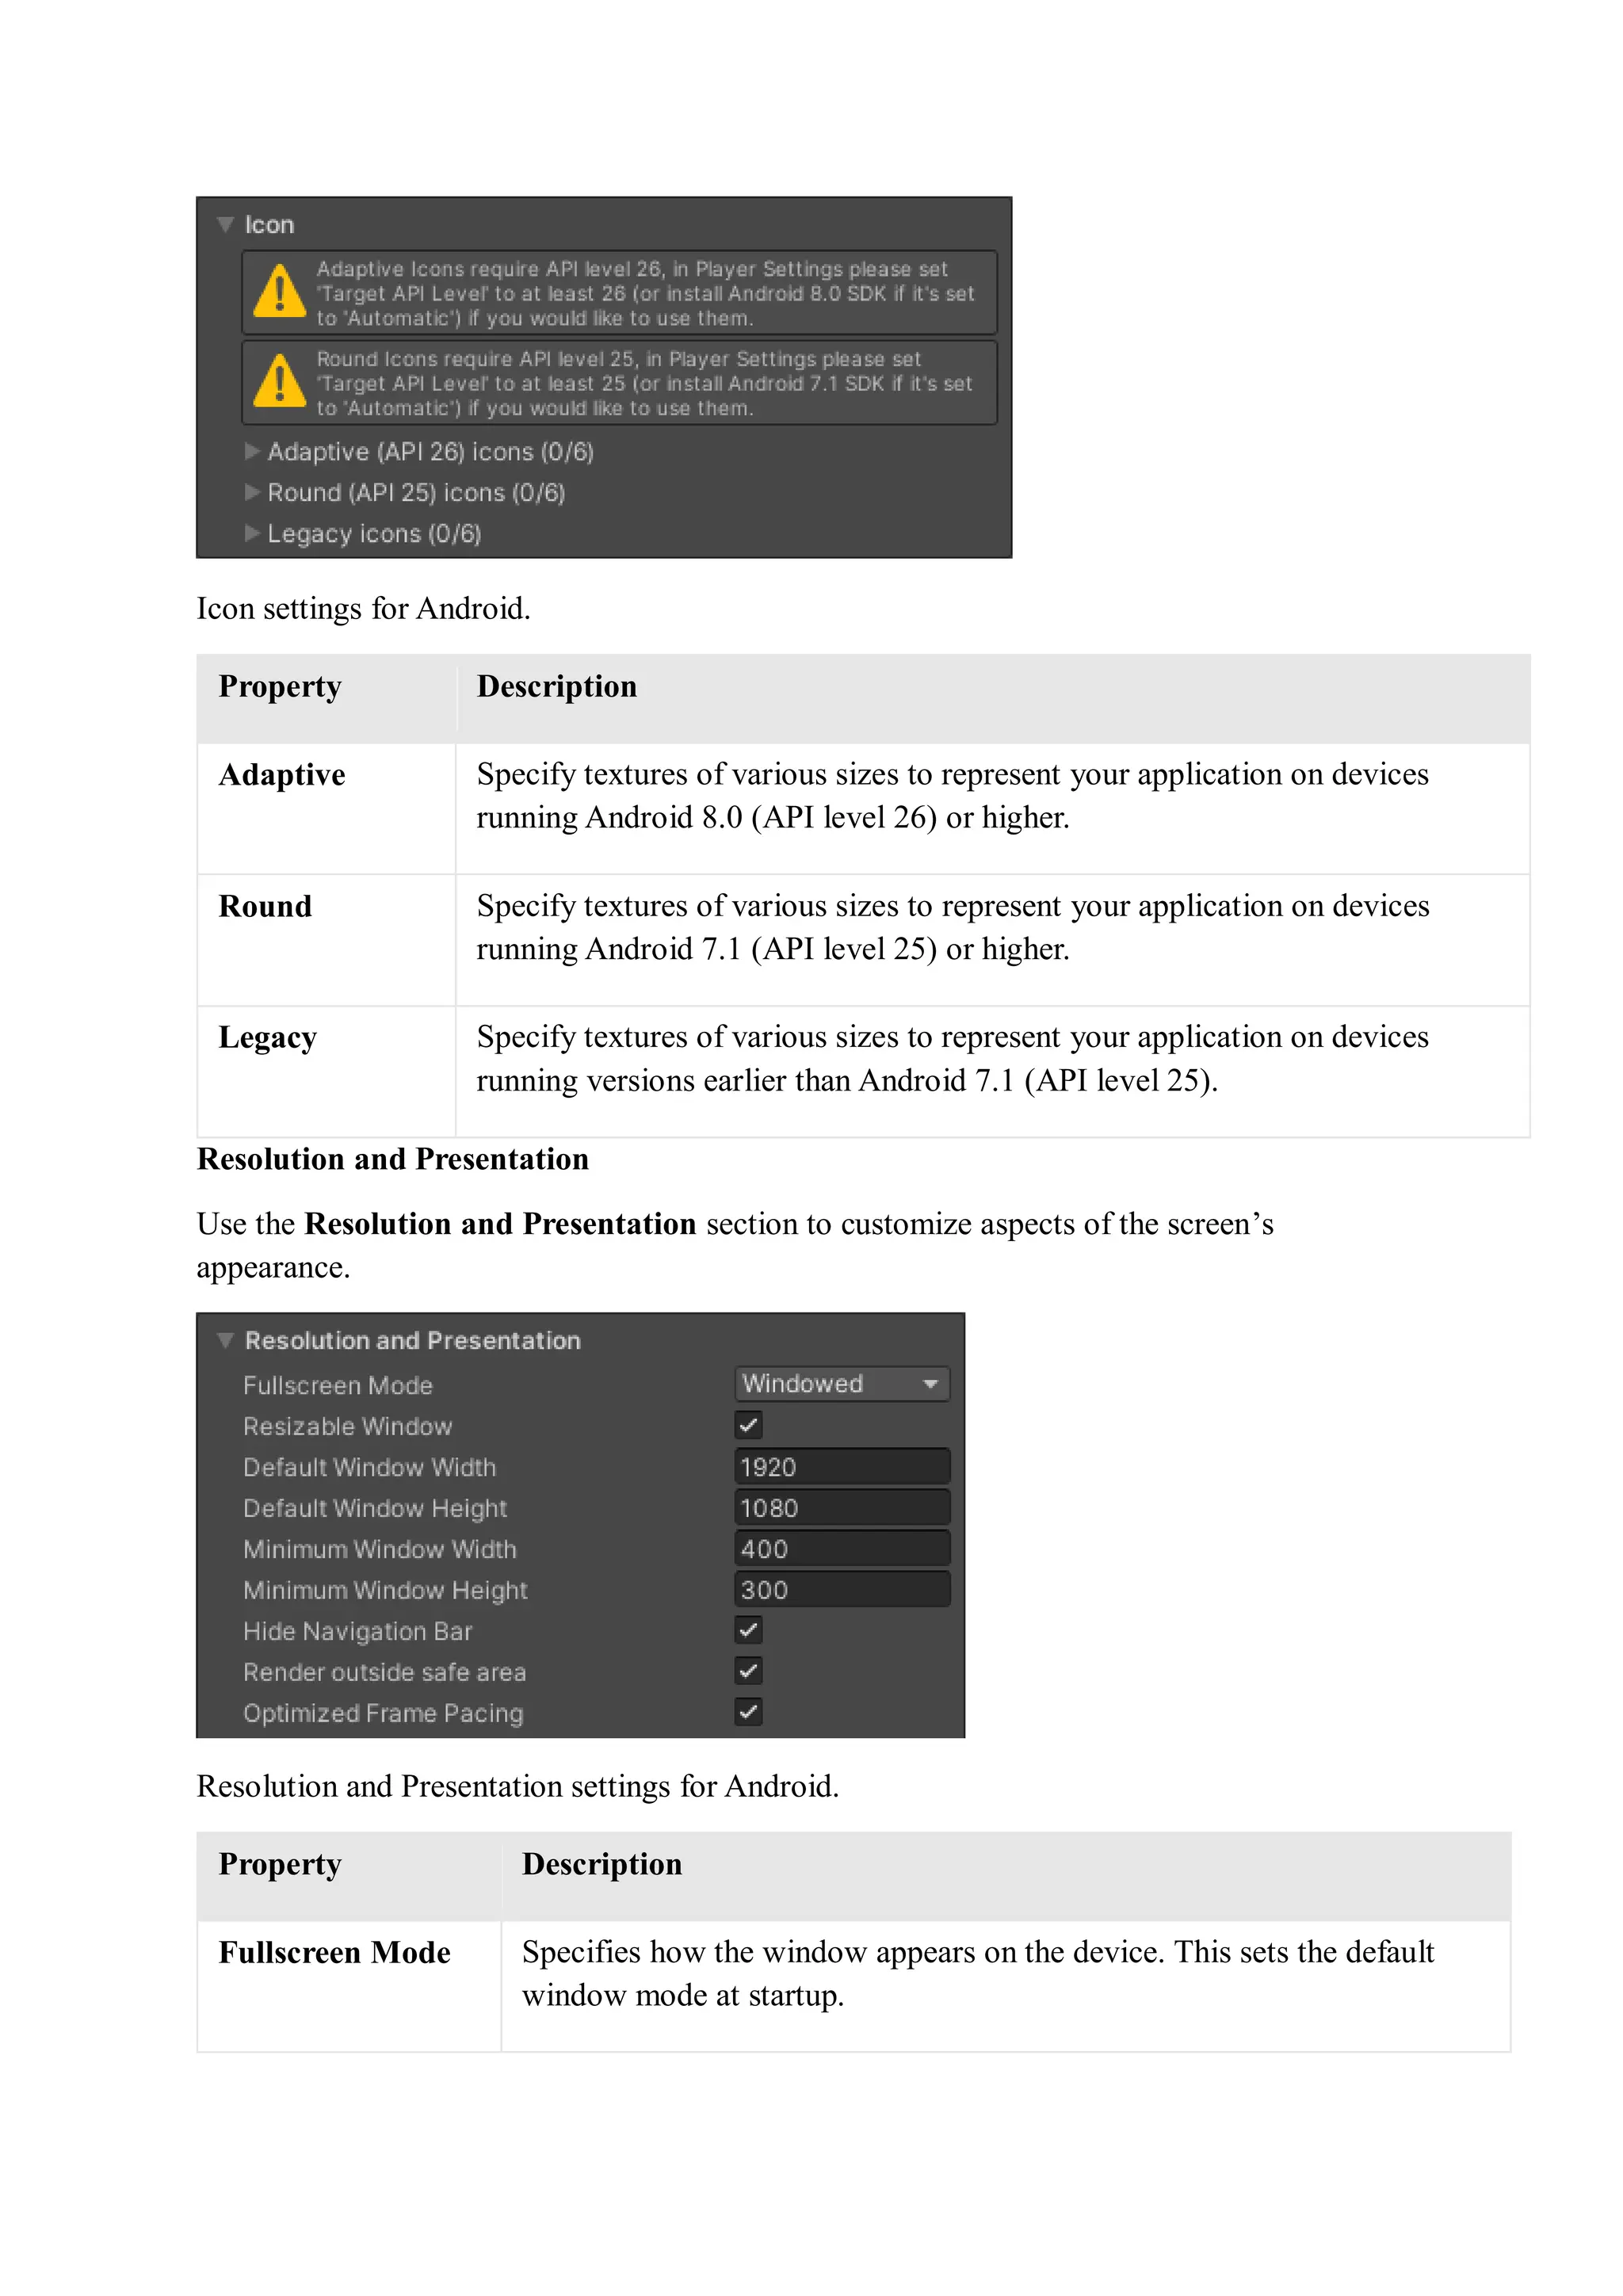
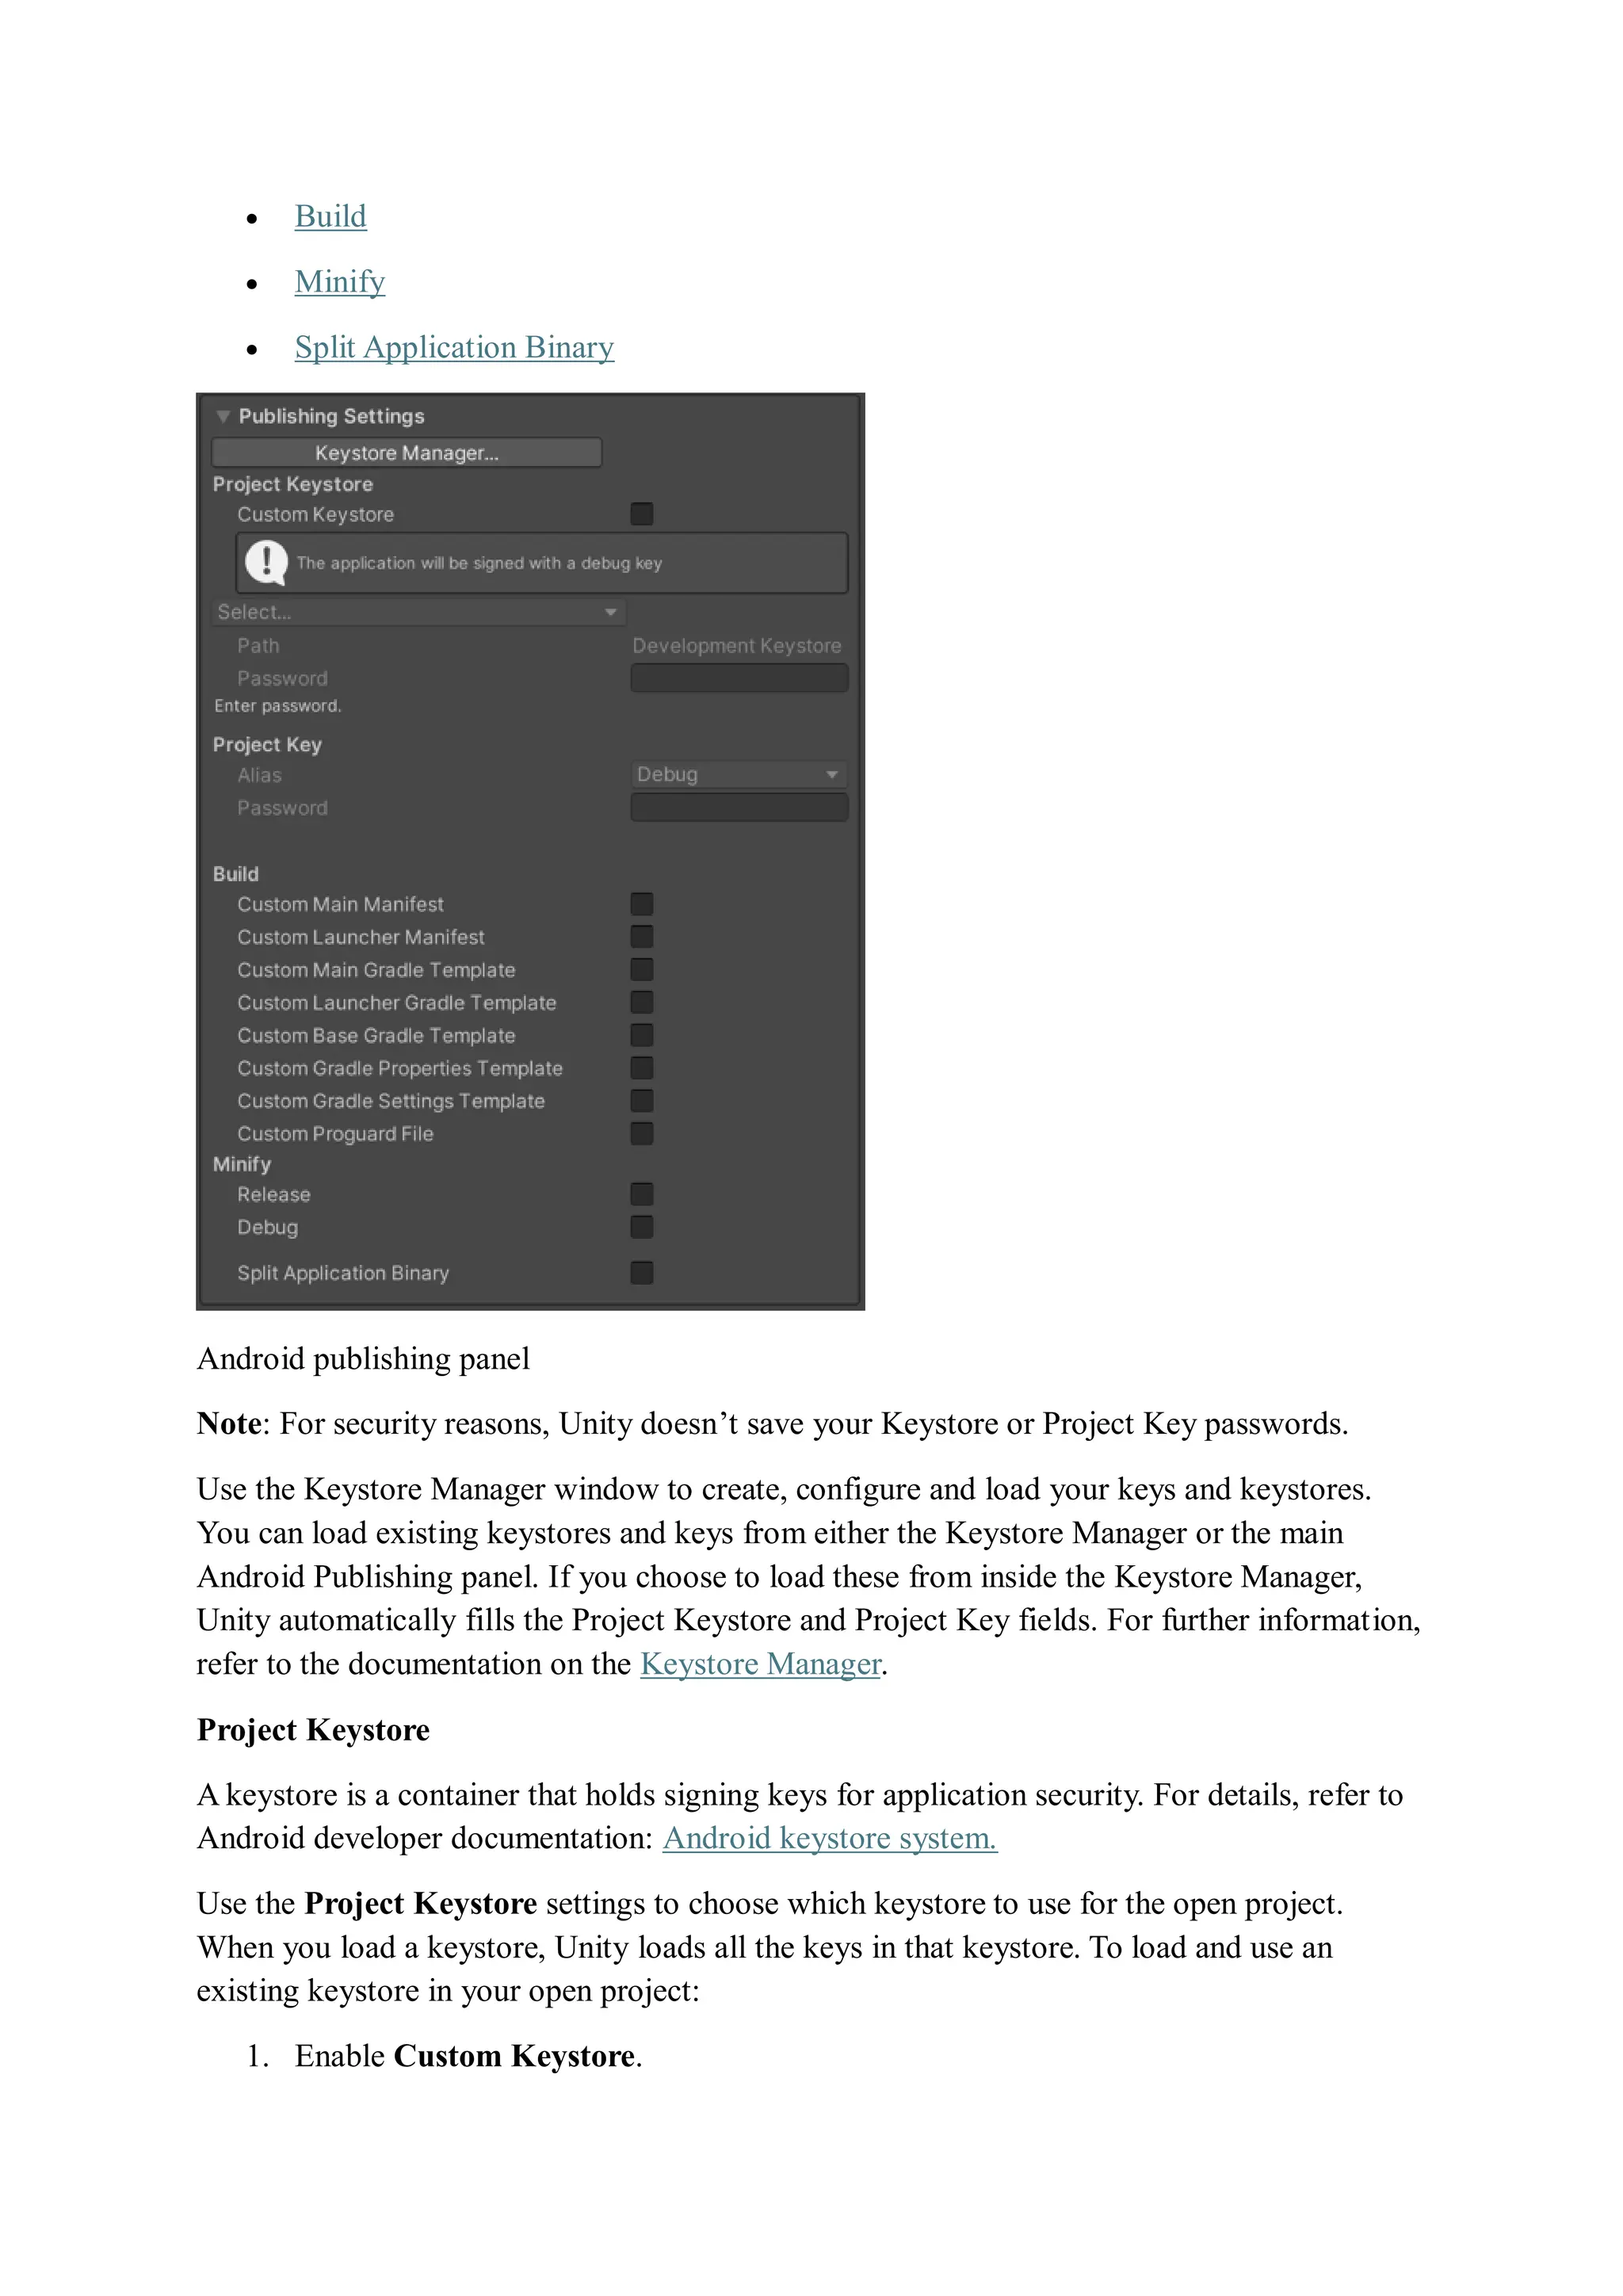
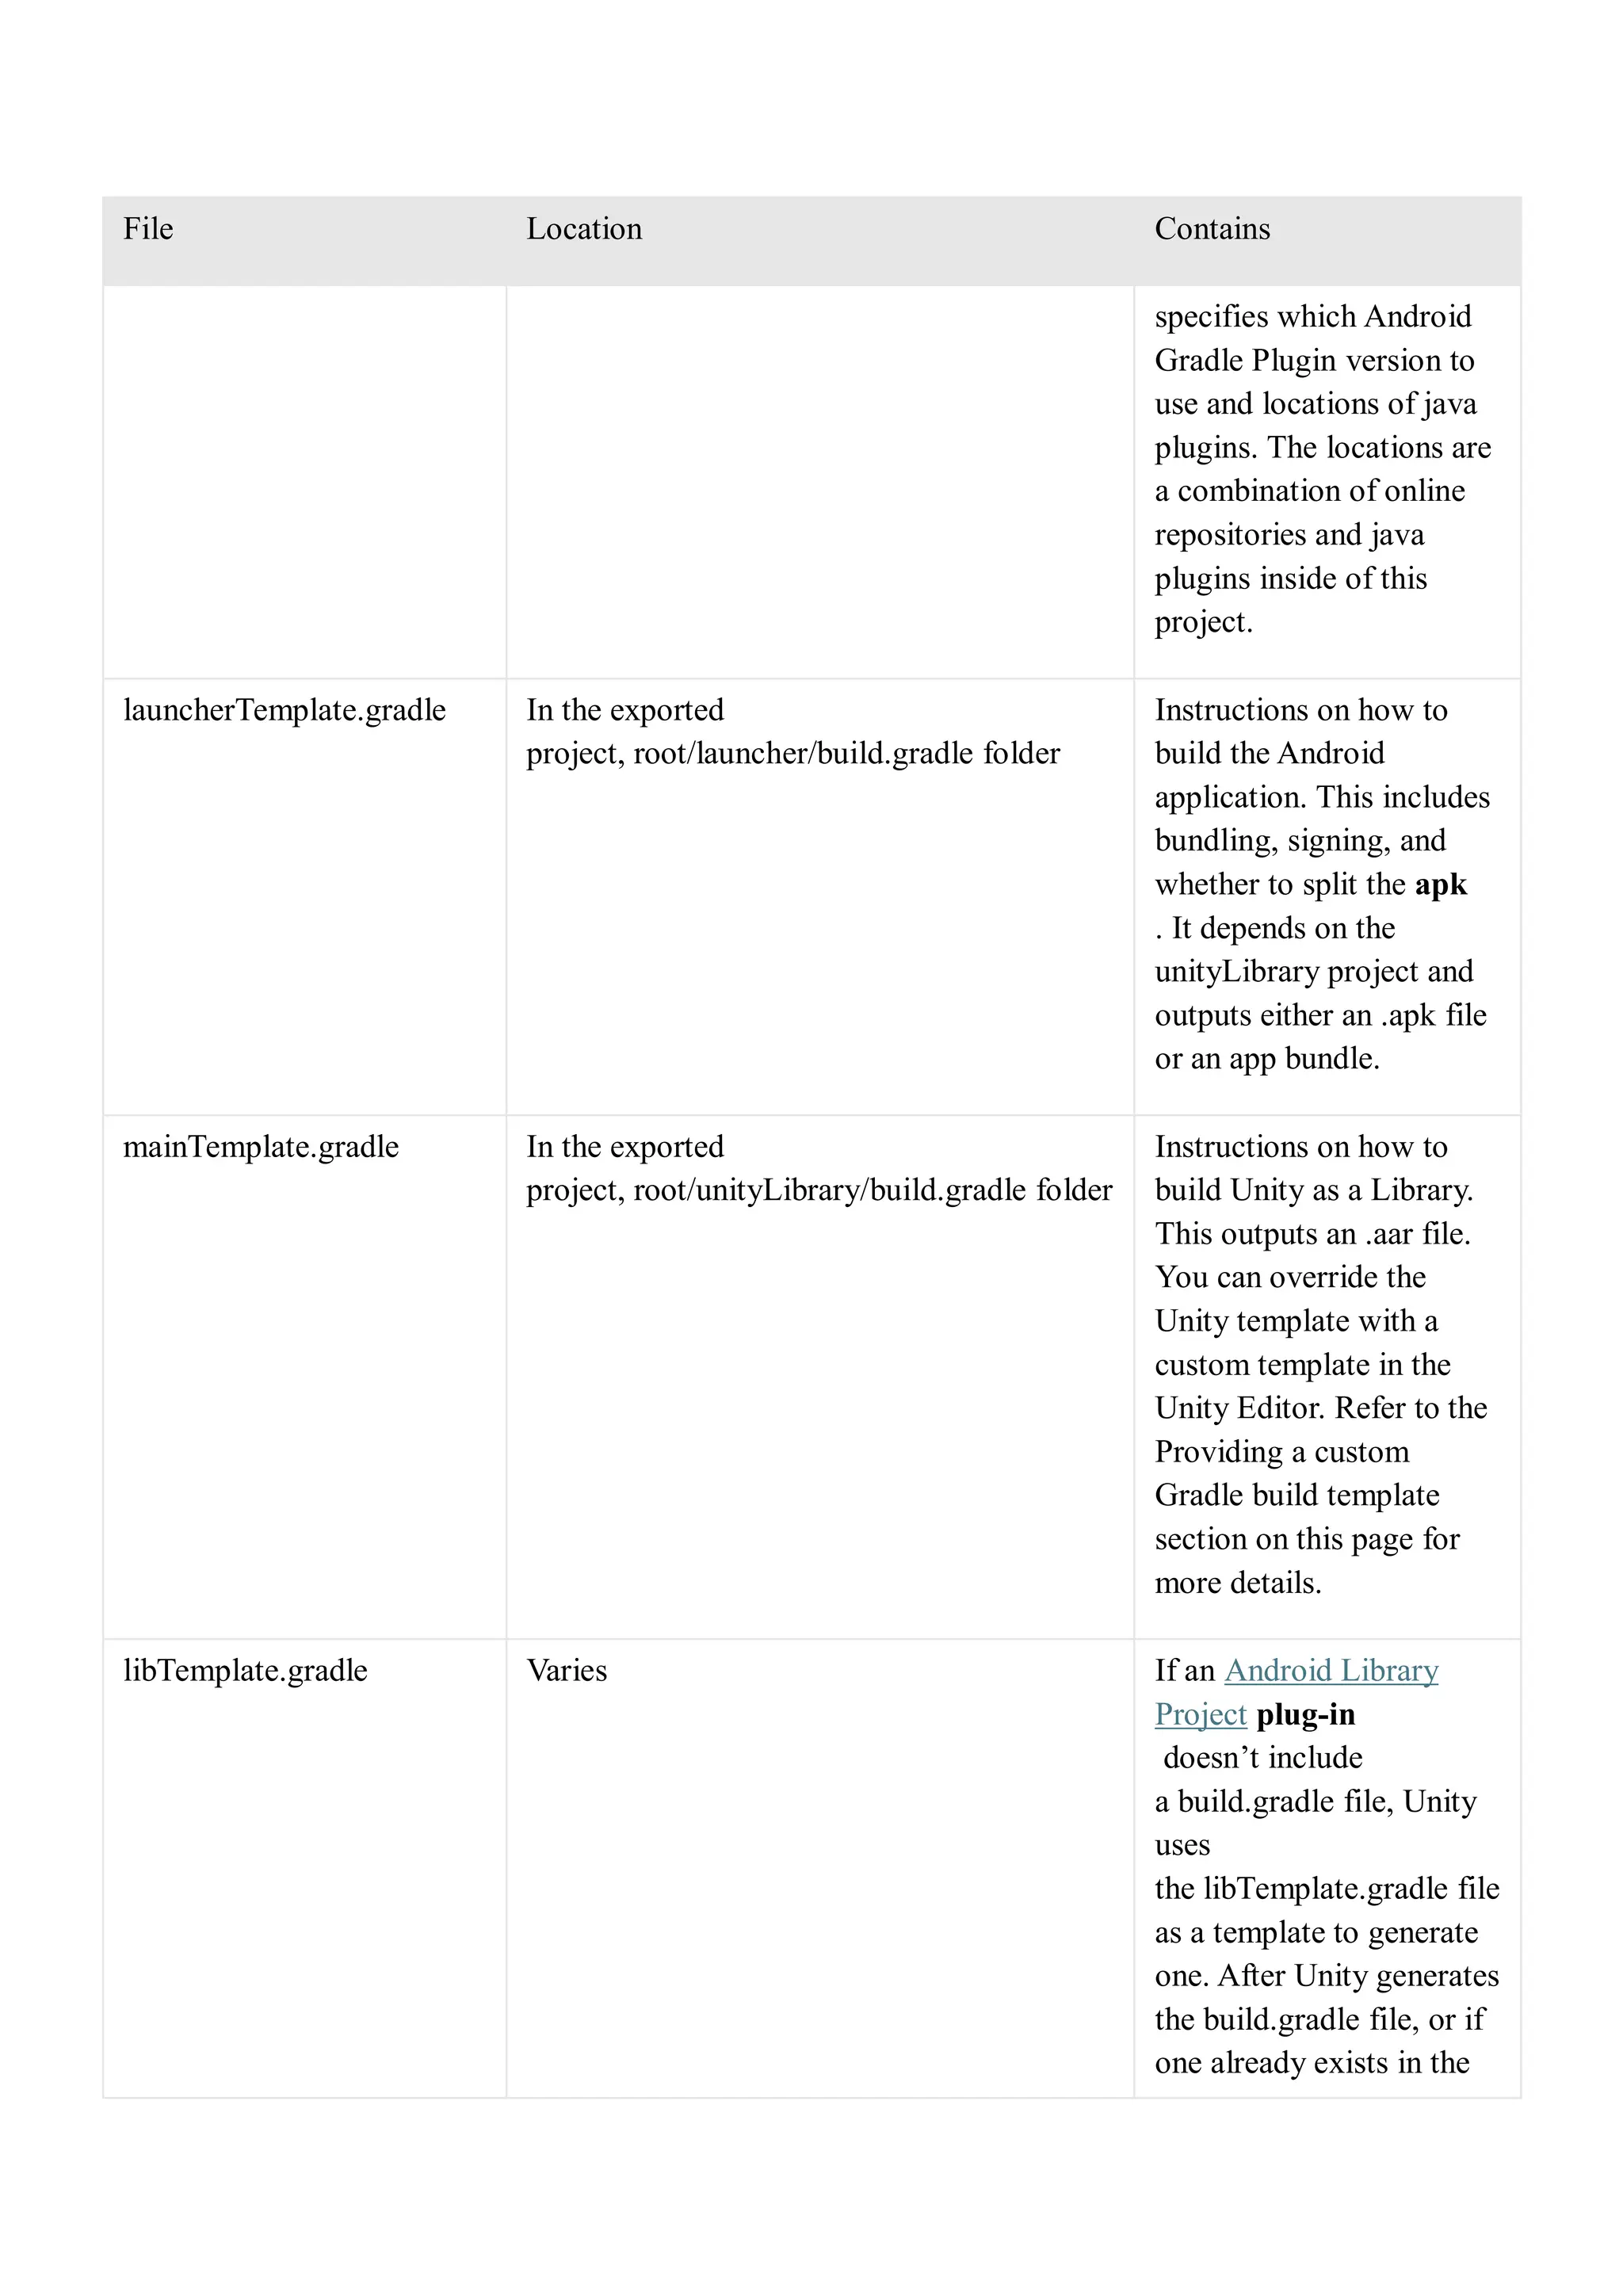
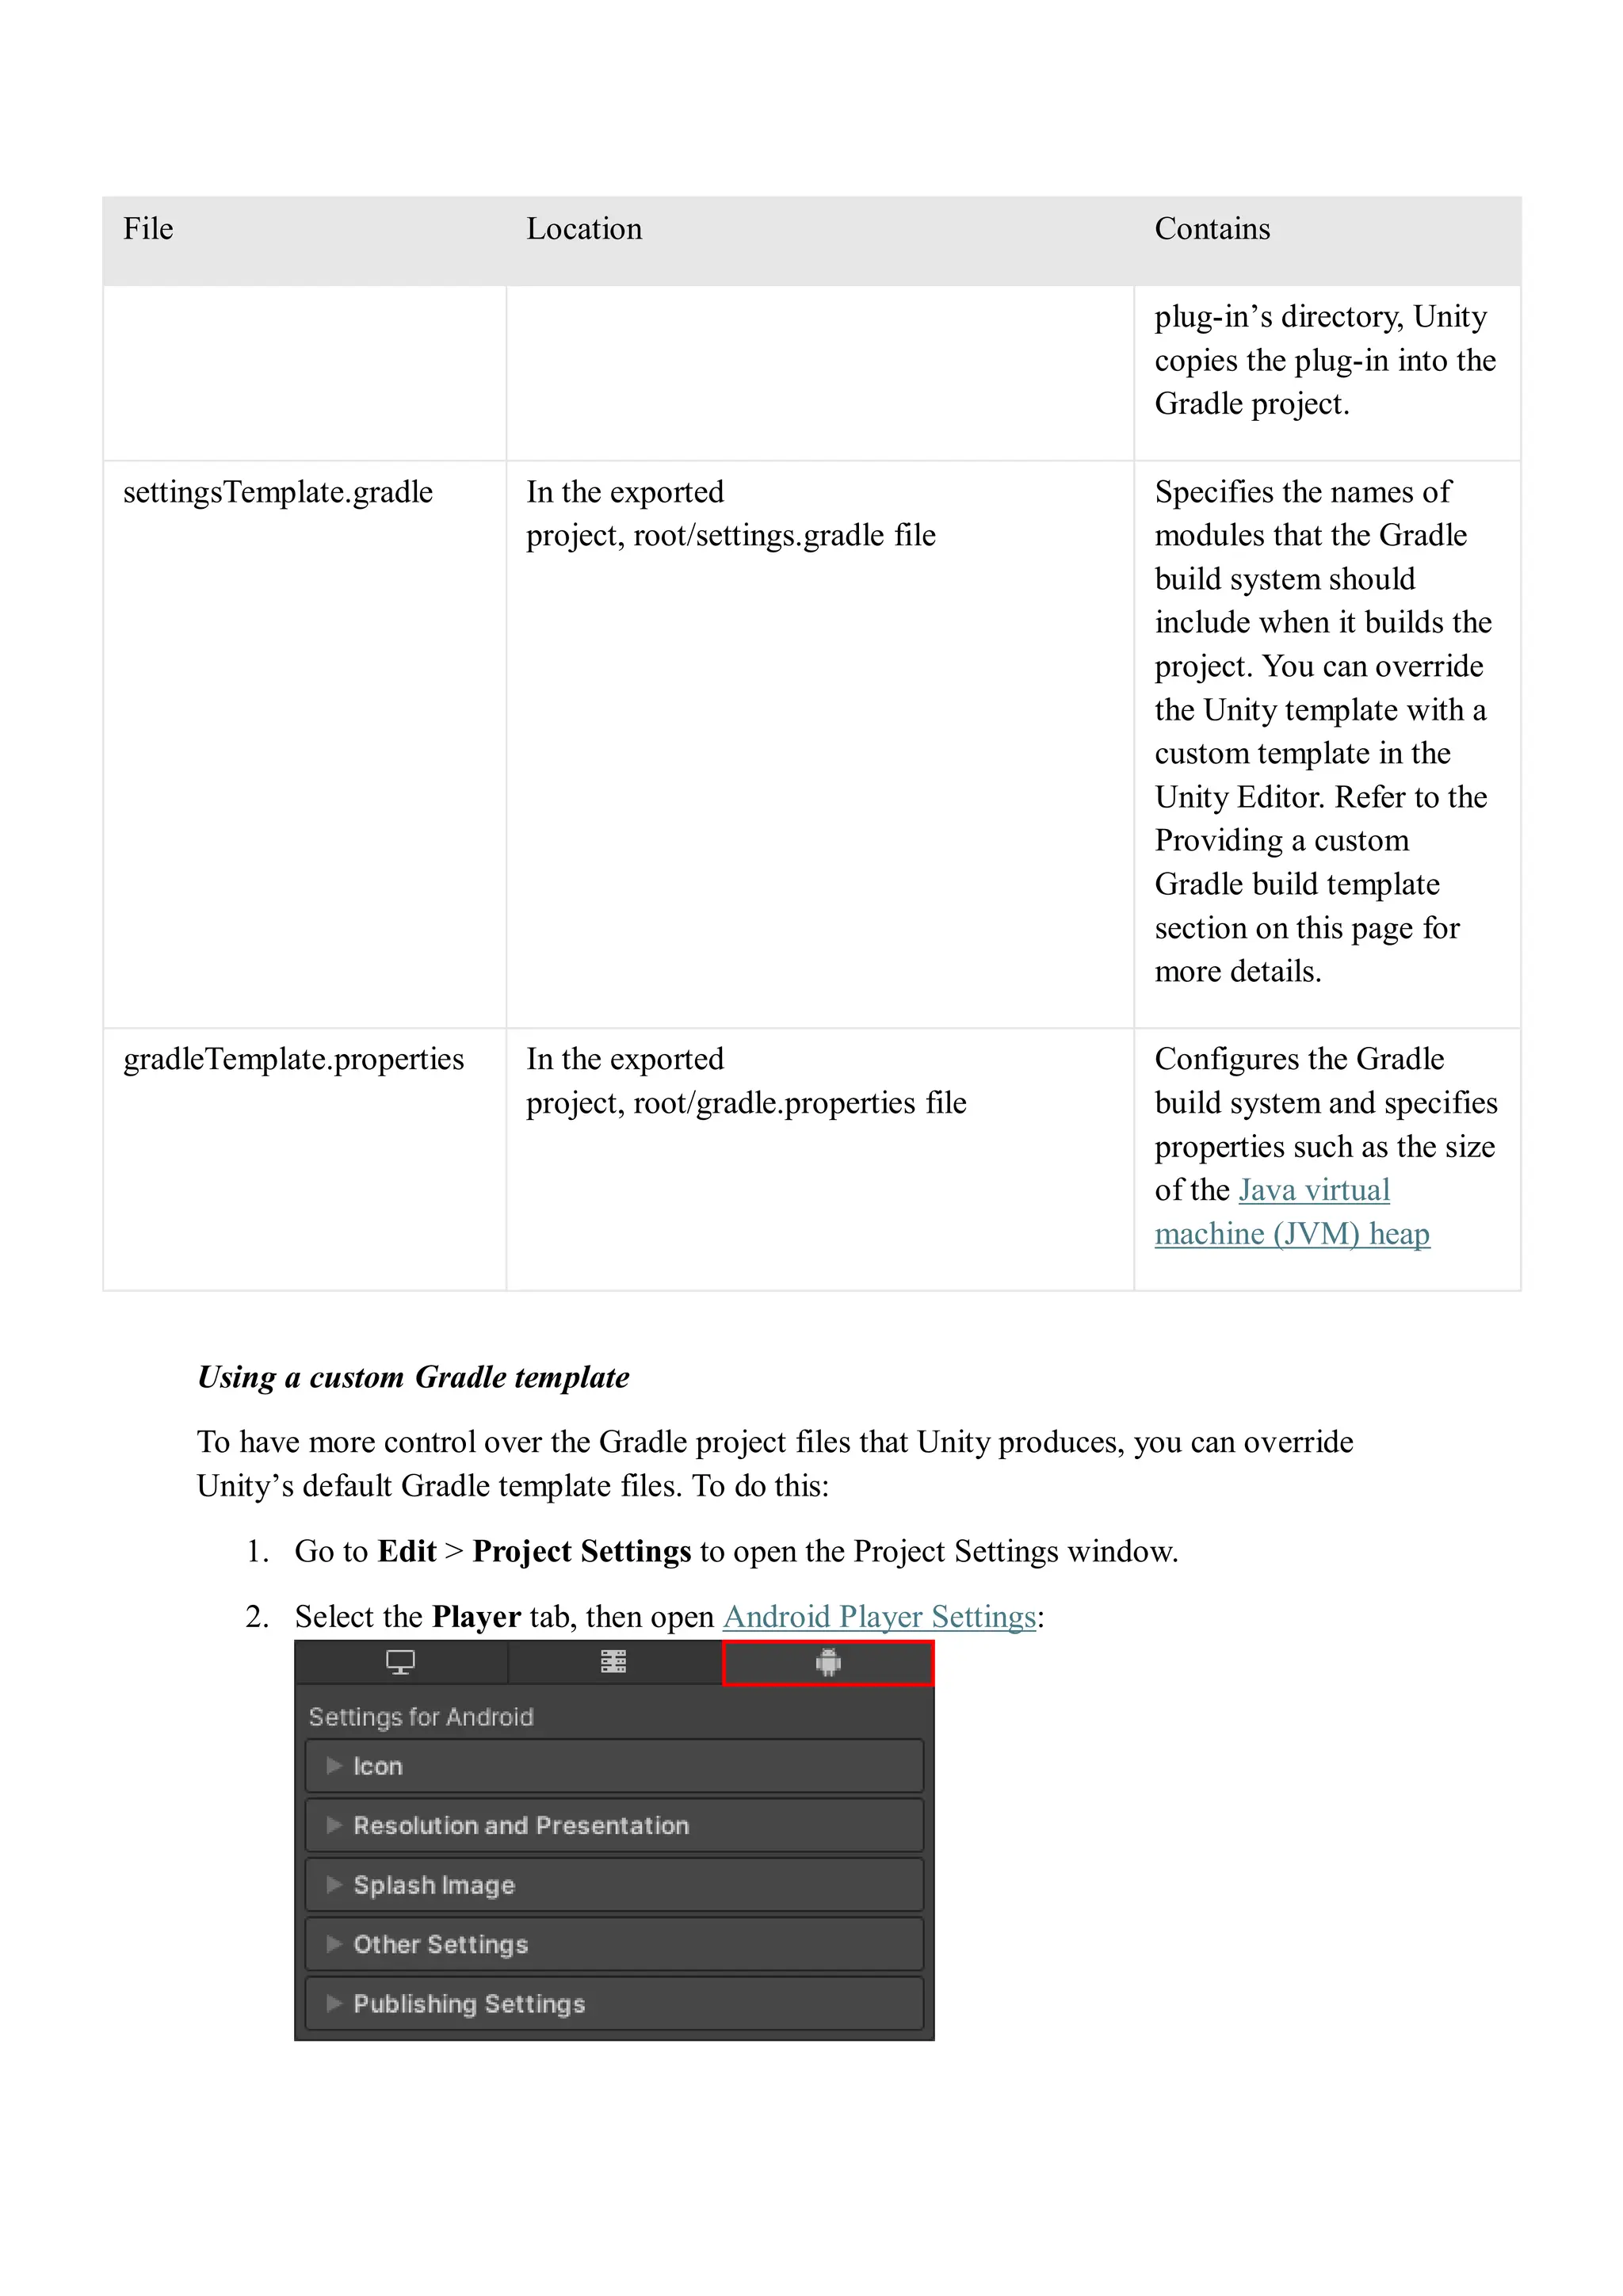
The document provides detailed guidance on Unity's build and deploy settings, including platform-specific configurations, scene management, and debugging options. It distinguishes between release and development builds, highlights asset compression methods, and outlines settings for Android builds. Additionally, it explains how to iterate and optimize the build process while managing texture imports and their compression formats.


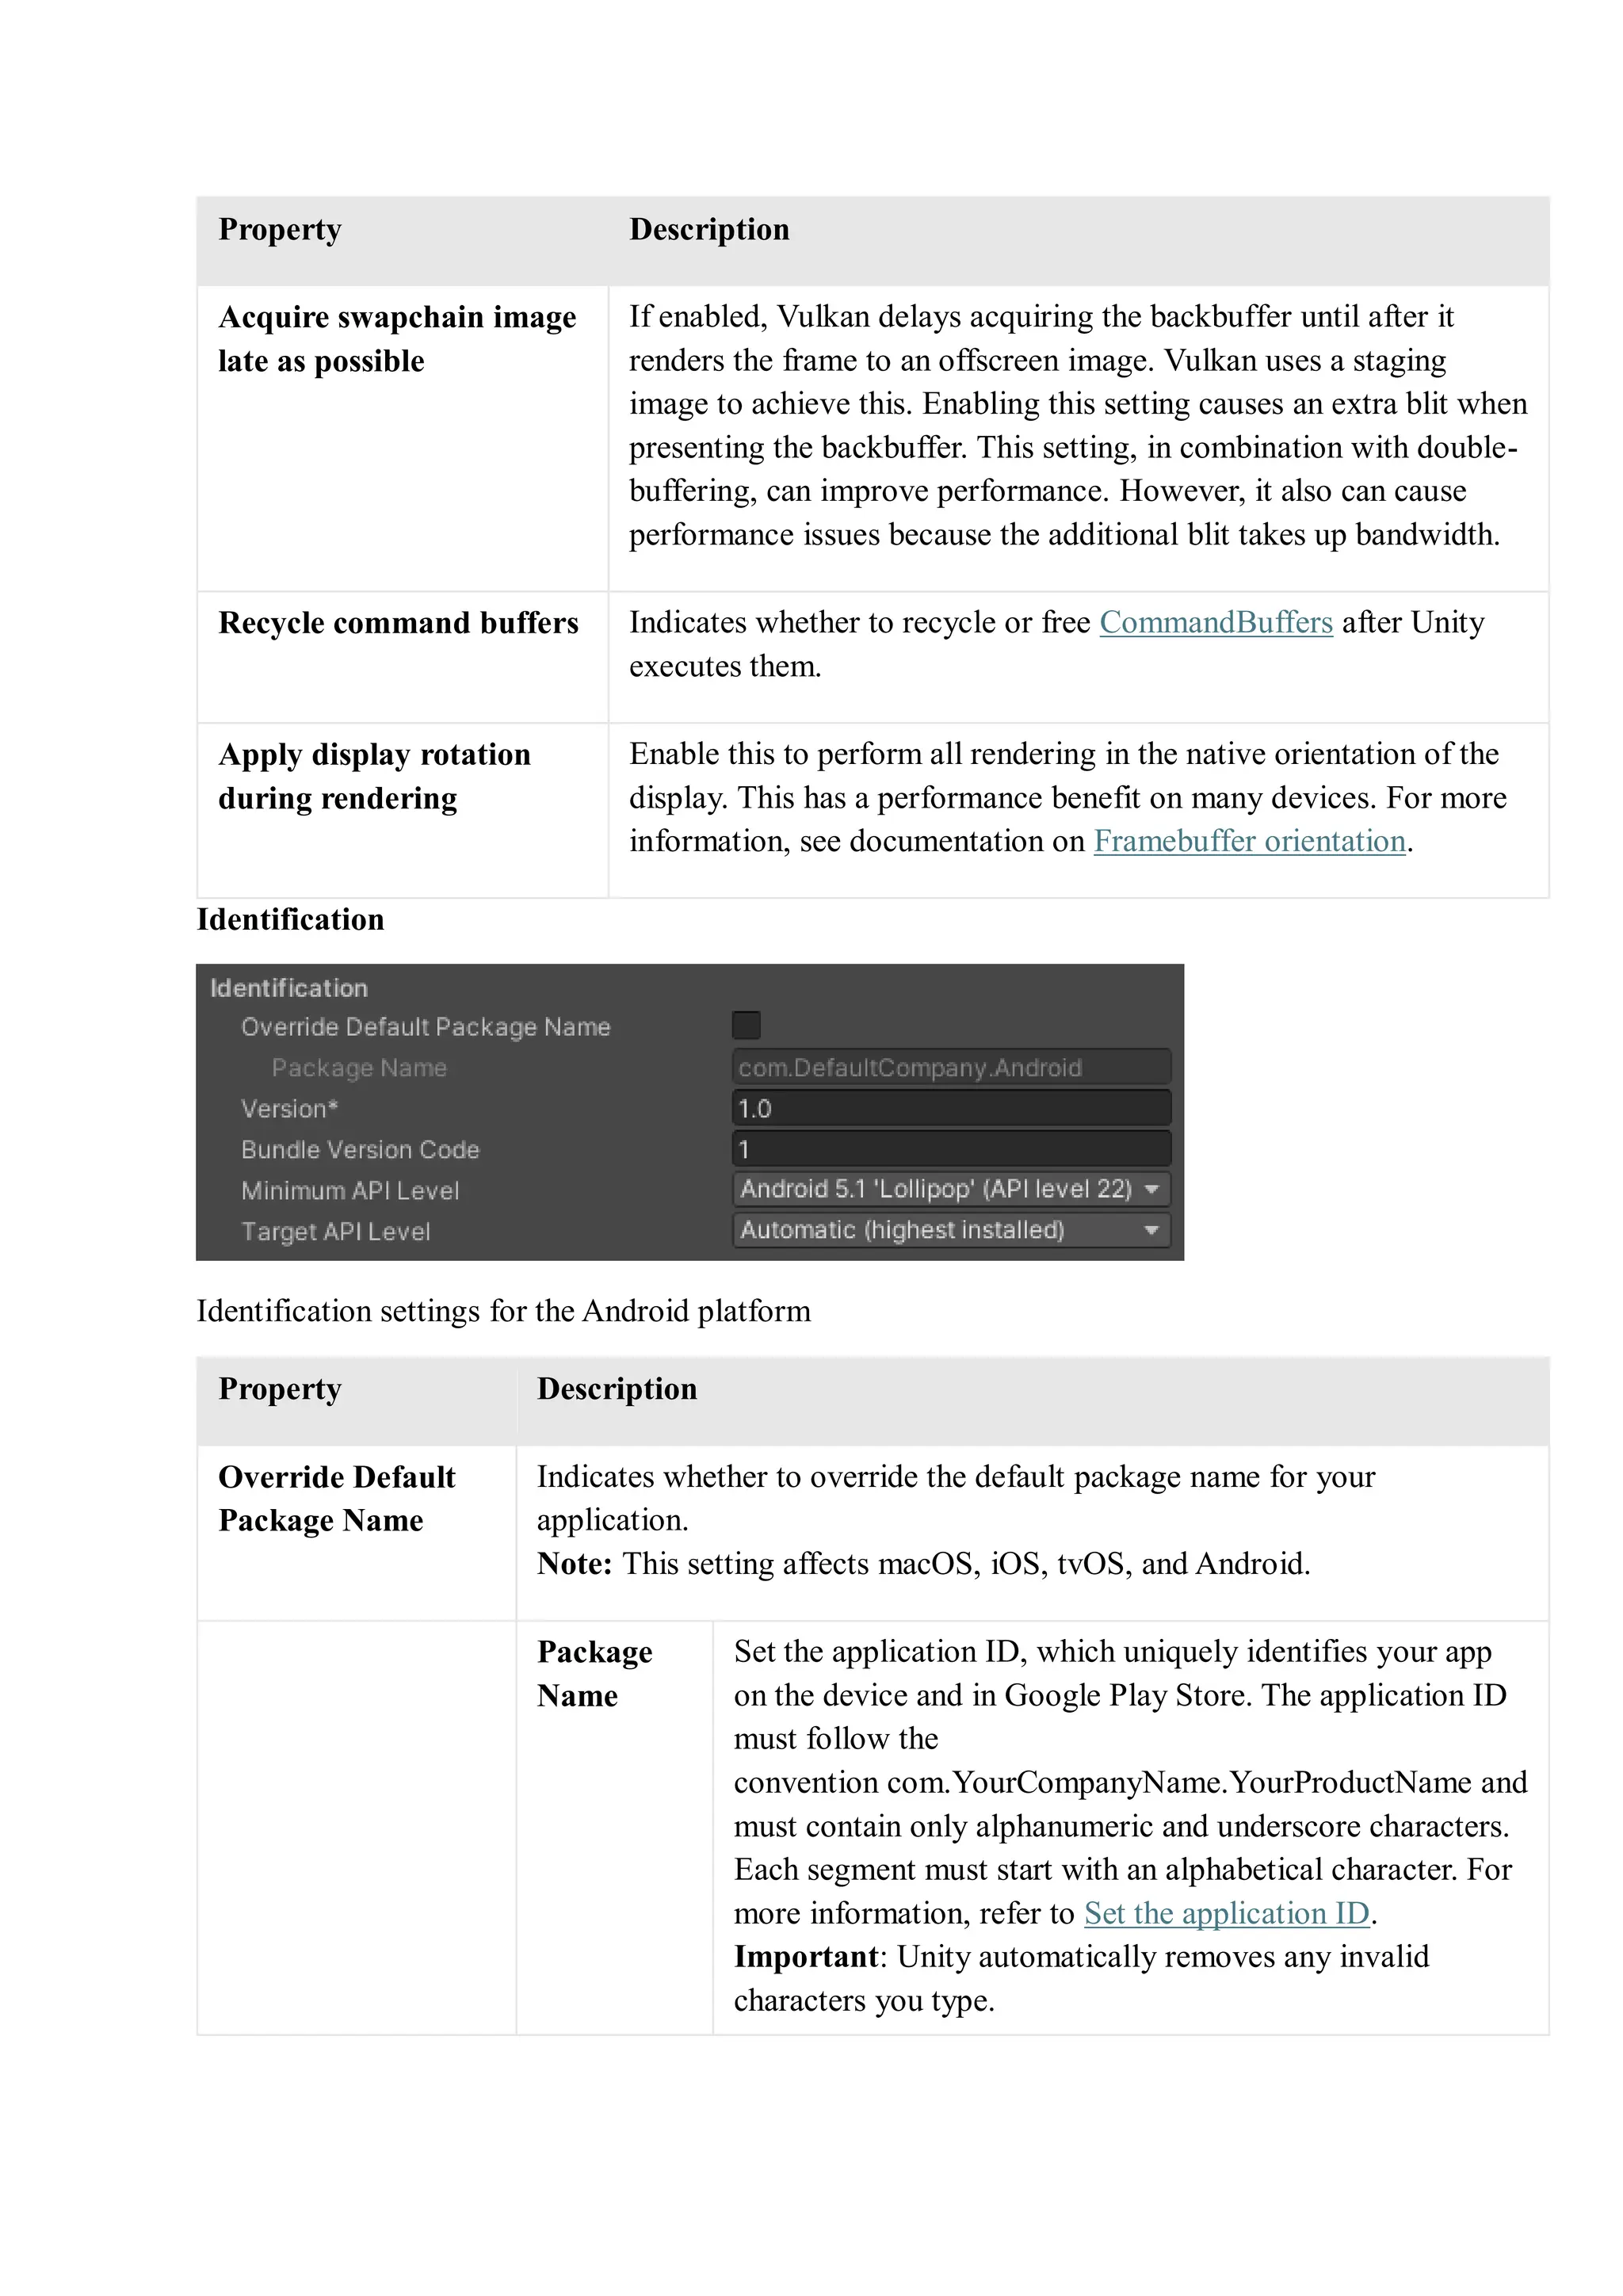

![The Android Build Settings window.
Using the scripting API
If you implement your own build pipeline, you can use the scripting API to patch your
application. To do this, pass
the BuildOptions.BuildScriptsOnly and BuildOptions.PatchPackage options to
the BuildPipeline.BuildPlayer method.
For example:
BuildPlayerOptions buildPlayerOptions = new BuildPlayerOptions();
buildPlayerOptions.scenes = new[] { "Assets/Scene1.unity"};
buildPlayerOptions.target = BuildTarget.Android;
// Use Patch & Run for all builds for optimal turn-around times.
// (In prior versions, an initial regular Build & Run was necessary.)
buildPlayerOptions.options = BuildOptions.PatchPackage | BuildOptions.AutoRunPlayer |
BuildOptions.Development;
BuildPipeline.BuildPlayer(buildPlayerOptions);
How application patching works
When you patch an application, Unity:
Creates a minimal APK
that contains all compiled Java sources.
Takes files that have changed since the last patch and stores them in a directory inside
the application’s cache folder
at: /storage/emulated/0/Android/data/<PackageName>/pram-shadow-files/.](https://image.slidesharecdn.com/unitv-241205052517-0c7d180c/75/Unit-V_Player-Settings-and-Build-Settings-pdf-52-2048.jpg)


![[UniteKorea2013] Memory profiling in Unity](https://cdn.slidesharecdn.com/ss_thumbnails/memoryprofilinginunity-130509204713-phpapp01-thumbnail.jpg?width=640&height=640&fit=bounds)