Downloaded 119 times

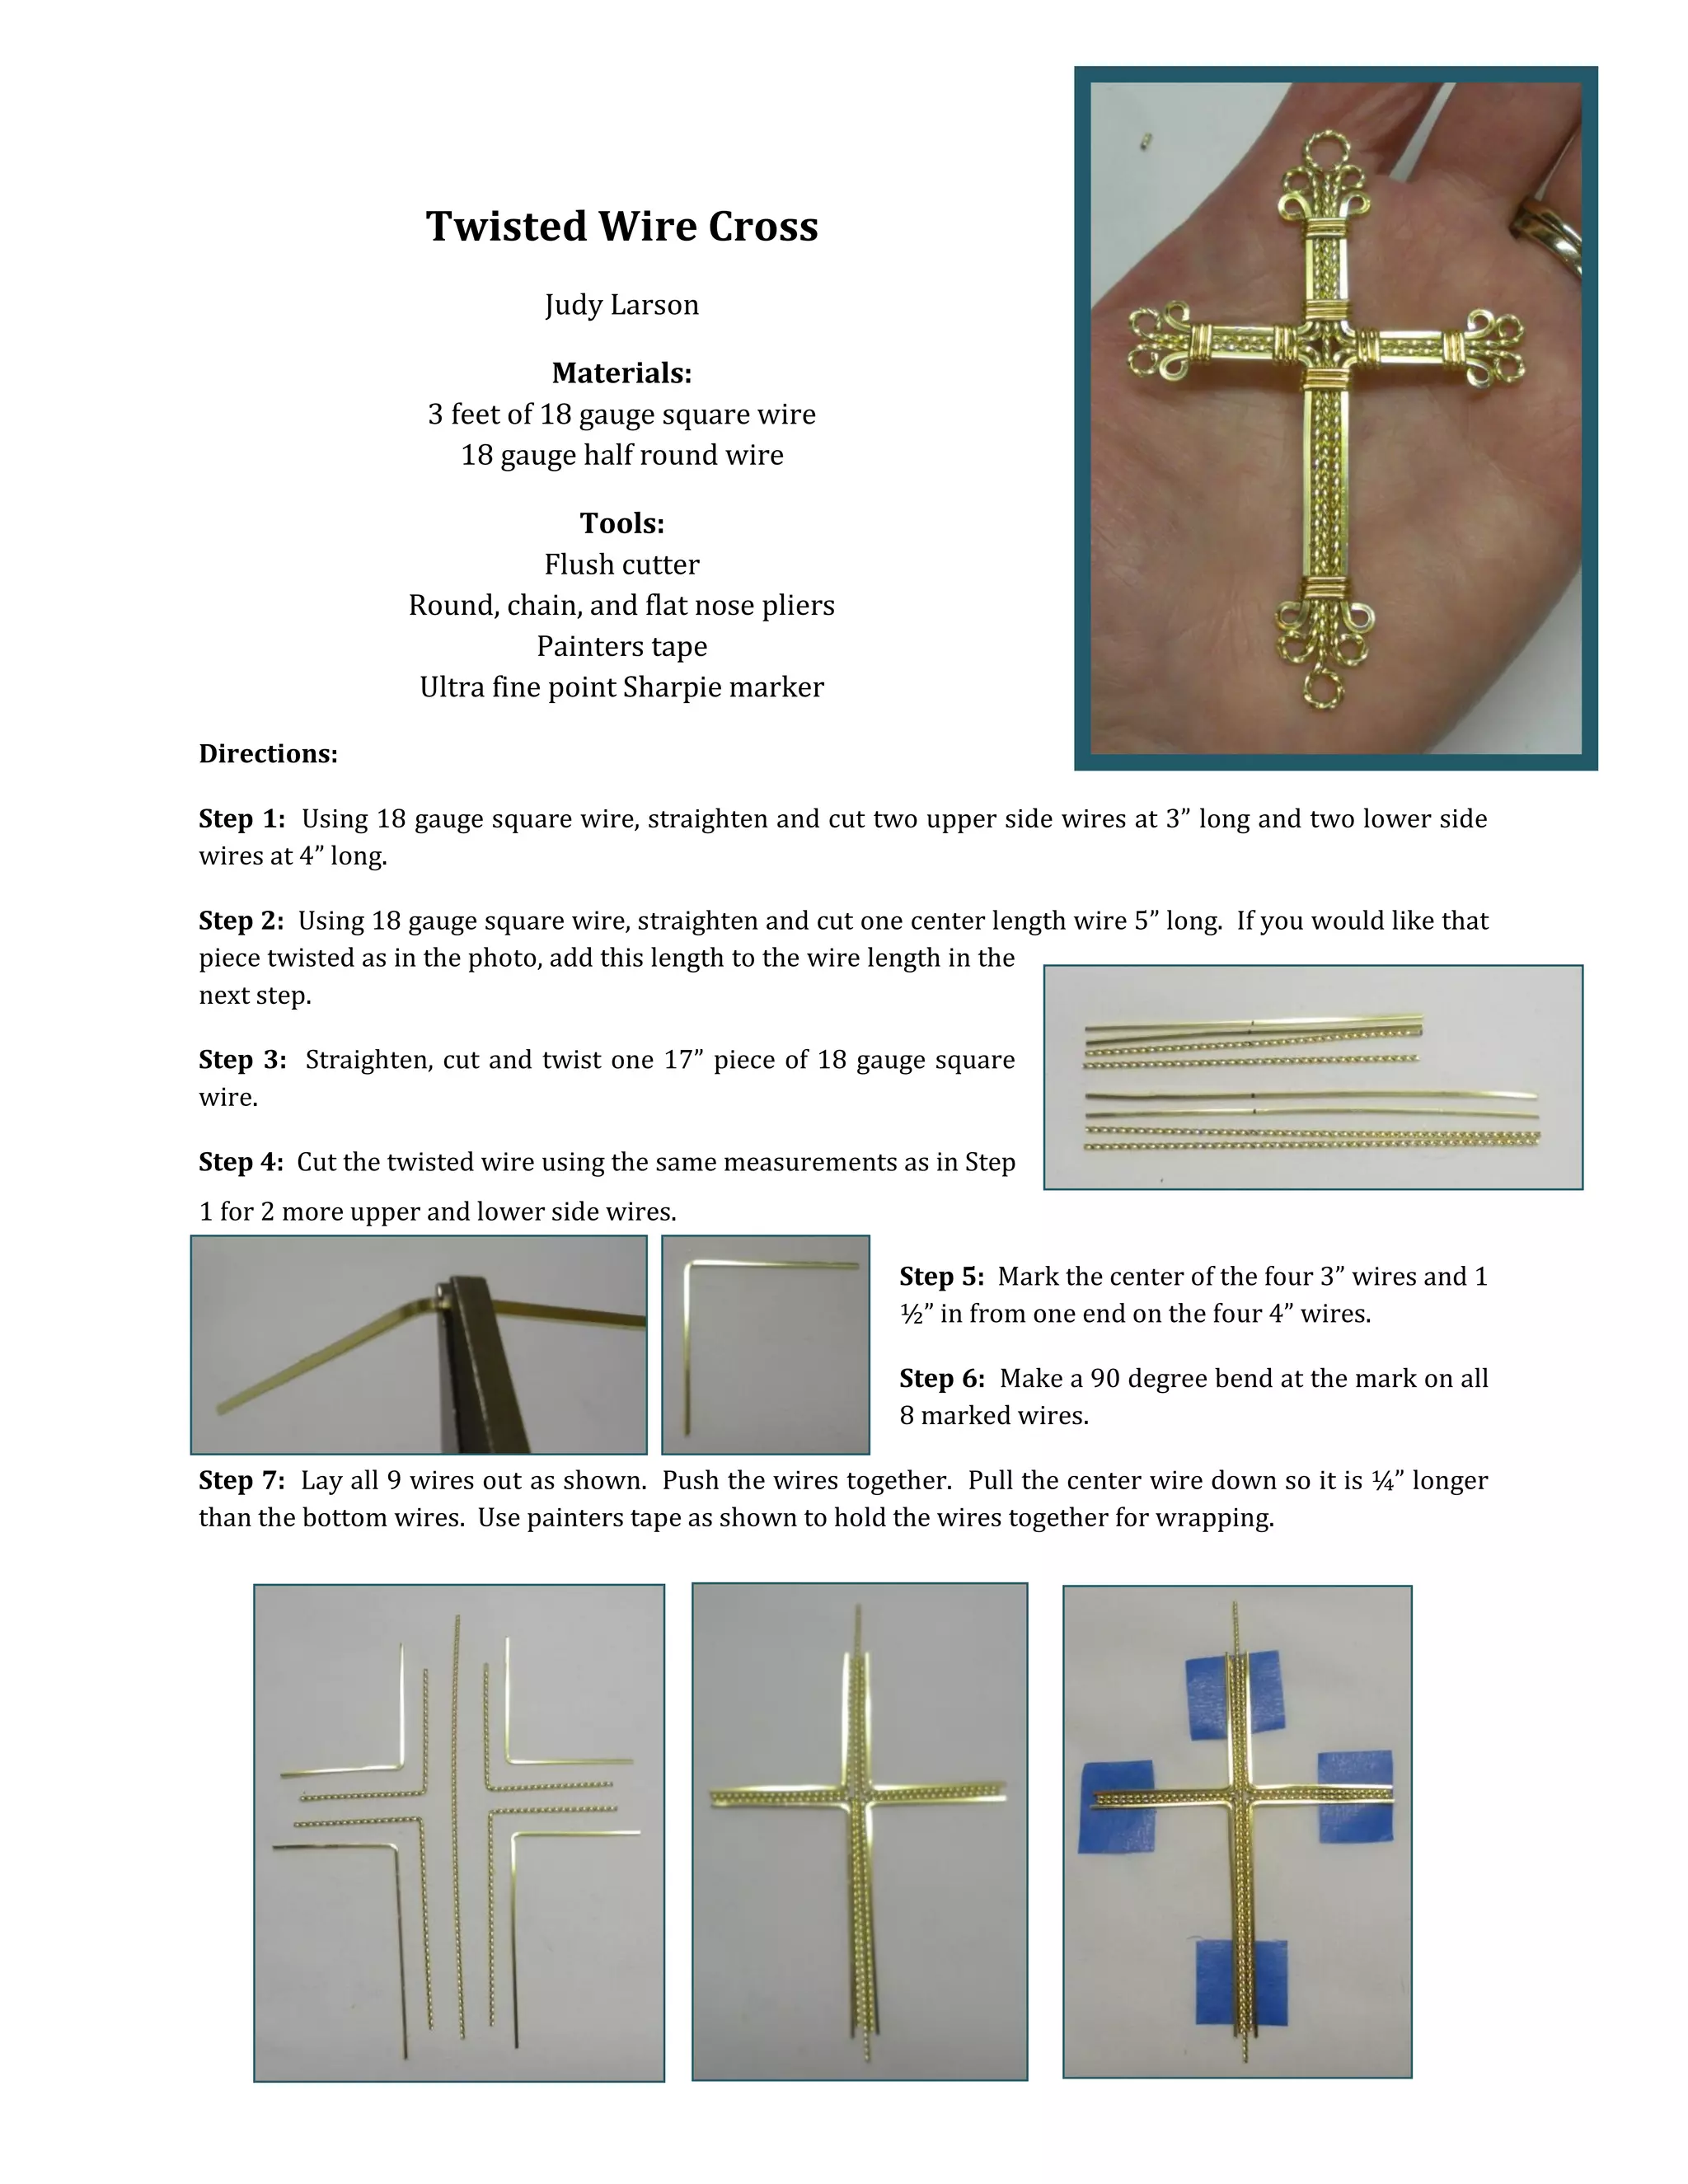

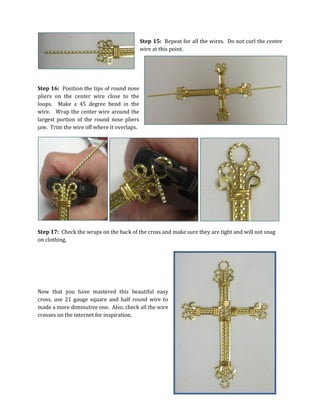

The document provides a step-by-step guide to create a twisted wire cross using 18 gauge square and half round wires. It includes detailed instructions on measuring, cutting, twisting, and curling the wires to form the cross structure. Additionally, it suggests using a smaller gauge for a more diminutive version and encourages seeking further inspiration online.


