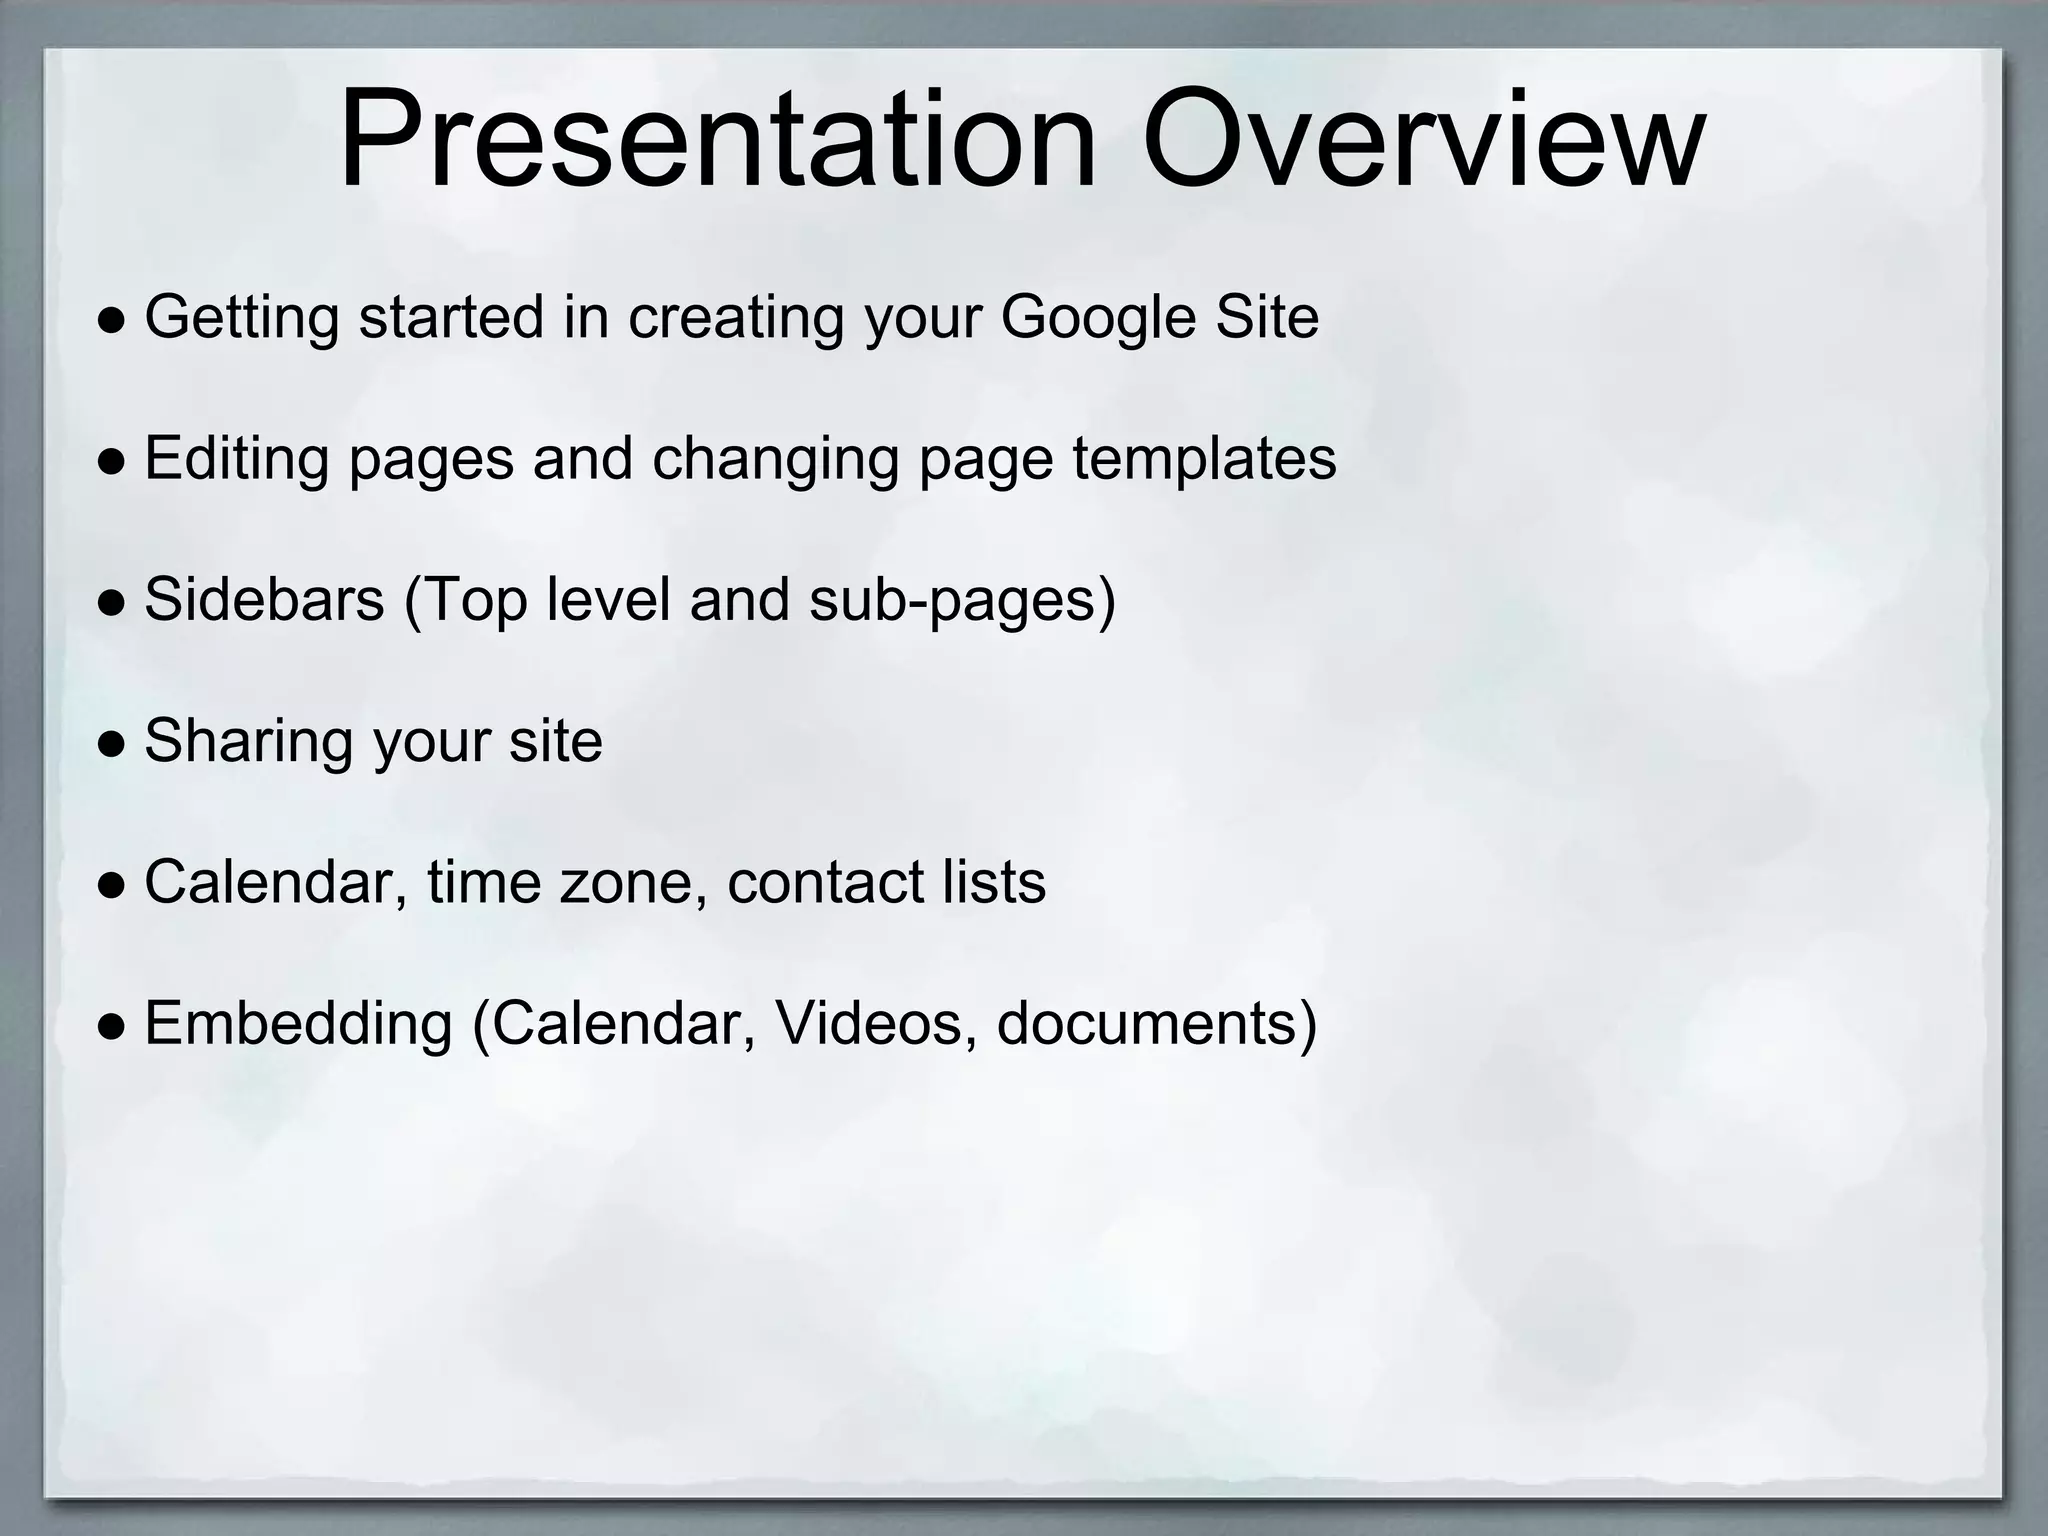
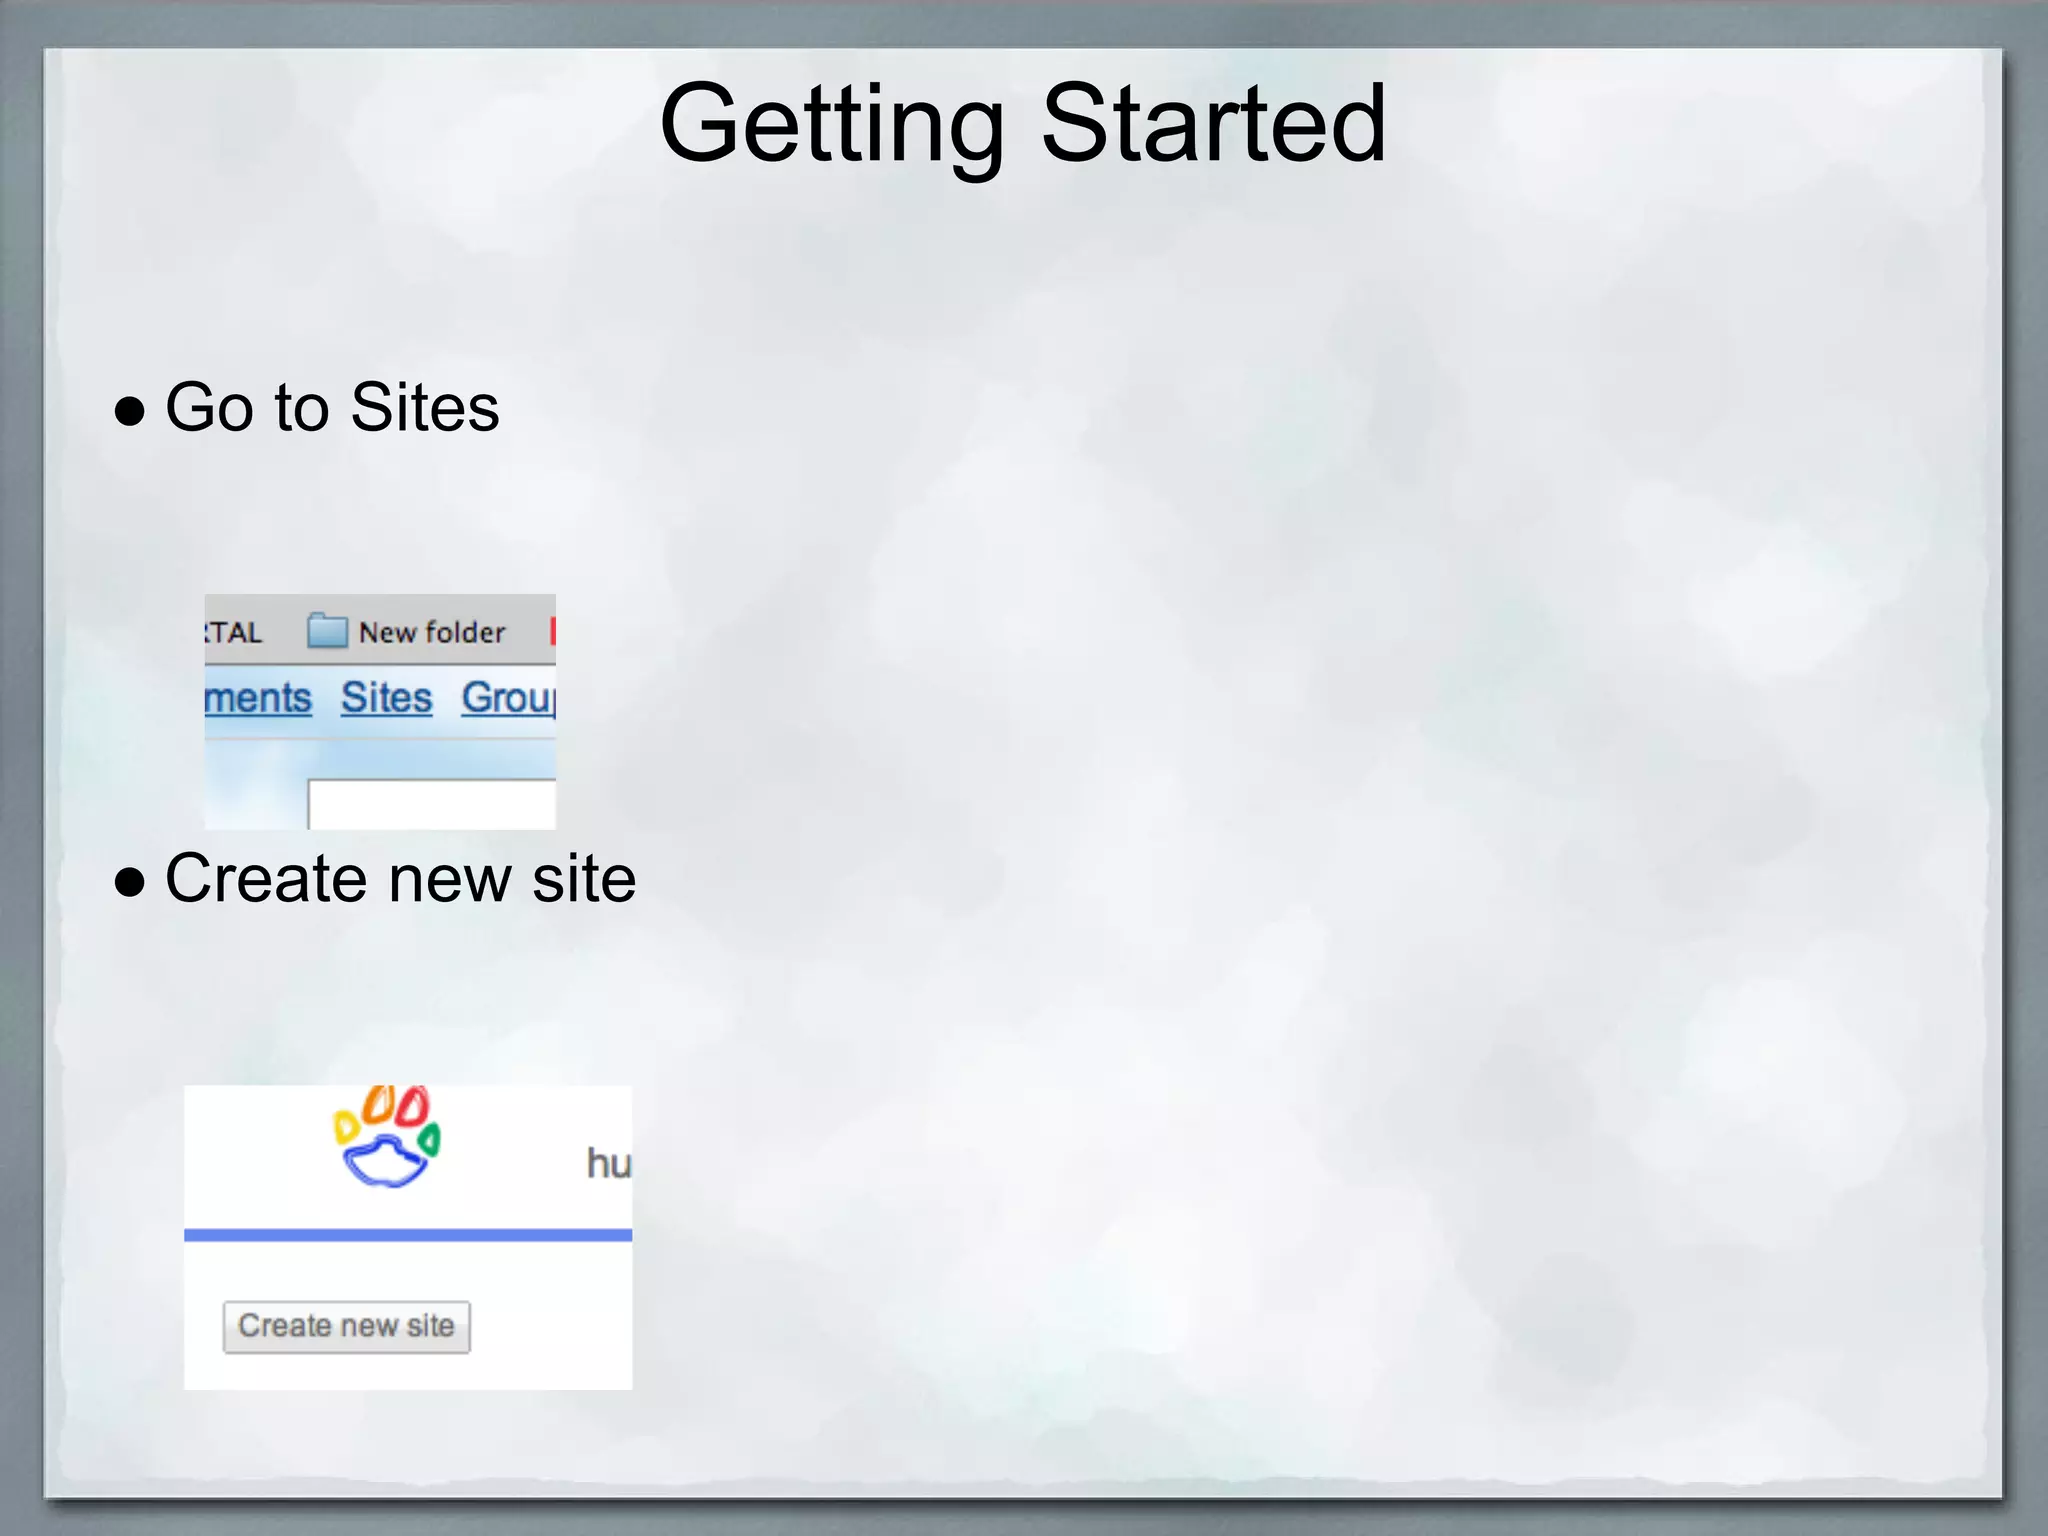
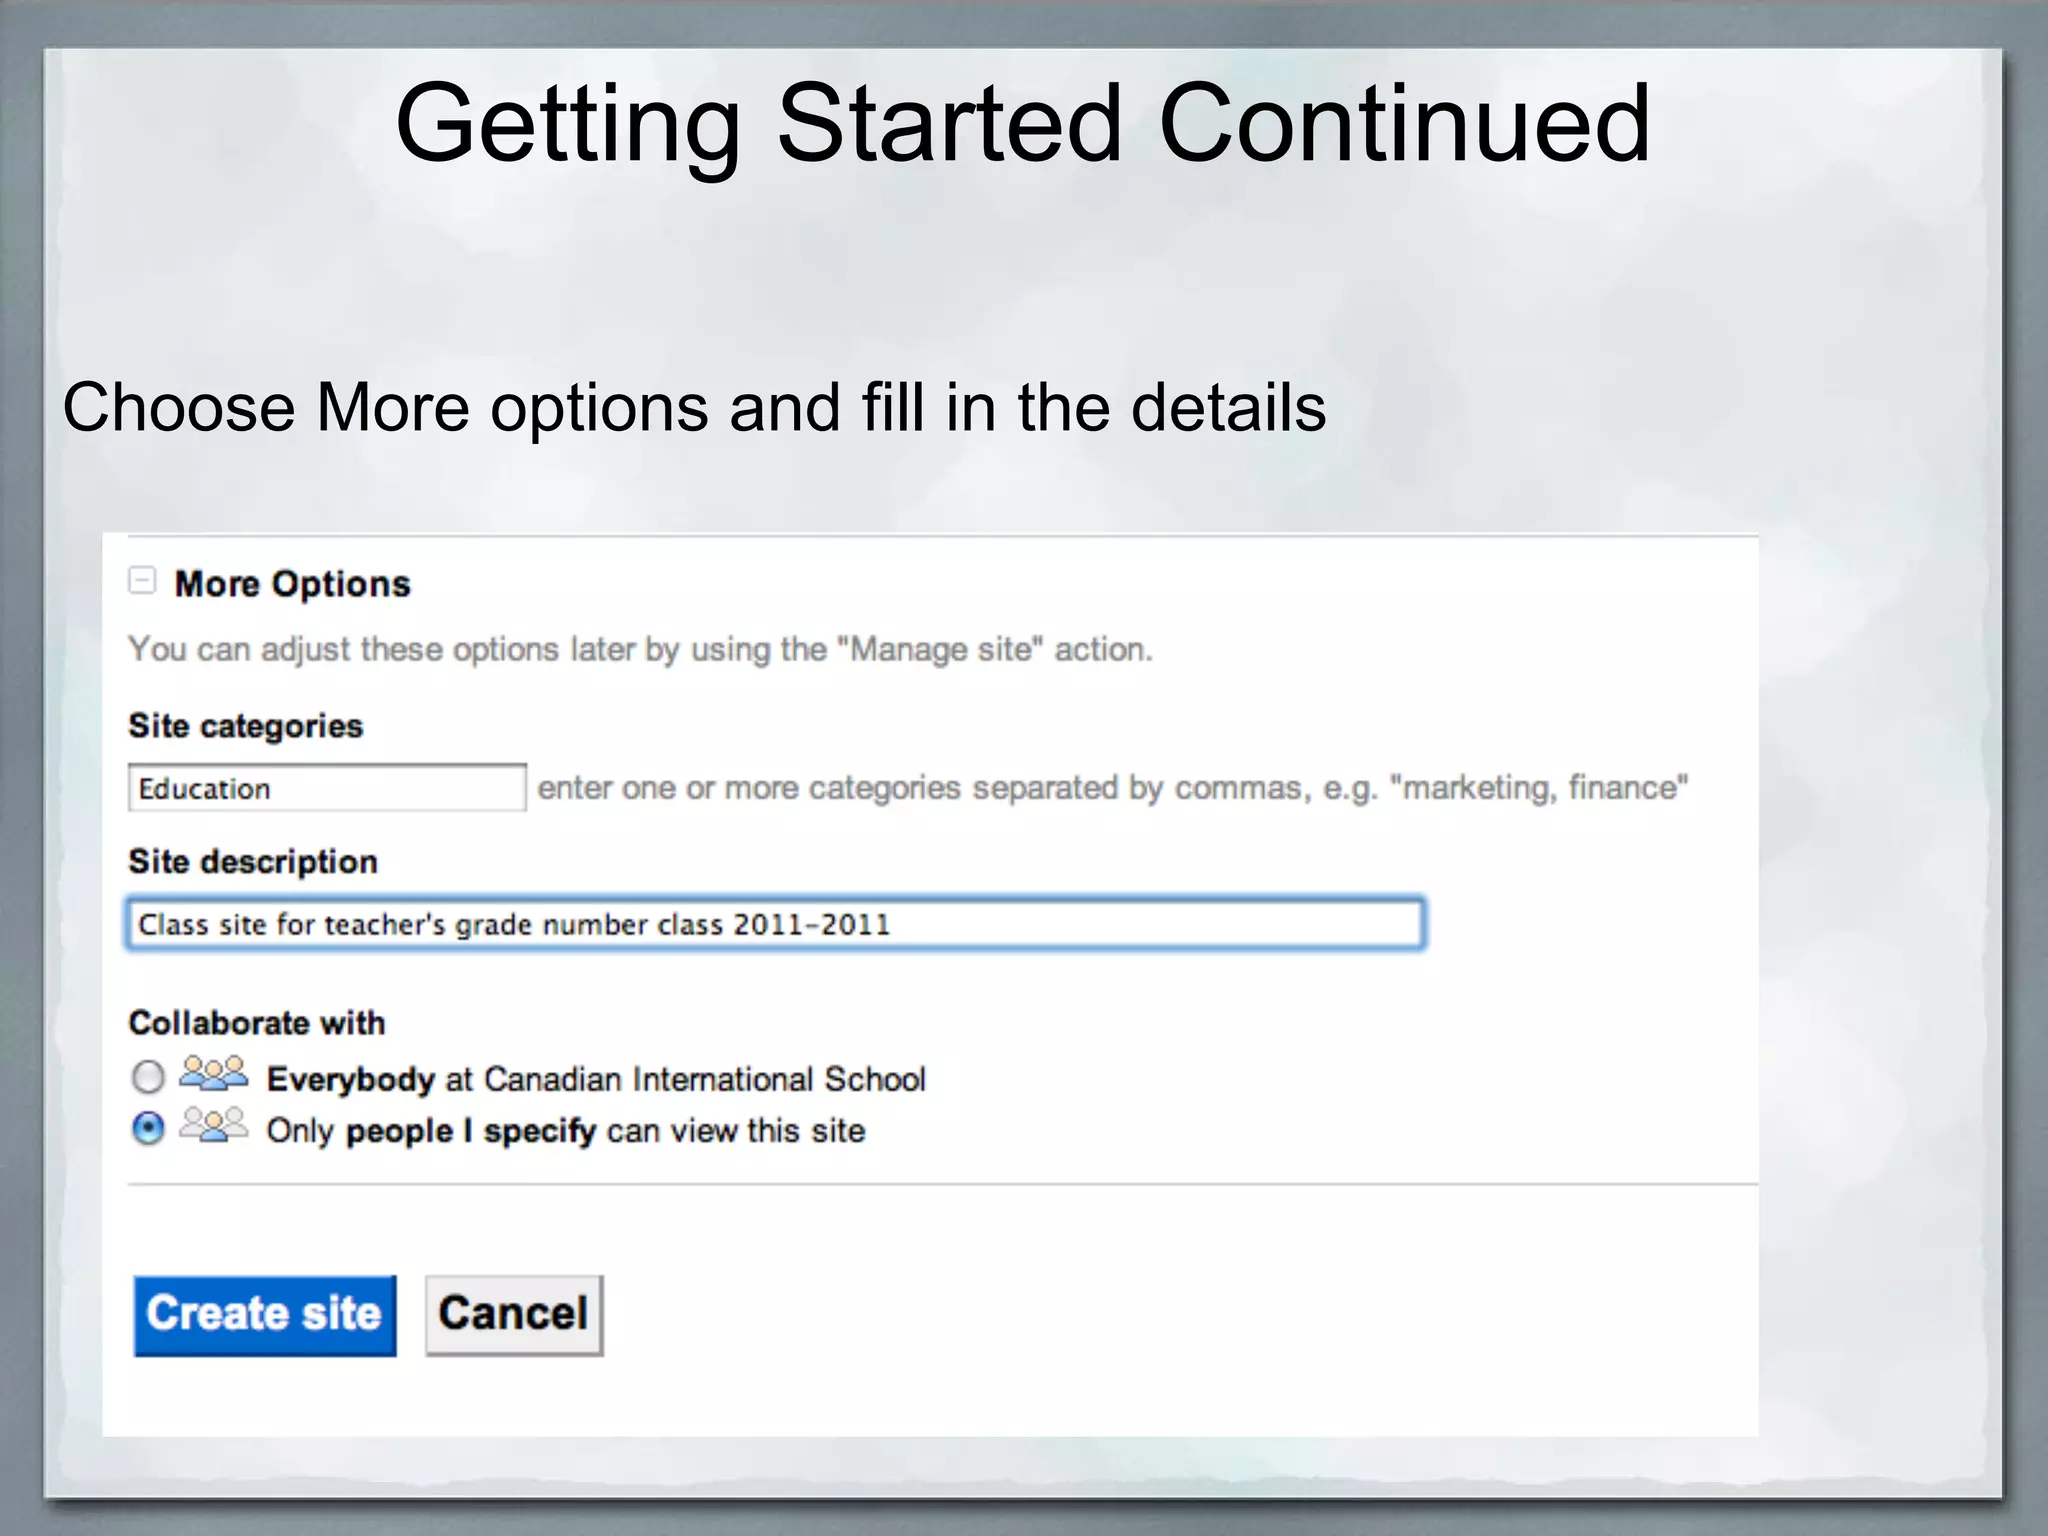
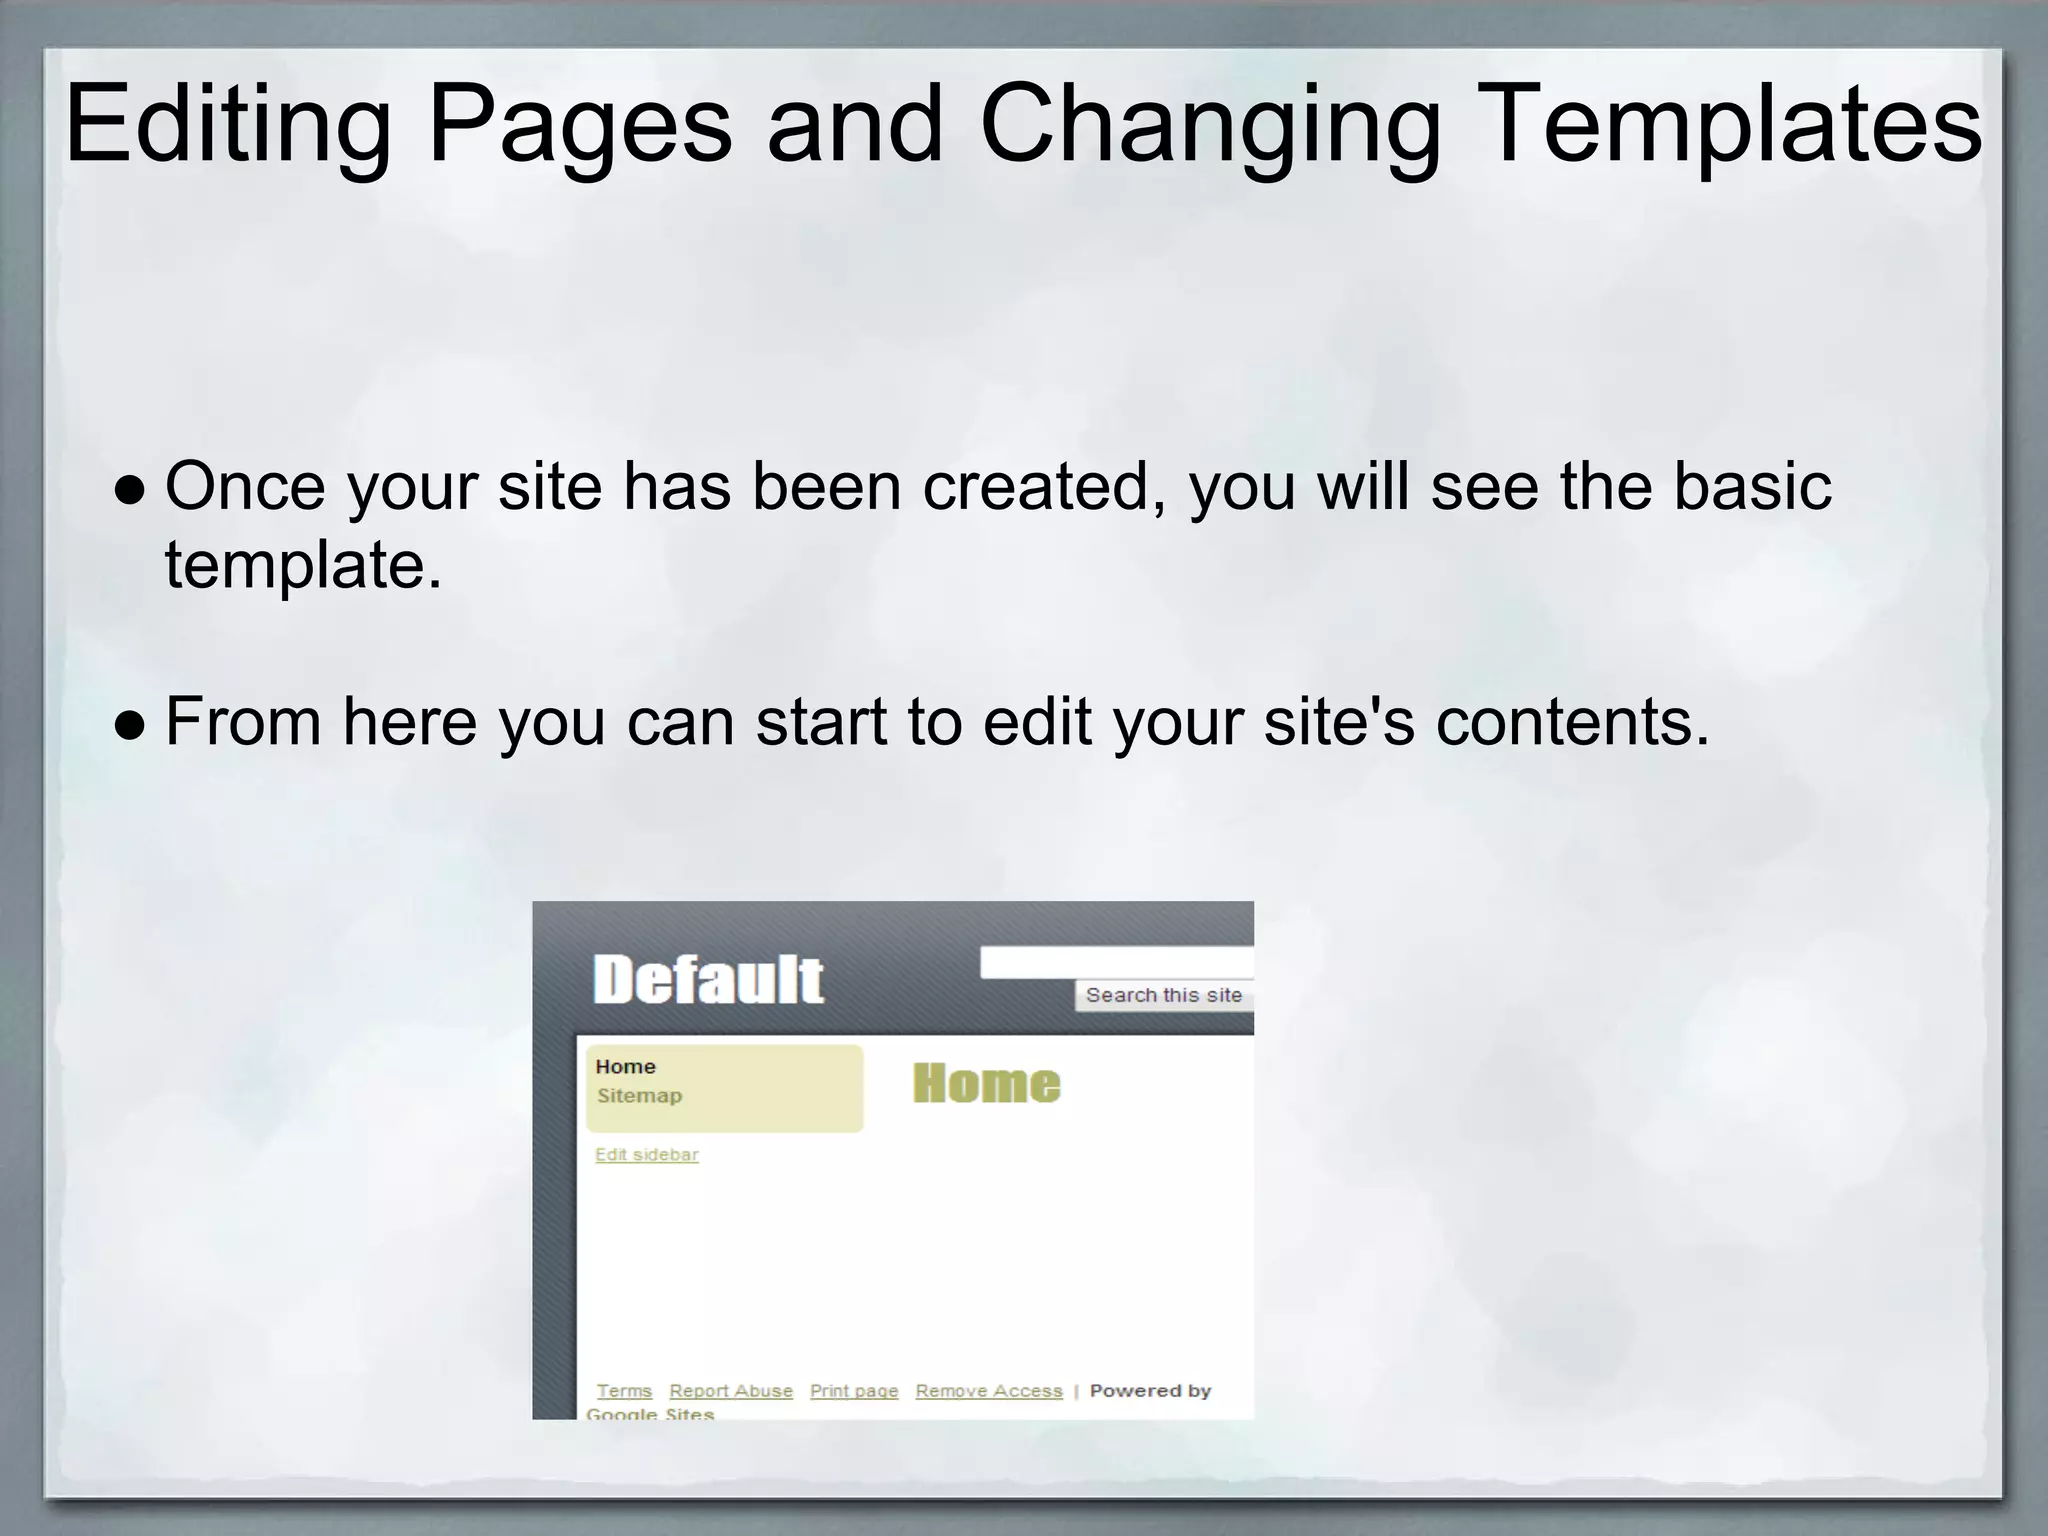
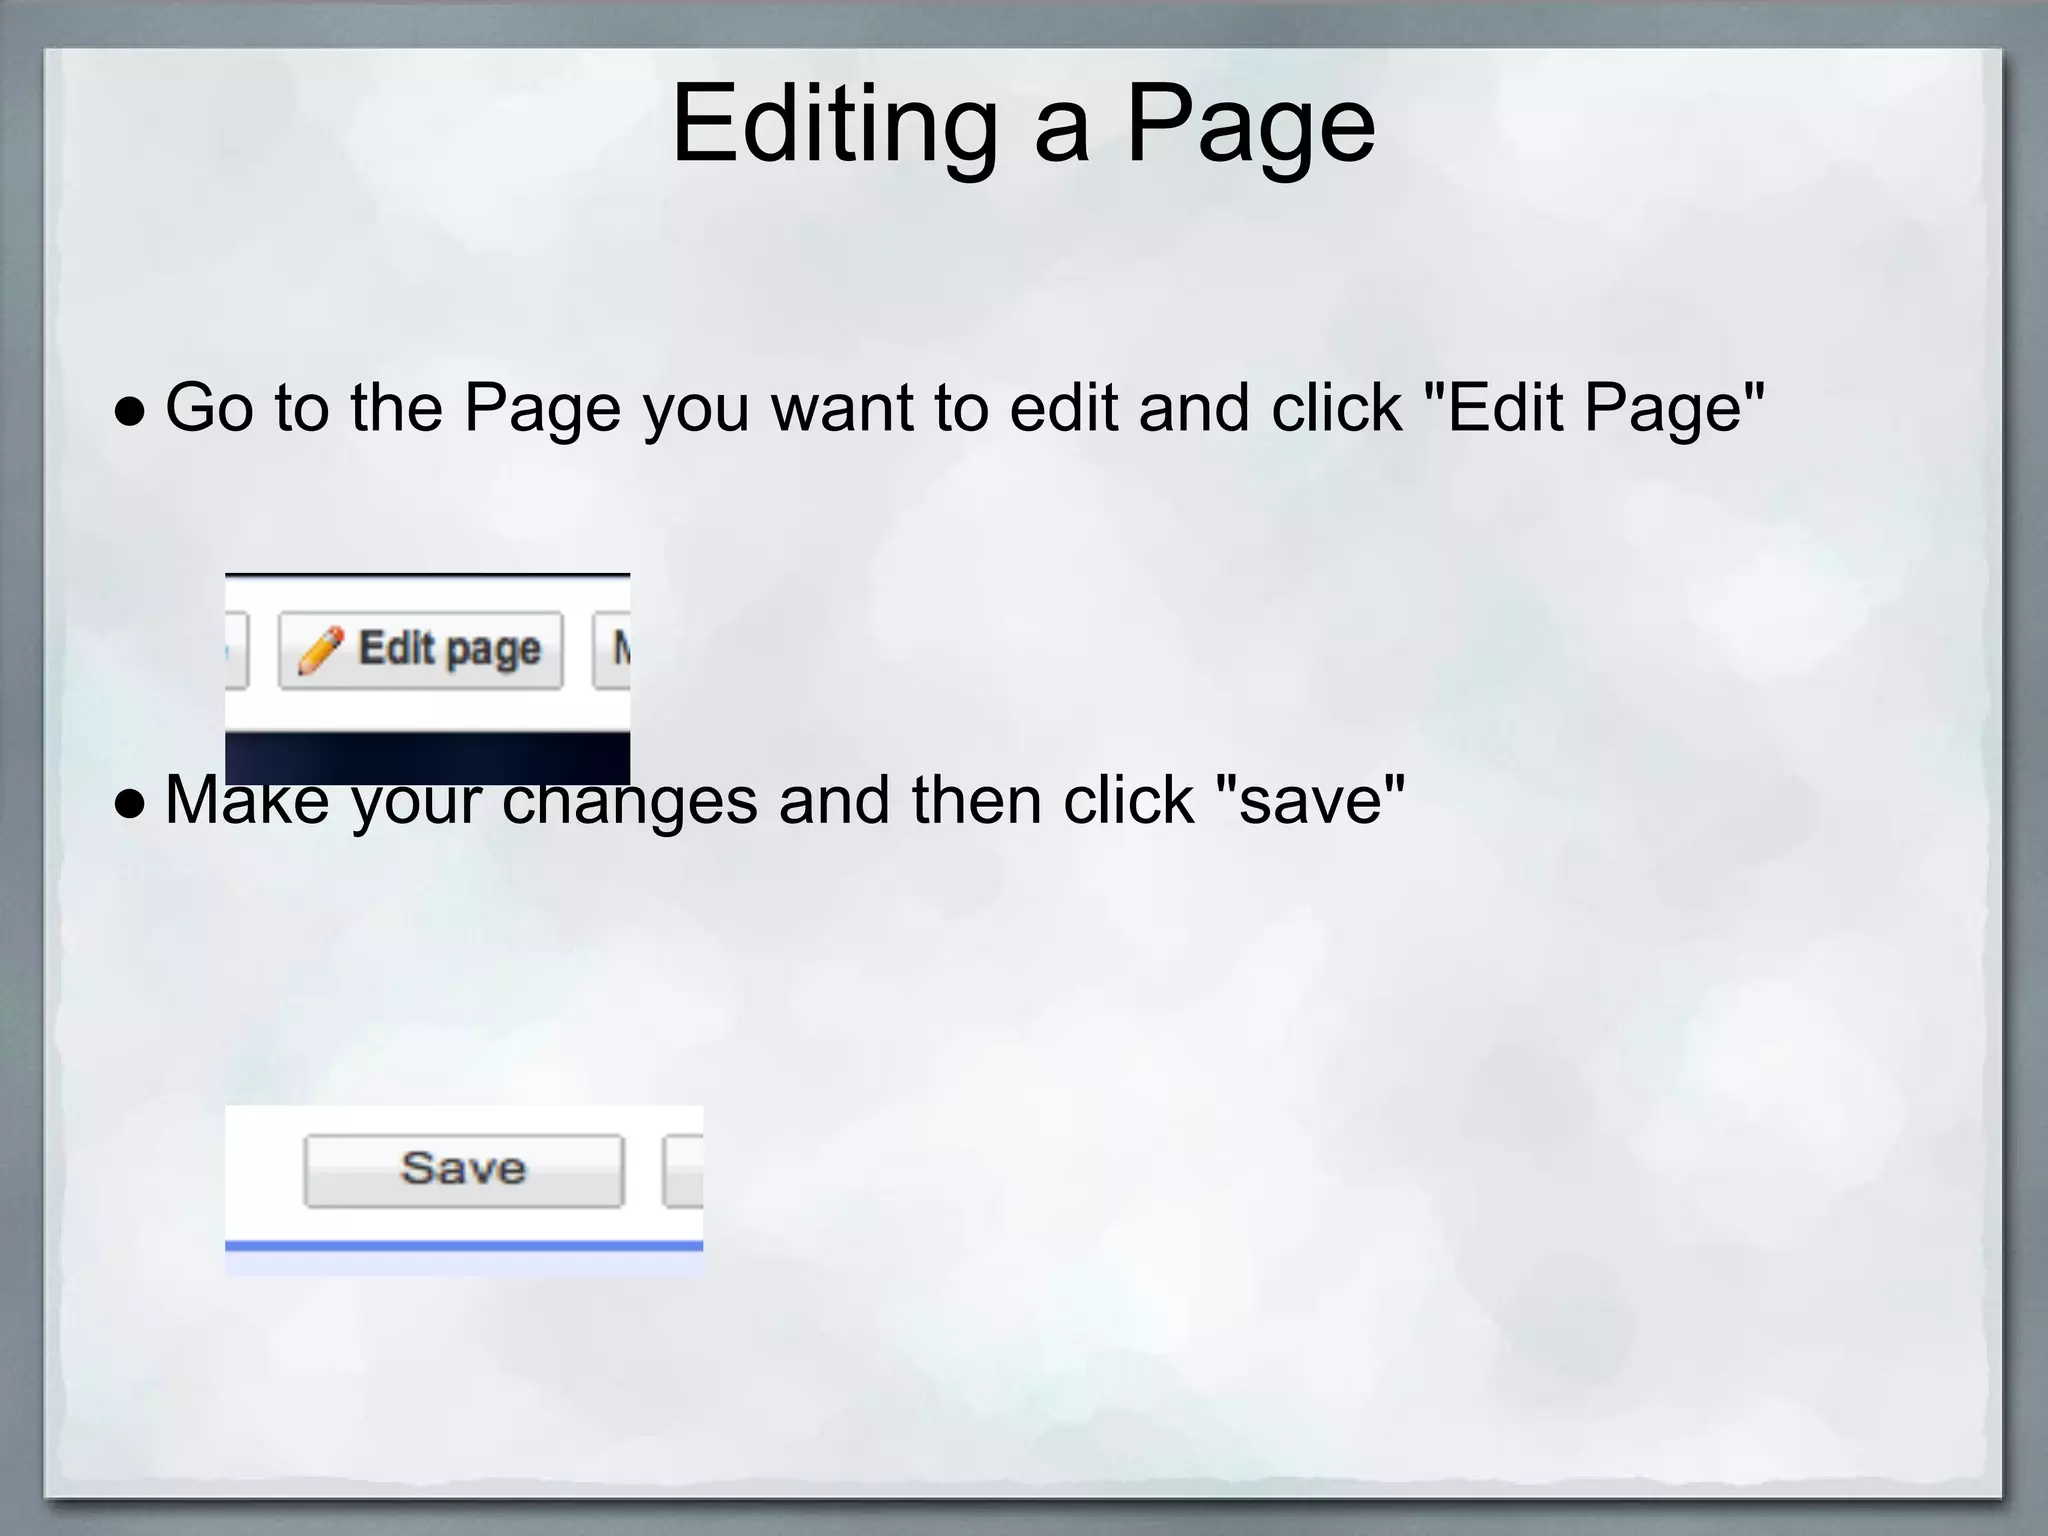
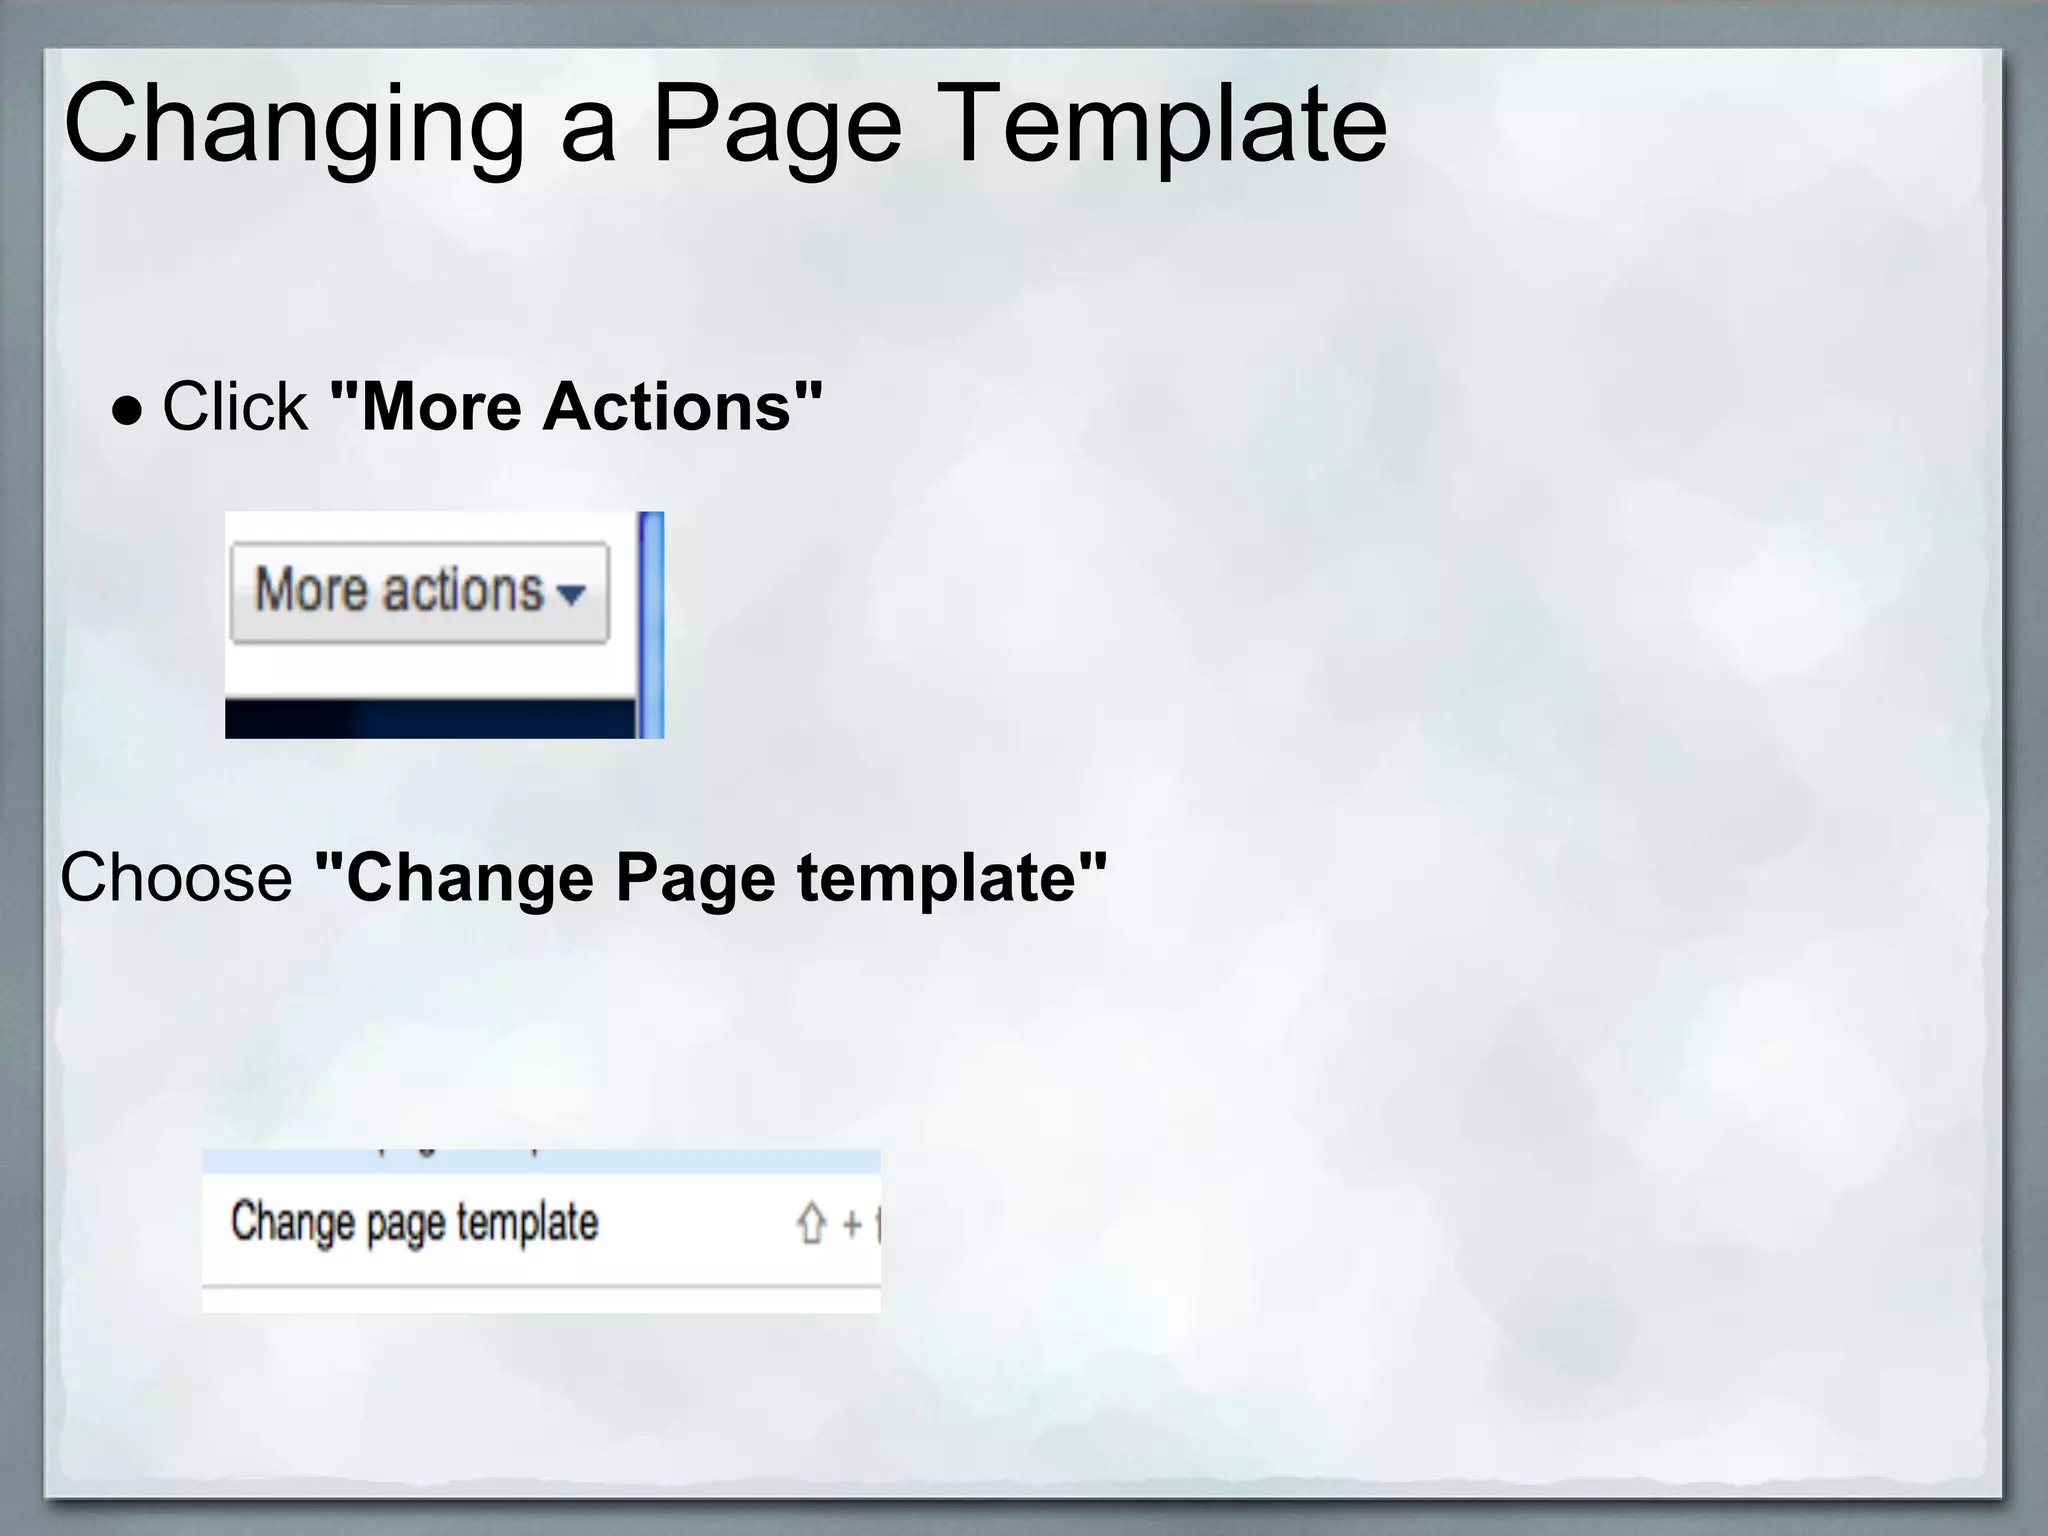
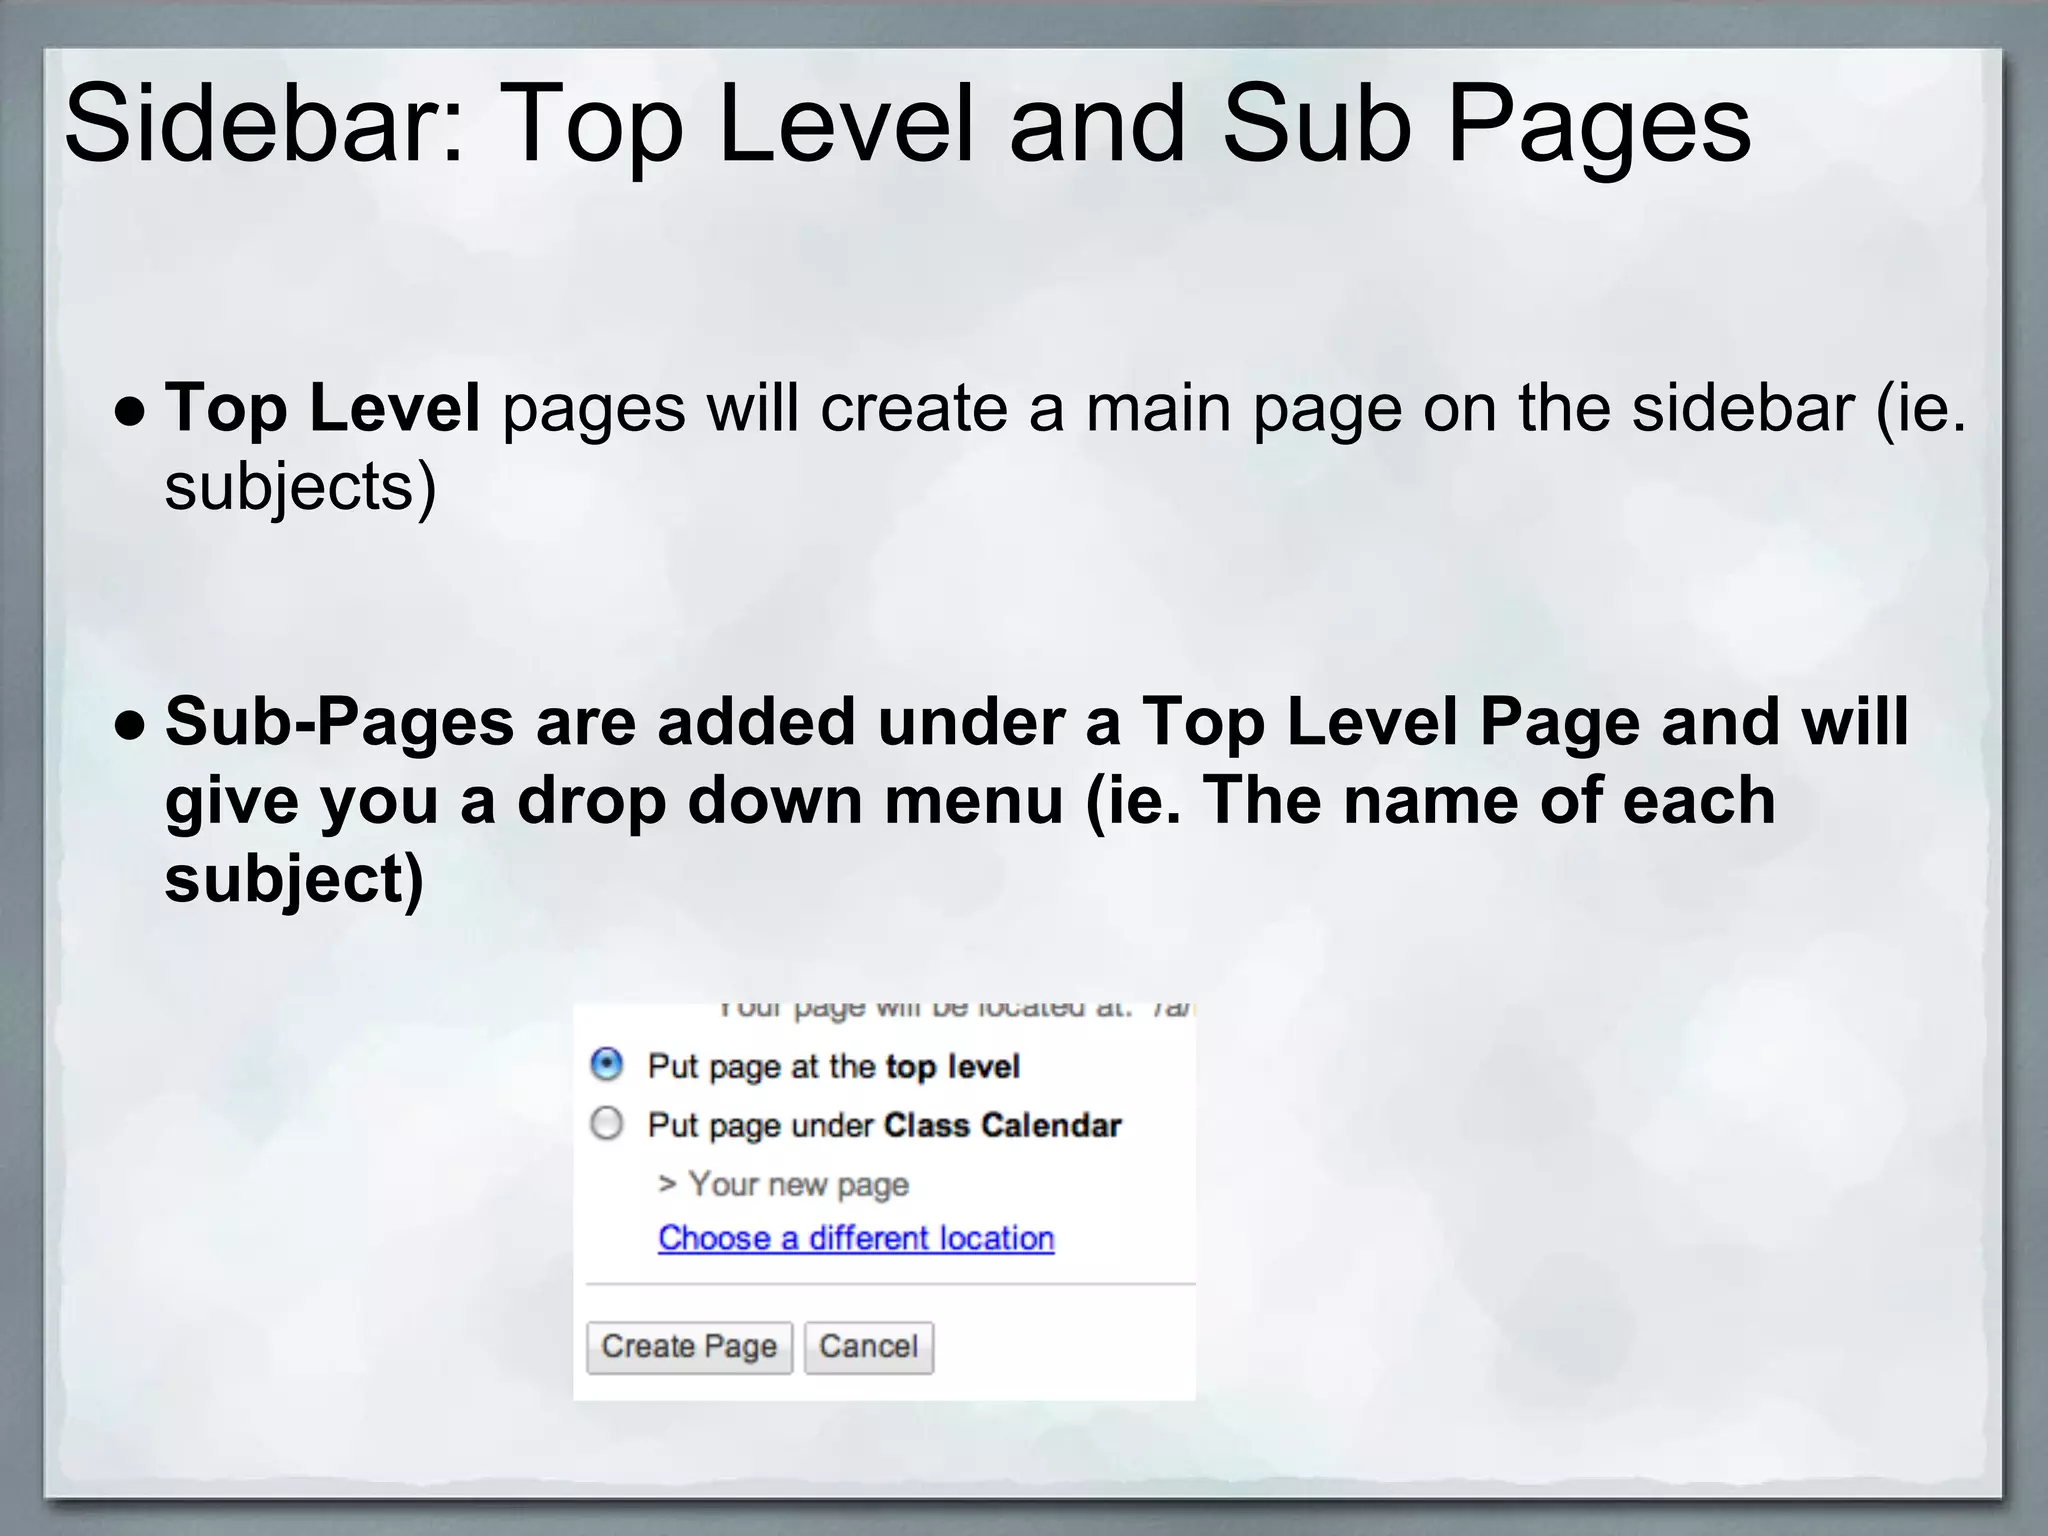
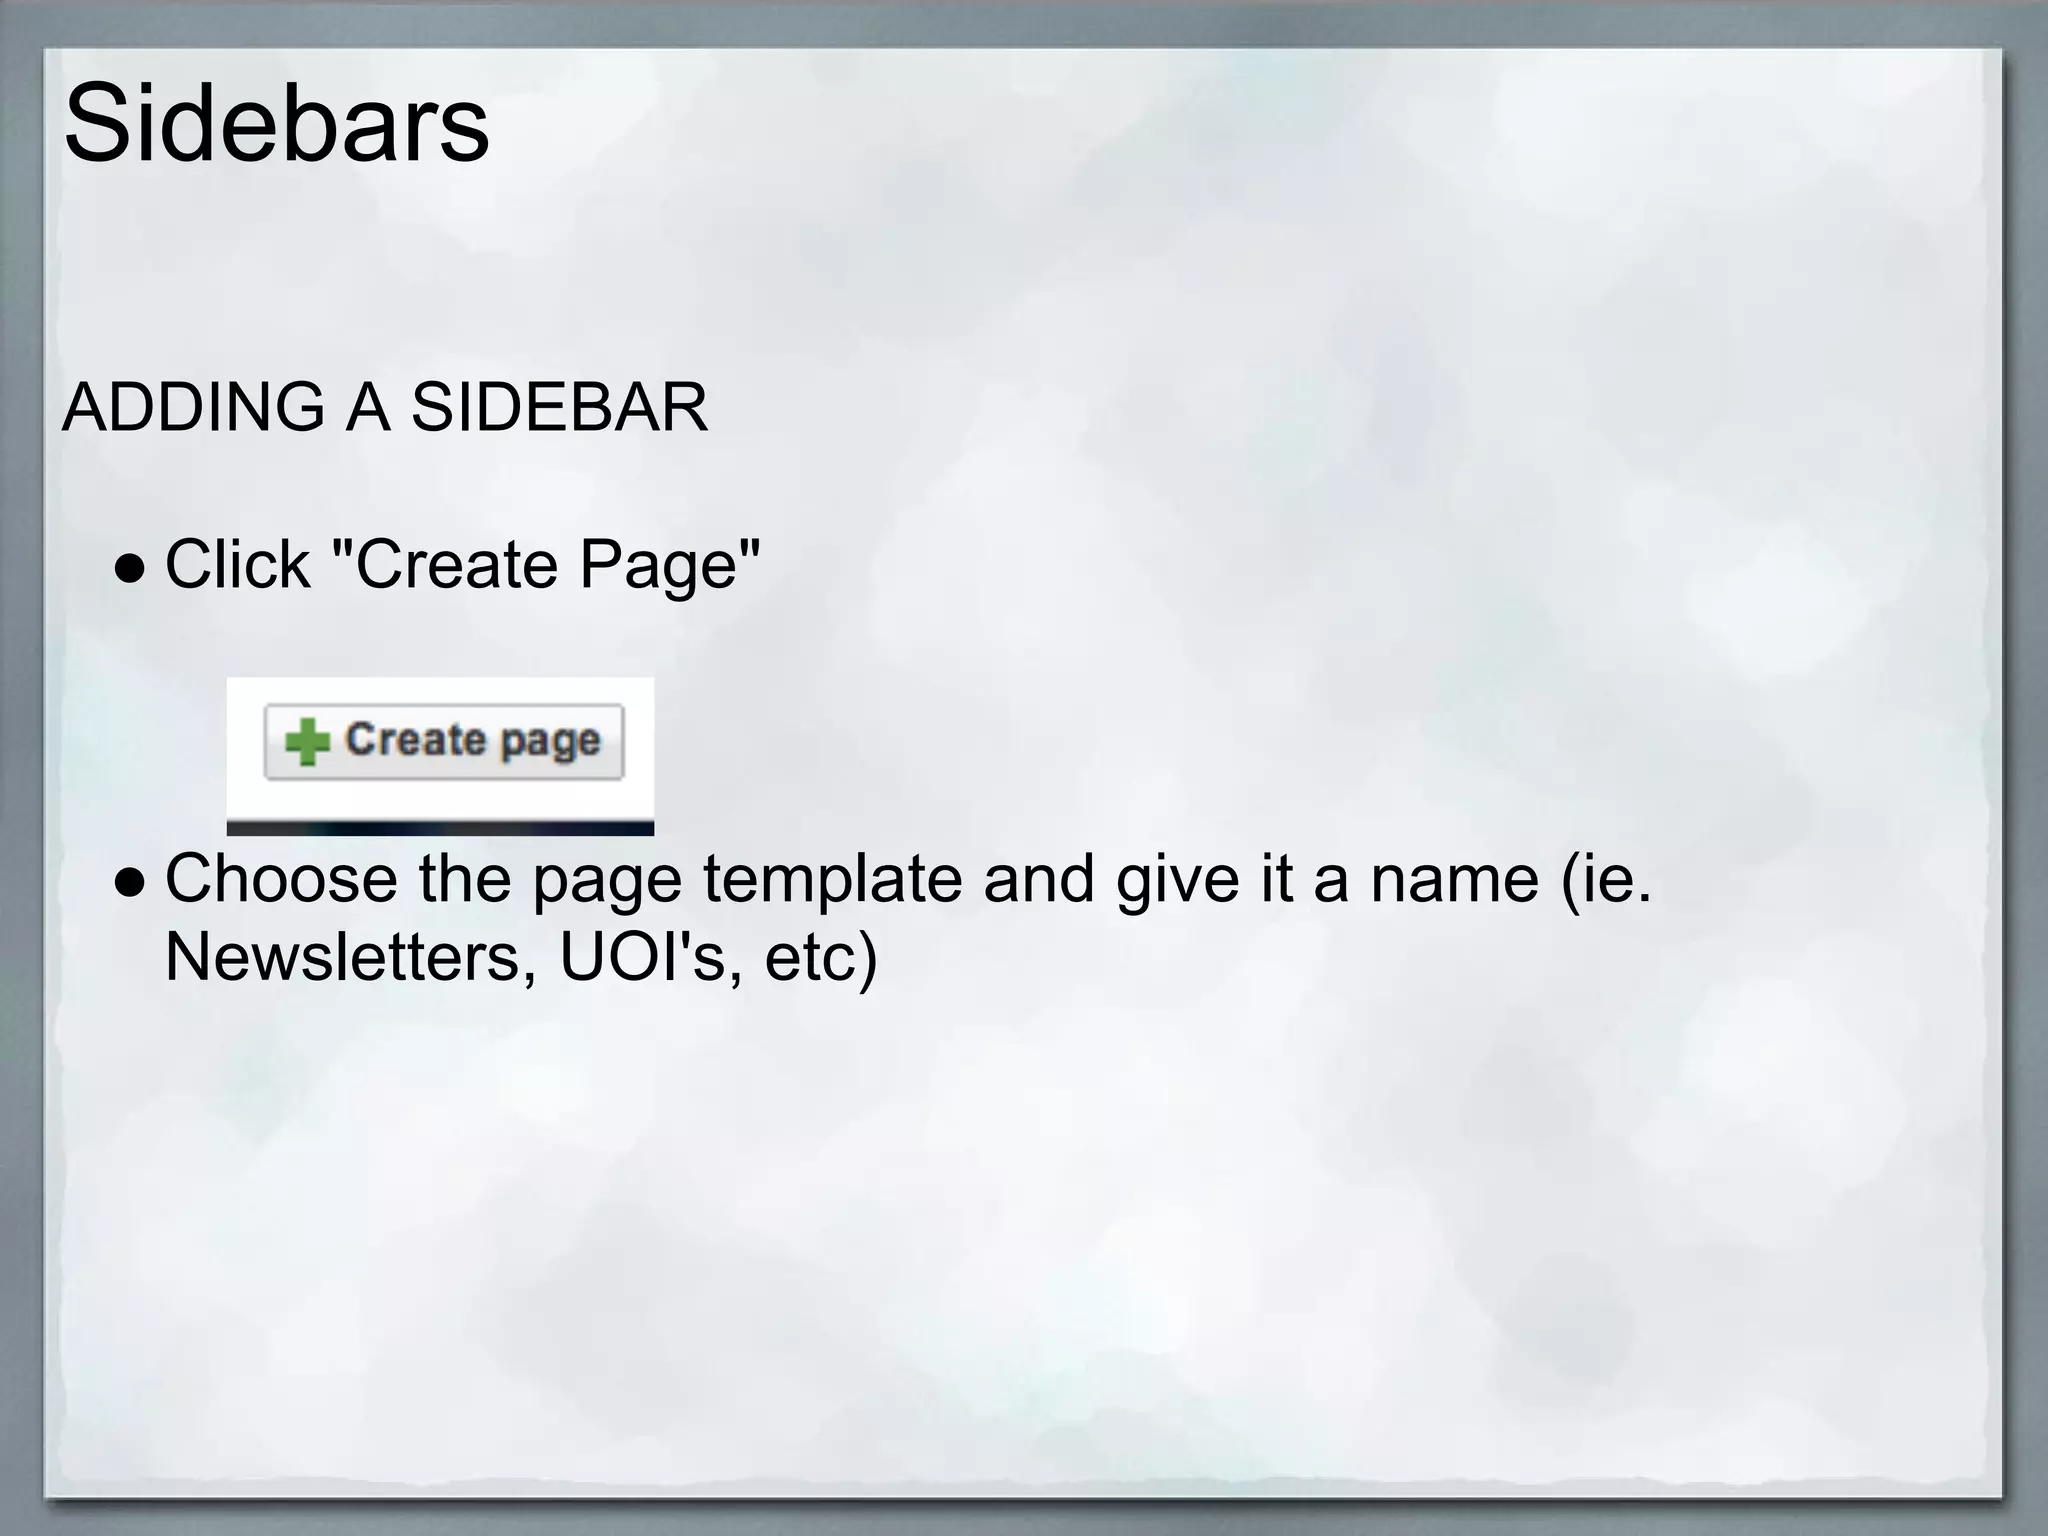
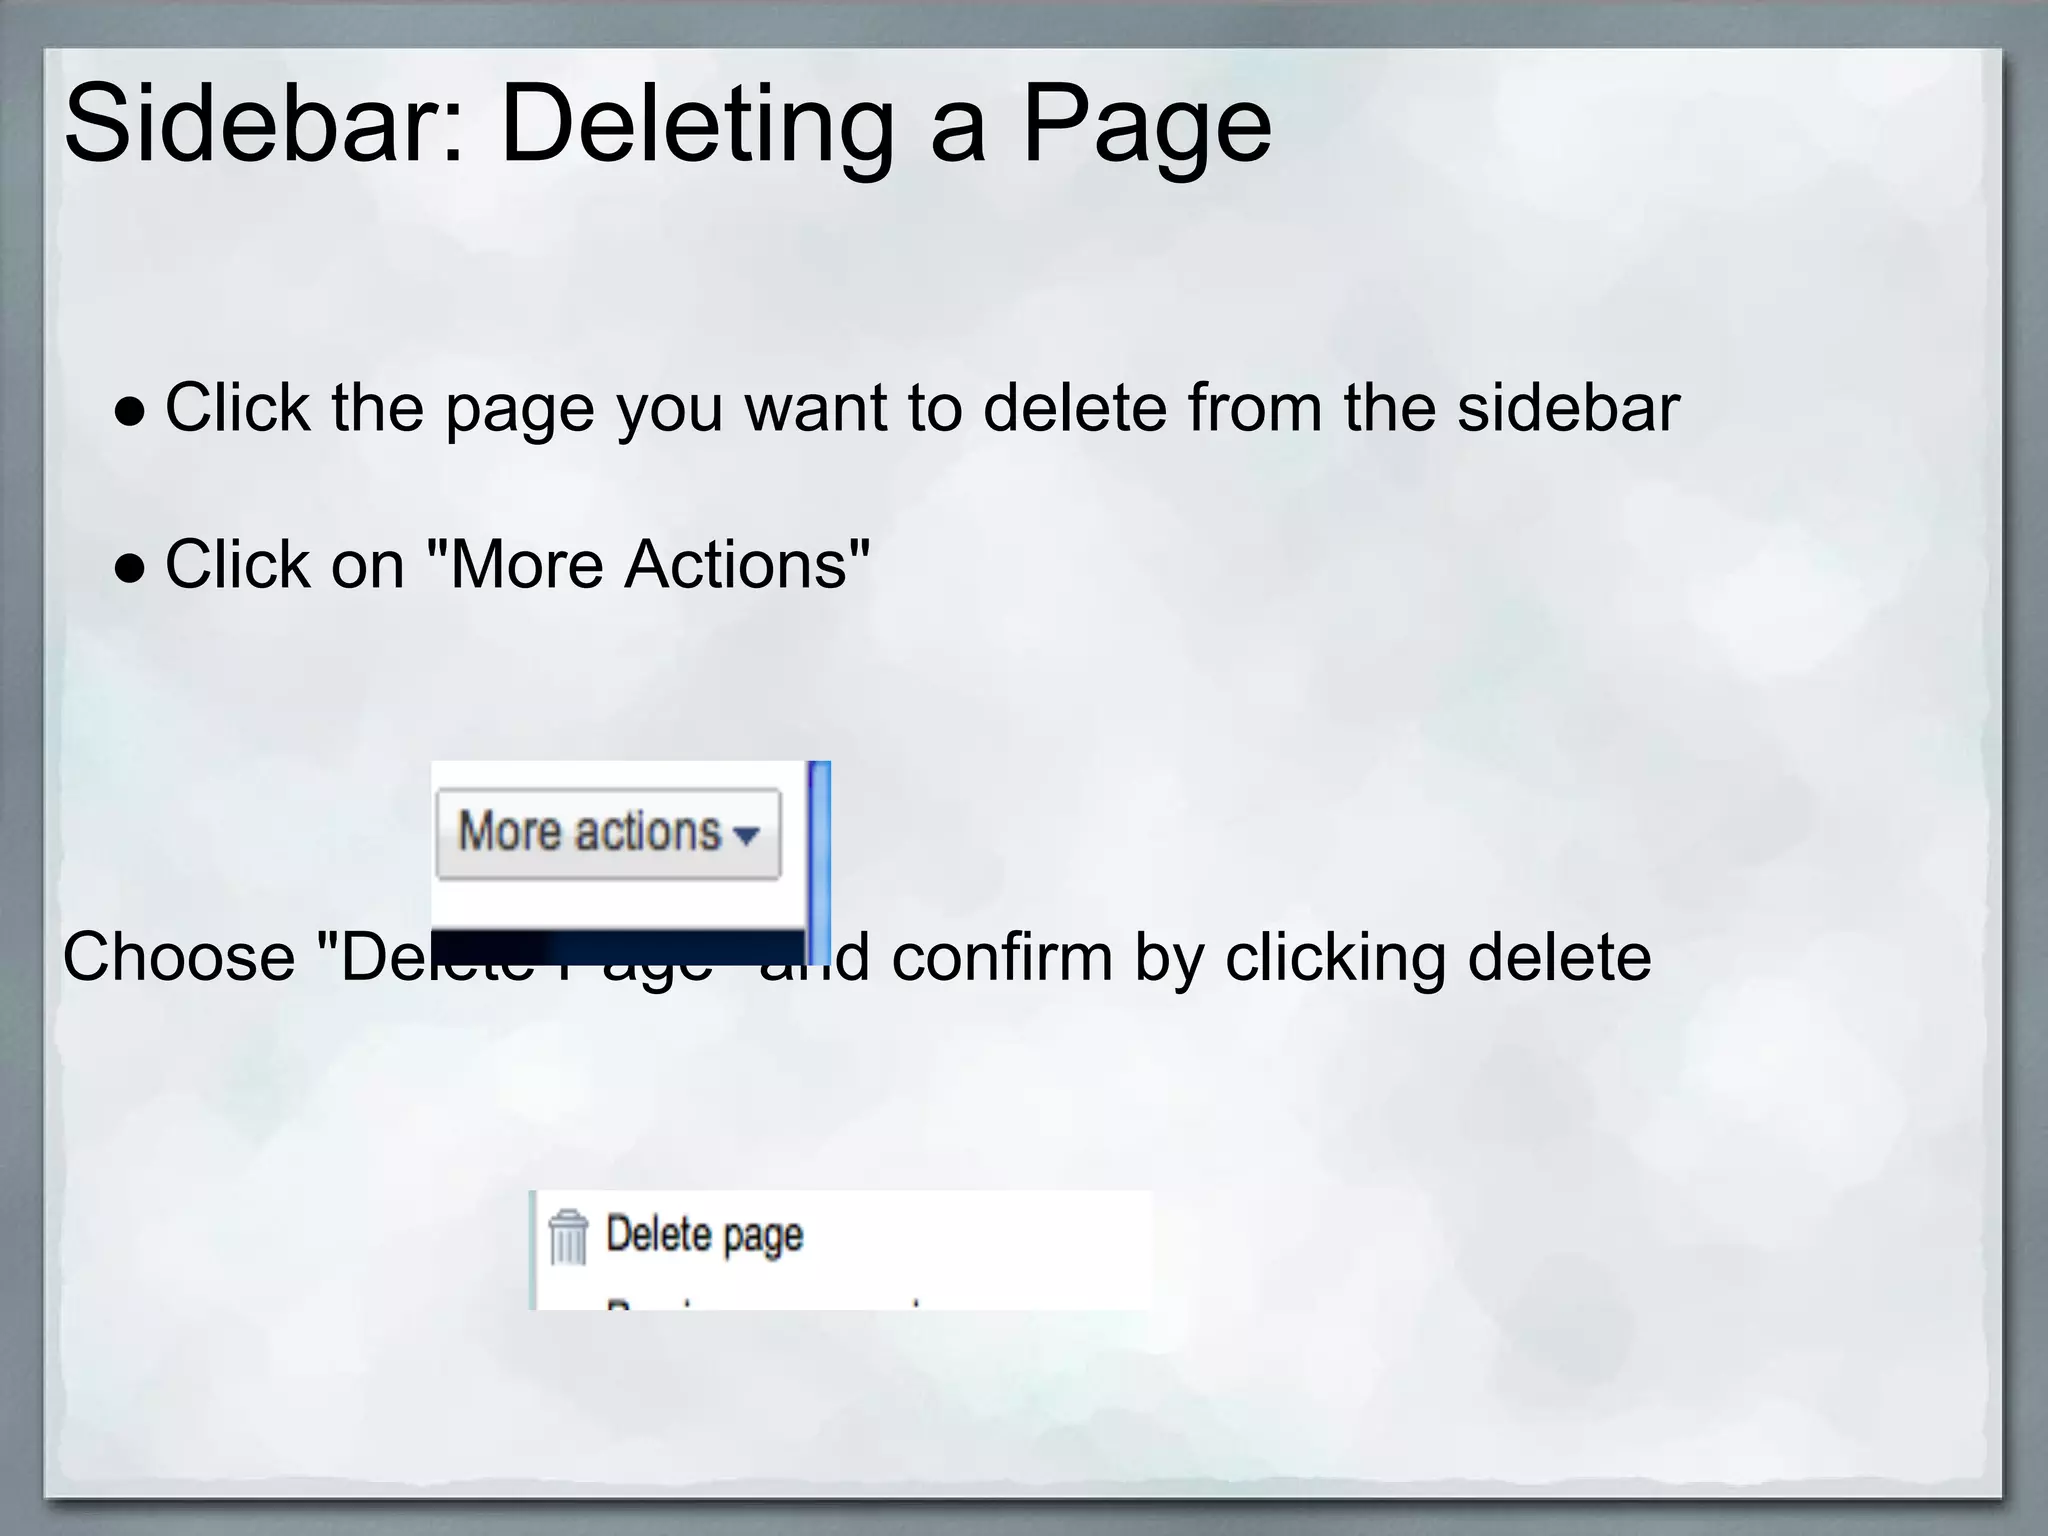
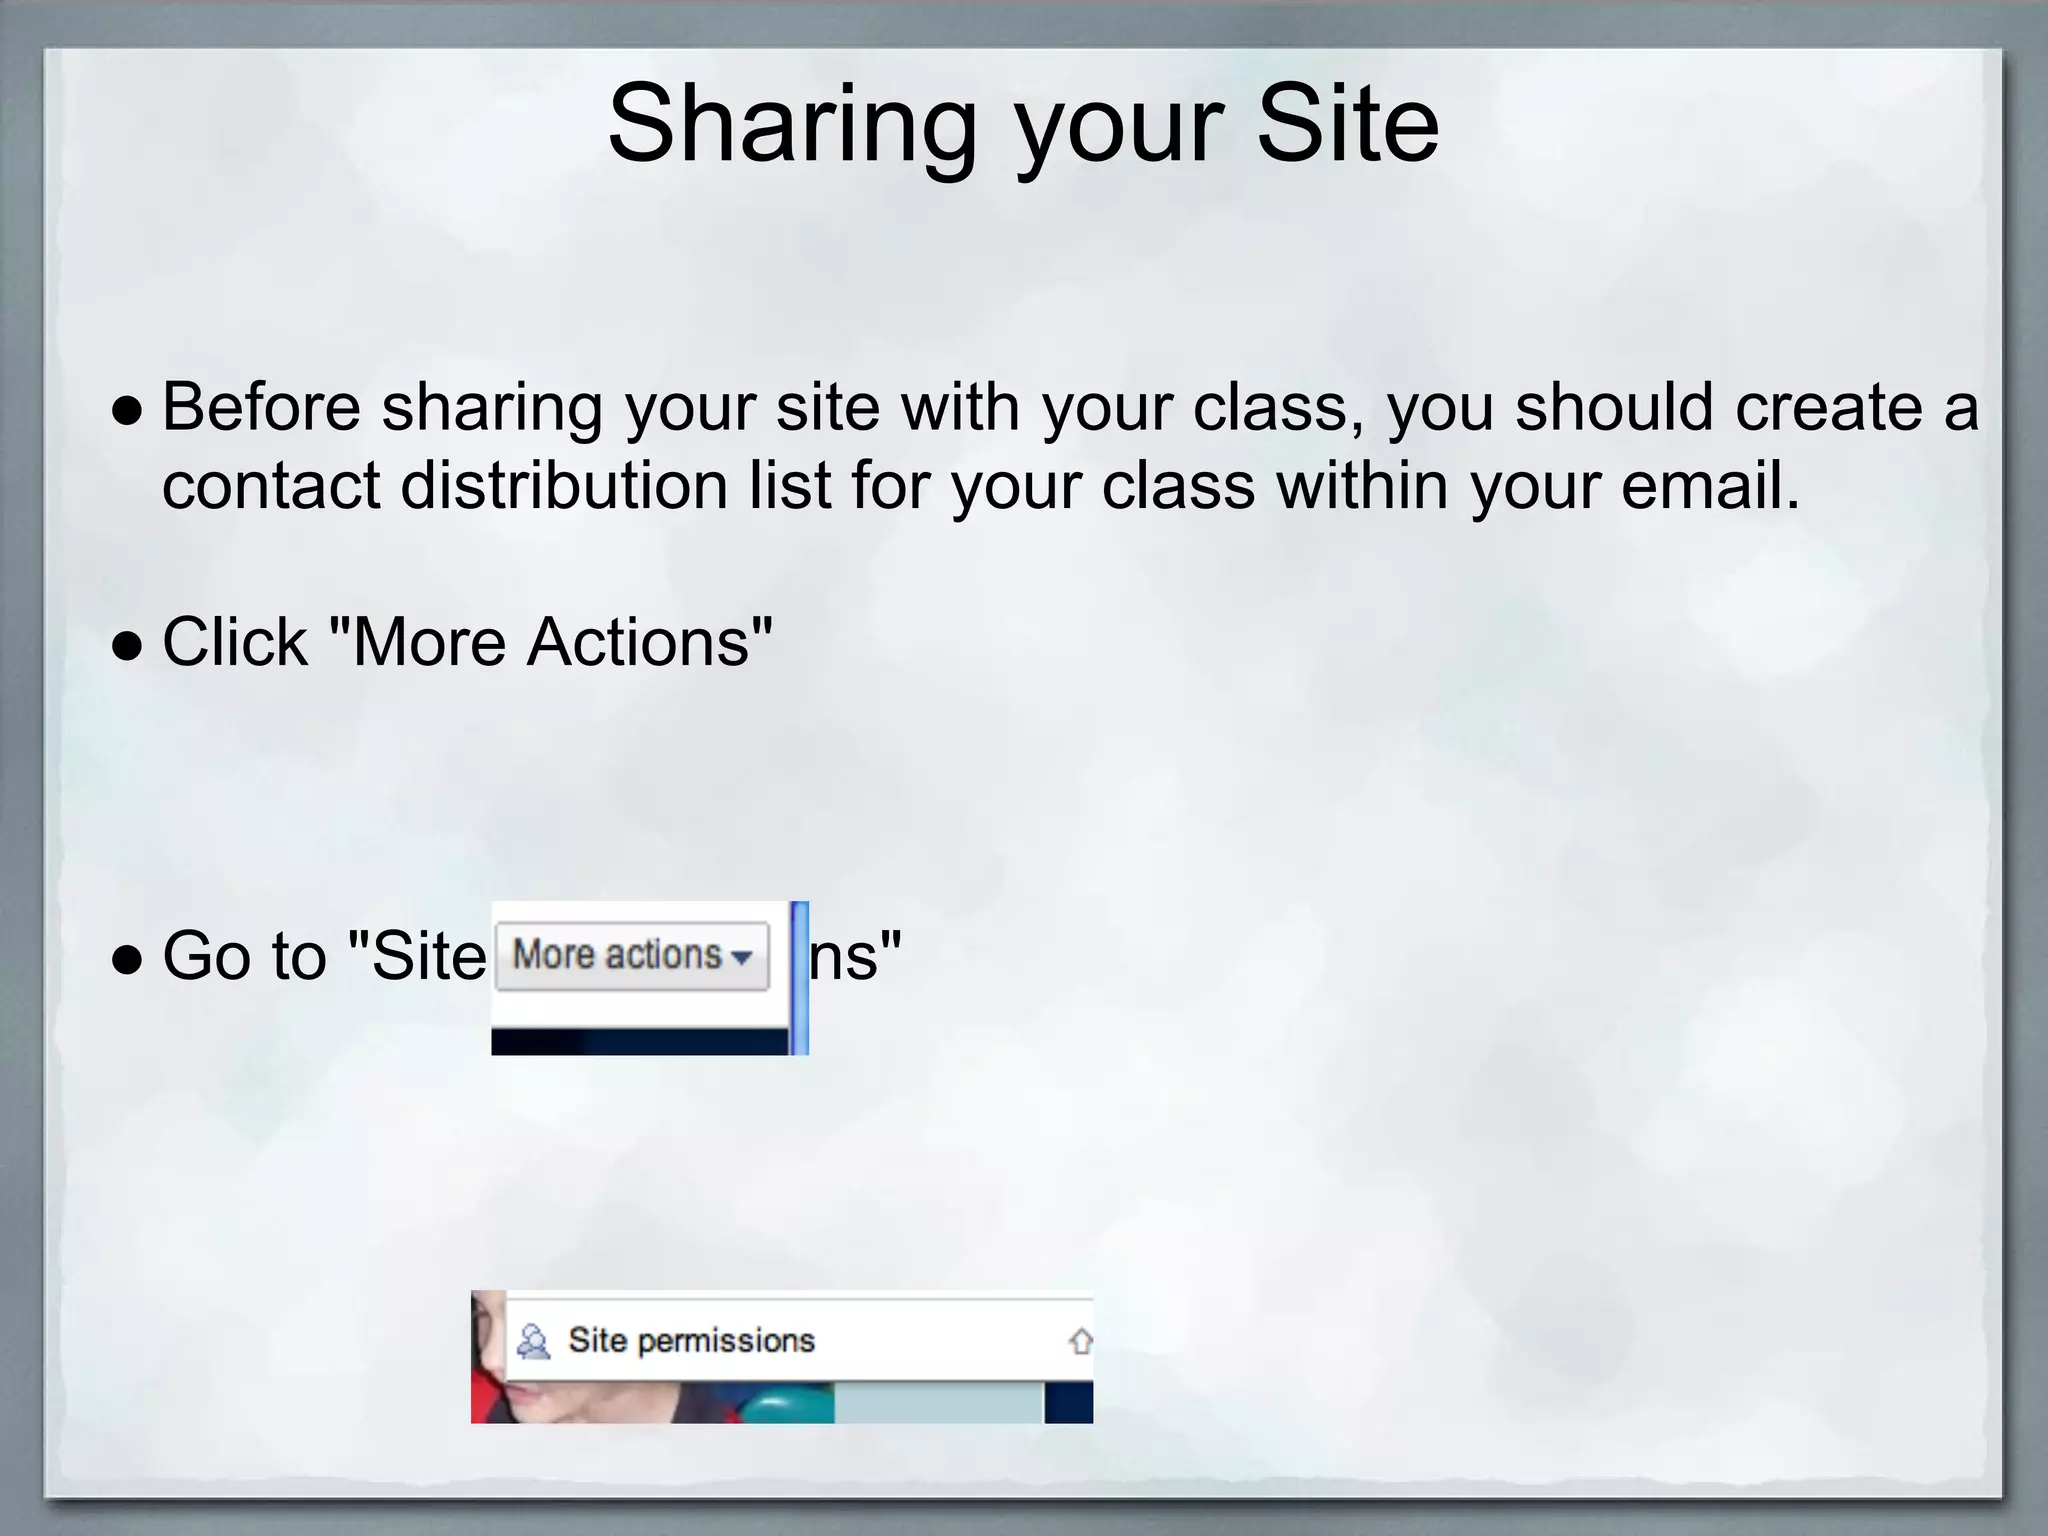
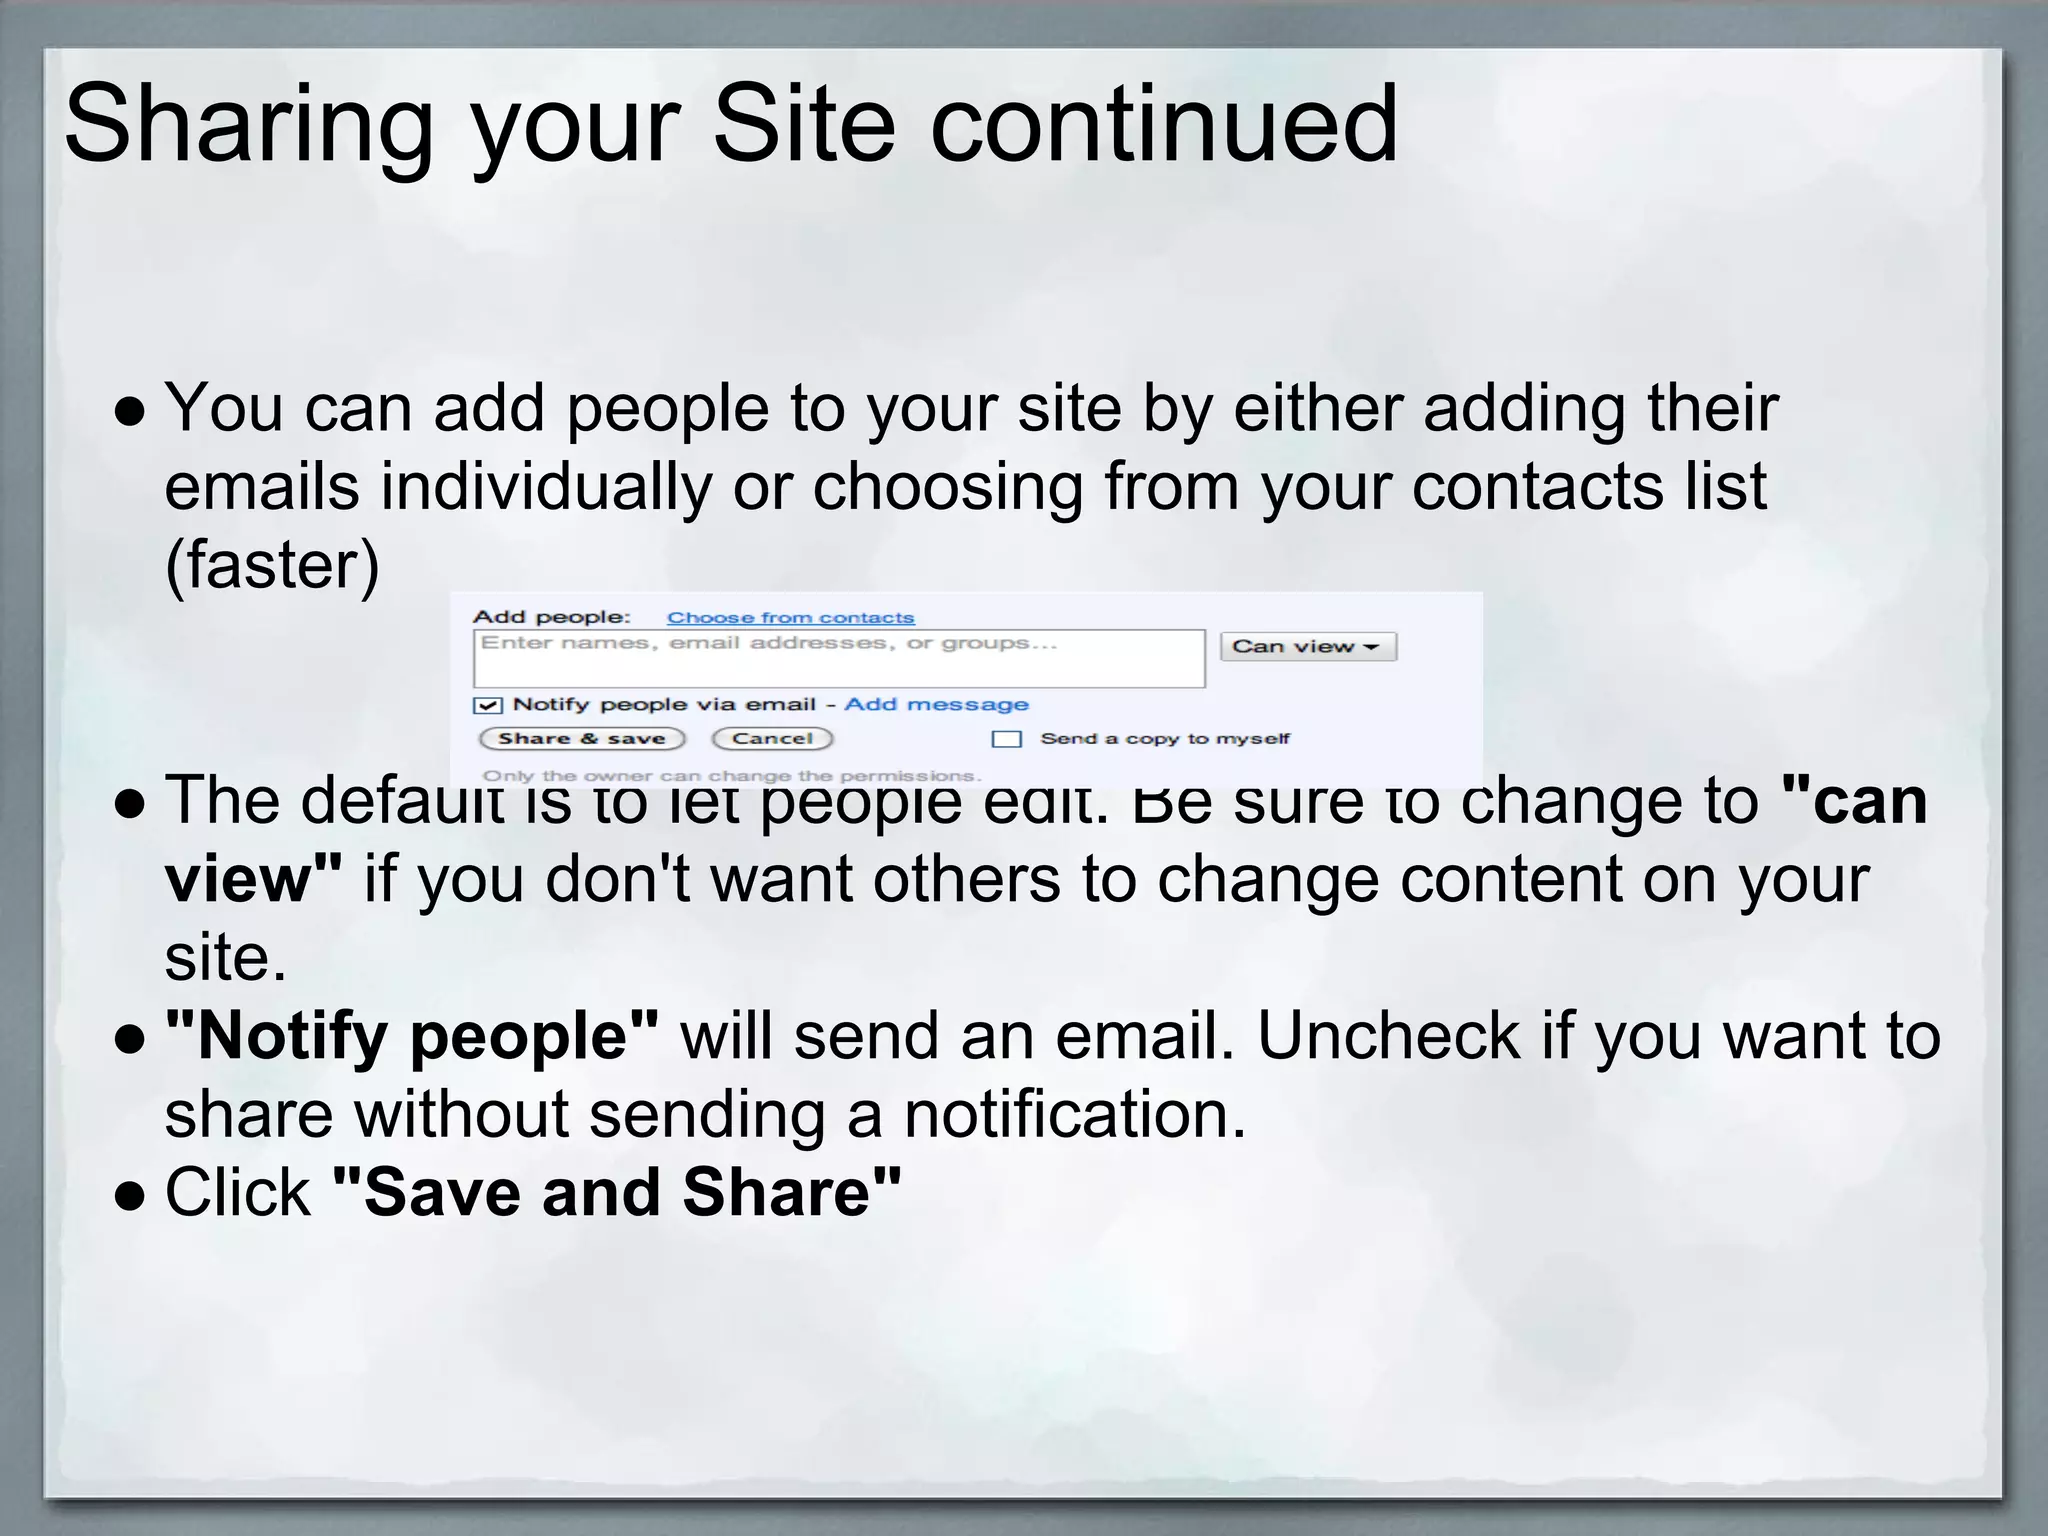
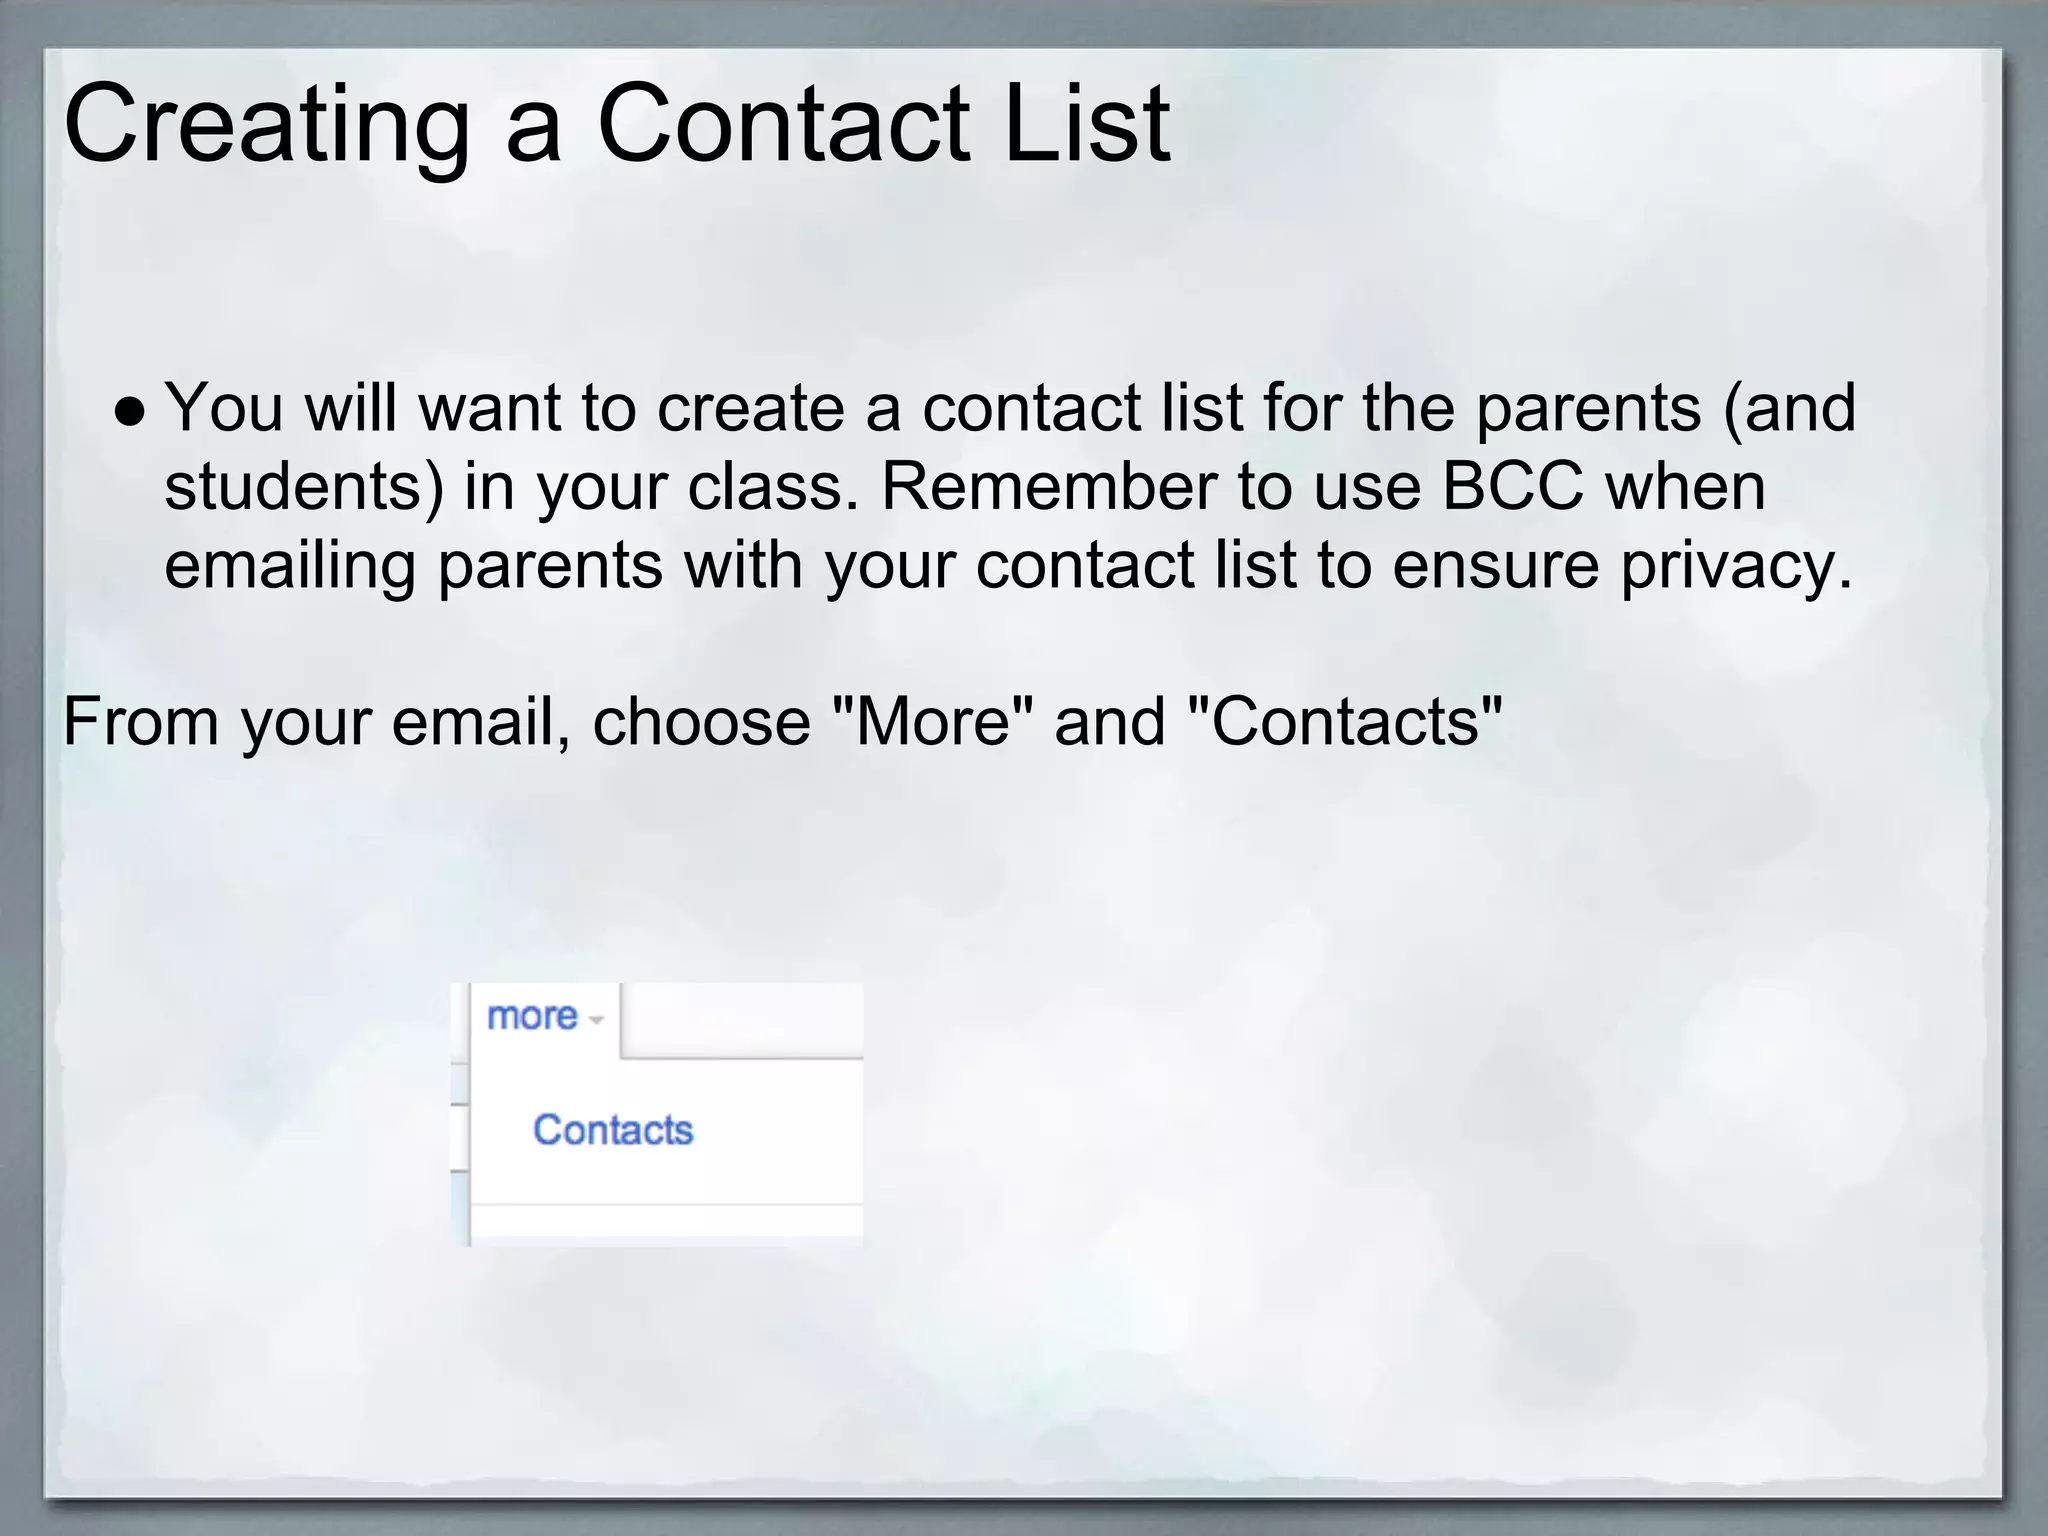
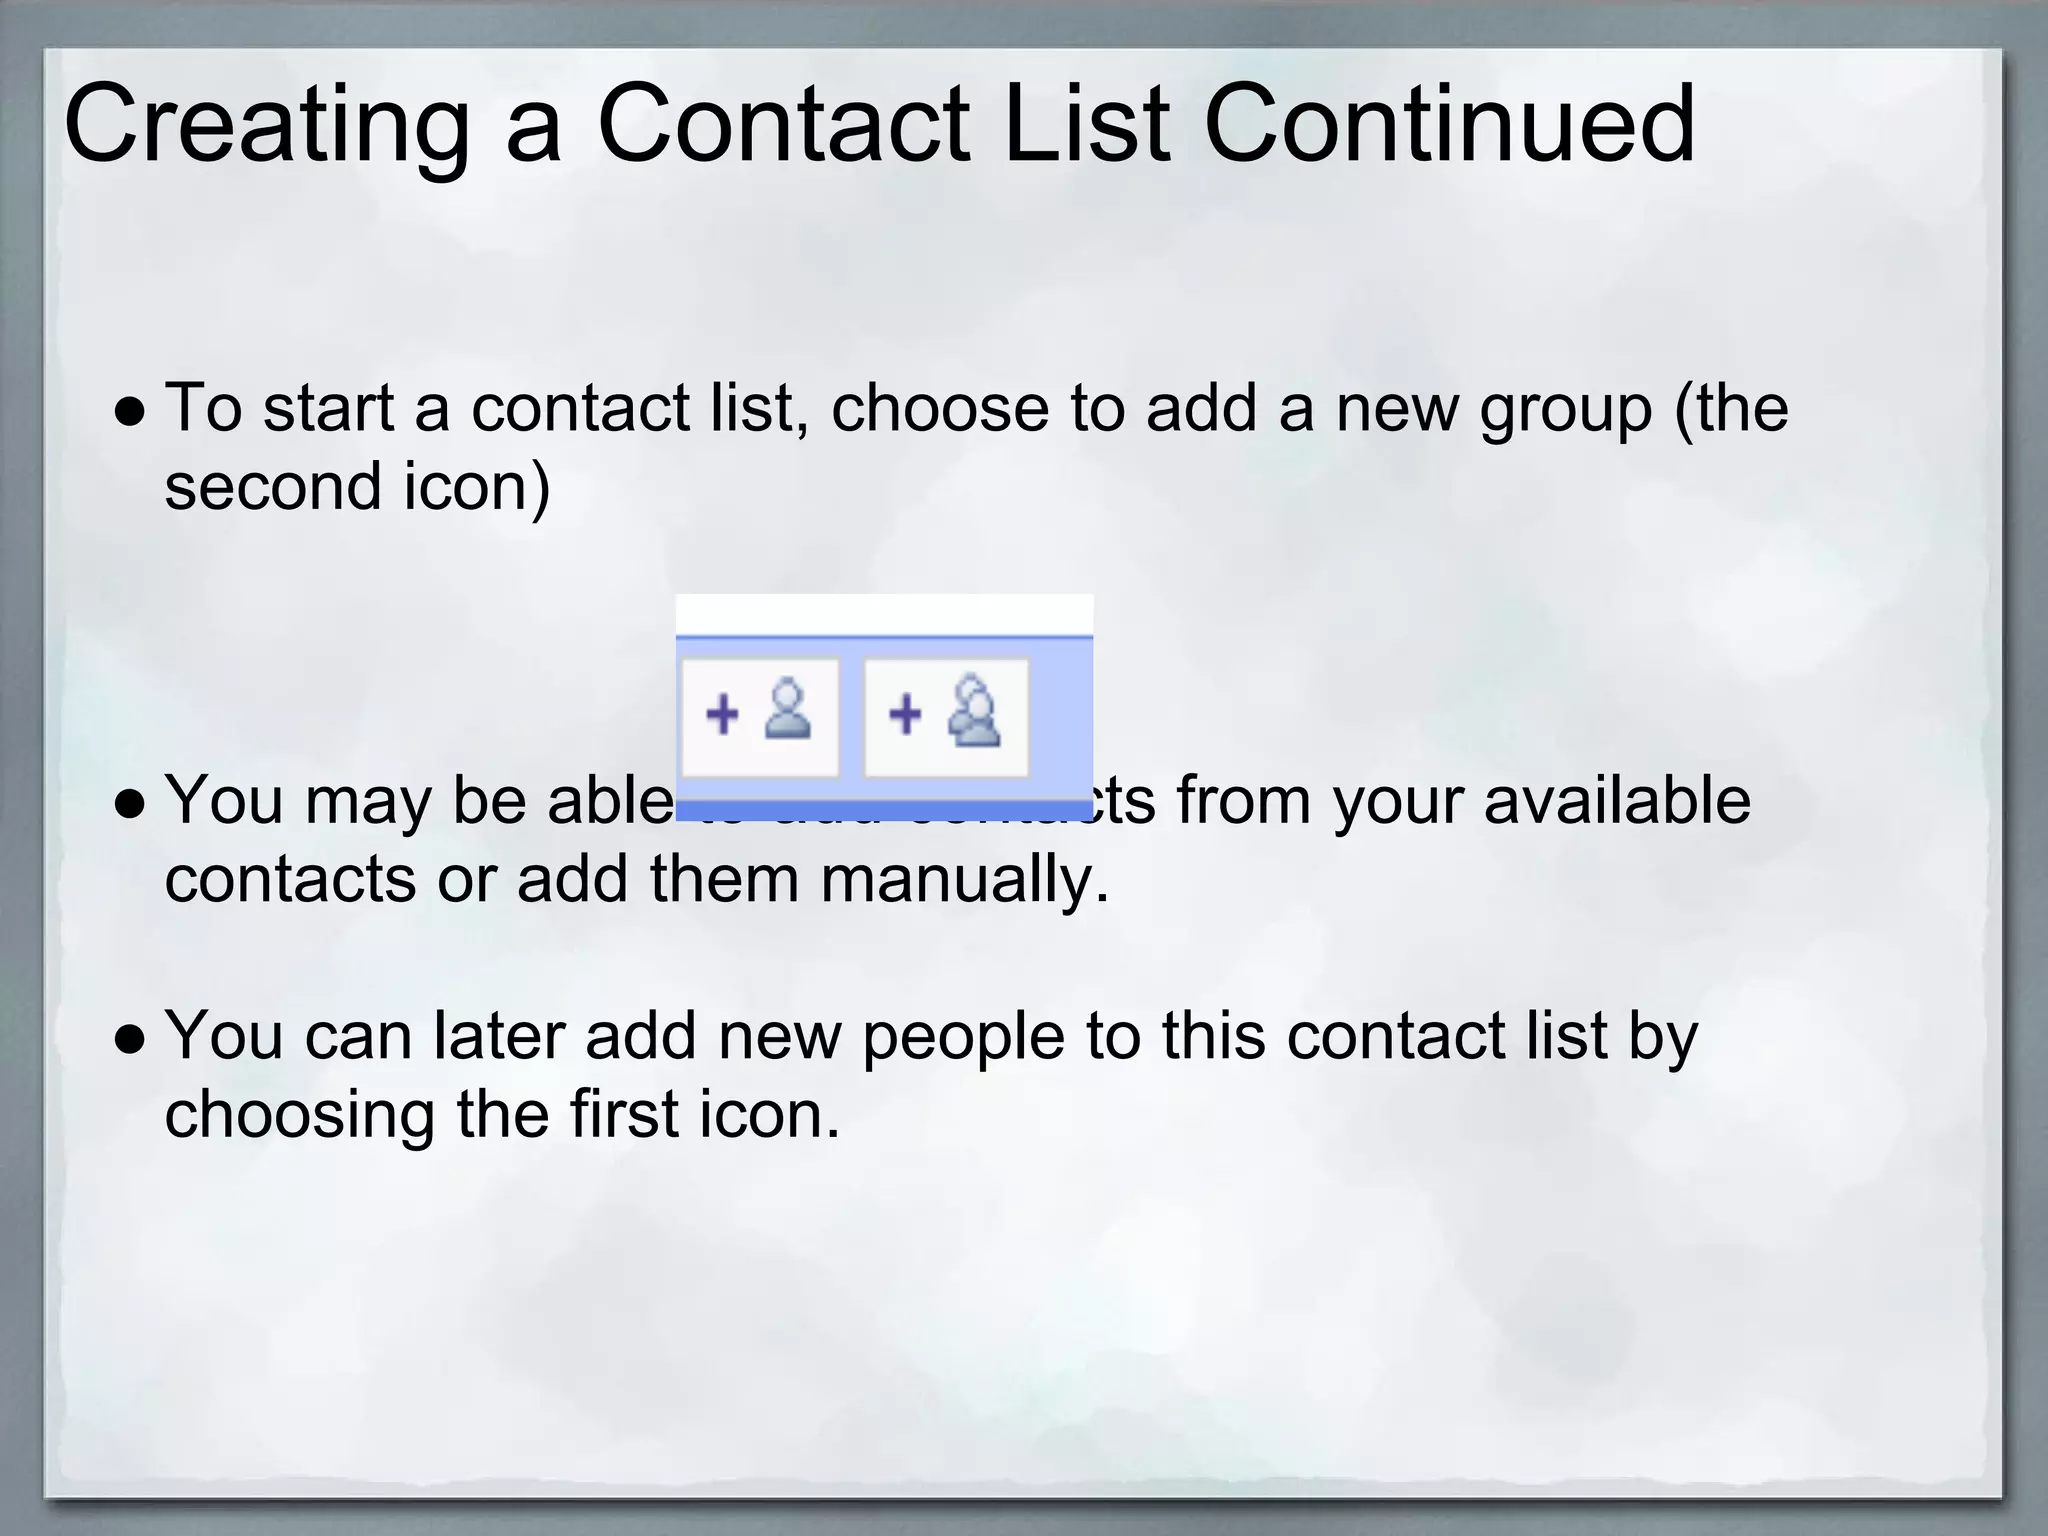
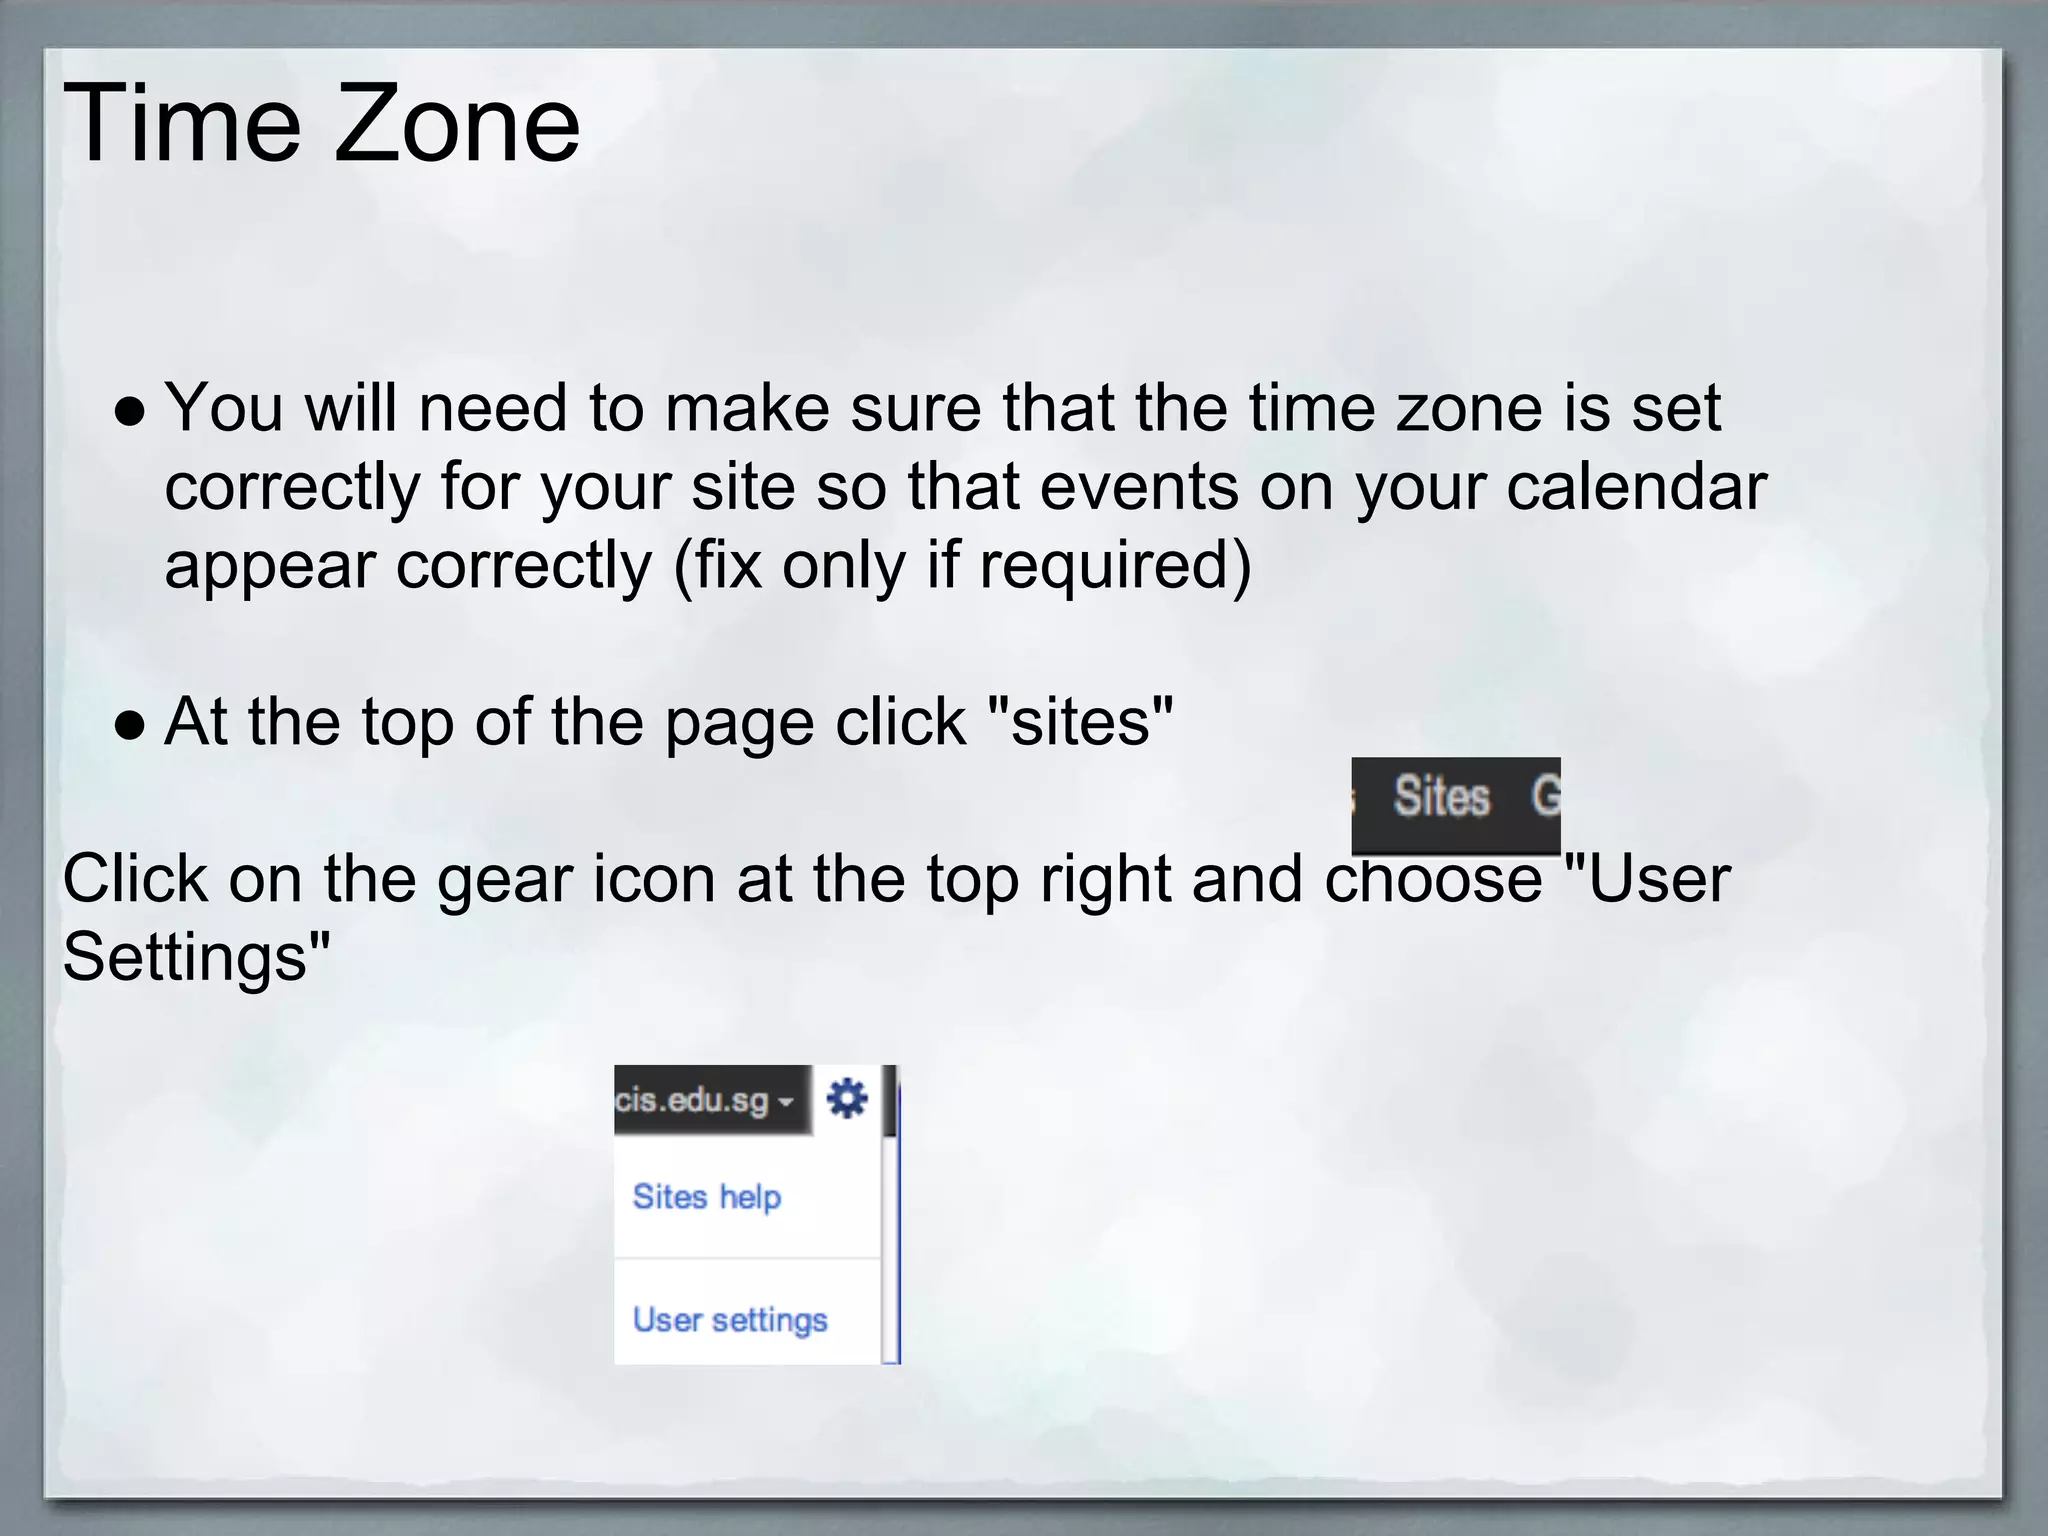
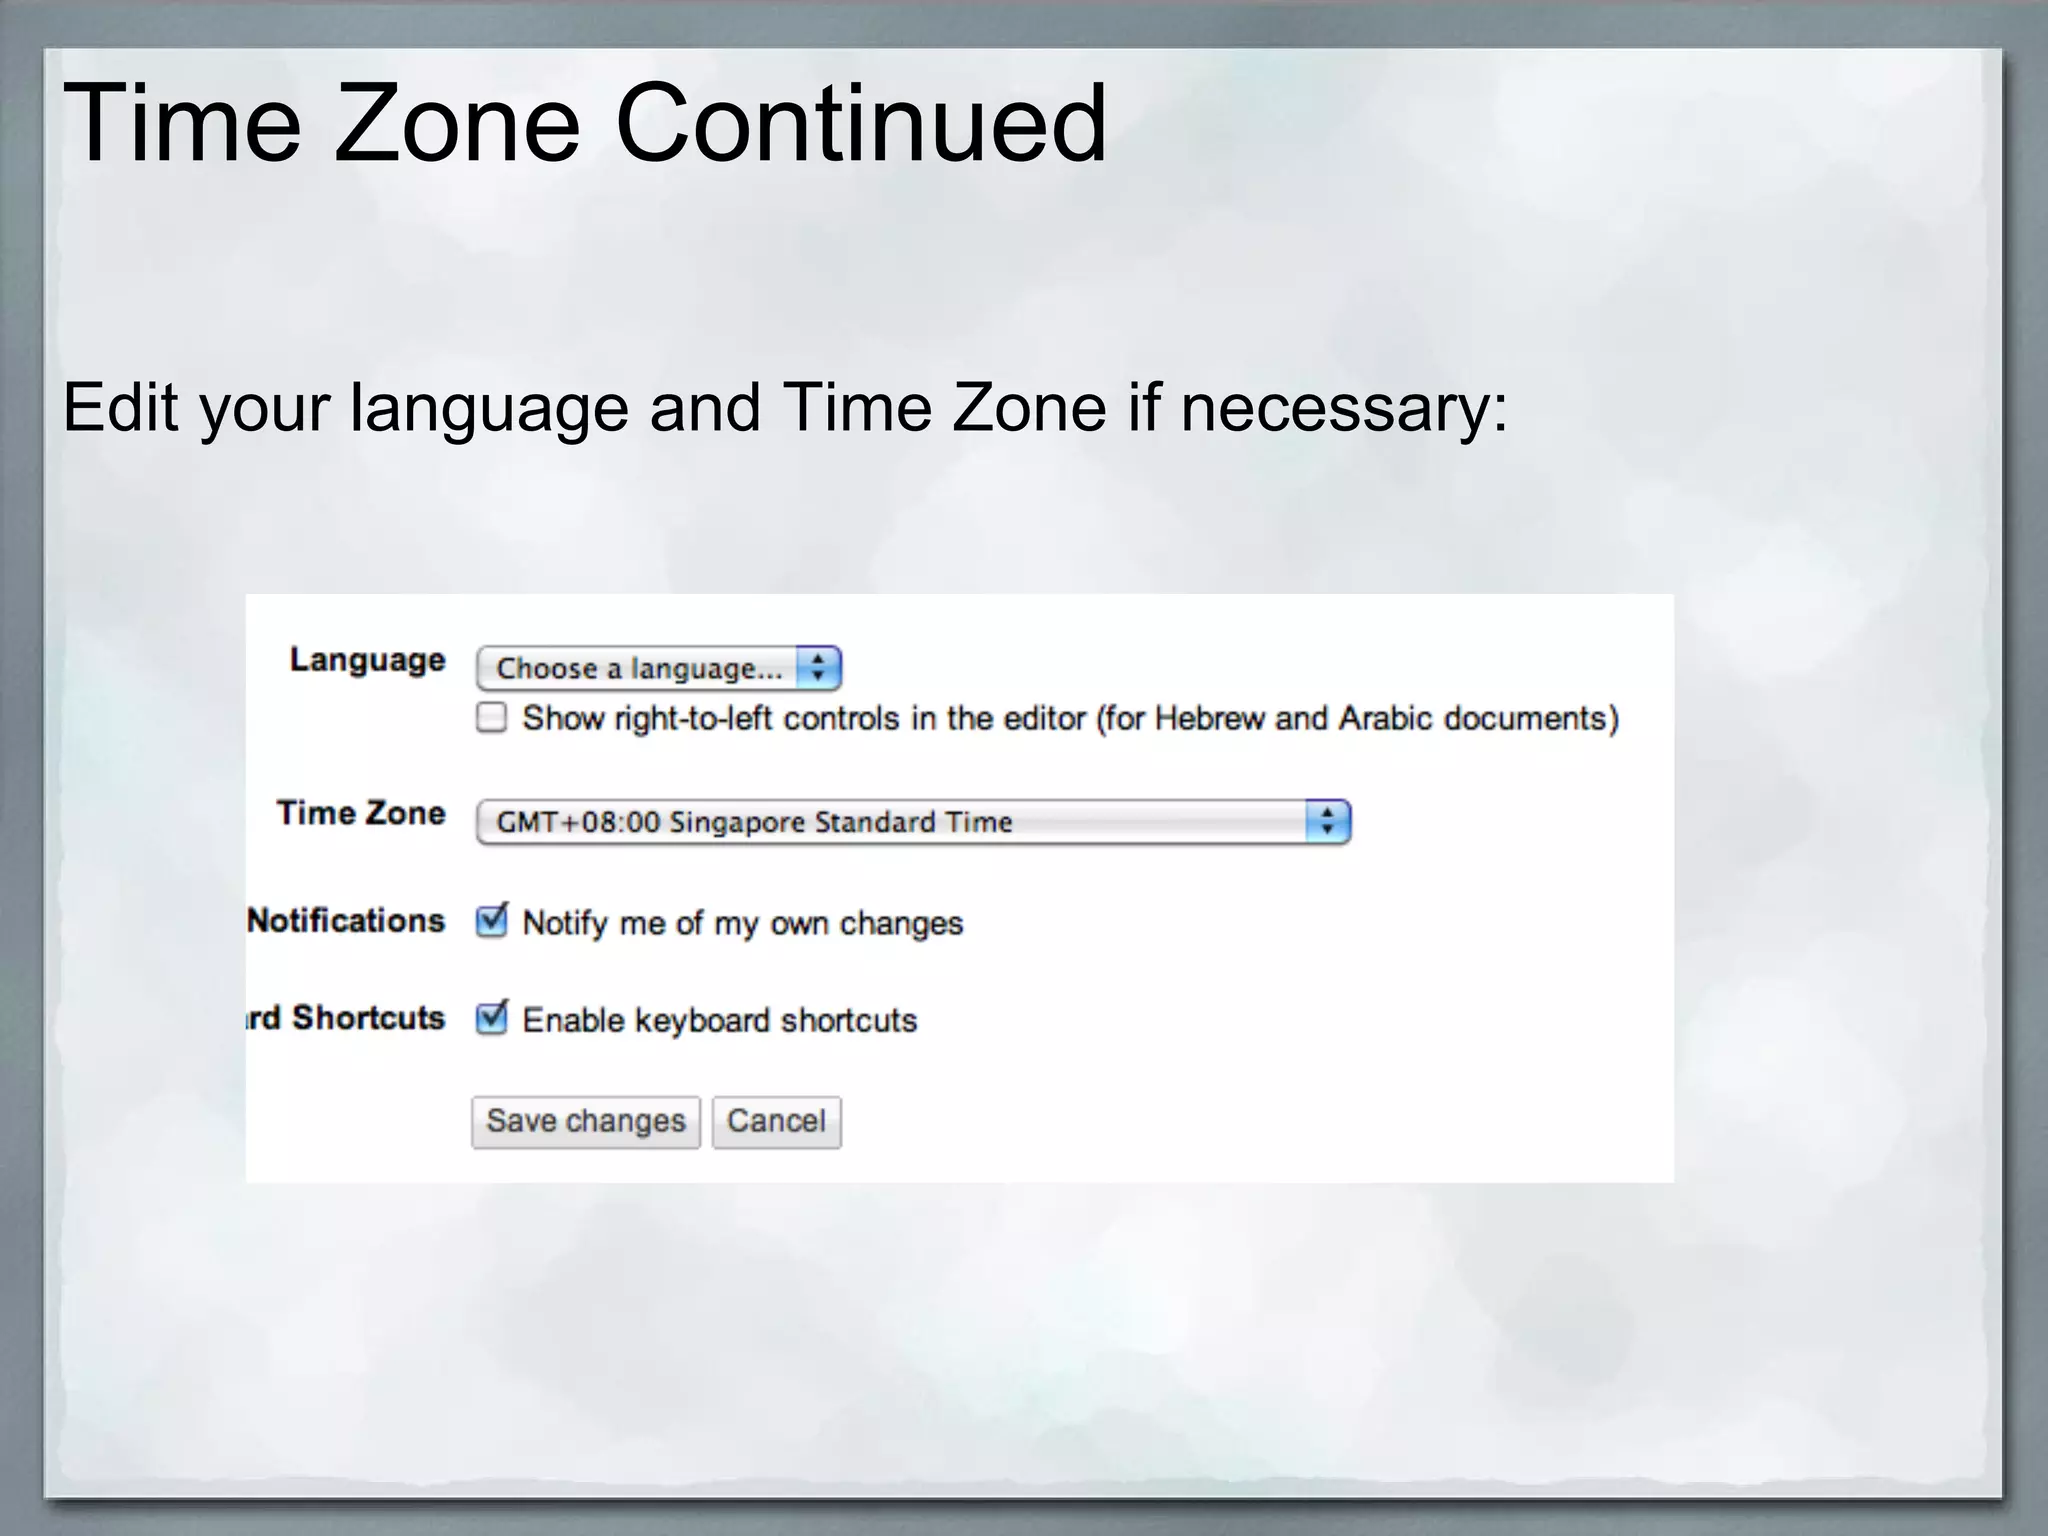
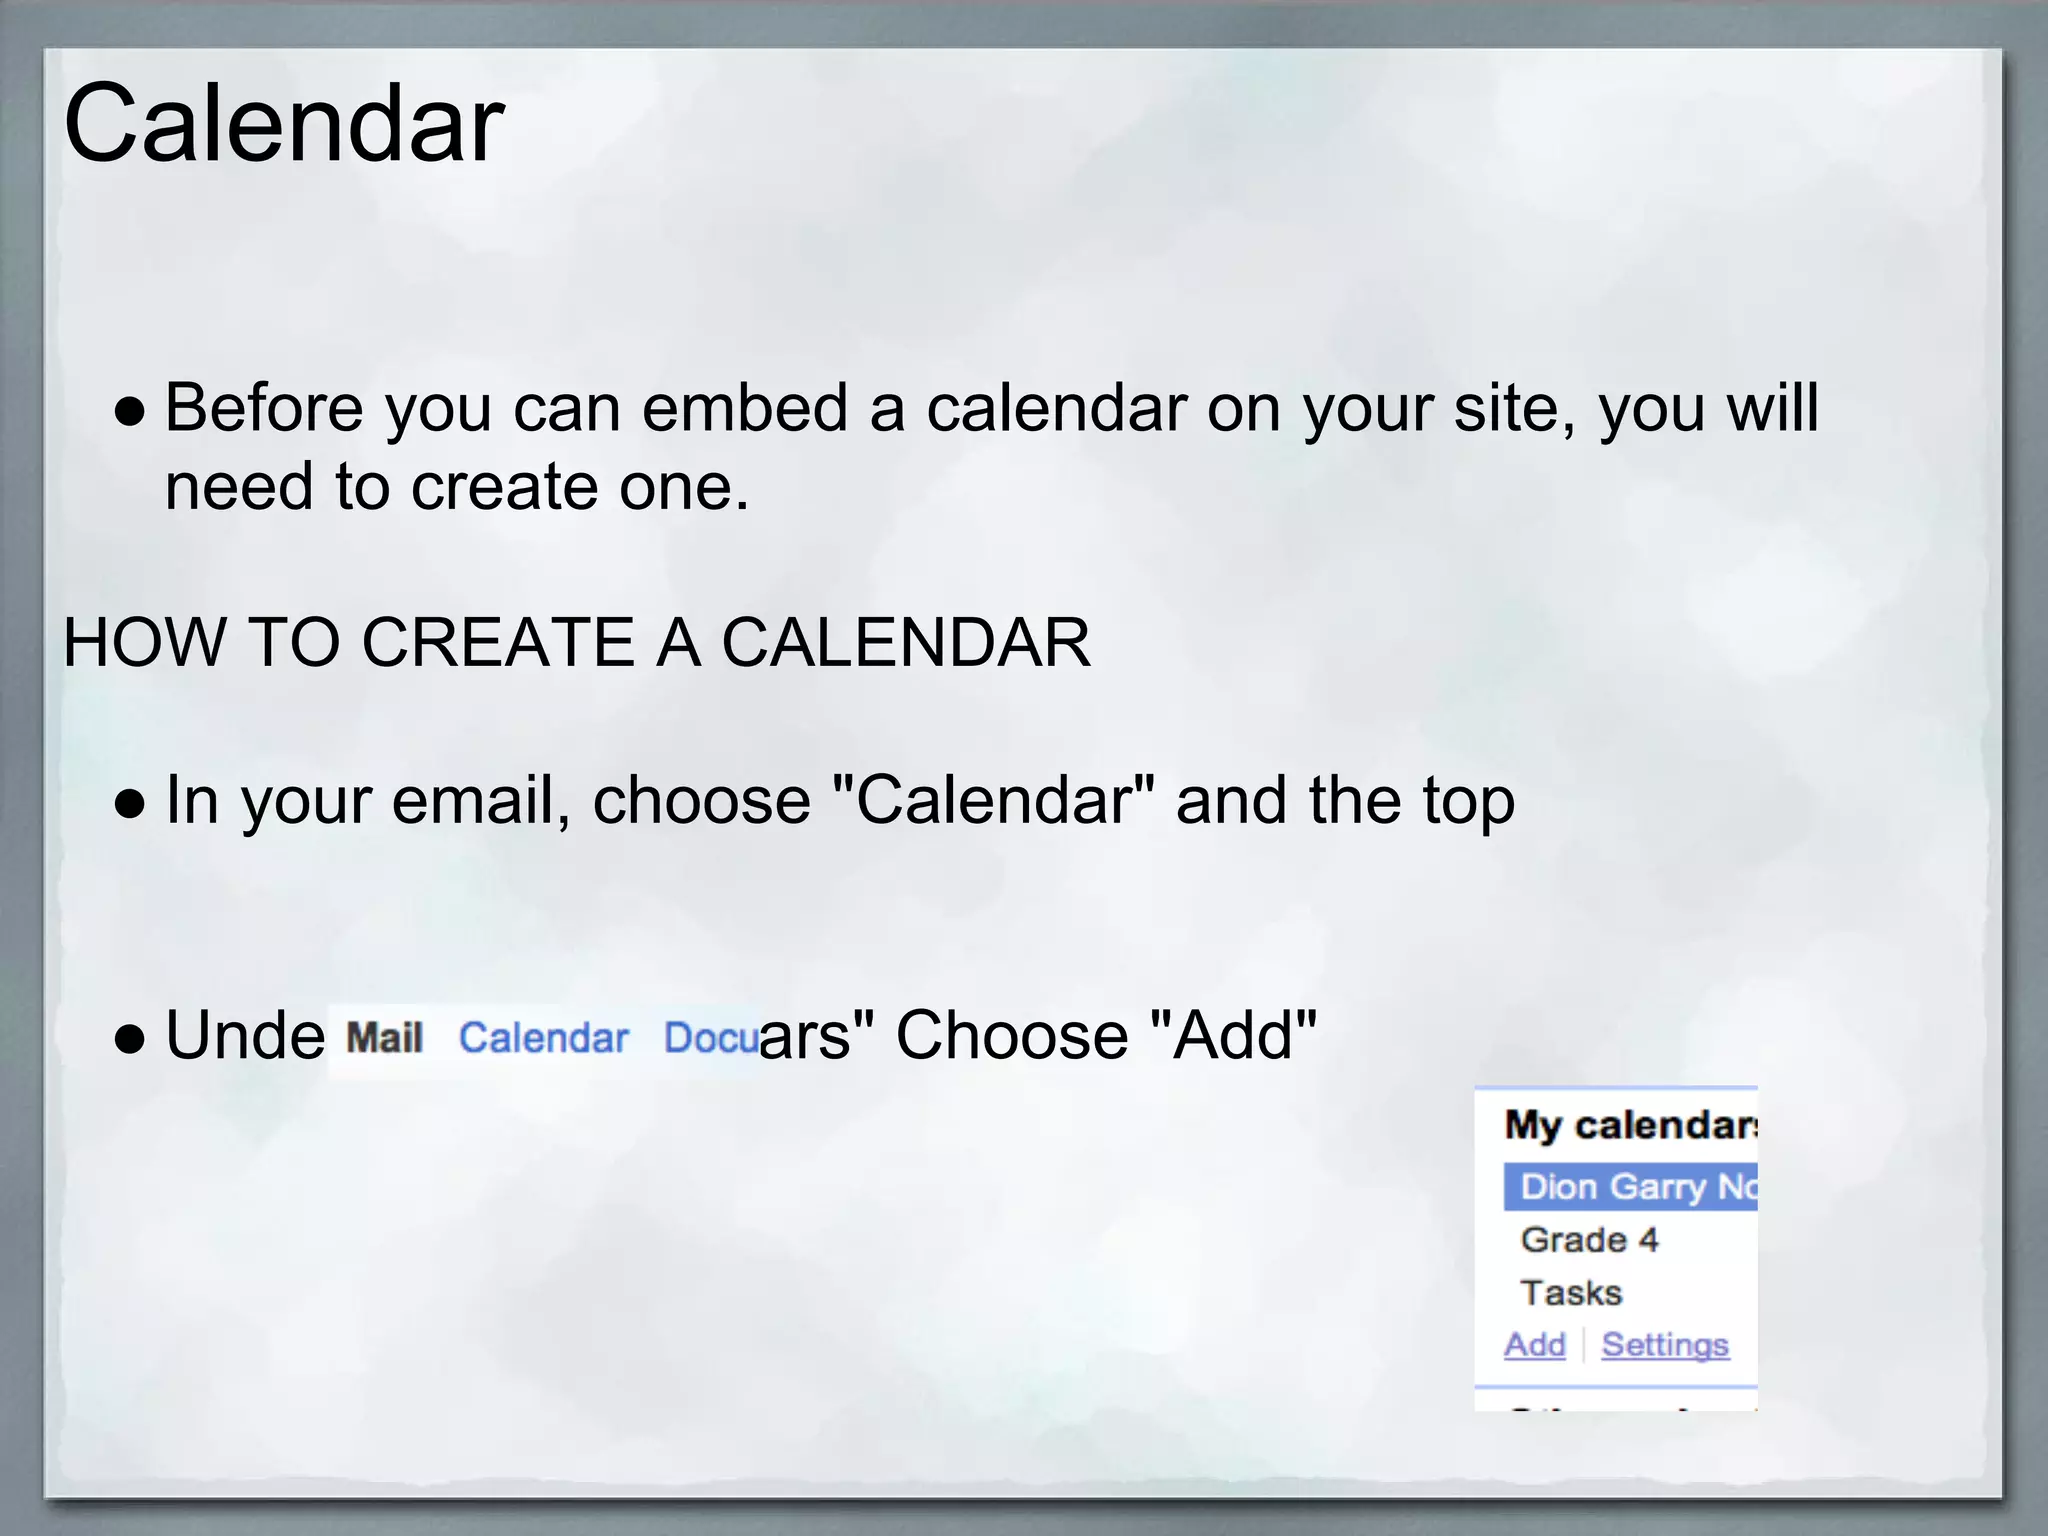
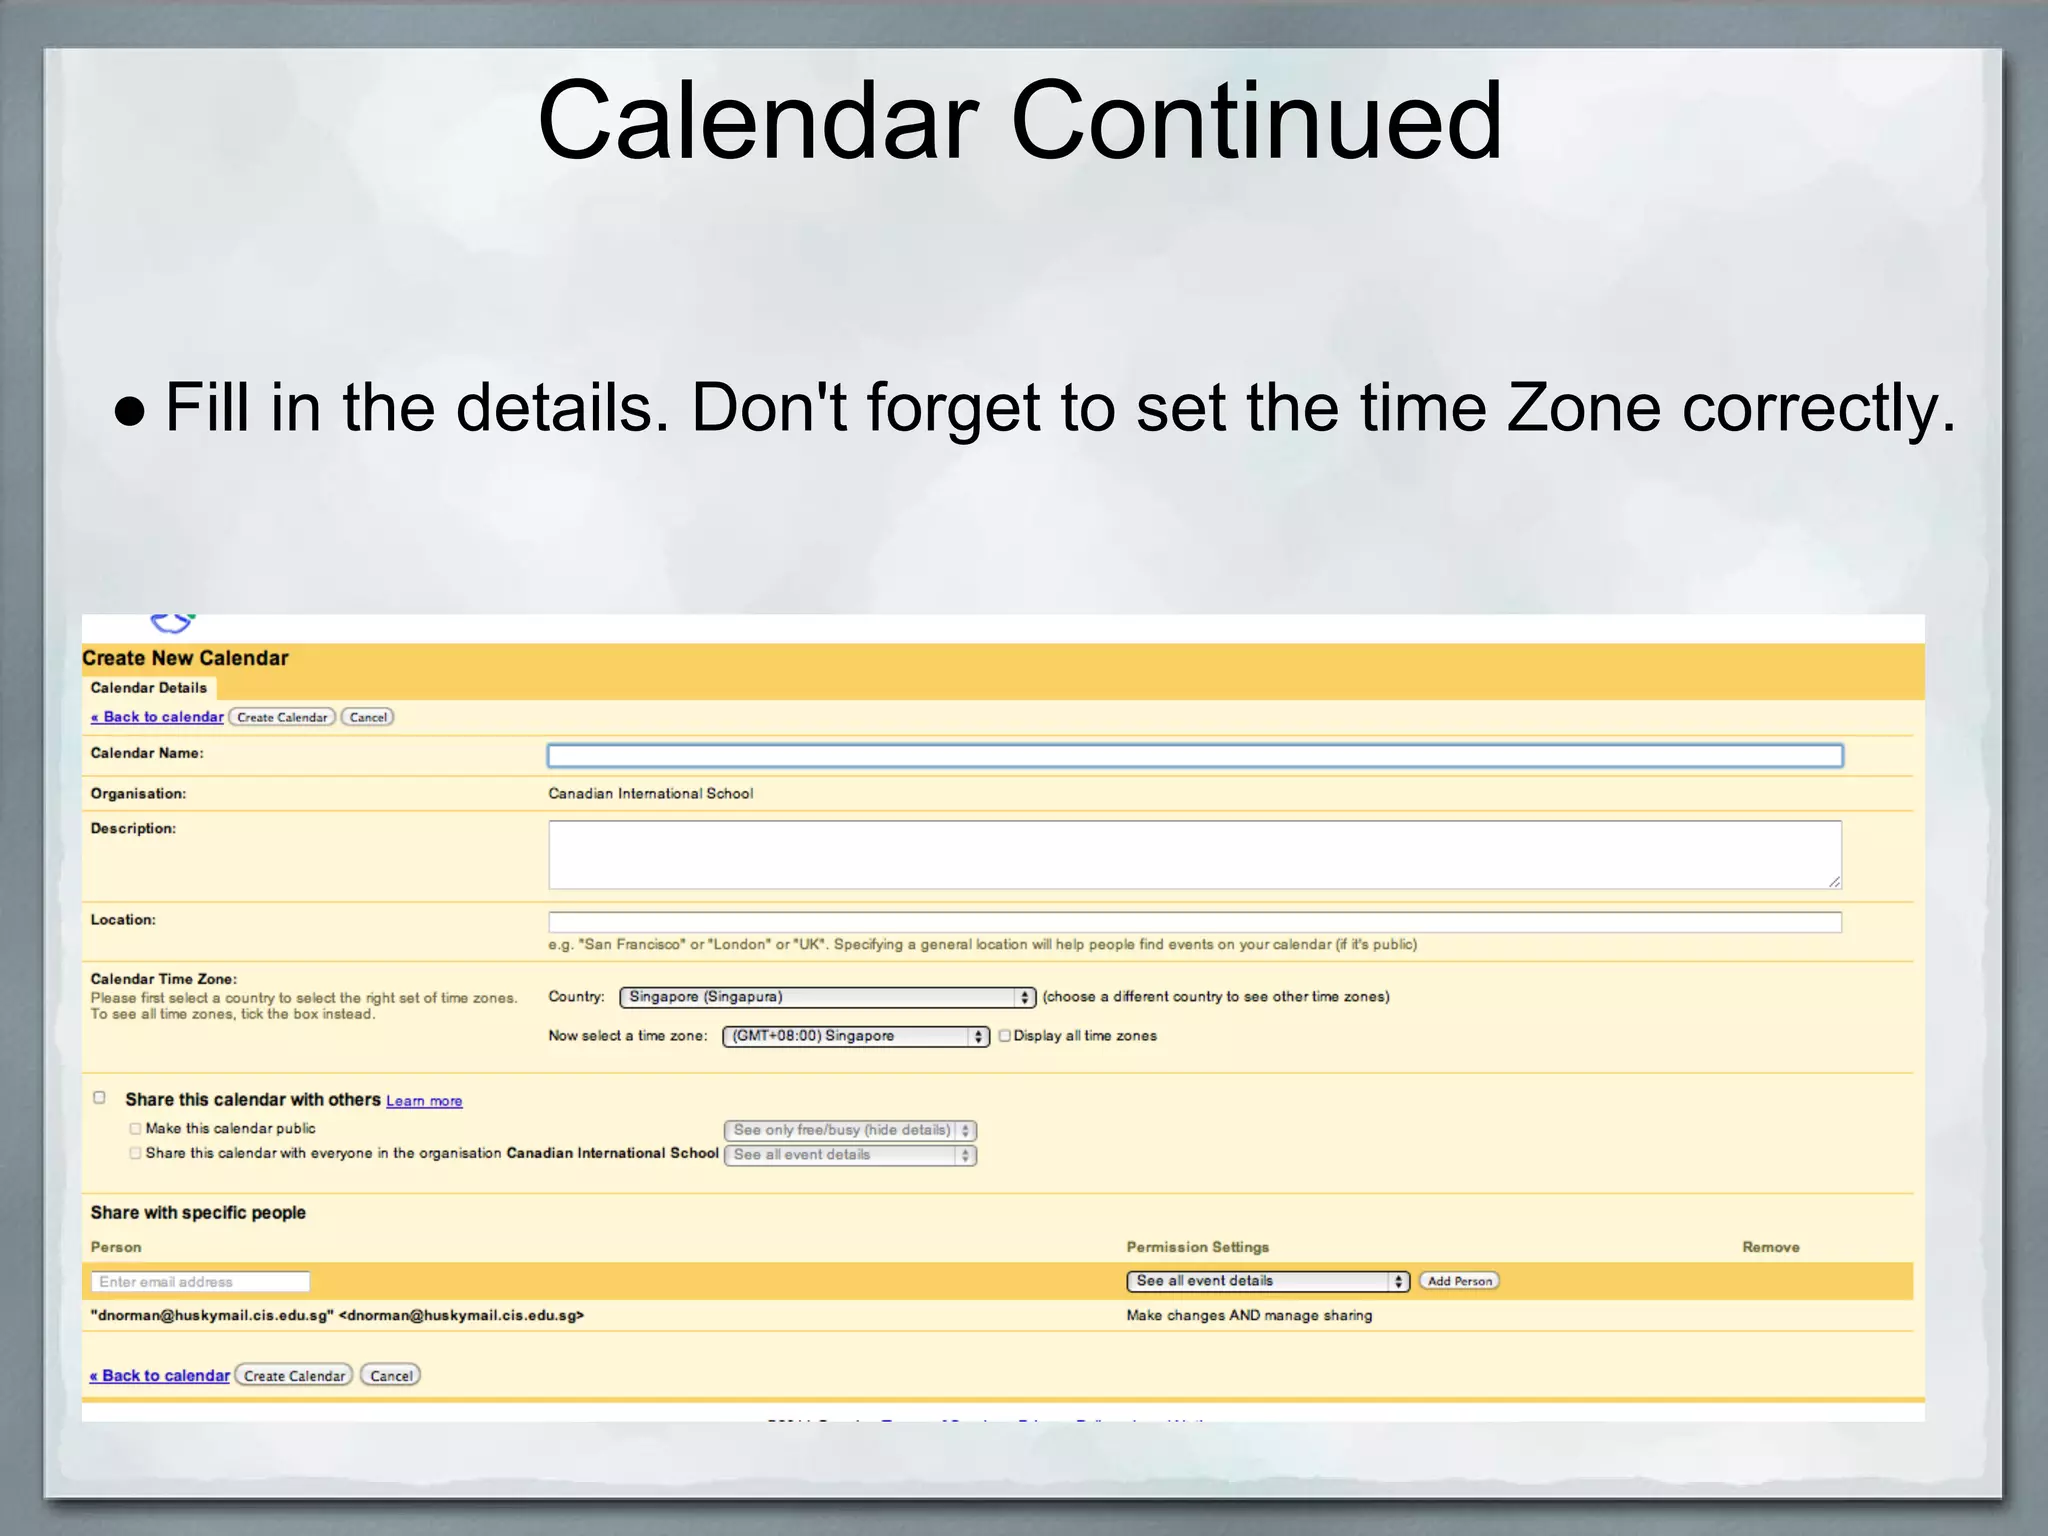
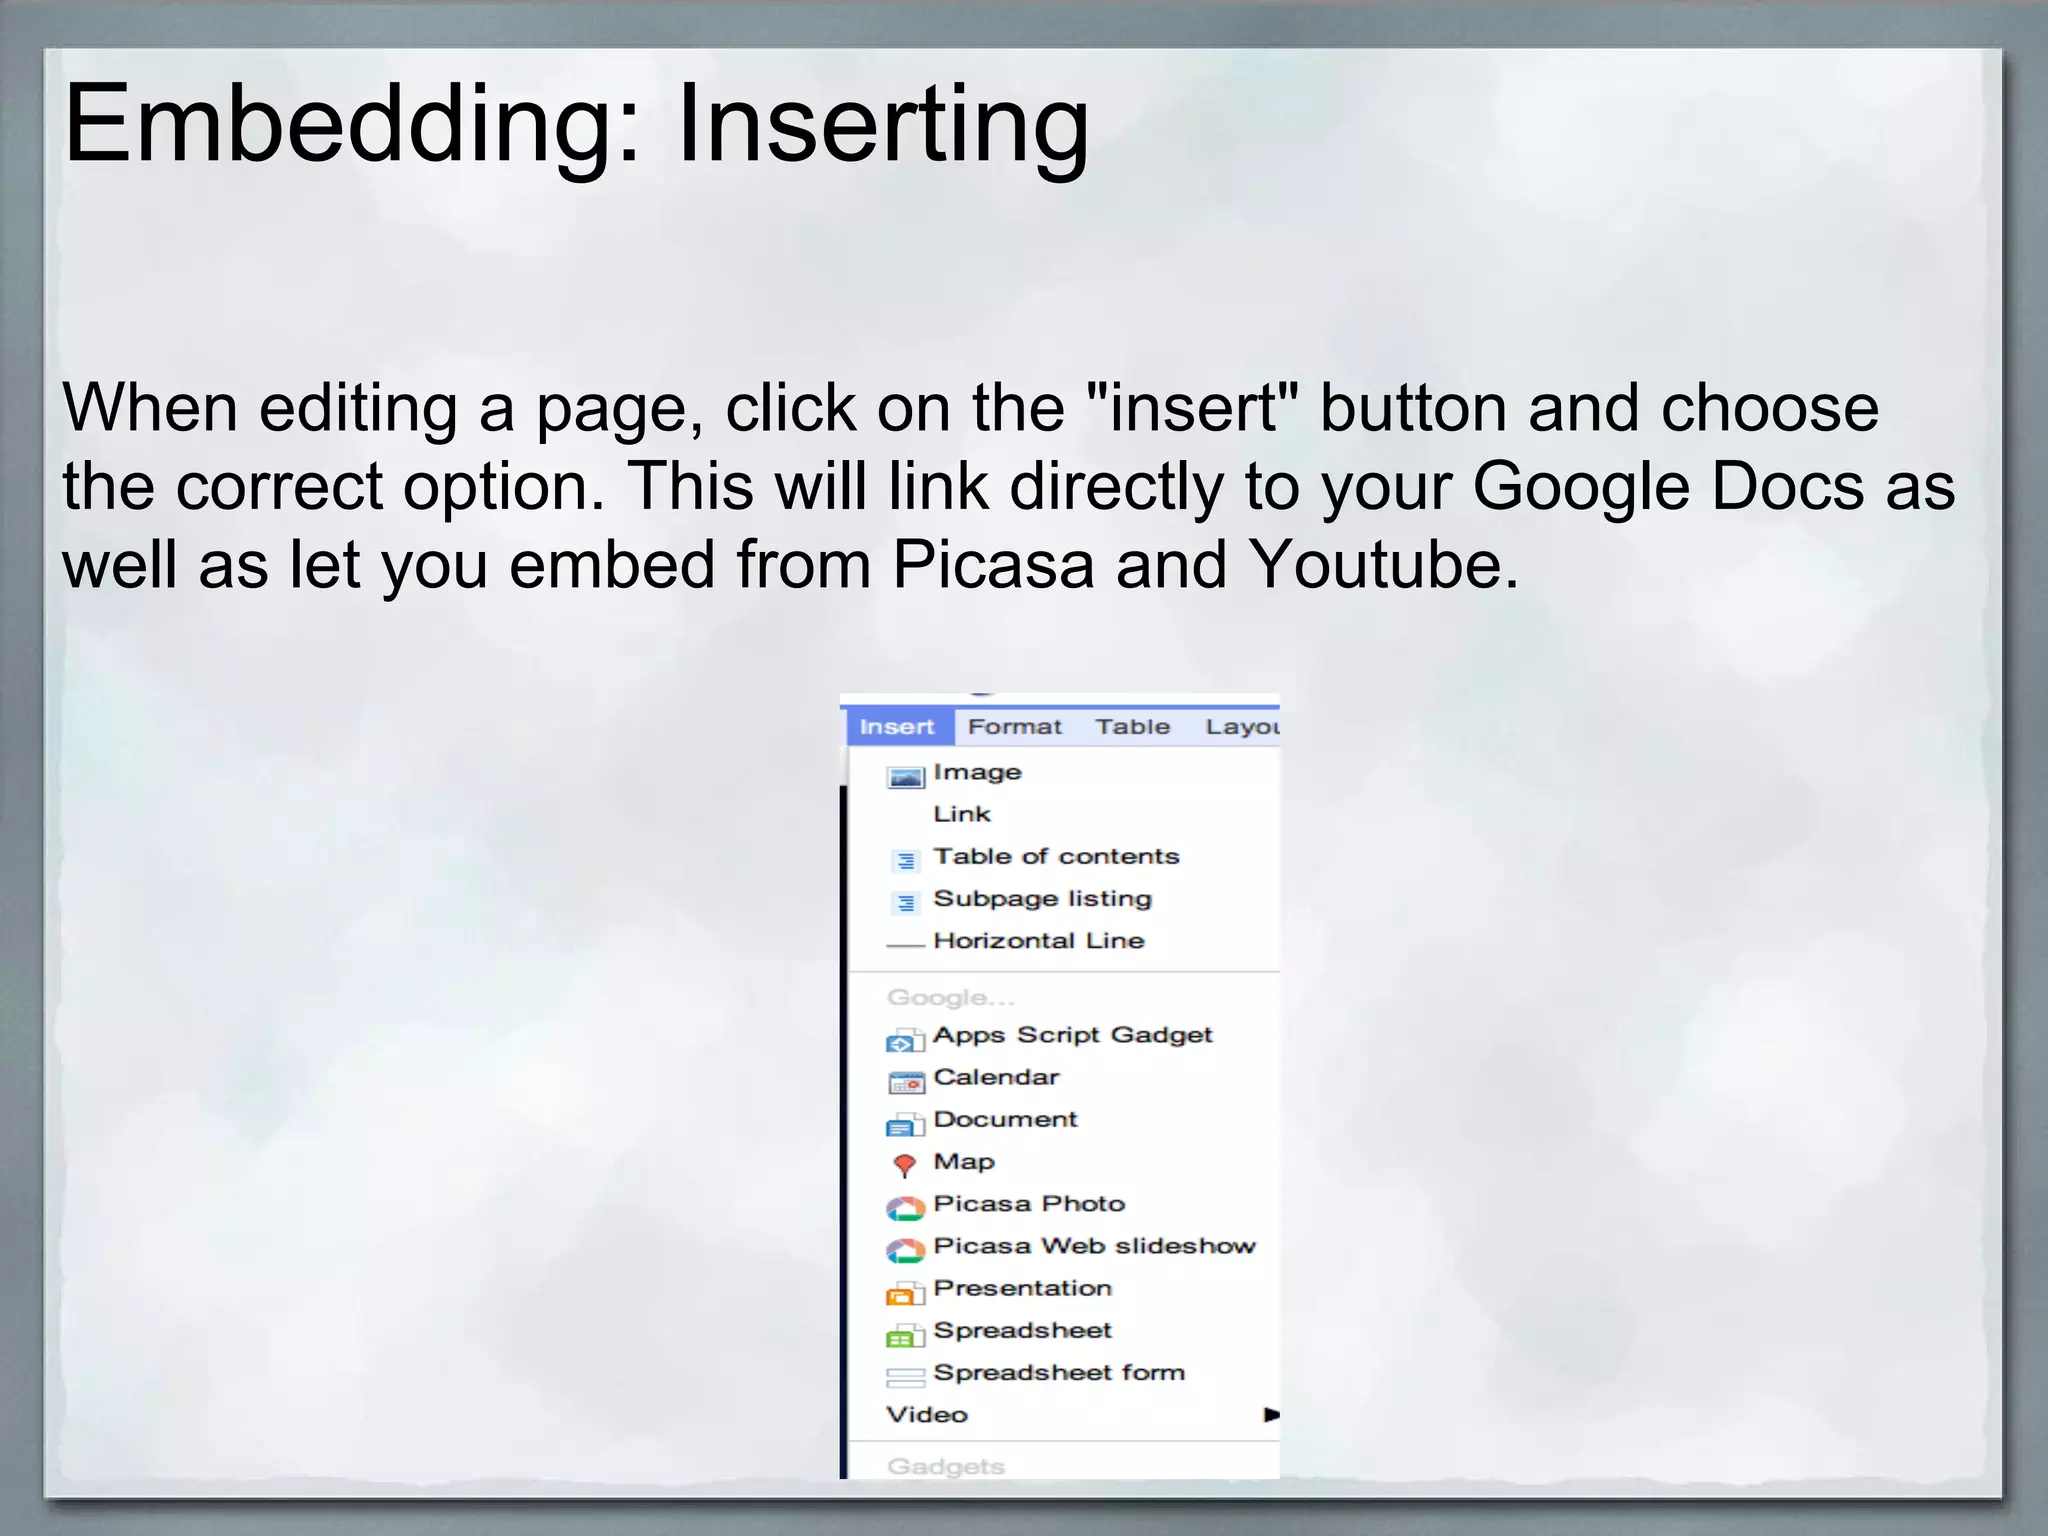
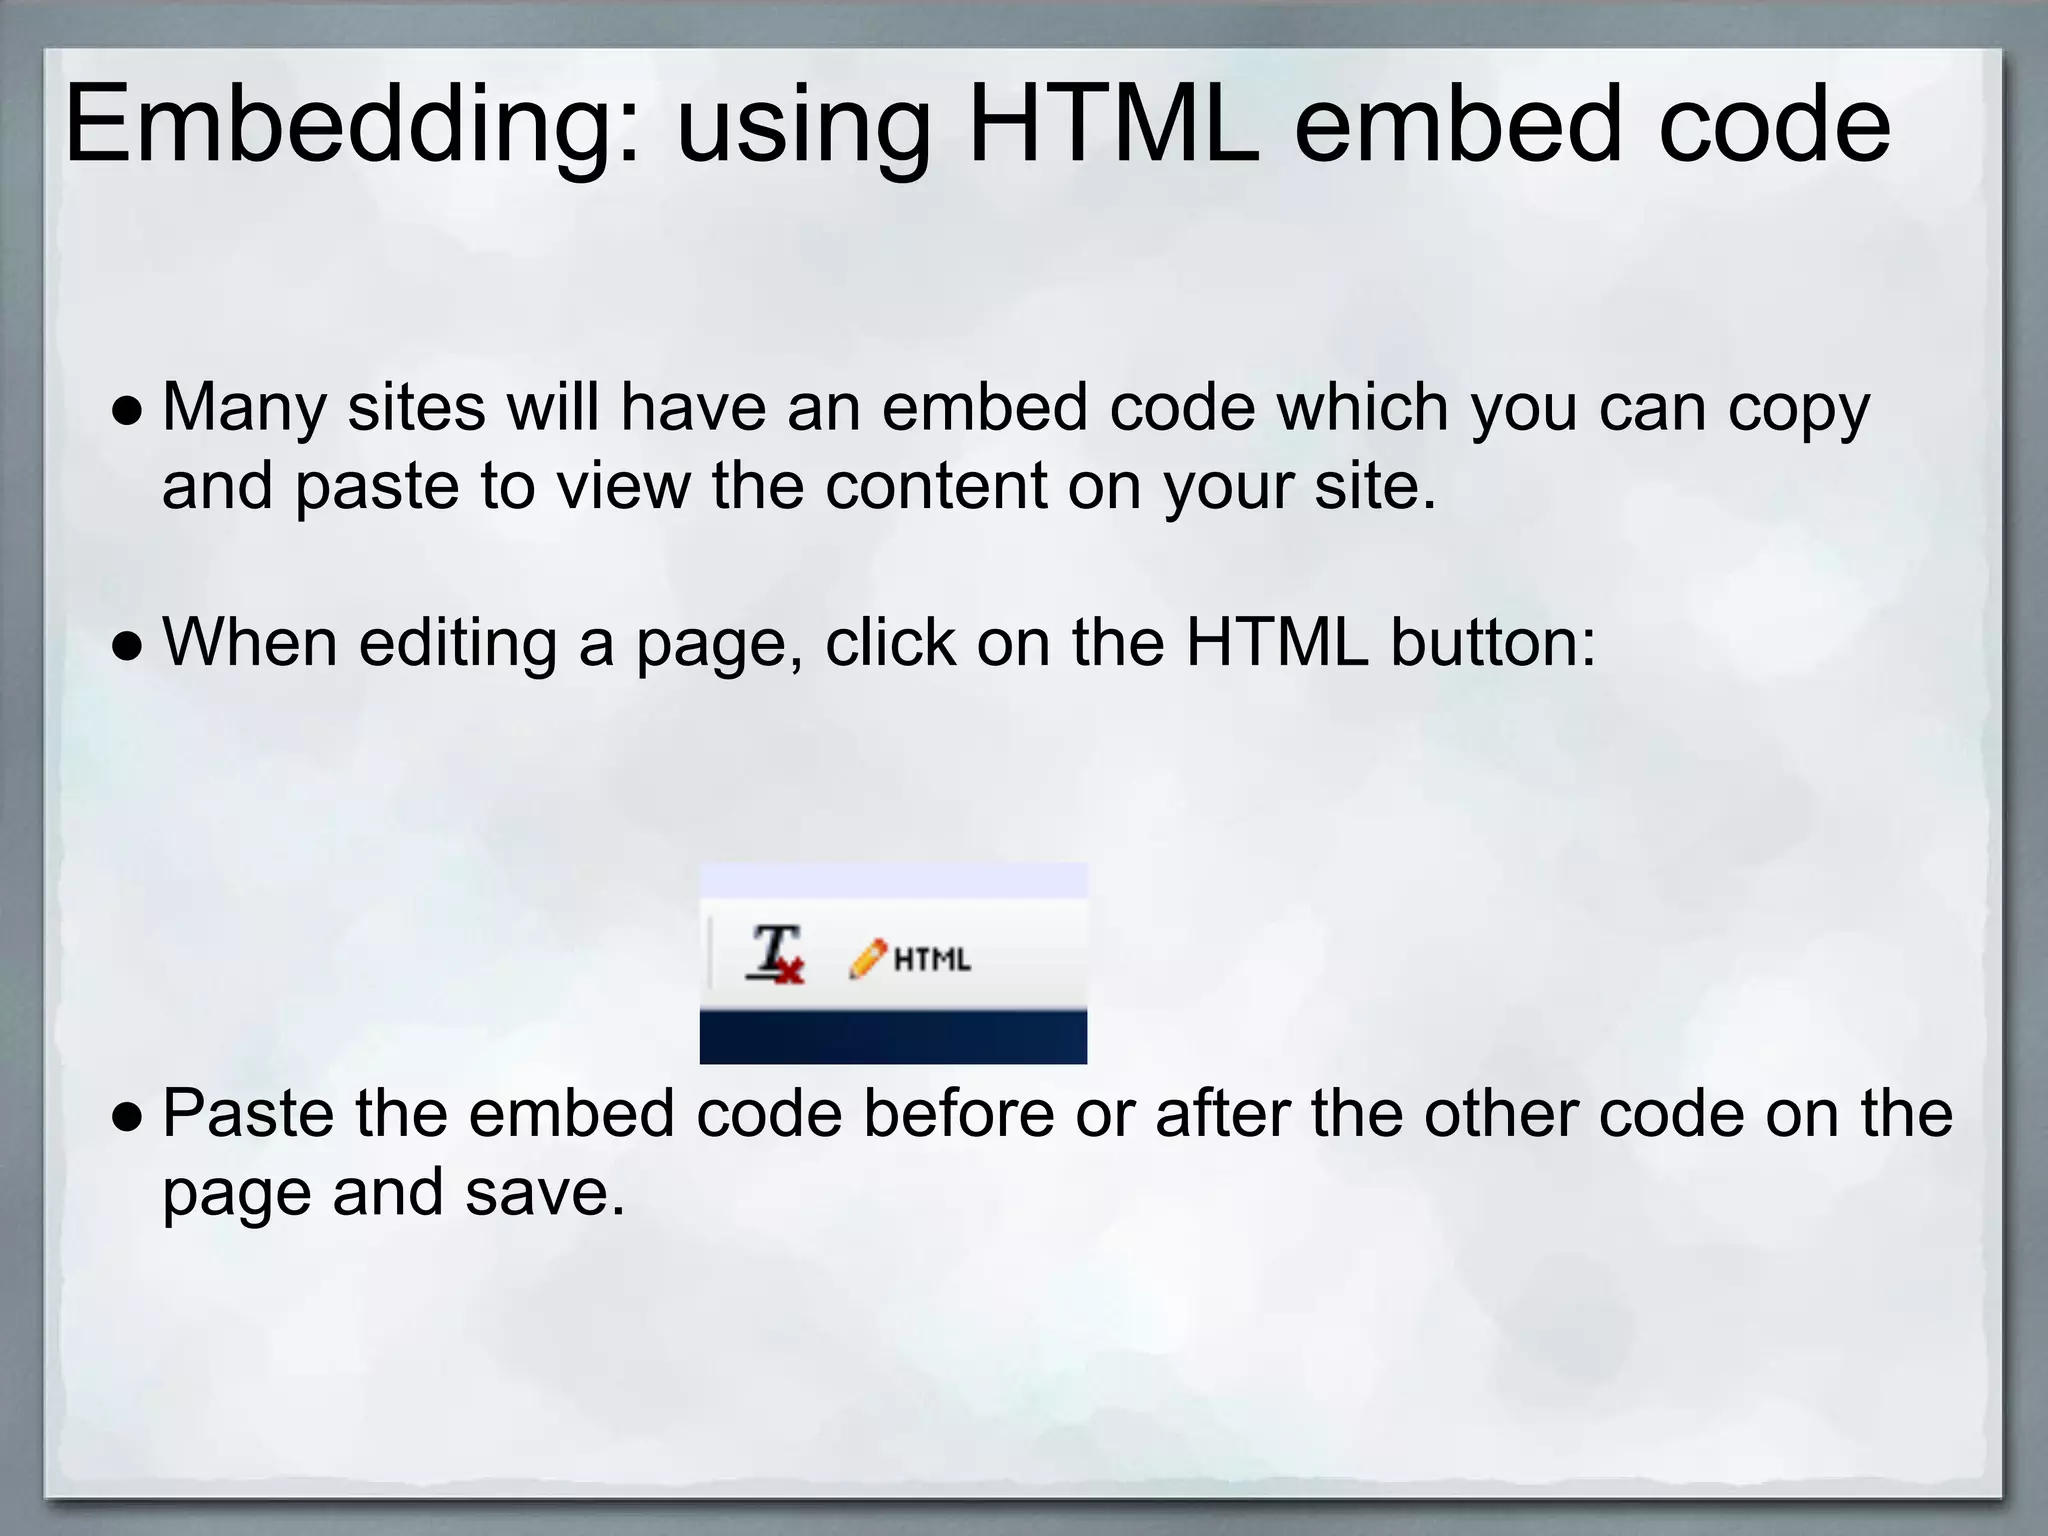
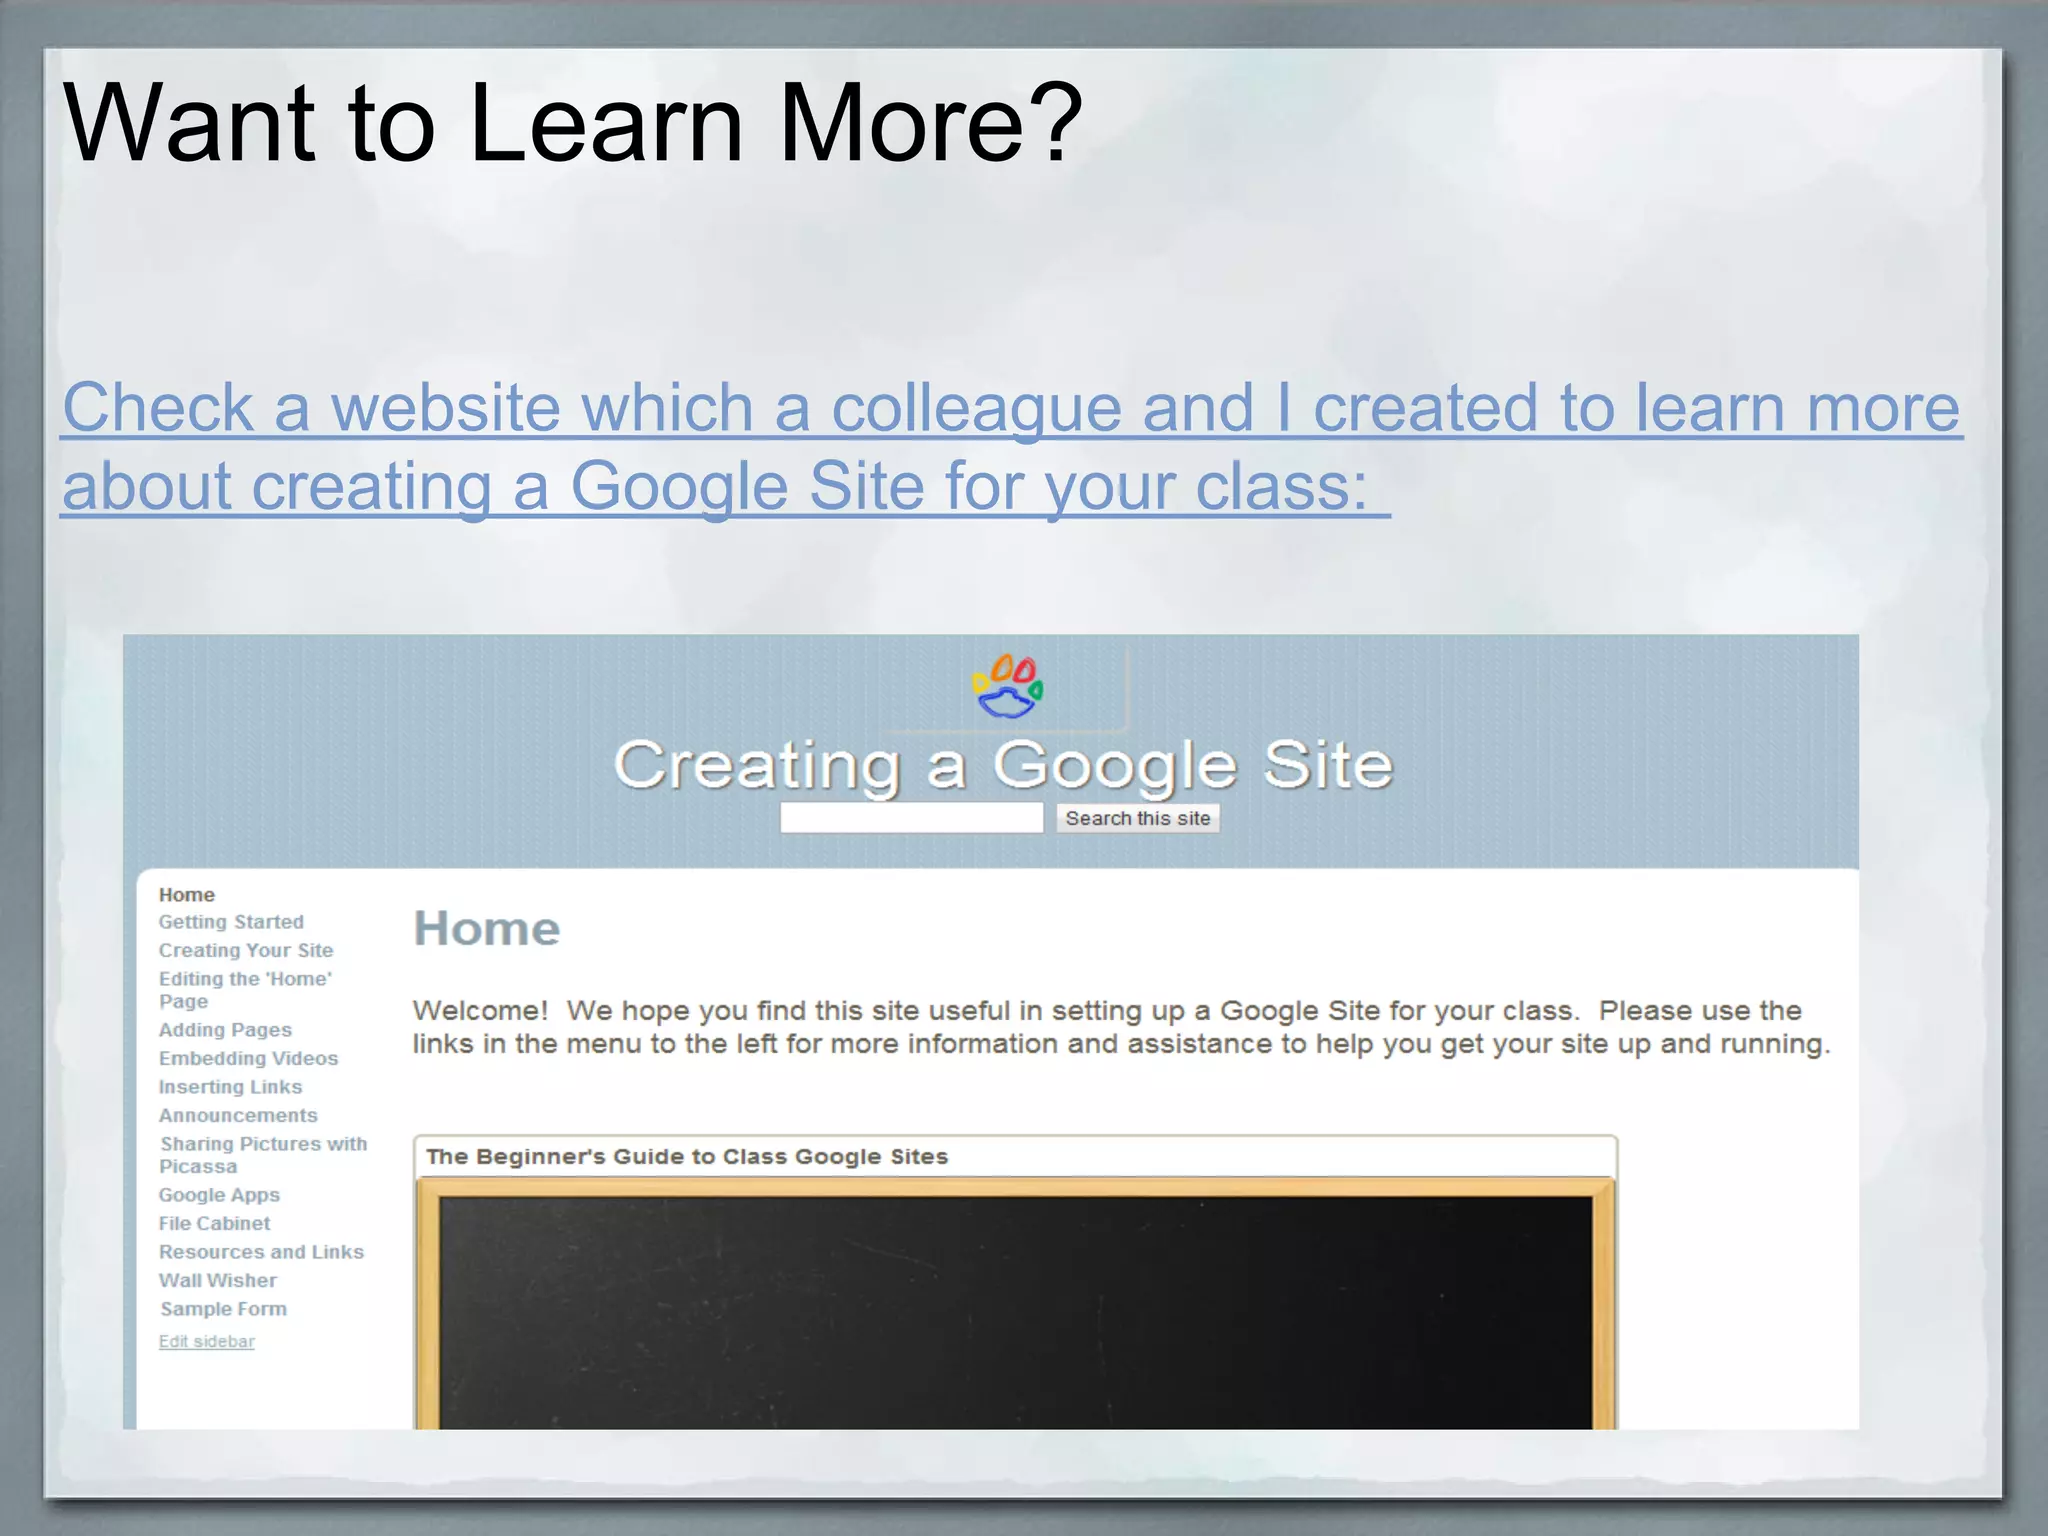
The Beginner's Guide to
              Class Google Sites
                                     D. Norman
                                ictforeducators.com
                                 Twitter @ictforeducators


This work is licensed under a Creative Commons Attribution
Noncommercial Share Alike 3.0 License.
Google Sites
Introduction Videos
Presentation Overview
● Getting started in creating your Google Site

● Editing pages and changing page templates

● Sidebars (Top level and sub-pages)

● Sharing your site

● Calendar, time zone, contact lists

● Embedding (Calendar, Videos, documents)
Getting Started

● Go to Sites


● Create new site
Getting Started Continued

● Choose the theme (default theme for our school)


● Give your site a unique name
Getting Started Continued

Choose More options and fill in the details
Editing Pages and Changing Templates


● Once your site has been created, you will see the basic
  template.

● From here you can start to edit your site's contents.
Editing a Page

● Go to the Page you want to edit and click "Edit Page"


● Make your changes and then click "save"
Changing a Page Template

 ● Click "More Actions"


Choose "Change Page template"
Changing a Page Template Continued
Page Templates:


Webpage: Good for general page to insert text and embed
objects.
Announcements: Adds new posts to the top with date and title.
Good for newsletters, homework, announcements. Great for
blogging as well.
File Cabinet: Use to store uploaded documents
List: Good for listing books, websites, etc
Sidebar: Top Level and Sub Pages

● Top Level pages will create a main page on the sidebar (ie.
  subjects)


● Sub-Pages are added under a Top Level Page and will
  give you a drop down menu (ie. The name of each
  subject)
Sidebars

ADDING A SIDEBAR

 ● Click "Create Page"


 ● Choose the page template and give it a name (ie.
   Newsletters, UOI's, etc)
Sidebar: Deleting a Page

 ● Click the page you want to delete from the sidebar

 ● Click on "More Actions"


Choose "Delete Page" and confirm by clicking delete
Sharing your Site

● Before sharing your site with your class, you should create a
  contact distribution list for your class within your email.

● Click "More Actions"


● Go to "Site Permissions"
Sharing your Site continued

● You can add people to your site by either adding their
  emails individually or choosing from your contacts list
  (faster)


● The default is to let people edit. Be sure to change to "can
  view" if you don't want others to change content on your
  site.
● "Notify people" will send an email. Uncheck if you want to
  share without sending a notification.
● Click "Save and Share"
Creating a Contact List

 ● You will want to create a contact list for the parents (and
   students) in your class. Remember to use BCC when
   emailing parents with your contact list to ensure privacy.

From your email, choose "More" and "Contacts"
Creating a Contact List Continued

● To start a contact list, choose to add a new group (the
  second icon)


● You may be able to add contacts from your available
  contacts or add them manually.

● You can later add new people to this contact list by
  choosing the first icon.
Time Zone

 ● You will need to make sure that the time zone is set
   correctly for your site so that events on your calendar
   appear correctly (fix only if required)

 ● At the top of the page click "sites"

Click on the gear icon at the top right and choose "User
Settings"
Time Zone Continued

Edit your language and Time Zone if necessary:
Calendar

 ● Before you can embed a calendar on your site, you will
   need to create one.

HOW TO CREATE A CALENDAR

 ● In your email, choose "Calendar" and the top


 ● Under "My Caldendars" Choose "Add"
Calendar Continued

● Fill in the details. Don't forget to set the time Zone correctly.
Embedding

There are two ways to embed:

1. Insert from the list of choices offered


2. Get the embed code from the site you want to embed and
use Html to embed (for any content that can be embedded
which is not on the list)
Embedding: Inserting

When editing a page, click on the "insert" button and choose
the correct option. This will link directly to your Google Docs as
well as let you embed from Picasa and Youtube.
Embedding: using HTML embed code

● Many sites will have an embed code which you can copy
  and paste to view the content on your site.

● When editing a page, click on the HTML button:


● Paste the embed code before or after the other code on the
  page and save.
Want to Learn More?

Check a website which a colleague and I created to learn more
about creating a Google Site for your class:

The Beginner's guide to creating a Google Site

  • 1.
    The Beginner's Guideto Class Google Sites D. Norman ictforeducators.com Twitter @ictforeducators This work is licensed under a Creative Commons Attribution Noncommercial Share Alike 3.0 License.
  • 2.
  • 3.
    Presentation Overview ● Gettingstarted in creating your Google Site ● Editing pages and changing page templates ● Sidebars (Top level and sub-pages) ● Sharing your site ● Calendar, time zone, contact lists ● Embedding (Calendar, Videos, documents)
  • 4.
    Getting Started ● Goto Sites ● Create new site
  • 5.
    Getting Started Continued ●Choose the theme (default theme for our school) ● Give your site a unique name
  • 6.
    Getting Started Continued ChooseMore options and fill in the details
  • 7.
    Editing Pages andChanging Templates ● Once your site has been created, you will see the basic template. ● From here you can start to edit your site's contents.
  • 8.
    Editing a Page ●Go to the Page you want to edit and click "Edit Page" ● Make your changes and then click "save"
  • 9.
    Changing a PageTemplate ● Click "More Actions" Choose "Change Page template"
  • 10.
    Changing a PageTemplate Continued Page Templates: Webpage: Good for general page to insert text and embed objects. Announcements: Adds new posts to the top with date and title. Good for newsletters, homework, announcements. Great for blogging as well. File Cabinet: Use to store uploaded documents List: Good for listing books, websites, etc
  • 11.
    Sidebar: Top Leveland Sub Pages ● Top Level pages will create a main page on the sidebar (ie. subjects) ● Sub-Pages are added under a Top Level Page and will give you a drop down menu (ie. The name of each subject)
  • 12.
    Sidebars ADDING A SIDEBAR ● Click "Create Page" ● Choose the page template and give it a name (ie. Newsletters, UOI's, etc)
  • 13.
    Sidebar: Deleting aPage ● Click the page you want to delete from the sidebar ● Click on "More Actions" Choose "Delete Page" and confirm by clicking delete
  • 14.
    Sharing your Site ●Before sharing your site with your class, you should create a contact distribution list for your class within your email. ● Click "More Actions" ● Go to "Site Permissions"
  • 15.
    Sharing your Sitecontinued ● You can add people to your site by either adding their emails individually or choosing from your contacts list (faster) ● The default is to let people edit. Be sure to change to "can view" if you don't want others to change content on your site. ● "Notify people" will send an email. Uncheck if you want to share without sending a notification. ● Click "Save and Share"
  • 16.
    Creating a ContactList ● You will want to create a contact list for the parents (and students) in your class. Remember to use BCC when emailing parents with your contact list to ensure privacy. From your email, choose "More" and "Contacts"
  • 17.
    Creating a ContactList Continued ● To start a contact list, choose to add a new group (the second icon) ● You may be able to add contacts from your available contacts or add them manually. ● You can later add new people to this contact list by choosing the first icon.
  • 18.
    Time Zone ●You will need to make sure that the time zone is set correctly for your site so that events on your calendar appear correctly (fix only if required) ● At the top of the page click "sites" Click on the gear icon at the top right and choose "User Settings"
  • 19.
    Time Zone Continued Edityour language and Time Zone if necessary:
  • 20.
    Calendar ● Beforeyou can embed a calendar on your site, you will need to create one. HOW TO CREATE A CALENDAR ● In your email, choose "Calendar" and the top ● Under "My Caldendars" Choose "Add"
  • 21.
    Calendar Continued ● Fillin the details. Don't forget to set the time Zone correctly.
  • 22.
    Embedding There are twoways to embed: 1. Insert from the list of choices offered 2. Get the embed code from the site you want to embed and use Html to embed (for any content that can be embedded which is not on the list)
  • 23.
    Embedding: Inserting When editinga page, click on the "insert" button and choose the correct option. This will link directly to your Google Docs as well as let you embed from Picasa and Youtube.
  • 24.
    Embedding: using HTMLembed code ● Many sites will have an embed code which you can copy and paste to view the content on your site. ● When editing a page, click on the HTML button: ● Paste the embed code before or after the other code on the page and save.
  • 25.
    Want to LearnMore? Check a website which a colleague and I created to learn more about creating a Google Site for your class: