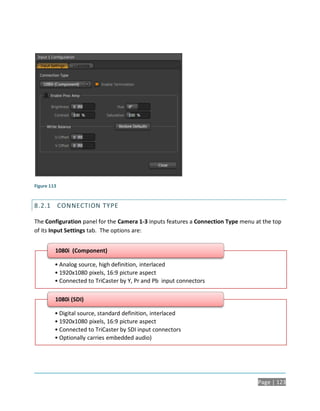
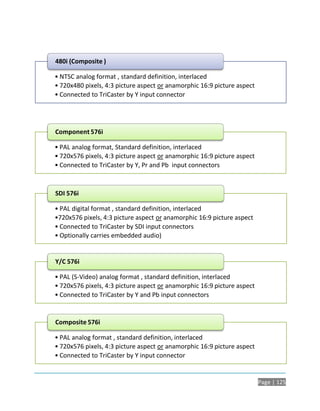
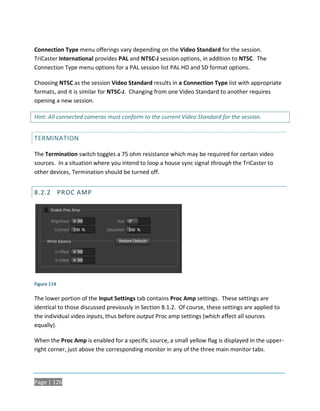
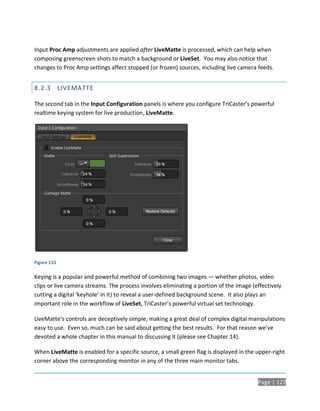
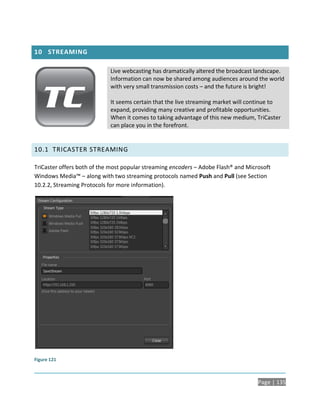
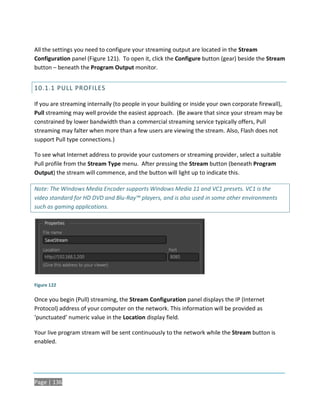
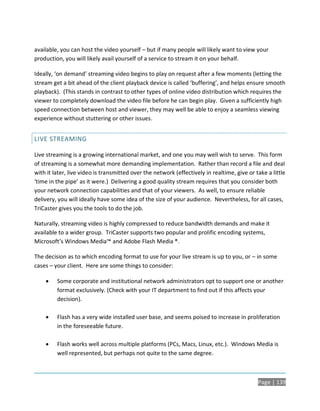
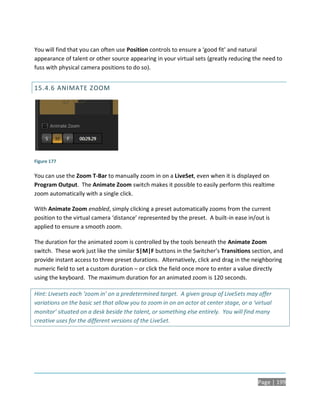
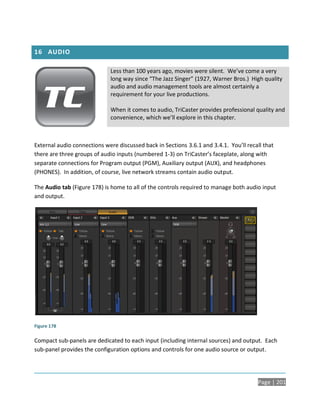
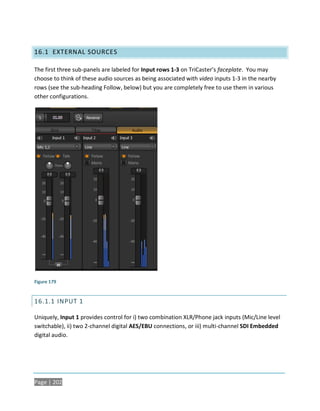
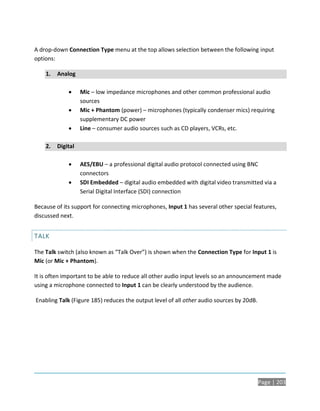
This document provides an overview of the TriCaster TCXD300 system. It begins with a table of contents and introduction to the manual. Section 2 provides an overview of the startup screen and Live Desktop interface. Section 3 covers setting up inputs, outputs, and other configuration options. Section 4 walks through a sample live production workflow, demonstrating features like switching, recording, media playback, and streaming. The remainder of the document provides in-depth reference information on various Live Desktop tools and configuration options.
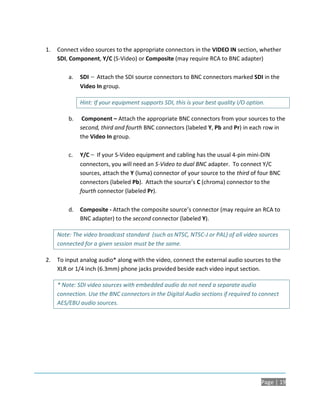
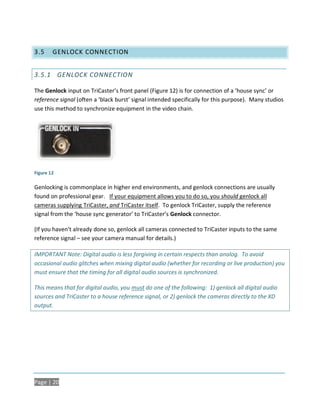
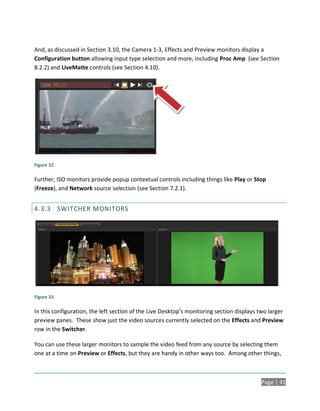
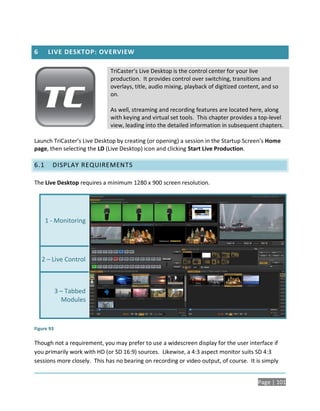
![Revised – Feb. 10, 2010
Copyright 2010 NewTek Inc., 5131 Beckwith Blvd. San Antonio, TX USA 78249. TriCaster TCXD300,
TriCaster, 3PLAY, VT[5], SpeedEDIT, LiveSet, LiveMatte, LiveMatte and LiveText are trademarks of NewTek
Inc. All other brand names, product names, or trademarks belong to their respective holders.](https://image.slidesharecdn.com/tcxd300manual02-10-10-130210230911-phpapp01/85/Tcxd-300-manual_02-10-10-2-320.jpg)


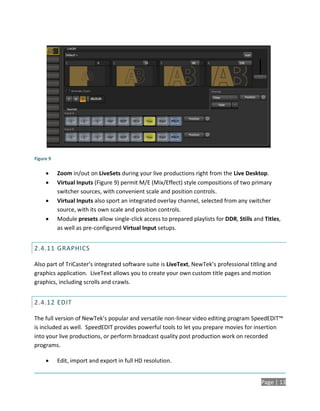

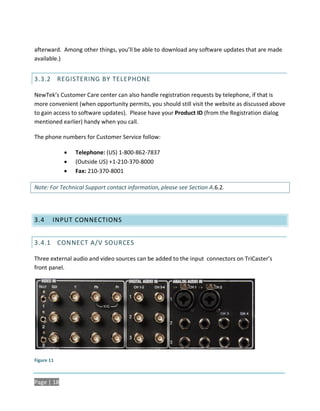
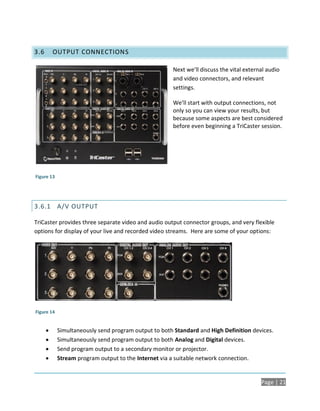
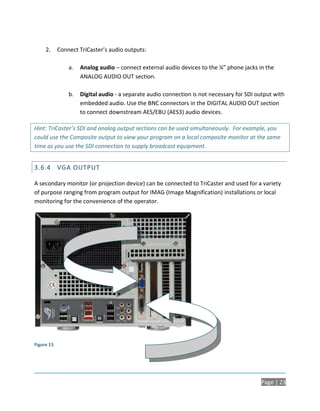
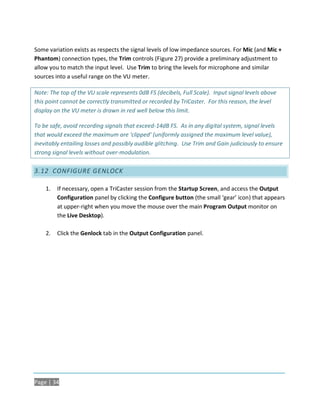
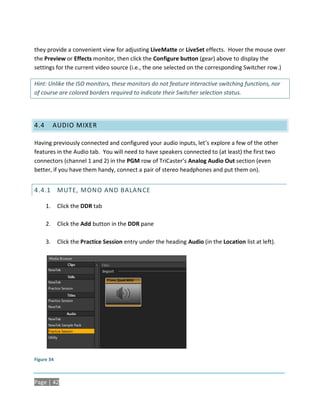
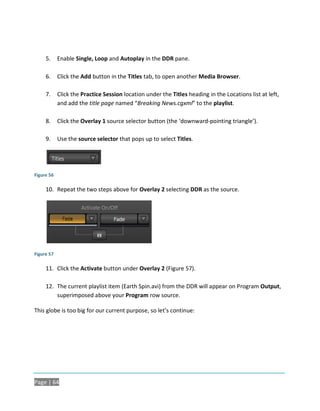
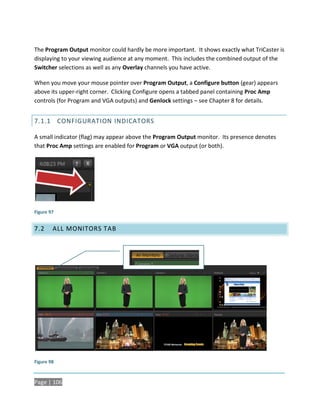
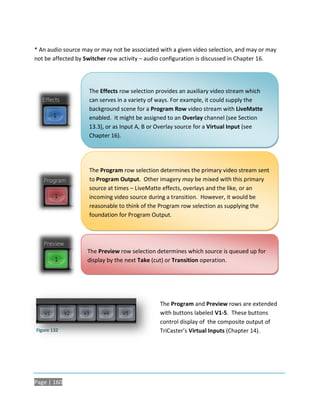
![ The tip-sleeve contact state is controlled by the Program row selection, corresponding
to the red Tally Light on TriCaster’s faceplate.
The ring-sleeve contact state is controlled by the Preview row selection, corresponding
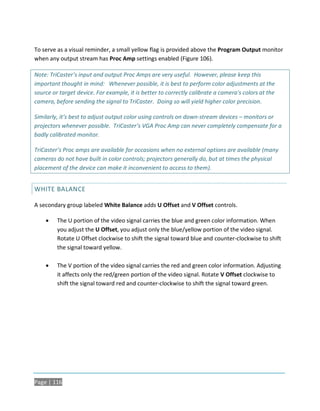
to a green Tally Light on TriCaster’s faceplate.
When an input is selected on both Program and Preview, the faceplate Tally Light will
glow amber.
Note: To prevent damage to TriCaster’s components when making external connections to the
tally light jacks, care should be taken that connection to the sleeve is always at ground potential.
3.8 STARTING A SESSION
If TriCaster is not already running, power it up now to reveal the Startup Screen. If TriCaster was
already running, and is in the Live Desktop or another area of the interface, you may need to
click the small [x] button at upper-right to exit; click the Back arrow at upper-left in the Session
Page to return to the Home Page.
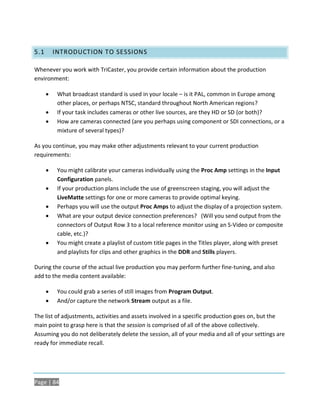
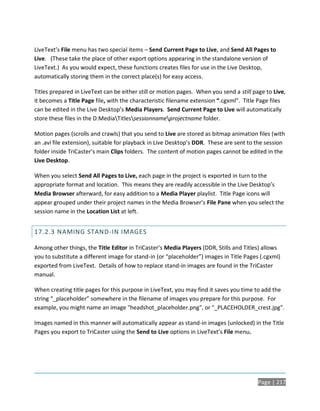
The Startup Screen consists of two similar interface pages – Home and Session. Among other
things, the Home page is where you choose basic TriCaster session settings.
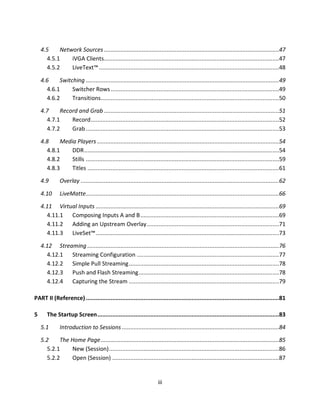
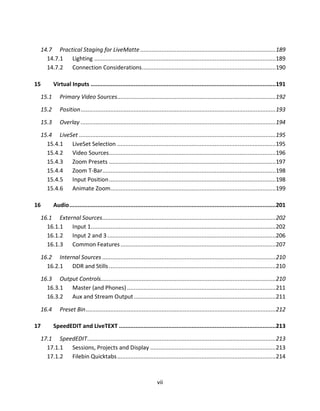
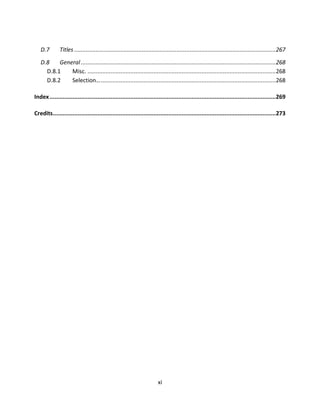
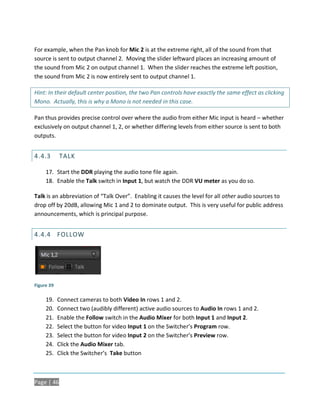
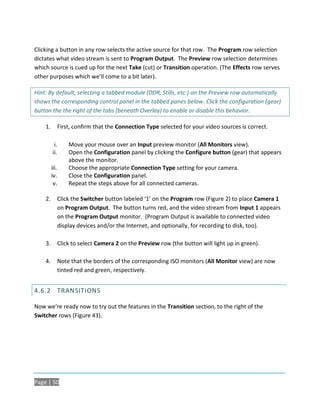
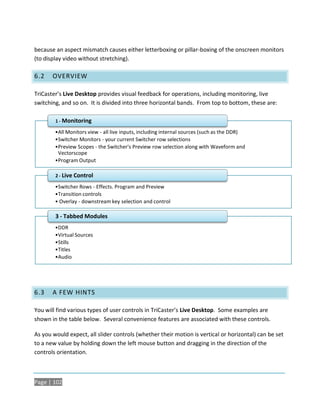
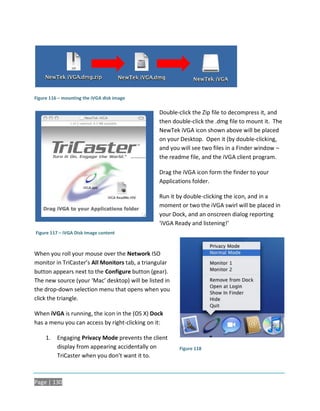
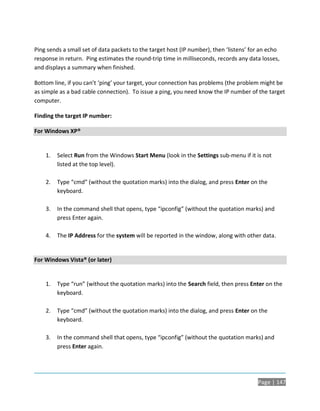
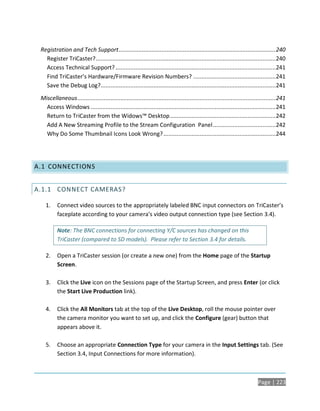
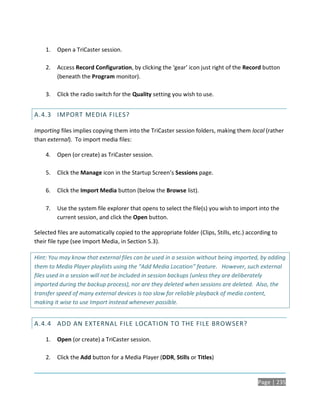
THE HOME PAGE
When no previously created sessions exist, the function selector ring dominating the Home page
defaults to the New icon, inviting you to create a new session. A default name for the new
sessions is listed at the top of the right-hand pane. Initially, the suggested name will be the
current date. Click in this area to modify the name using the keyboard if you like.
Page | 25](https://image.slidesharecdn.com/tcxd300manual02-10-10-130210230911-phpapp01/85/Tcxd-300-manual_02-10-10-41-320.jpg)


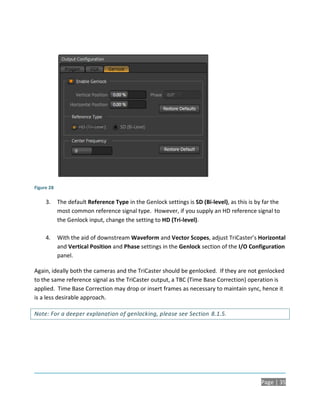
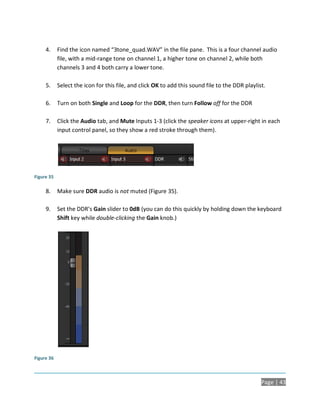
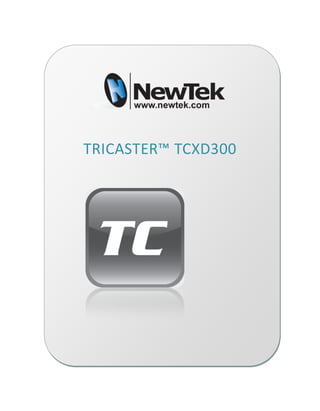
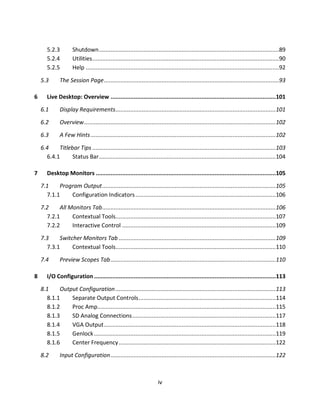
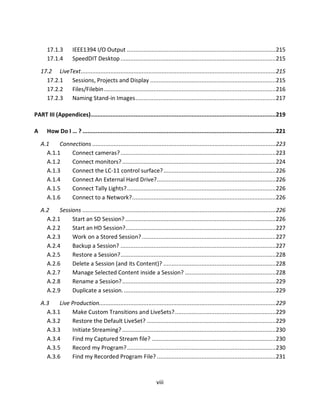
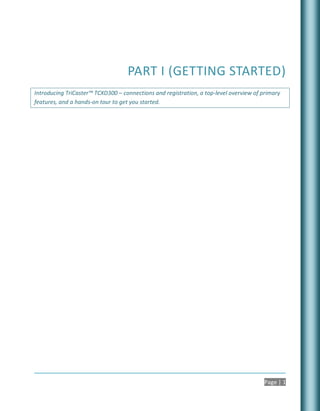
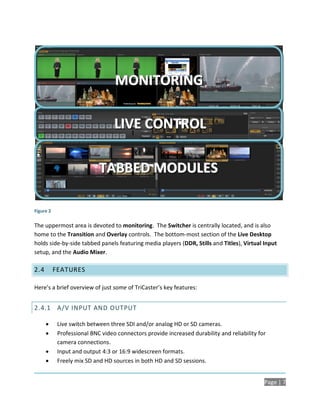
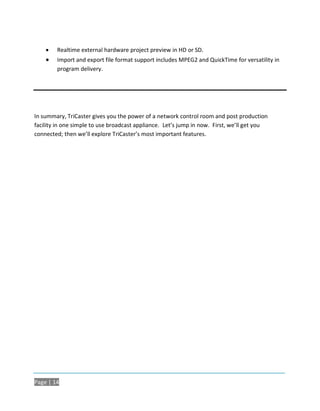
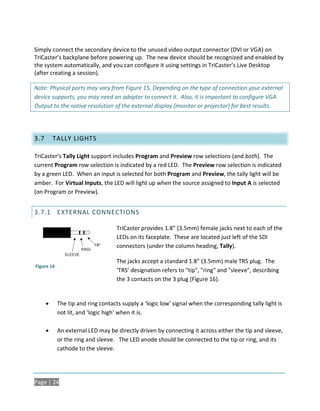
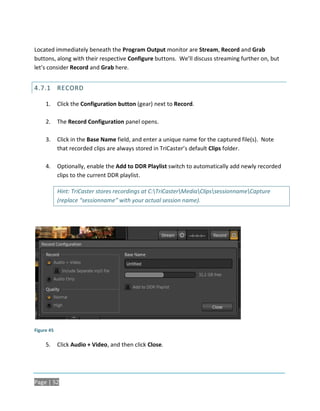
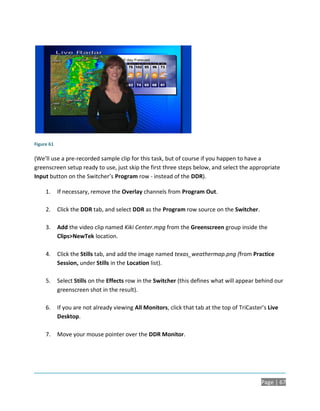
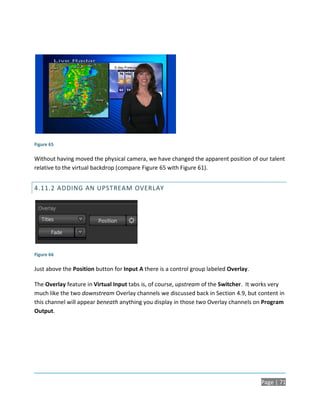
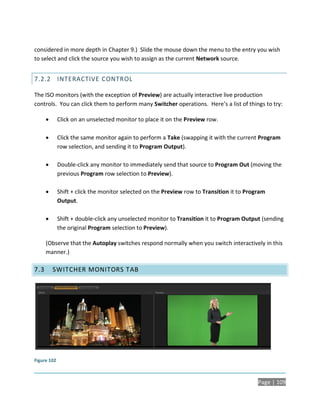
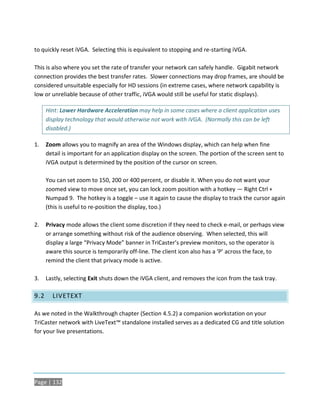
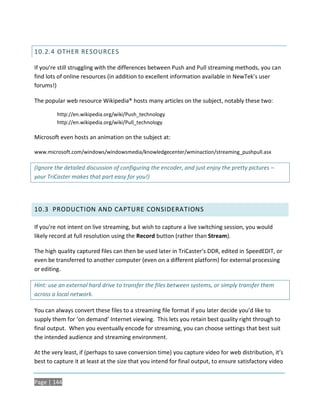
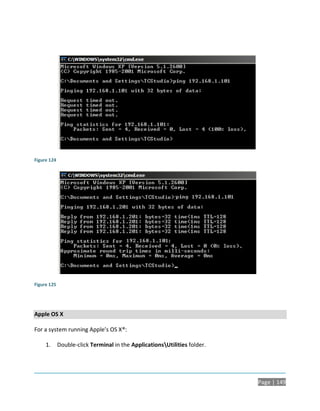
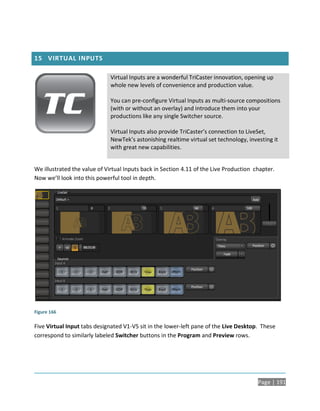
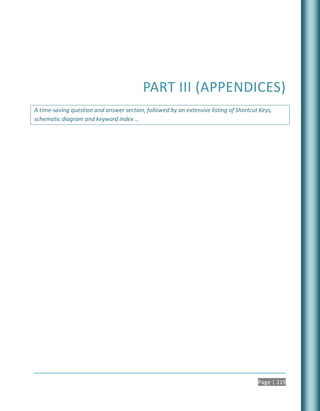
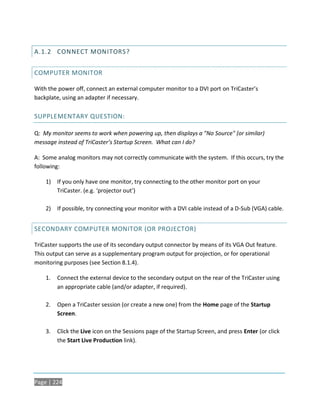
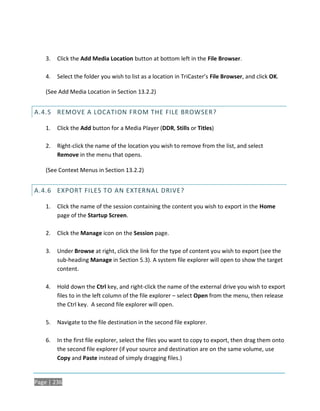
![Figure 43
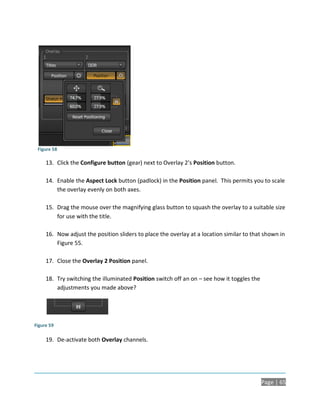
1. Click the Transition button
i. Camera 1 is gradually removed from Program Out
ii. Camera 2 (previously the Preview row selection) takes its place on Program Output
iii. The Camera 2 button is now lit up on the Program row
iv. The Camera 1 button is lit up on the Preview row
v. The red and green borders around the ISO monitors have been swapped
2. Click Take to force the swap between Program and Preview row selections to occur
instantly
3. Click a different transition icon in the selector pane (beside FTB), and click the Transition
button again. (TriCaster supplies a wealth of transitions to suit every need)
4. Click the [S] button to select a slower speed preset, and click Transition again to test the
new rate of change
Hint: you can manually control the progress of a transition by grabbing the T-bar with the left
mouse button and dragging it downward.
4.7 RECORD AND GRAB
Figure 44
Page | 51](https://image.slidesharecdn.com/tcxd300manual02-10-10-130210230911-phpapp01/85/Tcxd-300-manual_02-10-10-67-320.jpg)
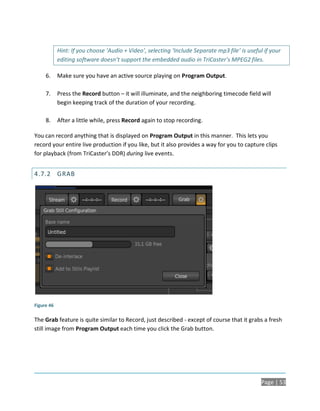
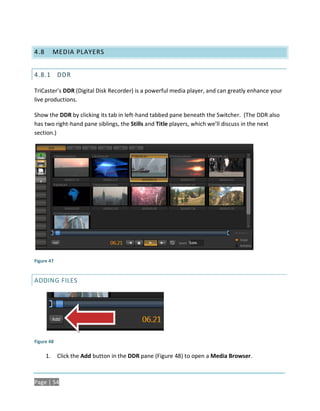
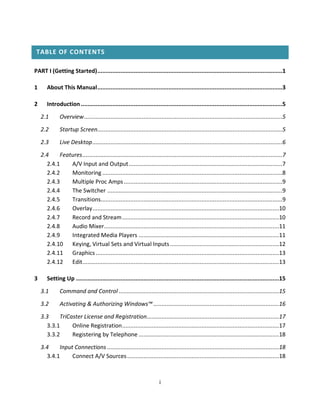
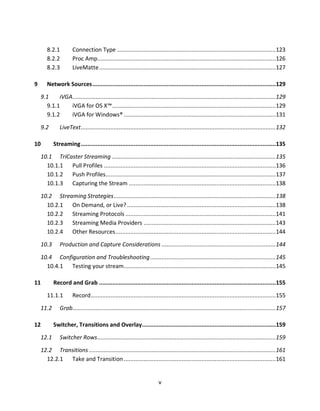
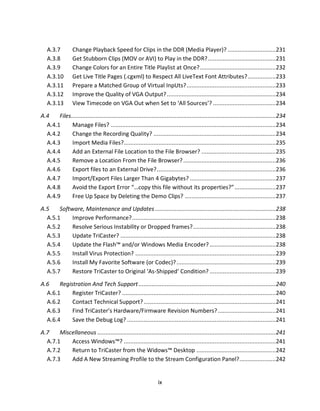
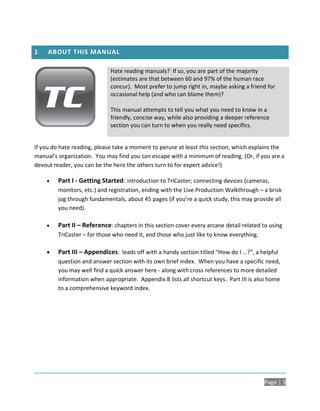
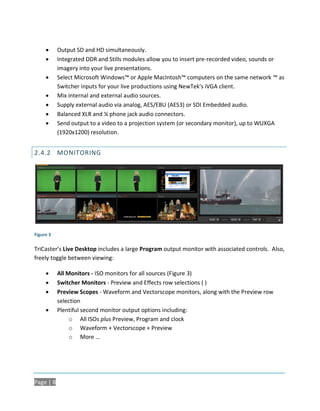
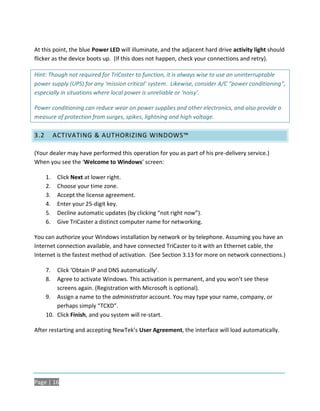
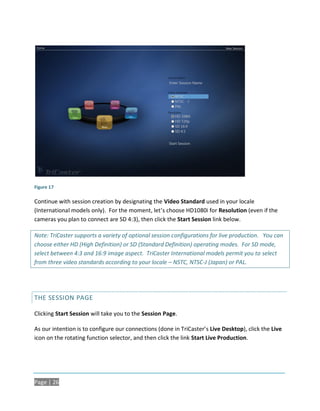
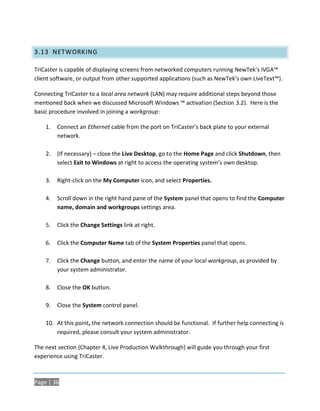
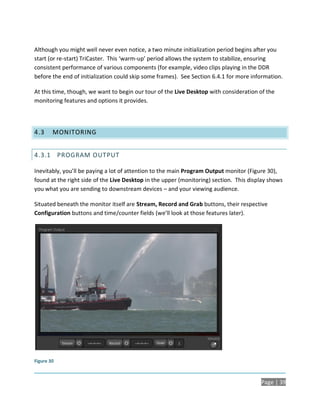
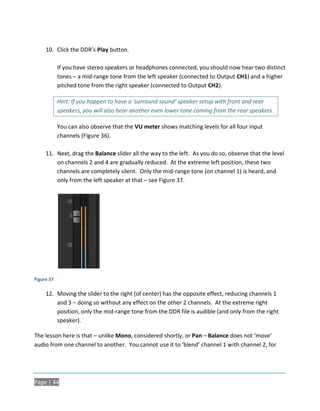
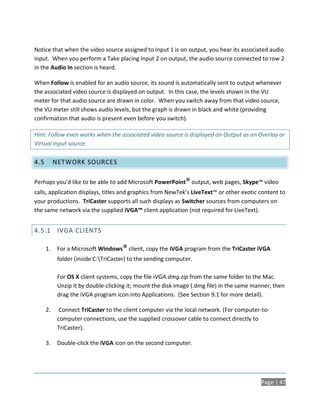
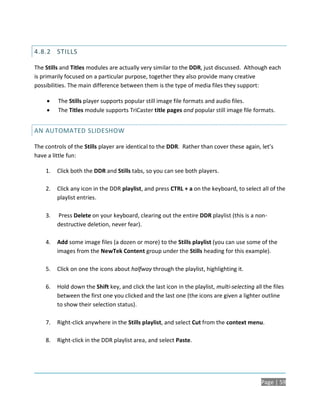
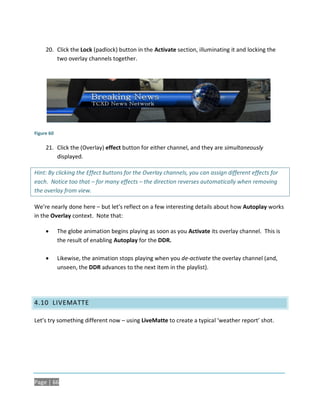
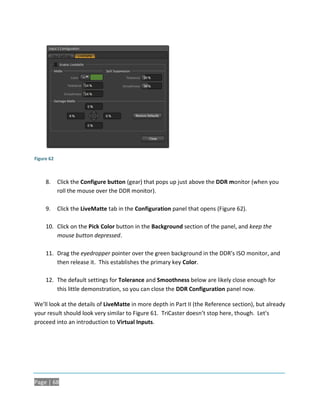
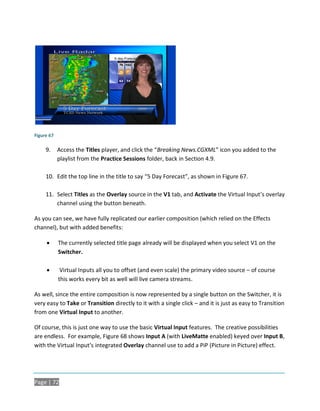
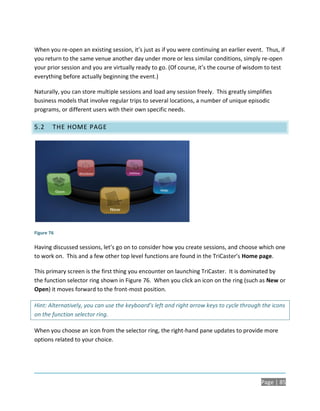
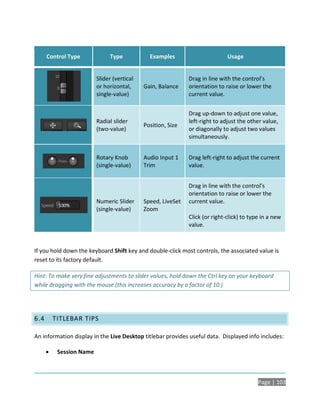
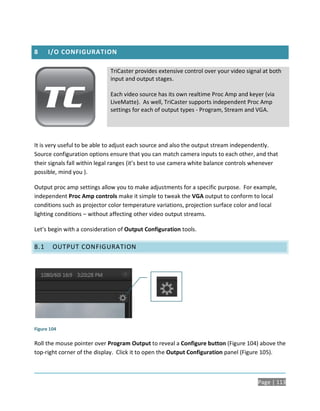
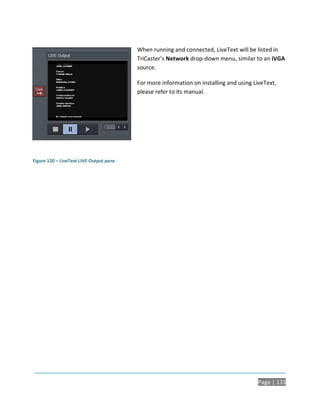
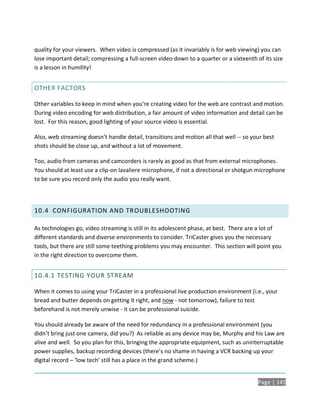
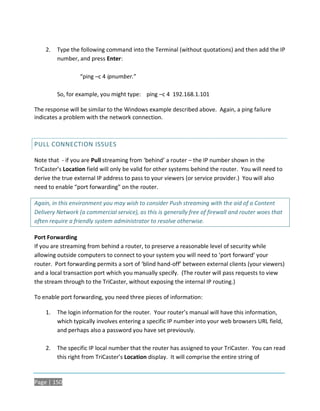
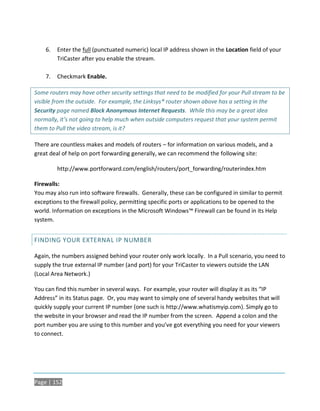
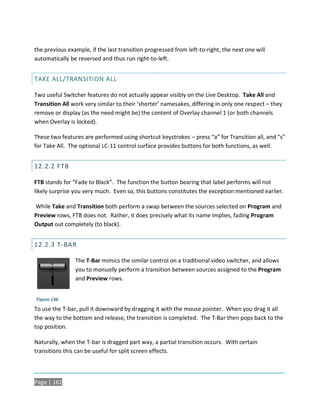
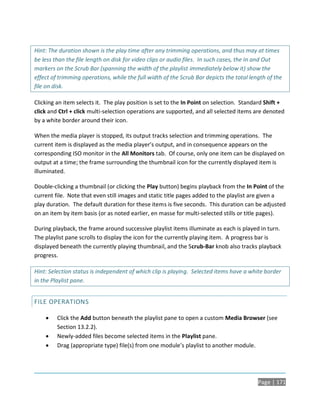
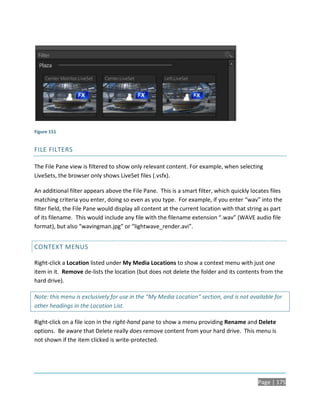
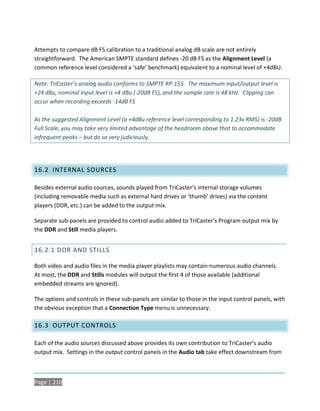
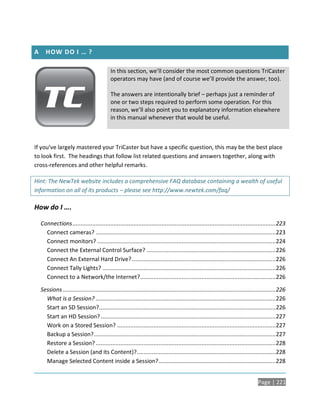
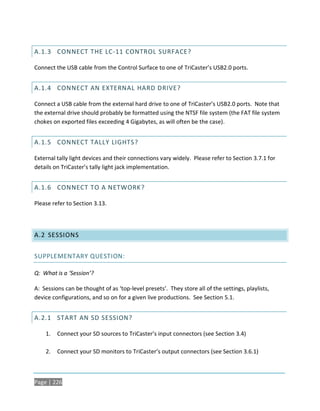
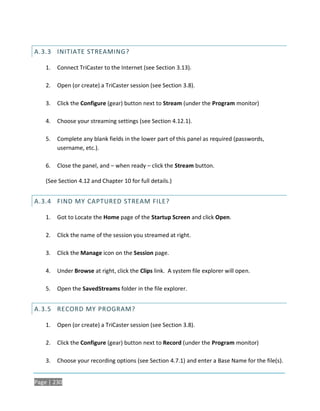
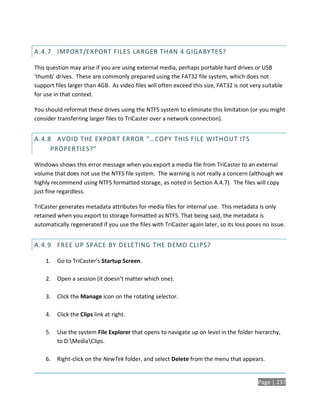
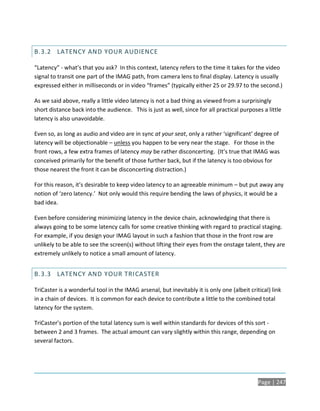
![TRIMMING AND SCRUBBING
Let’s spend a moment learning how to trim a clip in the DDR. To do this you will use tools in the
Scrub Bar immediately beneath the playlist pane (Figure 50).
Figure 50
Drag the Scrub Bar’s square blue knob left or right to change the current play position. Trimming
is accomplished by dragging the start and end points for the clip using the blue ] and [ gadgets at
either end. (The mouse pointer changes to a double-headed arrow when you move it over a trim
control.)
12. Click the first (top-left) clip in the DDR playlist, highlighting it.
13. Drag the trim handles to shorten the clip’s runtime to 10 seconds (watching the
Duration display to the right of the Scrub Bar helps when trimming).
14. Record a few more clips, if you haven’t already done so, and add several to the DDR
playlist (either automatically or by using the Add button).
SINGLE AND AUTOPLAY
Figure 51
15. Click the Single switch (Figure 51).
16. Double-click the first clip in the DDR playlist to play it (double-clicking is another way to
engage Play). With Single mode engaged, playback stops at the end of the current clip.
17. Select Camera 1 on the Switcher’s Preview row.
Page | 56](https://image.slidesharecdn.com/tcxd300manual02-10-10-130210230911-phpapp01/85/Tcxd-300-manual_02-10-10-72-320.jpg)
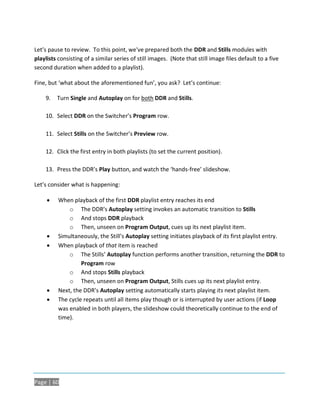
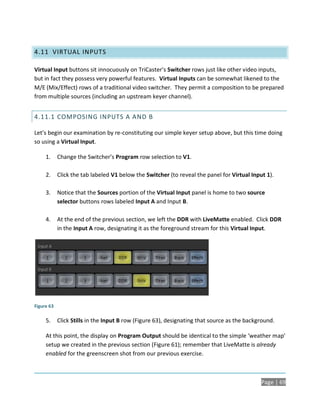
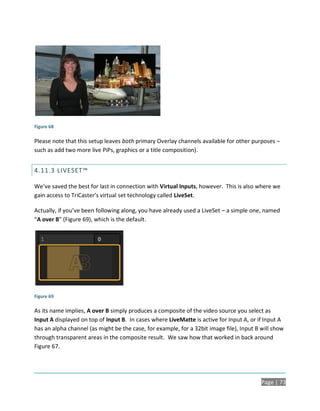


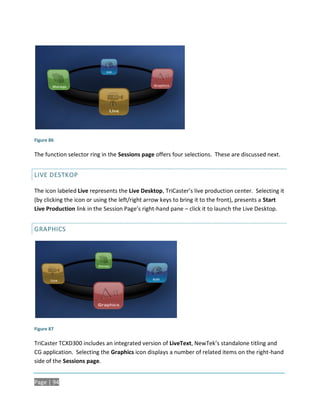
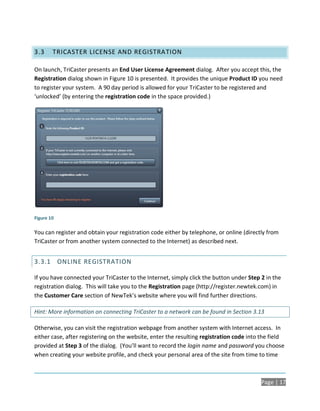
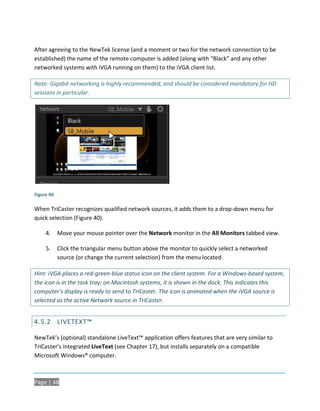
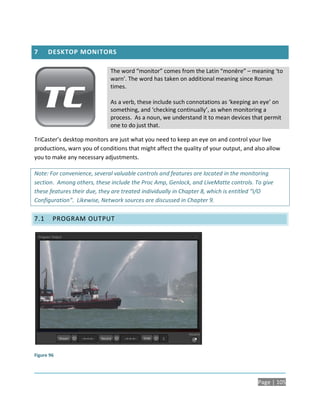
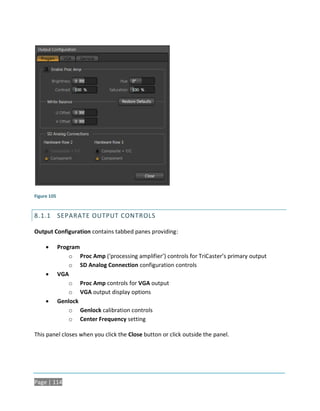
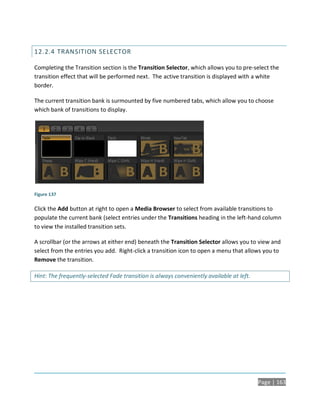
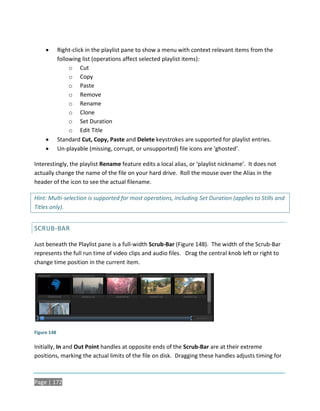
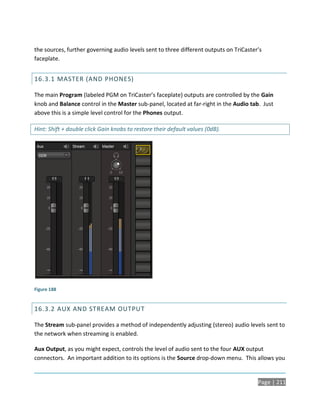
![Figure 88
When you first enter a new session, no LiveText projects are listed in the area under Project
Name. When you have created one or more projects, the name(s) will appear here and, as you
would expect, you can re-open the project by clicking its name.
Note: TriCaster stores new LiveText projects inside a folder named for the current session, as
follows: D:LIVETEXT PROJECTSsessionnameprojectname.cg. LiveText’s internal File menu Save
and SaveAs functions default to the same location.
However, it is possible to use File>SaveAs to store a project in another location outside the session
structure. Be aware that projects stored outside the session structure are not shown in the
project list on the Sessions screen. To re-open them, you’ll need to navigate to the project file
using File>Open in LiveText. Similarly, external projects will not be backed up by the Backup
Session function (or be deleted by the Delete Session function)
To create a new LiveText project, click in the default project name (just above the Start New
Project link) and modify it, then click Start New Project. When you are finished working in
LiveText, clicking the [x] button in its upper-right corner (or selecting Exit in the File menu)
returns you to the Session Page.
Page | 95](https://image.slidesharecdn.com/tcxd300manual02-10-10-130210230911-phpapp01/85/Tcxd-300-manual_02-10-10-111-320.jpg)
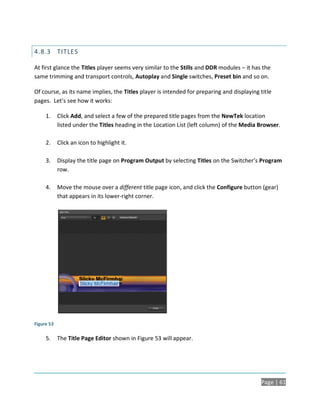
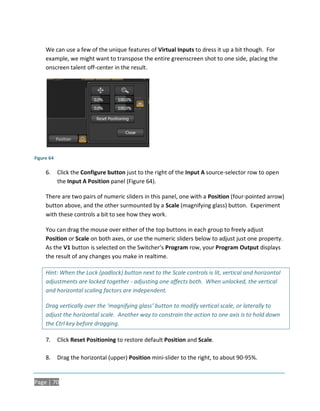
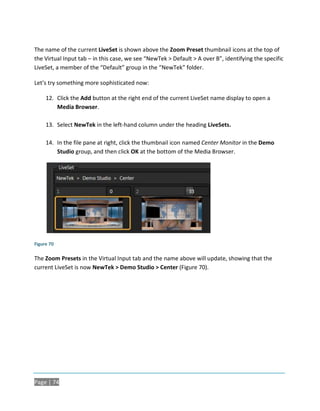
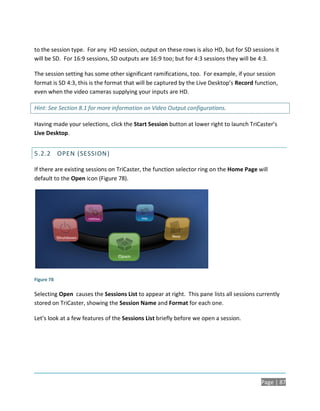
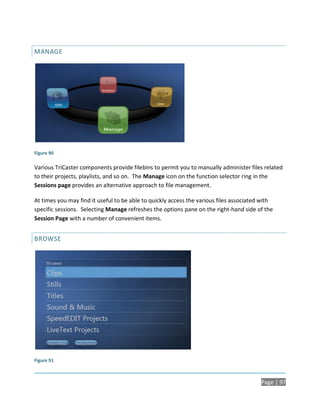
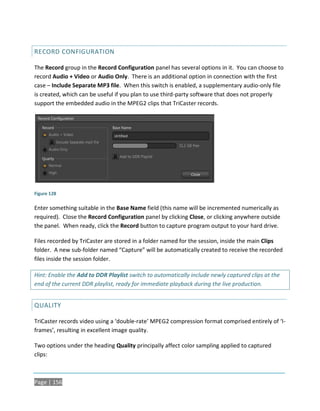
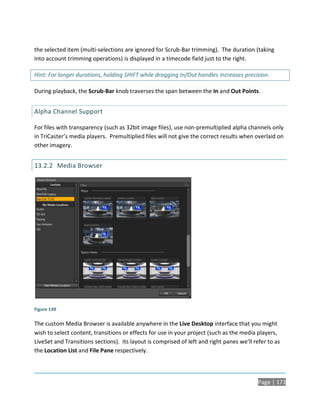
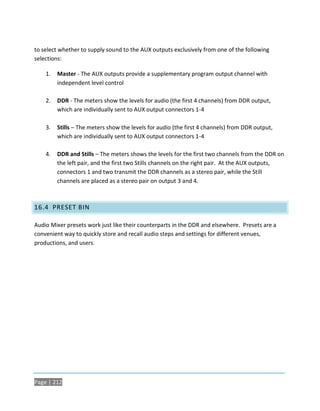
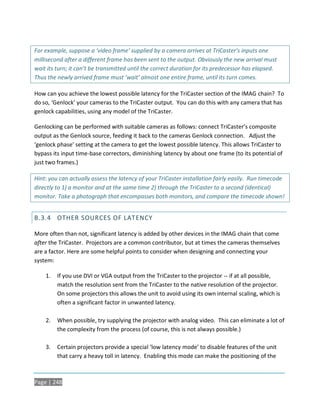
![EDIT
Figure 89
TriCaster includes an integrated version of SpeedEDIT, NewTek’s popular standalone non-linear
video editor. Selecting the Edit icon displays a number of related items on the right-hand side of
the Sessions screen.
When you first enter a new session, no SpeedEDIT projects are listed in the area under Project
Name. When you have created one or more edit projects, the name(s) will appear here and, as
you would expect, you can re-open the project by clicking its name.
Note: TriCaster stores new SpeedEDIT projects inside a folder named for the current session, as
follows: D:SPEEDEDIT PROJECTSsessionnameprojectname.vtp. LiveText’s internal File menu
Save and SaveAs functions default to the same location.
However, it is possible to use File>SaveAs to store a project in another location outside the session
structure. Be aware that projects stored outside the session structure are not shown in the
project list on the Sessions screen. To re-open them, you’ll need to navigate to the project file
using File>Open in SpeedEDIT. Similarly, external projects will not be backed up by the Backup
Session function (or be deleted by the Delete Session function)
To create a new SpeedEDIT project, click in the default project name (just above the Start New
Project link) and modify it, then click Start New Project. When you are finished working in
SpeedEDIT, clicking the [x] button in its upper-right corner (or selecting Close in the File menu)
will bring you back to the Session Page.
Page | 96](https://image.slidesharecdn.com/tcxd300manual02-10-10-130210230911-phpapp01/85/Tcxd-300-manual_02-10-10-112-320.jpg)
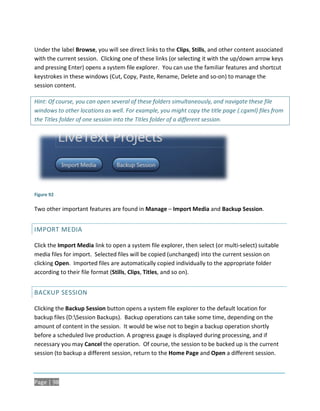

![ Session format
Time of Day (from the system clock)
[x] (Exit button)
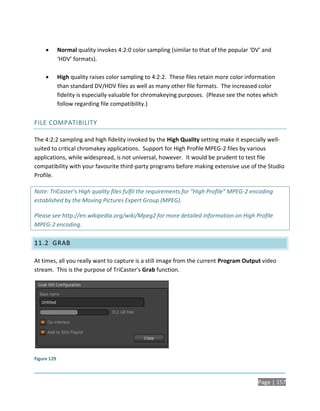
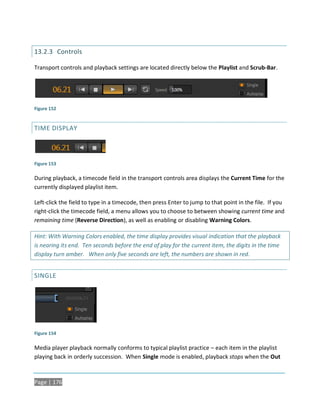
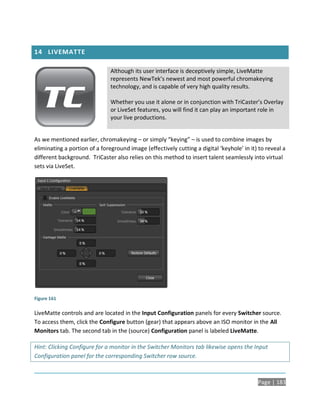
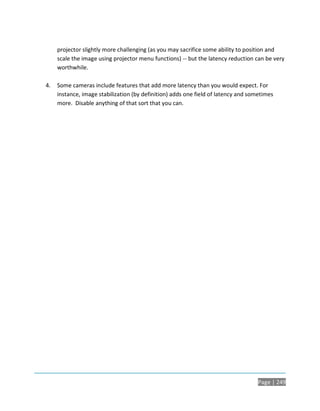
6.4.1 STATUS BAR
An information display is conveniently located below the titlebar, just above the main Program
monitor. From time to time this bar displays information pertaining to operations or system
status, including any cautionary indications.
Figure 94
For example, a brief initialization is required following a system start (or restart) for DDR video
playback to stabilize. During this brief ‘warm-up’ period, an initialization countdown is displayed
(Figure 94) in the Status Bar.
Figure 95
At the end of the countdown, the status line is updated (Figure 95). The display automatically
clears a few moments later, so as not to pose an unnecessary distraction.
Page | 104](https://image.slidesharecdn.com/tcxd300manual02-10-10-130210230911-phpapp01/85/Tcxd-300-manual_02-10-10-120-320.jpg)


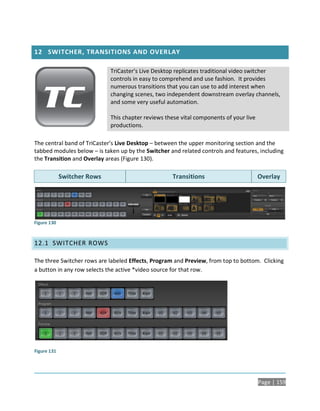
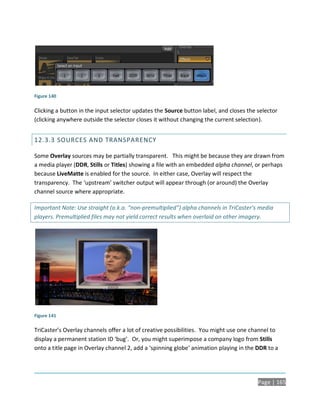
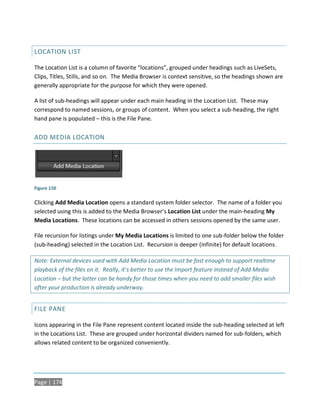
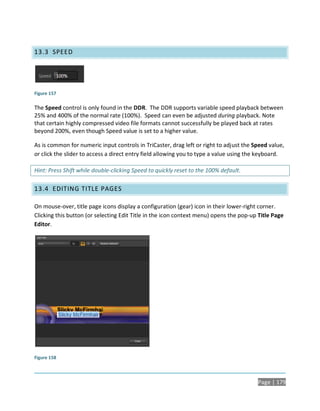
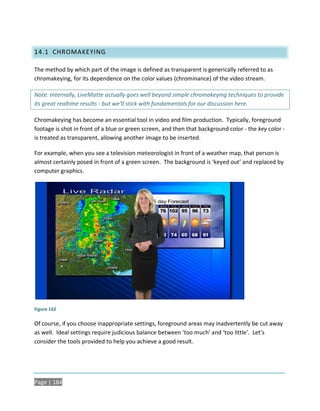
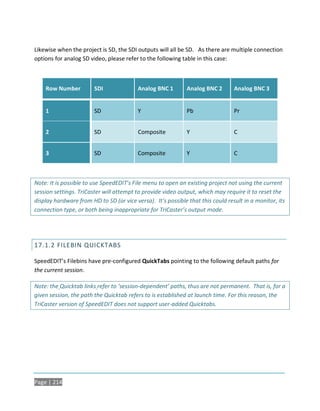
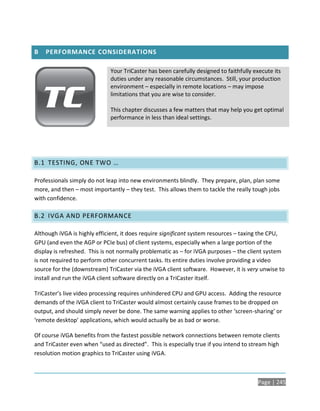
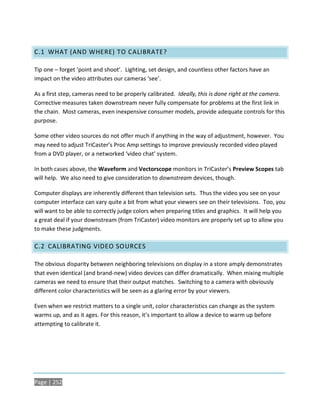
![12.2 TRANSITIONS
Immediately to the right of the Switcher rows is the Transitions section. With just one exception,
this group of controls and settings provide many creative and flexible ways to swap the video
streams selected on the Program row for that selected on the Preview Row.
Figure 133
12.2.1 TAKE AND TRANSITION
The simplest way to accomplish this Program Preview stream swap is to click the Take button
(keyboard shortcut Enter). This performs a straight cut to the Preview source.
Clicking Transition (or pressing the keyboard Spacebar) performs the same source swap, but
does so using the digital video effect selected in the Transition Bin - whether a simple Fade
between sources, or something more elaborate. The time it
takes for the transition is determined by the [F], [M], and [S]
(Fast, Medium, and Slow) buttons. These correspond to two,
one and one half seconds. Alternatively, you can drag left or Figure 134
right on the nearby numeric slider to set a different transition
time (click the time slider to enable direct keyboard entry of the duration for transitions).
Clicking Reverse causes transitions to be performed in the opposite direction. For example, a
transition that normally reveals the incoming video stream from left-to-right will operate from
right-to-left instead. The small button immediately to the left of Reverse is
Ping Pong (shown illuminated in Figure 135). When Ping Pong is enabled, the
Figure 135 Reverse button is toggled on or off each time a transition is performed. Using
Page | 161](https://image.slidesharecdn.com/tcxd300manual02-10-10-130210230911-phpapp01/85/Tcxd-300-manual_02-10-10-177-320.jpg)


![17.1.3 IEEE1394 I/O OUTPUT
The realtime IEE1394 (DV/HDV) preview found in SpeedEDIT standalone is not supported for
TriCaster, which has other (superior) video display options. However, the File menu point Send
to DV Tape (and the similar icon context menu in the Filebin) is available.
Hint: SpeedEDIT’s Output menu is not required in TriCaster for this reason.
17.1.4 SPEEDDIT DESKTOP
TriCaster launches SpeedEDIT on a desktop of its own, spanning all connected monitors. You can
exit SpeedEDIT by clicking the [x] button in the upper-right corner of the desktop, or by using the
File men item Close.
If you have a secondary monitor connected to TriCaster, you can drag SpeedEDIT’s Video Output
window (opened from the Window menu) onto that screen, then maximize it by double-clicking
inside the preview area (double-clicking a second time restores the standard floating window).
Similarly, you might find it convenient to maximize the SpeedEDIT window to fill the primary
monitor display. To do this, double-click the window border. In this configuration, the Desktop
exit button is not available, but you can exit the application using the File menu’s Close item.
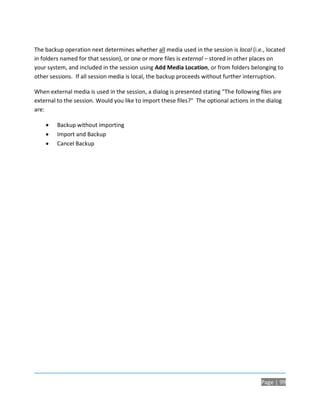
17.2 LIVETEXT
LiveText projects are launched from the Session Page in TriCaster’s Startup Screen. After
creating a new session or opening an existing one, click the Graphics icon on the rotating
function selector ring (see Section 5.3). This reveals options and links at right, discussed
previously in the Startup Screen chapter just mentioned.
17.2.1 SESSIONS, PROJECTS AND DISPLAY
LiveText uses the current session settings for output to TCXD300 video outputs, new projects
(created within the LiveText File menu or from the Session Page) and bitmap file exports. If you
use the File menu to Open a project whose settings do not correspond to the current session
settings, TriCaster will attempt to display it on its hardware video outputs, if possible.
Page | 215](https://image.slidesharecdn.com/tcxd300manual02-10-10-130210230911-phpapp01/85/Tcxd-300-manual_02-10-10-231-320.jpg)


![A.2.8 RENAME A SESSION ?
1. Right-click the name of the session you want to rename in the Home page of the
Startup Screen.
2. Choose Rename from the menu that appears.
A.2.9 DUPLICATE A SESSION.
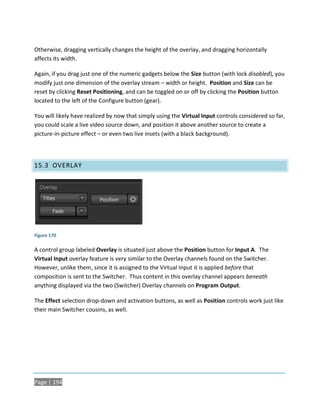
It can be very useful to make a copy of a session. For example, it might often take less time to
modify a copy of an existing session than to configure an entirely new one.
1. Backup a session (to the d: drive if you have space) – see Section A.2.4.
2. Rename the current session – see Section A.2.8 .
3. Restore the backed up session – see Section A.2.5.
A.3 LIVE PRODUCTION
A.3.1 MAKE CUSTOM TRANSITI ONS AND LIVESETS?
At the time of writing, user-friendly tools for creating custom transitions and/or LiveSets for
TriCaster have not yet been released.
A.3.2 RESTORE THE DEFAULT LIVESET?
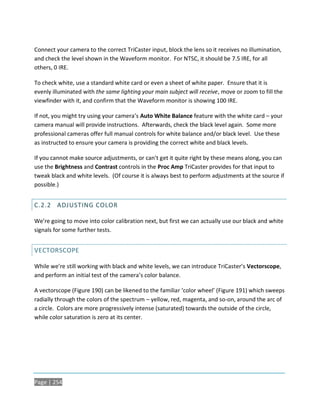
1. Click the ellipsis button [...] to the right of the current LiveSet name to open the LiveSet
Browser.
2. Click the NewTek heading beneath the LiveSets heading in the locations list at left.
3. Click the A over B in the Default group in the file pane at right. (See Section 15.4.1.)
Page | 229](https://image.slidesharecdn.com/tcxd300manual02-10-10-130210230911-phpapp01/85/Tcxd-300-manual_02-10-10-245-320.jpg)


![5. Enter the Registration Code provided into the Registration dialog at Step 3
(Please see Section 3.3 for more detail.)
A.6.2 CONTACT TECHNICAL SUPPORT?
Visit the NewTek Website, at www.newtek.com and select Technical Support from the main
Customer Care menu at the top of the page. This page always contains the latest support
information for your NewTek products, including FAQs for all products. It also lists the Technical
Support Department’s hours of operation and contact details.
A.6.3 FIND TRICASTER’S HARDWARE/FIRMWARE REVISION NUMBERS?
Click the About icon in the Startup Screen’s Home page. Doing this opens an information panel
that lists significant version numbers (at the bottom).
A.6.4 SAVE THE DEBUG LOG?
Click the Utilities icon in the Startup Screen’s Home page, and select the link labelled Save Debug
Log. This allows you to specify a location where a file containing the debugger output from the
most recent TriCaster session will be saved. (This information may help diagnose any
unexpected issues you encounter.)
A.7 MISCELLANEOUS
A.7.1 ACCESS WINDOWS™?
1. If necessary, close the Live Desktop by clicking the [x] button at the right-hand end of
the titlebar.
2. Click the Shutdown icon on the Home page of the Startup Screen.
3. Click the Exit to Windows link at right.
Page | 241](https://image.slidesharecdn.com/tcxd300manual02-10-10-130210230911-phpapp01/85/Tcxd-300-manual_02-10-10-257-320.jpg)


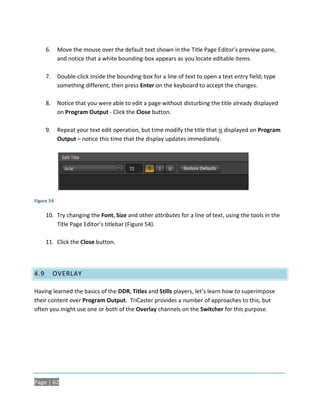
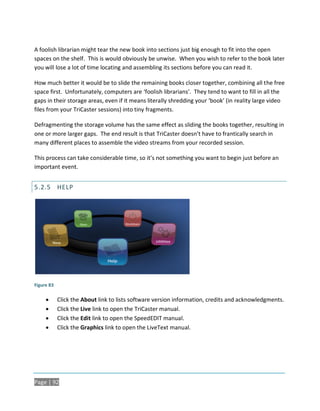
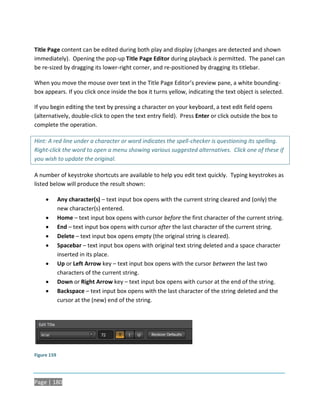
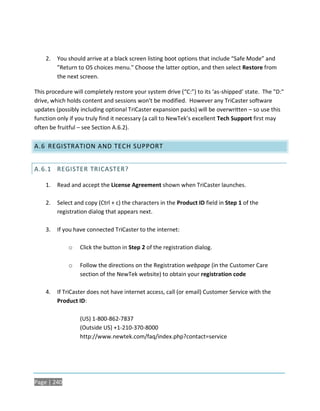
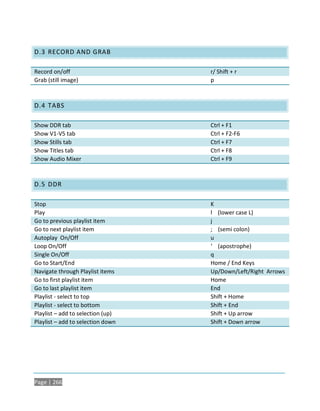
![D KEYSTROKE SHORTCUTS
D.1 SWITCHER…
Live Row, Inputs 1 to 13 F1 – F12 plus [Shift + F12]
Preview Row, Inputs 1 to 13 1 – 0 (plus - and = and )
Effects Row, Inputs 1 to 8 Alt + 1 – Alt + 8
Transition Overlay 1 On/Off f
Transition Overlay 2 On/Off Shift + f
Take Overlay 1 On/Off d
Take Overlay 2 On/Off Shift + d
Overlay Channel Lock On/Off Shift+ (i.e., ‘pipe’, | )
Transition All (using Switcher Transitions and Overlay Effects) a
Take All (Overlay ignores current Effects) s
Fade to Black Backspace, or Ctrl + b
Select Transition (prev/next) , and .
Select Fade Transition Ctrl + f
Restore Last Transition Shift + Ctrl + f
Transition – Fast … Medium … Slow z…x… c
Transition – Increase Speed Shift + z
Transition – Decrease Speed Shift + c
Toggle Reverse Transition On/Off e
Ping Pong Transition (off/on) Alt + e
D.2 T-BAR
Take Return Key
Take T-Bar Back to Top Shift + Return
Transition … Go/Pause. Spacebar
Auto Reverse Shift + Spacebar
Adjust T-Bar… Down/Up t / Shift + t (faster add Alt)
Halfway T-Bar… Take h
Page | 265](https://image.slidesharecdn.com/tcxd300manual02-10-10-130210230911-phpapp01/85/Tcxd-300-manual_02-10-10-281-320.jpg)

![CREDITS
Acknowledgments: Tim Jenison, Jim Plant
Engineering: Andrew Cross, Kevin Rouviere, Nathan Kovner, James Killian, Kirk Morger, Brian
Brice, Kevin Nations, Jeremy Wiseman, Masaaki Konno, John Perkins, Mike Watkins, Kenneth
Long, Bennie Pierce, Cary Tetrick, Alvaro Suarez, Steve Bowie, Charles Steinkuehler, Menghua
Wang, Shawn Wisniewski, Bob Peene, Greg Heine, Dan Fletcher, Anthony Louviere
Additional thanks to: NewTek Marketing
NewTek Content Development
NewTek Technical Support
NewTek Customer Service
NewTek Sales
This product uses the FreeImage library. This is licensed under the LGPL license (see link below). For the source, and the
ability to change and recompile this component, please visit : http://freeimage.sourceforge.net/
This product uses the LAME library. This is licensed under the LGPL license (see link below). For the source, and the ability
to change and recompile this component, please visit : http://lame.sourceforge.net/
This product uses the FFMPEG library. This is licensed under the LGPL license (see link below). For the source, and the
ability to change and recompile this component, please visit : http://ffmpeg.org/
For a copy of the LGPL licence, please look in the folder c:TriCasterLGPL
Portions use Microsoft Windows Media Technologies. Copyright (c)1999-2008 Microsoft Corporation. All Rights reserved.
VST PlugIn Spec. by Steinberg Media Technologies GmbH.
TriCaster TCXD300, TriCaster DUO, TriCaster, TriCaster PRO, TriCaster PRO FX, TriCaster STUDIO, TriCaster BROADCAST,
3Play, SpeedEDIT, DataLink, LiveText, LiveControl, VT, VT[3], VT[4], VT[5], Video Toaster, Toaster, Inspire 3D, 3D Arsenal
and Aura are trademarks of NEWTEK. LightWave and LightWave 3D are registered trademarks of NEWTEK. All other
brand names, product names, or trademarks belong to their respective holders.
(c) NewTek 1990-2010, All Rights Reserved](https://image.slidesharecdn.com/tcxd300manual02-10-10-130210230911-phpapp01/85/Tcxd-300-manual_02-10-10-289-320.jpg)