Download to read offline

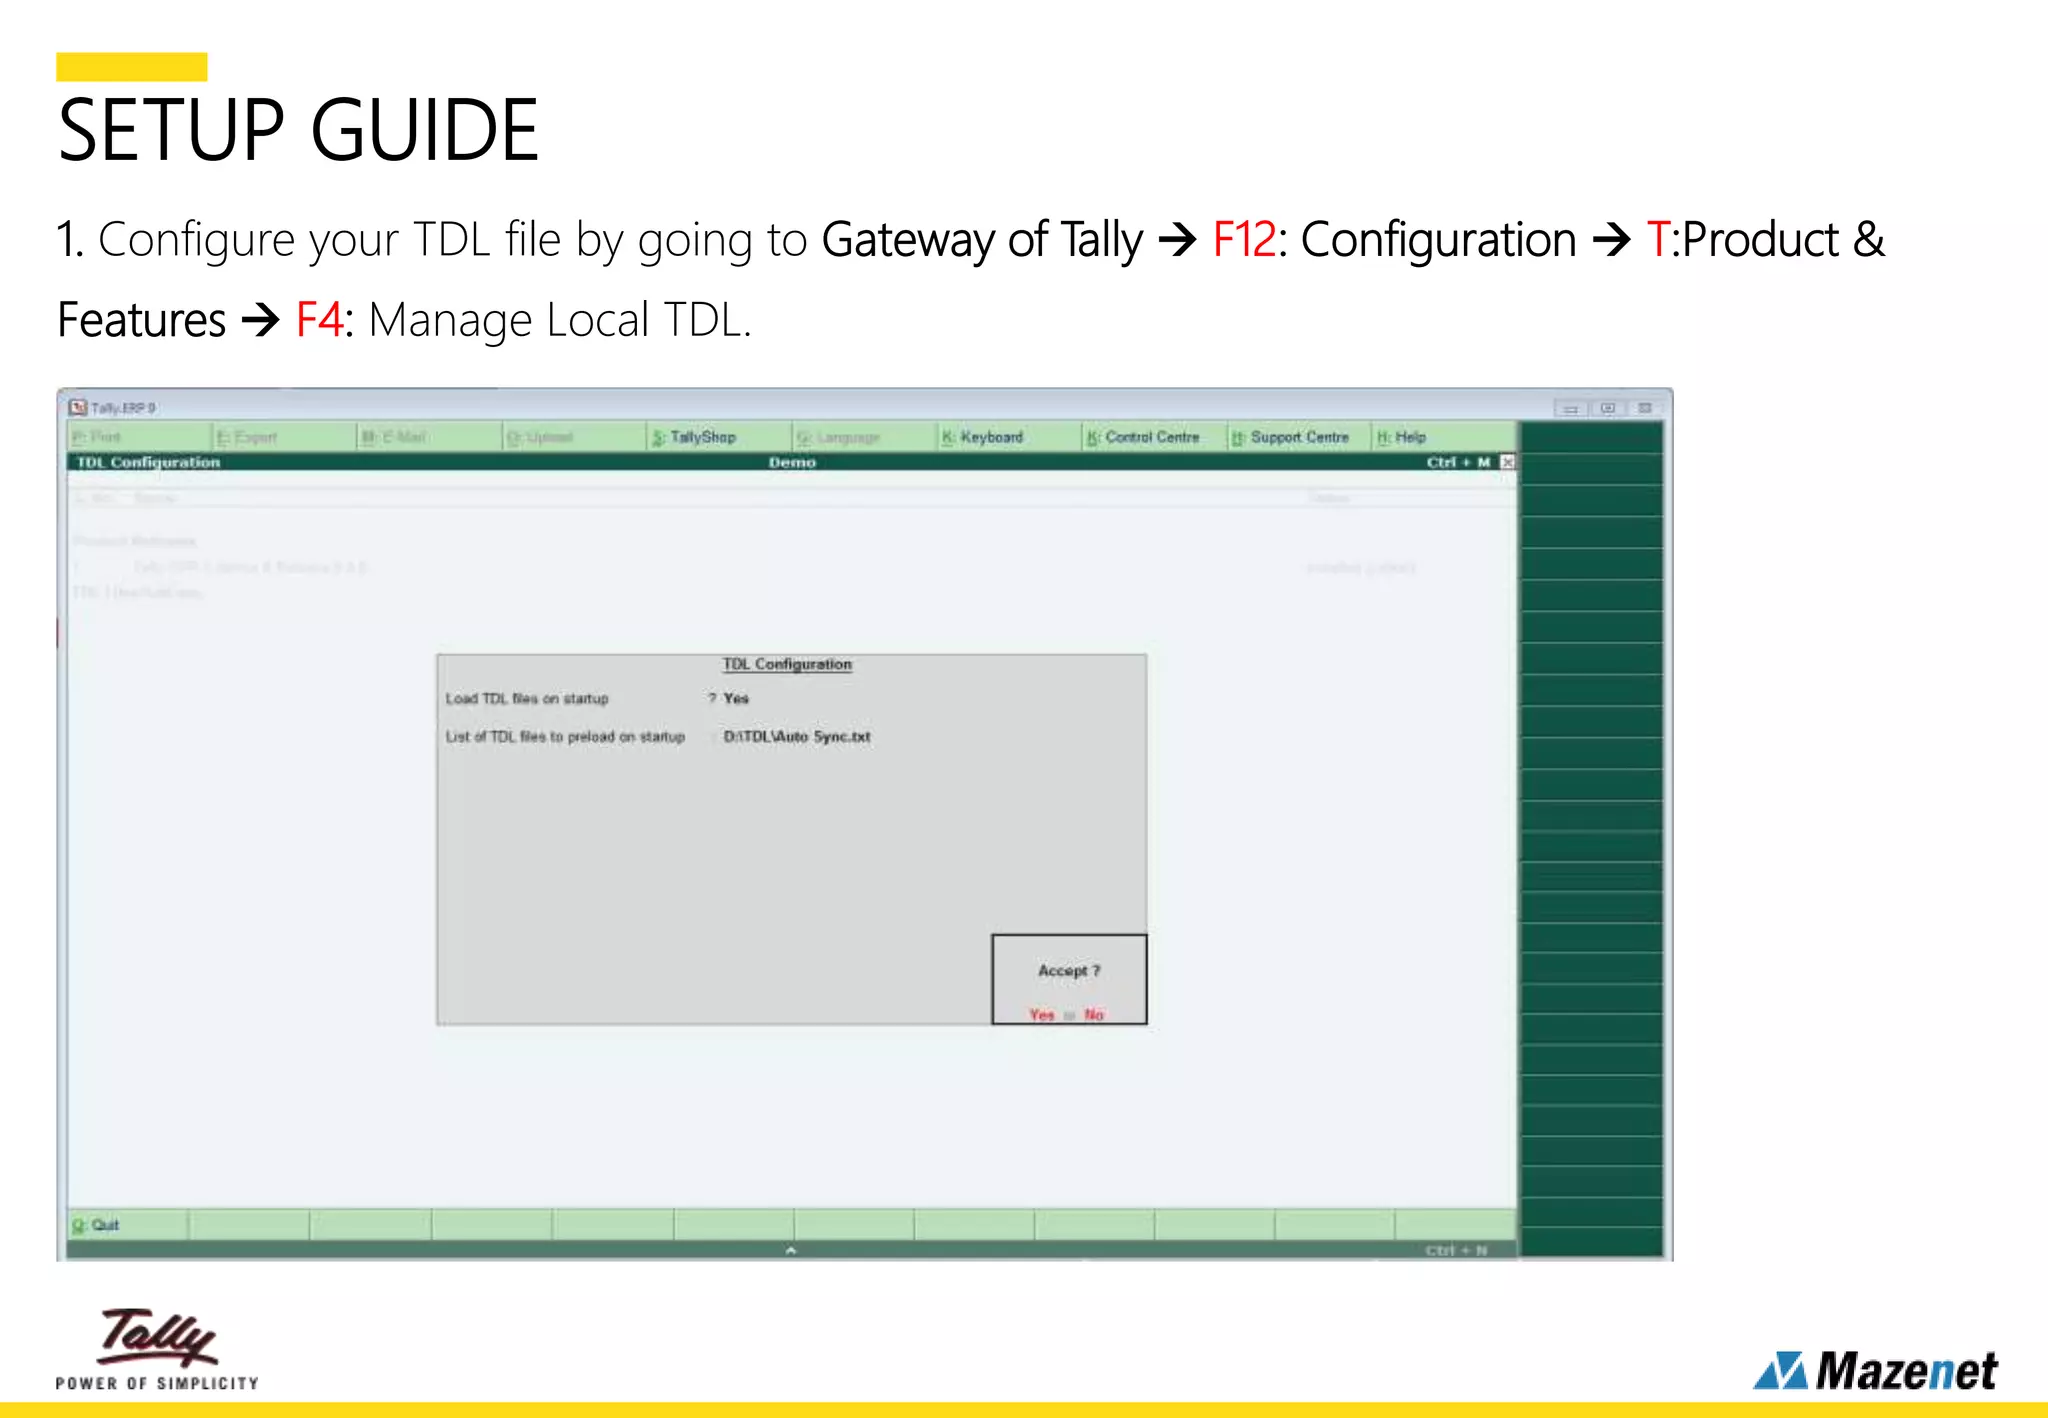
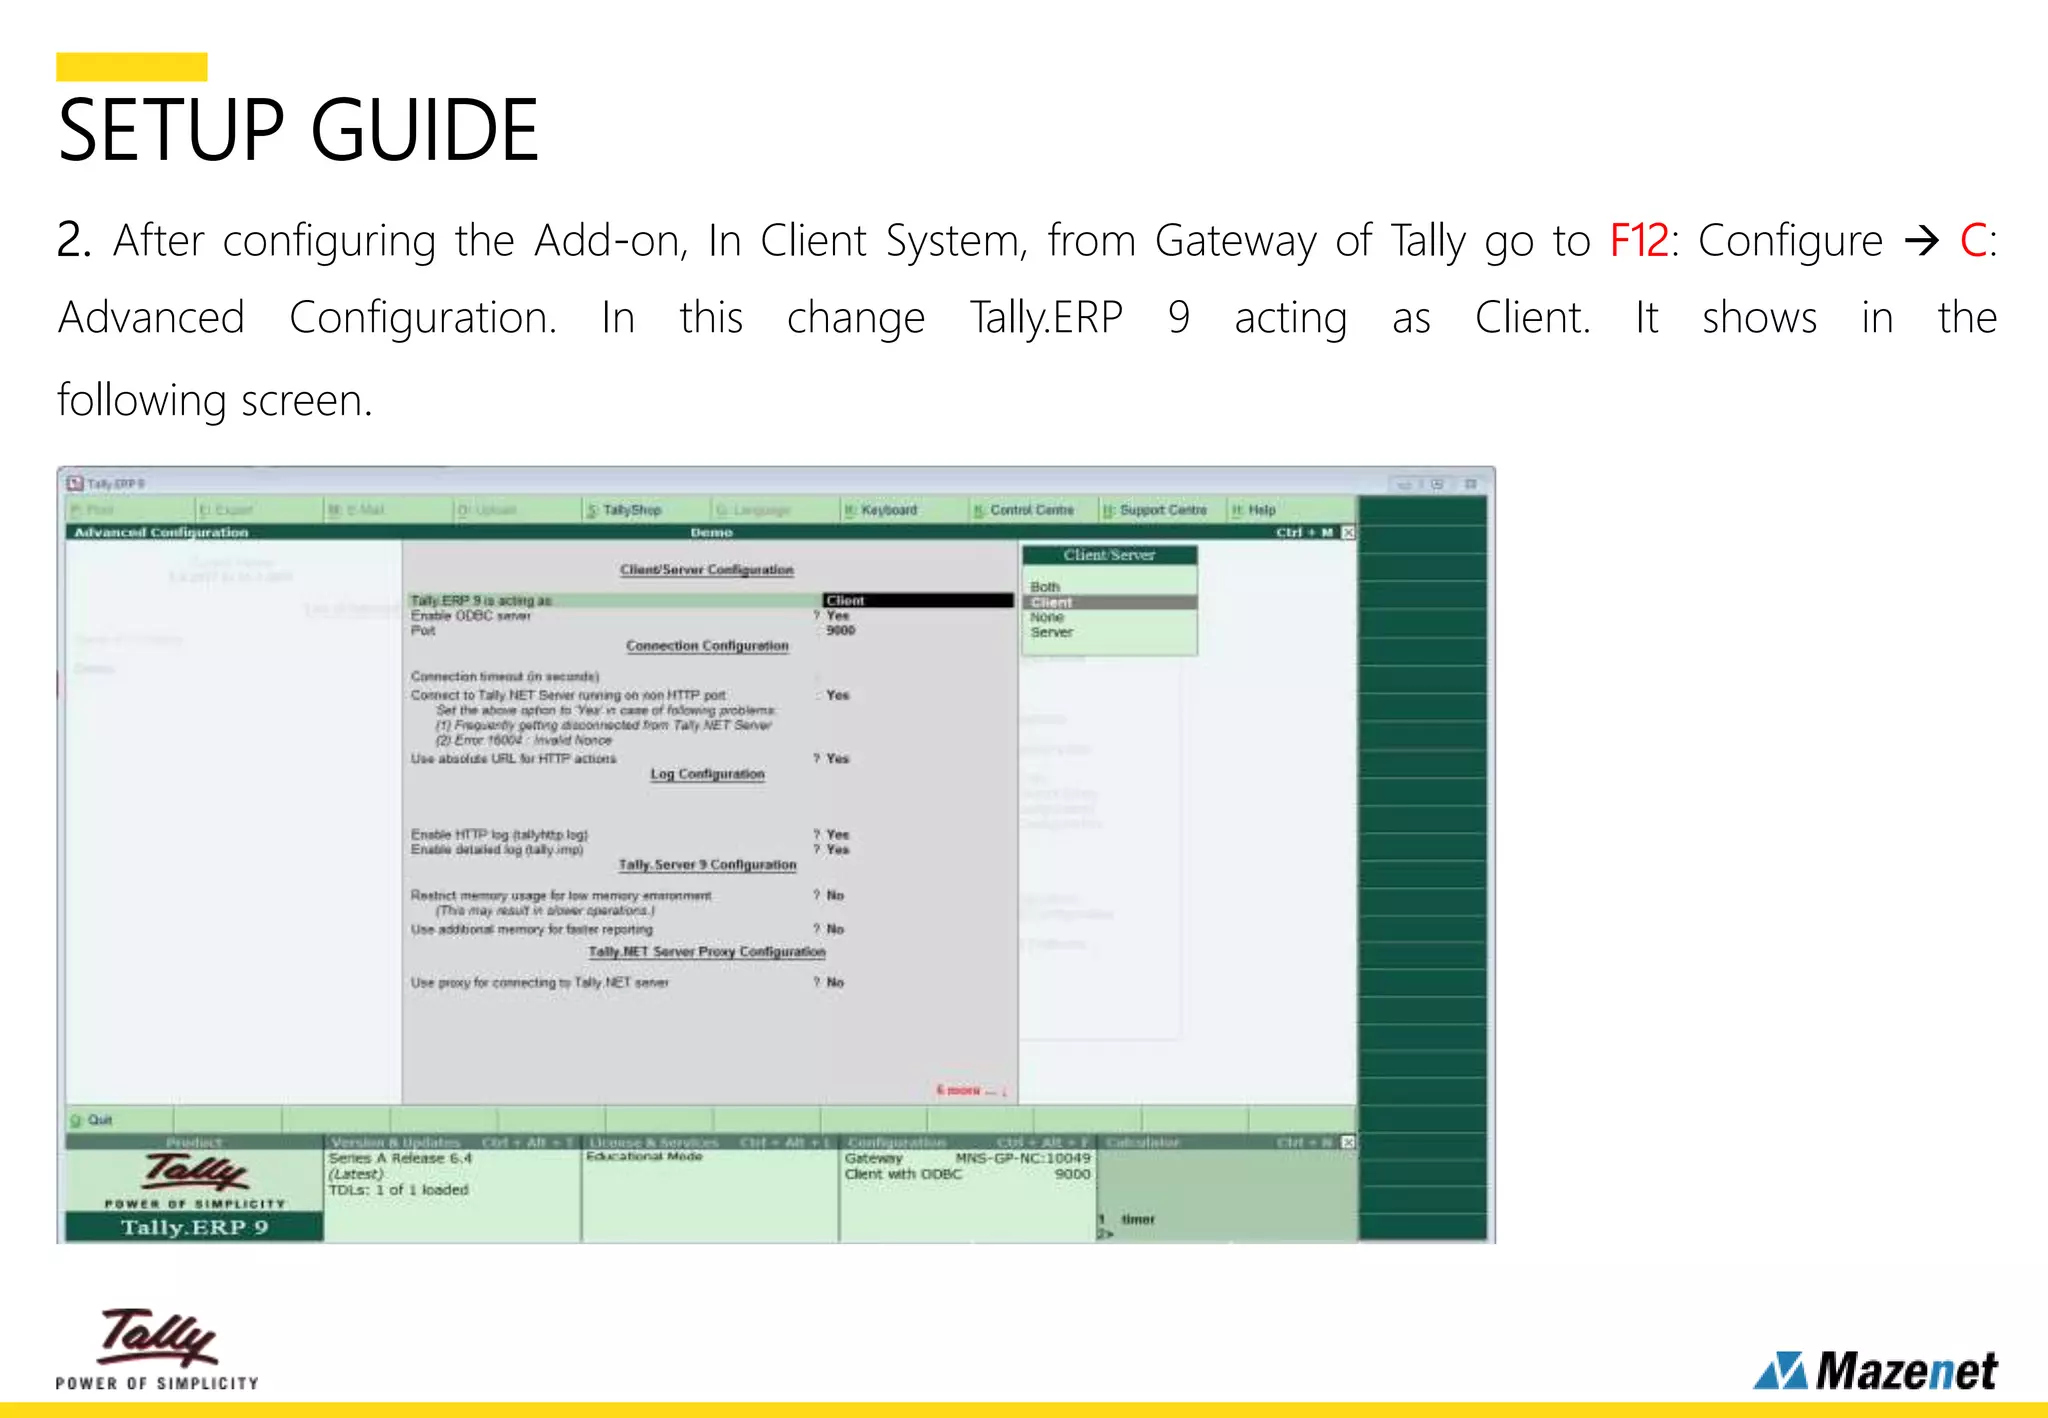
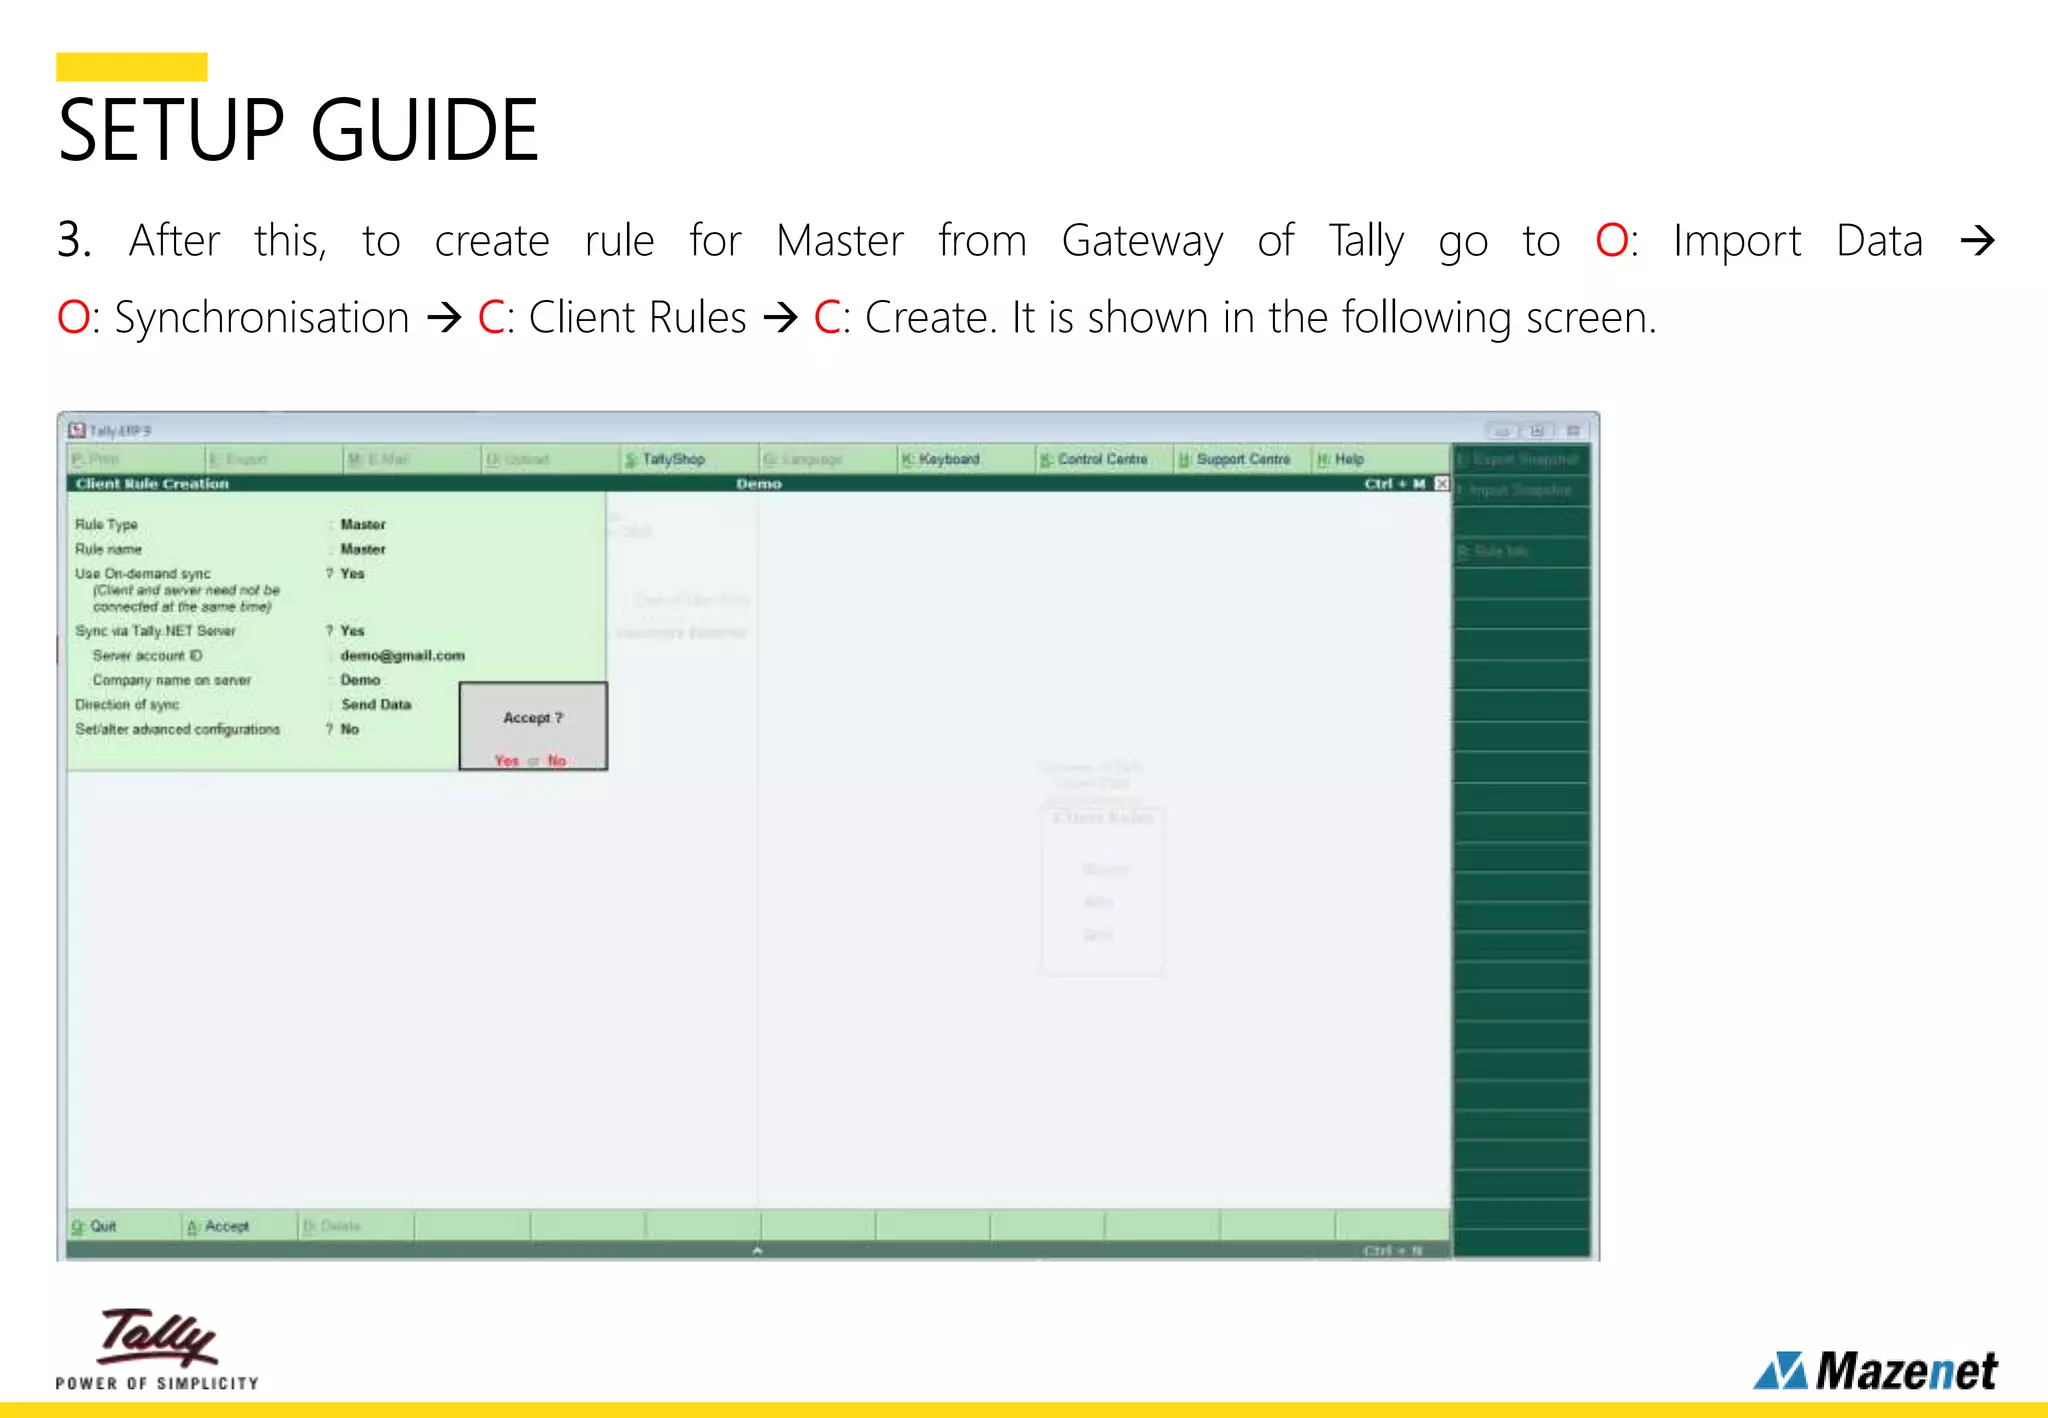
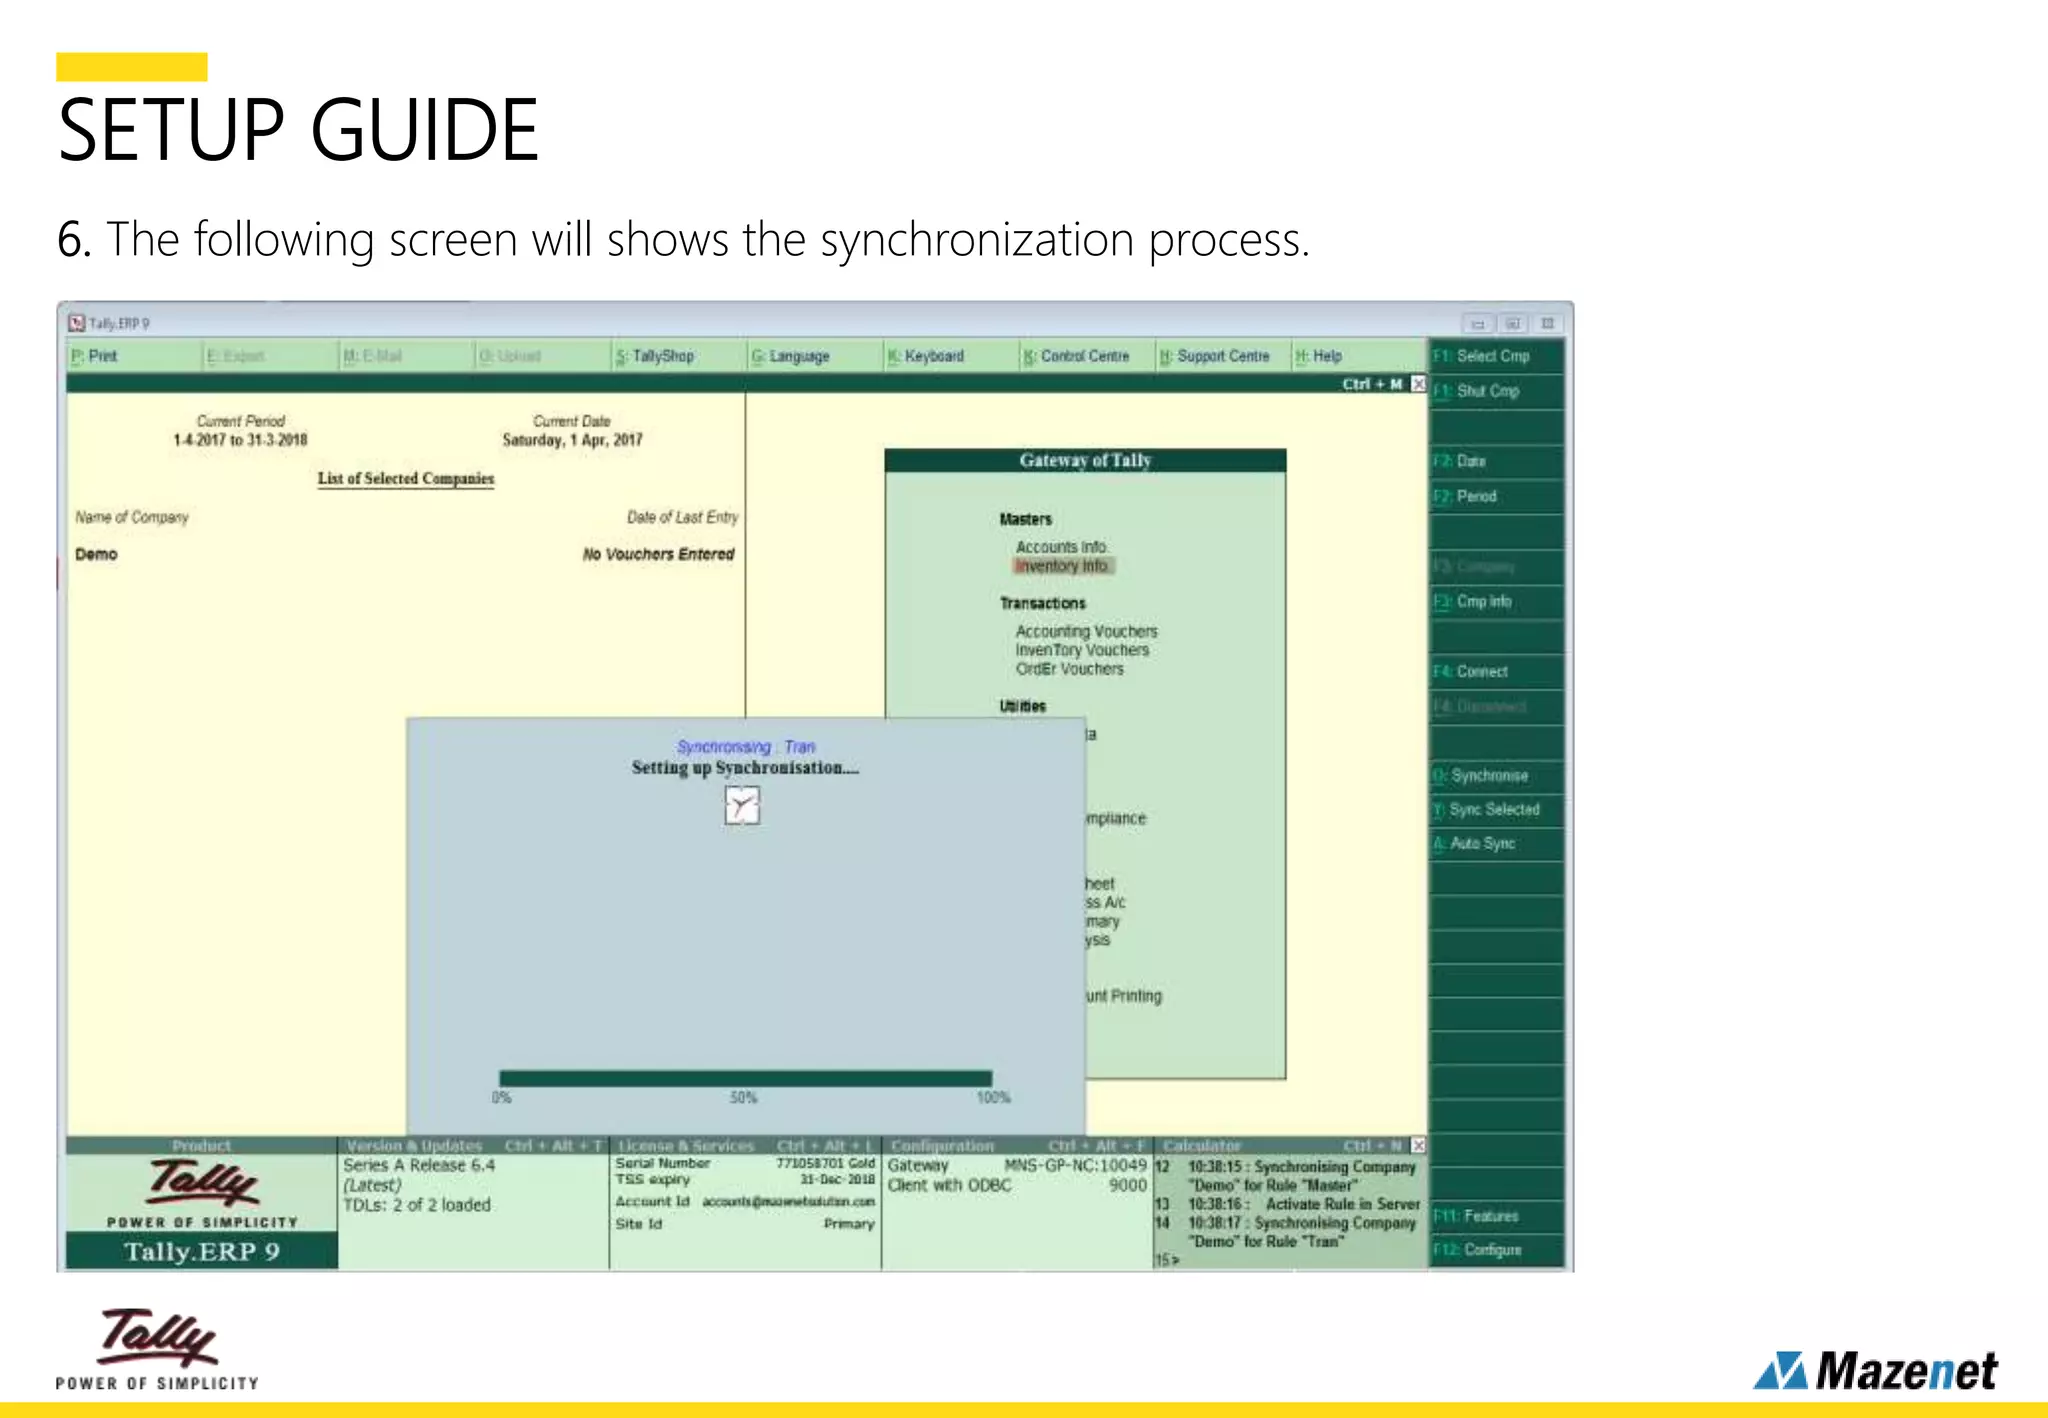
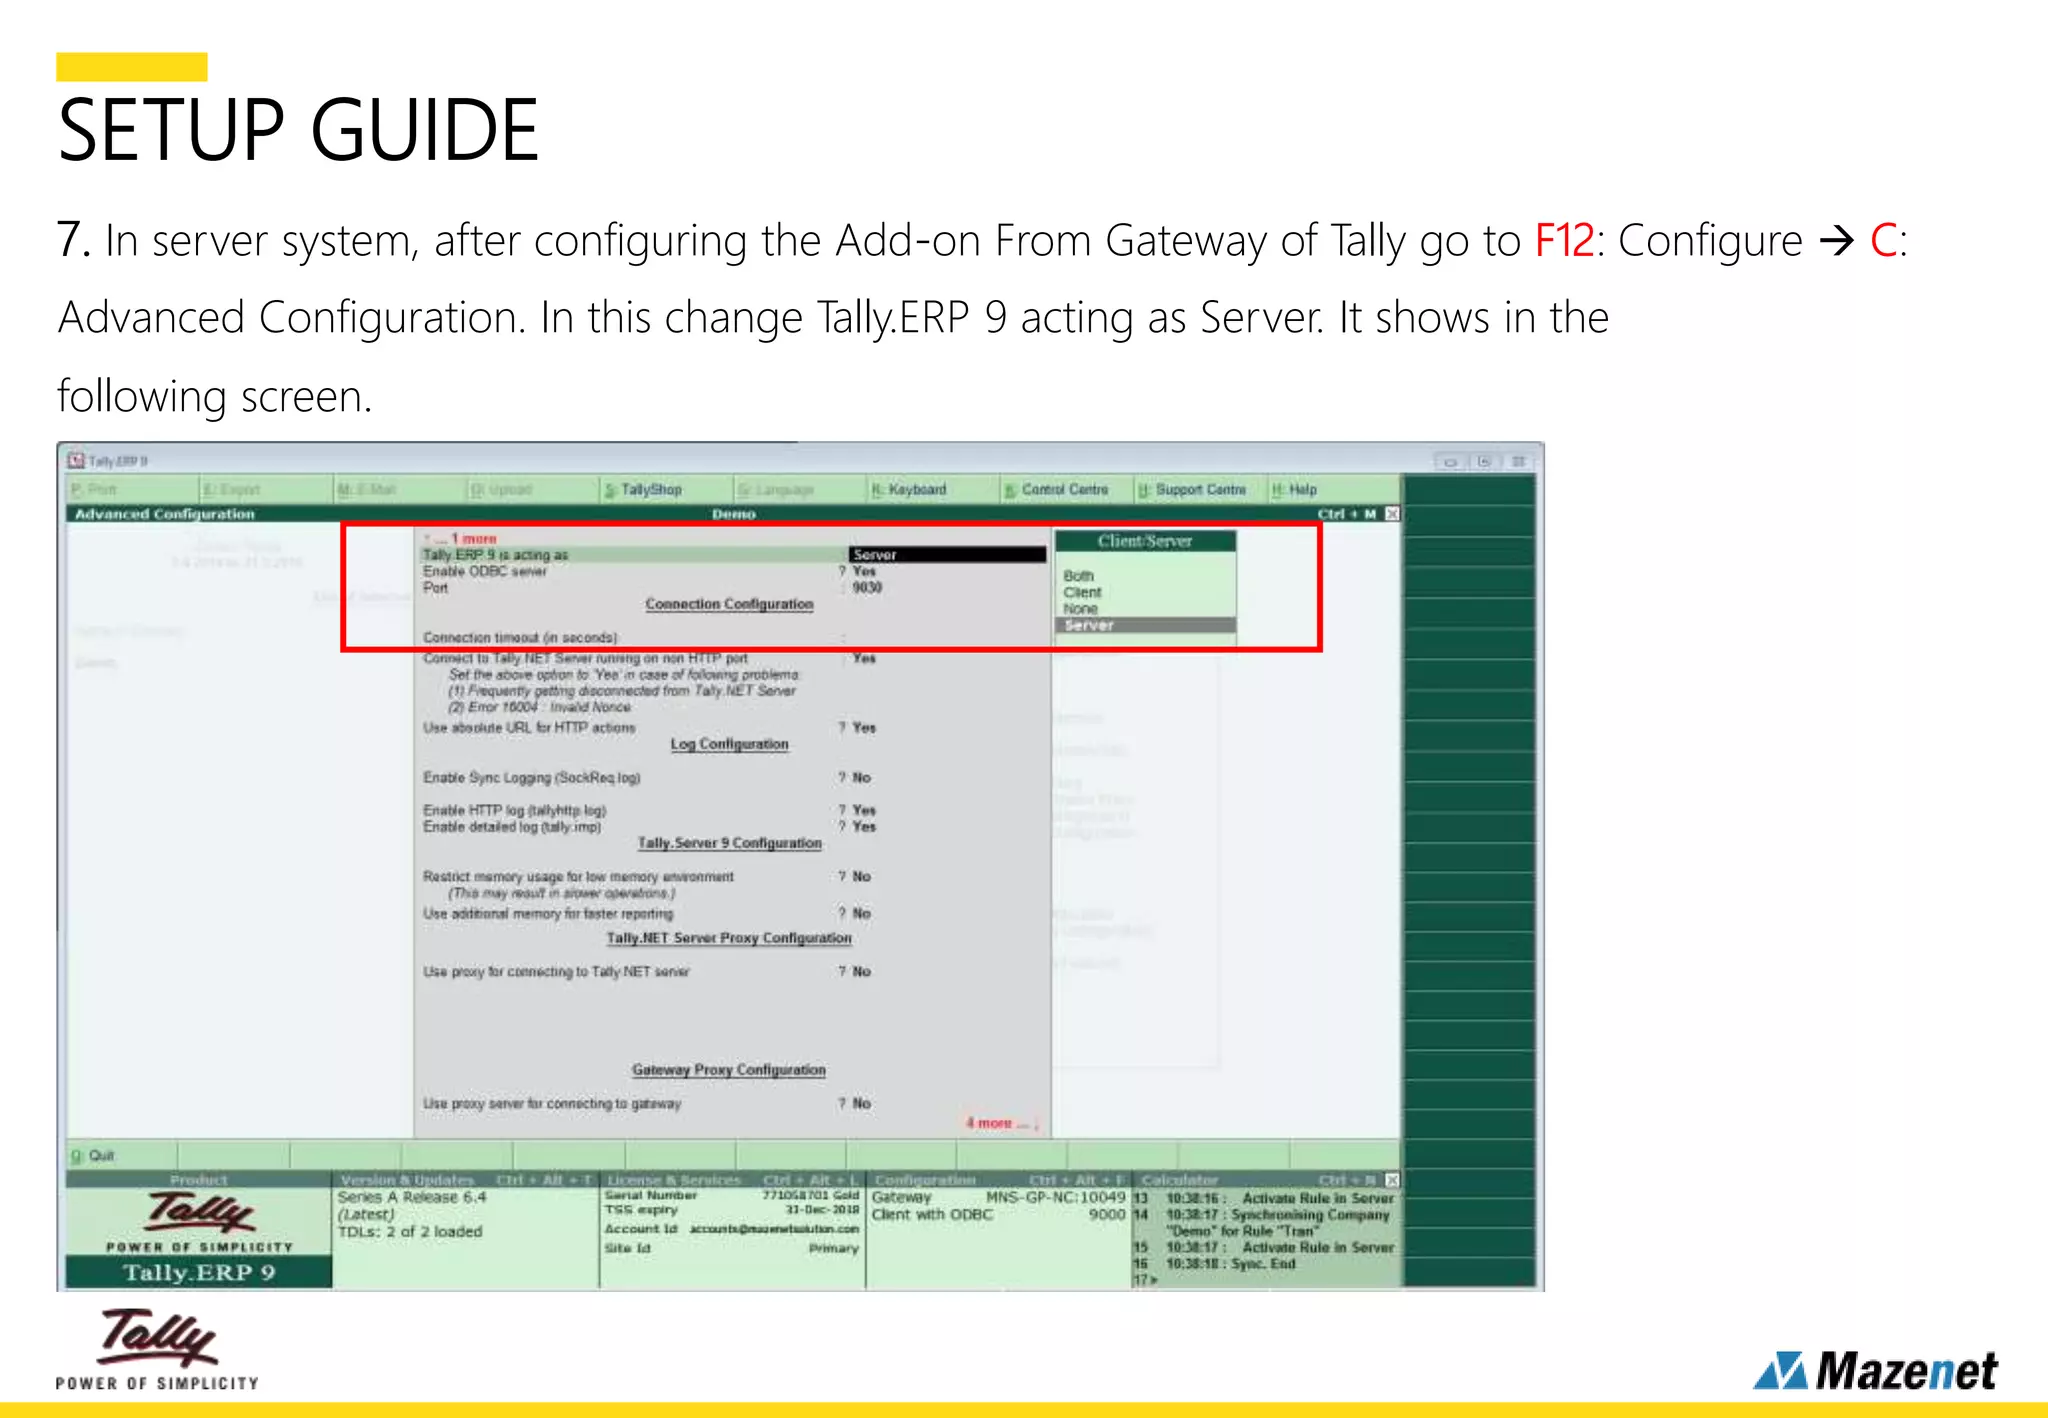
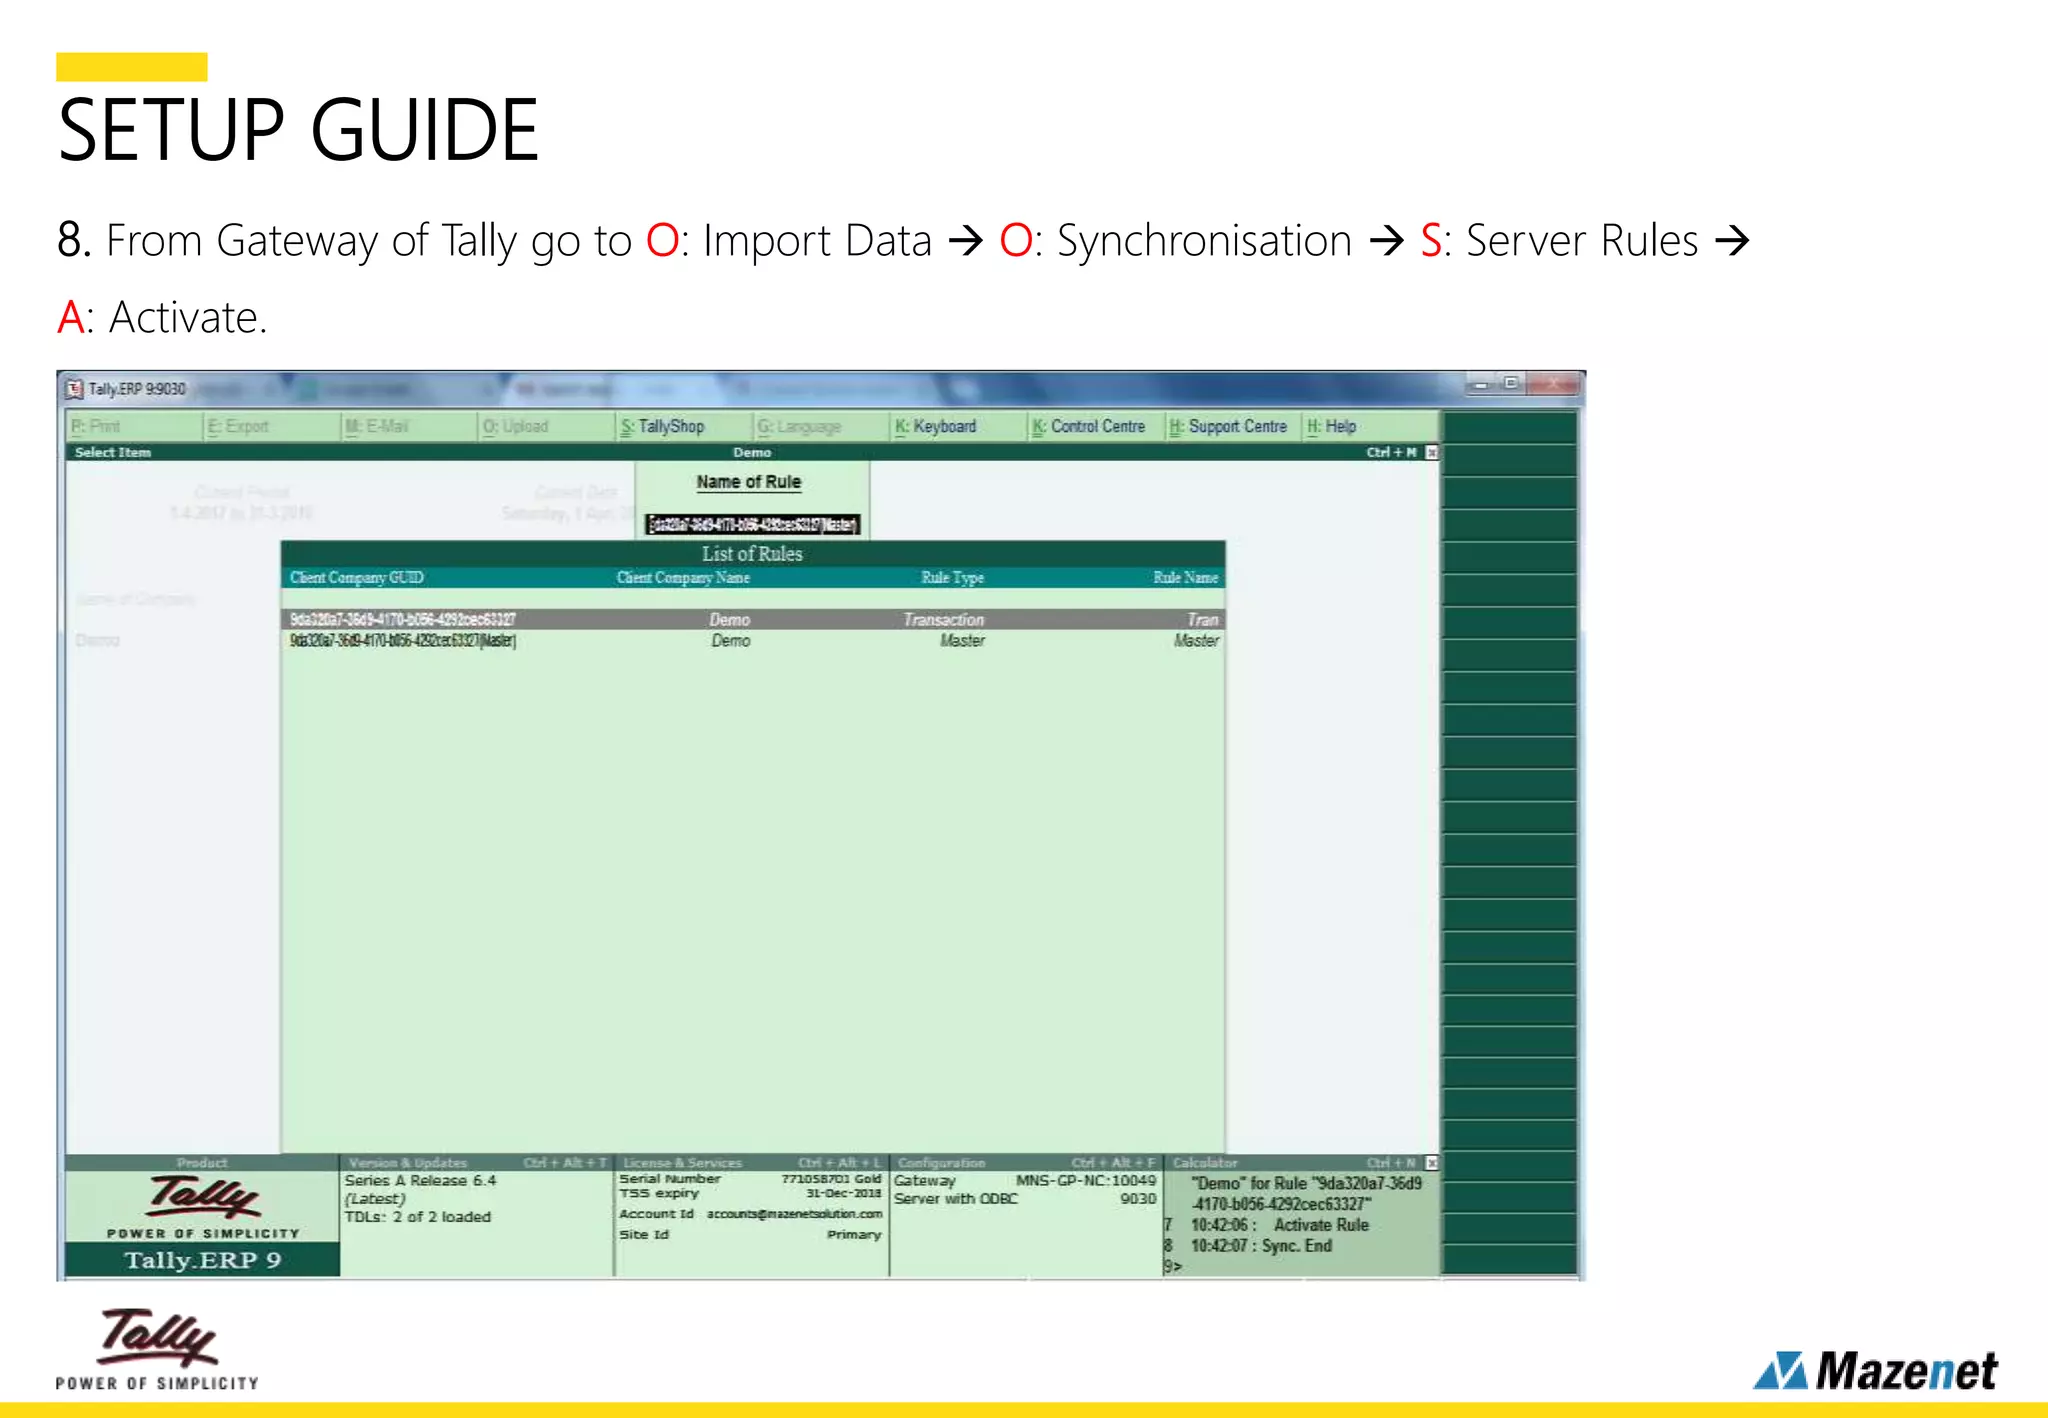
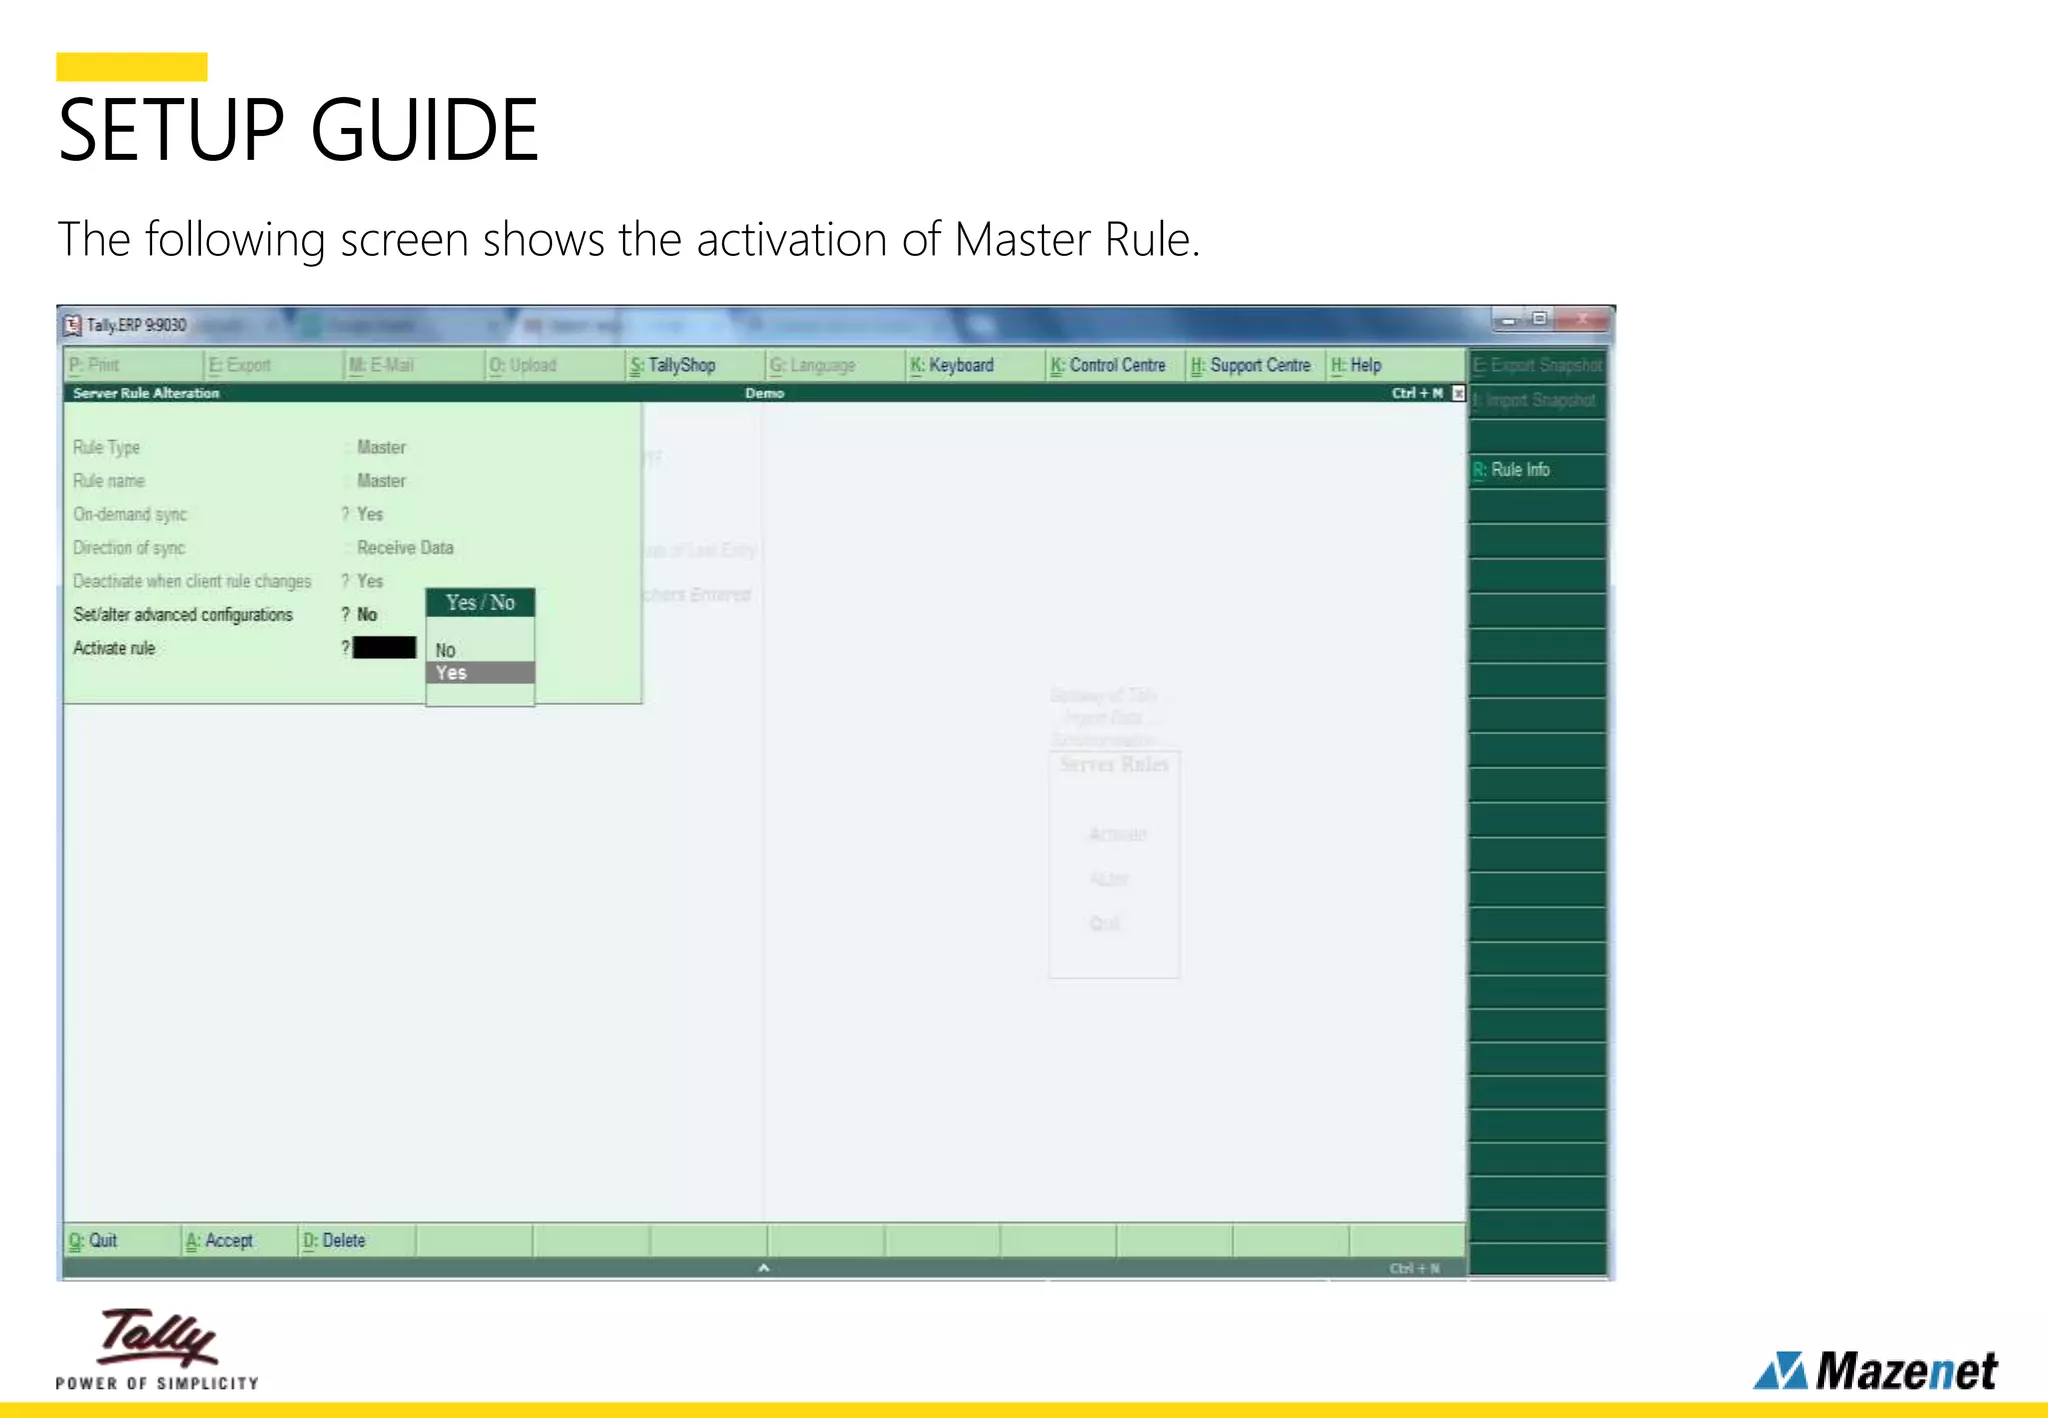
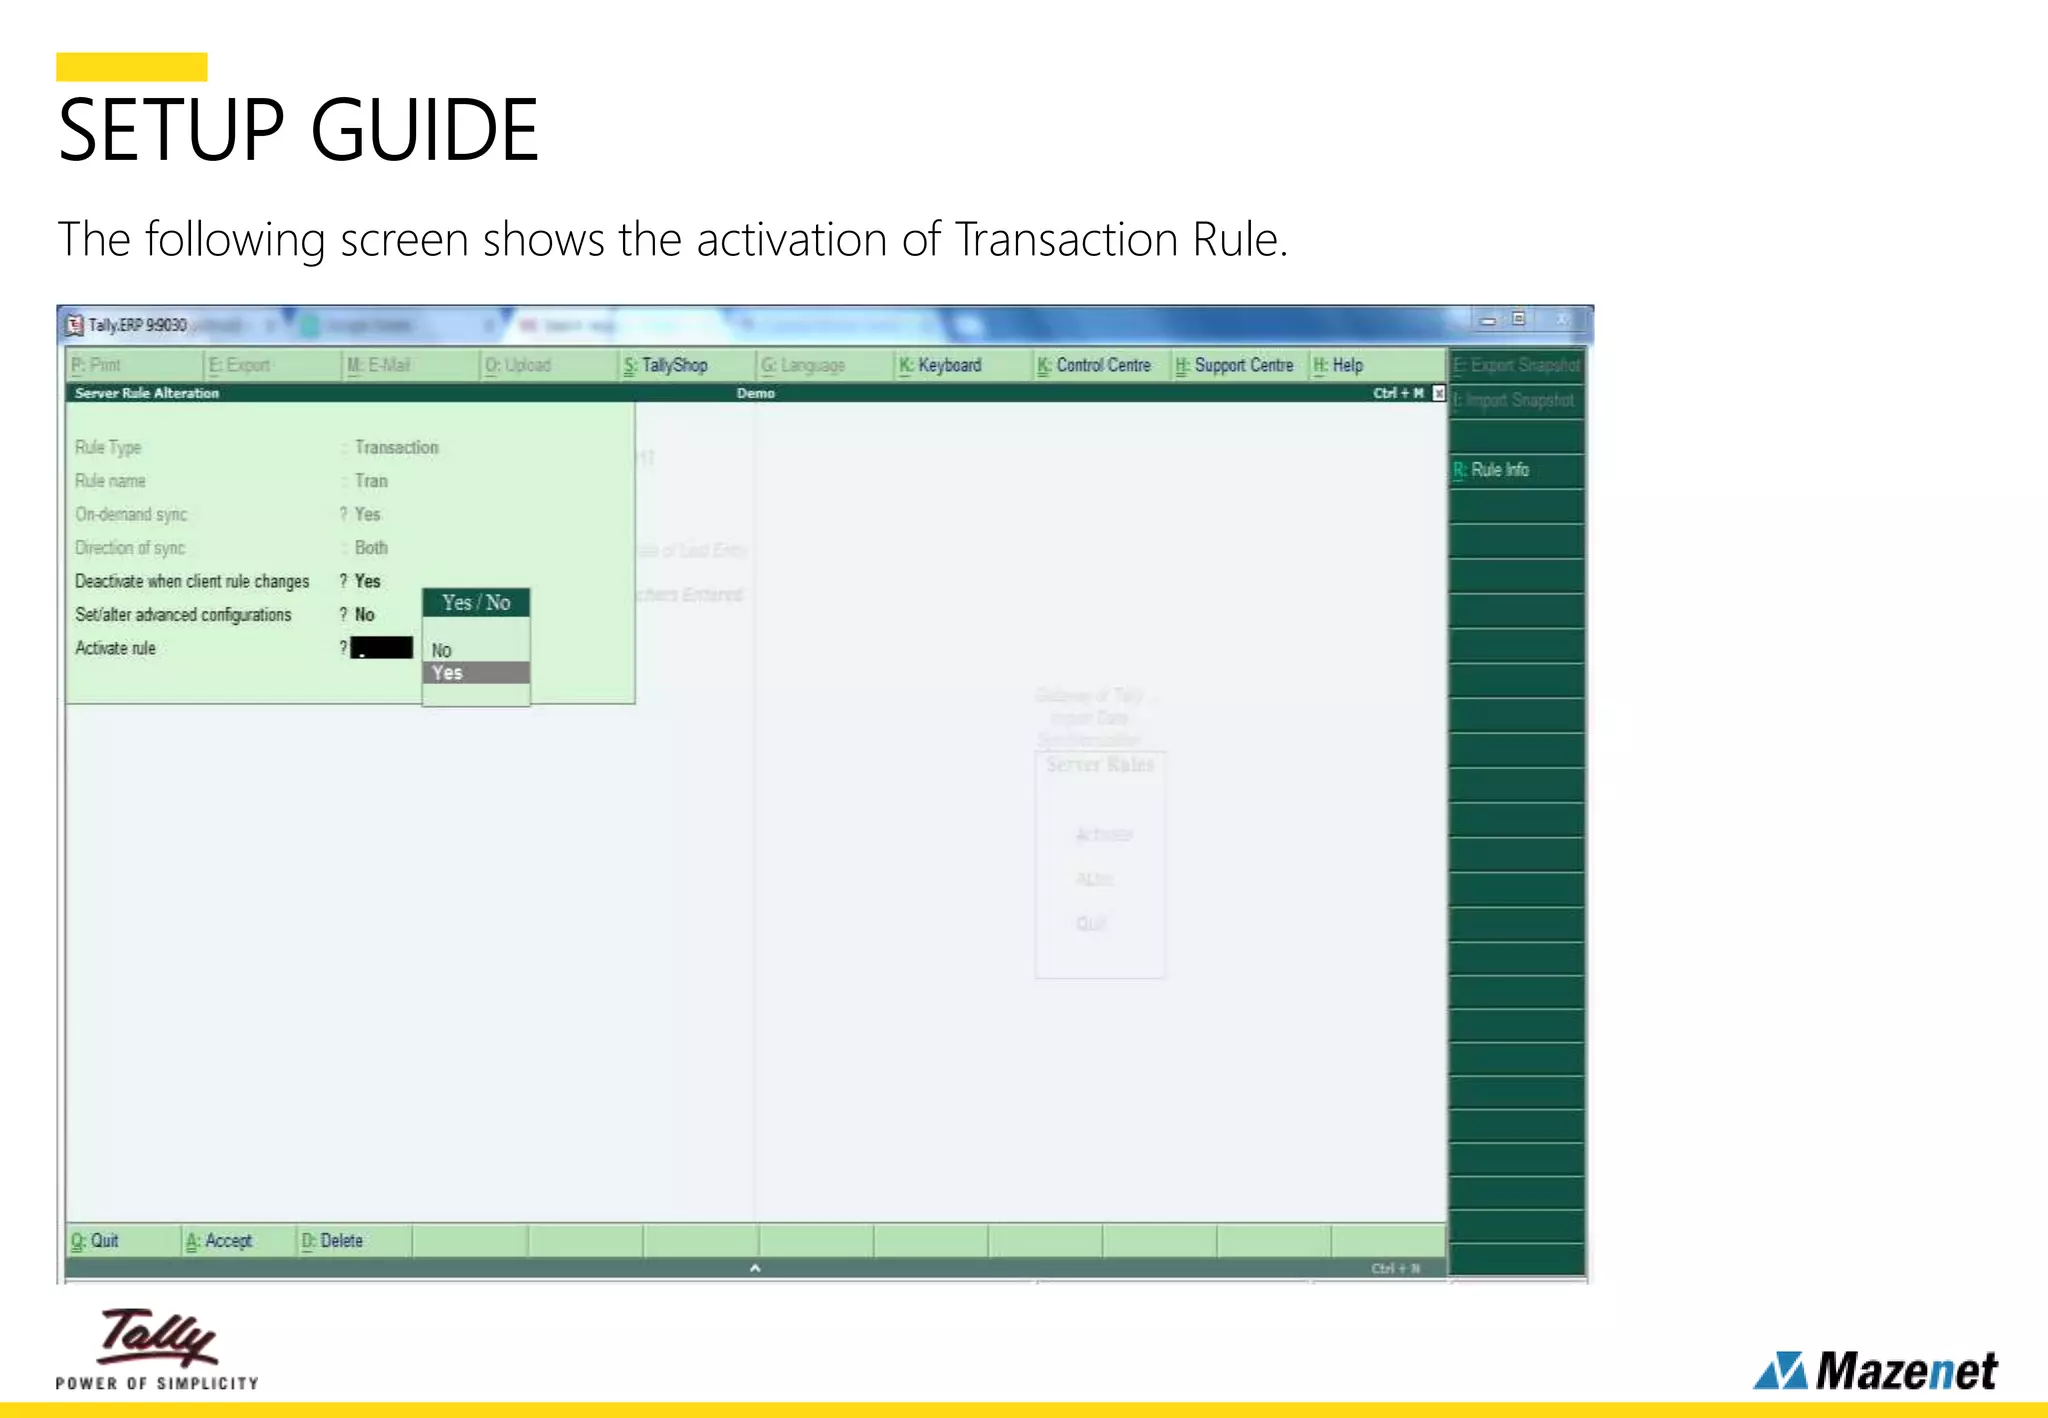
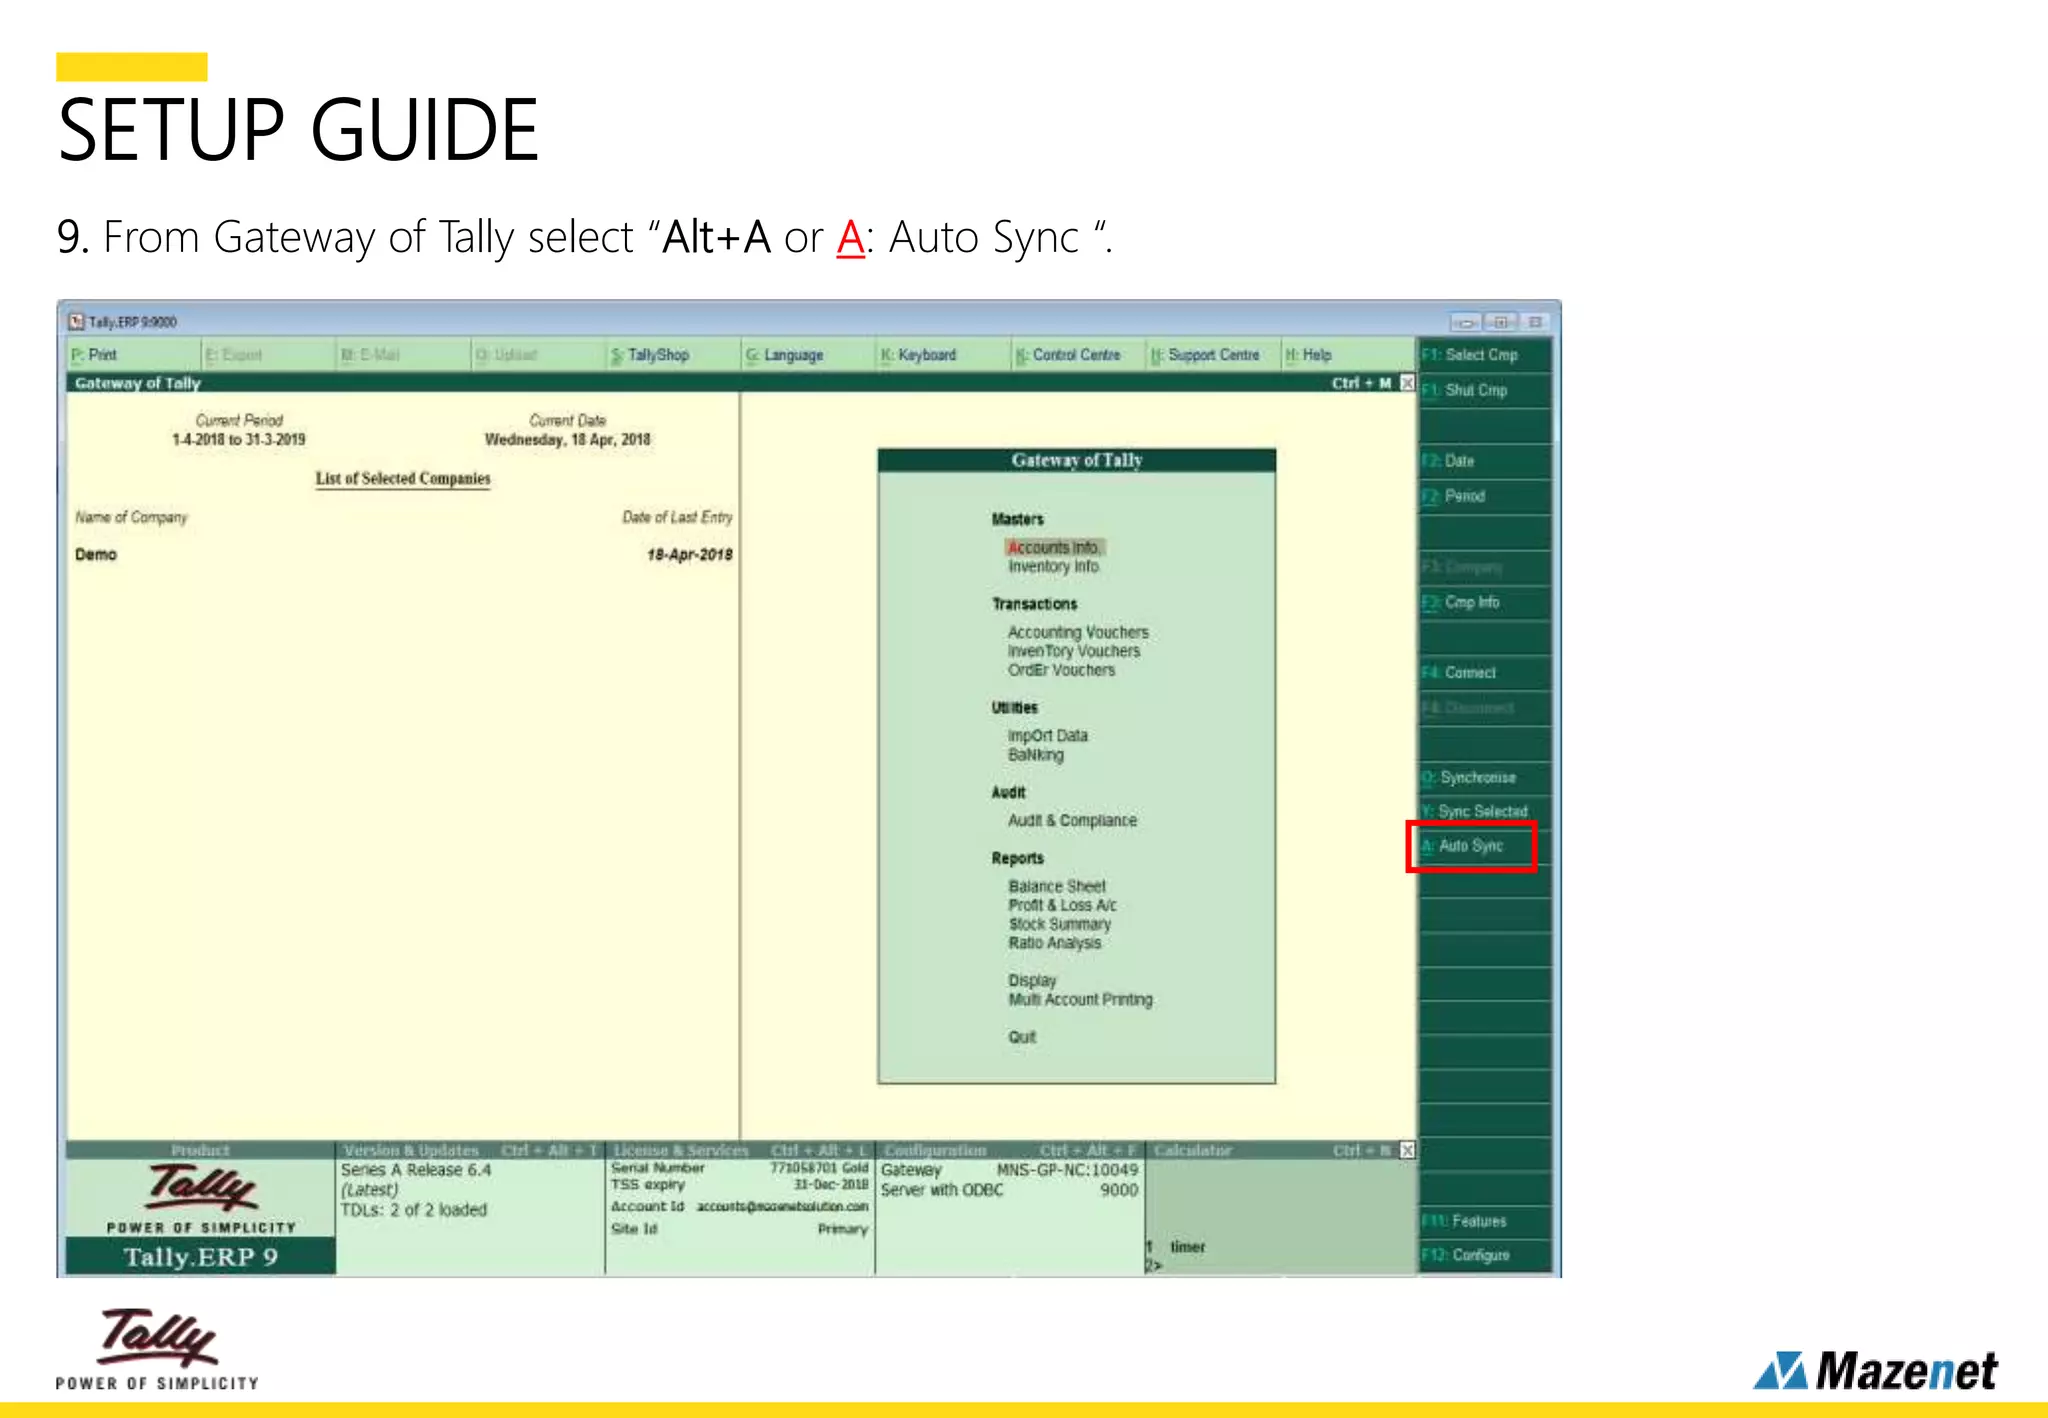
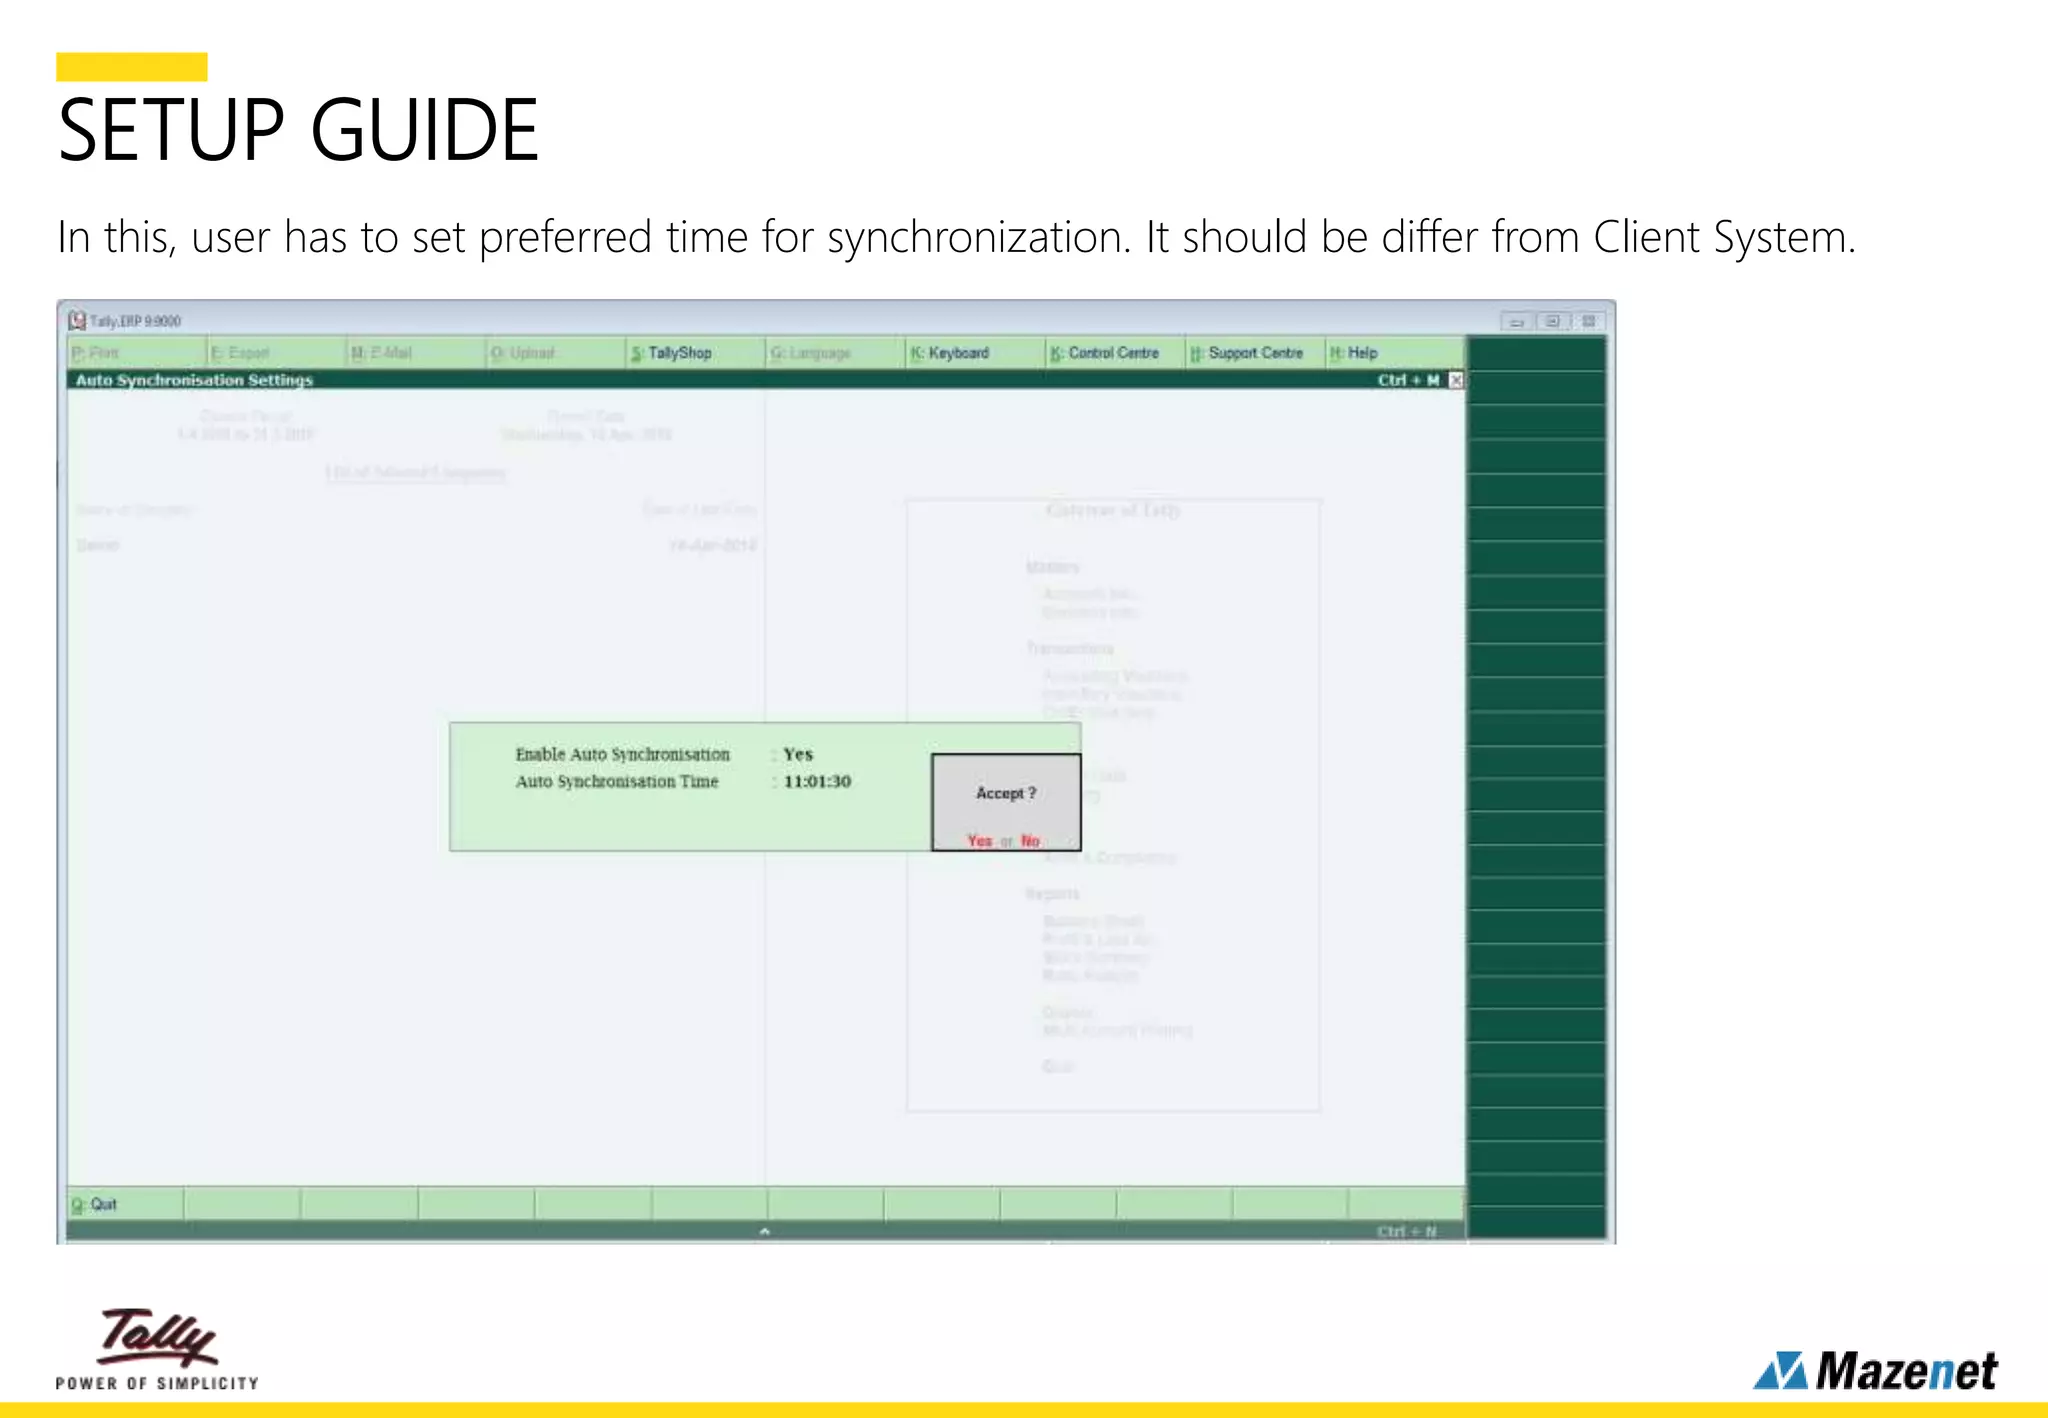
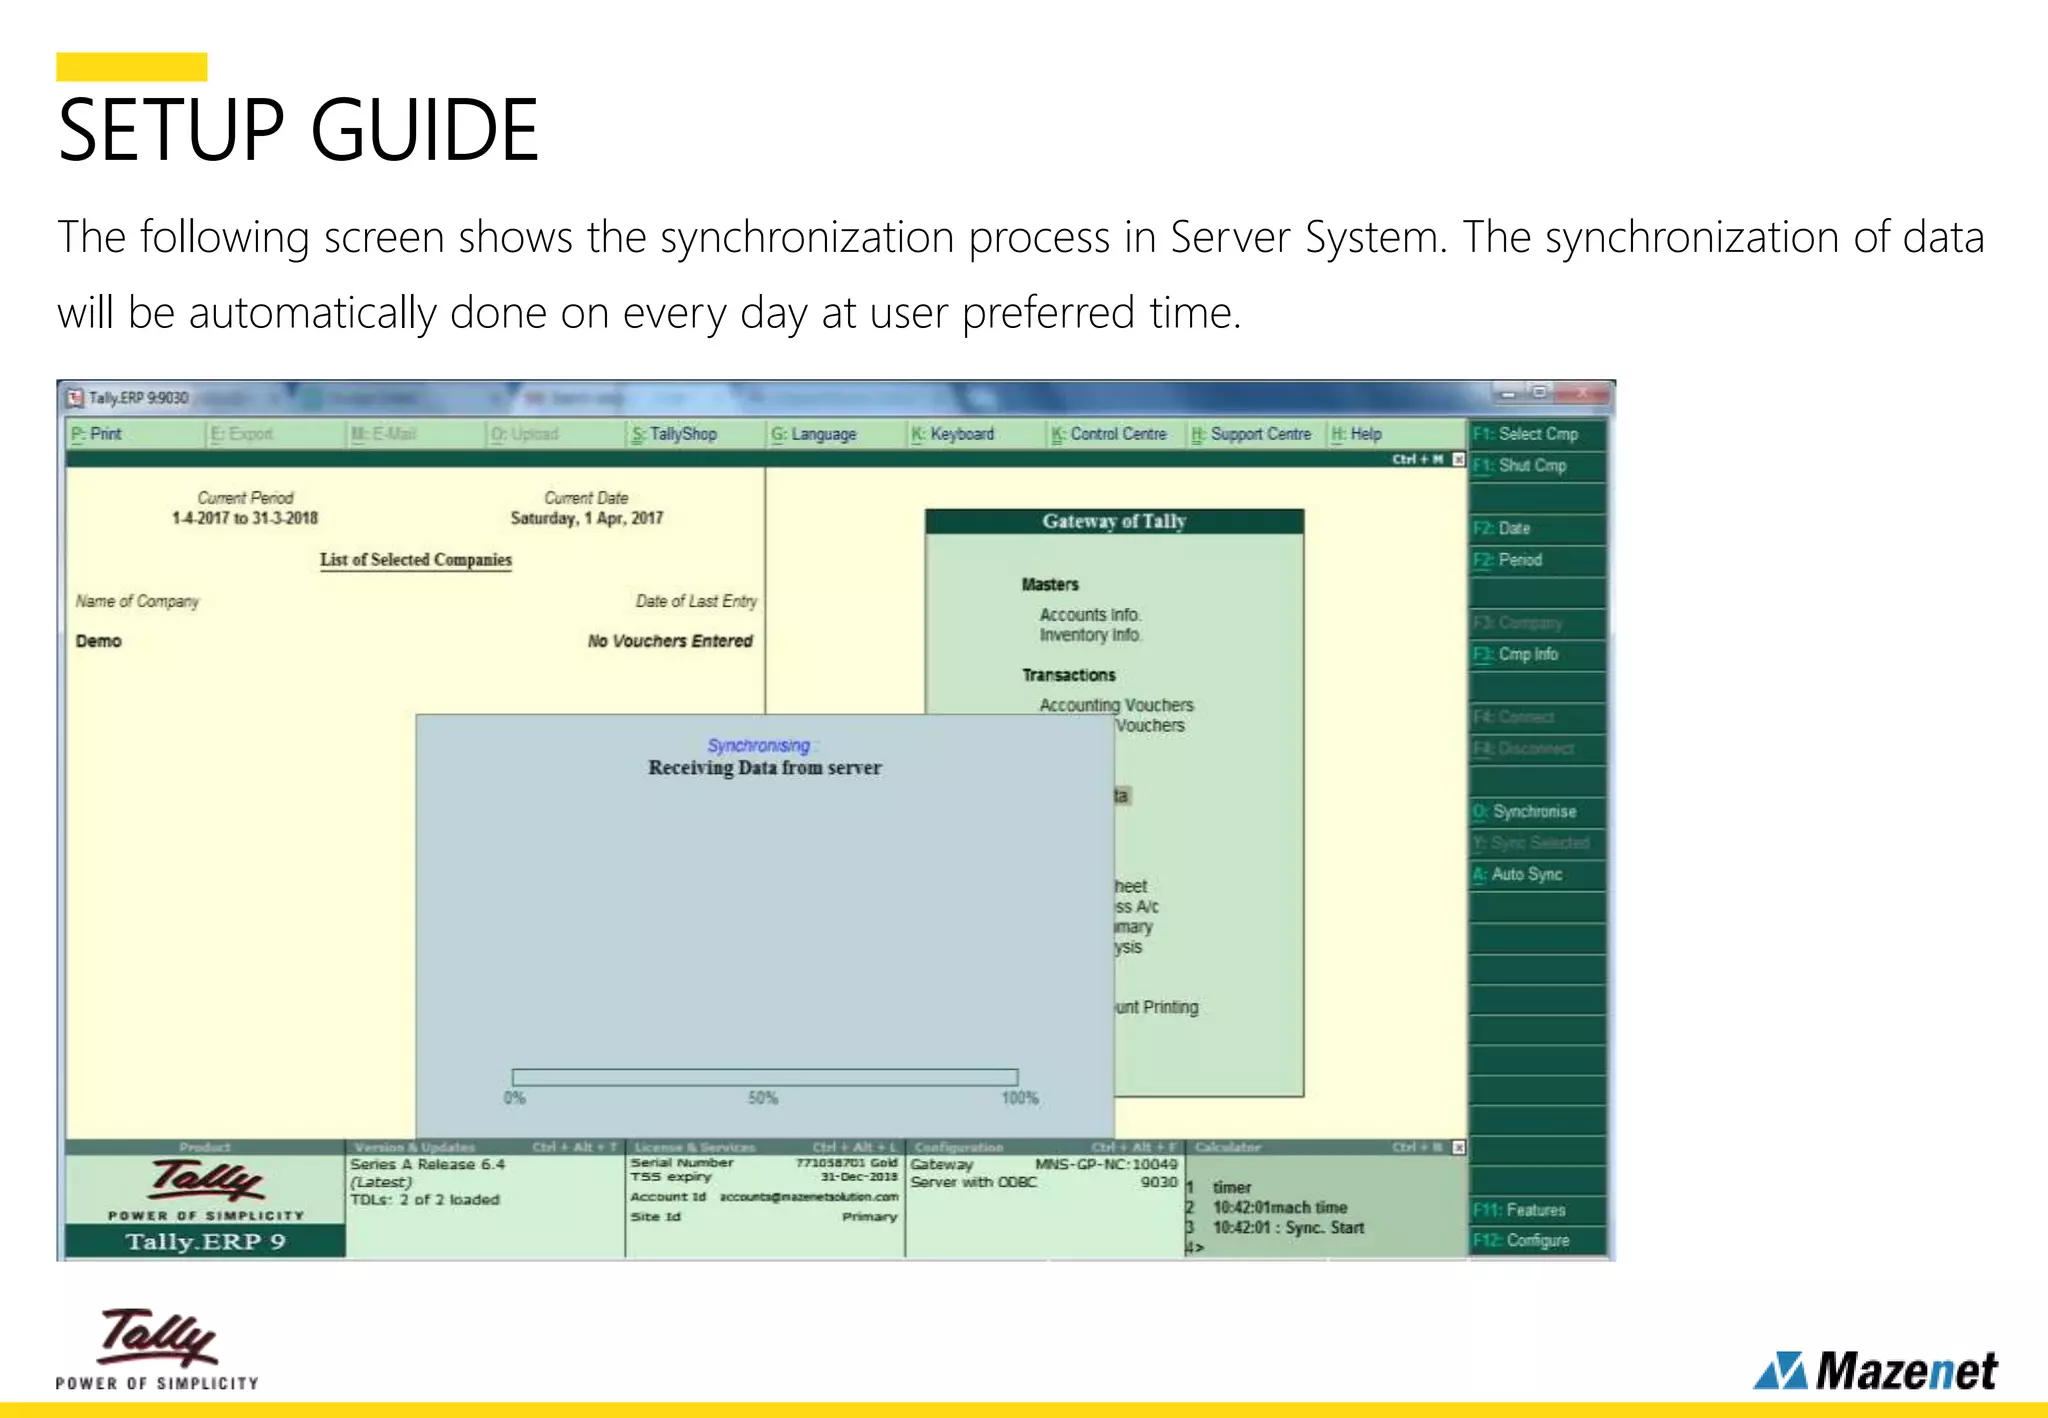


The document outlines the installation and configuration process for the Tally auto synchronization add-on, which enables scheduled data synchronization for specific periods. It emphasizes the importance of backing up company data before installation and describes the steps for configuring the add-on on both client and server systems. The synchronization process is automated to occur daily at user-defined times, with rules set for master and transaction data synchronization.


