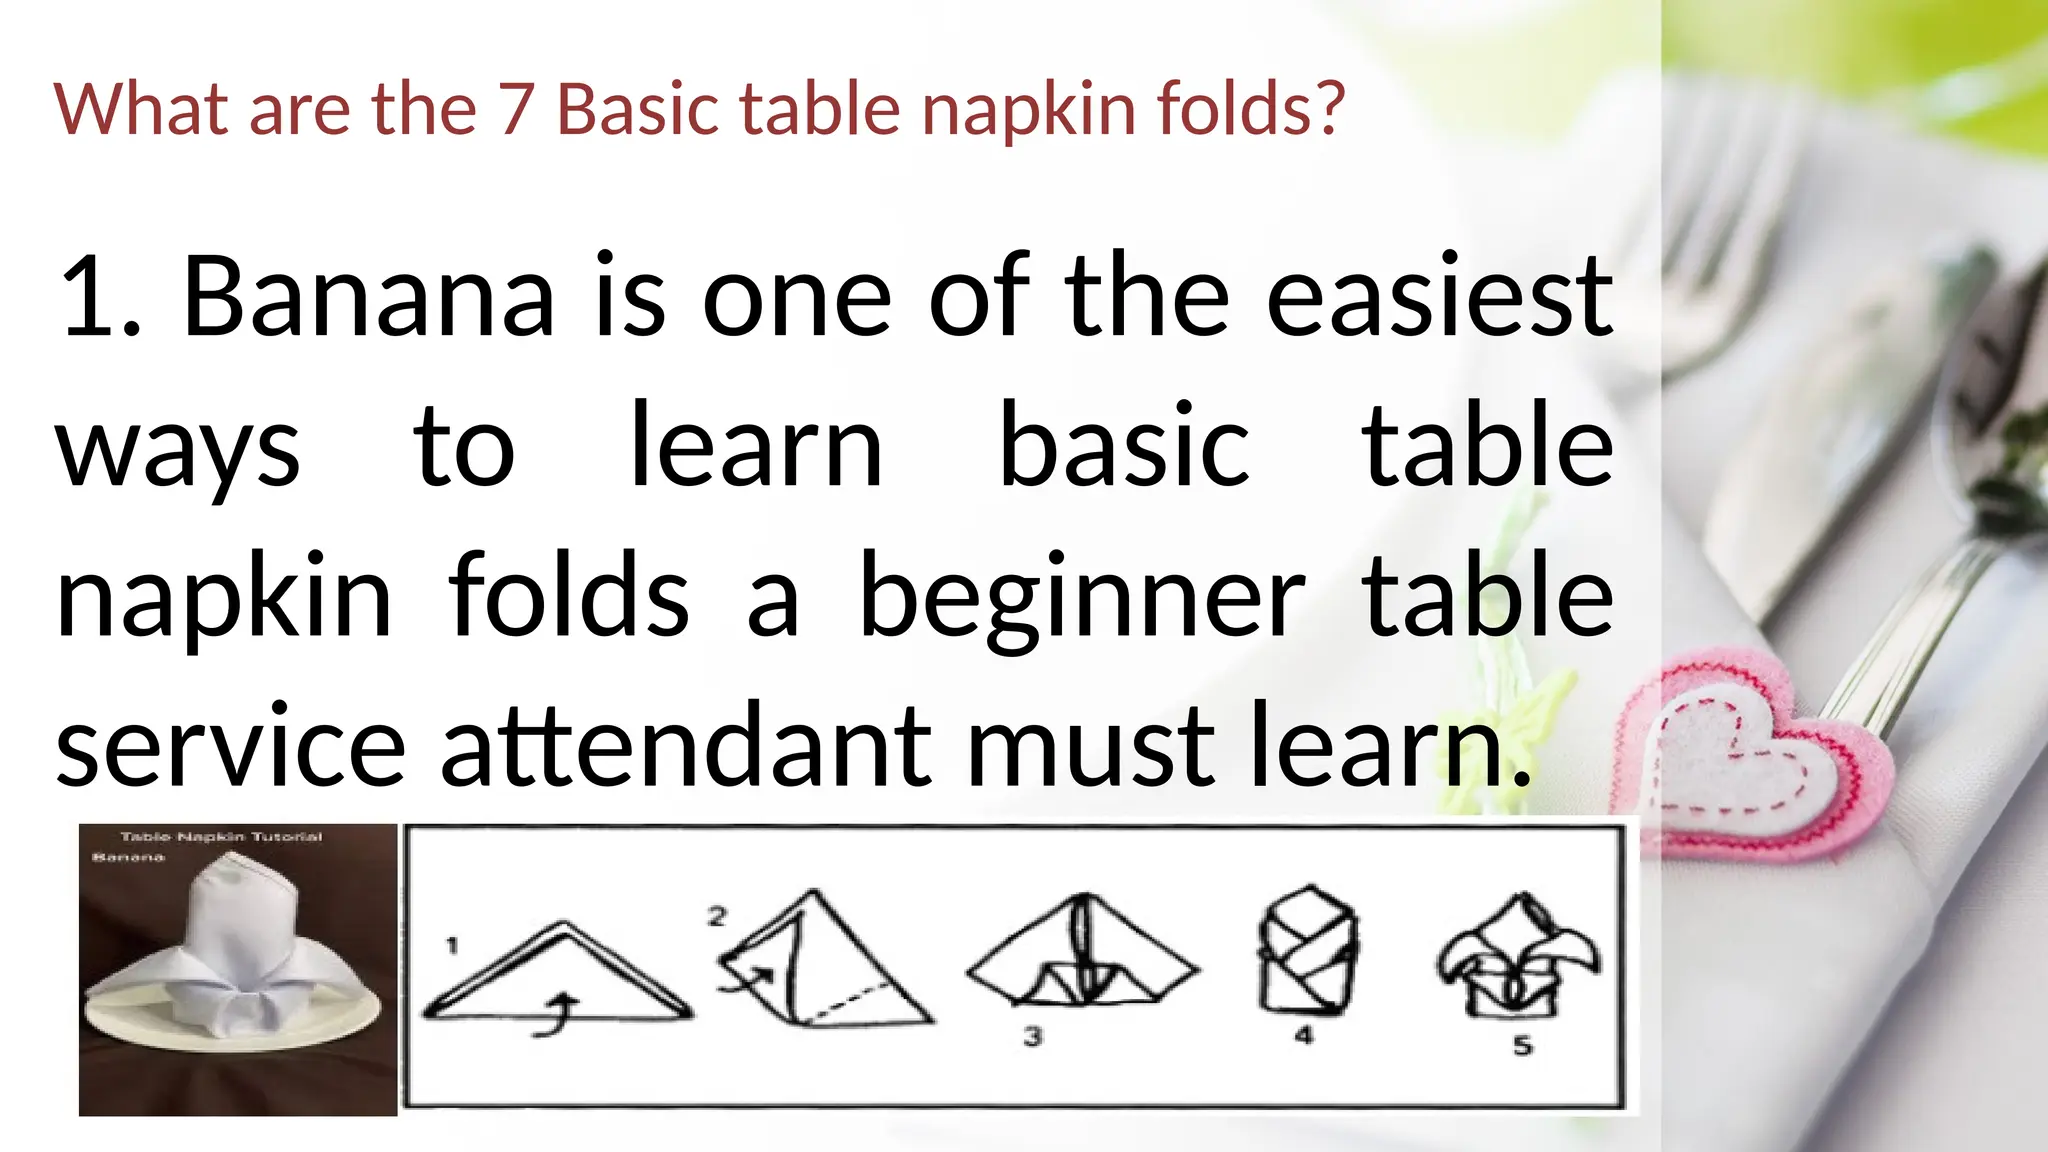
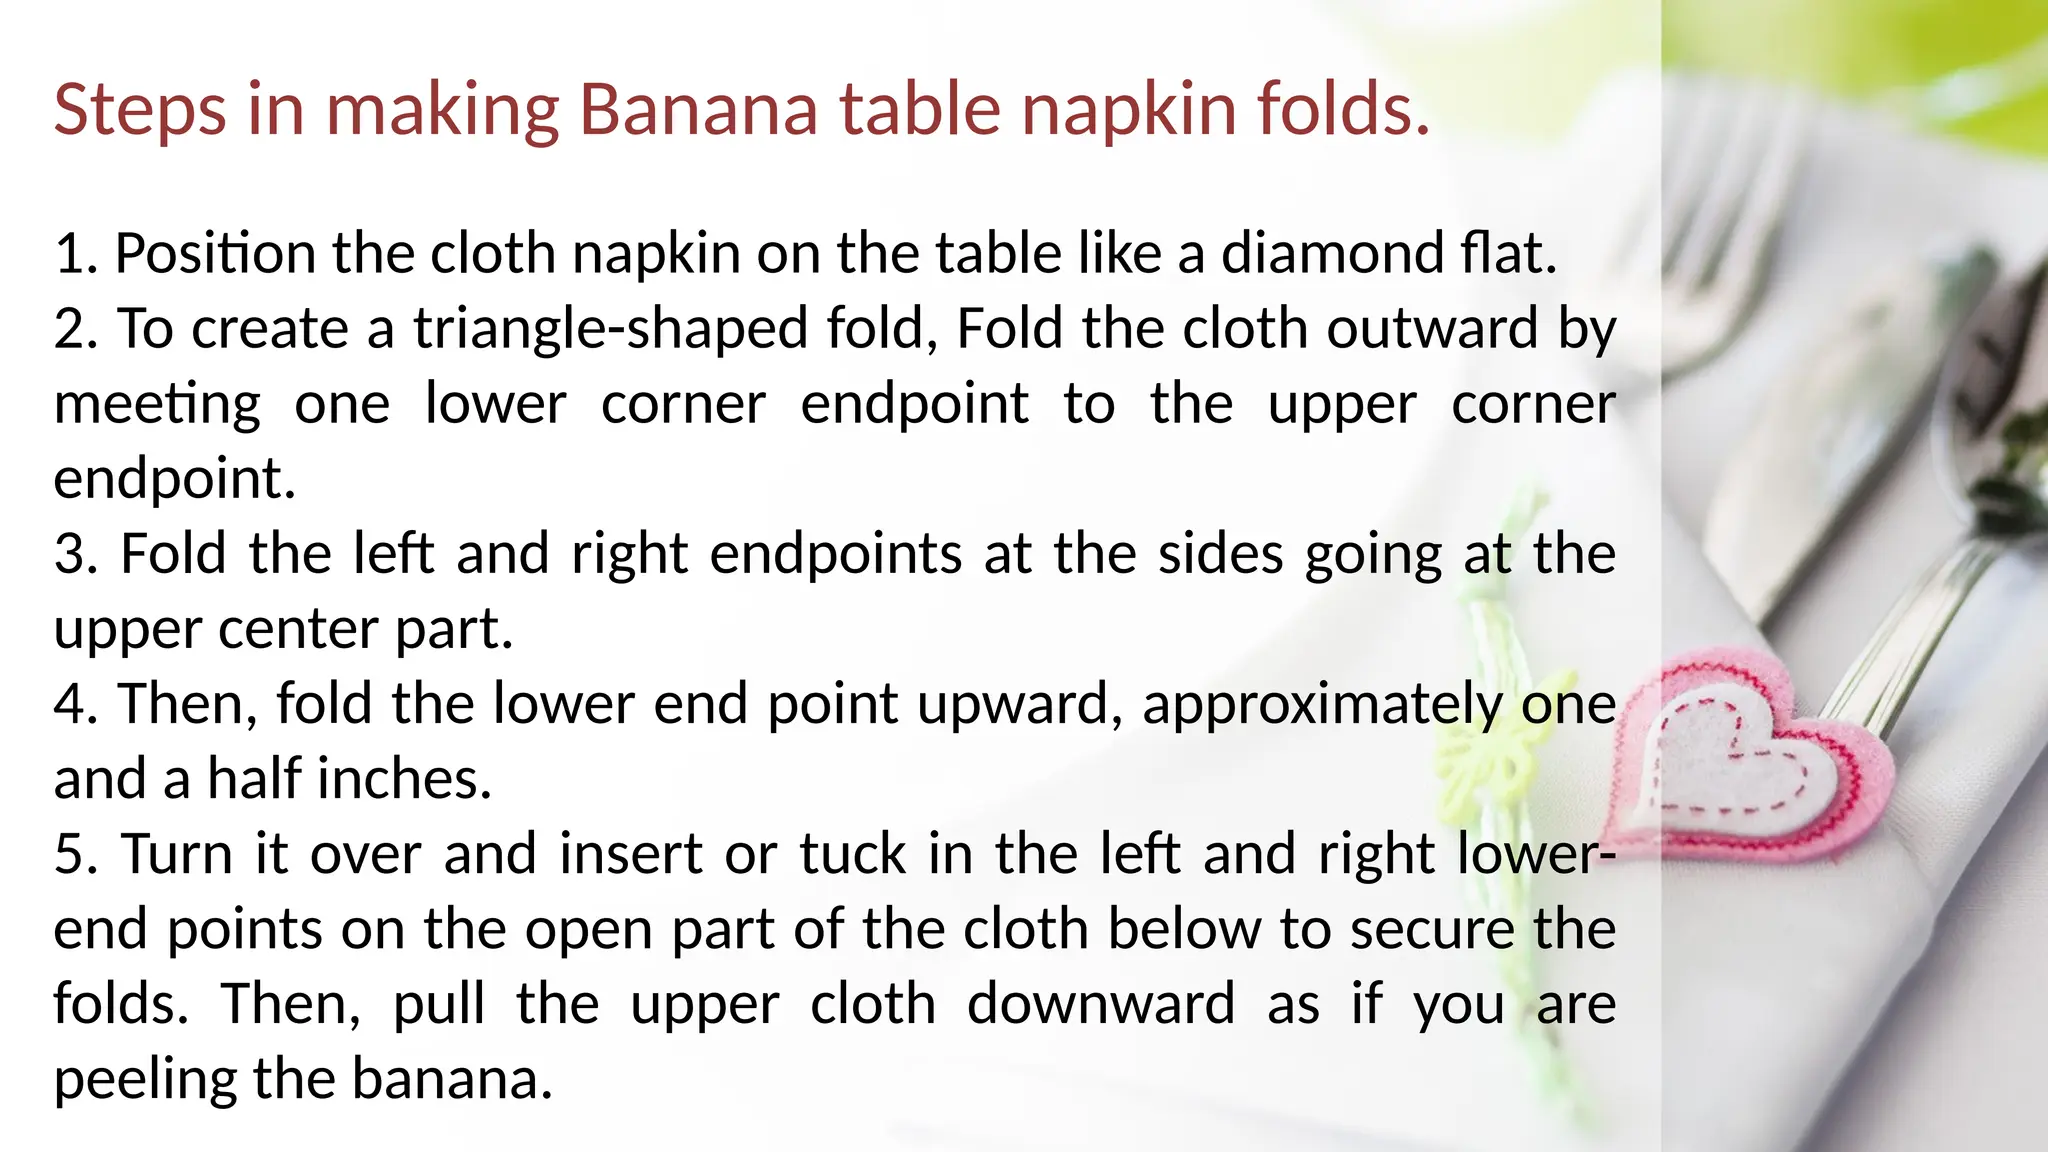
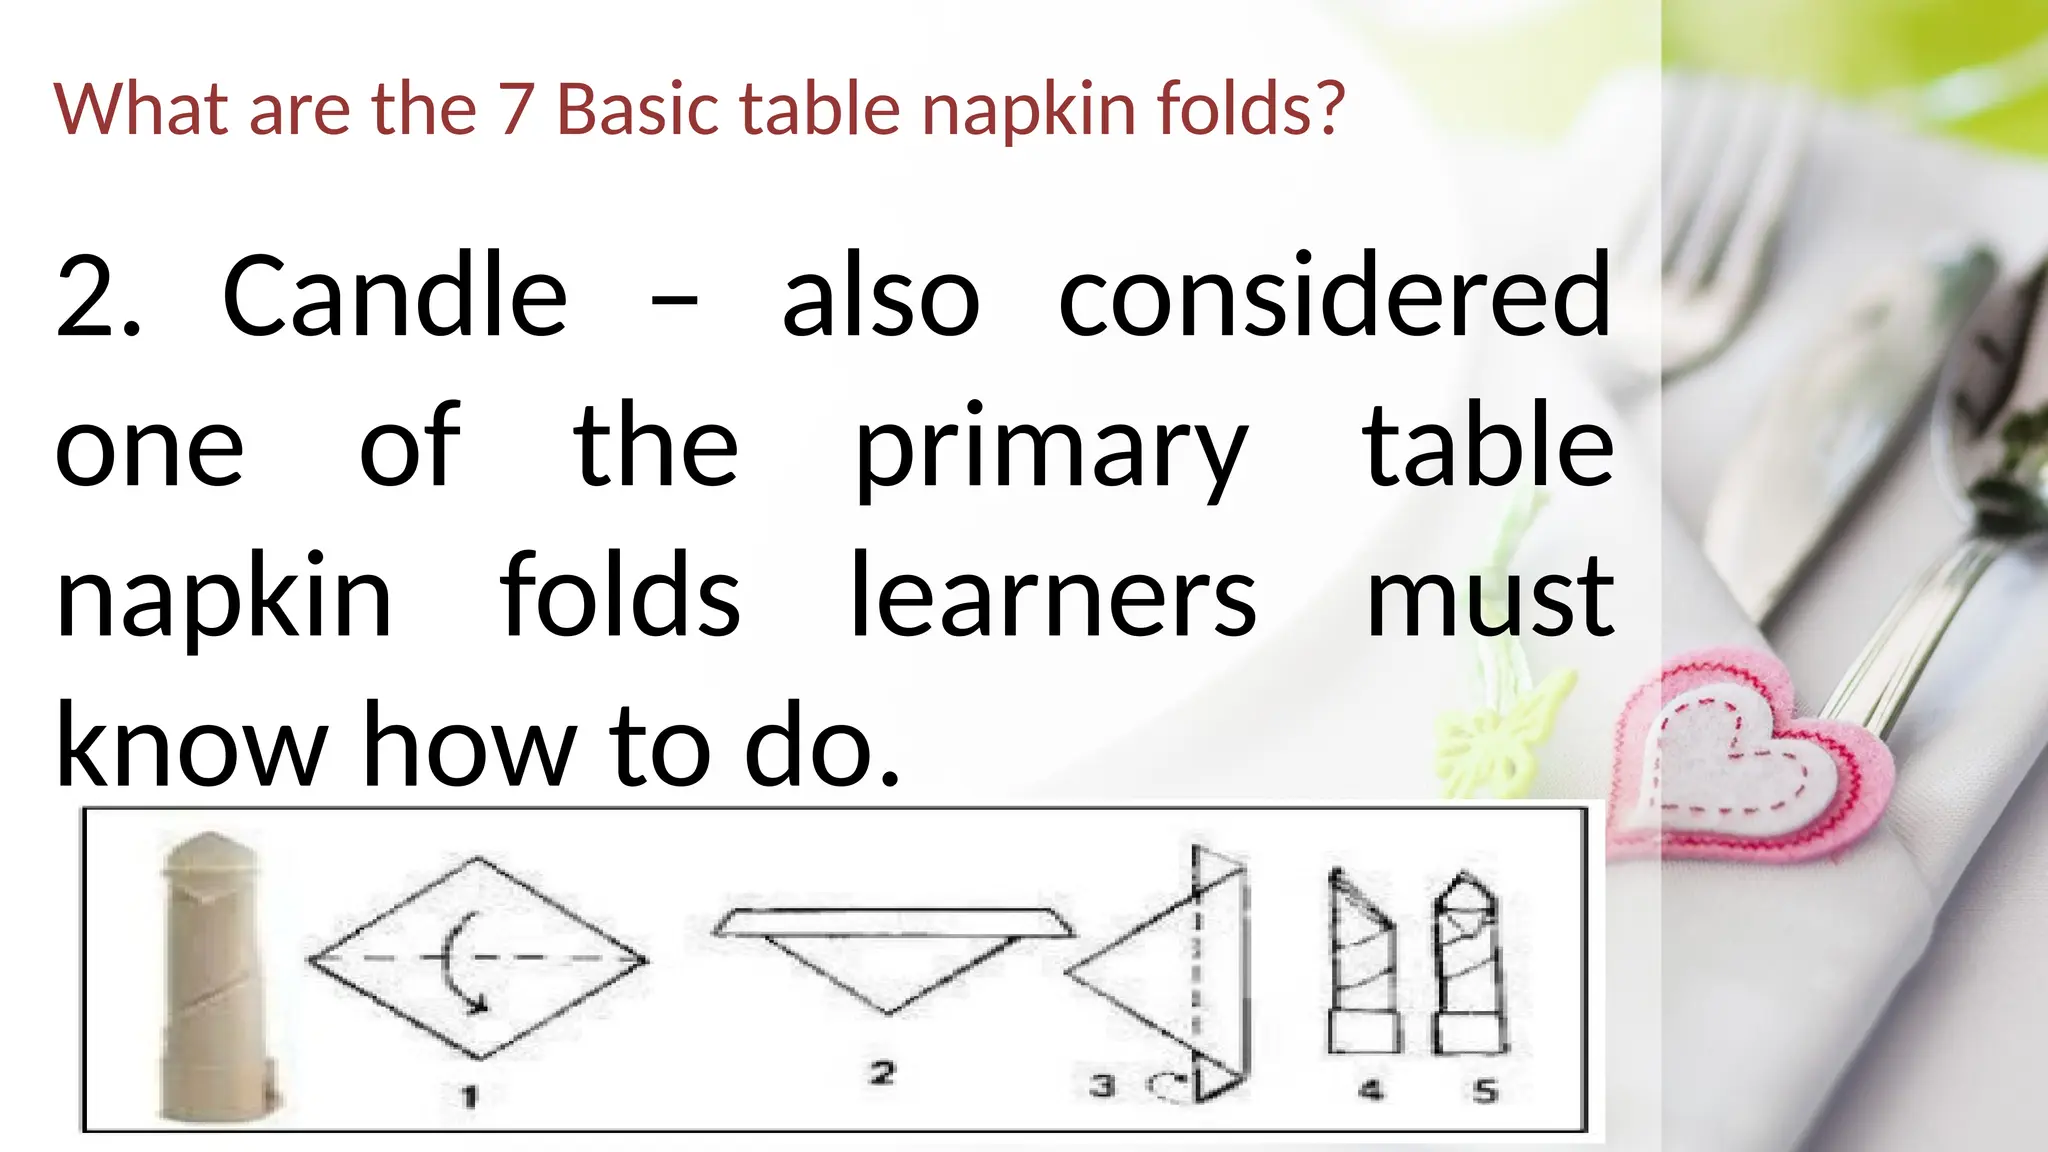
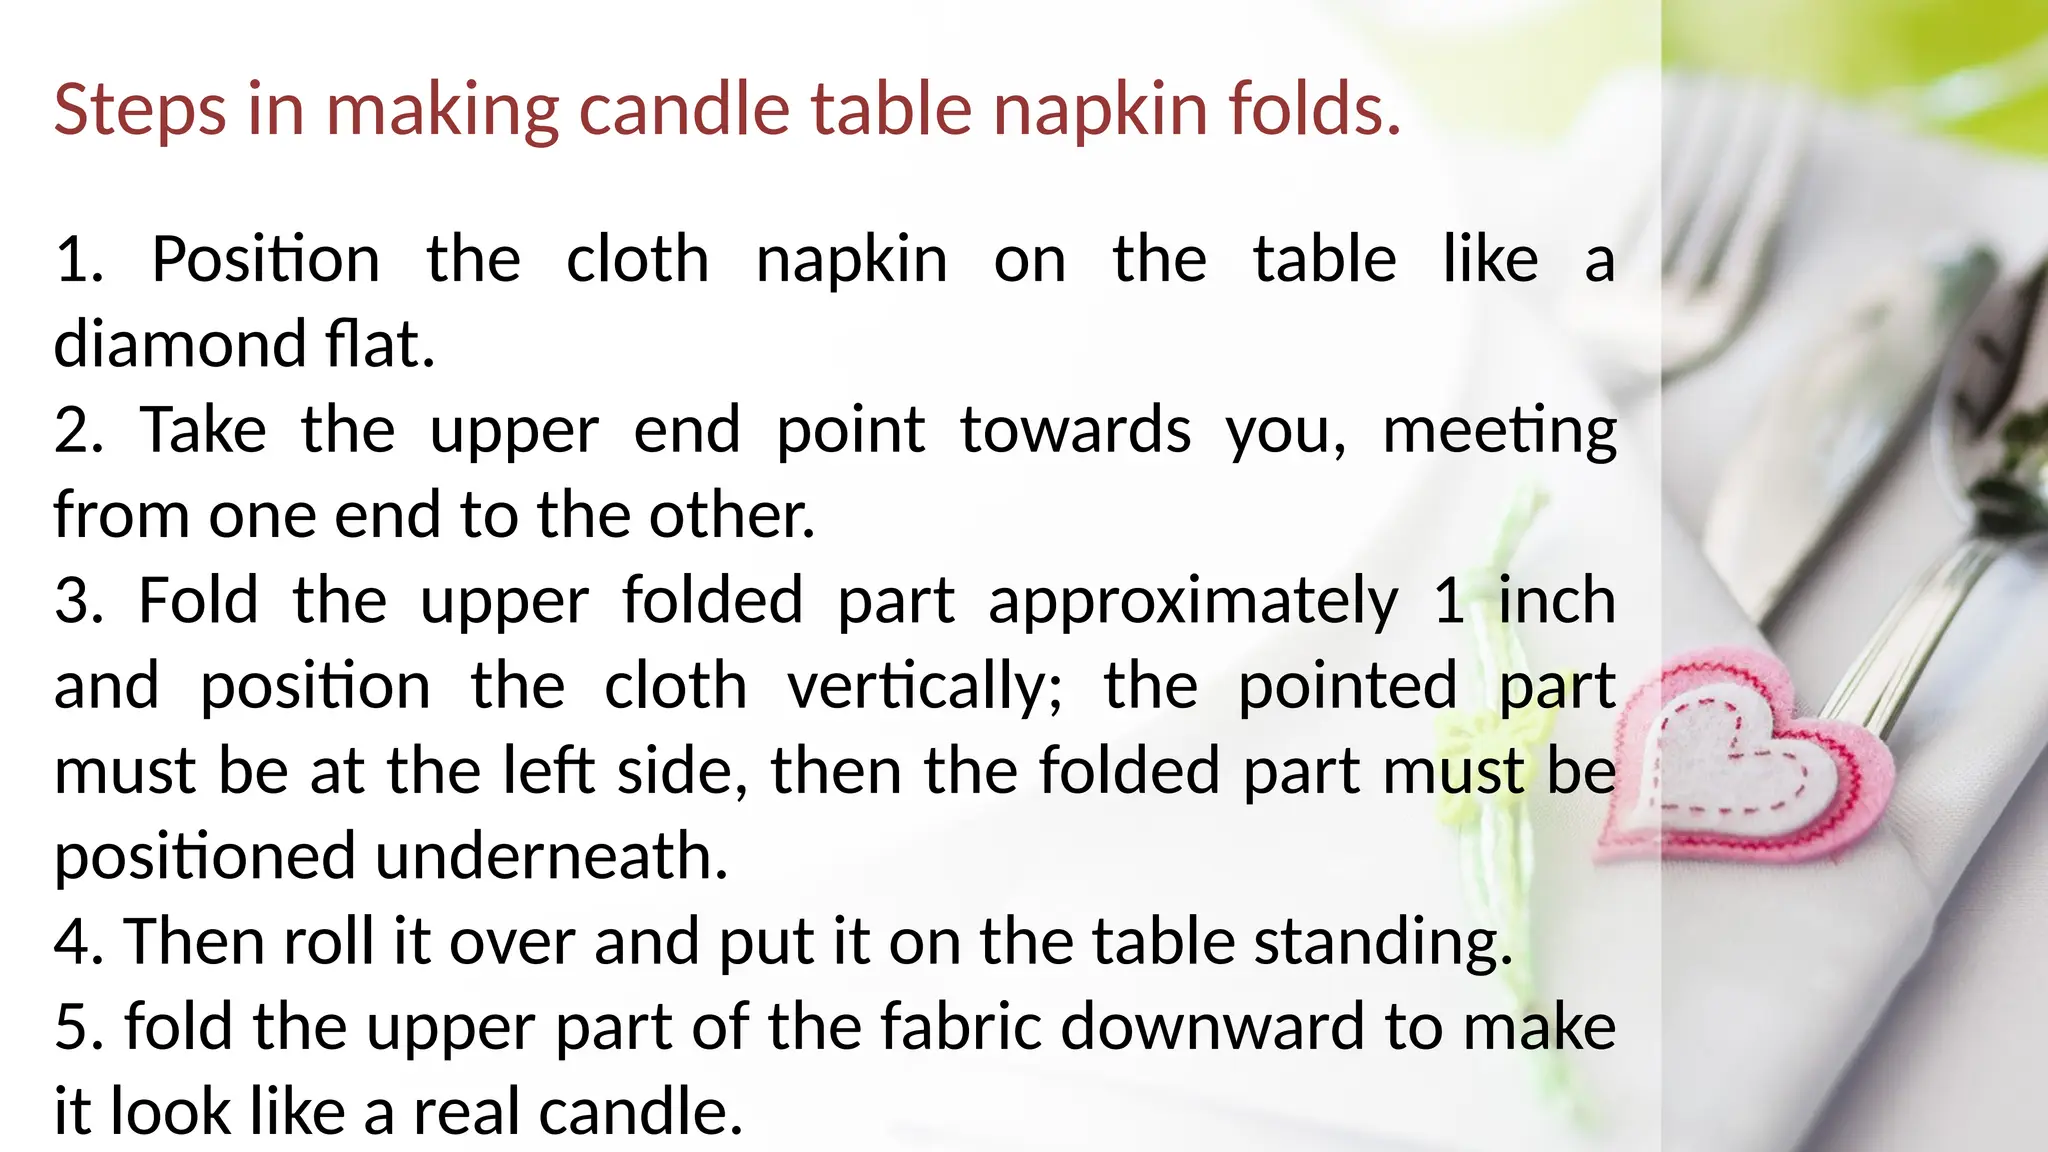
DAY 21 & 22
Short Review
Matching Type: Match column A to column B. Write only the letter
of the correct answer in the space provided before each number.
A B
a. Oven
1. b. Measuring spoons
c. Baster
d. Dredgers
2. e. Colanders
Short Review
Matching Type: Match column A to column B. Write only the letter of the
correct answer in the space provided before each number.
A B
3. a. Oven
b. Measuring spoons
4. c. Baster
d. Dredgers
5. e. Colanders
Let’s think about it…..
• Before we proceed to today's lesson, is
there any clarification you would like to ask?
• Why do you think we need to familiarize
ourselves with the different kitchen tools,
utensils, and equipment at home?
• Are there any other questions you would
like to clarify about our previous lesson on
food preparation and service tools, utensils,
and equipment?
Lesson Purpose
At the end of the lesson, the students will be able to:
1. Identify the basic table napkin folds usually seen on
the fine dining table.
2. Explain each table napkin's different sizes and
purpose when taking foods and drinks.
3. Demonstrate the proper way of different basic table
napkin folding designs.
4. Emphasize the importance of acquiring knowledge
and skills in table napkin folding once applied in real-
life situations like setting the dining or presidential
table during special occasions.
Content Area Vocabulary
Napkin – is one of the most striking elements you can put
on a table for designing atmosphere and for protection
from any food and drinks spill. We have napkins for any
occasion - from an informal breakfast to a festive dinner.
Table Napkin - a small piece of cloth or paper, usually
square, placed on the lap, used to wipe the lips when
eating and it also protect our clothes from food or drink
spill.
Table Napkin Folding - is a type of decorative folding done
with a napkin. It can be done as art or as a hobby. Napkin
folding is most commonly encountered as a table
decoration in a restaurants or hotels.
Let’s think about it…..
Do you have some idea/s on the
photo on the board or PowerPoint?
How do we call those colorful folded
napkins on the table? Were you able
to try folding napkins on the table?
When was that?
What are the 7 Basic table napkin folds?
1. Banana is one of the easiest
ways to learn basic table
napkin folds a beginner table
service attendant must learn.
Steps in making Banana table napkin folds.
1. Position the cloth napkin on the table like a diamond flat.
2. To create a triangle-shaped fold, Fold the cloth outward by
meeting one lower corner endpoint to the upper corner
endpoint.
3. Fold the left and right endpoints at the sides going at the
upper center part.
4. Then, fold the lower end point upward, approximately one
and a half inches.
5. Turn it over and insert or tuck in the left and right lower-
end points on the open part of the cloth below to secure the
folds. Then, pull the upper cloth downward as if you are
peeling the banana.
What are the 7 Basic table napkin folds?
2. Candle – also considered
one of the primary table
napkin folds learners must
know how to do.
Steps in making candle table napkin folds.
1. Position the cloth napkin on the table like a
diamond flat.
2. Take the upper end point towards you, meeting
from one end to the other.
3. Fold the upper folded part approximately 1 inch
and position the cloth vertically; the pointed part
must be at the left side, then the folded part must be
positioned underneath.
4. Then roll it over and put it on the table standing.
5. fold the upper part of the fabric downward to make
it look like a real candle.
What are the 7 Basic table napkin folds?
3. Pyramid – the quickest
and easiest table napkin
folds.
Steps in making pyramid table napkin folds.
1. Fold the napkin half diagonally.
2. Fold corners to meet top points.
3. Turn it over and fold it again in half,
meeting at the upper center part of the
cloth.
4. As shown in the photo above, meet up
at the center and position it on top of the
dinner plate.
What are the 7 Basic table napkin folds?
4. Sailing Boat – is another
basic napkin fold that is
easy to make.
Steps in Making a Sailing Boat Table Napkin Folds
1. Position the table napkin cloth in a
diamond way.
2. Fold the bottom endpoint outward to
the upper-end point part of the cloth to
make it a triangle shape.
3. Roll the lower part outward three
times.
4. And let it stand firm like a sailing boat.
What are the 7 Basic table napkin folds?
5. Bishop’s Hat – is one of
the basic table napkin
folds.
Steps in Making Bishop’s Hat Table Napkin Folds
1. Lay the napkin on a flat surface in front of you.
2. Fold the napkin in half, ensuring the open end
is towards you.
3. Fold the right corner diagonally towards you.
4. Repeat the same by folding the left corner away
from you so it will meet in the middle with the
right folds you did a while ago.
5. Flip the napkin over and lay it in a way that
points to the far left and the near right.
Steps in Making Bishop’s Hat Table Napkin Folds
6. Fold the bottom half of the napkin up outward from you,
laying it flat as edges lay on top of one other.
7. Take underneath the napkin and pull out the flap on the
right, making the near side come to two points, as seen in the
picture.
8. Gently fold the left half of the left triangle over and tuck its
end underneath the right triangle.
9. Flip the napkin over, pointing away from you; fold the right
triangle to the left, tucking its end into the other triangle, just
like you did on the other side a while ago.
10. Open up the hat and press the material inside to fill it out
so that it becomes circular, and let it stand firmly.
What are the 7 Basic table napkin folds?
6. Fan with Stand – this is also
one of the basic table napkin
folds that is easy to make.
Steps in making Fan with Stand Folds
1. Lay the napkin flat on a flat surface.
2. Fold into half lengthwise towards you.
3. Apply accordion folds from one end at about 1-
inch fold, leaving at least 1/3 part of the napkin.
4. Then flip it over in half, lengthwise. Leaving the
remaining 1/3 part on the other end of the
napkin.
5. As you flip, fold the remaining cloth into the
lower part of the accordion folds.
Steps in making Fan with Stand Folds
6. Make sure the folded part is secure or make the fan
stand still.
7. Check the folded lower part of the remaining 1/3 of
the napkin.
8. Then position the table napkin being called a fan with
a stand.
9. Let it stand with a stand-folded table napkin for a
while to ensure a fan's durable and good-quality output.
10. The photo on the left side served as the final
expected output of the Fand with the Stand table napkin
design.
What are the 7 Basic table napkin folds?
7. Artichoke – this is the last basic
table napkin fold design. It is
usually placed on top of the
dinner plate.
Steps in making Fan with Stand Folds
1. Lay the table napkin cloth on a flat surface.
2. Fold all four (4) corner endpoints to the center
part of the napkin.
3. Flip the napkin, and repeat the same procedure
you did on number 2.
4. Pull the endpoints of the four corners
underneath the napkin to form the shape of a
lotus flower.
5. You finally have your final output in the
abovementioned photo.
Do you know why table napkins vary in size?
Common Types and Sizes of Table Napkins
Beverage napkins are used in bars and
restaurants; they are designed underneath a
drink or cocktail glass to absorb any drips from
condensation, ensuring the surface remains
clean and dry. These napkins can also gently
dab the sides of one’s mouth to remove drink
residue. Food and beverage staff can also use
beverage napkins for carrying plates and other
serving dishes to help prevent the transfer of
germs and protect their hands from hot
surfaces.
Common Types and Sizes of Table Napkins
● The size of a beverage napkin will be 10 inches
by 10 inches. But when quarterly folded, its final
size becomes 5 inches by 5 inches.
Common Types and Sizes of Table Napkins
Dinner Napkins - are typically reusable and
made from fabric, unlike paper-based
disposable napkins. Their sizes vary,
ranging from 16 inches by 16 inches to 22
inches by 22 inches.
These napkins are fabric-made, so they
don’t come pre-folded to allow creative
folding designs depending on
one’s/customers' discretion.
Common Types and Sizes of Table Napkins
Smaller sizes of napkins are 16” x 16”. 17” x
17” and 18” x 18” are suitable for encasing
cutlery in the folded napkins.
It is important to note that the larger the size
of the napkin to be used, measuring 22” ×
22” inches, the more formal the dinner
event, which means a highly prestigious
dining experience it will bring to the guests.
Common Types and Sizes of Table Napkins
Luncheon Napkins – These are usually
made from paper and are single-use
napkins. They are a little larger than
beverage napkins and are popularly used
for children’s birthday parties. They are
advised to be used for serving small slices
of cake and intended to wipe children’s
hands after they have eaten a light meal.
Common Types and Sizes of Table Napkins
When not folded fully, these napkins
measure 13 inches by 13 inches, but
when bought by pack, luncheon
napkins, once folded in a quarter
fold, will result in the final
measurement of 6.5 inches by 6.5
inches.
DAY 23
Worked Example
Let us watch this video on performing the
seven basic table napkins to serve as your
guide since you will be given only 3
minutes to accomplish or finish the seven
folds.
Lesson Activity
Guidelines for taking the practicum in
performing the 7 Basic Table Napkin Folding.
1. Learners will be listed on a small piece of
paper for a draw-lot set-up.
2. Once the name is called, the learner will
approach the teacher's table and lay the napkin
flat on the table.
3. After the teacher sets the timer (for 3 minutes
only), say go! That’s the time the learner will
start performing the table napkin folding.
4. And once the teacher says stop, time is up.
The learner will stop, and the teacher will
announce the grade the learner got based on the
number of times table napkin folding was
performed.
DAY 24
Learners’ Takeaways
Can you imagine any object or symbol
that will express the learnings you gained
from the lesson “basic table napkin
folding”?
Generalization
Knowledge and skills gained about basic
napkin folding and how to do it will help us
apply it in real-life situations. When there are
special occasions or events to celebrate, we
can set up the table and add beauty to the
dining table by creating or making different
basic or even fancy table napkin folding.
Reflection on Learning
Think and reflect on the importance of
learning how to make the different table
napkins, fold them, and realize the value
of the acquired knowledge on different
sizes and the purpose of each napkin size,
using it appropriately when eating.
Formative Assessment
Enumeration with supporting drawing
Direction: Give at least 5 out of 7 Basic Table
Napkin Folding and draw each using a type of
writing paper and a pencil with an eraser.
Label each table napkin design or folds. (2pts.
each)

Table Napkin Folds and Presentations Procedures. This helps those students wanting to learn the basics of table napkins presentations

  • 1.
  • 2.
    Short Review Matching Type:Match column A to column B. Write only the letter of the correct answer in the space provided before each number. A B a. Oven 1. b. Measuring spoons c. Baster d. Dredgers 2. e. Colanders
  • 3.
    Short Review Matching Type:Match column A to column B. Write only the letter of the correct answer in the space provided before each number. A B 3. a. Oven b. Measuring spoons 4. c. Baster d. Dredgers 5. e. Colanders
  • 4.
    Let’s think aboutit….. • Before we proceed to today's lesson, is there any clarification you would like to ask? • Why do you think we need to familiarize ourselves with the different kitchen tools, utensils, and equipment at home? • Are there any other questions you would like to clarify about our previous lesson on food preparation and service tools, utensils, and equipment?
  • 5.
    Lesson Purpose At theend of the lesson, the students will be able to: 1. Identify the basic table napkin folds usually seen on the fine dining table. 2. Explain each table napkin's different sizes and purpose when taking foods and drinks. 3. Demonstrate the proper way of different basic table napkin folding designs. 4. Emphasize the importance of acquiring knowledge and skills in table napkin folding once applied in real- life situations like setting the dining or presidential table during special occasions.
  • 6.
    Content Area Vocabulary Napkin– is one of the most striking elements you can put on a table for designing atmosphere and for protection from any food and drinks spill. We have napkins for any occasion - from an informal breakfast to a festive dinner. Table Napkin - a small piece of cloth or paper, usually square, placed on the lap, used to wipe the lips when eating and it also protect our clothes from food or drink spill. Table Napkin Folding - is a type of decorative folding done with a napkin. It can be done as art or as a hobby. Napkin folding is most commonly encountered as a table decoration in a restaurants or hotels.
  • 7.
    Let’s think aboutit….. Do you have some idea/s on the photo on the board or PowerPoint? How do we call those colorful folded napkins on the table? Were you able to try folding napkins on the table? When was that?
  • 8.
    What are the7 Basic table napkin folds? 1. Banana is one of the easiest ways to learn basic table napkin folds a beginner table service attendant must learn.
  • 10.
    Steps in makingBanana table napkin folds. 1. Position the cloth napkin on the table like a diamond flat. 2. To create a triangle-shaped fold, Fold the cloth outward by meeting one lower corner endpoint to the upper corner endpoint. 3. Fold the left and right endpoints at the sides going at the upper center part. 4. Then, fold the lower end point upward, approximately one and a half inches. 5. Turn it over and insert or tuck in the left and right lower- end points on the open part of the cloth below to secure the folds. Then, pull the upper cloth downward as if you are peeling the banana.
  • 11.
    What are the7 Basic table napkin folds? 2. Candle – also considered one of the primary table napkin folds learners must know how to do.
  • 13.
    Steps in makingcandle table napkin folds. 1. Position the cloth napkin on the table like a diamond flat. 2. Take the upper end point towards you, meeting from one end to the other. 3. Fold the upper folded part approximately 1 inch and position the cloth vertically; the pointed part must be at the left side, then the folded part must be positioned underneath. 4. Then roll it over and put it on the table standing. 5. fold the upper part of the fabric downward to make it look like a real candle.
  • 14.
    What are the7 Basic table napkin folds? 3. Pyramid – the quickest and easiest table napkin folds.
  • 16.
    Steps in makingpyramid table napkin folds. 1. Fold the napkin half diagonally. 2. Fold corners to meet top points. 3. Turn it over and fold it again in half, meeting at the upper center part of the cloth. 4. As shown in the photo above, meet up at the center and position it on top of the dinner plate.
  • 17.
    What are the7 Basic table napkin folds? 4. Sailing Boat – is another basic napkin fold that is easy to make.
  • 19.
    Steps in Makinga Sailing Boat Table Napkin Folds 1. Position the table napkin cloth in a diamond way. 2. Fold the bottom endpoint outward to the upper-end point part of the cloth to make it a triangle shape. 3. Roll the lower part outward three times. 4. And let it stand firm like a sailing boat.
  • 20.
    What are the7 Basic table napkin folds? 5. Bishop’s Hat – is one of the basic table napkin folds.
  • 22.
    Steps in MakingBishop’s Hat Table Napkin Folds 1. Lay the napkin on a flat surface in front of you. 2. Fold the napkin in half, ensuring the open end is towards you. 3. Fold the right corner diagonally towards you. 4. Repeat the same by folding the left corner away from you so it will meet in the middle with the right folds you did a while ago. 5. Flip the napkin over and lay it in a way that points to the far left and the near right.
  • 23.
    Steps in MakingBishop’s Hat Table Napkin Folds 6. Fold the bottom half of the napkin up outward from you, laying it flat as edges lay on top of one other. 7. Take underneath the napkin and pull out the flap on the right, making the near side come to two points, as seen in the picture. 8. Gently fold the left half of the left triangle over and tuck its end underneath the right triangle. 9. Flip the napkin over, pointing away from you; fold the right triangle to the left, tucking its end into the other triangle, just like you did on the other side a while ago. 10. Open up the hat and press the material inside to fill it out so that it becomes circular, and let it stand firmly.
  • 24.
    What are the7 Basic table napkin folds? 6. Fan with Stand – this is also one of the basic table napkin folds that is easy to make.
  • 26.
    Steps in makingFan with Stand Folds 1. Lay the napkin flat on a flat surface. 2. Fold into half lengthwise towards you. 3. Apply accordion folds from one end at about 1- inch fold, leaving at least 1/3 part of the napkin. 4. Then flip it over in half, lengthwise. Leaving the remaining 1/3 part on the other end of the napkin. 5. As you flip, fold the remaining cloth into the lower part of the accordion folds.
  • 27.
    Steps in makingFan with Stand Folds 6. Make sure the folded part is secure or make the fan stand still. 7. Check the folded lower part of the remaining 1/3 of the napkin. 8. Then position the table napkin being called a fan with a stand. 9. Let it stand with a stand-folded table napkin for a while to ensure a fan's durable and good-quality output. 10. The photo on the left side served as the final expected output of the Fand with the Stand table napkin design.
  • 28.
    What are the7 Basic table napkin folds? 7. Artichoke – this is the last basic table napkin fold design. It is usually placed on top of the dinner plate.
  • 30.
    Steps in makingFan with Stand Folds 1. Lay the table napkin cloth on a flat surface. 2. Fold all four (4) corner endpoints to the center part of the napkin. 3. Flip the napkin, and repeat the same procedure you did on number 2. 4. Pull the endpoints of the four corners underneath the napkin to form the shape of a lotus flower. 5. You finally have your final output in the abovementioned photo.
  • 31.
    Do you knowwhy table napkins vary in size?
  • 32.
    Common Types andSizes of Table Napkins Beverage napkins are used in bars and restaurants; they are designed underneath a drink or cocktail glass to absorb any drips from condensation, ensuring the surface remains clean and dry. These napkins can also gently dab the sides of one’s mouth to remove drink residue. Food and beverage staff can also use beverage napkins for carrying plates and other serving dishes to help prevent the transfer of germs and protect their hands from hot surfaces.
  • 33.
    Common Types andSizes of Table Napkins ● The size of a beverage napkin will be 10 inches by 10 inches. But when quarterly folded, its final size becomes 5 inches by 5 inches.
  • 34.
    Common Types andSizes of Table Napkins Dinner Napkins - are typically reusable and made from fabric, unlike paper-based disposable napkins. Their sizes vary, ranging from 16 inches by 16 inches to 22 inches by 22 inches. These napkins are fabric-made, so they don’t come pre-folded to allow creative folding designs depending on one’s/customers' discretion.
  • 35.
    Common Types andSizes of Table Napkins Smaller sizes of napkins are 16” x 16”. 17” x 17” and 18” x 18” are suitable for encasing cutlery in the folded napkins. It is important to note that the larger the size of the napkin to be used, measuring 22” × 22” inches, the more formal the dinner event, which means a highly prestigious dining experience it will bring to the guests.
  • 36.
    Common Types andSizes of Table Napkins Luncheon Napkins – These are usually made from paper and are single-use napkins. They are a little larger than beverage napkins and are popularly used for children’s birthday parties. They are advised to be used for serving small slices of cake and intended to wipe children’s hands after they have eaten a light meal.
  • 37.
    Common Types andSizes of Table Napkins When not folded fully, these napkins measure 13 inches by 13 inches, but when bought by pack, luncheon napkins, once folded in a quarter fold, will result in the final measurement of 6.5 inches by 6.5 inches.
  • 38.
  • 39.
    Worked Example Let uswatch this video on performing the seven basic table napkins to serve as your guide since you will be given only 3 minutes to accomplish or finish the seven folds.
  • 41.
    Lesson Activity Guidelines fortaking the practicum in performing the 7 Basic Table Napkin Folding. 1. Learners will be listed on a small piece of paper for a draw-lot set-up. 2. Once the name is called, the learner will approach the teacher's table and lay the napkin flat on the table. 3. After the teacher sets the timer (for 3 minutes only), say go! That’s the time the learner will start performing the table napkin folding. 4. And once the teacher says stop, time is up. The learner will stop, and the teacher will announce the grade the learner got based on the number of times table napkin folding was performed.
  • 42.
  • 43.
    Learners’ Takeaways Can youimagine any object or symbol that will express the learnings you gained from the lesson “basic table napkin folding”?
  • 44.
    Generalization Knowledge and skillsgained about basic napkin folding and how to do it will help us apply it in real-life situations. When there are special occasions or events to celebrate, we can set up the table and add beauty to the dining table by creating or making different basic or even fancy table napkin folding.
  • 45.
    Reflection on Learning Thinkand reflect on the importance of learning how to make the different table napkins, fold them, and realize the value of the acquired knowledge on different sizes and the purpose of each napkin size, using it appropriately when eating.
  • 46.
    Formative Assessment Enumeration withsupporting drawing Direction: Give at least 5 out of 7 Basic Table Napkin Folding and draw each using a type of writing paper and a pencil with an eraser. Label each table napkin design or folds. (2pts. each)

Editor's Notes

  • #2 Key to Correction: 1. C 1. C 2. E 3. D 4. B 5. A
  • #3 Key to Correction: 1. C 1. C 2. E 3. D 4. B 5. A
  • #22 Note: Step 1 is from the upper left photo, followed by the 2nd and 3rd steps to the right, then the 4th to 6th steps are the photos in the middle below going to the right, and the 7th to 9th steps are the three photos at the bottom. The final output is the only photo placed on the left side.
  • #23 Note: Step 1 is from the upper left photo, followed by the 2nd and 3rd steps to the right, then the 4th to 6th steps are the photos in the middle below going to the right, and the 7th to 9th steps are the three photos at the bottom. The final output is the only photo placed on the left side.
  • #26 Note: Step 1 is from the upper left photo, followed by the 2nd and 3rd steps to the right, then the 4th to 6th steps are the photos in the middle below going to the right, and the 7th to 9th steps are the three photos at the bottom. The final output is the only photo placed on the left side.
  • #27 Note: Step 1 is from the upper left photo, followed by the 2nd and 3rd steps to the right, then the 4th to 6th steps are the photos in the middle below going to the right, and the 7th to 9th steps are the three photos at the bottom. The final output is the only photo placed on the left side.
  • #30 Note: Photos at the right from the upper part are where the 1st step starts, followed by the 2nd step to the 3rd step to the right. Photos below are from the left, the 4th step, and the 5th to 6th step to the right. The final output can be found on the first separate photo on the left.
  • #32 Note: Photos at the right from the upper part are where the 1st step starts, followed by the 2nd step to the 3rd step to the right. Photos below are from the left, the 4th step, and the 5th to 6th step to the right. The final output can be found on the first separate photo on the left.
  • #33 Note: Photos at the right from the upper part are where the 1st step starts, followed by the 2nd step to the 3rd step to the right. Photos below are from the left, the 4th step, and the 5th to 6th step to the right. The final output can be found on the first separate photo on the left.
  • #34 Note: Photos at the right from the upper part are where the 1st step starts, followed by the 2nd step to the 3rd step to the right. Photos below are from the left, the 4th step, and the 5th to 6th step to the right. The final output can be found on the first separate photo on the left.
  • #35 Note: Photos at the right from the upper part are where the 1st step starts, followed by the 2nd step to the 3rd step to the right. Photos below are from the left, the 4th step, and the 5th to 6th step to the right. The final output can be found on the first separate photo on the left.
  • #36 Note: Photos at the right from the upper part are where the 1st step starts, followed by the 2nd step to the 3rd step to the right. Photos below are from the left, the 4th step, and the 5th to 6th step to the right. The final output can be found on the first separate photo on the left.
  • #37 Note: Photos at the right from the upper part are where the 1st step starts, followed by the 2nd step to the 3rd step to the right. Photos below are from the left, the 4th step, and the 5th to 6th step to the right. The final output can be found on the first separate photo on the left.
  • #40 Key to Correction: 1. C 1. C 2. E 3. D 4. B 5. A
  • #41 Before the individualized practicum test, the teacher will give the guidelines and explain how the learners will be graded using a rating scorecard.
  • #43 The teacher will ask the learners to think of any object that will symbolize achieving the day’s learning objectives.
  • #44 The teacher will ask the learners to think of any object that will symbolize achieving the day’s learning objectives.
  • #45 The teacher will ask the learners to think of any object that will symbolize achieving the day’s learning objectives.
  • #46 The teacher will ask the learners to think of any object that will symbolize achieving the day’s learning objectives.