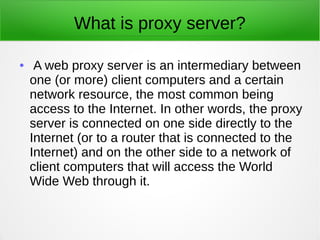
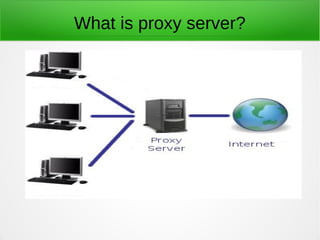
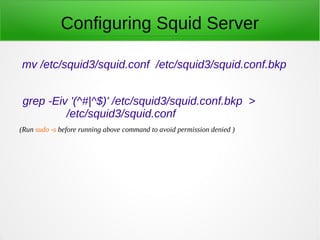
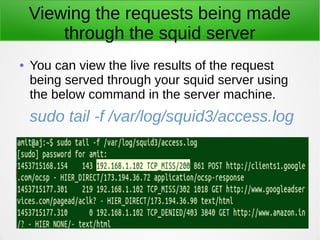
2. What is proxy server?
● A web proxy server is an intermediary between
one (or more) client computers and a certain
network resource, the most common being
access to the Internet. In other words, the proxy
server is connected on one side directly to the
Internet (or to a router that is connected to the
Internet) and on the other side to a network of
client computers that will access the World
Wide Web through it.
4. Functions/Uses of proxy server
● Squid stores files from previous requests to speed
up future transfers. For example, suppose client1
downloads ubuntu14.04.iso from the Internet. When
client2 requests access to the same file, squid can
transfer the file from its cache instead of
downloading it again from the Internet. As you can
guess, you can use this feature to speed up data
transfers in a network of computers that require
frequent updates of some kind.
5. Functions/Uses of Squid proxy
server
● ACLs (Access Control Lists) allow us to restrict the
access to websites, and / or monitor the access on a
per user basis. You can restrict access based on
day of week or time of day, or domain, for example.
● Bypassing web filters is made possible through the
use of a web proxy to which requests are made and
which returns requested content to a client, instead
of having the client request it directly to the Internet.
6. Configuring Squid Server
1. Install Squid server
sudo apt-get install squid
2. Squid’s main configuration file is /etc/squid/squid.conf,
which is ~5000 lines long since it includes both
configuration directives and documentation. For that
reason, we will create a new squid.conf file with only the
lines that include configuration directives for our
convenience, leaving out empty or commented lines. To
do so, we will use the following commands.
7. Configuring Squid Server
mv /etc/squid3/squid.conf /etc/squid3/squid.conf.bkp
grep -Eiv '(^#|^$)' /etc/squid3/squid.conf.bkp >
/etc/squid3/squid.conf
(Run sudo -s before running above command to avoid permission denied )
8. Configuring client machine to use
proxy server
In Firefox
1. Go to the Edit menu and choose the Preferences option.
2. Click on Advanced, then on the Network tab, and finally on
Settings…
3. Check Manual proxy configuration and enter the IP address of
the proxy server and the port where it is listening for
connections.
Note: That by default, Squid listens on port 3128, but you can override
this behaviour by editing the access list rule that begins with http_port (by
default it reads http_port 3128).
4.Click OK to apply the changes.
9.
10. Restricting access to a client
Suppose you want to explicitly deny access to a particular client IP
address, while yet maintaining access for the rest of the local network.
● Open the squid.conf file
sudo gedit /etc/squid3/squid.conf
● Add the following
acl studentA src 192.168.1.102
http_access deny studentA
(You can obtain IP Address by running ifconfig command )
● Restart squid server for the changes to take place.
sudo service squid3 restart
11. Restricting access by domain
● Add the following in squid.conf file
acl blocked_websites dstdomain .amazon.in
(You can also include a text file which contains the list of forbidden websites for eg.
acl blocked_websites dstdomain
“/etc/squid/blocked_websites.txt” )
http_access deny blocked_websites
● Restart squid server for the changes to take place.
sudo service squid3 restart
12. Restricting access by time of day /
day of week
● Add the following in squid.conf file
acl somedays time MTWHF 13:00-14:00
http_access deny somedays
● Restart squid server for the changes to take
place.
sudo service squid3 restart
13. Using Cache to Speed Up Data
Transfer
One of Squid’s distinguishing features is the possibility of caching
resources requested from the web to disk in order to speed up future
requests of those objects either by the same client or others.
● Add the following directives in your squid.conf file.
maximum_object_size 100 MB
cache_dir ufs /var/cache/squid3 1000 16 256
cache_effective_user proxy
#coredump_dir /var/spool/squid3
refresh_pattern -i .(mp4|mp3|test|iso|jpeg)$ 2880 50% 10080
14. Using Cache to Speed Up Data
Transfer
A few clarifications of the above directives.
●
ufs is the Squid storage format.
● /var/cache/squid is a top-level directory where cache files will be stored.
This directory must exist and be writeable by Squid.
● 1000 is the amount (in MB) to use under this directory.
●
16 is the number of 1st-level subdirectories, whereas 256 is the number of
2nd-level subdirectories within /var/cache/squid3.
● The maximum_object_size directive specifies the maximum size of allowed
objects in the cache.
● refresh_pattern tells Squid how to deal with specific file types (.mp4 , .mp3
and .iso in this case) and for how long it should store the requested objects
in cache (2880 minutes = 2 days).
15.
16. Viewing the requests being made
through the squid server
● You can view the live results of the request
being served through your squid server using
the below command in the server machine.
sudo tail -f /var/log/squid3/access.log