Title: Developing aLine Follower Robot
Subtitle: An Overview of Components and Design
Date: [28/10/2024]
Govern men t Po lytechnic Purnea
Presented by:
Presented to: [Kundan Sir]
Subject: [Robotics(tw)]
Department of electrical engineering
Sumit Raj
Manish Kumar
Sudhir kumar
Nishu Kumari
2.
Introduction
• What isa Line Follower Robot?
• A robot that follows a pre-defined path or line.
• Commonly used in robotics competitions and educational
projects.
3.
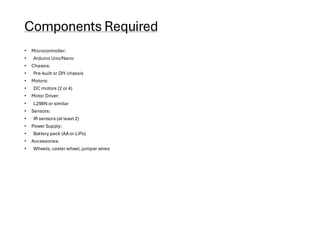
Components Required
• Microcontroller:
•Arduino Uno/Nano
• Chassis:
• Pre-built or DIY chassis
• Motors:
• DC motors (2 or 4)
• Motor Driver:
• L298N or similar
• Sensors:
• IR sensors (at least 2)
• Power Supply:
• Battery pack (AA or LiPo)
• Accessories:
• Wheels, caster wheel, jumper wires
4.
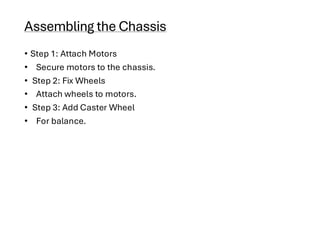
Assembling the Chassis
•Step 1: Attach Motors
• Secure motors to the chassis.
• Step 2: Fix Wheels
• Attach wheels to motors.
• Step 3: Add Caster Wheel
• For balance.
5.
Connecting the MotorDriver
• Wiring Overview:
• Connect motors to the driver.
• IN1/IN2 for Motor A, IN3/IN4 for Motor B.
• Power connections to Arduino and battery.
6.
Setting Up IRSensors
• Sensor Placement:
• Mount IR sensors at the front.
• Wiring:
• Connect to digital pins on Arduino.
Programming the Arduino
•Basic Logic:
• Read sensor values.
• Control motors based on sensor input.
• Code Snippet:
• Include a brief section of the Arduino code.
9.
Testing the Robot
•Create a Track:
• Use black tape on a white surface.
• Observe Behavior:
• Ensure the robot follows the line correctly.
10.
Calibration and Optimization
•Adjustments:
• Tweak sensor positions.
• Modify code for better performance.
• Experiment with More Sensors:
• Enhance tracking accuracy.
Conclusion
• Summary:
• Keysteps in building a line follower robot.
• Importance of testing and refinement.
• Future Work:
• Potential projects and improvements.
13.
References
• 1. Books:
•- “Robotics: A Beginner’s Guide” by John Doe
• - “Arduino Robotics” by Michael Margolis
•
• 2. Websites:
• - Arduino Official Documentation: [arduino.cc](https://www.arduino.cc)
• - SparkFun Tutorials: [sparkfun.com](https://www.sparkfun.com/tutorials)
•
• 3. Research Papers:
• - Smith, J. (2020). “Line Following Robots: An Overview of Techniques.” *Journal of Robotics Research*.
•
• 4. YouTube Channels:
• - Jeremy Blum’s Arduino Tutorials
• - Paul McWhorter’s Robotics Series
•
• 5. Forumsand Community Resources:
• - Stack Overflow: [stackoverflow.com](https://stackoverflow.com)
• - Reddit: r/robotics
![Title: Developing a Line Follower Robot
Subtitle: An Overview of Components and Design
Date: [28/10/2024]
Govern men t Po lytechnic Purnea
Presented by:
Presented to: [Kundan Sir]
Subject: [Robotics(tw)]
Department of electrical engineering
Sumit Raj
Manish Kumar
Sudhir kumar
Nishu Kumari](https://image.slidesharecdn.com/roboticstermwork-250425141403-4ba37852/85/Robotics-term-work-for-engineering-pdf-1-320.jpg)
![Title: Developing a Line Follower Robot
Subtitle: An Overview of Components and Design
Date: [28/10/2024]
Govern men t Po lytechnic Purnea
Presented by:
Presented to: [Kundan Sir]
Subject: [Robotics(tw)]
Department of electrical engineering
Sumit Raj
Manish Kumar
Sudhir kumar
Nishu Kumari](https://image.slidesharecdn.com/roboticstermwork-250425141403-4ba37852/75/Robotics-term-work-for-engineering-pdf-1-2048.jpg)

• - SparkFun Tutorials: [sparkfun.com](https://www.sparkfun.com/tutorials)
•
• 3. Research Papers:
• - Smith, J. (2020). “Line Following Robots: An Overview of Techniques.” *Journal of Robotics Research*.
•
• 4. YouTube Channels:
• - Jeremy Blum’s Arduino Tutorials
• - Paul McWhorter’s Robotics Series
•
• 5. Forumsand Community Resources:
• - Stack Overflow: [stackoverflow.com](https://stackoverflow.com)
• - Reddit: r/robotics](https://image.slidesharecdn.com/roboticstermwork-250425141403-4ba37852/85/Robotics-term-work-for-engineering-pdf-13-320.jpg)