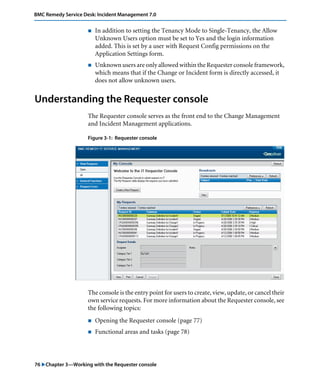
Downloaded 30 times


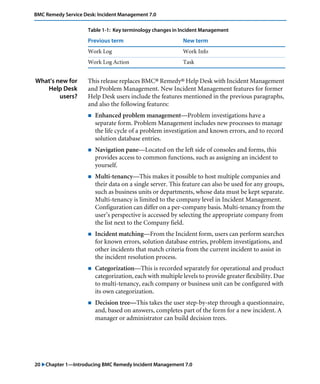


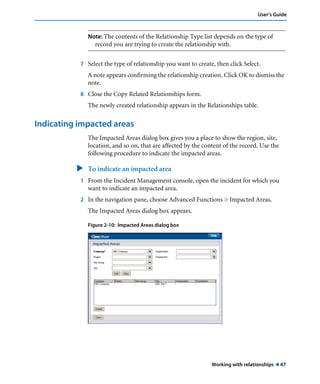

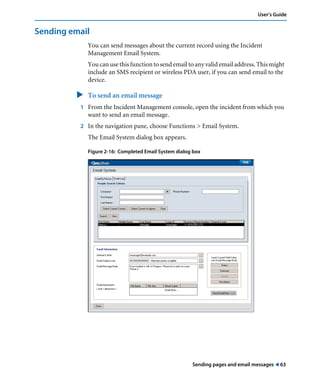


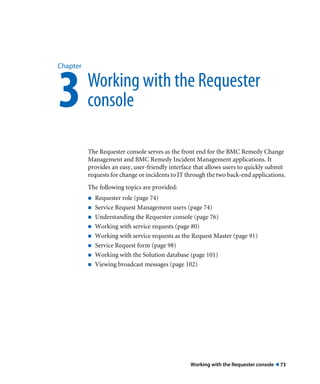


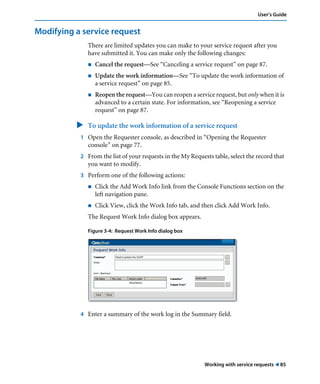


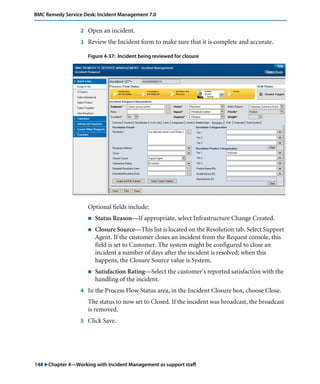


This document is the user guide for BMC Remedy Incident Management 7.0. It provides information on installing and configuring Incident Management, describes the key roles and workflows in Incident Management including the lifecycle of an incident request. It also covers common functions across the BMC Remedy IT Service Management suite such as working with records, relationships, reports and more. The guide is intended for all users of Incident Management including requesters, support staff and incident managers.


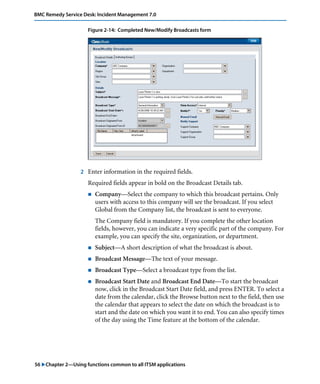
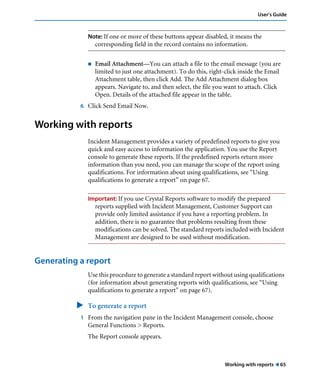
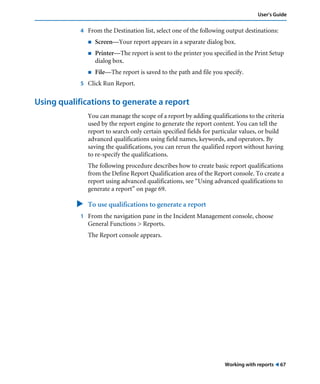
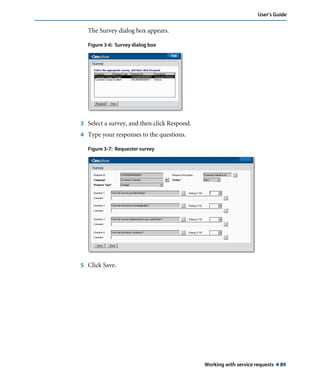
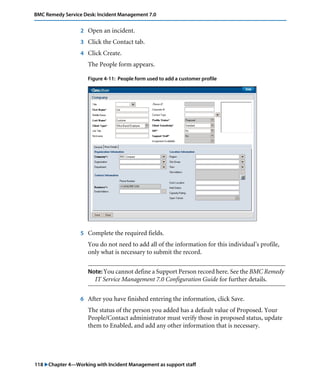
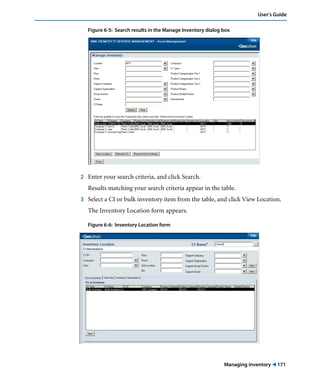
![20260201 [FOSDEM] gomodjail - library sandboxing for Go modules.pdf](https://cdn.slidesharecdn.com/ss_thumbnails/20260201fosdemgomodjail-librarysandboxingforgomodules-260201225659-76609ec4-thumbnail.jpg?width=640&height=640&fit=bounds)


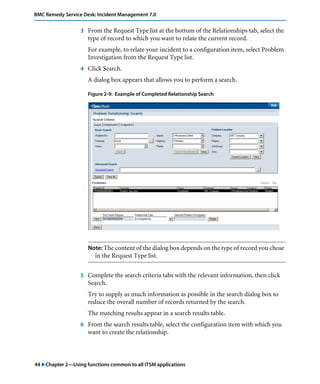
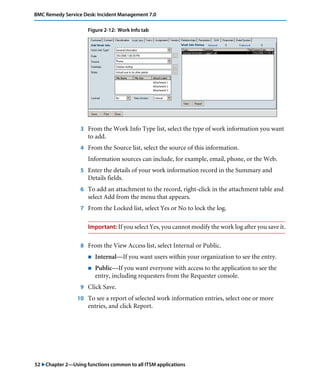
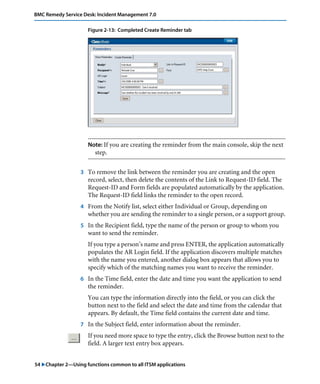
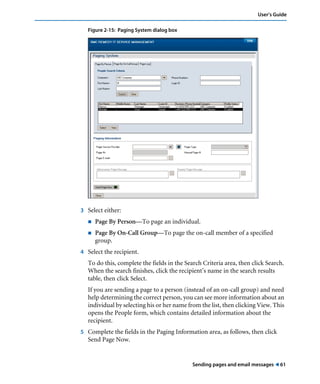
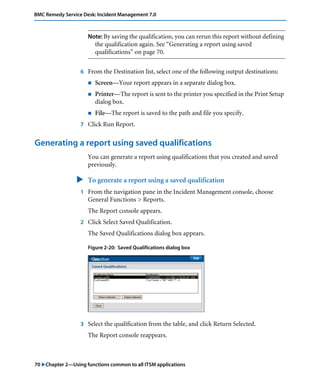
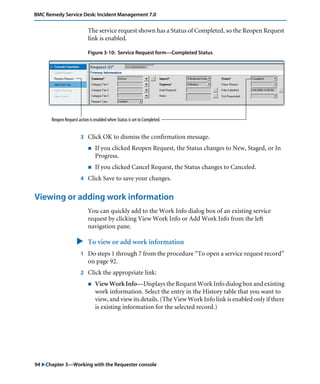
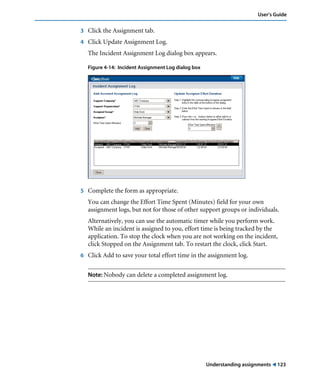
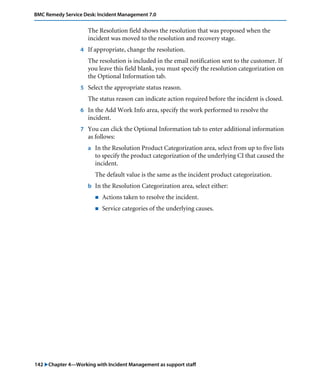
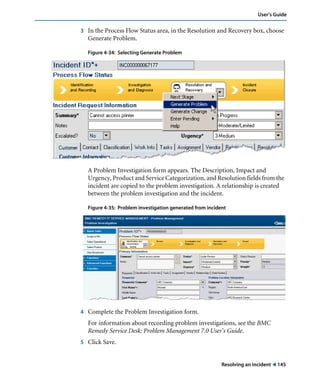
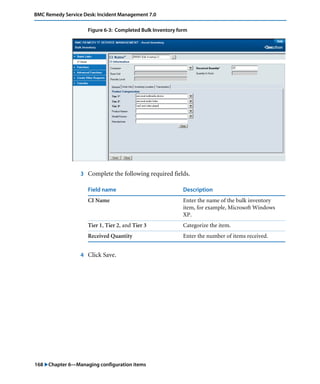
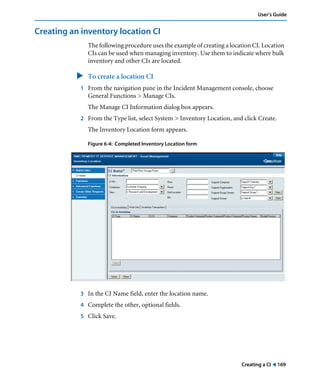
![谷歌留痕技术教程[ 𝙩𝙤𝙥 𝟮𝟯𝟯. 𝙘 𝙤𝙢 ]](https://cdn.slidesharecdn.com/ss_thumbnails/top233-260130173900-2eb784f9-thumbnail.jpg?width=640&height=640&fit=bounds)