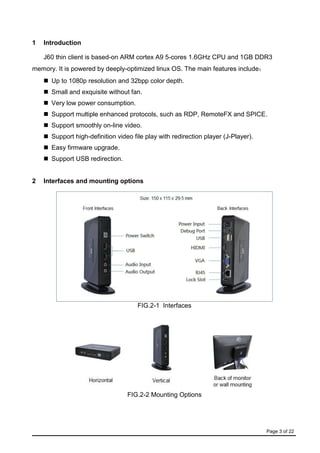
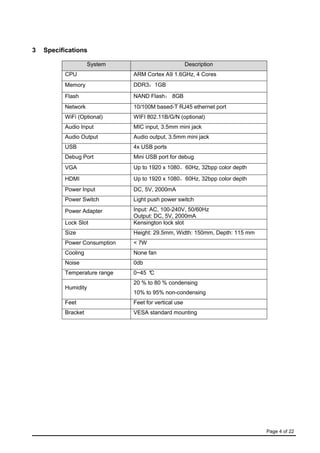
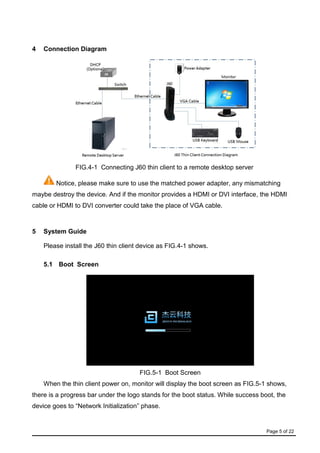
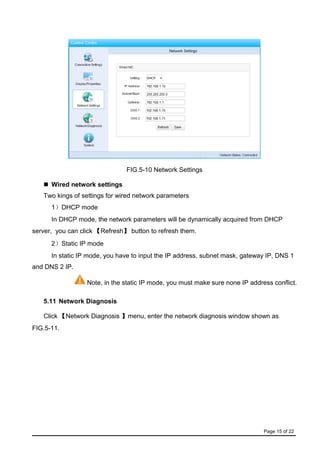
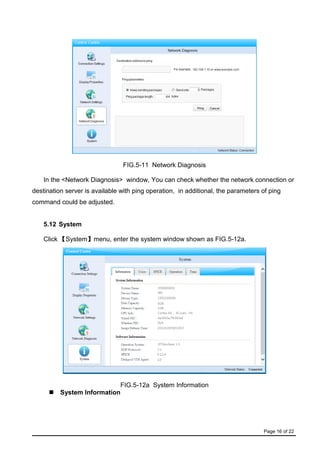
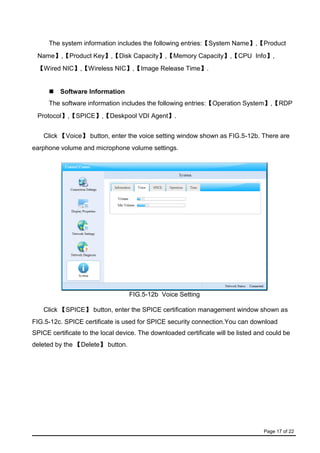
This document provides instructions for using a thin client device called the J60. It has the following key features: RDP 7.1, RemoteFX graphics, and SPICE with USB redirection. The document outlines how to set up and configure connections to remote desktops using RDP and SPICE protocols. It also describes how to configure network, display, and system settings on the J60 thin client. Restore factory defaults and common troubleshooting steps are provided at the end.


![Page 21 of 22
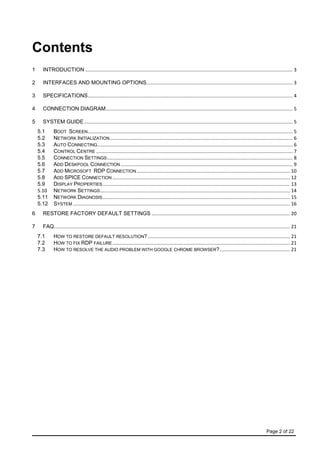
7 FAQ
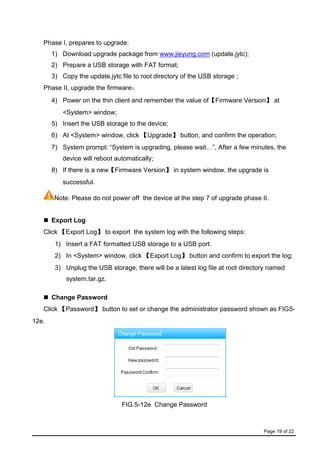
7.1 How to restore default resolution?
Three steps to restore the device output resolution to default setting with 800x600:
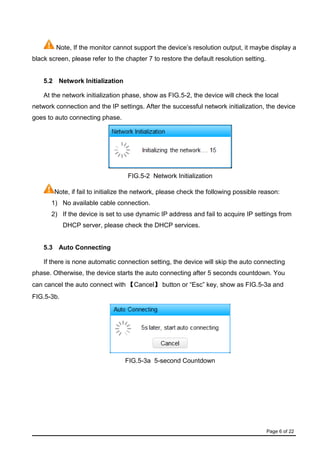
Step 1: Power on and waiting for the end of boot screen (Shown as FIG.5-1);
Step 2: Keep pressing 【Ctrl+Alt+Shift+s】keys for 5~10 seconds;
Step 3: Waiting for reboot and check the new resolution.
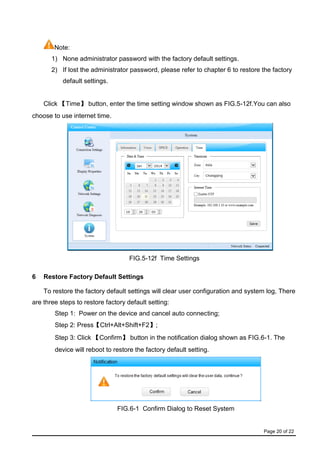
7.2 How to fix RDP failure
Check network: diagnose the connection between thin client and windows server.
Check the server side setting: check the remote desktop settings and firewall
settings, for the windows xp server, the local security strategy should be classic
mode.
Check the thin client RDP setting: check the NLA setting, if the NLA is enabled,
the login account should be filled correctly.
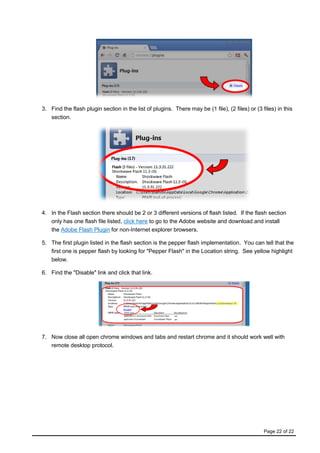
7.3 How to resolve the audio problem with google chrome browser?
With the recent release of Google Chrome Version 21 and later, Google made a change
and instead of using Adobe's Flash, they now use something new called Pepper Flash. The
problem is that the Pepper Flash cannot work well with Microsoft RDP, which will degrade
the remote audio mapping. Please follow the steps below to disable the new Pepper Flash:
1. Open the chrome plugins page by typing this URL into the address bar: chrome://plugins
2. Find the "[+] Details" button in the upper right to show the details of each installed plugin and click
this button.](https://image.slidesharecdn.com/rdp-remotefx-spice-arm-linux-thin-client-140416211442-phpapp02/85/rdp-remotefx-spice-arm-linux-thin-client-21-320.jpg)


![Cimco edit 5 user guide[1]](https://cdn.slidesharecdn.com/ss_thumbnails/cimcoedit5userguide1-110305112440-phpapp01-thumbnail.jpg?width=640&height=640&fit=bounds)


