The document provides step-by-step instructions for installing ESXi hypervisor software on a Cisco UCS C-Series server using the Cisco Integrated Management Controller (CIMC). Key steps include: 1) Accessing the CIMC over the network and power cycling the server; 2) Mapping the ESXi installation ISO image using CIMC virtual media; 3) Installing ESXi which will host a Cisco Unified Call Manager virtual machine. Finally, 4) Configuring the ESXi management network and accessing the new hypervisor installation through vSphere client.
This document provides a checklist for building an MS Windows Server 2008 machine. It outlines 14 high-level steps: 1) Prepare required paperwork; 2) Configure hardware or virtual machine; 3) Prepare the server environment; 4) Install Windows Server OS; 5) Customize the desktop and power settings; 6) Configure core server settings; 7) Install necessary agents and add-ons; and 8) Mark the build complete upon installing required VMware or hardware tools. It also provides additional pages of detailed instructions for each step.
In This PPT we are discussed about complete details of that product (Use,Operation, Technical details, Dimensions, Wiring, and etc..)
Please Support us and Follow our other Sites
https://automationtechplc2.blogspot.com
https://humidificationcontrol.blogspot.com
https://controlsandsystems.business.site
If you enjoyed this article, share it with your friends and colleagues.
The document provides instructions for basic operations on Cisco routers and switches including connecting to devices, erasing configurations, recovering passwords, creating VLANs, saving configurations, loading and saving IOS images using TFTP, and setting up a TFTP server. The instructions cover topics such as connecting via console cable, erasing startup configurations, recovering passwords for different models by changing configuration register values, creating VLANs on specific switch models by assigning ports, saving configurations to flash or TFTP server, copying IOS images to and from a TFTP server, and creating a monitor port on a switch to capture traffic on a port or VLAN.
The document provides instructions for setting up and using a VIVOTEK network camera test lab. It includes chapters on preparation, installation, using the Installation Wizard 2 software, camera configuration, and using the ST7501 client/server software. Some key points:
- Chapter 1 discusses necessary lab components and how to connect the camera.
- Chapter 2 covers installing the Installation Wizard 2 and ST7501 software, including selecting installation directories and options.
- Chapter 3 describes the Installation Wizard 2 user interface and how it analyzes the network environment.
- Chapter 4 provides steps for configuring camera cropping through the viewing window page to define the region of interest and output frame size.
This document provides information about Balance Fitness, a health and wellness business owned by Andrea Lopez. It outlines problems the business solves such as weight issues, health problems, and low confidence. It also discusses unfair advantages the business has in reaching customers on a personal level. The business model focuses on providing high quality service and results to busy working mothers and stay at home moms ages 25-35. It forecasts growth over three years with increasing customers, employees, sales, and profits. The long term goals are to expand into a fitness studio and grow the small business.
El documento describe el pensamiento sistémico, que implica comprender cómo las partes de un sistema se relacionan y afectan entre sí. Explica que Peter Senge popularizó esta idea y describió cinco disciplinas para las organizaciones inteligentes, siendo la quinta disciplina el pensamiento sistémico. También resume once principios clave del pensamiento sistémico, como que los problemas de hoy derivan de las soluciones de ayer y que pequeños cambios pueden tener grandes efectos si se realizan en el punto adecuado del sistema.
This document provides information about Balance Fitness, a health and wellness business owned by Andrea Lopez. It outlines problems the business solves such as weight issues, health problems, and low confidence. It also discusses unfair advantages the business has in reaching customers on a personal level. The business model focuses on providing high quality service and results to busy working mothers and stay at home moms ages 25-35. Sales and marketing are done through social media, word of mouth, and free consultations. Goals for the business include opening a fitness studio and growing the small business into a larger company.
Kaseluvi Tendencia 2015 memberikan informasi tentang tren tahun 2015. Dokumen tersebut mengulang judul "Kaseluvi Tendencia 2015" sebanyak tiga kali, menunjukkan fokus pada tren yang akan terjadi pada tahun 2015.
The health sector in Ghana is transitioning from a government-managed public system to a more diverse set of providers. The public sector faces challenges in financing and quality due to budget constraints. The National Health Insurance Scheme finances the sector but faces sustainability and efficiency issues. There are growing opportunities in the private sector to meet demand from the emerging middle class willing to pay for quality care. Opportunities include constructing hospitals, diagnostic centers, and expanding health services management. The transition brings challenges around equity but Ghana is pioneering health reforms and welcomes innovation.
Modul ini membahas proses troubleshooting untuk komponen hardware komputer dengan menggunakan siklus troubleshooting yang terdiri dari mengidentifikasi masalah, mengumpulkan informasi, mengembangkan solusi, menerapkan solusi, memastikan masalah terpecahkan, dan mendokumentasikan solusi. Langkah-langkah ini dijelaskan beserta teknik mengumpulkan informasi dari pengguna akhir dan peralatan diagnosa yang dapat digunakan.
Enjoy an afternoon of festive fruit mixing activity along with a grand buffet lunch for just INR 850 including taxes!
For more details, logon to: http://pune.regency.hyatt.com/en/hotel/news-and-events/news-listing/pre-christmas-fruit-mixing.html now!
During National Op Shop week 2014, we want to share the story of how your donated goods to BSL are sorted, processed, and then sold in our op shops, providing low-cost goods to shoppers and raising vital funds for our programs and services.
The document provides tips and advice for starting a new organization across 11 chapters. It discusses making meaning and mantras in chapter 1, positioning in chapter 2, pitching in chapter 3, writing business plans in chapter 4, bootstrapping in chapter 5, recruiting in chapter 6, raising capital in chapter 7, partnering in chapter 8, branding in chapter 9, rainmaking in chapter 10, and being ethical in chapter 11. The overall guidance emphasizes focusing on customers, building the business first before fundraising, hiring for strengths over weaknesses, and conducting oneself with integrity.
Hyatt Regency Pune is one of the most renowned 5 star hotels in Pune and recipient of TripAdvisor's 2014 Certificate of Excellence.
The hotel is conveniently located on Nagar Road in close proximity to Pune’s Lohegaon International Airport. and to thecity’s entertainment areas of Koregaon Park and Kalyani Nagar.
Hyatt Regency Pune is the only hotel in Pune, which features a temperature controlled indoor swimming pool. On the property you will also find exclusive facilities like the Regency Club Lounge, the Arogya Spa, The Cafe all day restaurant, the La Terrazza - Italian Trattorial & Lounge, the Gourmet Avenue for savouries & desserts and the Single Malt & Co. bar and lounge.
Cyber Security Workshop @SPIT- 3rd October 2015Nilesh Sapariya
Got Invited for conducting the workshop on ‘Cyber Security’ at top notch engineering college.
Sardar Patel Institute of Technology, Andheri on 3rd October, 2015.
Student feedback:-
https://drive.google.com/file/d/0B_uWWP1uW7TFWVdTanJFdTlqNkE/view?usp=sharing
Appreciation letter:-
https://drive.google.com/file/d/0B_uWWP1uW7TFMkVVUTR4V1JTN2c/view?usp=sharing
The document provides instructions for installing Cisco Business Edition 6000, which includes deploying virtual machines, configuring the ESXi host, and installing collaboration applications. Key steps include collecting network information, powering on and customizing the ESXi host for remote access, deploying virtual machines using preloaded OVA template files, and installing applications on the virtual machines.
This document provides instructions for installing and configuring Cisco Business Edition 6000 (BE6000). The key steps include:
1. Collecting required network information such as IP addresses, subnet mask, gateway, and DNS before installation.
2. Powering on the BE6000 server, connecting monitors and keyboards, and accessing the Cisco Integrated Management Controller (CIMC) for remote management if needed.
3. Customizing the ESXi hypervisor by changing passwords, assigning static IP addresses, and enabling remote access via vSphere client.
4. Accessing and configuring the ESXi host using the vSphere client.
Vmware esxi and ucs firmware upgrade steps and challenges v4.10Amim Ansari
This document provides instructions for upgrading the VMware ESXi operating system from version 5.x to 6.x on Cisco UCS servers. It outlines two methods for downloading the upgrade ISO file, how to map the ISO to the server using the KVM console, and steps to initiate the upgrade process. It also describes challenges that may be encountered with incompatible hardware drivers and provides solutions for removing those drivers from a custom ISO image. The document concludes with guidance on upgrading firmware and BIOS on UCS C220/C240 servers using the Host Upgrade Utility ISO.
The document provides instructions for configuring a Cisco 2901 router through the Cisco Setup Command Facility. It involves 11 steps:
1) Powering on the router and accessing the Setup Command Facility
2) Choosing to use the Setup Command Facility for initial configuration
3) Configuring basic settings like hostname, passwords, and SNMP settings
4) Selecting an interface (GigabitEthernet0/1) and configuring IP address and subnet mask
5) Viewing and confirming the generated configuration script
6) Saving the configuration to complete initial setup
7) Additional options like modifying the existing configuration through CLI
This document provides procedures for initial configuration of a network element, including:
1. Configuring the software environment and loading new software via FTP.
2. Setting the NE to operate in SDH mode by changing the mode via CLI.
3. Configuring the loopback IP address via WebUI or CLI.
4. Provisioning the OAMP port and enabling it to allow the NE to act as a gateway, and provisioning IP routes for connectivity to other network elements.
The document contains detailed step-by-step instructions for completing each configuration using both the WebUI and CLI interfaces.
Blockchain - Hyperledger Fabric v1.0 Running on LinuxONE, see it in action!Anderson Bassani
This document provides instructions for deploying a Hyperledger Fabric blockchain network on a LinuxONE virtual machine. It outlines how to sign up for a LinuxONE Community Cloud trial account, deploy a virtual server instance, and generate an SSH key pair to access the server securely. Detailed steps are provided to install prerequisites, build Hyperledger Fabric, create a four-peer network, and deploy an example smart contract application. The goal is for participants to gain hands-on experience running a blockchain network on LinuxONE infrastructure.
This document provides instructions for configuring various end devices in Packet Tracer, including a server, two PCs, and a switch. Students are asked to:
1. Build a network topology connecting a server, two PCs, and a switch.
2. Configure IP addresses on the server, PC0, and PC1, then validate the connections by pinging between devices and accessing the server web page from PC1.
3. Access the switch CLI and change the switch name, then shut down two interfaces to disable those connections.
Screenshots should be provided showing the completion of each step.
This document outlines the planning and implementation of a VOIP system using Asterisk on Linux. It includes network diagrams, server and client specifications, and steps for installing Asterisk on CentOS and configuring extensions, trunks, and outbound routes in the Asterisk web interface. Tests of internal and external calls between softphones on Linux and Windows clients are also described. The goal is to provide a free solution for making calls over an internal network and to external networks to reduce calling costs.
Configure windows xp professional to be a vpn serverNie Andini
This document provides instructions for configuring a Windows XP Professional computer to accept incoming VPN connections and act as a VPN server. It explains that Windows XP Professional allows a computer to accept up to four simultaneous remote access connections on interfaces like a dial-up modem, infrared port, parallel port, or VPN interface. It then provides step-by-step instructions for using the New Connection Wizard to set up an advanced incoming connection and configure the computer to accept VPN connections, allowing remote users to access shared folders and files.
Cisco Configuration Professional allows for the configuration of site-to-site IPsec VPN tunnels between two Cisco IOS routers. The document provides an example configuration using static routes that establishes an IPsec tunnel between Router A and Router B. The configuration is performed using Cisco Configuration Professional on each router and specifies the IKE and IPsec proposals, transform sets, and traffic to be protected between the 10.10.10.0 and 10.20.10.0 networks. Show commands are included to verify the tunnel is successfully established and traffic is being encrypted and decrypted.
All Coyprights belong to: https://class.coursera.org/startup-001/class/index
This is just for documentation and sharing the word about the this great course. If your interesting follow the link and join the course.
This document provides a quick-start guide for connecting various Weintek I/O modules to CODESYS using a cMT-X HMI device. It outlines the steps to set up CODESYS, create a project, scan for devices, add specific Weintek devices like iR-ETN, iR-COP, and iR-ECAT, and map I/O tags between the modules and CODESYS project. The guide is intended to help users get started integrating Weintek I/O with CODESYS control programming.
1. Use the BtspConfig software to set up the network parameters for the BT-Pusher device, including the device name, number of devices, IP address range, and server IP address.
2. Update the BT-Pusher device configuration by saving it to a USB flash drive and inserting the drive into the device.
3. Open the BtManagerServer software on the PC and ensure the IP settings match what was configured for the BT-Pusher device to establish a connection.
The document provides instructions for customizing the dashboard displayed on the driver station screen in the 2010 FIRST Robotics Competition. It discusses modifying the dashboard to display additional sensor readings, status updates, and video feeds from the robot. The key steps include using data types to bundle and transfer information from the robot program to the driver station via UDP, designing the dashboard user interface, and building an executable file to display the customized dashboard.
This blog is about utilizing IBM Bluemix’s readily available environment capabilities for the development of IoT application by integrating it with IBMWatson, Raspberry Pi and virtual device.
The document provides instructions for setting up three virtual machines: Kali Linux with Nessus, Windows Server 2008 with vulnerable software, and Metasploitable 2. The instructions include downloading and installing VMware or VirtualBox, downloading the virtual machine files, and configuring and capturing screenshots of each virtual machine once launched.
1. This document provides step-by-step instructions for setting up OPC communications between a PC and a Simatic PLC using Simatic Net and a CP5611 card.
2. Key steps include installing Simatic Net software, inserting the CP5611 card, configuring the PG/PC interface, creating a Simatic PC station, inserting an OPC server and CP5611 module, configuring the S7 connection, downloading to the project, and testing with an OPC client.
3. Common pitfalls include ensuring the PG/PC interface is set to internal, station name is specified correctly everywhere, communication hardware mode is configured with the proper index, and correct slot number is specified for
Hacking windows xp sp 2 using metasploitTejasKore3
Using metasploit to hack windows xp machines just by using the ip address of the victim machine. It does not involve installing any backdoor or trojan server on the victim machine.
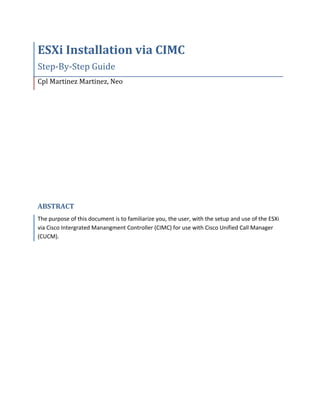
1. ESXi Installation via CIMC
Step-By-Step Guide
Cpl Martinez Martinez, Neo
ABSTRACT
The purpose of this document is to familiarize you, the user, with the setup and use of the ESXi
via Cisco Intergrated Manangment Controller (CIMC) for use with Cisco Unified Call Manager
(CUCM).
2. 3rd MarDiv HQBN Communications Company
ESXi Installation via CIMC
2
The purpose of this document is to familiarize you, the user, with the setup and use of the ESXi
via Cisco Intergrated Manangment Controller (CIMC) for use with Cisco Unified Call Manager
(CUCM). This document is for users with basic knowledge of the CUCM. This document will walk
you through how to install and configure an example CIMC. Presequites and IP information for
this scenario is listed below.
Before you get started you will need the following:
UCS C-Series Servers, CIMC (part of a single USMC Call Manager Package)
PoE Cisco Catalyst Switch (also included in the USMC’s Call Manager Package)
Monitor screen and keyboard
Cat5 cable and cabling equipment
Cisco Call Manager version 8.6.1
1 Laptop, with NIC, CD Drive and the following software installed:
o VMWare ESXi vSphere Client 5.5
o Latest version of Adobe and Java
3. 3rd MarDiv HQBN Communications Company
ESXi Installation via CIMC
3
Example IP Quick Reference:
Gateway: 214.15.111.129
Subnetmask: 255.255.255.240
CIMC: 214.15.111.134
EXSi (vSphere): 214.15.111.132
Call Manager :214.15.111.130
Laptop: 214.15.111.133
In this example the devices are physically connected as follows:
Connect the (publisher) server’s NIC 1 to the PoE switch ports 1.
Connect the (subscriber) server’s NIC 1 to the PoE switch ports 2.
Connect your laptop’s NIC to the PoE switch port 3.
Connect the monitor screen to the server with VGA cable and keyboard with USB cable.
4. 3rd MarDiv HQBN Communications Company
ESXi Installation via CIMC
4
Before you begin, provide inter-connectivity within the devices by seting but a local area
network. In this example, the PoE switch is configured using the following commands:
Username: cisco
Password: cisco
>enable
#config ter
Default username and password for
new Cisco Switch.
(config)#line con 0 If you are using a brand new switch
(config-if)#no login local
(config-if)#exit
(config)#ntp master 8
(config)#interface vlan 40
(config-if)#ip add 214.15.111.129 255.255.255.240
(config-if)#exit
(config)#inter range gi 2/0/1 – 24
(config-if)#switchport mode access
(config-if)#switchport access voice vlan 40
(config-if)#exit
(config)# ip routing
(config)#do write
disable the default password. The CLI
will lock lockout otherwise.
Enable an NTP reference for CUCM.
Create a VLAN for this network.
Assign the voice VLAN to the remaining
Ethernet ports on the switch.
Assure IP Routing is enabled.
Save running configuration.
5. 3rd MarDiv HQBN Communications Company
ESXi Installation via CIMC
5
OVERVIEW
The servers featured on the former Call Manager package contained a CD drive in which the
user insterted a bootable image disc.This latest Call Manager package consist of UCS C-Series
rackment servers which provides management access via the Cisco Intergrated Management
Controller (CIMC). To access this feature you simply power on the server, give it an IP address
and manage over the network. This is important because in order to install the version 8.6.1
Call Manager image we need to create a virtual machine with ESXi vSphere Client on the server.
In the following example the servers are blank. To install the software we need to configure the
server to load software, then install the EXSi software. ESXi, is a hypervisor, meaning it allows
us to install and run multiple operating systems on the same hardware. In this example we will
merely install the Unified Cisco Call Manager software. First we will load the EXSi to the CIMC
servers.
6. 3rd MarDiv HQBN Communications Company
ESXi Installation via CIMC
6
Before you continue on to step one, reassure you assigned the laptop an IP address and that all
physical connections are in the propper place.
1. Pay attention to the monitor screen as you power on the server and it should appear
similar to the figure 1. Press <F8> when the option is available. If you miss the
opportunity to hit the F8 key during this boot proccess, try again by powering the server
off and on again. Next, you will notice several options displayed on the monitor screen.
NOTE: there is no screen shot of the settings displayed on the monitor presented on this
document. Uncheck DHCP Enabled and enter the CIMC IP, Subnet Mask and Gateway.
(You may change the password here also) Pess <F10> on the keyboard to save it. See
Figure 1 below and the IP Quick Reference above.
Figure 1
7. 3rd MarDiv HQBN Communications Company
ESXi Installation via CIMC
7
2. As you already know, assigning an IP adress to the CIMC allows the user to access
management through the web GUI. Having said that, open the web browser and type
the CIMC IP address on the URL search bar. In this case is 214.15.111.134. Default
Username:admin Password:password. See Figure 2. Unless it was changed during step
one.
Figure 2
8. 3rd MarDiv HQBN Communications Company
ESXi Installation via CIMC
8
3. Now you should see the GUI interface. Select Power Off Server. See Figure 3.
Figure 3
4. After the server is powered off, selet Launch KVM Console and a message will pop up. It
reads: Do you want to continue? Select Continue See Figure 4.
Figure 4
9. 3rd MarDiv HQBN Communications Company
ESXi Installation via CIMC
9
5. Another meassege will pop up. Check box to accpet and select Run. See Figure 5.
Figure 5
6. Press Power On Server and then Continue. See Figure 6.
Figure 6
10. 3rd MarDiv HQBN Communications Company
ESXi Installation via CIMC
10
7. You will now see the boot proccess via KVM console on your laptop. (See See Figure 7).
Figure 7
8. Pay attention to the boot proccess when you see the screen on figure 8, press Ctrl+ H, to
access the WebBIOS.
Figure 8
11. 3rd MarDiv HQBN Communications Company
ESXi Installation via CIMC
11
9. From your laptop you can now access the WebBIOS as shown in Figure 9. Hit the Start
button on the screen.
Figure 9
10. Choose Configuration Wizard. See Figure 10
Figure 10
12. 3rd MarDiv HQBN Communications Company
ESXi Installation via CIMC
12
11. Select New Configuration, then Next. See Figure 11
Figure 11
12. Select Automatic Configuration and then No Redundency. Hit Next. See Figure 12
Figure 12
13. 3rd MarDiv HQBN Communications Company
ESXi Installation via CIMC
13
13. Simply press Accept. See Figure 13.
Figure 13
14. Click Set Boot Drive and hit Go. Then, select the Home button. See Figure 14
Figure 14
14. 3rd MarDiv HQBN Communications Company
ESXi Installation via CIMC
14
15. You should still be using the GUI from your laptop. Scroll through the tabs; hit Macros,
Static Macros and Ctrl+Alt+Del as show on Figure 15. The system will reboot.
Figure 15
16. From the GUI interface, go to the Virtual Media tab. See Figure 16.
Figure 16
15. 3rd MarDiv HQBN Communications Company
ESXi Installation via CIMC
15
17. Click on Add Image and find the image file for VMWare vSphere. See Figure 17
Figure 17
18. Check the box directed to the vSphere image to map it. See Figure 18
Figure 18
16. 3rd MarDiv HQBN Communications Company
ESXi Installation via CIMC
16
19. Once again scroll through the tabs; hit Macros, Static Macros and Ctrl+Alt+Del as
shown on Figure 19. The system will reboot.
Figure 19
20. If the boot proccess does not find the image, simply press Enter. See Figure 20.
Figure 20
17. 3rd MarDiv HQBN Communications Company
ESXi Installation via CIMC
17
21. The system will boot automatically after five seconds. See Figure 21.
Figure 21
22. Press Enter. See Figure 22.
Figure 22
18. 3rd MarDiv HQBN Communications Company
ESXi Installation via CIMC
18
23. Press <F11> to accept. See Figure 23.
Figure 23
24. Press Enter. See Figure 24.
Figure 24
19. 3rd MarDiv HQBN Communications Company
ESXi Installation via CIMC
19
25. Press Enter to select the defualt keyboard layout. See Figure 25.
Figure 25
26. Set your password and press Enter. See Figure 26.
Figure 26
20. 3rd MarDiv HQBN Communications Company
ESXi Installation via CIMC
20
27. Press <F11> to confirm your intent to install. See Figure 27.
Figure 27
28. Confirm by pressing Enter. See Figure 28.
Figure 28
21. 3rd MarDiv HQBN Communications Company
ESXi Installation via CIMC
21
29. Press <F2>.See Figure 29
Figure 29
30. Enter the login and password. The default login is Root. The password was set by you
on step 26. Then, press Enter. See Figure 30
Figure 30
22. 3rd MarDiv HQBN Communications Company
ESXi Installation via CIMC
22
31. Select Configure Management Network. See Figure 31
Figure 31
32. Go to Network Adapters and select vnic1. Enter. See Figure 32
Figure 32
23. 3rd MarDiv HQBN Communications Company
ESXi Installation via CIMC
23
33. VLAN (optional) See Figure 33
Figure 33
34. Set VLAN ID (VLAN configurations are optional. In this case you will not need to change
vlan information because all your devices are on the same network.) See Figure 34
Figure 34
24. 3rd MarDiv HQBN Communications Company
ESXi Installation via CIMC
24
35. IP Configuration See Figure 35
Figure 35
36. Check off the box for Static IP. See Figure 36
Figure 36
25. 3rd MarDiv HQBN Communications Company
ESXi Installation via CIMC
25
37. Enter IP information. In this scenario: IP Address 214.15.111.132 Subnetmask
255.255.255.240 and Gateway is 214.15.111.129. See Figure 37
Figure 37
38. Hit the ESC key on the keyboard and Y to continue. See Figure 38
Figure 38
26. 3rd MarDiv HQBN Communications Company
ESXi Installation via CIMC
26
39. On your desktop, open the vSphere Client. Enter the IP Address (214.15.111.132) and
login information. See Figure 39
Figure 39
40. Check off the box to install certification and hit Ignore. See Figure 40
Figure 40
27. 3rd MarDiv HQBN Communications Company
ESXi Installation via CIMC
27
41. Hit Yes and Ok on the pop-up message boxes. NOTE: occasionally, a notification hides
behind the pop-up boxes. Drag the pop-up boxes out of the way and hit ok. See Figure
41
Figure 41
28. 3rd MarDiv HQBN Communications Company
ESXi Installation via CIMC
28
42. Now you have access to the vSphere Client GUI. Create a new virtual machine. See
Figure 42
Figure 42
29. 3rd MarDiv HQBN Communications Company
ESXi Installation via CIMC
29
43. In the next steps you will create a virtual drive for the Call Manager installation. The
settings will vary by user preference. The following settings will work. Hit Custom and
Next. See Figure 43
Figure 43
30. 3rd MarDiv HQBN Communications Company
ESXi Installation via CIMC
30
44. Next See Figure 44
Figure 44
45. Next See Figure 45
Figure 45
31. 3rd MarDiv HQBN Communications Company
ESXi Installation via CIMC
31
46. Select Linux for guest operating system, then Red Hat Enterprise Linux 4 (64-bit). Next.
See Figure 46
Figure 46
47. Assign 4 GB to the memory. Next. See Figure 47
Figure 47
32. 3rd MarDiv HQBN Communications Company
ESXi Installation via CIMC
32
48. Next See Figure 48
Figure 48
49. Next See Figure 49
Figure 49
33. 3rd MarDiv HQBN Communications Company
ESXi Installation via CIMC
33
50. Next See Figure 50
Figure 50
51. Create a New Virtual Disk. Next See Figure 51
Figure 51
34. 3rd MarDiv HQBN Communications Company
ESXi Installation via CIMC
34
52. Assign 400 GB to the Virtual Disk. Next See Figure 52
Figure 52
53. Next See Figure 53
Figure 53
35. 3rd MarDiv HQBN Communications Company
ESXi Installation via CIMC
35
54. Finish See Figure 54
Figure 54
55. Power on Virtual Machine See Figure 55.
Figure 55
36. 3rd MarDiv HQBN Communications Company
ESXi Installation via CIMC
36
56. Set the virtual machine to boot from the laptop’s D Drive. See Figure 56.
Figure 56
57. The virtual machine will find the bootble CUCM disc from your laptop. See Figure 57.
Figure 57