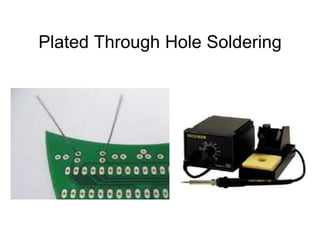
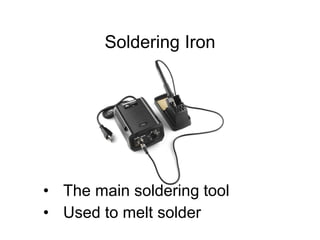
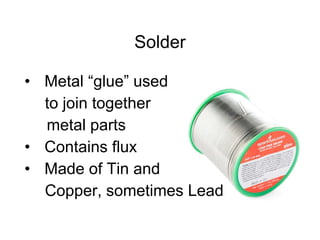
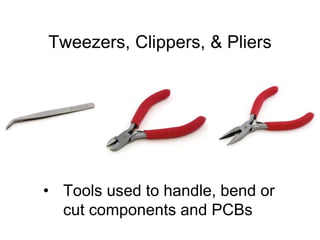
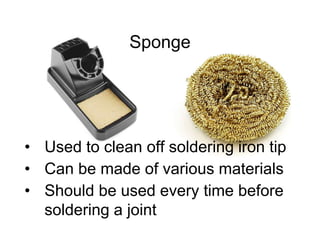
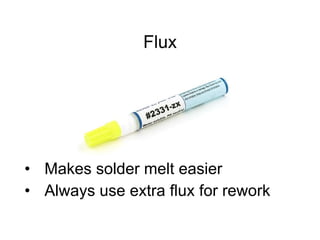
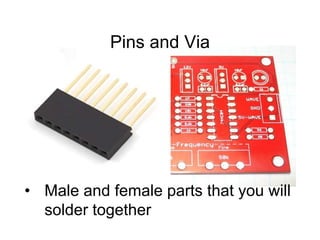
Plated Through Hole Soldering
Materials by Lindsay Craig
Plated Through Hole Soldering
Soldering Iron
• The main soldering tool
• Used to melt solder
Solder
• Metal “glue” used
to join together
metal parts
• Contains flux
• Made of Tin and
Copper, sometimes Lead
Tweezers, Clippers, & Pliers
• Tools used to handle, bend or
cut components and PCBs
Sponge
• Used to clean off soldering iron tip
• Can be made of various materials
• Should be used every time before
soldering a joint
Flux
• Makes solder melt easier
• Always use extra flux for rework
Solder Wick
• Use to remove solder
• Careful, it gets really hot!
Pins and Via
• Male and female parts that you will
solder together
PCB
• Printed Circuit Board
• Comprised mainly of fiberglass
and copper foil
Safety Goggles
• Wear them, you only have 2 eyes and
solder is very, very hot! (Like this guy.)
What is oxidization?
•Oxidization is what happens when oxygen breaks
down matter
•It impedes heat and electricity transfer
•As a result you must clean your iron tip
constantly… really!
What is polarity?
• Some parts have to be
attached in a very particular
way due to polarity
• These parts will not work if
you put them in incorrectly,
pay attention
• Polarized parts are
highlighted in yellow in
your kit card Example of polarized LEDs
Cleaning your soldering iron
•Cleaning your soldering iron is one of the most
important aspects of soldering
•If you can’t get the oxidization off using a
sponge try tip tinner
Perfect solder joint, step 1 of 4
• Hold the iron touching both the pin and the
via for the count of one
• Make sure to touch the side of the tip of the
iron to the pin and via
Perfect solder joint, step 2 of 4
•Feed solder into the pin and via from the
opposite side of the pin as the soldering iron
•If you’re having trouble getting the solder to
flow, briefly touch the iron with the solder
Perfect solder joint, step 3 of 4
• Pull the solder away first and then the
soldering iron
• If your solder gets stuck to the via or pin you
can just melt it off with the iron
Perfect solder joint, step 3 of 4
•Don’t feed too much solder into the joint
•Solder covers entire via, but no more
•You can see solder from the other side of the
joint (if it isn’t blocked by a component)
Perfect solder joint, step 4 of 4
• Clip excess wire off using clippers
Perfect and not so perfect solder joint
•“Jumpers” will give electricity another path to
travel (one that you don’t want it to travel)
•“Cold joints” may look like they are connected,
but won’t conduct electricity
Questions?
www.sparkfun.com
6175 Longbow Drive, Suite 200
Boulder, Colorado 80301

PTH_Soldering.ppt

  • 1.
    Plated Through HoleSoldering Materials by Lindsay Craig
  • 2.
  • 3.
    Soldering Iron • Themain soldering tool • Used to melt solder
  • 4.
    Solder • Metal “glue”used to join together metal parts • Contains flux • Made of Tin and Copper, sometimes Lead
  • 5.
    Tweezers, Clippers, &Pliers • Tools used to handle, bend or cut components and PCBs
  • 6.
    Sponge • Used toclean off soldering iron tip • Can be made of various materials • Should be used every time before soldering a joint
  • 7.
    Flux • Makes soldermelt easier • Always use extra flux for rework
  • 8.
    Solder Wick • Useto remove solder • Careful, it gets really hot!
  • 9.
    Pins and Via •Male and female parts that you will solder together
  • 10.
    PCB • Printed CircuitBoard • Comprised mainly of fiberglass and copper foil
  • 11.
    Safety Goggles • Wearthem, you only have 2 eyes and solder is very, very hot! (Like this guy.)
  • 12.
    What is oxidization? •Oxidizationis what happens when oxygen breaks down matter •It impedes heat and electricity transfer •As a result you must clean your iron tip constantly… really!
  • 13.
    What is polarity? •Some parts have to be attached in a very particular way due to polarity • These parts will not work if you put them in incorrectly, pay attention • Polarized parts are highlighted in yellow in your kit card Example of polarized LEDs
  • 14.
    Cleaning your solderingiron •Cleaning your soldering iron is one of the most important aspects of soldering •If you can’t get the oxidization off using a sponge try tip tinner
  • 15.
    Perfect solder joint,step 1 of 4 • Hold the iron touching both the pin and the via for the count of one • Make sure to touch the side of the tip of the iron to the pin and via
  • 16.
    Perfect solder joint,step 2 of 4 •Feed solder into the pin and via from the opposite side of the pin as the soldering iron •If you’re having trouble getting the solder to flow, briefly touch the iron with the solder
  • 17.
    Perfect solder joint,step 3 of 4 • Pull the solder away first and then the soldering iron • If your solder gets stuck to the via or pin you can just melt it off with the iron
  • 18.
    Perfect solder joint,step 3 of 4 •Don’t feed too much solder into the joint •Solder covers entire via, but no more •You can see solder from the other side of the joint (if it isn’t blocked by a component)
  • 19.
    Perfect solder joint,step 4 of 4 • Clip excess wire off using clippers
  • 20.
    Perfect and notso perfect solder joint •“Jumpers” will give electricity another path to travel (one that you don’t want it to travel) •“Cold joints” may look like they are connected, but won’t conduct electricity
  • 21.
  • 22.
    www.sparkfun.com 6175 Longbow Drive,Suite 200 Boulder, Colorado 80301