SlideShare a Scribd company logo
1 of 14
Adobe InDesign, Illustrator, & Photoshop: The Graphic Design Portfolio
Smart Object Layers
Embedded or linked
Link to data external from the
primary Photoshop file
Allow non-destructive editing,
effects, and transformation
Editing:
– Double-click icon to
open linked file
– Use File>Save
Adobe InDesign, Illustrator, & Photoshop: The Graphic Design Portfolio
Transforming Layers
Edit>Transform or
Edit>Free Transform
(Command/Control-T)
Drag transformation
handles
Options bar =
specific numeric
transformation
Can’t be applied to the
(locked) Background
layer
Adobe InDesign, Illustrator, & Photoshop: The Graphic Design Portfolio
Making Selections
Marquee tools
Lasso tools
Magic Wand tool
Quick Selection tool
Select menu
options
Adobe InDesign, Illustrator, & Photoshop: The Graphic Design Portfolio
Marquee tools
Click and drag to select a basic-shape area
Rectangle, Oval, Single Row, or Single
Column
Adobe InDesign, Illustrator, & Photoshop: The Graphic Design Portfolio
Lasso tools
Click and drag to create
a freeform selection
Polygonal Lasso tool
– Click to create points
– Points automatically
connect to create a
straight-edged selection
Magnetic Lasso tool
– Click and drag near edges
to snap selection
marquee to areas of high
contrast in the image
Adobe InDesign, Illustrator, & Photoshop: The Graphic Design Portfolio
Quick Mask Mode
Activated at the
bottom of the
Tools panel
Semi-transparent
overlay of the
active selection
Lighter shades in the
quick mask indicate
partially selected
pixels
Adobe InDesign, Illustrator, & Photoshop: The Graphic Design Portfolio
Channels panel
One channel for each primary color
– Red, Green, and Blue in RGB
– Cyan, Magenta, Yellow, and Black in CMYK
Turn individual channels on and off
Manage Alpha and Spot channels
Adobe InDesign, Illustrator, & Photoshop: The Graphic Design Portfolio
Quick Selection tool
Click and drag to
“paint” a selection
Area expands to
apparent edges in
the image
Adobe InDesign, Illustrator, & Photoshop: The Graphic Design Portfolio
Magic Wand tool
Click to select areas within defined color tolerance
Contiguous limits the selection to areas that touch
the spot where you click
Sample All Layers bases selection on all layers in
the file
Adobe InDesign, Illustrator, & Photoshop: The Graphic Design Portfolio
Select Menu Options
Deselect
Reselect
Inverse
Transform Selection
Modify>
– Border
– Smooth
– Expand
– Contract
– Feather
Adobe InDesign, Illustrator, & Photoshop: The Graphic Design Portfolio
Select>Color Range
Make complex
selections based on
layer content
Click to define the color
of the initial selection
Fuzziness increases the
tolerance of the
selection area (away
from the original color
selection)
Adobe InDesign, Illustrator, & Photoshop: The Graphic Design Portfolio
Select and Mask Workspace
Controls for fine-tuning selection edges
Define the type of output:
selection, mask, layer, file
Adobe InDesign, Illustrator, & Photoshop: The Graphic Design Portfolio
Layer Masks
Non-destructive
– Enable or Disable
without affecting actual
layer pixels
– No longer non-
destructive once
permanently Applied
Black areas hide
underlying pixels
White areas reveal
underlying pixels
Shades of gray partially
reveal pixels to blend
edges
Adobe InDesign, Illustrator, & Photoshop: The Graphic Design Portfolio
File Formats
PSD
– Native, work-in-progress format
– Placement in later versions of other apps
TIFF
– Common for high-res file submission
– Supports layers
– No compression/data loss
JPEG
– Common for low-res file transfer
– Does not support layers
– Uses lossy data compression

More Related Content

What's hot

Illustrator assignment 1
Illustrator assignment 1Illustrator assignment 1
Illustrator assignment 1rgosselin
 
DID Unit 5 - Illustrator Basics
DID Unit 5 - Illustrator BasicsDID Unit 5 - Illustrator Basics
DID Unit 5 - Illustrator BasicsMrLawler
 
Photoshop intro to basics
Photoshop intro to basicsPhotoshop intro to basics
Photoshop intro to basicsNatalie Hurd
 
InDesign Project 7 LetterHead Design
InDesign Project 7 LetterHead DesignInDesign Project 7 LetterHead Design
InDesign Project 7 LetterHead DesignJerry Arnold
 
Learning Illustrator CS6 with 100 practical exercises
Learning Illustrator CS6 with 100 practical exercisesLearning Illustrator CS6 with 100 practical exercises
Learning Illustrator CS6 with 100 practical exercisesMCB Press
 
Photoshop_CS_Tutorial
Photoshop_CS_TutorialPhotoshop_CS_Tutorial
Photoshop_CS_Tutorialtutorialsruby
 
Adobe Illustrator - Creating the Poster
Adobe Illustrator - Creating the PosterAdobe Illustrator - Creating the Poster
Adobe Illustrator - Creating the PosterTimothy F McKenna
 
Adobe After Effects
Adobe After EffectsAdobe After Effects
Adobe After EffectsKat350
 
Illustrator Asa
Illustrator AsaIllustrator Asa
Illustrator Asaameshasa
 
Print17 slides interface
Print17 slides interfacePrint17 slides interface
Print17 slides interfaceJerry Arnold
 
Intro to Adobe Illustrator Vector Concepts
Intro to Adobe Illustrator Vector ConceptsIntro to Adobe Illustrator Vector Concepts
Intro to Adobe Illustrator Vector ConceptsKaitlin Hanger, Ph.D.
 
Project 1 Letterhead Design-InDesign
Project 1 Letterhead Design-InDesignProject 1 Letterhead Design-InDesign
Project 1 Letterhead Design-InDesignJerry Arnold
 
Project 1 Campground Icons-Illustrator
Project 1 Campground Icons-IllustratorProject 1 Campground Icons-Illustrator
Project 1 Campground Icons-IllustratorJerry Arnold
 
Adobe Illustrator CS6 - Magic paintbrush howto
Adobe Illustrator CS6 - Magic paintbrush howtoAdobe Illustrator CS6 - Magic paintbrush howto
Adobe Illustrator CS6 - Magic paintbrush howtoRafael Felipe Santos
 
Introduction to autocad 2014
Introduction to autocad 2014Introduction to autocad 2014
Introduction to autocad 2014Prabhat Sharma
 

What's hot (20)

Illustrator assignment 1
Illustrator assignment 1Illustrator assignment 1
Illustrator assignment 1
 
Print17 slides p5
Print17 slides p5Print17 slides p5
Print17 slides p5
 
DID Unit 5 - Illustrator Basics
DID Unit 5 - Illustrator BasicsDID Unit 5 - Illustrator Basics
DID Unit 5 - Illustrator Basics
 
Photoshop intro to basics
Photoshop intro to basicsPhotoshop intro to basics
Photoshop intro to basics
 
InDesign Project 7 LetterHead Design
InDesign Project 7 LetterHead DesignInDesign Project 7 LetterHead Design
InDesign Project 7 LetterHead Design
 
Chapter 4
Chapter 4Chapter 4
Chapter 4
 
Learning Illustrator CS6 with 100 practical exercises
Learning Illustrator CS6 with 100 practical exercisesLearning Illustrator CS6 with 100 practical exercises
Learning Illustrator CS6 with 100 practical exercises
 
Photoshop_CS_Tutorial
Photoshop_CS_TutorialPhotoshop_CS_Tutorial
Photoshop_CS_Tutorial
 
Adobe Illustrator - Creating the Poster
Adobe Illustrator - Creating the PosterAdobe Illustrator - Creating the Poster
Adobe Illustrator - Creating the Poster
 
Adobe After Effects
Adobe After EffectsAdobe After Effects
Adobe After Effects
 
Illustrator Asa
Illustrator AsaIllustrator Asa
Illustrator Asa
 
Print17 slides interface
Print17 slides interfacePrint17 slides interface
Print17 slides interface
 
Corel Draw Introduction
Corel Draw IntroductionCorel Draw Introduction
Corel Draw Introduction
 
Intro to Adobe Illustrator Vector Concepts
Intro to Adobe Illustrator Vector ConceptsIntro to Adobe Illustrator Vector Concepts
Intro to Adobe Illustrator Vector Concepts
 
Project 1 Letterhead Design-InDesign
Project 1 Letterhead Design-InDesignProject 1 Letterhead Design-InDesign
Project 1 Letterhead Design-InDesign
 
Project 1 Campground Icons-Illustrator
Project 1 Campground Icons-IllustratorProject 1 Campground Icons-Illustrator
Project 1 Campground Icons-Illustrator
 
Adobe Illustrator CS6 - Magic paintbrush howto
Adobe Illustrator CS6 - Magic paintbrush howtoAdobe Illustrator CS6 - Magic paintbrush howto
Adobe Illustrator CS6 - Magic paintbrush howto
 
Drawing toolbar
Drawing toolbarDrawing toolbar
Drawing toolbar
 
Introduction to autocad 2014
Introduction to autocad 2014Introduction to autocad 2014
Introduction to autocad 2014
 
Auto cad basics
Auto cad basicsAuto cad basics
Auto cad basics
 

Similar to Print20 slides p4_sections 3&4

Illustrator 2018 Campground Icons
Illustrator 2018 Campground Icons Illustrator 2018 Campground Icons
Illustrator 2018 Campground Icons Jerry Arnold
 
Illustrator 2018 Regatta Artwork
Illustrator 2018 Regatta ArtworkIllustrator 2018 Regatta Artwork
Illustrator 2018 Regatta ArtworkJerry Arnold
 
Print20 slides p4_sections 1&2
Print20 slides p4_sections 1&2Print20 slides p4_sections 1&2
Print20 slides p4_sections 1&2nrpgx2
 
Illustrator 18 Identity Package
Illustrator 18 Identity PackageIllustrator 18 Identity Package
Illustrator 18 Identity PackageJerry Arnold
 
Illustrator 2018 Identity Package
Illustrator 2018 Identity PackageIllustrator 2018 Identity Package
Illustrator 2018 Identity PackageJerry Arnold
 
adobe Photoshop
adobe Photoshop adobe Photoshop
adobe Photoshop FariK1
 
Illustrator assignment 1
Illustrator assignment 1Illustrator assignment 1
Illustrator assignment 1rgosselin
 
InDesign 2018 Festival Poster
InDesign 2018 Festival PosterInDesign 2018 Festival Poster
InDesign 2018 Festival PosterJerry Arnold
 
photoshop_workshop_01
photoshop_workshop_01photoshop_workshop_01
photoshop_workshop_01tutorialsruby
 
photoshop_workshop_01
photoshop_workshop_01photoshop_workshop_01
photoshop_workshop_01tutorialsruby
 
Photoshop cs tutorial
Photoshop cs tutorialPhotoshop cs tutorial
Photoshop cs tutorialFurqan Alley
 
Adobe CC2018 Interface
Adobe CC2018 InterfaceAdobe CC2018 Interface
Adobe CC2018 InterfaceJerry Arnold
 
Vector to Bitmap Workflow for Surface Designers
Vector to Bitmap Workflow for Surface DesignersVector to Bitmap Workflow for Surface Designers
Vector to Bitmap Workflow for Surface DesignersElaine Polvinen
 

Similar to Print20 slides p4_sections 3&4 (20)

Print17 slides p7
Print17 slides p7Print17 slides p7
Print17 slides p7
 
Pscc slides p1
Pscc slides p1Pscc slides p1
Pscc slides p1
 
Print17 slides p1
Print17 slides p1Print17 slides p1
Print17 slides p1
 
Illustrator 2018 Campground Icons
Illustrator 2018 Campground Icons Illustrator 2018 Campground Icons
Illustrator 2018 Campground Icons
 
Illustrator 2018 Regatta Artwork
Illustrator 2018 Regatta ArtworkIllustrator 2018 Regatta Artwork
Illustrator 2018 Regatta Artwork
 
Print20 slides p4_sections 1&2
Print20 slides p4_sections 1&2Print20 slides p4_sections 1&2
Print20 slides p4_sections 1&2
 
Illustrator 18 Identity Package
Illustrator 18 Identity PackageIllustrator 18 Identity Package
Illustrator 18 Identity Package
 
Illustrator 2018 Identity Package
Illustrator 2018 Identity PackageIllustrator 2018 Identity Package
Illustrator 2018 Identity Package
 
Print17 slides p3
Print17 slides p3Print17 slides p3
Print17 slides p3
 
adobe Photoshop
adobe Photoshop adobe Photoshop
adobe Photoshop
 
Illustrator assignment 1
Illustrator assignment 1Illustrator assignment 1
Illustrator assignment 1
 
Print17 slides p8
Print17 slides p8Print17 slides p8
Print17 slides p8
 
Pscc slides p2
Pscc slides p2Pscc slides p2
Pscc slides p2
 
InDesign 2018 Festival Poster
InDesign 2018 Festival PosterInDesign 2018 Festival Poster
InDesign 2018 Festival Poster
 
photoshop_workshop_01
photoshop_workshop_01photoshop_workshop_01
photoshop_workshop_01
 
photoshop_workshop_01
photoshop_workshop_01photoshop_workshop_01
photoshop_workshop_01
 
Photoshop cs tutorial
Photoshop cs tutorialPhotoshop cs tutorial
Photoshop cs tutorial
 
Adobe CC2018 Interface
Adobe CC2018 InterfaceAdobe CC2018 Interface
Adobe CC2018 Interface
 
Photoshop
PhotoshopPhotoshop
Photoshop
 
Vector to Bitmap Workflow for Surface Designers
Vector to Bitmap Workflow for Surface DesignersVector to Bitmap Workflow for Surface Designers
Vector to Bitmap Workflow for Surface Designers
 

More from nrpgx2

Ccva project 1 - sp 21
Ccva   project 1 - sp 21Ccva   project 1 - sp 21
Ccva project 1 - sp 21nrpgx2
 
4 color woodcut_2020
4 color woodcut_20204 color woodcut_2020
4 color woodcut_2020nrpgx2
 
CCVA - Group Project Final
CCVA - Group Project FinalCCVA - Group Project Final
CCVA - Group Project Finalnrpgx2
 
Love yourself final presentation
Love yourself final presentationLove yourself final presentation
Love yourself final presentationnrpgx2
 
Assignment 11 – Project 2 Preparation - Example 3
Assignment 11 – Project 2 Preparation - Example 3Assignment 11 – Project 2 Preparation - Example 3
Assignment 11 – Project 2 Preparation - Example 3nrpgx2
 
Assignment 11 – Project 2 Preparation - Example 2
Assignment 11 – Project 2 Preparation - Example 2Assignment 11 – Project 2 Preparation - Example 2
Assignment 11 – Project 2 Preparation - Example 2nrpgx2
 
Assignment 11 – Project 2 Preparation - Example 1
Assignment 11 – Project 2 Preparation - Example 1Assignment 11 – Project 2 Preparation - Example 1
Assignment 11 – Project 2 Preparation - Example 1nrpgx2
 
CCVA Earthwork presentation
CCVA Earthwork presentationCCVA Earthwork presentation
CCVA Earthwork presentationnrpgx2
 
Lecture 5
Lecture 5Lecture 5
Lecture 5nrpgx2
 
4 color woodcut
4 color woodcut4 color woodcut
4 color woodcutnrpgx2
 
Diptych examples
Diptych examplesDiptych examples
Diptych examplesnrpgx2
 

More from nrpgx2 (11)

Ccva project 1 - sp 21
Ccva   project 1 - sp 21Ccva   project 1 - sp 21
Ccva project 1 - sp 21
 
4 color woodcut_2020
4 color woodcut_20204 color woodcut_2020
4 color woodcut_2020
 
CCVA - Group Project Final
CCVA - Group Project FinalCCVA - Group Project Final
CCVA - Group Project Final
 
Love yourself final presentation
Love yourself final presentationLove yourself final presentation
Love yourself final presentation
 
Assignment 11 – Project 2 Preparation - Example 3
Assignment 11 – Project 2 Preparation - Example 3Assignment 11 – Project 2 Preparation - Example 3
Assignment 11 – Project 2 Preparation - Example 3
 
Assignment 11 – Project 2 Preparation - Example 2
Assignment 11 – Project 2 Preparation - Example 2Assignment 11 – Project 2 Preparation - Example 2
Assignment 11 – Project 2 Preparation - Example 2
 
Assignment 11 – Project 2 Preparation - Example 1
Assignment 11 – Project 2 Preparation - Example 1Assignment 11 – Project 2 Preparation - Example 1
Assignment 11 – Project 2 Preparation - Example 1
 
CCVA Earthwork presentation
CCVA Earthwork presentationCCVA Earthwork presentation
CCVA Earthwork presentation
 
Lecture 5
Lecture 5Lecture 5
Lecture 5
 
4 color woodcut
4 color woodcut4 color woodcut
4 color woodcut
 
Diptych examples
Diptych examplesDiptych examples
Diptych examples
 

Recently uploaded

办理卡尔顿大学毕业证成绩单|购买加拿大文凭证书
办理卡尔顿大学毕业证成绩单|购买加拿大文凭证书办理卡尔顿大学毕业证成绩单|购买加拿大文凭证书
办理卡尔顿大学毕业证成绩单|购买加拿大文凭证书zdzoqco
 
How to Be Famous in your Field just visit our Site
How to Be Famous in your Field just visit our SiteHow to Be Famous in your Field just visit our Site
How to Be Famous in your Field just visit our Sitegalleryaagency
 
shot list for my tv series two steps back
shot list for my tv series two steps backshot list for my tv series two steps back
shot list for my tv series two steps back17lcow074
 
1比1办理美国北卡罗莱纳州立大学毕业证成绩单pdf电子版制作修改
1比1办理美国北卡罗莱纳州立大学毕业证成绩单pdf电子版制作修改1比1办理美国北卡罗莱纳州立大学毕业证成绩单pdf电子版制作修改
1比1办理美国北卡罗莱纳州立大学毕业证成绩单pdf电子版制作修改yuu sss
 
办理(UC毕业证书)查尔斯顿大学毕业证成绩单原版一比一
办理(UC毕业证书)查尔斯顿大学毕业证成绩单原版一比一办理(UC毕业证书)查尔斯顿大学毕业证成绩单原版一比一
办理(UC毕业证书)查尔斯顿大学毕业证成绩单原版一比一z xss
 
原版1:1定制堪培拉大学毕业证(UC毕业证)#文凭成绩单#真实留信学历认证永久存档
原版1:1定制堪培拉大学毕业证(UC毕业证)#文凭成绩单#真实留信学历认证永久存档原版1:1定制堪培拉大学毕业证(UC毕业证)#文凭成绩单#真实留信学历认证永久存档
原版1:1定制堪培拉大学毕业证(UC毕业证)#文凭成绩单#真实留信学历认证永久存档208367051
 
Untitled presedddddddddddddddddntation (1).pptx
Untitled presedddddddddddddddddntation (1).pptxUntitled presedddddddddddddddddntation (1).pptx
Untitled presedddddddddddddddddntation (1).pptxmapanig881
 
Abu Dhabi Call Girls O58993O4O2 Call Girls in Abu Dhabi`
Abu Dhabi Call Girls O58993O4O2 Call Girls in Abu Dhabi`Abu Dhabi Call Girls O58993O4O2 Call Girls in Abu Dhabi`
Abu Dhabi Call Girls O58993O4O2 Call Girls in Abu Dhabi`dajasot375
 
Call Girls Meghani Nagar 7397865700 Independent Call Girls
Call Girls Meghani Nagar 7397865700  Independent Call GirlsCall Girls Meghani Nagar 7397865700  Independent Call Girls
Call Girls Meghani Nagar 7397865700 Independent Call Girlsssuser7cb4ff
 
办理(USYD毕业证书)澳洲悉尼大学毕业证成绩单原版一比一
办理(USYD毕业证书)澳洲悉尼大学毕业证成绩单原版一比一办理(USYD毕业证书)澳洲悉尼大学毕业证成绩单原版一比一
办理(USYD毕业证书)澳洲悉尼大学毕业证成绩单原版一比一diploma 1
 
Call Girls Satellite 7397865700 Ridhima Hire Me Full Night
Call Girls Satellite 7397865700 Ridhima Hire Me Full NightCall Girls Satellite 7397865700 Ridhima Hire Me Full Night
Call Girls Satellite 7397865700 Ridhima Hire Me Full Nightssuser7cb4ff
 
办理(宾州州立毕业证书)美国宾夕法尼亚州立大学毕业证成绩单原版一比一
办理(宾州州立毕业证书)美国宾夕法尼亚州立大学毕业证成绩单原版一比一办理(宾州州立毕业证书)美国宾夕法尼亚州立大学毕业证成绩单原版一比一
办理(宾州州立毕业证书)美国宾夕法尼亚州立大学毕业证成绩单原版一比一F La
 
MT. Marseille an Archipelago. Strategies for Integrating Residential Communit...
MT. Marseille an Archipelago. Strategies for Integrating Residential Communit...MT. Marseille an Archipelago. Strategies for Integrating Residential Communit...
MT. Marseille an Archipelago. Strategies for Integrating Residential Communit...katerynaivanenko1
 
在线办理ohio毕业证俄亥俄大学毕业证成绩单留信学历认证
在线办理ohio毕业证俄亥俄大学毕业证成绩单留信学历认证在线办理ohio毕业证俄亥俄大学毕业证成绩单留信学历认证
在线办理ohio毕业证俄亥俄大学毕业证成绩单留信学历认证nhjeo1gg
 
PORTFOLIO DE ARQUITECTURA CRISTOBAL HERAUD 2024
PORTFOLIO DE ARQUITECTURA CRISTOBAL HERAUD 2024PORTFOLIO DE ARQUITECTURA CRISTOBAL HERAUD 2024
PORTFOLIO DE ARQUITECTURA CRISTOBAL HERAUD 2024CristobalHeraud
 
定制(RMIT毕业证书)澳洲墨尔本皇家理工大学毕业证成绩单原版一比一
定制(RMIT毕业证书)澳洲墨尔本皇家理工大学毕业证成绩单原版一比一定制(RMIT毕业证书)澳洲墨尔本皇家理工大学毕业证成绩单原版一比一
定制(RMIT毕业证书)澳洲墨尔本皇家理工大学毕业证成绩单原版一比一lvtagr7
 
Call Girls in Ashok Nagar Delhi ✡️9711147426✡️ Escorts Service
Call Girls in Ashok Nagar Delhi ✡️9711147426✡️ Escorts ServiceCall Girls in Ashok Nagar Delhi ✡️9711147426✡️ Escorts Service
Call Girls in Ashok Nagar Delhi ✡️9711147426✡️ Escorts Servicejennyeacort
 
(办理学位证)埃迪斯科文大学毕业证成绩单原版一比一
(办理学位证)埃迪斯科文大学毕业证成绩单原版一比一(办理学位证)埃迪斯科文大学毕业证成绩单原版一比一
(办理学位证)埃迪斯科文大学毕业证成绩单原版一比一Fi sss
 
3D Printing And Designing Final Report.pdf
3D Printing And Designing Final Report.pdf3D Printing And Designing Final Report.pdf
3D Printing And Designing Final Report.pdfSwaraliBorhade
 

Recently uploaded (20)

办理卡尔顿大学毕业证成绩单|购买加拿大文凭证书
办理卡尔顿大学毕业证成绩单|购买加拿大文凭证书办理卡尔顿大学毕业证成绩单|购买加拿大文凭证书
办理卡尔顿大学毕业证成绩单|购买加拿大文凭证书
 
How to Be Famous in your Field just visit our Site
How to Be Famous in your Field just visit our SiteHow to Be Famous in your Field just visit our Site
How to Be Famous in your Field just visit our Site
 
shot list for my tv series two steps back
shot list for my tv series two steps backshot list for my tv series two steps back
shot list for my tv series two steps back
 
1比1办理美国北卡罗莱纳州立大学毕业证成绩单pdf电子版制作修改
1比1办理美国北卡罗莱纳州立大学毕业证成绩单pdf电子版制作修改1比1办理美国北卡罗莱纳州立大学毕业证成绩单pdf电子版制作修改
1比1办理美国北卡罗莱纳州立大学毕业证成绩单pdf电子版制作修改
 
办理(UC毕业证书)查尔斯顿大学毕业证成绩单原版一比一
办理(UC毕业证书)查尔斯顿大学毕业证成绩单原版一比一办理(UC毕业证书)查尔斯顿大学毕业证成绩单原版一比一
办理(UC毕业证书)查尔斯顿大学毕业证成绩单原版一比一
 
原版1:1定制堪培拉大学毕业证(UC毕业证)#文凭成绩单#真实留信学历认证永久存档
原版1:1定制堪培拉大学毕业证(UC毕业证)#文凭成绩单#真实留信学历认证永久存档原版1:1定制堪培拉大学毕业证(UC毕业证)#文凭成绩单#真实留信学历认证永久存档
原版1:1定制堪培拉大学毕业证(UC毕业证)#文凭成绩单#真实留信学历认证永久存档
 
Untitled presedddddddddddddddddntation (1).pptx
Untitled presedddddddddddddddddntation (1).pptxUntitled presedddddddddddddddddntation (1).pptx
Untitled presedddddddddddddddddntation (1).pptx
 
Abu Dhabi Call Girls O58993O4O2 Call Girls in Abu Dhabi`
Abu Dhabi Call Girls O58993O4O2 Call Girls in Abu Dhabi`Abu Dhabi Call Girls O58993O4O2 Call Girls in Abu Dhabi`
Abu Dhabi Call Girls O58993O4O2 Call Girls in Abu Dhabi`
 
Call Girls Meghani Nagar 7397865700 Independent Call Girls
Call Girls Meghani Nagar 7397865700  Independent Call GirlsCall Girls Meghani Nagar 7397865700  Independent Call Girls
Call Girls Meghani Nagar 7397865700 Independent Call Girls
 
办理(USYD毕业证书)澳洲悉尼大学毕业证成绩单原版一比一
办理(USYD毕业证书)澳洲悉尼大学毕业证成绩单原版一比一办理(USYD毕业证书)澳洲悉尼大学毕业证成绩单原版一比一
办理(USYD毕业证书)澳洲悉尼大学毕业证成绩单原版一比一
 
Call Girls Satellite 7397865700 Ridhima Hire Me Full Night
Call Girls Satellite 7397865700 Ridhima Hire Me Full NightCall Girls Satellite 7397865700 Ridhima Hire Me Full Night
Call Girls Satellite 7397865700 Ridhima Hire Me Full Night
 
办理(宾州州立毕业证书)美国宾夕法尼亚州立大学毕业证成绩单原版一比一
办理(宾州州立毕业证书)美国宾夕法尼亚州立大学毕业证成绩单原版一比一办理(宾州州立毕业证书)美国宾夕法尼亚州立大学毕业证成绩单原版一比一
办理(宾州州立毕业证书)美国宾夕法尼亚州立大学毕业证成绩单原版一比一
 
MT. Marseille an Archipelago. Strategies for Integrating Residential Communit...
MT. Marseille an Archipelago. Strategies for Integrating Residential Communit...MT. Marseille an Archipelago. Strategies for Integrating Residential Communit...
MT. Marseille an Archipelago. Strategies for Integrating Residential Communit...
 
在线办理ohio毕业证俄亥俄大学毕业证成绩单留信学历认证
在线办理ohio毕业证俄亥俄大学毕业证成绩单留信学历认证在线办理ohio毕业证俄亥俄大学毕业证成绩单留信学历认证
在线办理ohio毕业证俄亥俄大学毕业证成绩单留信学历认证
 
PORTFOLIO DE ARQUITECTURA CRISTOBAL HERAUD 2024
PORTFOLIO DE ARQUITECTURA CRISTOBAL HERAUD 2024PORTFOLIO DE ARQUITECTURA CRISTOBAL HERAUD 2024
PORTFOLIO DE ARQUITECTURA CRISTOBAL HERAUD 2024
 
定制(RMIT毕业证书)澳洲墨尔本皇家理工大学毕业证成绩单原版一比一
定制(RMIT毕业证书)澳洲墨尔本皇家理工大学毕业证成绩单原版一比一定制(RMIT毕业证书)澳洲墨尔本皇家理工大学毕业证成绩单原版一比一
定制(RMIT毕业证书)澳洲墨尔本皇家理工大学毕业证成绩单原版一比一
 
Call Girls in Ashok Nagar Delhi ✡️9711147426✡️ Escorts Service
Call Girls in Ashok Nagar Delhi ✡️9711147426✡️ Escorts ServiceCall Girls in Ashok Nagar Delhi ✡️9711147426✡️ Escorts Service
Call Girls in Ashok Nagar Delhi ✡️9711147426✡️ Escorts Service
 
(办理学位证)埃迪斯科文大学毕业证成绩单原版一比一
(办理学位证)埃迪斯科文大学毕业证成绩单原版一比一(办理学位证)埃迪斯科文大学毕业证成绩单原版一比一
(办理学位证)埃迪斯科文大学毕业证成绩单原版一比一
 
3D Printing And Designing Final Report.pdf
3D Printing And Designing Final Report.pdf3D Printing And Designing Final Report.pdf
3D Printing And Designing Final Report.pdf
 
Cheap Rate ➥8448380779 ▻Call Girls In Iffco Chowk Gurgaon
Cheap Rate ➥8448380779 ▻Call Girls In Iffco Chowk GurgaonCheap Rate ➥8448380779 ▻Call Girls In Iffco Chowk Gurgaon
Cheap Rate ➥8448380779 ▻Call Girls In Iffco Chowk Gurgaon
 

Print20 slides p4_sections 3&4

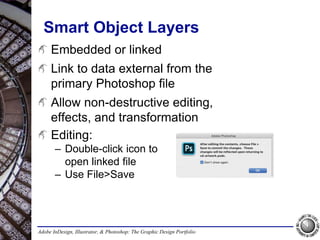
  • 1. Adobe InDesign, Illustrator, & Photoshop: The Graphic Design Portfolio Smart Object Layers Embedded or linked Link to data external from the primary Photoshop file Allow non-destructive editing, effects, and transformation Editing: – Double-click icon to open linked file – Use File>Save
  • 2. Adobe InDesign, Illustrator, & Photoshop: The Graphic Design Portfolio Transforming Layers Edit>Transform or Edit>Free Transform (Command/Control-T) Drag transformation handles Options bar = specific numeric transformation Can’t be applied to the (locked) Background layer
  • 3. Adobe InDesign, Illustrator, & Photoshop: The Graphic Design Portfolio Making Selections Marquee tools Lasso tools Magic Wand tool Quick Selection tool Select menu options
  • 4. Adobe InDesign, Illustrator, & Photoshop: The Graphic Design Portfolio Marquee tools Click and drag to select a basic-shape area Rectangle, Oval, Single Row, or Single Column
  • 5. Adobe InDesign, Illustrator, & Photoshop: The Graphic Design Portfolio Lasso tools Click and drag to create a freeform selection Polygonal Lasso tool – Click to create points – Points automatically connect to create a straight-edged selection Magnetic Lasso tool – Click and drag near edges to snap selection marquee to areas of high contrast in the image
  • 6. Adobe InDesign, Illustrator, & Photoshop: The Graphic Design Portfolio Quick Mask Mode Activated at the bottom of the Tools panel Semi-transparent overlay of the active selection Lighter shades in the quick mask indicate partially selected pixels
  • 7. Adobe InDesign, Illustrator, & Photoshop: The Graphic Design Portfolio Channels panel One channel for each primary color – Red, Green, and Blue in RGB – Cyan, Magenta, Yellow, and Black in CMYK Turn individual channels on and off Manage Alpha and Spot channels
  • 8. Adobe InDesign, Illustrator, & Photoshop: The Graphic Design Portfolio Quick Selection tool Click and drag to “paint” a selection Area expands to apparent edges in the image
  • 9. Adobe InDesign, Illustrator, & Photoshop: The Graphic Design Portfolio Magic Wand tool Click to select areas within defined color tolerance Contiguous limits the selection to areas that touch the spot where you click Sample All Layers bases selection on all layers in the file
  • 10. Adobe InDesign, Illustrator, & Photoshop: The Graphic Design Portfolio Select Menu Options Deselect Reselect Inverse Transform Selection Modify> – Border – Smooth – Expand – Contract – Feather
  • 11. Adobe InDesign, Illustrator, & Photoshop: The Graphic Design Portfolio Select>Color Range Make complex selections based on layer content Click to define the color of the initial selection Fuzziness increases the tolerance of the selection area (away from the original color selection)
  • 12. Adobe InDesign, Illustrator, & Photoshop: The Graphic Design Portfolio Select and Mask Workspace Controls for fine-tuning selection edges Define the type of output: selection, mask, layer, file
  • 13. Adobe InDesign, Illustrator, & Photoshop: The Graphic Design Portfolio Layer Masks Non-destructive – Enable or Disable without affecting actual layer pixels – No longer non- destructive once permanently Applied Black areas hide underlying pixels White areas reveal underlying pixels Shades of gray partially reveal pixels to blend edges
  • 14. Adobe InDesign, Illustrator, & Photoshop: The Graphic Design Portfolio File Formats PSD – Native, work-in-progress format – Placement in later versions of other apps TIFF – Common for high-res file submission – Supports layers – No compression/data loss JPEG – Common for low-res file transfer – Does not support layers – Uses lossy data compression

Editor's Notes

  1. Smart Object layers allow non-destructive editing of component layers. Remember: Smart Object layers are created whenever you use the File>Place commands. If you copy and paste layer content (or drag layer content from one document window to another), the resulting layer is a regular layer. Remember: Smart Object layers are actually links to external file data. To open the linked file, double-click the Smart Object layer thumbnail. (Details about the difference between Place Embedded and Place Links are provided on Page 227.) Changes made in the linked file automatically reflect in the master composite file when you save the changes. In this case, you have to use File>Save; if you Save As, you effectively break the link and the changes would not be reflected in the composite file. You should also understand that you can convert a regular layer to a Smart Object layer if you want to enable non-destructive effects for a particular layer. Any effects or masks applied to the layer are moved into the Smart Object file; they are no longer listed in the composite file’s Layers panel. If necessary, you can also convert a Smart Object layer to a regular layer. In this case, applied effects and masks from the Smart Object file are permanently applied to the resulting regular layer; they can no longer be edited or disabled.
  2. Before entering Transformation mode, make sure the correct layer is selected. If there is an active selection marquee, only the selected area will be transformed. If you transform a Smart Object layer, the Options bar remembers the original status of the layer. Say you scale a regular layer to 50%; if you finalize the transformation and then re-enter Transformation mode for the same layer, the Options bar shows the layer back at 100% even though you just scaled it down. If you apply the same transformation to a Smart Object layer, finalize it, and then re-enter Transformation mode, the Options bar shows the layer still at 50%. Remember, Smart Object layers allow non-destructive editing — which means you can rescale (including scaling back up to, say, 75%) it without losing quality. Keep the concept of non-destructive editing in the front of your mind. Maintain original data as long as possible to keep your options open. (Other non-destructive options will be explored in later projects.) Also keep in mind that transformations cannot be applied to the background layer. To transform the background layer, you must first convert it to a regular layer by double-clicking the Background layer name, naming the layer, and clicking OK in the New Layer dialog box. Alternately, you can use the Image>Image rotation submenu to affect the Background layer — and all other layers in the file.
  3. Some argue that making selections — the focus of Stage 3 of this project — is one of the most important skills you can master in Photoshop. We created this project to demonstrate a number of different methods for creating selections: marquee tools, lasso tools, color-range selection, and quick selection. As you work through this and other projects in this book, you might notice that you frequently do the same (or similar) tasks several times in a series of exercises. Remember this important point: There is almost always more than one way to accomplish the same task; we often present several related methods in sequential exercises. Think carefully about what you need to accomplish before you begin clicking to try to make a selection. For simple rectangle or oval areas, the marquee tools will be sufficient. For more complex selections, other options will be more useful. You should make every attempt to master all of the selection options so you can select whatever you need in any given image. Keep in mind that you can combine multiple selection tools to make a more complex selection. For example, you might use the Magic Wand tool to select the sky area of an image, then use the Rectangle Marquee tool in Subtract mode to deselect a specific square of the sky.
  4. When using a selection tool, always check the Options bar. The New/Add To/Subtract From/Intersect With Selection options are sticky — they remember the last-used option. When using the basic New Selection option, you can also use keyboard shortcuts to temporarily change the selection mode: • Press Shift to add to the active selection area • Press Option/Alt to subtract from the active selection • Press Shift-Option/Alt to intersect with the current selection When a Marquee tool is selected, you can use the Style menu in the Options bar to force the selection area to a fixed ratio or fixed size. Choosing Fixed Size, you can define specific height and width values in the attached fields. Clicking once automatically creates a selection marquee at the defined size. Choosing Fixed Ratio, you can define the selection proportions in the attached Height and Width fields. For example, you can force the selection to be 1:2, or exactly half as high as it is wide. Clicking and dragging automatically creates the selection marquee at the defined ratio.
  5. The basic Lasso tool works like a pencil, following the path where you drag the mouse. The Polygonal Lasso tool creates selections with straight lines, anchoring a line each time you click the mouse. To close a selection area, you must click the first point in the selection. The Magnetic Lasso tool snaps to edges of high contrast; you can use the Options bar to control the way Photoshop detects the edges of an image. • Width is the distance away from the edge the cursor can be and still detect the edge; if you set this value higher, you can move the cursor farther from the edge. • Contrast is how different the foreground can be from the background and still be detected; if there is a very sharp distinction between the foreground and background, you can set this value higher. • Frequency is the number of points that will be created to make the selection; setting this number higher creates finer selections, while setting it lower creates smoother edges. It isn’t uncommon for a mouse to unexpectedly jump when you don’t want it to — which can be particularly troublesome if you are drawing a selection with the Polygonal or Magnetic Lasso tools. If you are not happy with your Polygonal or Magnetic Lasso selection, press Escape to clear the selection and then try again.
  6. Many selection options result in some pixels that are partially selected. For example, pixels at the edge of a feathered selection are partially selected based on the amount of feathering. A selection marquee can only show “on or off”; partially selected pixels are not indicated by the marching ants. To preview those areas, you can use Quick Mask mode. When Quick Mask mode is active, you can paint directly in the image to modify the selection. Editing in Quick Mask follows the same principles as editing a regular mask.
  7. Although color models are not described in depth in this project, the information about channels (Page 249) is an important foundation for better understanding how Photoshop manages semi-transparent selections and Alpha channels. For now, the important thing to understand is that an Alpha channel stores selections. If you create an Alpha channel, it appears by default as a semi-transparent overlay. You can use the Channels panel Options menu to change the color and opacity of the Alpha channel, as well as whether the channel previews the masked or selected areas. When you create a pixel mask on a layer, the mask appears in the Channels panel as a temporary Alpha channel as long as the masked layer is selected (e.g., Layer 1 Mask). Quick Mask mode, accessed at the bottom of the Tools panel, is simply a way to view the temporary Alpha channel that is the result of the current selection. When working in Quick Mask mode, the quick mask appears in the Channels panel as a temporary Alpha channel, named Quick Mask. You can choose Duplicate Channel in the Channels panel Options menu to save a quick mask as a permanent Alpha channel.
  8. The Quick Selection tool essentially allows you to “paint” a selection. As you drag, the selection expands and automatically finds the edges in the image. If you stop dragging and then click in a nearby area, the selection grows to include the new area. After painting the selection, you can use the Select and Mask option to clean up complex edges of the selected area.
  9. The Magic Wand tool is an easy way to select large areas of solid color. The first four options in the Options bar are the same as those for the Marquee tools (New Selection, Add to Selection, Subtract from Selection, and Intersect with Selection). Tolerance is the degree of variation between the color you click and the colors Photoshop will select; higher tolerance values select a larger range based on the color you click. If you’re trying to select a very mottled background (for example), you should increase the tolerance; be careful, however, because increasing the tolerance might select too large a range of colors if parts of the foreground object fall within the tolerance range. The Anti-alias check box, selected by default, allows edges to blend more smoothly into the background, preventing a jagged, stair-stepped appearance. When Contiguous is selected, the Magic Wand tool only selects adjacent areas of the color; unchecking this option allows you to select all pixels within the color tolerance, even if some pixels are non-contiguous (for example, inside the shape of the letter Q). By default, selections relate to the active layer only. You can check Sample All Layers to make a selection of all layers in the file. The Select and Mask button opens a special workspace where you can use a number of tools to fine-tune the selection edge.
  10. Deselect turns off the active marquee. Reselect reactivates the last-used marquee. Inverse selects the opposite of the active area. Transform Selection enables the same transformation handles and Options bar options that you use to transform a layer. Only the selection marquee is transformed, not the layer content within the selection. Modify>Border converts the active selection marquee to a compound-path selection — as if the marquee was an actual shape and you wanted to select only the edge of that shape. You can define the number of pixels that represent that border. Modify>Smooth simplifies the selection path by removing points along the path where segments are less than a defined length. Modify>Expand enlarges the selection area by a defined number of pixels in all directions. Modify>Contract reduces the selection area by a defined number of pixels in all directions. Modify>Feather softens the selection edge to create a semi-transparent graded selection that is a defined number of pixels in from the edge of the original selection area.
  11. It is always a good idea to experiment with the settings in dialog boxes such as Color Range. The Selection Preview makes it easy to see the result before closing the dialog box. • None shows the normal image in the document window. • Grayscale shows the entire image in shades of gray; selected areas are white and unselected areas are black. • Black Matte shows unselected areas in solid black; selected areas appear in color. • White Matte shows unselected areas in solid white; selected areas appear in color. • Quick Mask adds a partially transparent overlay to unselected areas. You can use the Localized Color Clusters option to restrict the selection to areas of color within the defined range (for example, selecting only one jellyfish from an aquarium full of them). Fuzziness is similar to the Tolerance setting for the Magic Wand tool. Higher Fuzziness values allow you to select more variation from the color you click. Be careful, though, since higher fuzziness can eliminate fine lines and detail. When you use a higher Fuzziness setting, you might end up with too large a selection area. Rather than resampling a different color entirely, you can use the Add to Sample or Subtract from Sample eyedroppers to change the selected color range.
  12. The View options change how an image appears in the document window while the dialog box is open. • Marching Ants shows the basic standard selection. • Overlay shows unselected areas with a Quick Mask overlay. • On Black shows the selection in color against a black background. • On White shows the selection in color against a white background. • Black & White shows the selection area in white and the unselected area in black. • On Layers shows only the selected area; unselected areas are hidden. • Reveal Layer shows the entire layer, with no visual indication of the selection. The Properties panel offers a number of edge adjustments, basically combining selection options that are available in a number of other places. (These options are described in detail on Page 246.) The Output To menu can be used to create a new layer or file, with or without a mask, from the selection.
  13. Masks hide certain areas of a layer, but do not permanently remove pixels from a layer. Masks can be turned on or off, and edited to change the visible layer area without affecting the actual layer content. Pixel masks determine the visibility of individual pixels on the layer. Vector masks determine visibility based on a defined vector shape. When a mask is applied to a layer, you can use the Properties panel to edit the mask. Other options related to masks are explored in other projects. The basic concept is simply introduced here as a way to nondestructively remove elements from a layer.
  14. Stage 4 examines the most common options for saving a file that will be used in a print application. In general, you should always maintain the original native PSD file in case you later need to make changes. If you need to save other formats for specific applications (such as the printer who requires a TIFF file), keep the original PSD file in a safe place as the master file. Although the native Photoshop format is gaining popularity as an output format, the TIFF format will continue to be widely used for at least the near term. The JPEG format is very popular because the format compresses data into smaller files. However, the compression scheme is lossy — it throws away data — so it can result in loss of quality as well as file size. Most print production personnel discourage the use of JPEG files in print design.