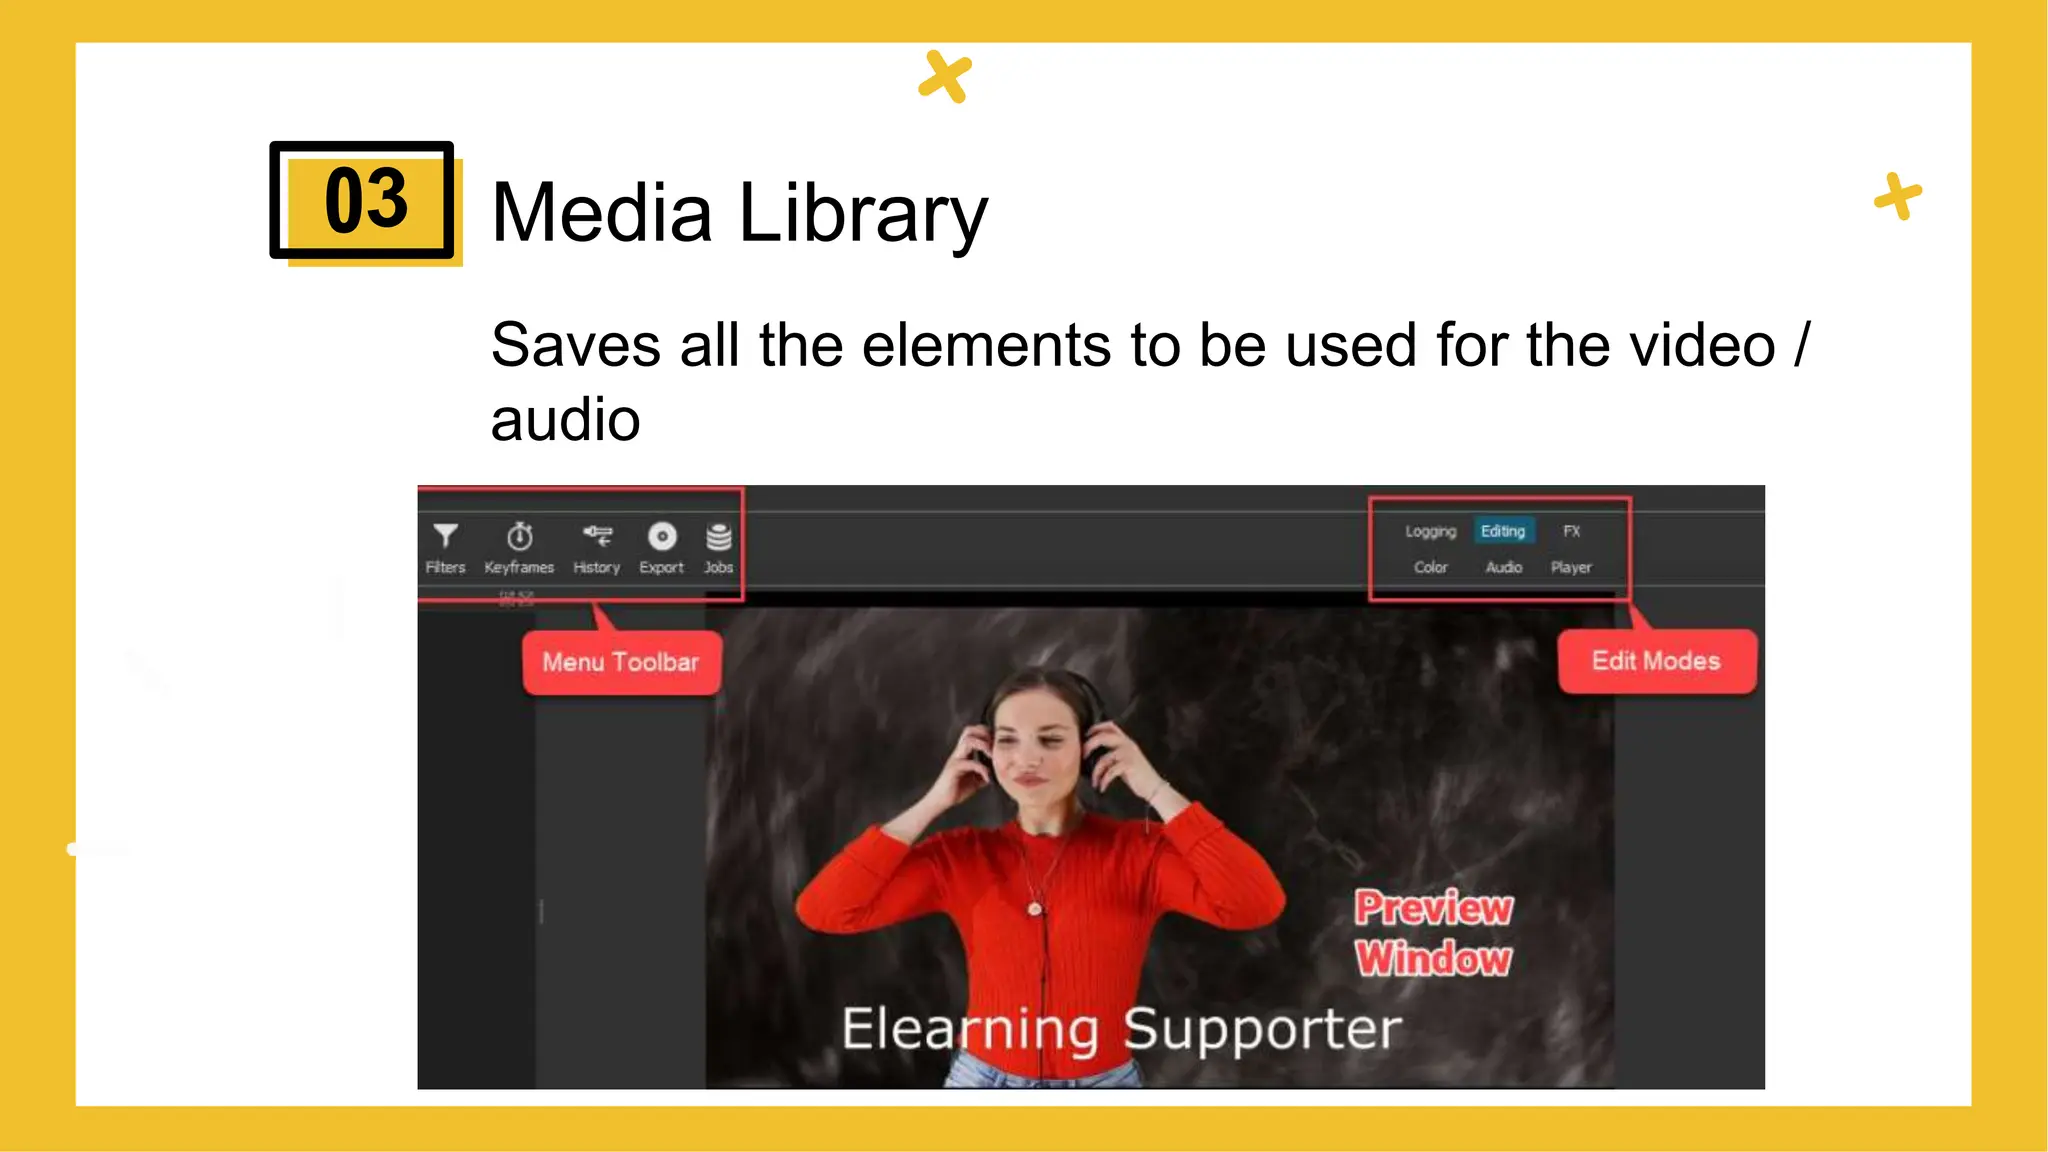
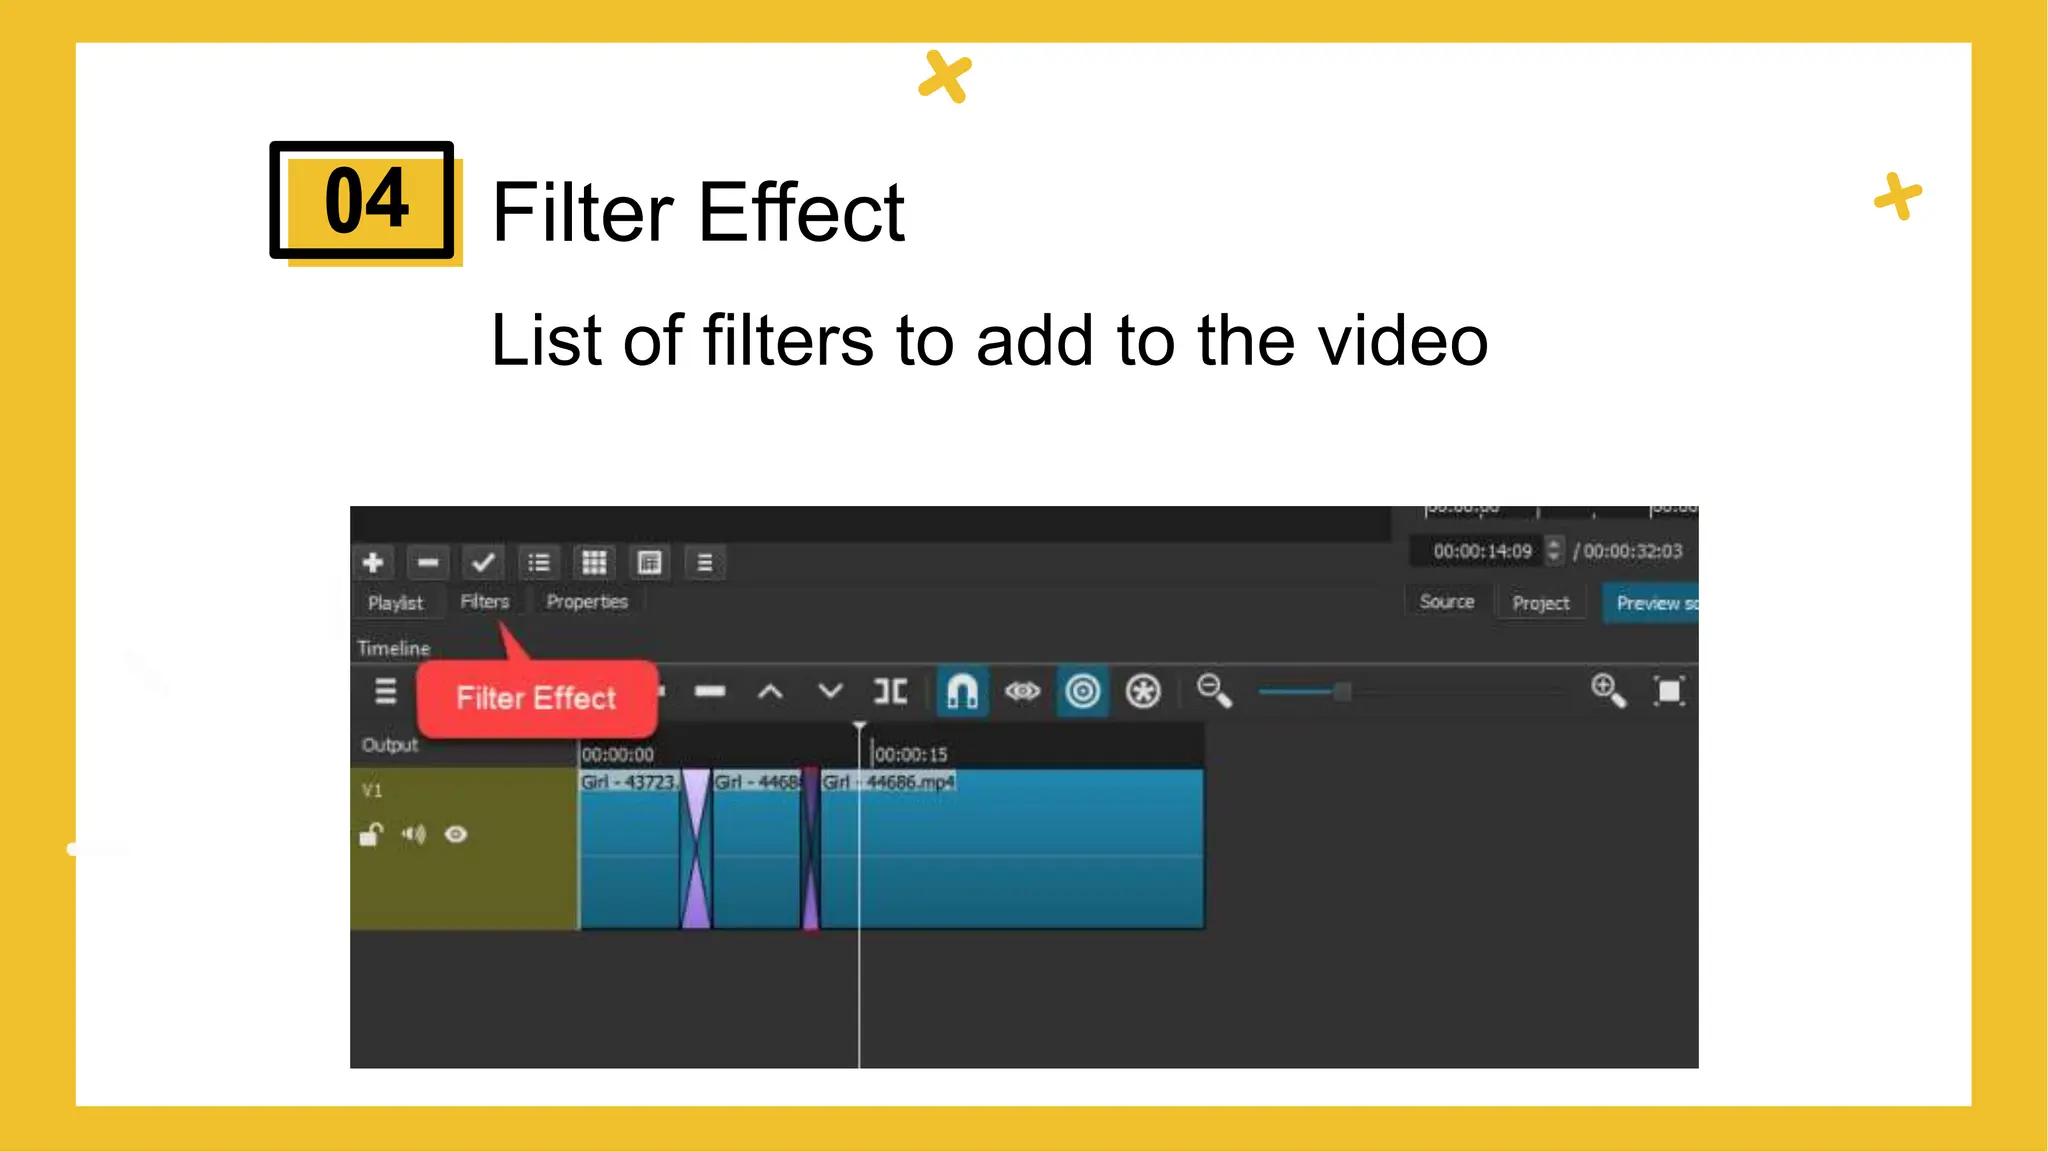
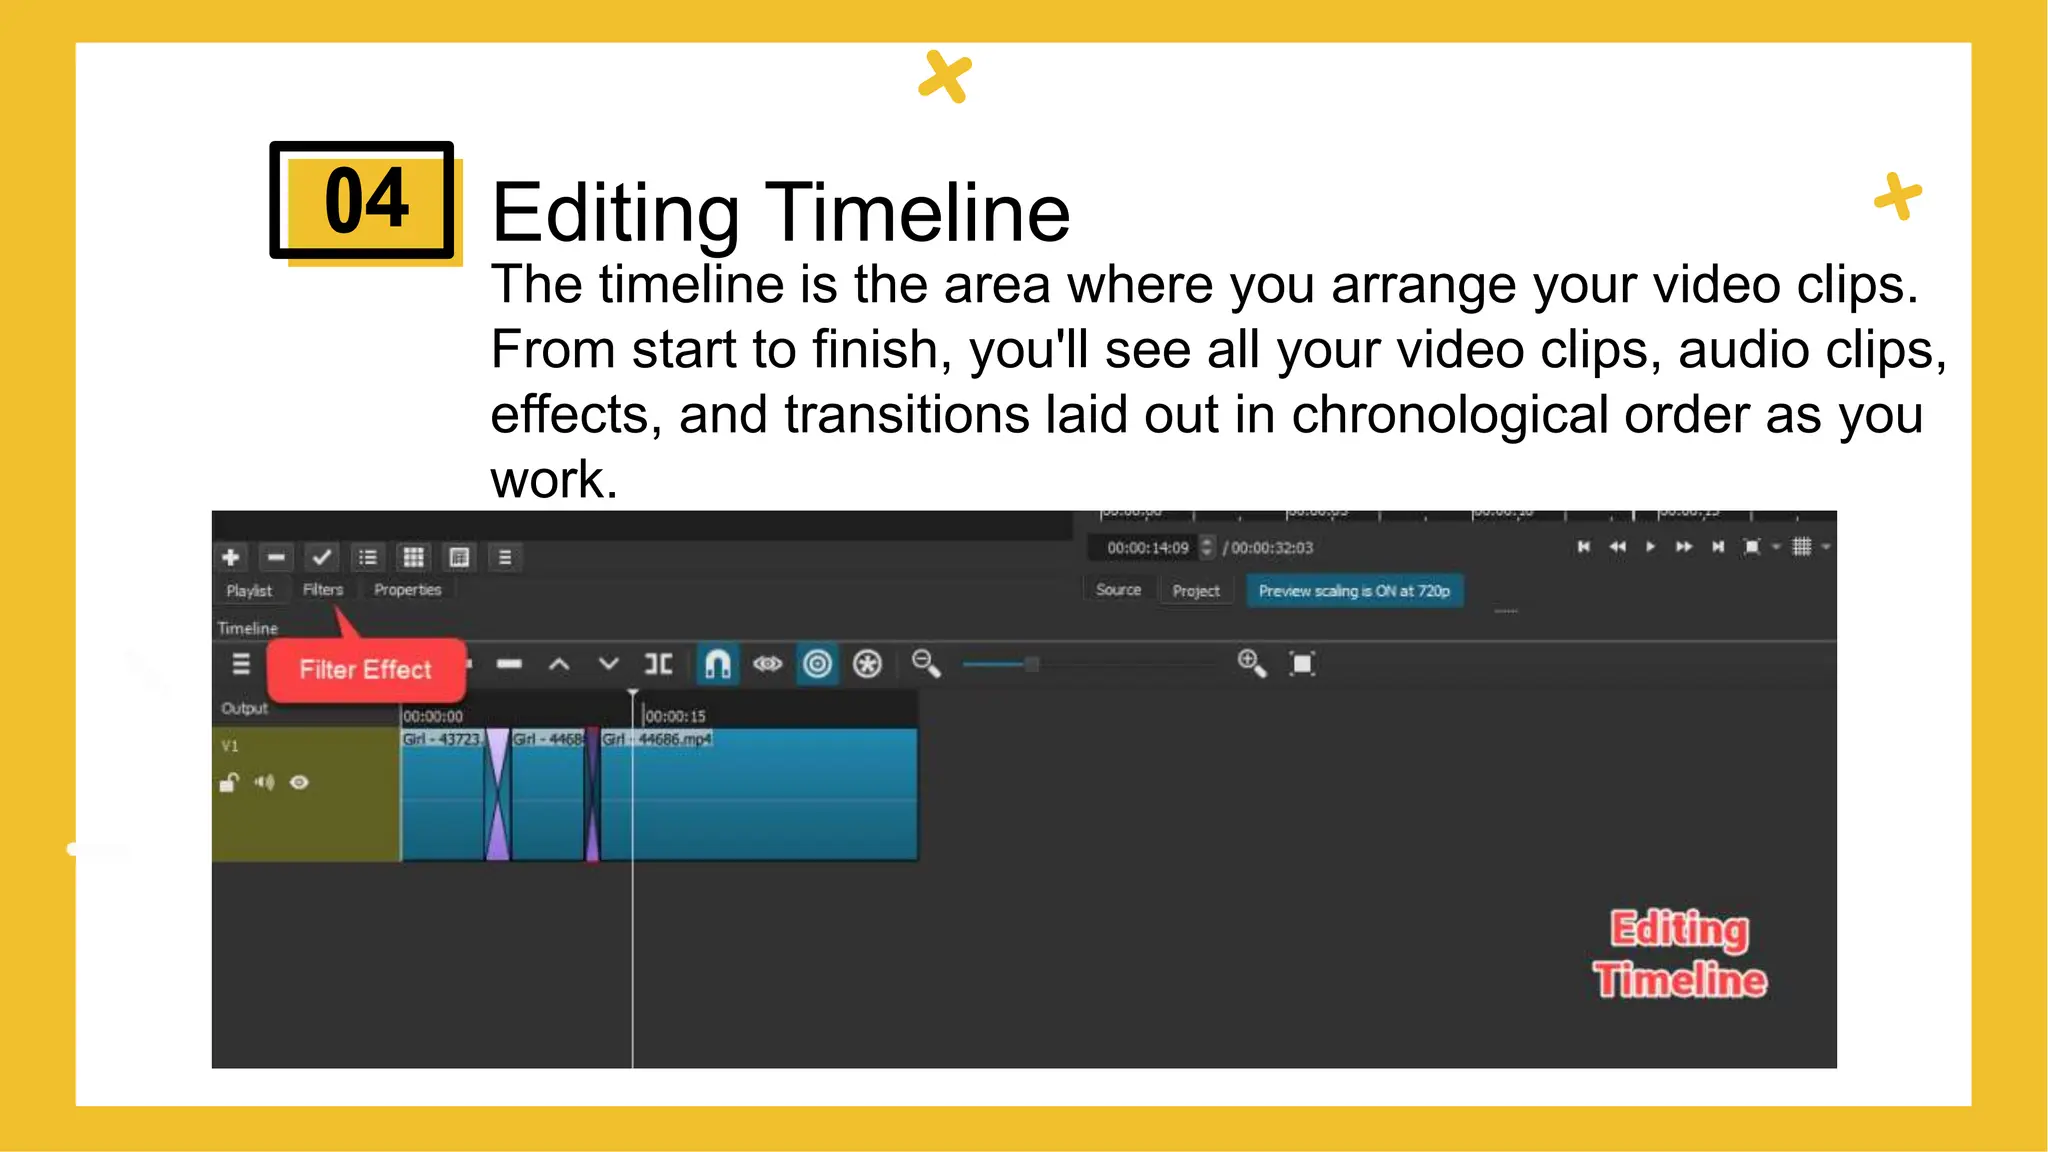
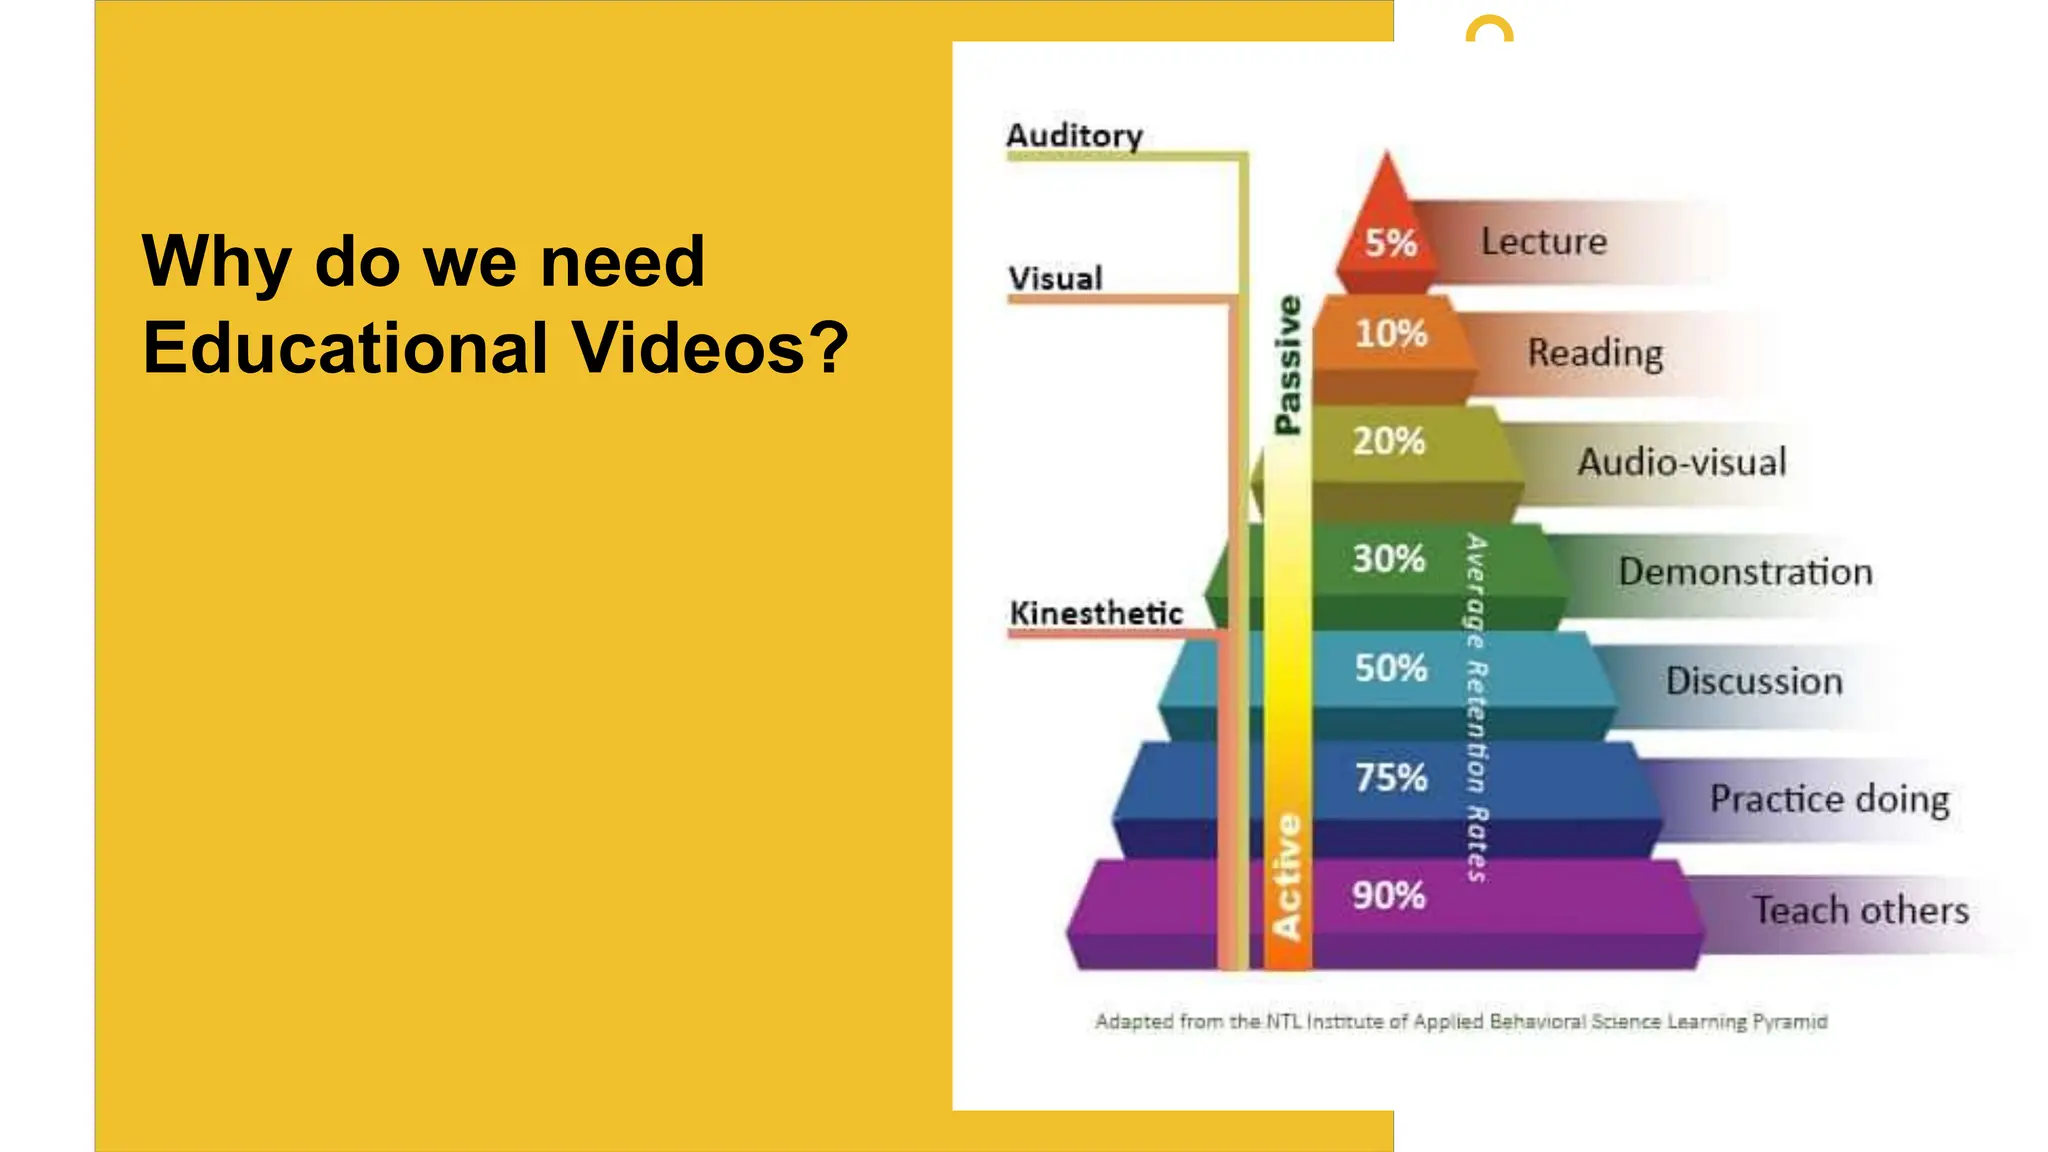
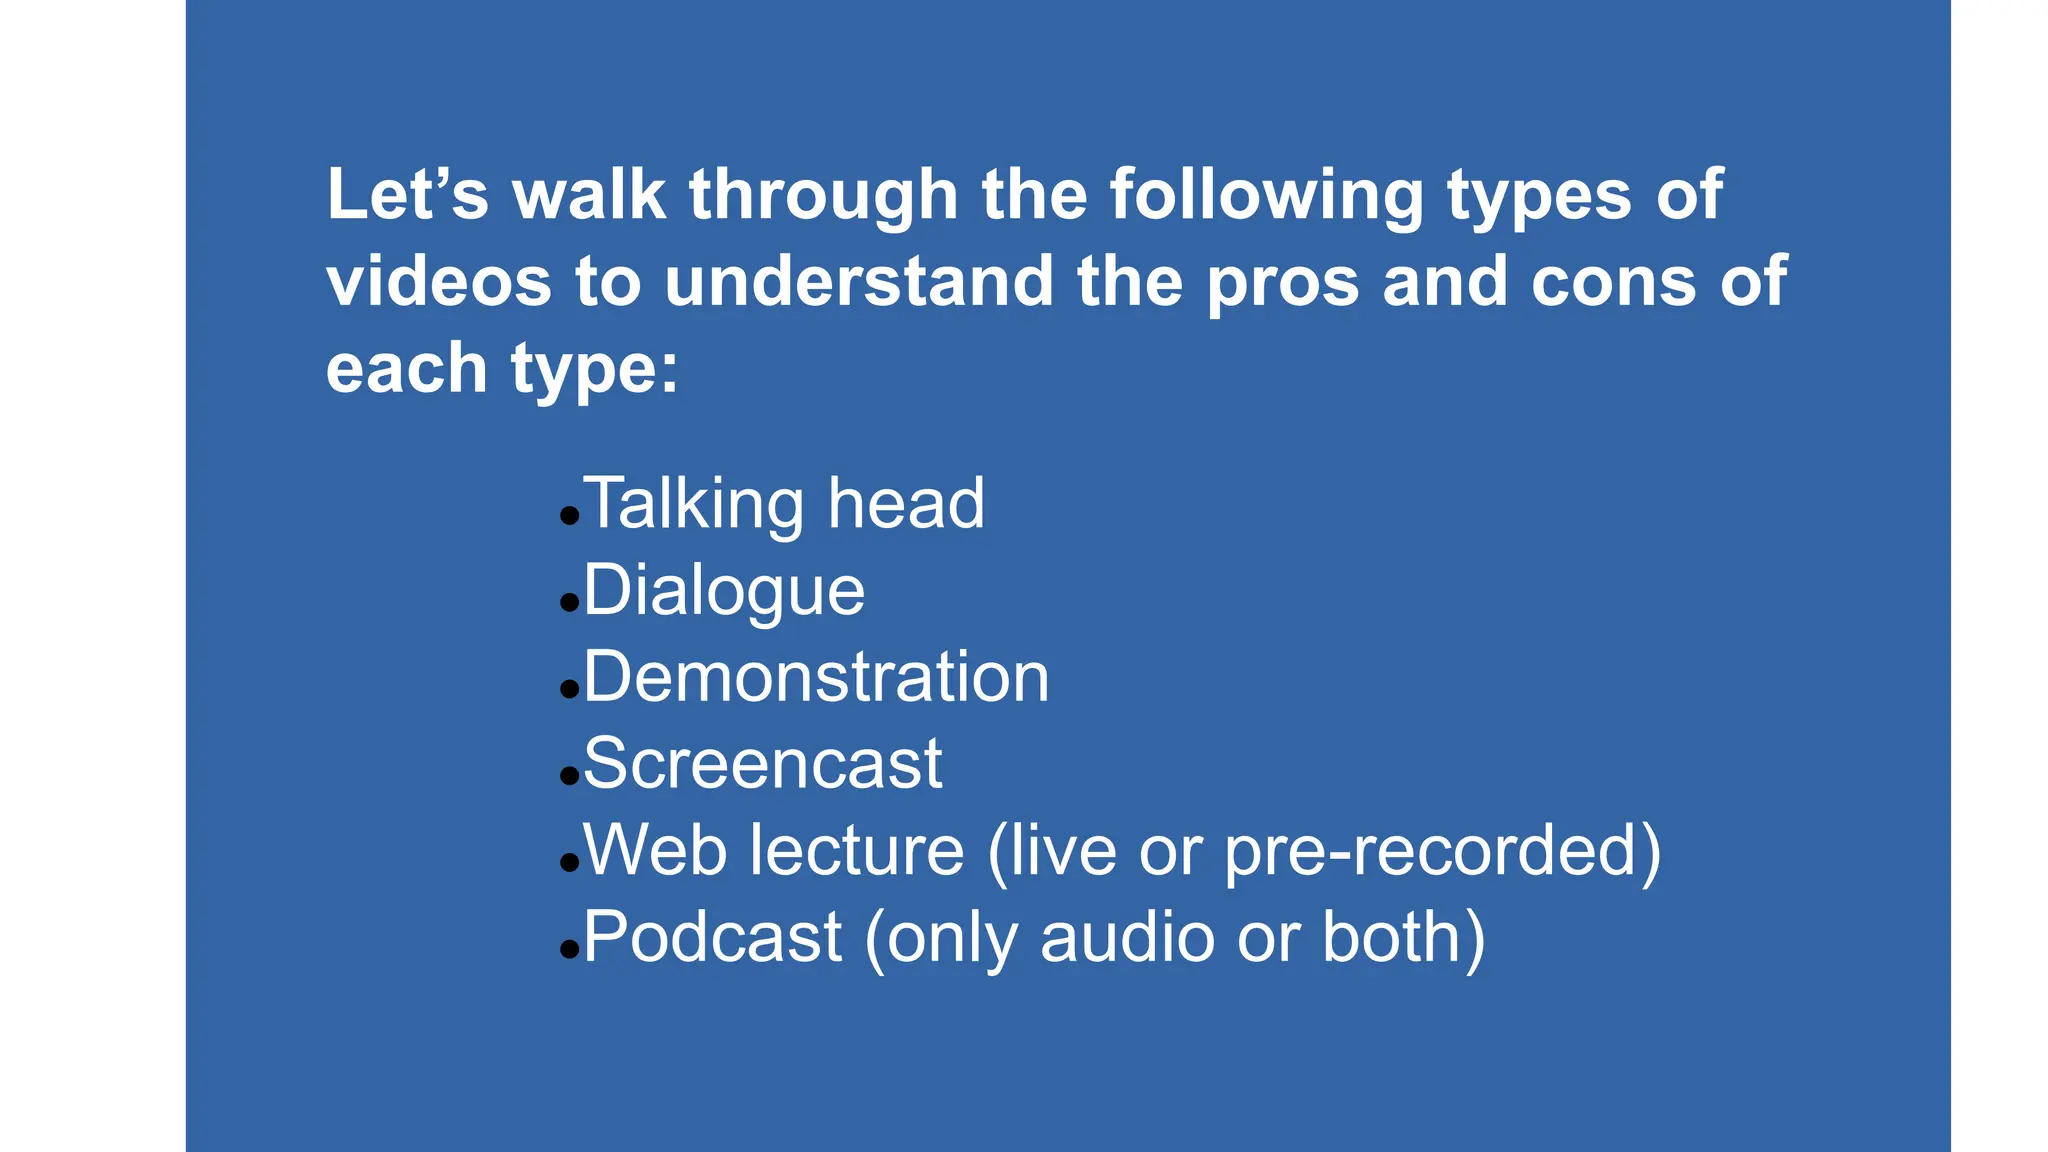
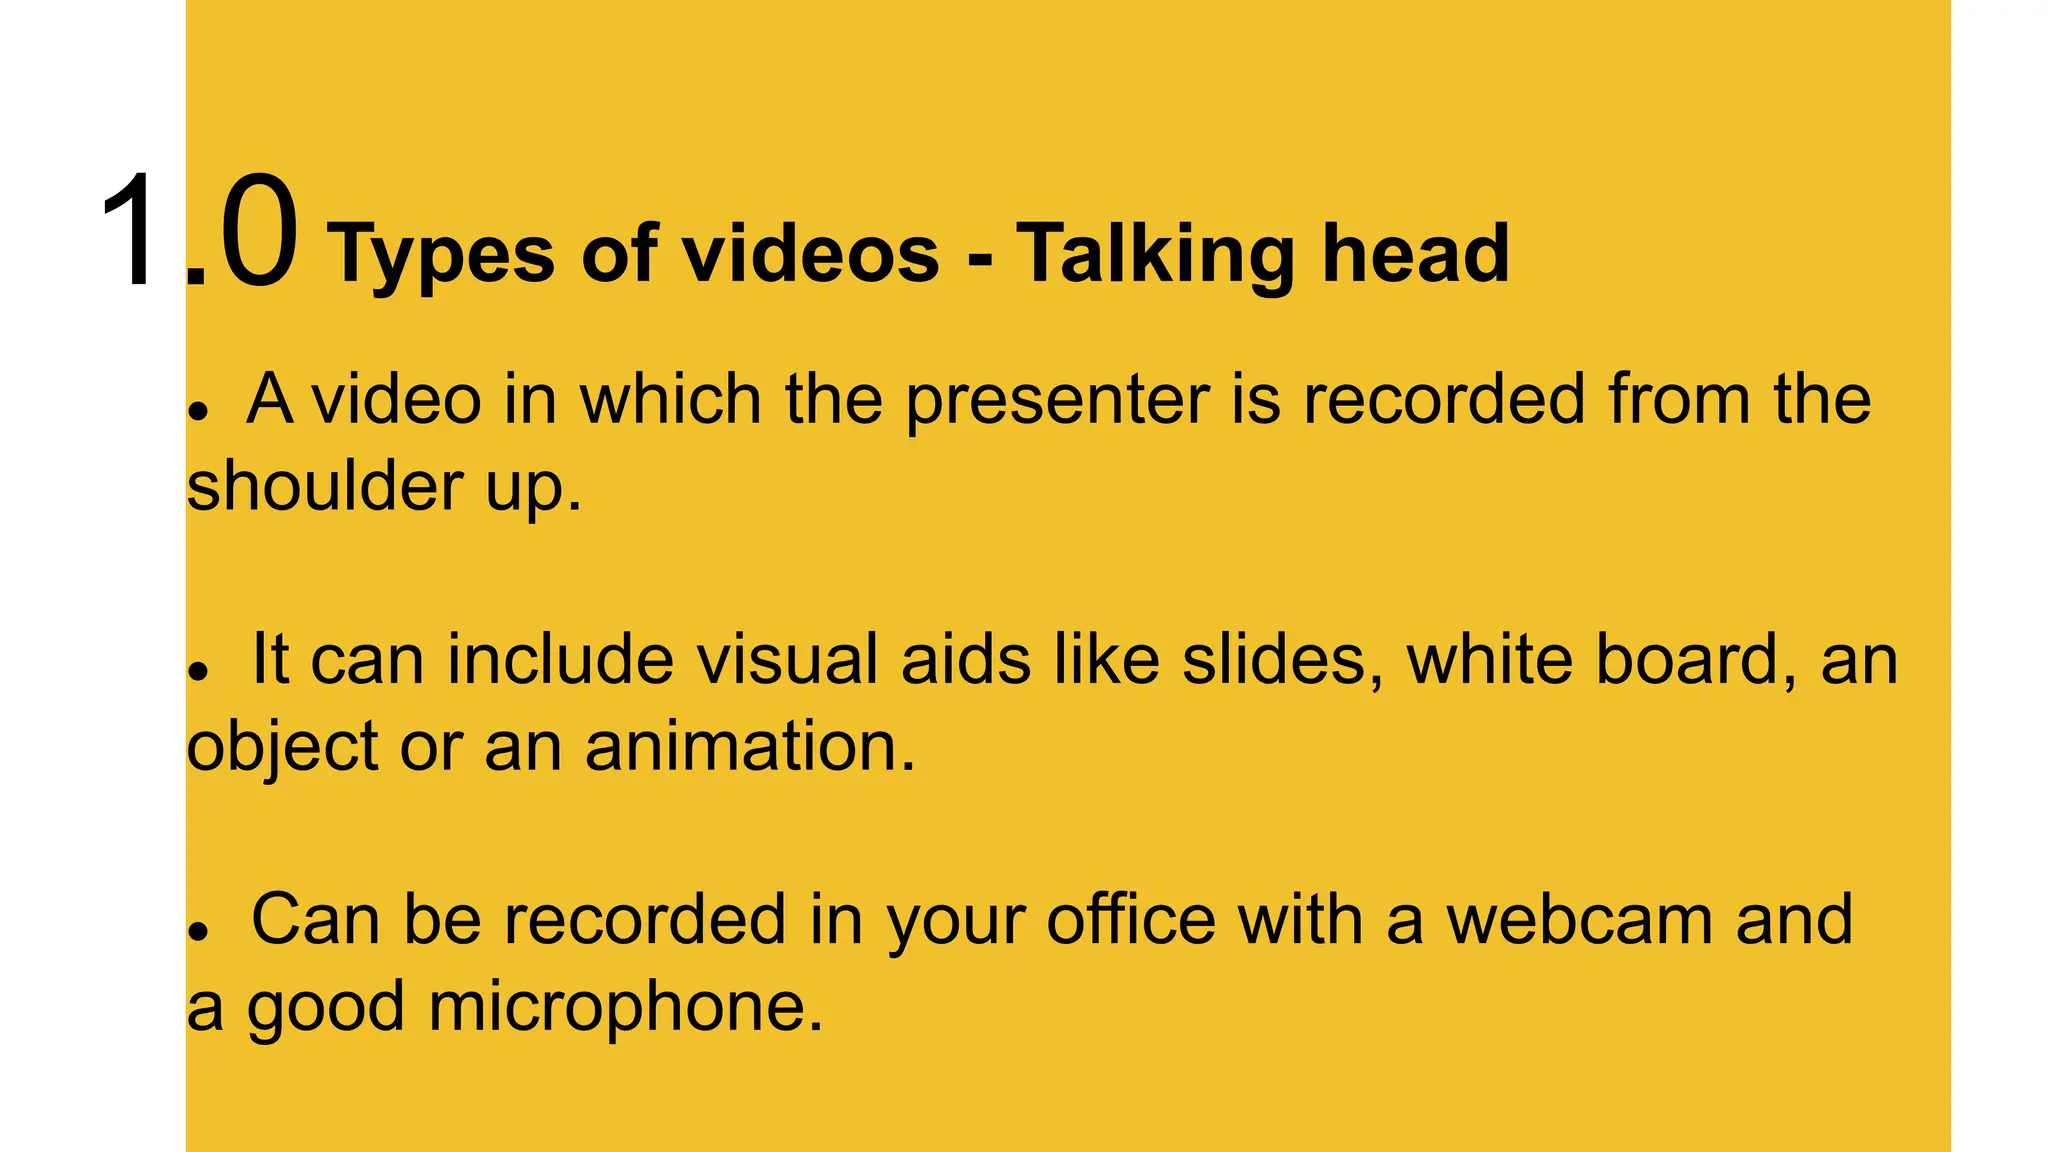
Leena Ramduth
& Voshan Pathareddy
Editing:
– Video &
– Audio
Training on ShotCut © 2023 by Leena Ramduth is licensed under CC BY-NC 4.0
Video editing is a powerful tool that
allows us to transform raw footage
into a compelling narrative in a way
that engages and captivates our
audience.
This workshop is tailored to provide
you with the fundamental skills
needed to kickstart your journey in
video editing.
We'll walk through the basics of the
video editing software:
 An overview of the interface,
 cover key concepts
- cutting and splicing footage,
- incorporating transitions, &
- adding some visual effects to
add that extra touch.
OpenShot
Kdenlive
VSDC
Pitivi
Free
Avidemux
Adobe
Premiere
Pro
Camtasia
Final Cut
Pro
Adobe
After
Effects
Wondershare
Filmora
Paid / Proprietary
Shotcut is a simple and
easy to use tool to edit videos
and audio.
Menu Toolbar
Access to different elements of Shotcut which will
enable us to interact with the software.
1
Media Library
Saves all the elements to be used for the video /
audio
2
Media Library
Saves all the elements to be used for the video /
audio
3
Filter Effect
List of filters to add to the video
4
Editing Timeline
The timeline is the area where you arrange your video clips.
From start to finish, you'll see all your video clips, audio clips,
effects, and transitions laid out in chronological order as you
work.
4
Video track
Insert your videos clips
Texts, images
Add filters
Limitless tracks
How tracks work
Video track
Audio track
Audio / sound will be stored.
Add transitions and other
effects.
Limitless tracks
How tracks work
Audio
track
Tips # 1
Go to – File – Open Other – Audio/Video Device
In the Video Input box, as a Web-Camera.
Select Web-Camera and pressed OK.
Go to – Export and, then “Capture File”.
Recording – Video and Audio
Video recording
Tips # 1 Video recording
Recording – Video and Audio
How to:
 Go to – File – Open Other – Audio/Video Device
 Click on the microphone icon under the preview screen to start
recording the audio
 Once done, click again on the microphone icon to stop the
recording.
Tips #2
Audio recording
Recording – Video and Audio
With a microphone at an appropriate distance.
Be in a soundproof room to limit any kind of noise
while recording.
Why do we need
Educational Videos?
 Video content is a medium to communicate
dynamic audio and visual elements.
 Students watch videos everywhere and at all
times through digital platforms.
0.1
 Video content helps to engage and motivate
your learners (as compared to lectures).
 Educational videos can help students to
memorize information, since they are able to
re-watch a video multiple times (unlike
lectures).
0.2
Why should you use video and is it right for you?
Does video fit your learning goal(s)?
What do you want to achieve?
0.3
Talking head
Dialogue
Demonstration
Screencast
Web lecture (live or pre-recorded)
Podcast (only audio or both)
Let’s walk through the following types of
videos to understand the pros and cons of
each type:
 A video in which the presenter is recorded from the
shoulder up.
 It can include visual aids like slides, white board, an
object or an animation.
 Can be recorded in your office with a webcam and
a good microphone.
Types of videos - Talking head
1.0
Explain theories and concepts
Introduce / remind key aspects of a lecture in
your course
Prepare students for in depth flipped classroom
sessions.
When to use this type of video?
Types of videos - Talking head
1.1
A quiet place and good lighting
Have to provide strong visuals and interact with
your on-screen images.
Keep it short and sweet: length of video is 6
minutes ideally.
What to keep in mind?
Types of videos - Talking head
1.2
Include interviews and discussions between 2 or
more people.
Questions may appear as text on screen to
reinforce information.
Types of videos - Dialogue
2.0
Gain insights from experts in the field.
Have in-depth discussions.
Address questions from and misconceptions of
students.
2.1
When to use this type of video?
Types of videos - Dialogue
 Example
To show and explain a skill or procedure in
a setting from practice, like a studio or in
the language labs.
Types of videos - Demonstration
3.0
 For your students to learn a certain skill or
procedure.
 To use the strength of visuals – show – don’t
tell
You can reinforce the information with a voice-
over.
When to use this type of video?
Types of videos - Demonstration
3.1
 Example
 Record your computer screen including changes and
enhance this with a voice over.
 Different supporting software, like OBS studio (free) and
Camtasia (paid).
 In some cases, this is used in combination with a webcam
recording.
Types of videos – Screencast
4.0
Explain software applications, complex
concepts or processes.
Give a step-by-step tutorial to show how
something works.
Types of videos – Screencast
4.1
When to use this type of video?
 This type of video shows a recorded lecture, often in
combination with interactive slides or a digital white board.
Types of videos – Web Lecture
5.0
To give students access to the lecture outside of
the lecture room – to re watch the lecture to make
notes or prepare for exams.
Types of videos – Web Lecture
5.1
When to use this type of video?
 Podcasts have a broad range of opportunities in education.
It can be used to transfer lectures, recorded interviews,
instructions.
It is a flexible medium, the small file size makes it easily
downloadable and students can listen to them anywhere,
anytime, while carrying out other activities.
Types of videos – Podcast
6.0
Have a concept to explain which does not depend
mainly on visuals.
Want to record yourself in an easy and flexible
way.
Have several interviews on which you can create a
podcast series.
Have a group of students who do not have access
to stable internet connections.
Types of videos – Podcast
6.1
When to use this type of video?
THANK
YOU

Presentation on ShotCut - How to edit video and audio

  • 1.
    Leena Ramduth & VoshanPathareddy Editing: – Video & – Audio Training on ShotCut © 2023 by Leena Ramduth is licensed under CC BY-NC 4.0
  • 2.
    Video editing isa powerful tool that allows us to transform raw footage into a compelling narrative in a way that engages and captivates our audience. This workshop is tailored to provide you with the fundamental skills needed to kickstart your journey in video editing.
  • 3.
    We'll walk throughthe basics of the video editing software:  An overview of the interface,  cover key concepts - cutting and splicing footage, - incorporating transitions, & - adding some visual effects to add that extra touch.
  • 4.
  • 5.
  • 6.
    Shotcut is asimple and easy to use tool to edit videos and audio.
  • 7.
    Menu Toolbar Access todifferent elements of Shotcut which will enable us to interact with the software. 1
  • 8.
    Media Library Saves allthe elements to be used for the video / audio 2
  • 9.
    Media Library Saves allthe elements to be used for the video / audio 3
  • 10.
    Filter Effect List offilters to add to the video 4
  • 11.
    Editing Timeline The timelineis the area where you arrange your video clips. From start to finish, you'll see all your video clips, audio clips, effects, and transitions laid out in chronological order as you work. 4
  • 12.
  • 13.
    Insert your videosclips Texts, images Add filters Limitless tracks How tracks work Video track
  • 14.
  • 15.
    Audio / soundwill be stored. Add transitions and other effects. Limitless tracks How tracks work Audio track
  • 16.
    Tips # 1 Goto – File – Open Other – Audio/Video Device In the Video Input box, as a Web-Camera. Select Web-Camera and pressed OK. Go to – Export and, then “Capture File”. Recording – Video and Audio Video recording
  • 17.
    Tips # 1Video recording Recording – Video and Audio How to:  Go to – File – Open Other – Audio/Video Device  Click on the microphone icon under the preview screen to start recording the audio  Once done, click again on the microphone icon to stop the recording.
  • 18.
    Tips #2 Audio recording Recording– Video and Audio With a microphone at an appropriate distance. Be in a soundproof room to limit any kind of noise while recording.
  • 19.
    Why do weneed Educational Videos?
  • 20.
     Video contentis a medium to communicate dynamic audio and visual elements.  Students watch videos everywhere and at all times through digital platforms. 0.1
  • 21.
     Video contenthelps to engage and motivate your learners (as compared to lectures).  Educational videos can help students to memorize information, since they are able to re-watch a video multiple times (unlike lectures). 0.2
  • 22.
    Why should youuse video and is it right for you? Does video fit your learning goal(s)? What do you want to achieve? 0.3
  • 23.
    Talking head Dialogue Demonstration Screencast Web lecture(live or pre-recorded) Podcast (only audio or both) Let’s walk through the following types of videos to understand the pros and cons of each type:
  • 24.
     A videoin which the presenter is recorded from the shoulder up.  It can include visual aids like slides, white board, an object or an animation.  Can be recorded in your office with a webcam and a good microphone. Types of videos - Talking head 1.0
  • 25.
    Explain theories andconcepts Introduce / remind key aspects of a lecture in your course Prepare students for in depth flipped classroom sessions. When to use this type of video? Types of videos - Talking head 1.1
  • 26.
    A quiet placeand good lighting Have to provide strong visuals and interact with your on-screen images. Keep it short and sweet: length of video is 6 minutes ideally. What to keep in mind? Types of videos - Talking head 1.2
  • 27.
    Include interviews anddiscussions between 2 or more people. Questions may appear as text on screen to reinforce information. Types of videos - Dialogue 2.0
  • 28.
    Gain insights fromexperts in the field. Have in-depth discussions. Address questions from and misconceptions of students. 2.1 When to use this type of video? Types of videos - Dialogue
  • 29.
  • 30.
    To show andexplain a skill or procedure in a setting from practice, like a studio or in the language labs. Types of videos - Demonstration 3.0
  • 31.
     For yourstudents to learn a certain skill or procedure.  To use the strength of visuals – show – don’t tell You can reinforce the information with a voice- over. When to use this type of video? Types of videos - Demonstration 3.1
  • 32.
  • 33.
     Record yourcomputer screen including changes and enhance this with a voice over.  Different supporting software, like OBS studio (free) and Camtasia (paid).  In some cases, this is used in combination with a webcam recording. Types of videos – Screencast 4.0
  • 34.
    Explain software applications,complex concepts or processes. Give a step-by-step tutorial to show how something works. Types of videos – Screencast 4.1 When to use this type of video?
  • 35.
     This typeof video shows a recorded lecture, often in combination with interactive slides or a digital white board. Types of videos – Web Lecture 5.0
  • 36.
    To give studentsaccess to the lecture outside of the lecture room – to re watch the lecture to make notes or prepare for exams. Types of videos – Web Lecture 5.1 When to use this type of video?
  • 37.
     Podcasts havea broad range of opportunities in education. It can be used to transfer lectures, recorded interviews, instructions. It is a flexible medium, the small file size makes it easily downloadable and students can listen to them anywhere, anytime, while carrying out other activities. Types of videos – Podcast 6.0
  • 38.
    Have a conceptto explain which does not depend mainly on visuals. Want to record yourself in an easy and flexible way. Have several interviews on which you can create a podcast series. Have a group of students who do not have access to stable internet connections. Types of videos – Podcast 6.1 When to use this type of video?
  • 39.