This document discusses various image processing techniques in Photoshop, including:
1. Adjusting brightness and contrast to improve image quality.
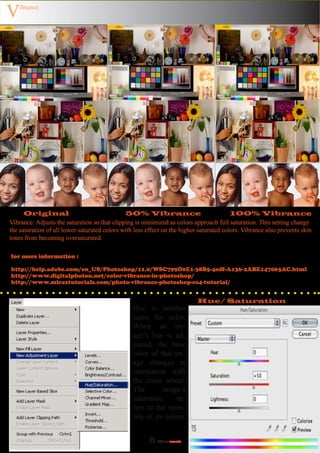
2. Using levels, curves, and exposure tools to modify tone and brightness levels.
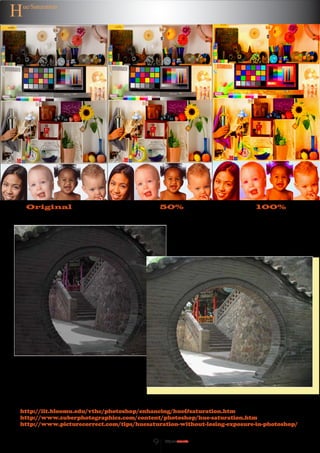
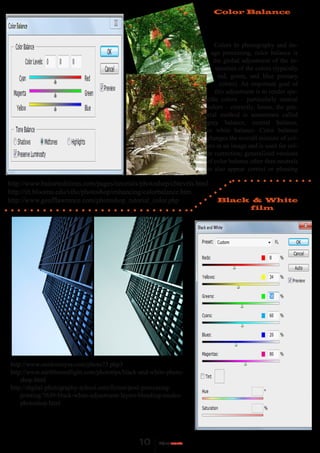
3. Adjusting color properties like hue, saturation, vibrance, and color balance.
4. Converting images to black and white using different film simulation techniques.