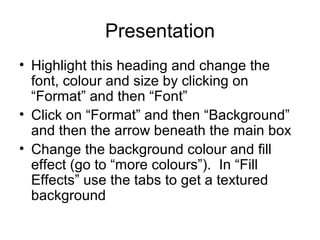
Welcome to PowerPoint

 A brief tutorial on using the
           program
Add a new slide

• Click on “Insert” and “New Slide” and write
  in a couple of lines (your name, what and
  where you teach)
• You can find your way around the
  presentation by clicking on the numbered
  slides on the left of the screen
Special layouts
• now add another slide by clicking on
  “Insert” “New Slide” and then clicking on
  one of the text or content layouts to the
  right of this
• If you wish, practise adding a picture by
  finding one on the web (Google Images),
  right clicking and copying, than right
  clicking and pasting into your slide
Presentation
• Highlight this heading and change the
  font, colour and size by clicking on
  “Format” and then “Font”
• Click on “Format” and then “Background”
  and then the arrow beneath the main box
• Change the background colour and fill
  effect (go to “more colours”). In “Fill
  Effects” use the tabs to get a textured
  background
Templates
• Click on “Format” and “Slide design”
• Preview a few of the prepared slide
  designs by clicking on them
• You can apply a design template to all
  your slides, or format each one individually
  (as in previous slide)
Setting up your slide show
• Click on “Slide Show” and “Animation
  Schemes”
• Use the scroll arrow to view options and
  choose an effect
• Click on “Apply to all slides”
• Now click on “Slide Show” and “View
  Show” to see the effect
Custom animation
• Click on “Slide show” and “Custom
  animation”
• Select and element of the slide, then click
  “Add Effect” to add animation. Try “Motion
  Paths” for some real excitement!
Slide Transition
• Click on “Slide Show” and “Slide
  Transition” and choose an effect
• Click on “Slide Show” and “View Show” to
  look at it
Rehearse timings
• Imagining you want your show to run
  automatically, click on “Slide Show” and
  “Rehearse Timings”
• Then just click every time you want it to
  advance. The program will record your timings
  and ask you to confirm that is what you want at
  the end
• Then click on “Slide Show” and “Set up show”
  and select “Loop continuously until escape”
• View your show
Different slide views
• Now click on the “thumbnail” slide view on
  the bottom left of the screen to see an
  overview
• You can hold down “Control” and click on
  some of the slides or select all and make
  changes to their format or animation
Changing slide order
• In the usual view, try clicking and dragging
  the overview slides to the left of this in
  order to change slide order
Congratulations!
• You have mastered the main features of
  PowerPoint and are ready to impress
  friends, colleagues, and most of all, your
  students!

Powerpoint tutorial 1

  • 1.
    Welcome to PowerPoint A brief tutorial on using the program
  • 2.
    Add a newslide • Click on “Insert” and “New Slide” and write in a couple of lines (your name, what and where you teach) • You can find your way around the presentation by clicking on the numbered slides on the left of the screen
  • 3.
    Special layouts • nowadd another slide by clicking on “Insert” “New Slide” and then clicking on one of the text or content layouts to the right of this • If you wish, practise adding a picture by finding one on the web (Google Images), right clicking and copying, than right clicking and pasting into your slide
  • 4.
    Presentation • Highlight thisheading and change the font, colour and size by clicking on “Format” and then “Font” • Click on “Format” and then “Background” and then the arrow beneath the main box • Change the background colour and fill effect (go to “more colours”). In “Fill Effects” use the tabs to get a textured background
  • 5.
    Templates • Click on“Format” and “Slide design” • Preview a few of the prepared slide designs by clicking on them • You can apply a design template to all your slides, or format each one individually (as in previous slide)
  • 6.
    Setting up yourslide show • Click on “Slide Show” and “Animation Schemes” • Use the scroll arrow to view options and choose an effect • Click on “Apply to all slides” • Now click on “Slide Show” and “View Show” to see the effect
  • 7.
    Custom animation • Clickon “Slide show” and “Custom animation” • Select and element of the slide, then click “Add Effect” to add animation. Try “Motion Paths” for some real excitement!
  • 8.
    Slide Transition • Clickon “Slide Show” and “Slide Transition” and choose an effect • Click on “Slide Show” and “View Show” to look at it
  • 9.
    Rehearse timings • Imaginingyou want your show to run automatically, click on “Slide Show” and “Rehearse Timings” • Then just click every time you want it to advance. The program will record your timings and ask you to confirm that is what you want at the end • Then click on “Slide Show” and “Set up show” and select “Loop continuously until escape” • View your show
  • 10.
    Different slide views •Now click on the “thumbnail” slide view on the bottom left of the screen to see an overview • You can hold down “Control” and click on some of the slides or select all and make changes to their format or animation
  • 11.
    Changing slide order •In the usual view, try clicking and dragging the overview slides to the left of this in order to change slide order
  • 12.
    Congratulations! • You havemastered the main features of PowerPoint and are ready to impress friends, colleagues, and most of all, your students!