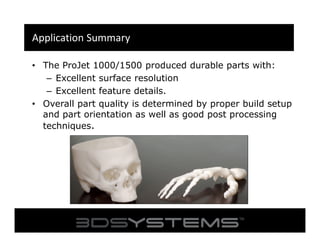
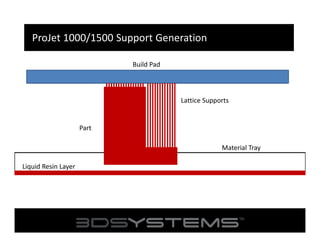
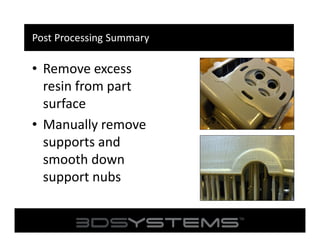
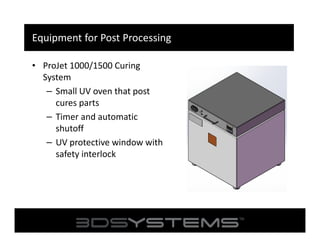
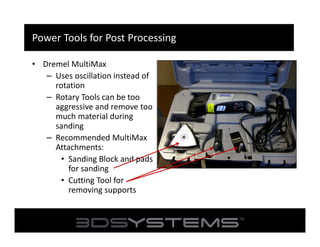
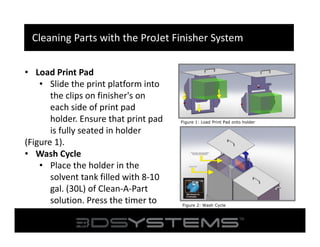
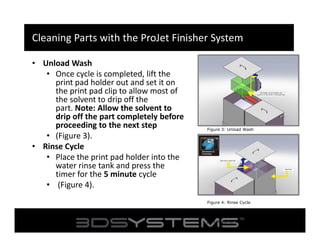
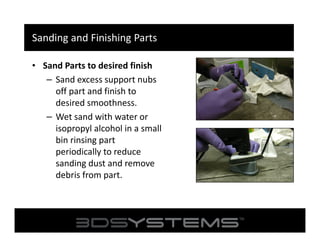
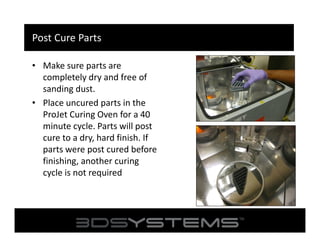
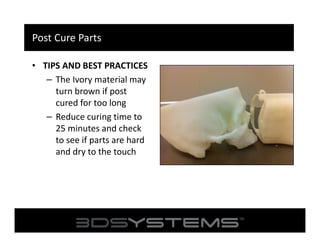
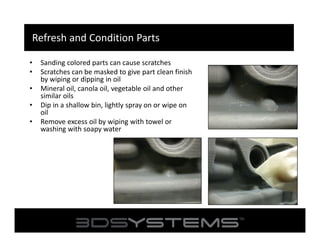
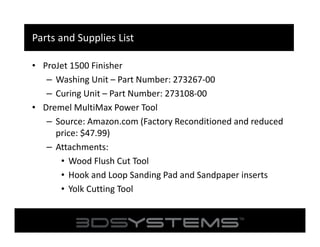
ProJet 1000/1500 POST PROCESSING

2012 7 23

日 月年
Application Summary
• The ProJet 1000/1500 produced durable parts with:
– Excellent surface resolution
– Excellent feature details.
• Overall part quality is determined by proper build setup
and part orientation as well as good post processing
techniques.
How the ProJet 1000/1500 Works
SHUTTLE PLATE
COATER BAR
MATERIAL TRAY
BUILD PAD

LIQUID RESIN
TRANSPARENT FILM

COATER BAR
SHUTTLE PLATE

`

UV IMAGER

MIRROR
ProJet 1000/1500 Support Generation
Build Pad

Lattice Supports

Part
Material Tray
Liquid Resin Layer
Post Processing Summary

• Remove excess
resin from part
surface
• Manually remove
supports and
smooth down
support nubs
Equipment for Post Processing
• ProJet 1000/1500 Finisher
– Two Tank System –
• 1st Tank holds 8-10 gals
of Clean-A-Part solution.
Wash excess resin
• 2nd Tank holds 8-10 gals
Water. Rinse
– Magnetic Motor with stir
bar to agitate liquid
– Timer
– Quick Connect Hoses for
filling and draining
Equipment for Post Processing
• ProJet 1000/1500 Curing
System
– Small UV oven that post
cures parts
– Timer and automatic
shutoff
– UV protective window with
safety interlock
Supplies and Hand Tools for Post Processing
Angled Snips
(included with Finisher
System)

Exacto Knife
Sandpaper, Files,
Sanding Blocks, etc.

Gloves if handling uncured
resin

Soft Bristle Toothbrush

Small bin of water or
isopropyl alcohol for
wet sanding
Power Tools for Post Processing
• Dremel MultiMax
– Uses oscillation instead of
rotation
– Rotary Tools can be too
aggressive and remove too
much material during
sanding
– Recommended MultiMax
Attachments:
• Sanding Block and pads
for sanding
• Cutting Tool for
removing supports
Cleaning Parts with the ProJet Finisher System
• Load Print Pad
• Slide the print platform into
the clips on finisher's on
each side of print pad
holder. Ensure that print pad
is fully seated in holder
(Figure 1).
• Wash Cycle
• Place the holder in the
solvent tank filled with 8-10
gal. (30L) of Clean-A-Part
solution. Press the timer to
start the 5 minute cycle
(Figure 2).

Figure 1: Load Print Pad onto holder

Figure 2: Wash Cycle
Cleaning Parts with the ProJet Finisher System
• Unload Wash
• Once cycle is completed, lift the
print pad holder out and set it on
the print pad clip to allow most of
the solvent to drip off the
part. Note: Allow the solvent to
drip off the part completely before
proceeding to the next step
• (Figure 3).
• Rinse Cycle
• Place the print pad holder into the
water rinse tank and press the
timer for the 5 minute cycle
• (Figure 4).

Figure 3: Unload Wash

Figure 4: Rinse Cycle
Figure 3: Mineral Spirits will dissolve the
part material so rinse no longer than a few
seconds.
Cleaning Parts with the ProJet Finisher System
• TIPS AND BEST PRACTICES
– Use both platform
holders as covers when
finisher not in use
– Take one out and set
aside and only use one
holder while cleaning
Cleaning Parts with the ProJet Finisher
• Unload Rinse
– Once cycle is completed,
lift the holder and set it
on the print pad clip to
allow most of the water
to drip off the part. Note:
for best quality, blot
excess water with a
paper towel, or use air to
remove water from the
part before curing
(Figure 5).

Figure 5: Unload Rinse
Sanding and Finishing Parts
• Remove supports
– Use the snips that were
supplied with the
ProJet™ Finisher to snip
the supports connecting
the part and the build
foundation.
– Using Dremel MultiMax
and straight cutter or
yolk cutter, gently move
tool through supports at
lowest level
Sanding and Finishing Parts
• TIPS AND BEST PRACTICES
– Take care not to snip too
close to the part surface to
prevent a pit into the part.
Leave a small amount of
support on the part that
can be sanded down
– Support columns can fly
when snipped. Cover the
part with one hand while
snipping with another to
catch the flying support
Sanding and Finishing Parts
• Sand Parts to desired finish
– Sand excess support nubs
off part and finish to
desired smoothness.
– Wet sand with water or
isopropyl alcohol in a small
bin rinsing part
periodically to reduce
sanding dust and remove
debris from part.
Sanding and Finishing Parts
• TIPS AND BEST PRACTICES
– Excess resin can still remain
on part in crevices and along
edges. LOOK FOR SHINY
AREAS.
– Remove excess resin using a
soft bristle toothbrush
dipped in isopropyl alcohol
Sanding and Finishing Parts
• TIPS AND BEST PRACTICES
– Check holes and other crevices for excess resin
that may be trapped.
– Remove using pointed object (i.e. dental picks,
wooden sticks, paper clips, etc.)
Post Cure Parts
• Make sure parts are
completely dry and free of
sanding dust.
• Place uncured parts in the
ProJet Curing Oven for a 40
minute cycle. Parts will post
cure to a dry, hard finish. If
parts were post cured before
finishing, another curing
cycle is not required
Post Cure Parts
• TIPS AND BEST PRACTICES
– The Ivory material may
turn brown if post
cured for too long
– Reduce curing time to
25 minutes and check
to see if parts are hard
and dry to the touch
Refresh and Condition Parts
•
•
•
•
•

Sanding colored parts can cause scratches
Scratches can be masked to give part clean finish
by wiping or dipping in oil
Mineral oil, canola oil, vegetable oil and other
similar oils
Dip in a shallow bin, lightly spray on or wipe on
oil
Remove excess oil by wiping with towel or
washing with soapy water
Parts and Supplies List
• ProJet 1500 Finisher
– Washing Unit – Part Number: 273267-00
– Curing Unit – Part Number: 273108-00
• Dremel MultiMax Power Tool
– Source: Amazon.com (Factory Reconditioned and reduced
price: $47.99)
– Attachments:
• Wood Flush Cut Tool
• Hook and Loop Sanding Pad and Sandpaper inserts
• Yolk Cutting Tool

Post processing webinar projet 1500

  • 1.
    ProJet 1000/1500 POSTPROCESSING 2012 7 23 日 月年
  • 2.
    Application Summary • TheProJet 1000/1500 produced durable parts with: – Excellent surface resolution – Excellent feature details. • Overall part quality is determined by proper build setup and part orientation as well as good post processing techniques.
  • 3.
    How the ProJet1000/1500 Works SHUTTLE PLATE COATER BAR MATERIAL TRAY BUILD PAD LIQUID RESIN TRANSPARENT FILM COATER BAR SHUTTLE PLATE ` UV IMAGER MIRROR
  • 4.
    ProJet 1000/1500 SupportGeneration Build Pad Lattice Supports Part Material Tray Liquid Resin Layer
  • 5.
    Post Processing Summary •Remove excess resin from part surface • Manually remove supports and smooth down support nubs
  • 6.
    Equipment for PostProcessing • ProJet 1000/1500 Finisher – Two Tank System – • 1st Tank holds 8-10 gals of Clean-A-Part solution. Wash excess resin • 2nd Tank holds 8-10 gals Water. Rinse – Magnetic Motor with stir bar to agitate liquid – Timer – Quick Connect Hoses for filling and draining
  • 7.
    Equipment for PostProcessing • ProJet 1000/1500 Curing System – Small UV oven that post cures parts – Timer and automatic shutoff – UV protective window with safety interlock
  • 8.
    Supplies and HandTools for Post Processing Angled Snips (included with Finisher System) Exacto Knife Sandpaper, Files, Sanding Blocks, etc. Gloves if handling uncured resin Soft Bristle Toothbrush Small bin of water or isopropyl alcohol for wet sanding
  • 9.
    Power Tools forPost Processing • Dremel MultiMax – Uses oscillation instead of rotation – Rotary Tools can be too aggressive and remove too much material during sanding – Recommended MultiMax Attachments: • Sanding Block and pads for sanding • Cutting Tool for removing supports
  • 10.
    Cleaning Parts withthe ProJet Finisher System • Load Print Pad • Slide the print platform into the clips on finisher's on each side of print pad holder. Ensure that print pad is fully seated in holder (Figure 1). • Wash Cycle • Place the holder in the solvent tank filled with 8-10 gal. (30L) of Clean-A-Part solution. Press the timer to start the 5 minute cycle (Figure 2). Figure 1: Load Print Pad onto holder Figure 2: Wash Cycle
  • 11.
    Cleaning Parts withthe ProJet Finisher System • Unload Wash • Once cycle is completed, lift the print pad holder out and set it on the print pad clip to allow most of the solvent to drip off the part. Note: Allow the solvent to drip off the part completely before proceeding to the next step • (Figure 3). • Rinse Cycle • Place the print pad holder into the water rinse tank and press the timer for the 5 minute cycle • (Figure 4). Figure 3: Unload Wash Figure 4: Rinse Cycle Figure 3: Mineral Spirits will dissolve the part material so rinse no longer than a few seconds.
  • 12.
    Cleaning Parts withthe ProJet Finisher System • TIPS AND BEST PRACTICES – Use both platform holders as covers when finisher not in use – Take one out and set aside and only use one holder while cleaning
  • 13.
    Cleaning Parts withthe ProJet Finisher • Unload Rinse – Once cycle is completed, lift the holder and set it on the print pad clip to allow most of the water to drip off the part. Note: for best quality, blot excess water with a paper towel, or use air to remove water from the part before curing (Figure 5). Figure 5: Unload Rinse
  • 14.
    Sanding and FinishingParts • Remove supports – Use the snips that were supplied with the ProJet™ Finisher to snip the supports connecting the part and the build foundation. – Using Dremel MultiMax and straight cutter or yolk cutter, gently move tool through supports at lowest level
  • 15.
    Sanding and FinishingParts • TIPS AND BEST PRACTICES – Take care not to snip too close to the part surface to prevent a pit into the part. Leave a small amount of support on the part that can be sanded down – Support columns can fly when snipped. Cover the part with one hand while snipping with another to catch the flying support
  • 16.
    Sanding and FinishingParts • Sand Parts to desired finish – Sand excess support nubs off part and finish to desired smoothness. – Wet sand with water or isopropyl alcohol in a small bin rinsing part periodically to reduce sanding dust and remove debris from part.
  • 17.
    Sanding and FinishingParts • TIPS AND BEST PRACTICES – Excess resin can still remain on part in crevices and along edges. LOOK FOR SHINY AREAS. – Remove excess resin using a soft bristle toothbrush dipped in isopropyl alcohol
  • 18.
    Sanding and FinishingParts • TIPS AND BEST PRACTICES – Check holes and other crevices for excess resin that may be trapped. – Remove using pointed object (i.e. dental picks, wooden sticks, paper clips, etc.)
  • 19.
    Post Cure Parts •Make sure parts are completely dry and free of sanding dust. • Place uncured parts in the ProJet Curing Oven for a 40 minute cycle. Parts will post cure to a dry, hard finish. If parts were post cured before finishing, another curing cycle is not required
  • 20.
    Post Cure Parts •TIPS AND BEST PRACTICES – The Ivory material may turn brown if post cured for too long – Reduce curing time to 25 minutes and check to see if parts are hard and dry to the touch
  • 21.
    Refresh and ConditionParts • • • • • Sanding colored parts can cause scratches Scratches can be masked to give part clean finish by wiping or dipping in oil Mineral oil, canola oil, vegetable oil and other similar oils Dip in a shallow bin, lightly spray on or wipe on oil Remove excess oil by wiping with towel or washing with soapy water
  • 22.
    Parts and SuppliesList • ProJet 1500 Finisher – Washing Unit – Part Number: 273267-00 – Curing Unit – Part Number: 273108-00 • Dremel MultiMax Power Tool – Source: Amazon.com (Factory Reconditioned and reduced price: $47.99) – Attachments: • Wood Flush Cut Tool • Hook and Loop Sanding Pad and Sandpaper inserts • Yolk Cutting Tool