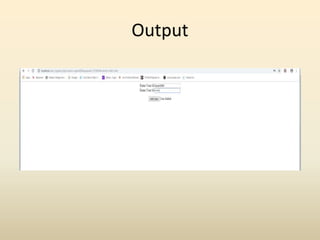
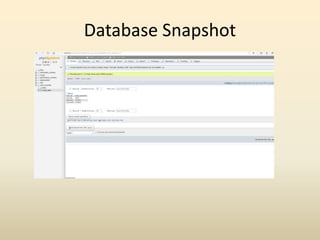
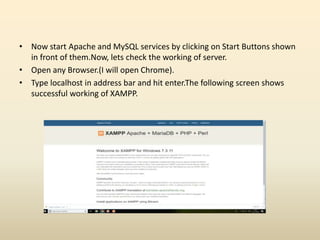
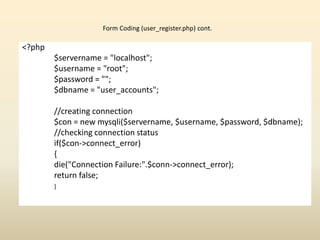
This document provides a step-by-step guide for connecting PHP to MySQL using XAMPP server. It describes downloading and installing XAMPP, creating a database and table in MySQL, and writing PHP code to insert data into the MySQL table from an HTML form.


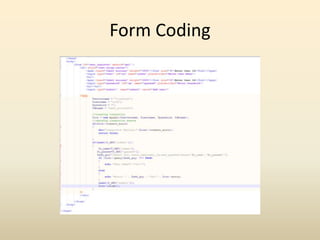

![Form Coding (user_register.php) cont.
if(isset($_GET['submit']))
{
$u_name=$_GET['uname'];
$u_passwd=$_GET['upasswd'];
$add_qry="insert into
users_tabs(user_id,user_passwd)values('$u_name','$u_passwd')";
if ($con->query($add_qry) === TRUE)
{
echo "User Added"."<br/>";
}
else
{echo "Error: " . $add_qry . "<br>" . $con->error;}
unset($_GET['submit']);
$con->close();
}
?>
</div></form><body></html>](https://image.slidesharecdn.com/php-mysqlconnectivityusingxamppserver-191123043045/85/PHP-MySQL-Database-Connectivity-Using-XAMPP-Server-19-320.jpg)