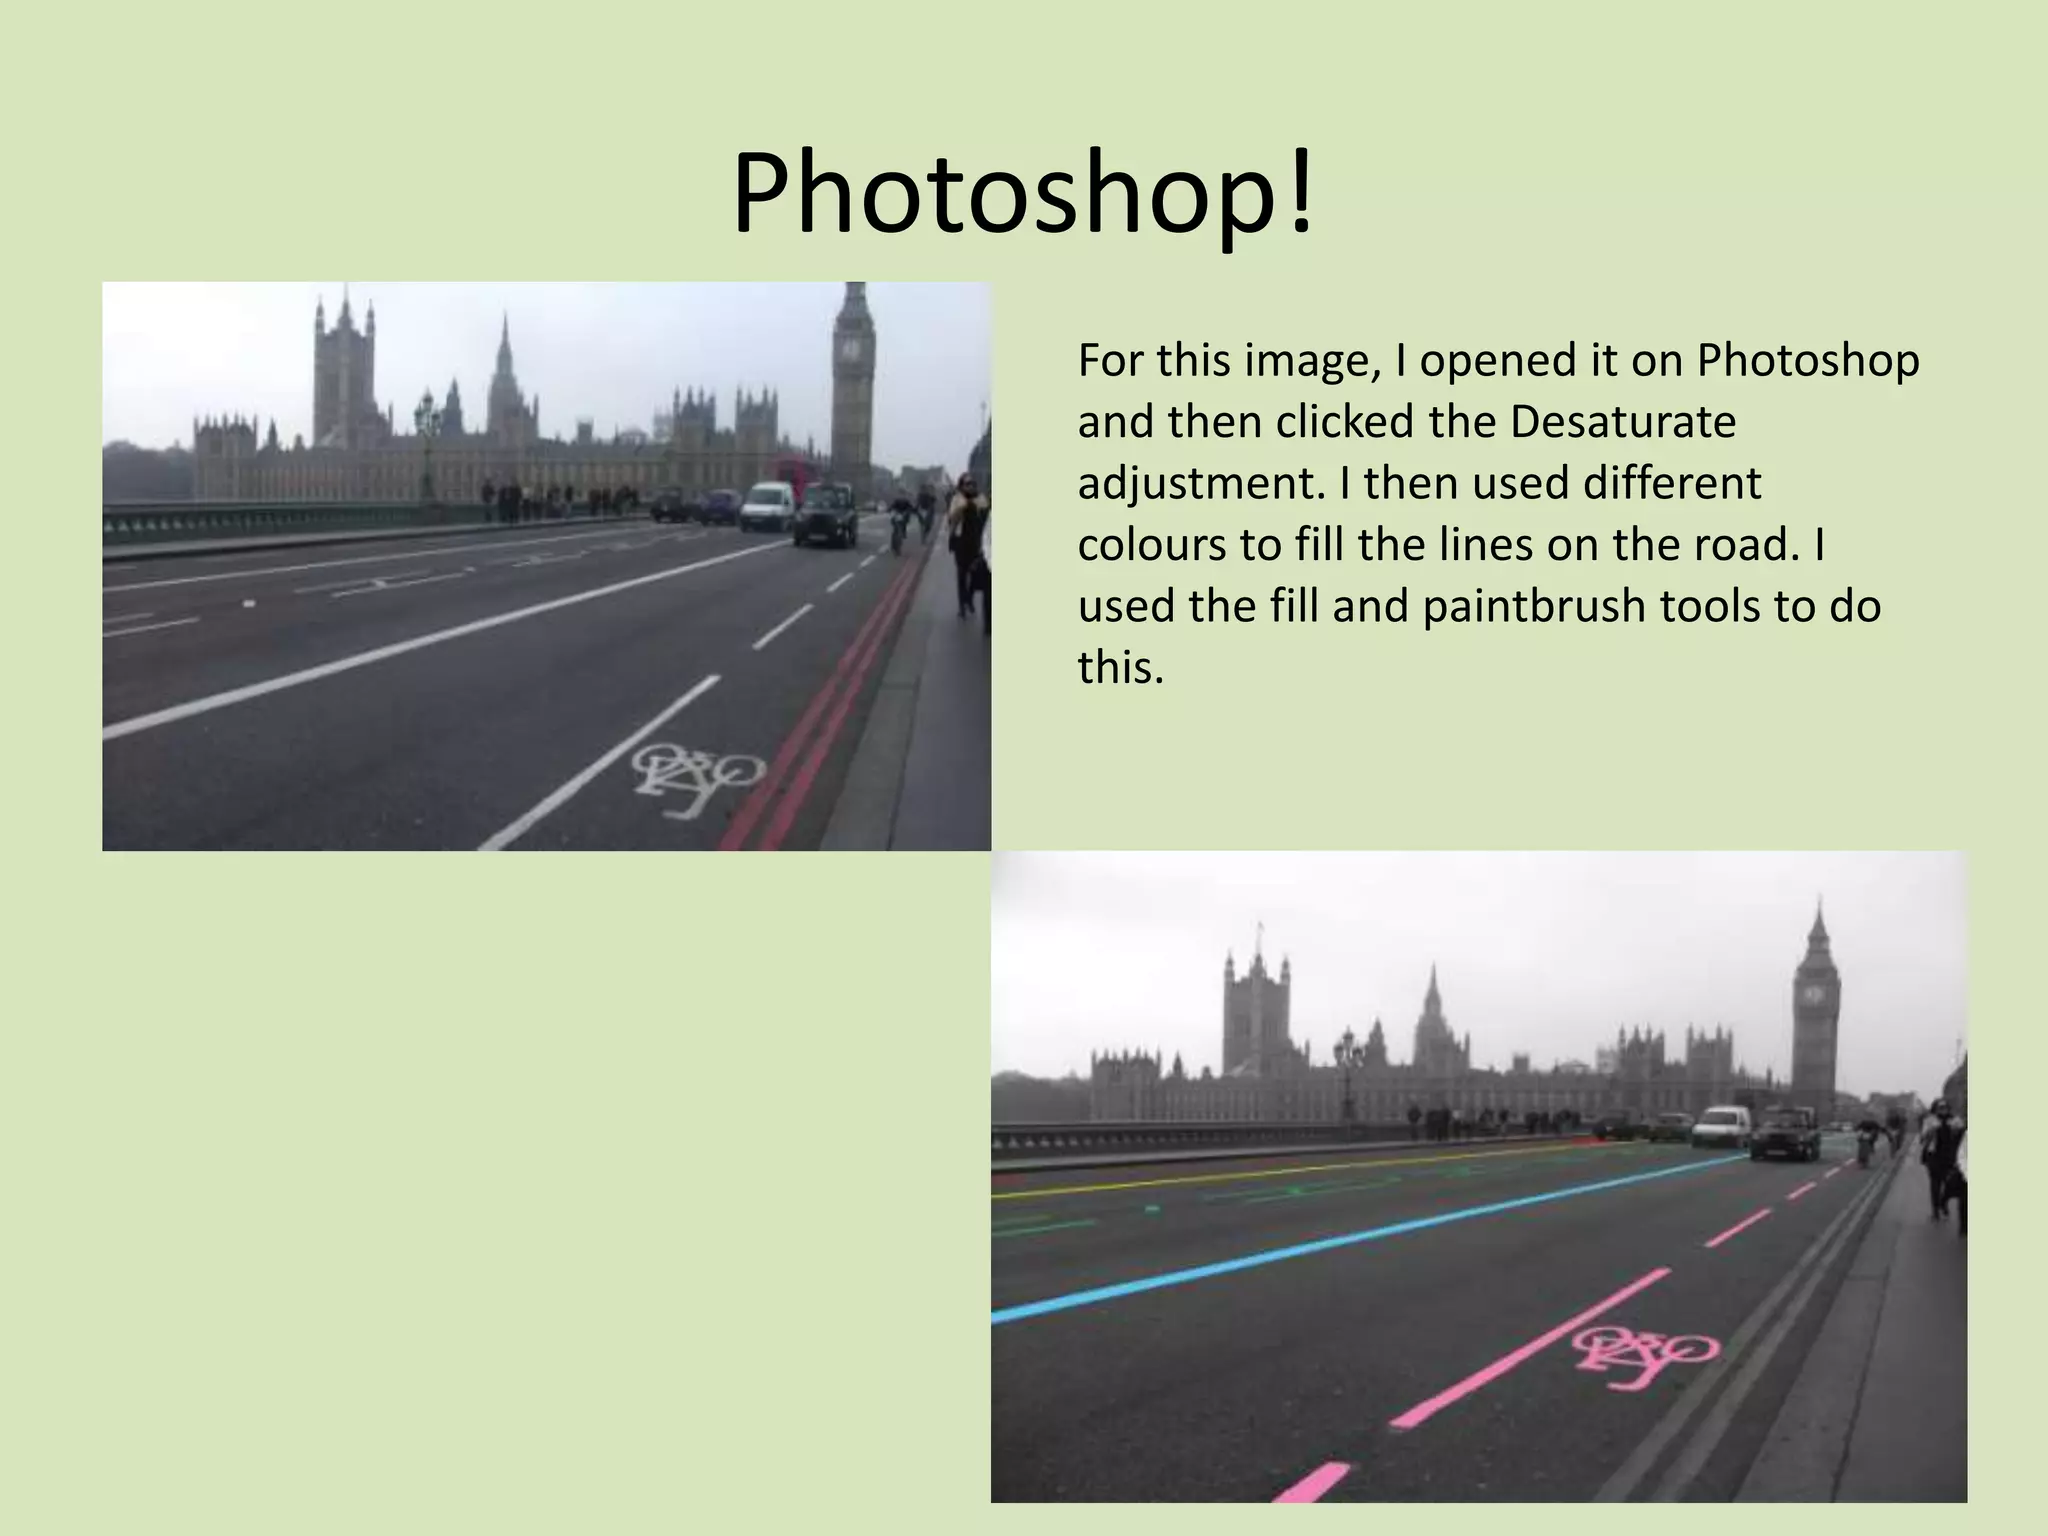
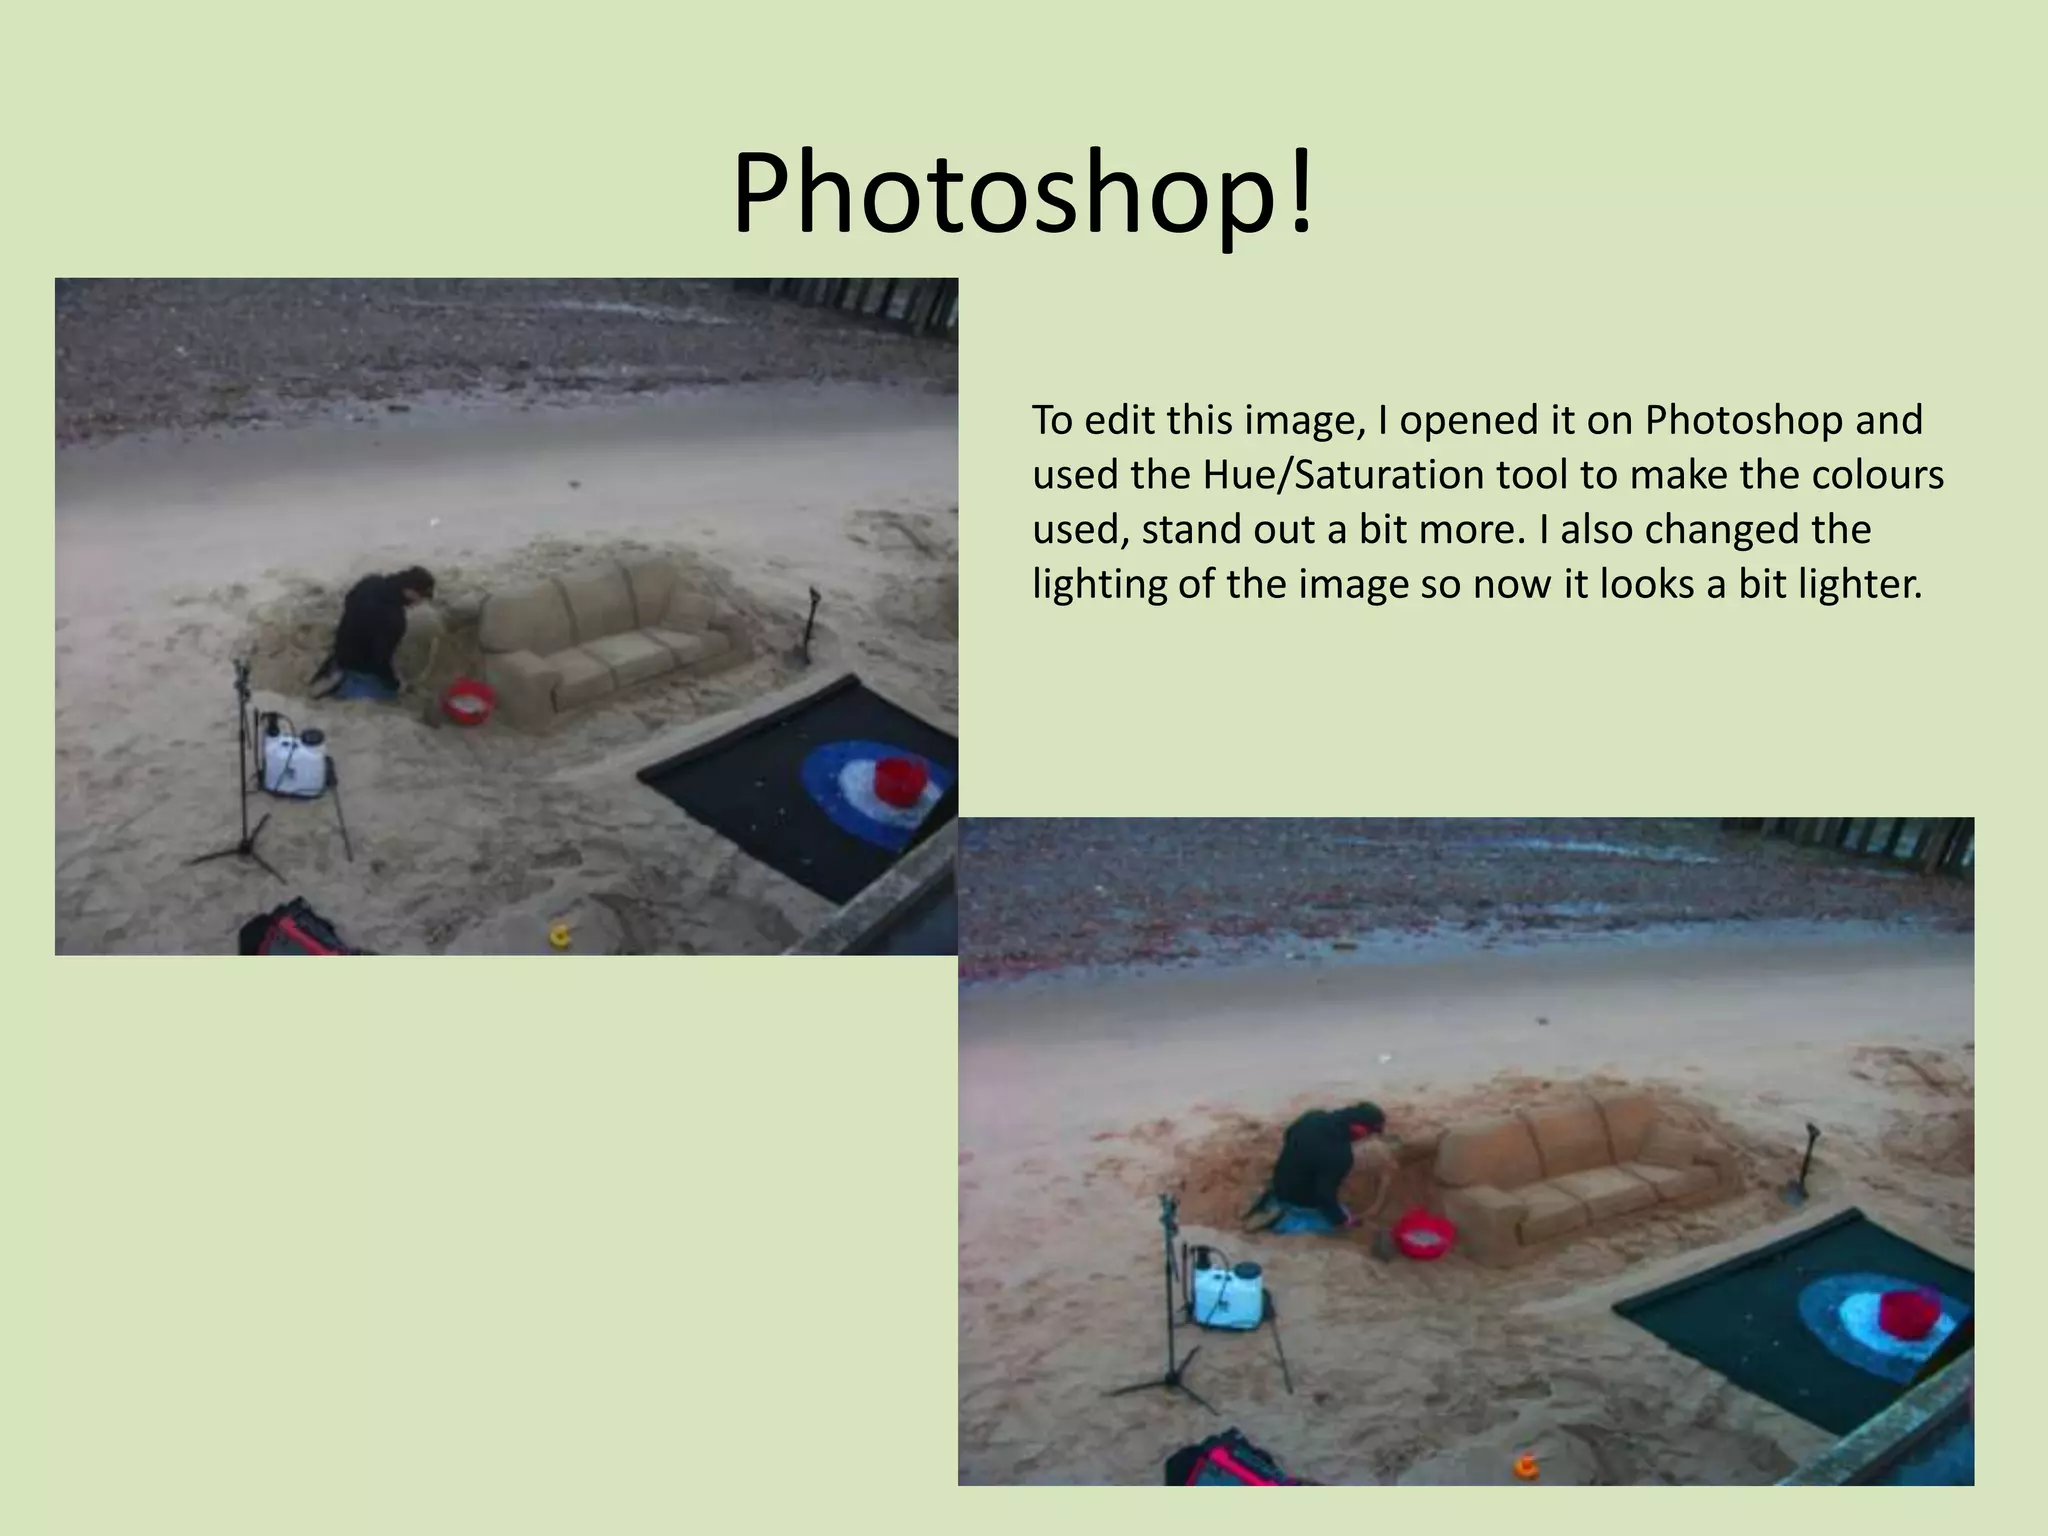
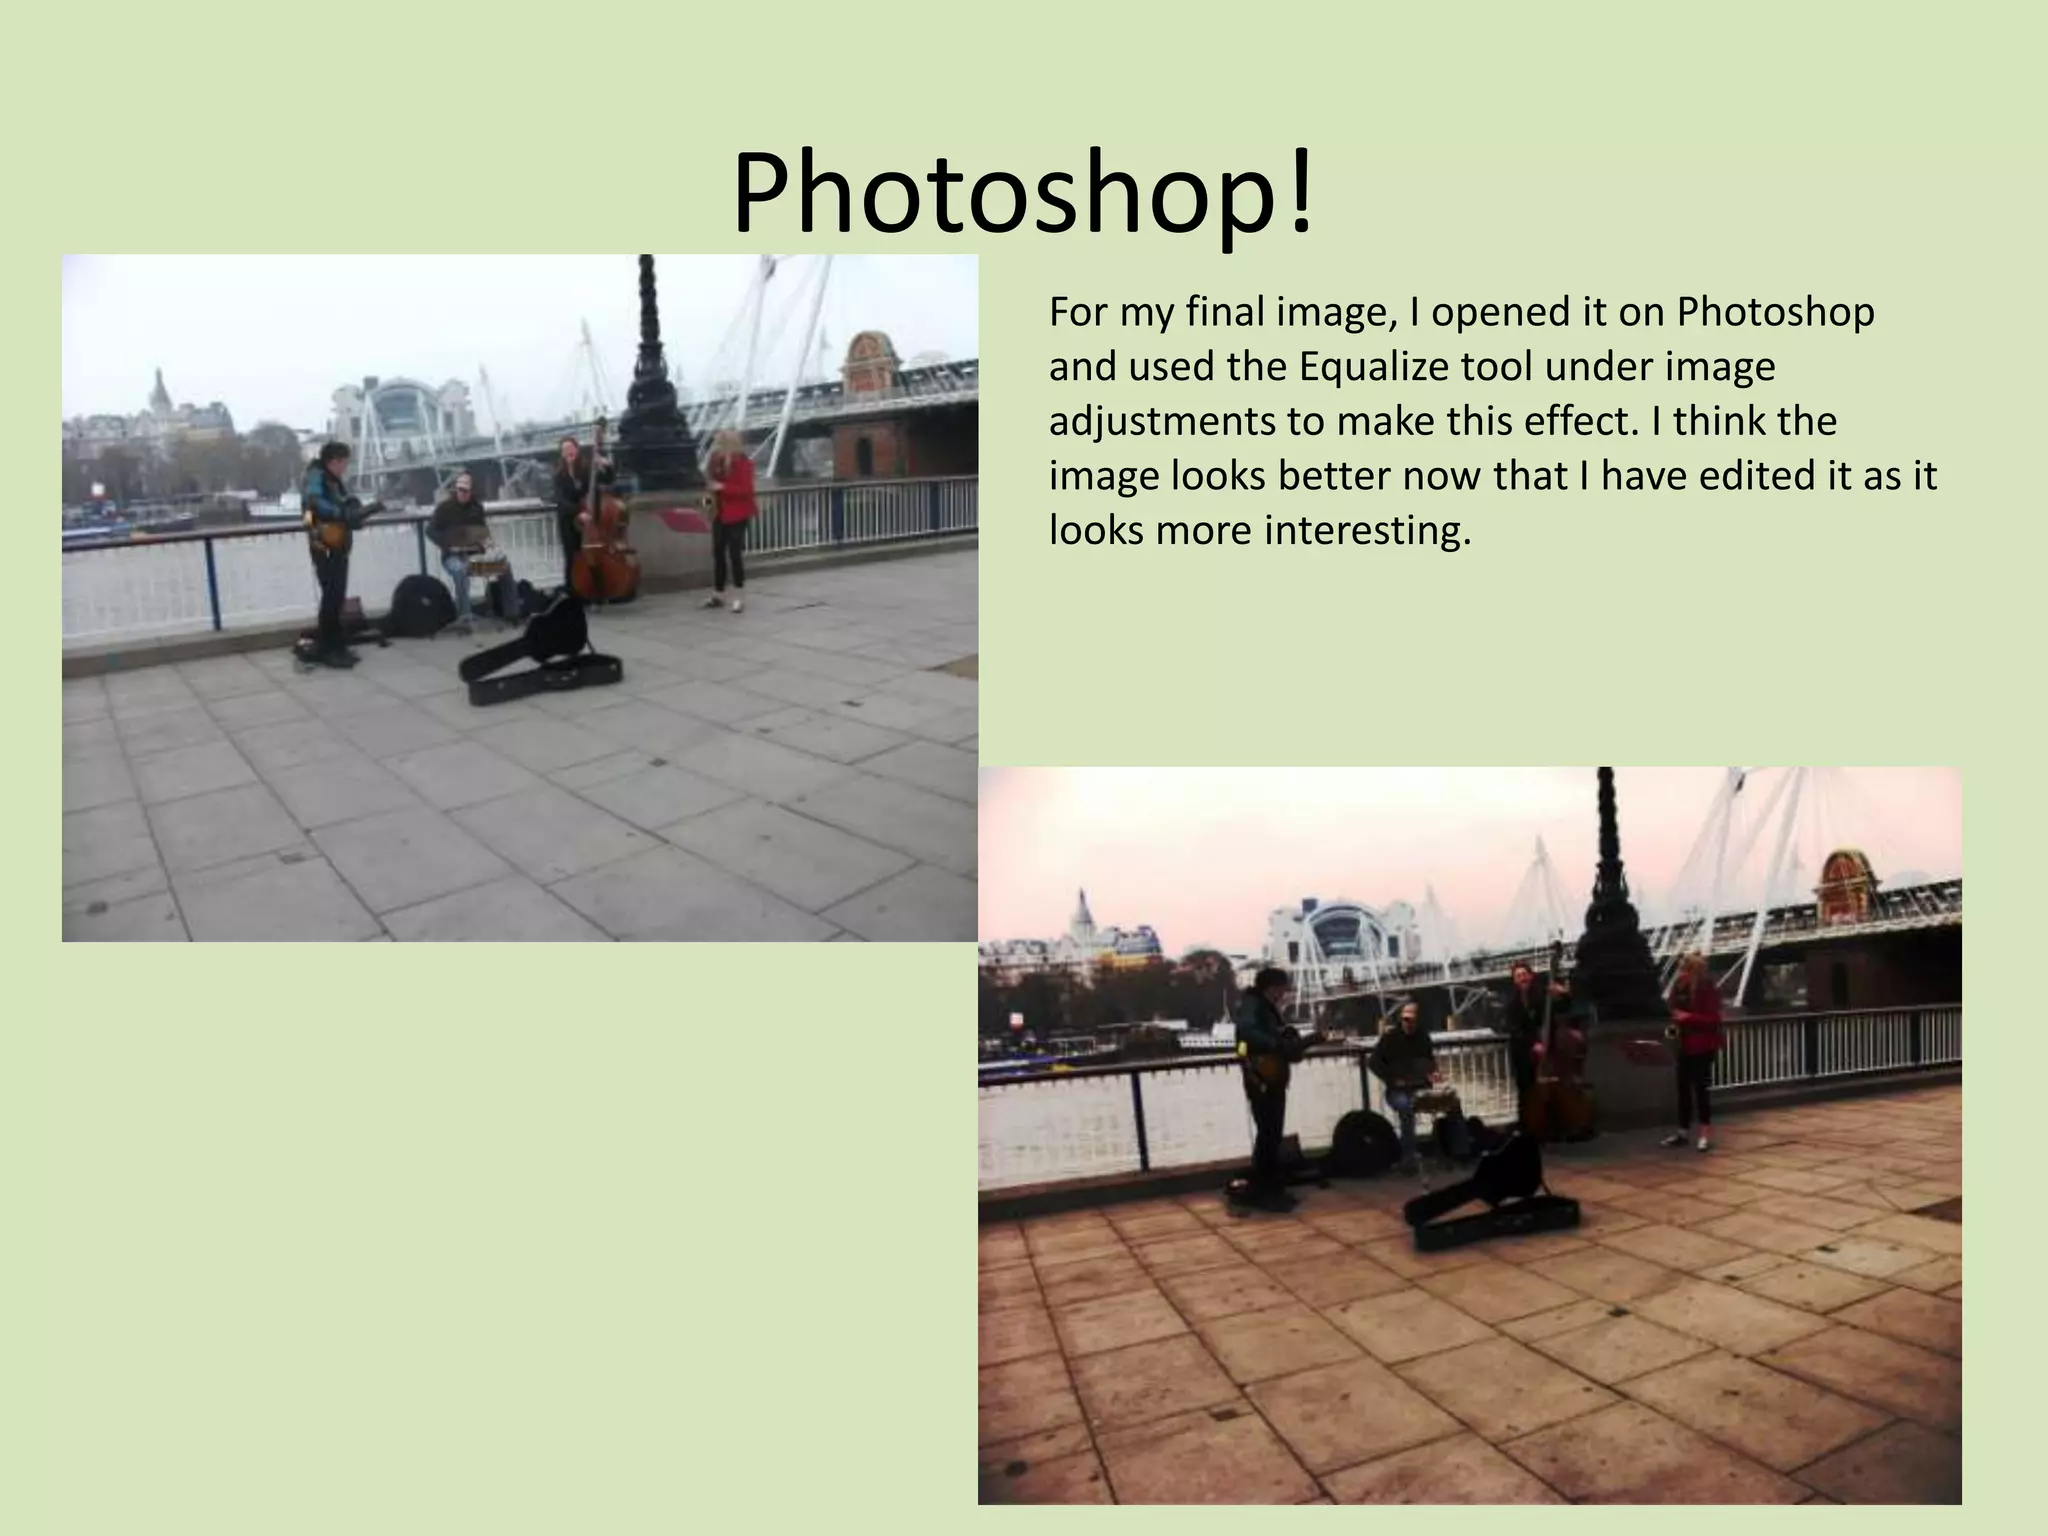
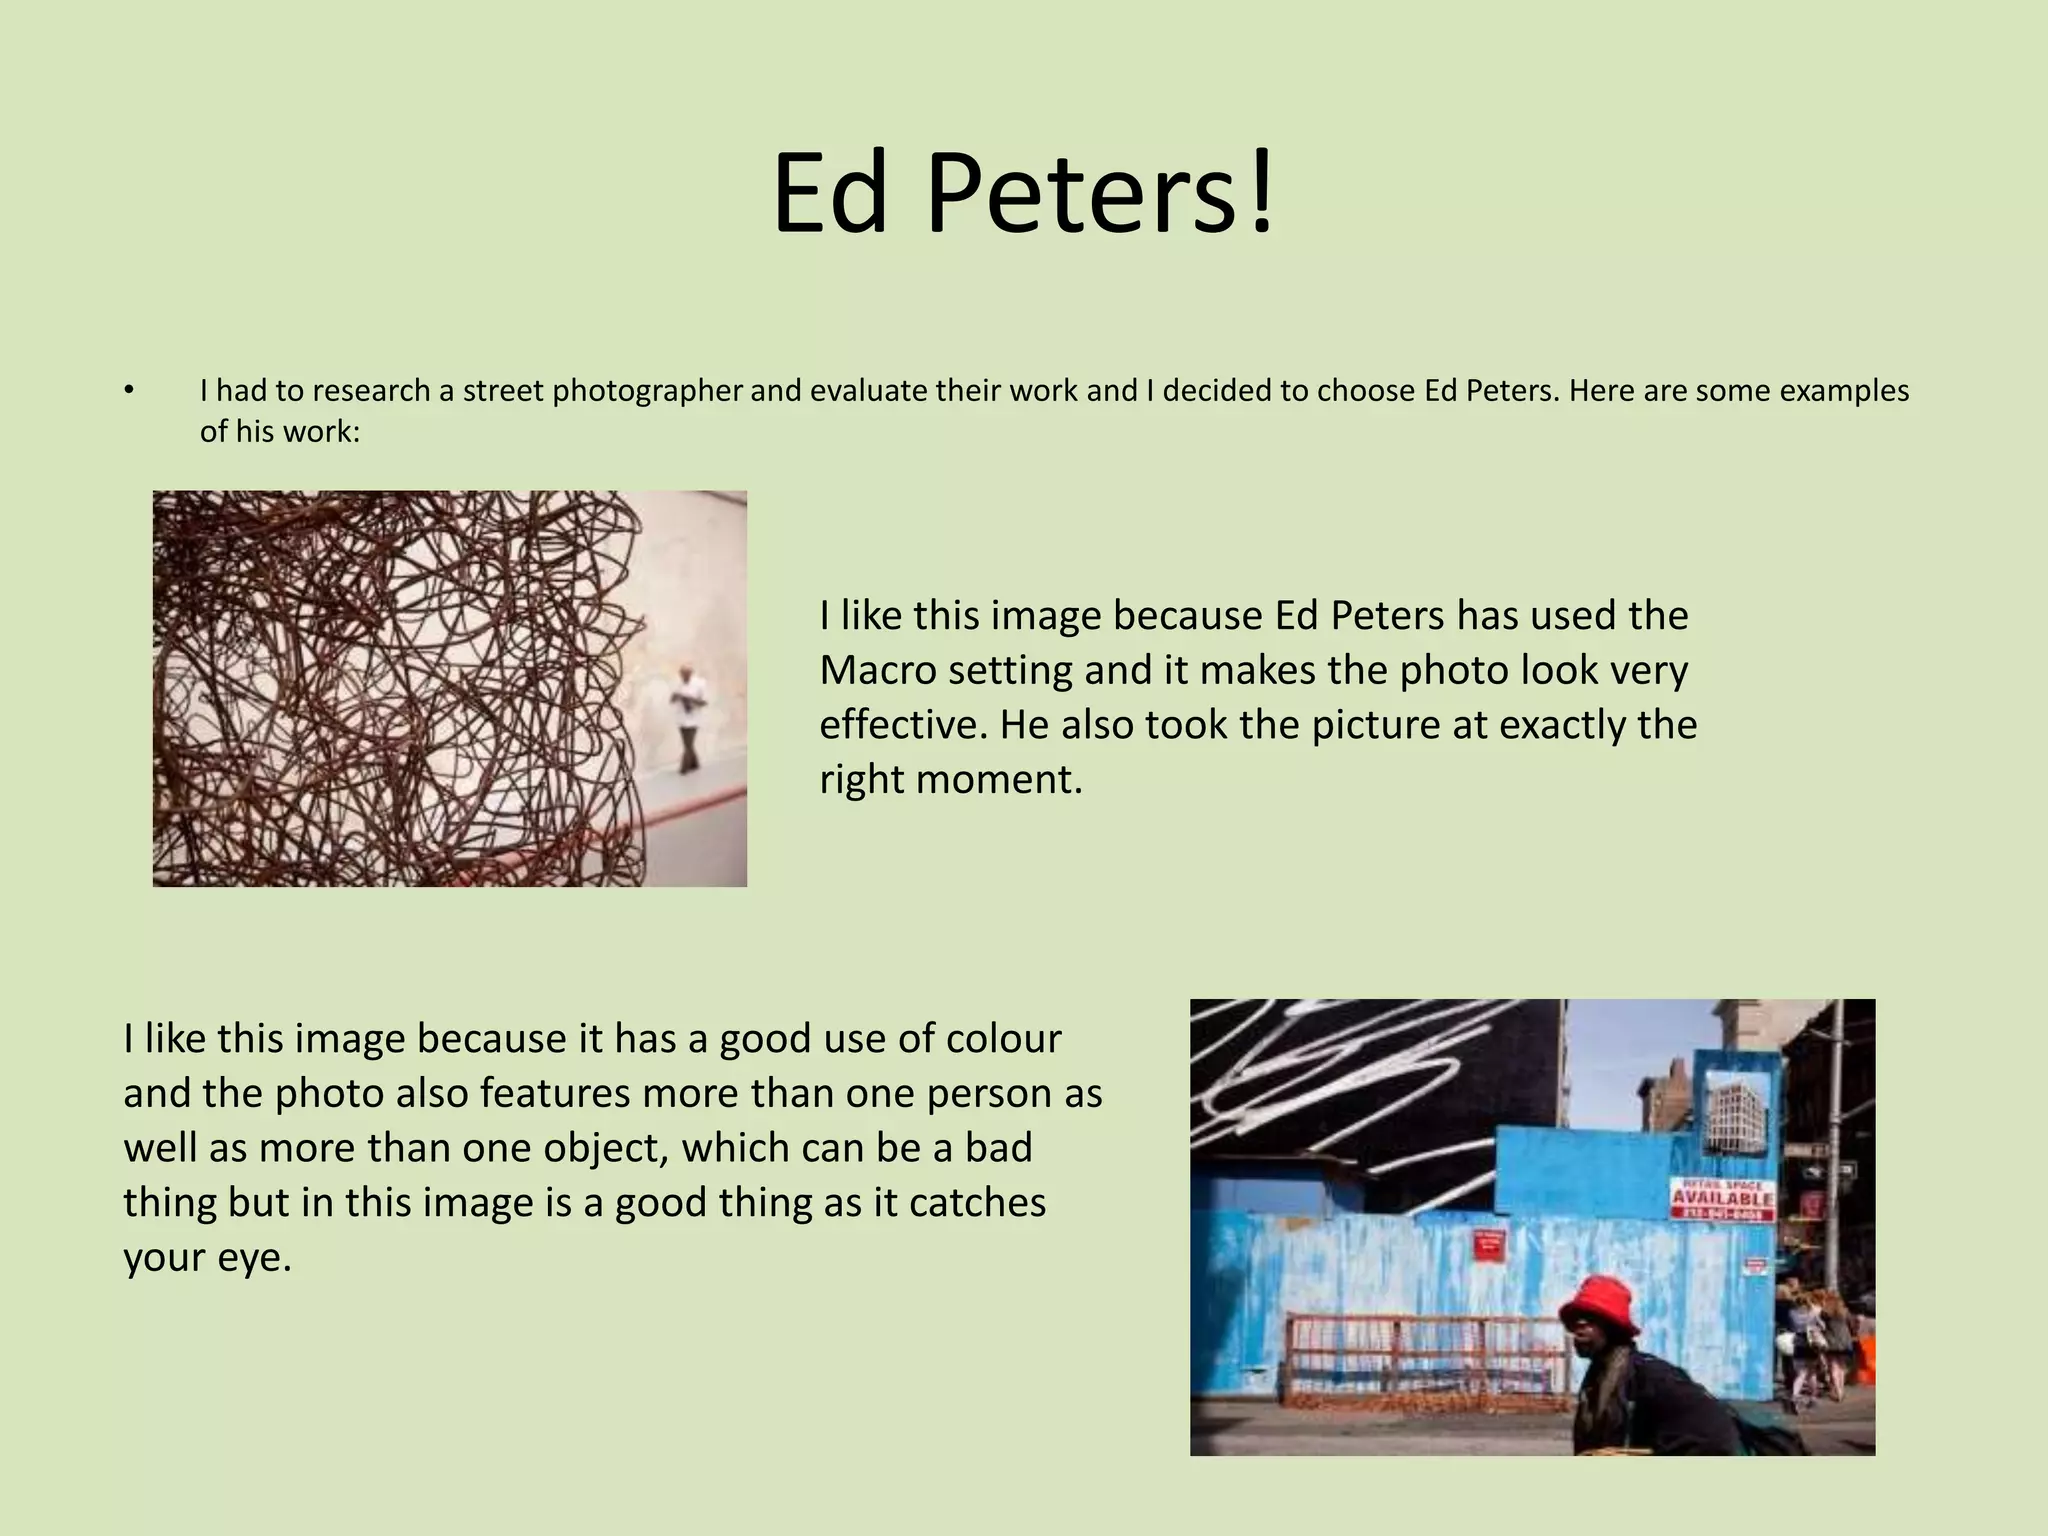
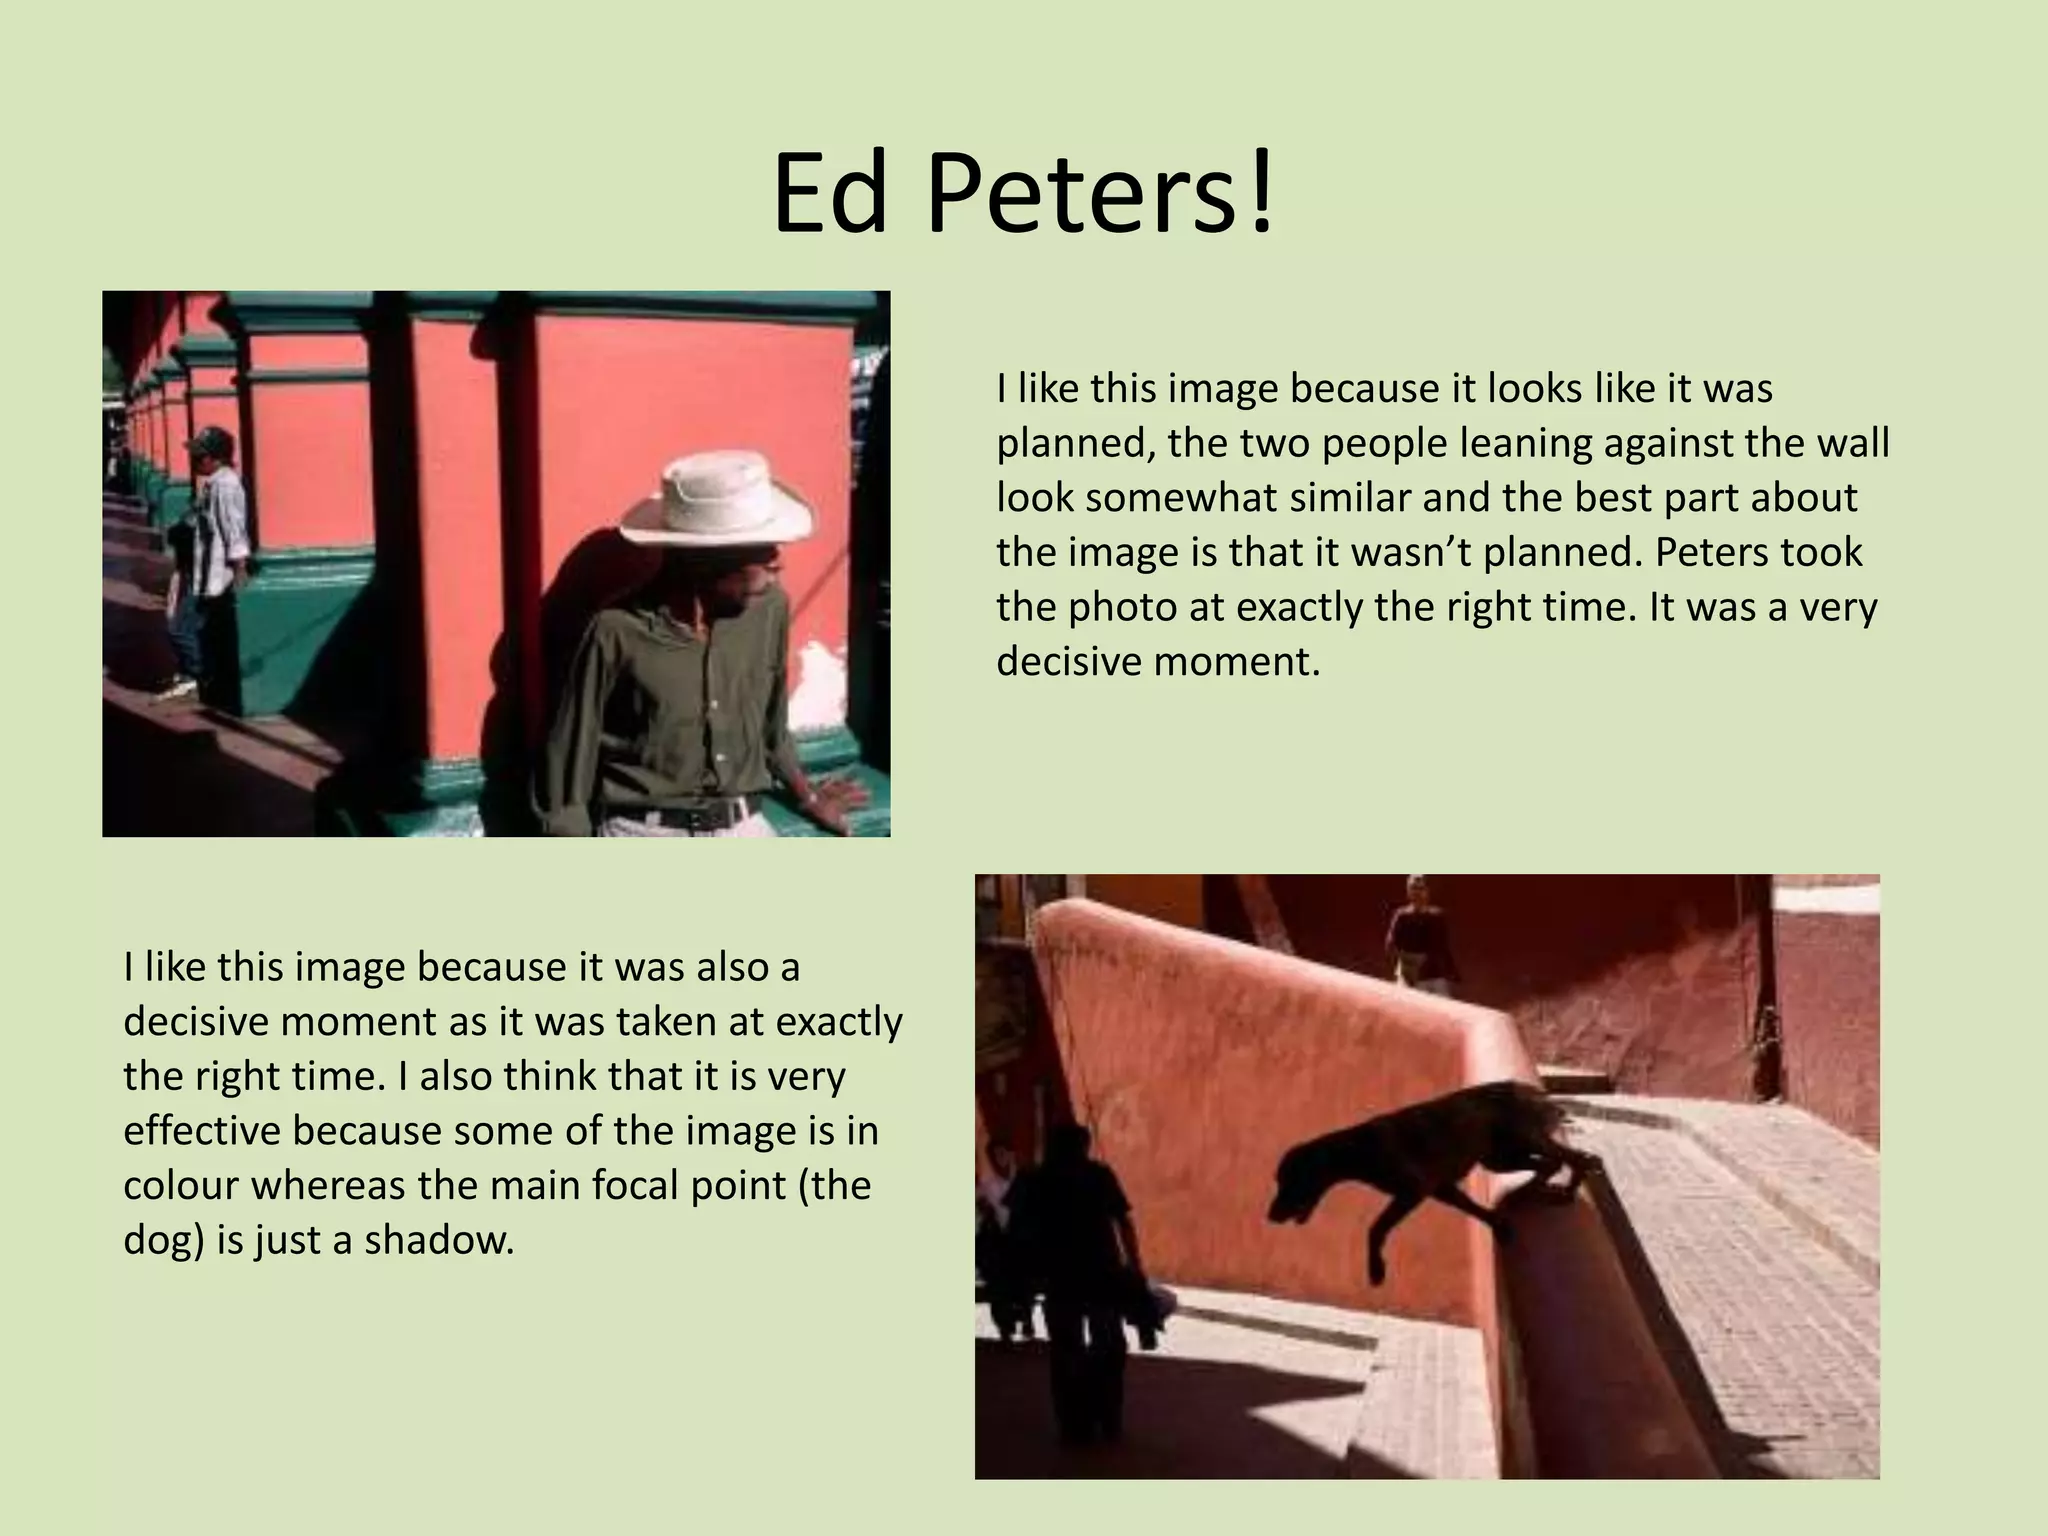
Photography Assignment Three!

         By Jessie Best!
Photoshop!
     This is one of my best images from London. As you
     can see, I uploaded it on Photoshop and changed
     the image so it looked like the bottom image.
     To make this effect, I used the shadow/highlight
     effect as well as the hue/saturation effect under
     adjustments under images.
Photoshop!
       This is my best image from London which I
       uploaded onto my blog. The original photo is the
       image on the left and to create the image on the
       bottom I uploaded the image to Photoshop and
       changed the image to black and white, I then
       used the eraser tool to add some colour back in to
       the image and I decided to add the colour back
       onto the buses to make this image look effective.
Photoshop!
     This is another one of my best images
     from London. To edit this image, I opened
     the photo on Photoshop and went onto
     images and adjustments. I then chose
     black and white and decided what original
     colours I would make black and what
     original colours I would make white.
Photoshop!
     For this image, I opened it on Photoshop
     and then clicked the Desaturate
     adjustment. I then used different
     colours to fill the lines on the road. I
     used the fill and paintbrush tools to do
     this.
Photoshop!
     To edit this image, I opened it in
     Photoshop and used the black and white
     adjustment. Then I used the fill and
     paintbrush tools to make the lights
     yellow and the pictures blue.
Photoshop!
      To edit this image, I opened it on
      Photoshop and used the
      shadow/highlight adjustment to
      change how the image looks. As you
      can see, the edited image looks foggy
      and darker than the original.
Photoshop!
      To edit this image, I opened it in
      Photoshop and used the posterize
      adjustment to create the image below. I
      think it looks effective and I prefer the
      new, edited image.
Photoshop!
     For this image, I opened in the picture in
     Photoshop and clicked the Desaturate tool in
     image adjustments. Then, I used the exposure tool
     to give it an olden day feel. I think the image looks
     more effective now.
Photoshop!
     To edit this image, I opened it on Photoshop and
     used the Hue/Saturation tool to make the colours
     used, stand out a bit more. I also changed the
     lighting of the image so now it looks a bit lighter.
Photoshop!
     For my final image, I opened it on Photoshop
     and used the Equalize tool under image
     adjustments to make this effect. I think the
     image looks better now that I have edited it as it
     looks more interesting.
Ed Peters!
•   I had to research a street photographer and evaluate their work and I decided to choose Ed Peters. Here are some examples
    of his work:


                                               I like this image because Ed Peters has used the
                                               Macro setting and it makes the photo look very
                                               effective. He also took the picture at exactly the
                                               right moment.


I like this image because it has a good use of colour
and the photo also features more than one person as
well as more than one object, which can be a bad
thing but in this image is a good thing as it catches
your eye.
Ed Peters!
                                               I like this image because it looks like it was
                                               planned, the two people leaning against the wall
                                               look somewhat similar and the best part about
                                               the image is that it wasn’t planned. Peters took
                                               the photo at exactly the right time. It was a very
                                               decisive moment.


I like this image because it was also a
decisive moment as it was taken at exactly
the right time. I also think that it is very
effective because some of the image is in
colour whereas the main focal point (the
dog) is just a shadow.
Considerations for Street
          Photographers!
Dos                                          Don’ts
Get in the zone-make sure you are            Dress like your hiding something-this
ready to take photos and your in the         will give people the wrong idea about
mood to take photographs                     you and they will never want their
                                             picture taken
Get groups of people to make it look         Take pictures of young children-you
good-obviously you won’t be able to          need parental permission for the child
get them all to sign something but           to have their picture taken so don’t
groups look effective                        include young children if you can help
                                             it
Be patient-not everyone will want their      Take pictures of people eating-nobody
picture taken, and you can’t blame           wants to have a photo of them with
them. However, there are people that         their mouth full, so don’t take photos
won’t mind you just need to be patient       of people whilst they are eating
and you’ll find them
Use all settings-there are many settings     Get up in people’s faces-If someone
on the camera so make sure you use           does not want to be in your photo,
them all, this will give all your images a   then accept their decision. Don’t creep
different look                               up on them and annoy them even
                                             more
Ethical and Moral!
•   You are free to photograph the activities, reactions and candid life of people on the streets,
    unless people find in uncomfortable to get themselves photographed.
•   Legal issues rise when you intent to threaten or violate the right of privacy of the people, i.e.
    photographing the personal dimension of their lives even though in public places.
•   Problems arise when you pick up the camera to photograph people to use for commercial
    use. (models have to sign release forms)
•   Some countries have their own laws for not photographing the concepts of hunger and
    poverty, considering such acts as exploitation of economically poor sections of the society.
•   Approach the person with a friendly smile and take the permission prior to taking the
    photograph.
•   Avoid photographing the people who consider your act offensive or obtrusive.

Photography presentation assignment 3

  • 1.
  • 2.
    Photoshop! This is one of my best images from London. As you can see, I uploaded it on Photoshop and changed the image so it looked like the bottom image. To make this effect, I used the shadow/highlight effect as well as the hue/saturation effect under adjustments under images.
  • 3.
    Photoshop! This is my best image from London which I uploaded onto my blog. The original photo is the image on the left and to create the image on the bottom I uploaded the image to Photoshop and changed the image to black and white, I then used the eraser tool to add some colour back in to the image and I decided to add the colour back onto the buses to make this image look effective.
  • 4.
    Photoshop! This is another one of my best images from London. To edit this image, I opened the photo on Photoshop and went onto images and adjustments. I then chose black and white and decided what original colours I would make black and what original colours I would make white.
  • 5.
    Photoshop! For this image, I opened it on Photoshop and then clicked the Desaturate adjustment. I then used different colours to fill the lines on the road. I used the fill and paintbrush tools to do this.
  • 6.
    Photoshop! To edit this image, I opened it in Photoshop and used the black and white adjustment. Then I used the fill and paintbrush tools to make the lights yellow and the pictures blue.
  • 7.
    Photoshop! To edit this image, I opened it on Photoshop and used the shadow/highlight adjustment to change how the image looks. As you can see, the edited image looks foggy and darker than the original.
  • 8.
    Photoshop! To edit this image, I opened it in Photoshop and used the posterize adjustment to create the image below. I think it looks effective and I prefer the new, edited image.
  • 9.
    Photoshop! For this image, I opened in the picture in Photoshop and clicked the Desaturate tool in image adjustments. Then, I used the exposure tool to give it an olden day feel. I think the image looks more effective now.
  • 10.
    Photoshop! To edit this image, I opened it on Photoshop and used the Hue/Saturation tool to make the colours used, stand out a bit more. I also changed the lighting of the image so now it looks a bit lighter.
  • 11.
    Photoshop! For my final image, I opened it on Photoshop and used the Equalize tool under image adjustments to make this effect. I think the image looks better now that I have edited it as it looks more interesting.
  • 12.
    Ed Peters! • I had to research a street photographer and evaluate their work and I decided to choose Ed Peters. Here are some examples of his work: I like this image because Ed Peters has used the Macro setting and it makes the photo look very effective. He also took the picture at exactly the right moment. I like this image because it has a good use of colour and the photo also features more than one person as well as more than one object, which can be a bad thing but in this image is a good thing as it catches your eye.
  • 13.
    Ed Peters! I like this image because it looks like it was planned, the two people leaning against the wall look somewhat similar and the best part about the image is that it wasn’t planned. Peters took the photo at exactly the right time. It was a very decisive moment. I like this image because it was also a decisive moment as it was taken at exactly the right time. I also think that it is very effective because some of the image is in colour whereas the main focal point (the dog) is just a shadow.
  • 14.
    Considerations for Street Photographers! Dos Don’ts Get in the zone-make sure you are Dress like your hiding something-this ready to take photos and your in the will give people the wrong idea about mood to take photographs you and they will never want their picture taken Get groups of people to make it look Take pictures of young children-you good-obviously you won’t be able to need parental permission for the child get them all to sign something but to have their picture taken so don’t groups look effective include young children if you can help it Be patient-not everyone will want their Take pictures of people eating-nobody picture taken, and you can’t blame wants to have a photo of them with them. However, there are people that their mouth full, so don’t take photos won’t mind you just need to be patient of people whilst they are eating and you’ll find them Use all settings-there are many settings Get up in people’s faces-If someone on the camera so make sure you use does not want to be in your photo, them all, this will give all your images a then accept their decision. Don’t creep different look up on them and annoy them even more
  • 15.
    Ethical and Moral! • You are free to photograph the activities, reactions and candid life of people on the streets, unless people find in uncomfortable to get themselves photographed. • Legal issues rise when you intent to threaten or violate the right of privacy of the people, i.e. photographing the personal dimension of their lives even though in public places. • Problems arise when you pick up the camera to photograph people to use for commercial use. (models have to sign release forms) • Some countries have their own laws for not photographing the concepts of hunger and poverty, considering such acts as exploitation of economically poor sections of the society. • Approach the person with a friendly smile and take the permission prior to taking the photograph. • Avoid photographing the people who consider your act offensive or obtrusive.