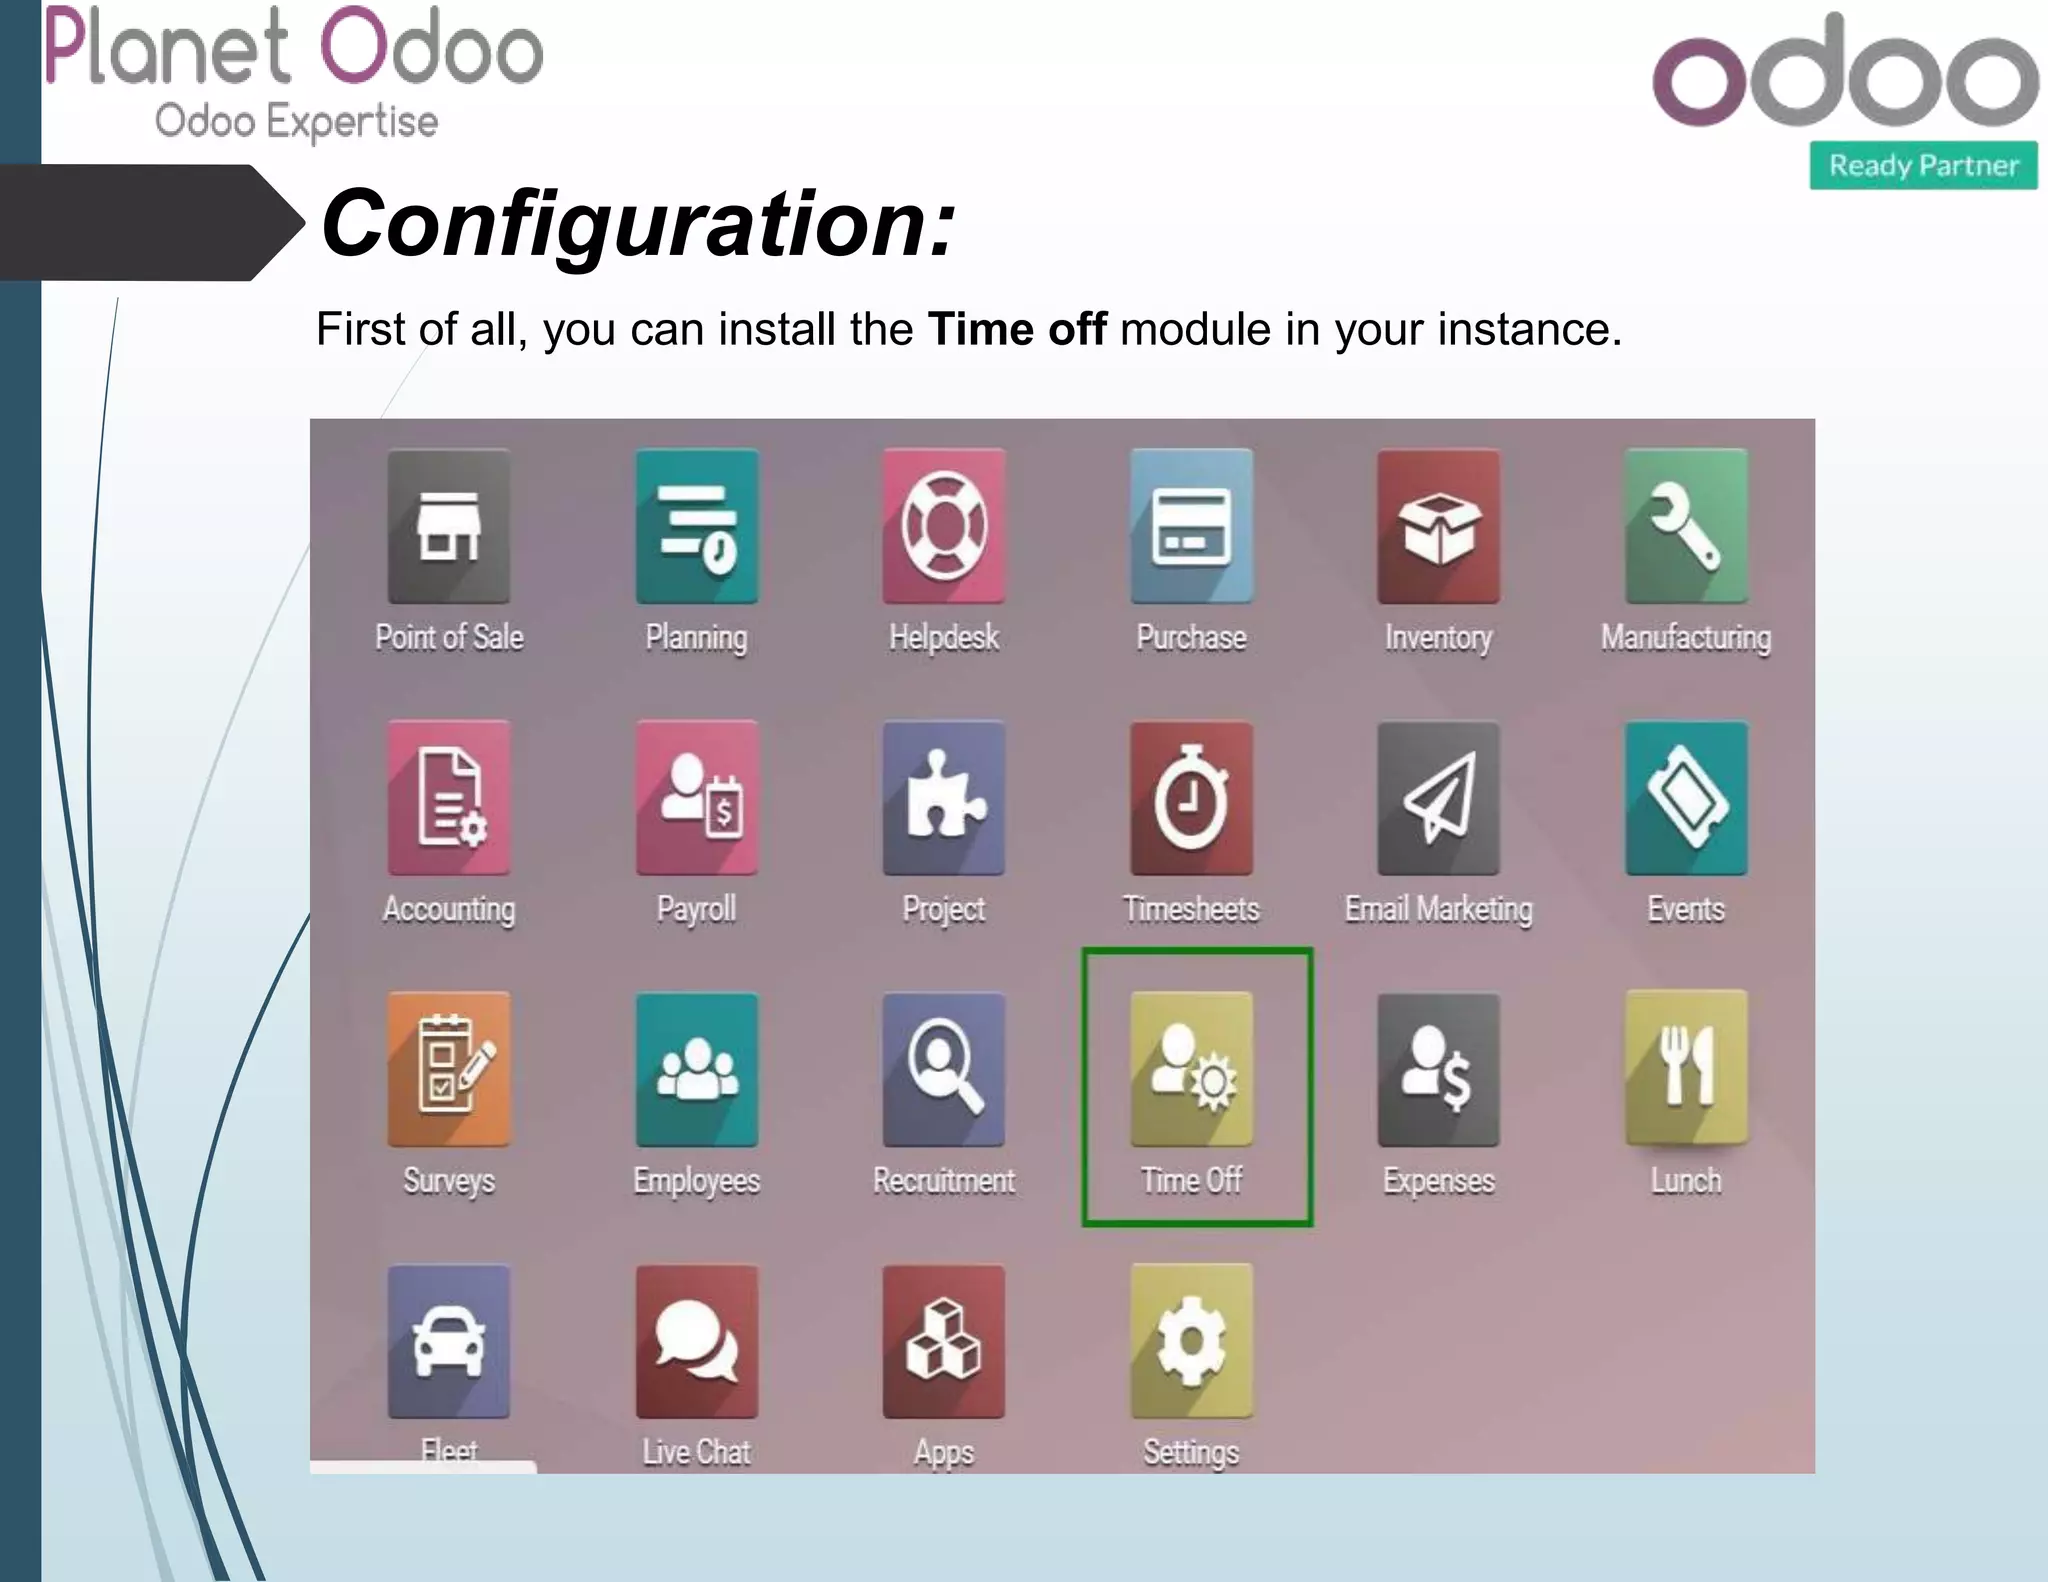
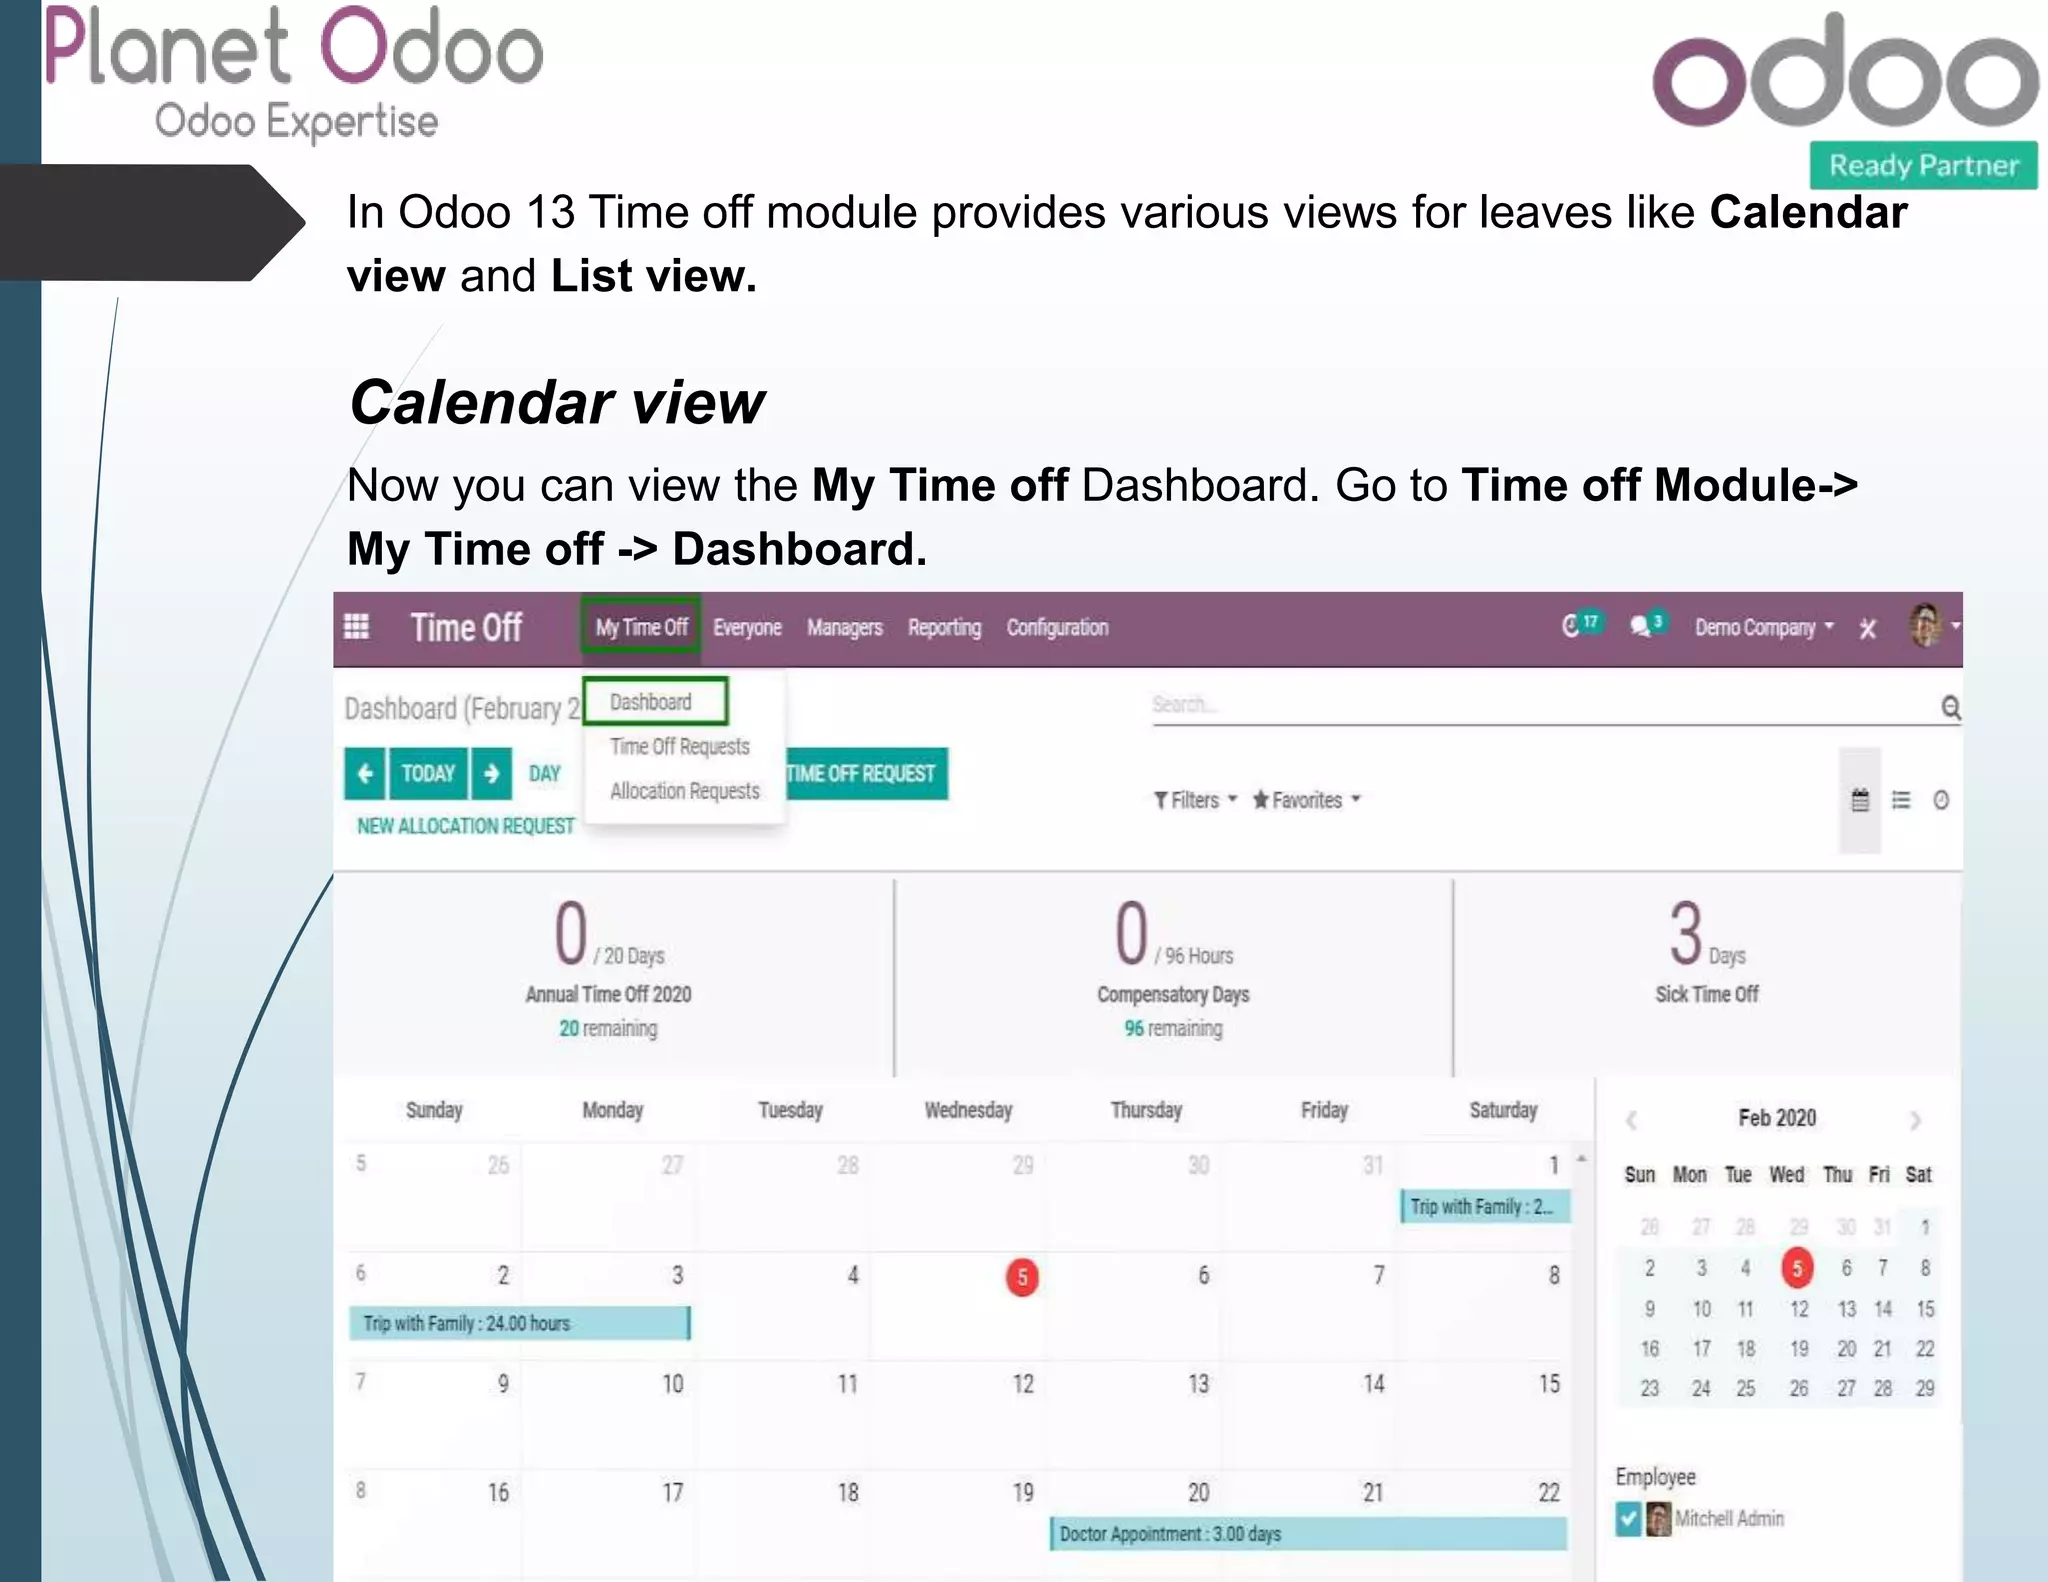
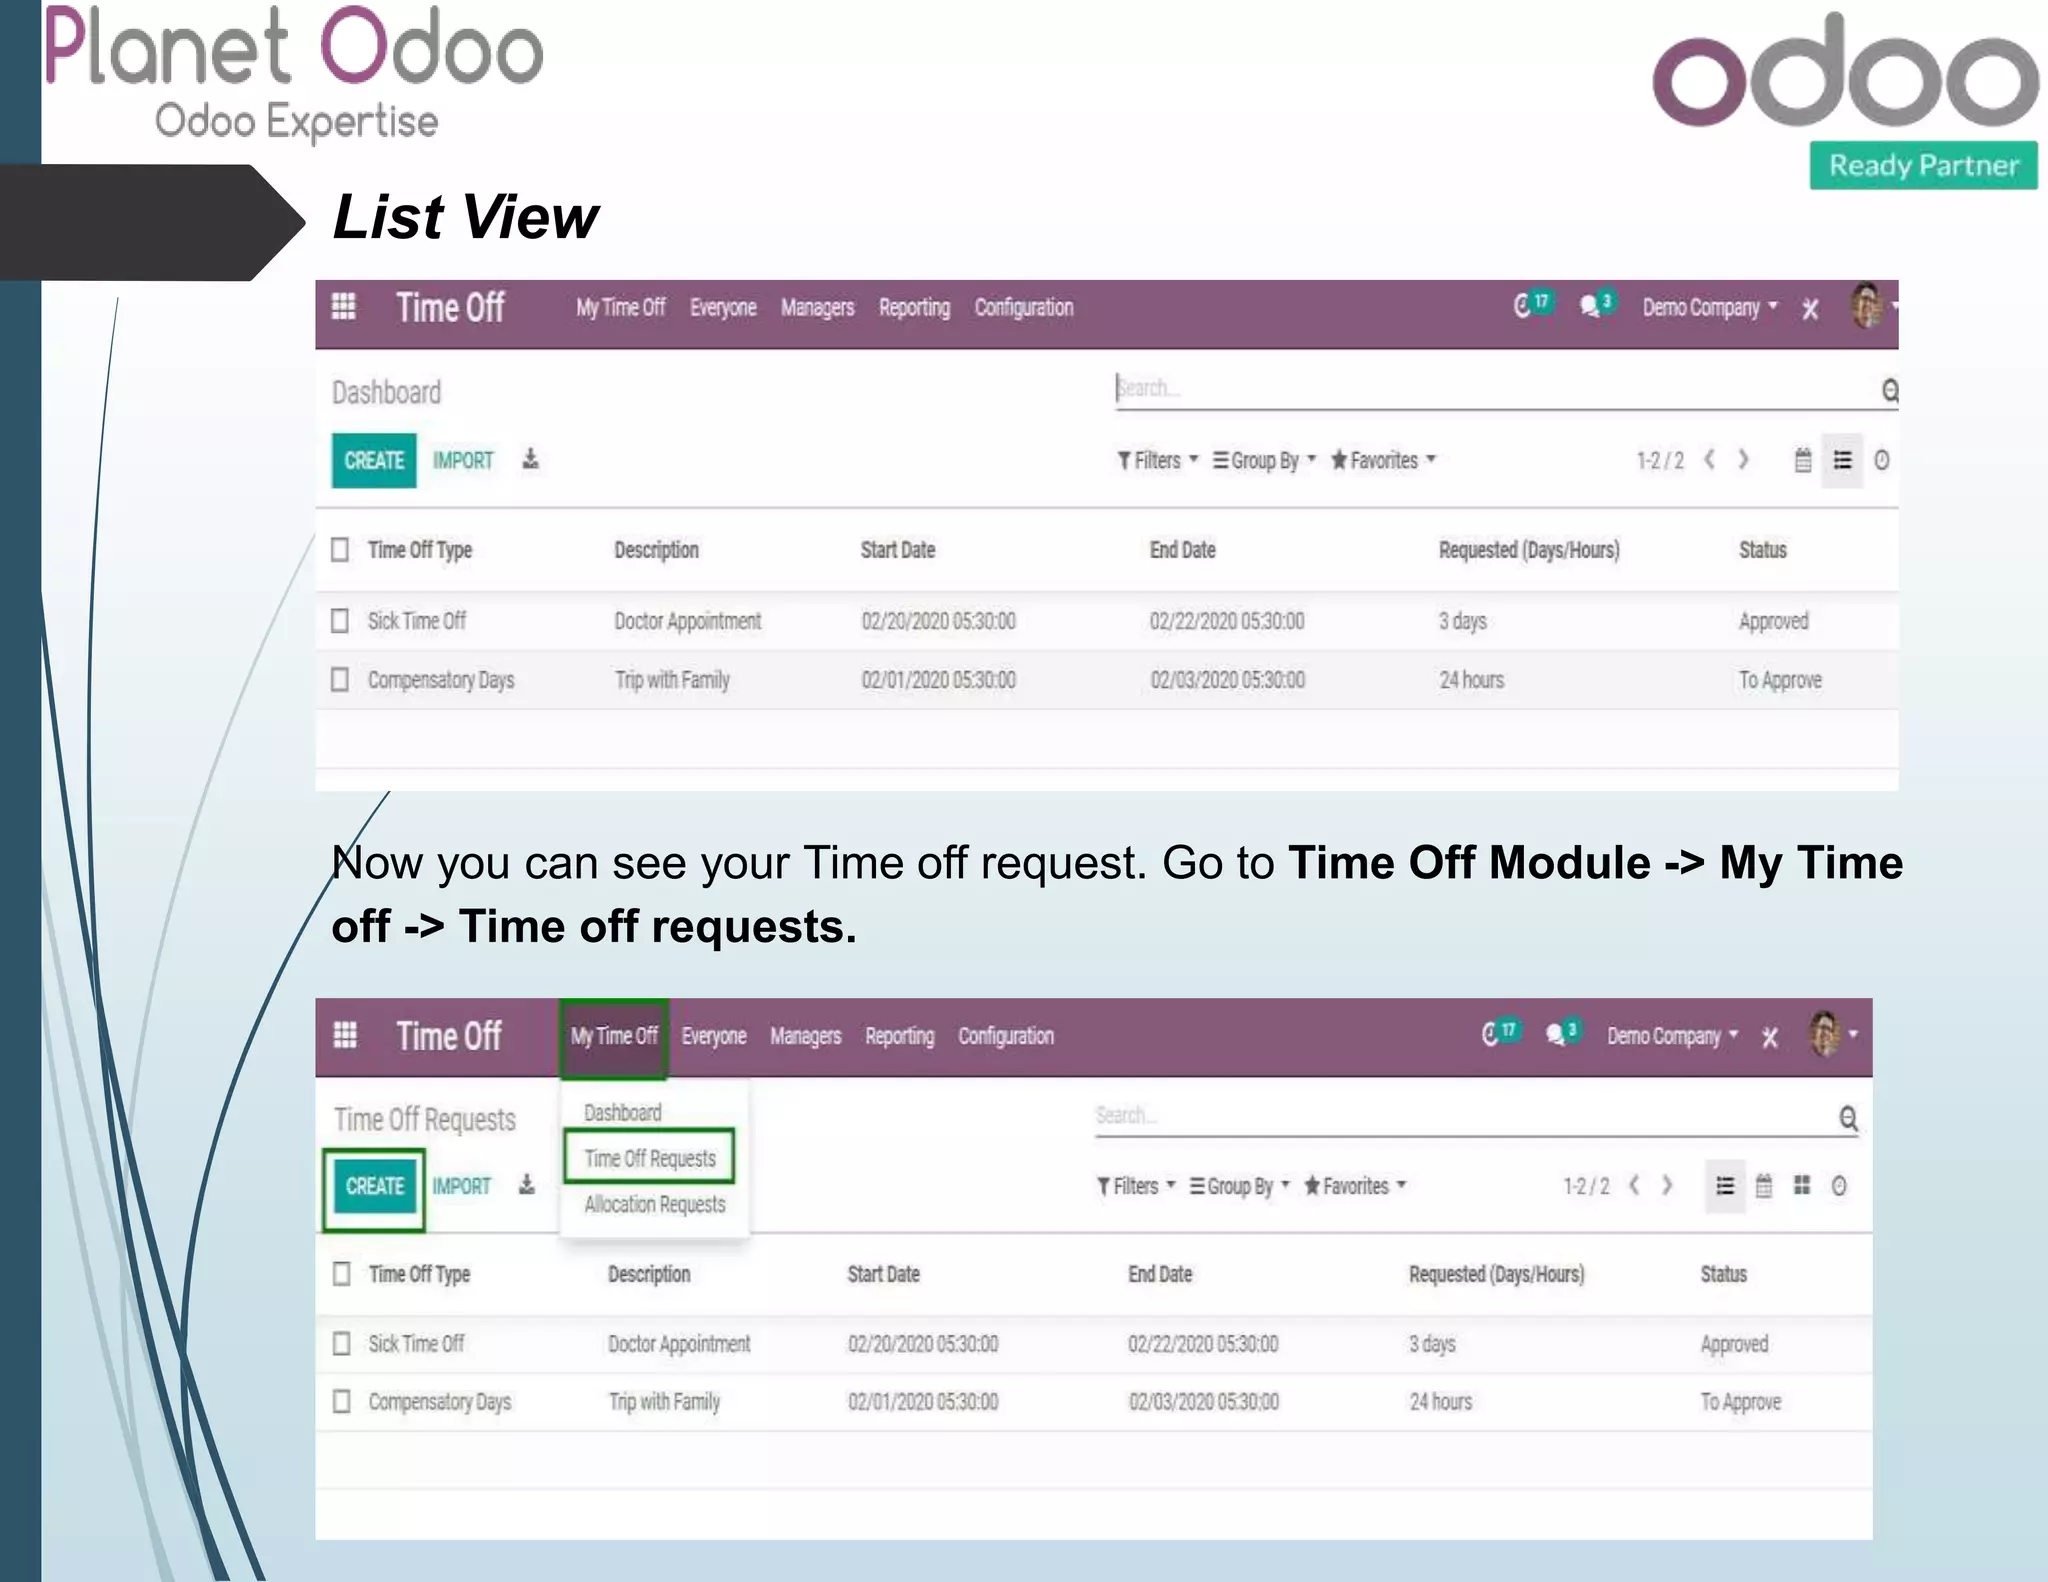
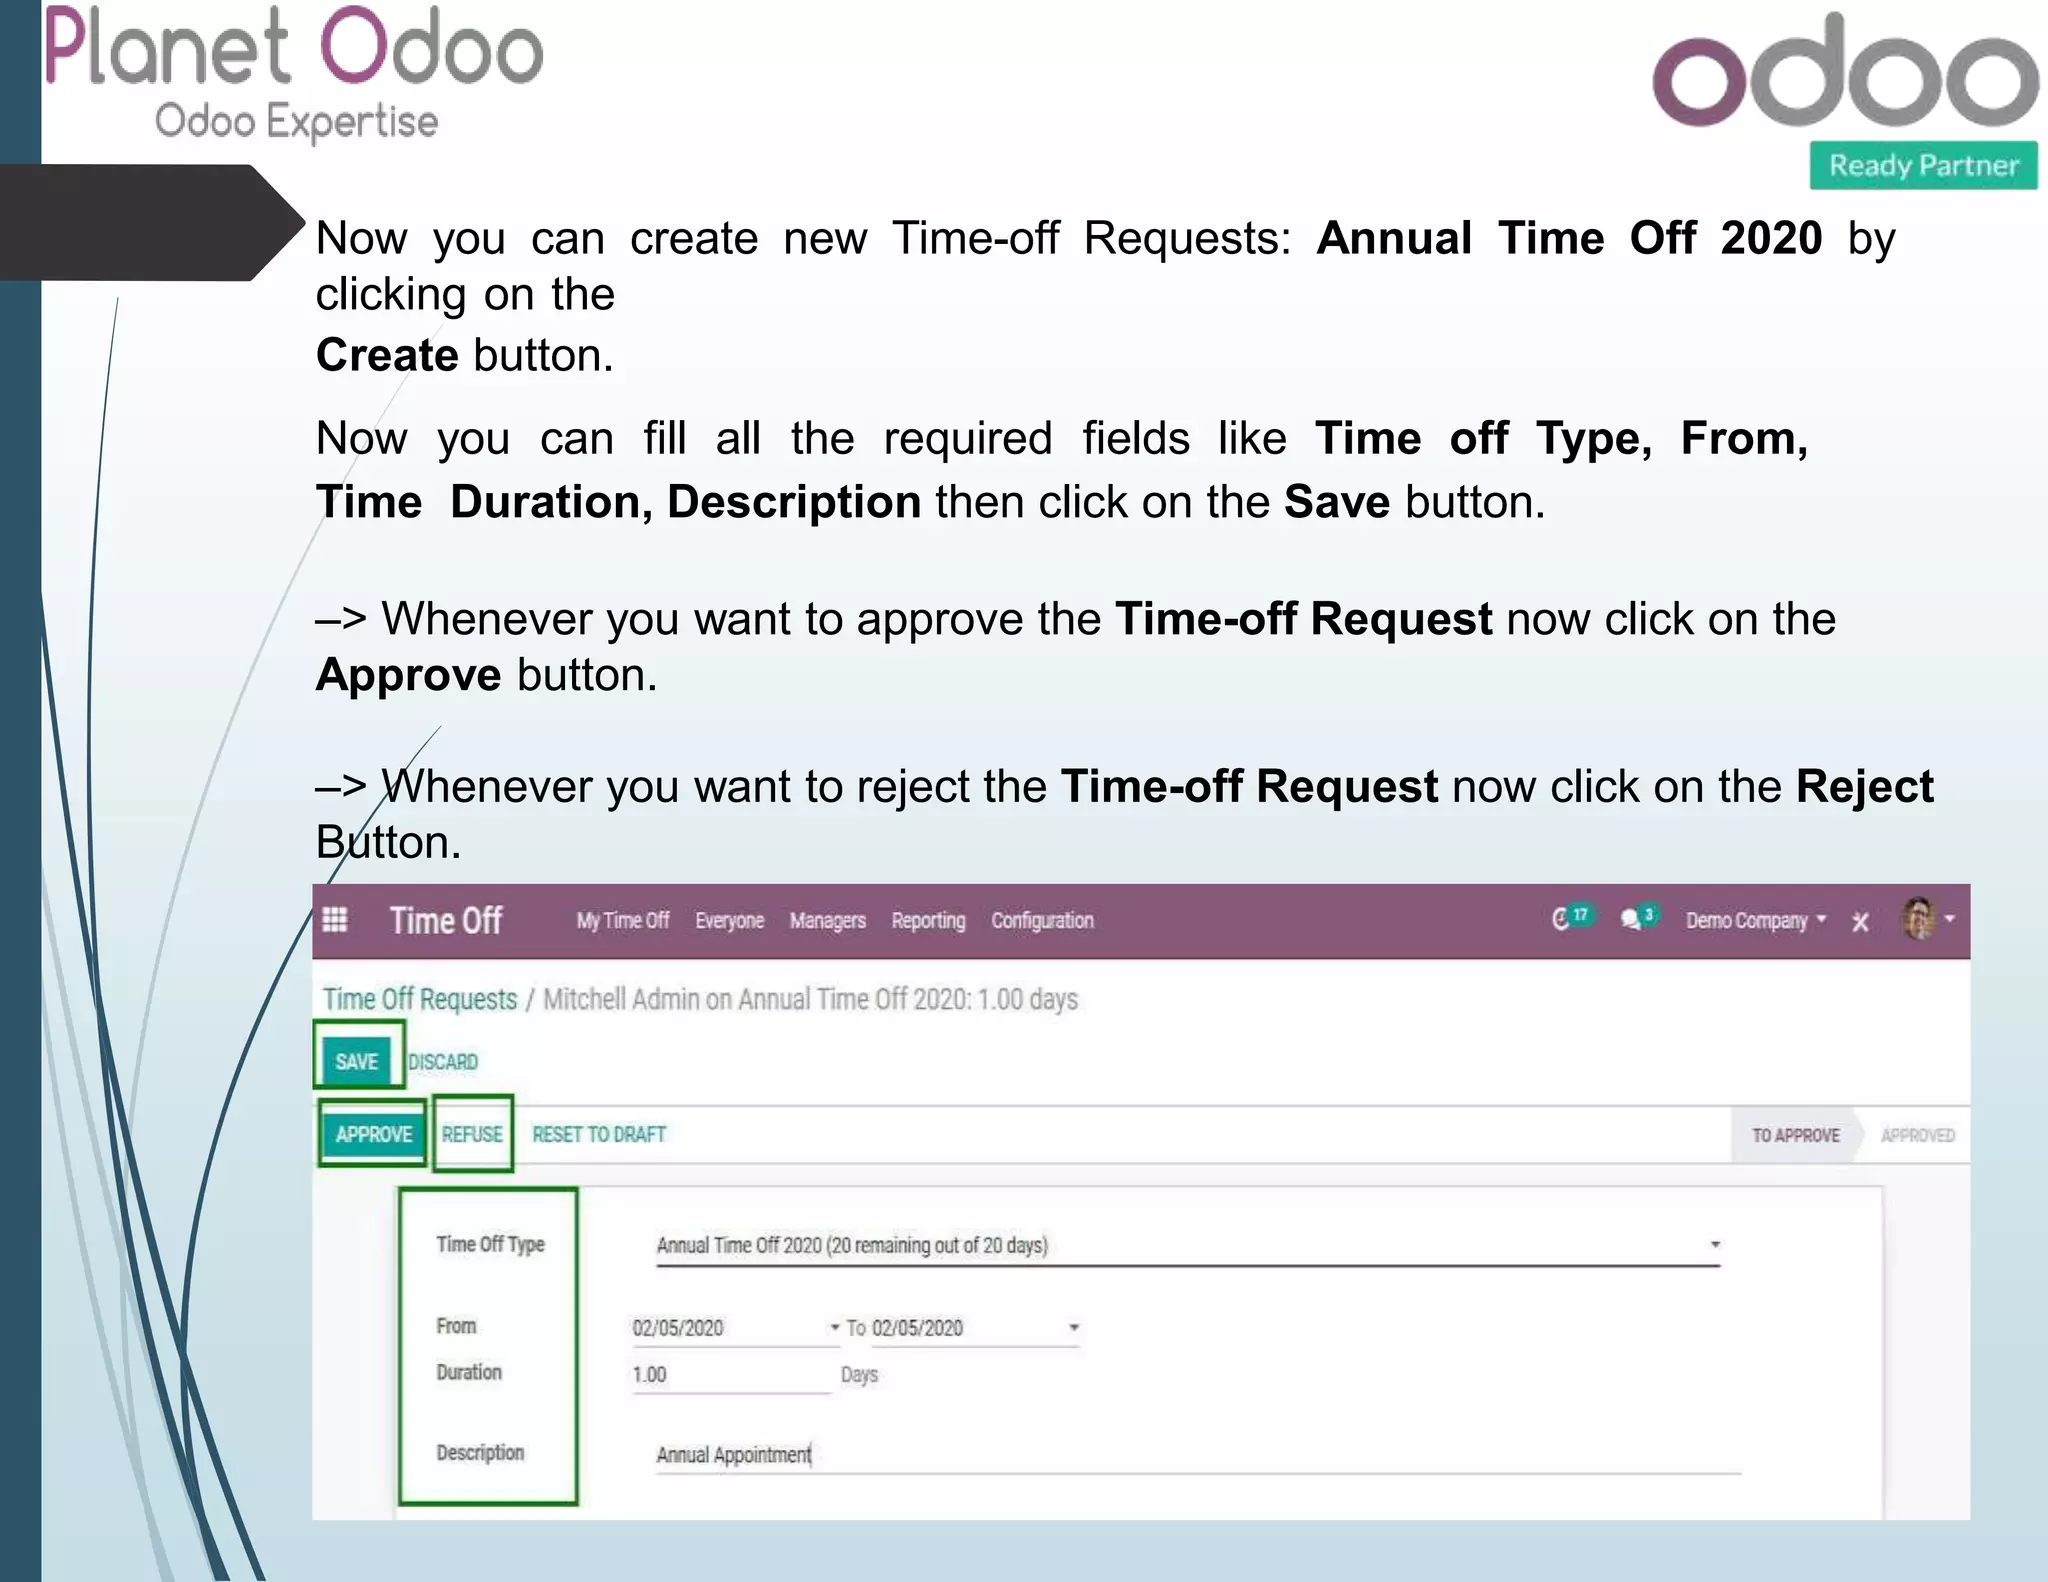
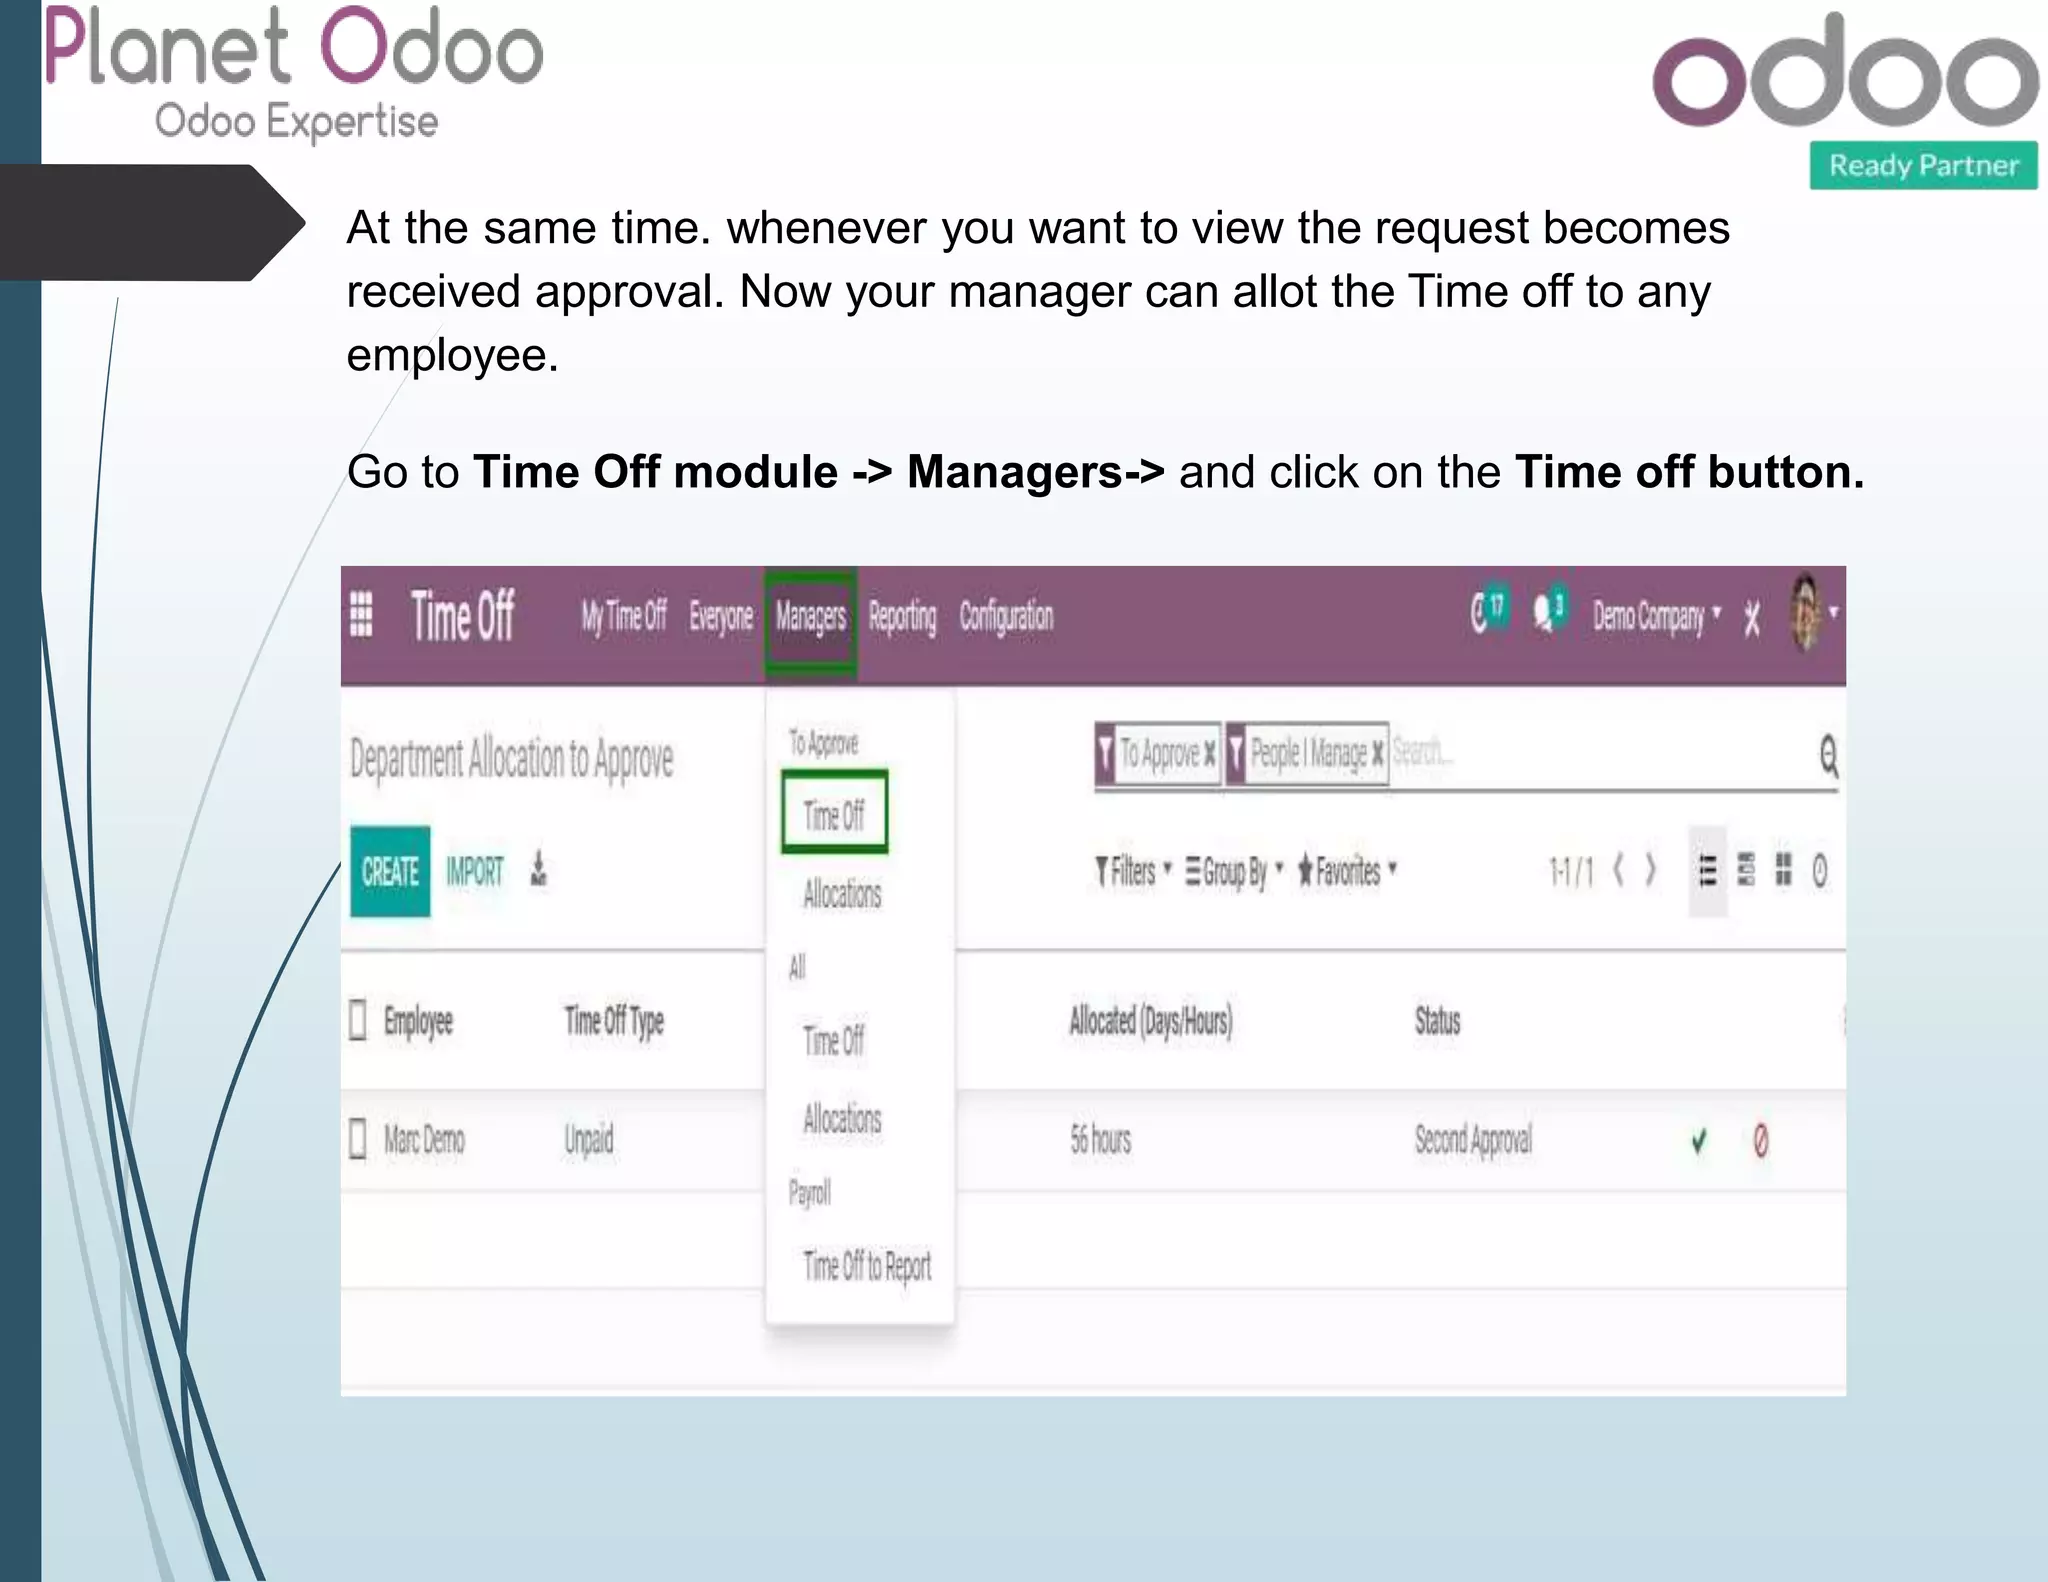
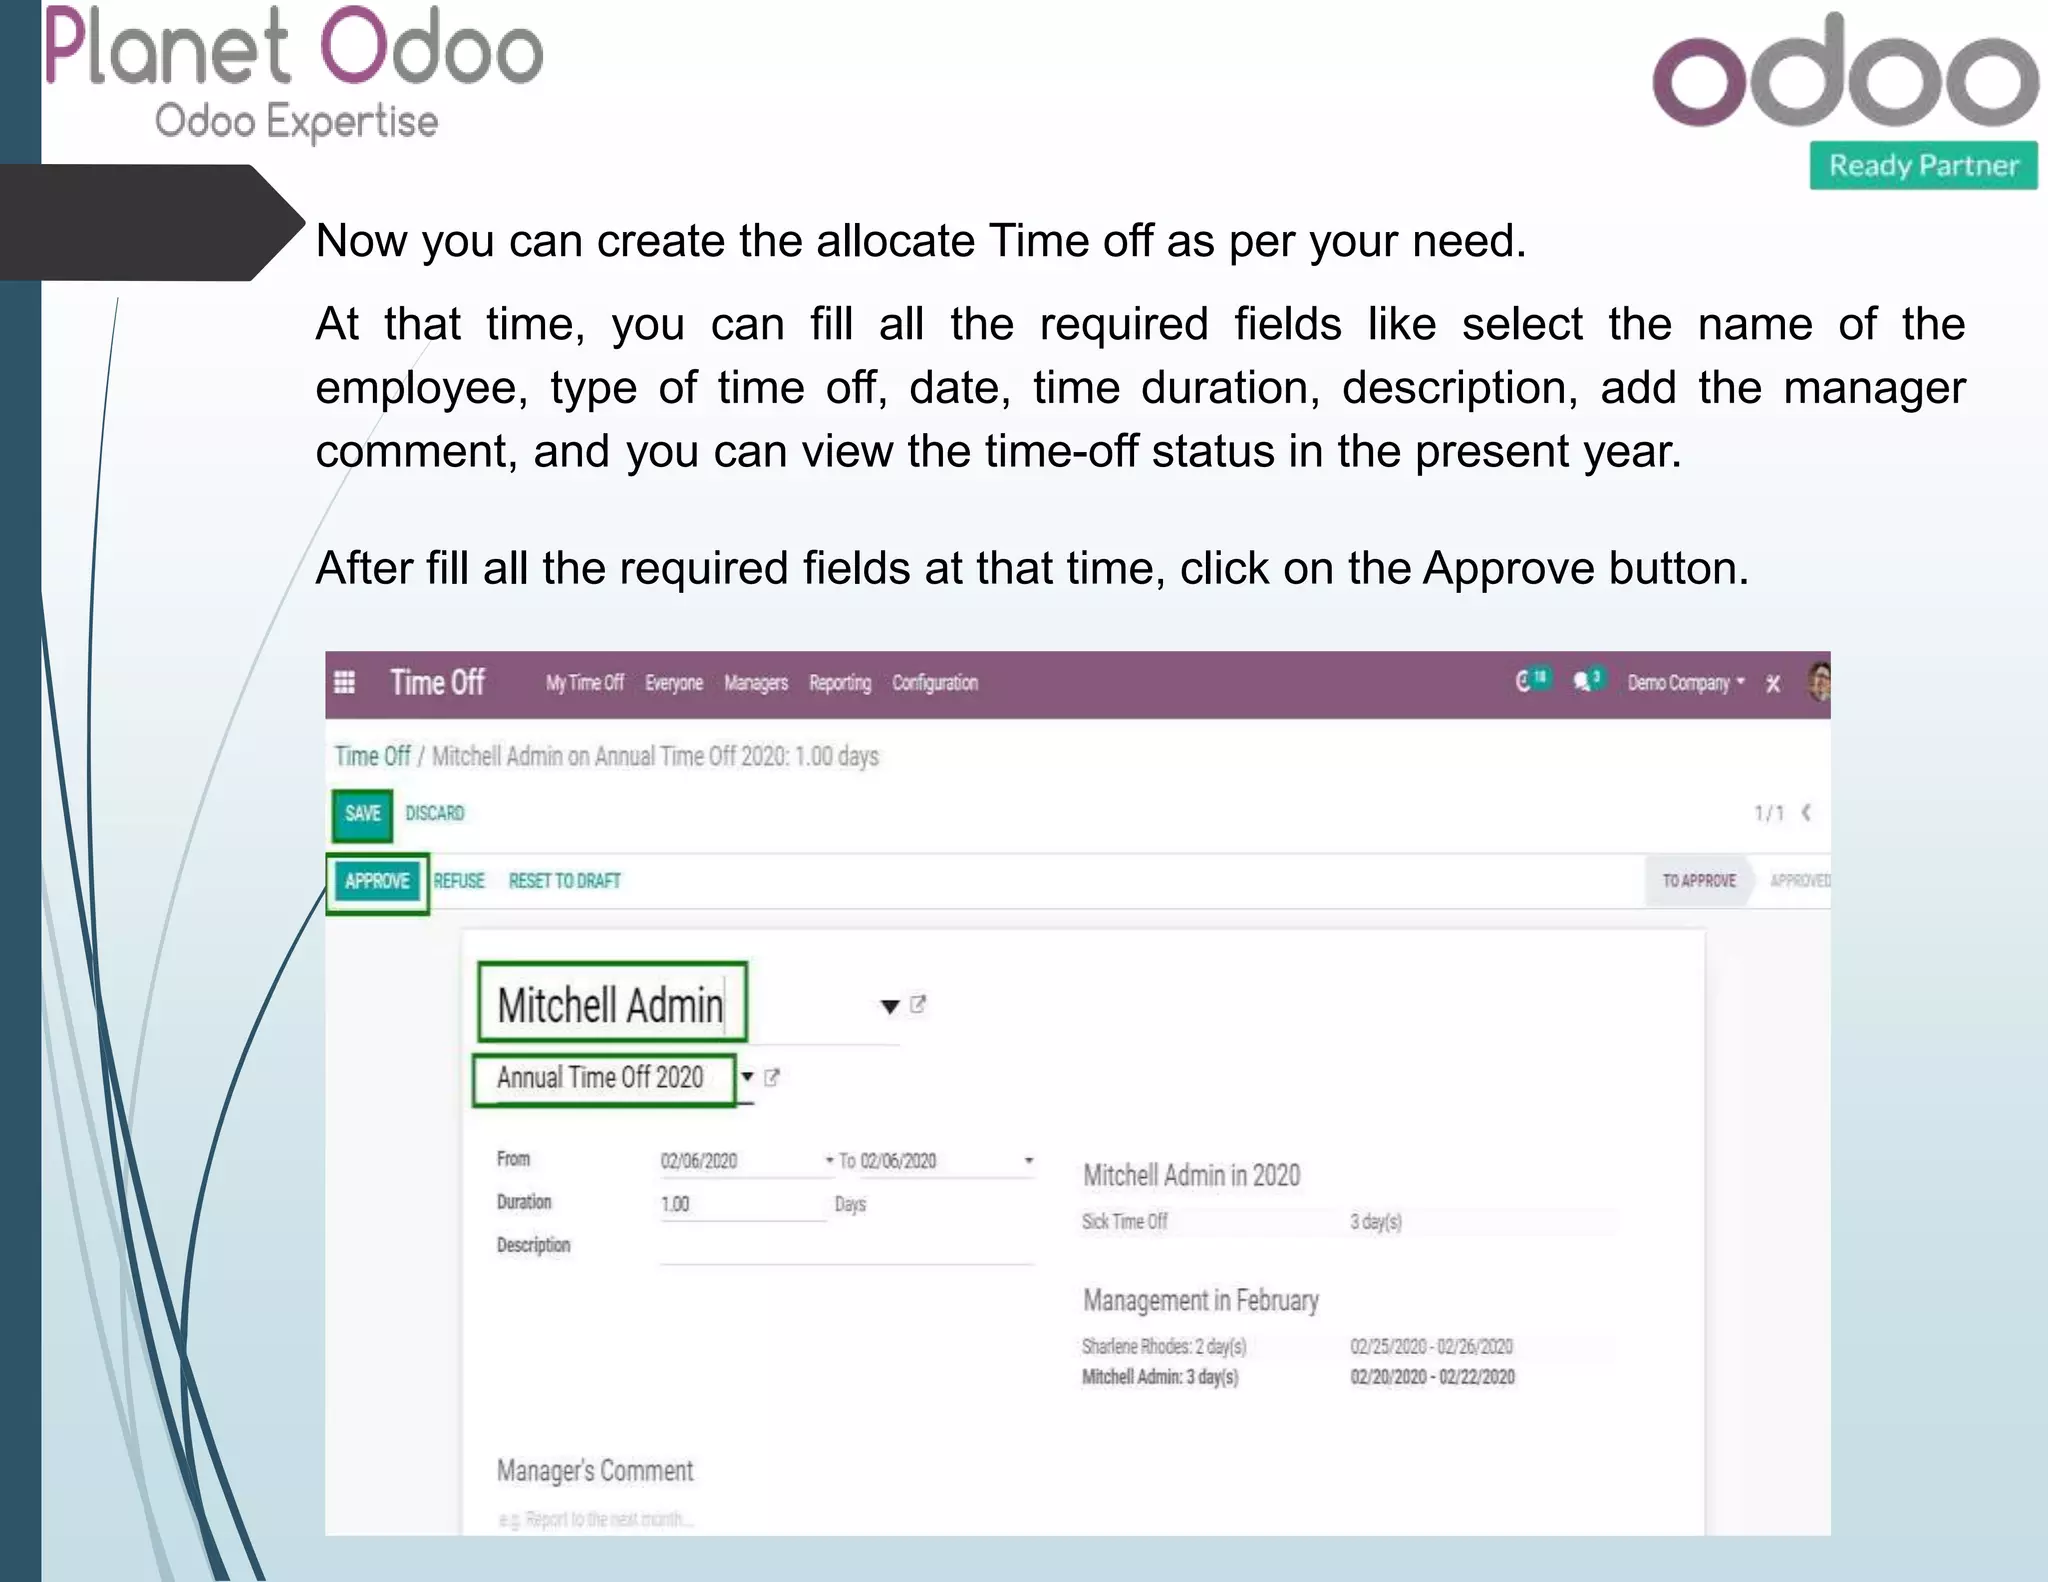
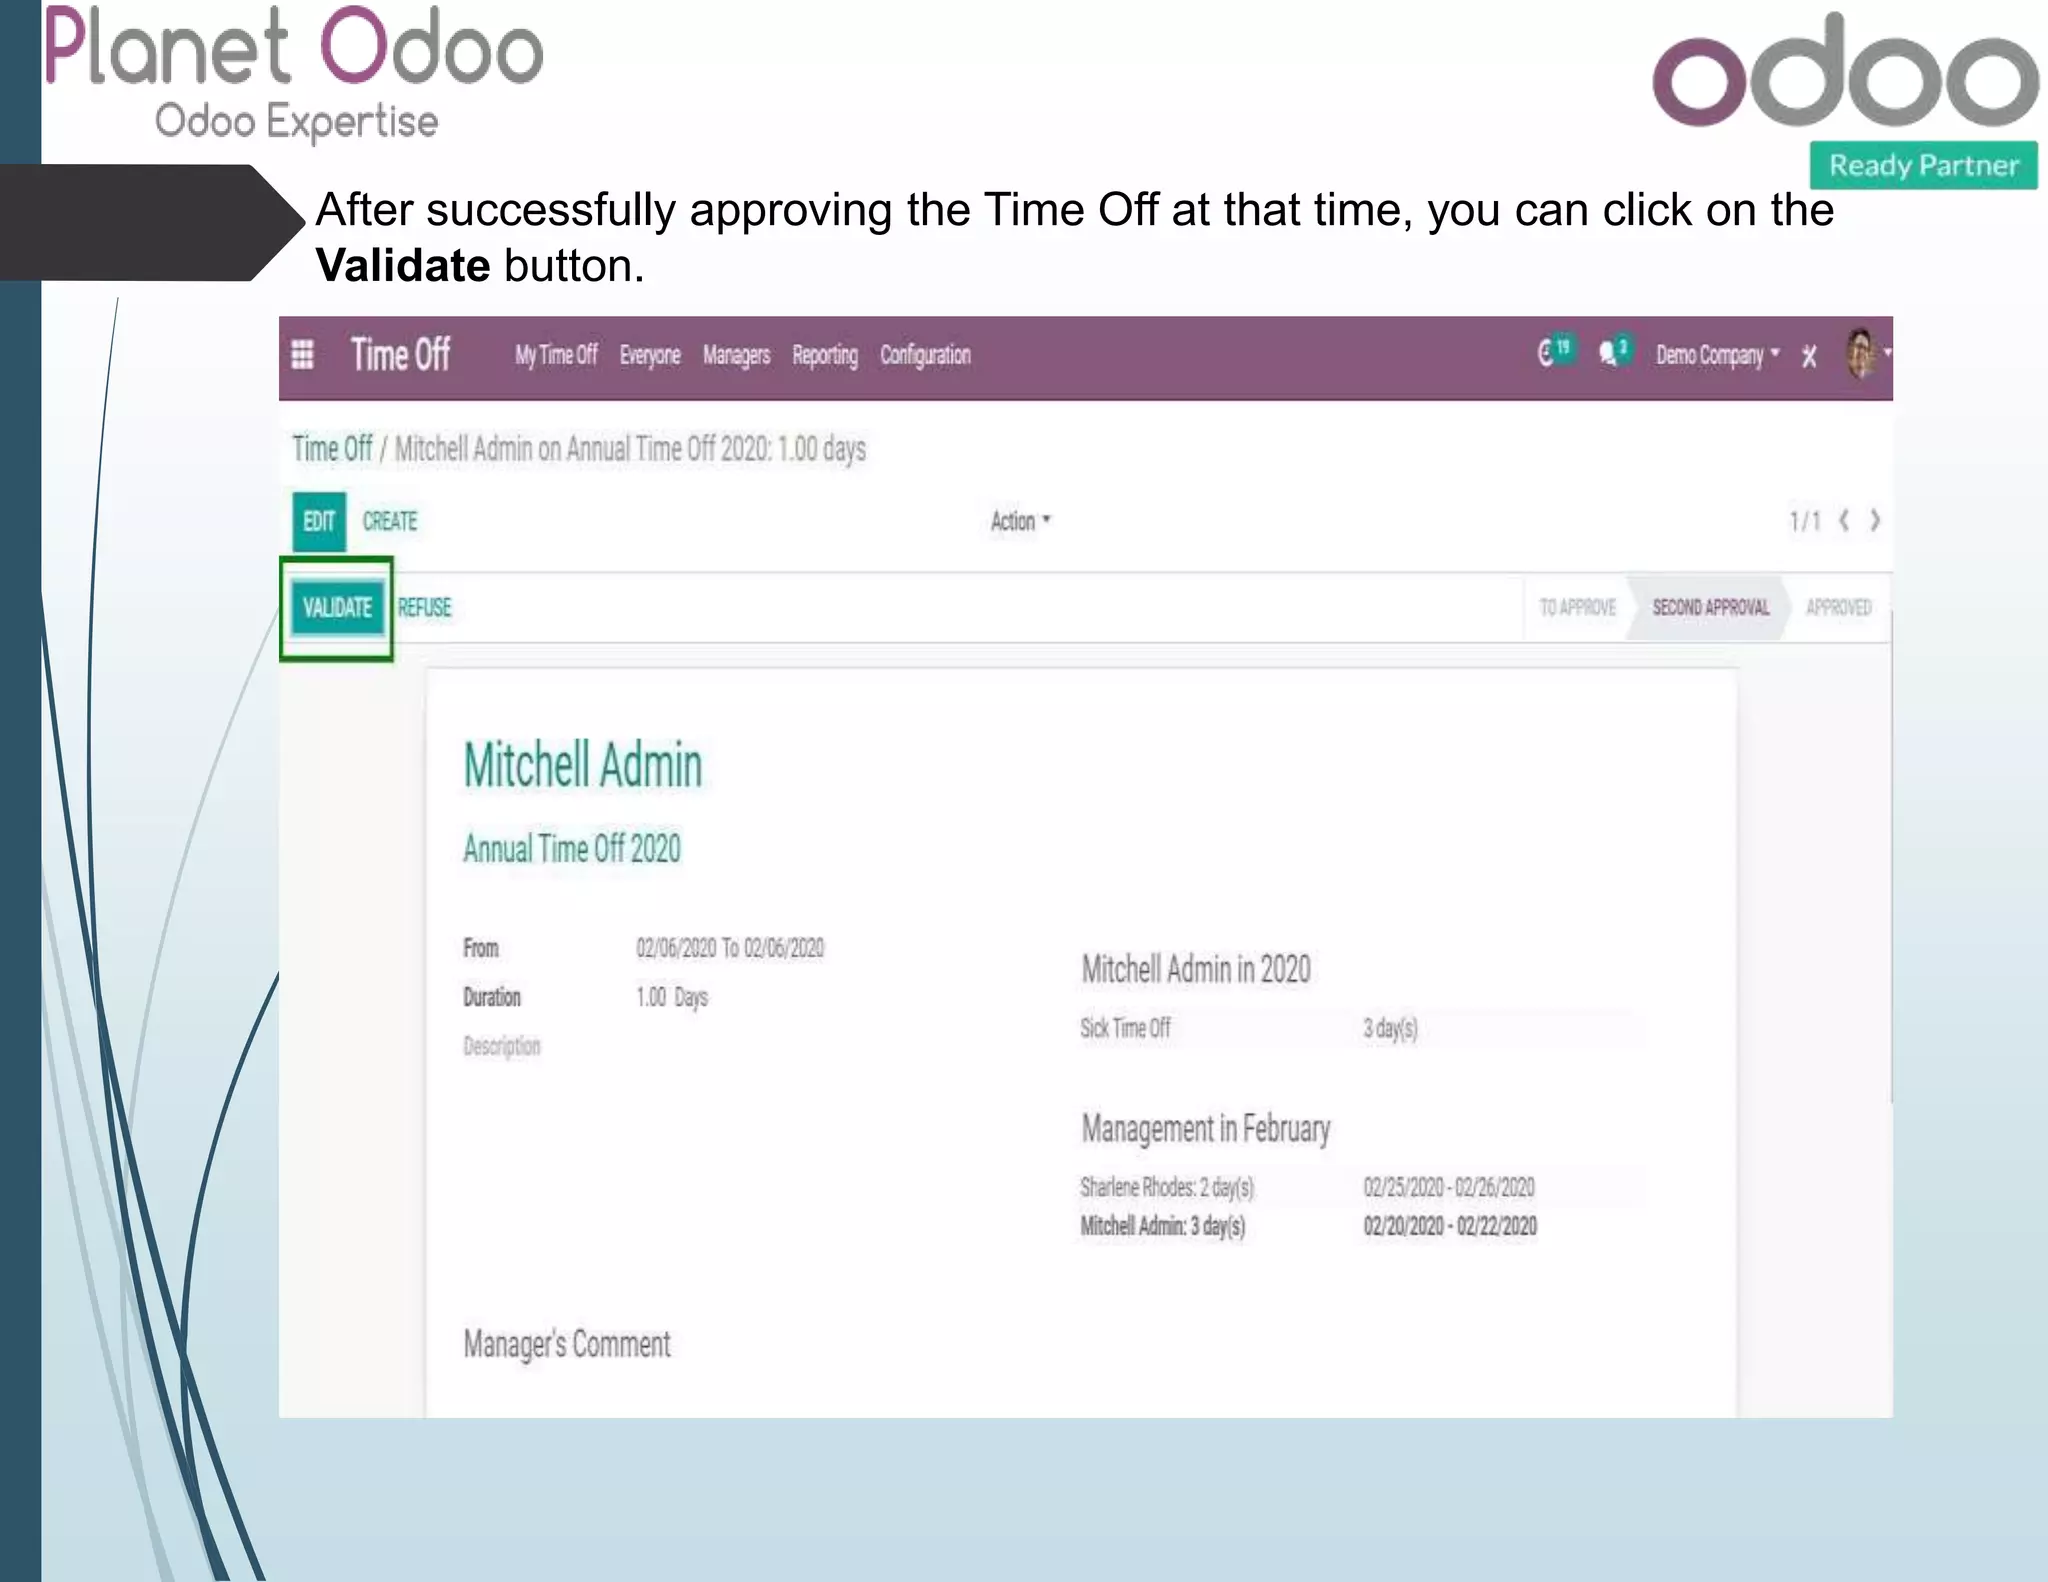
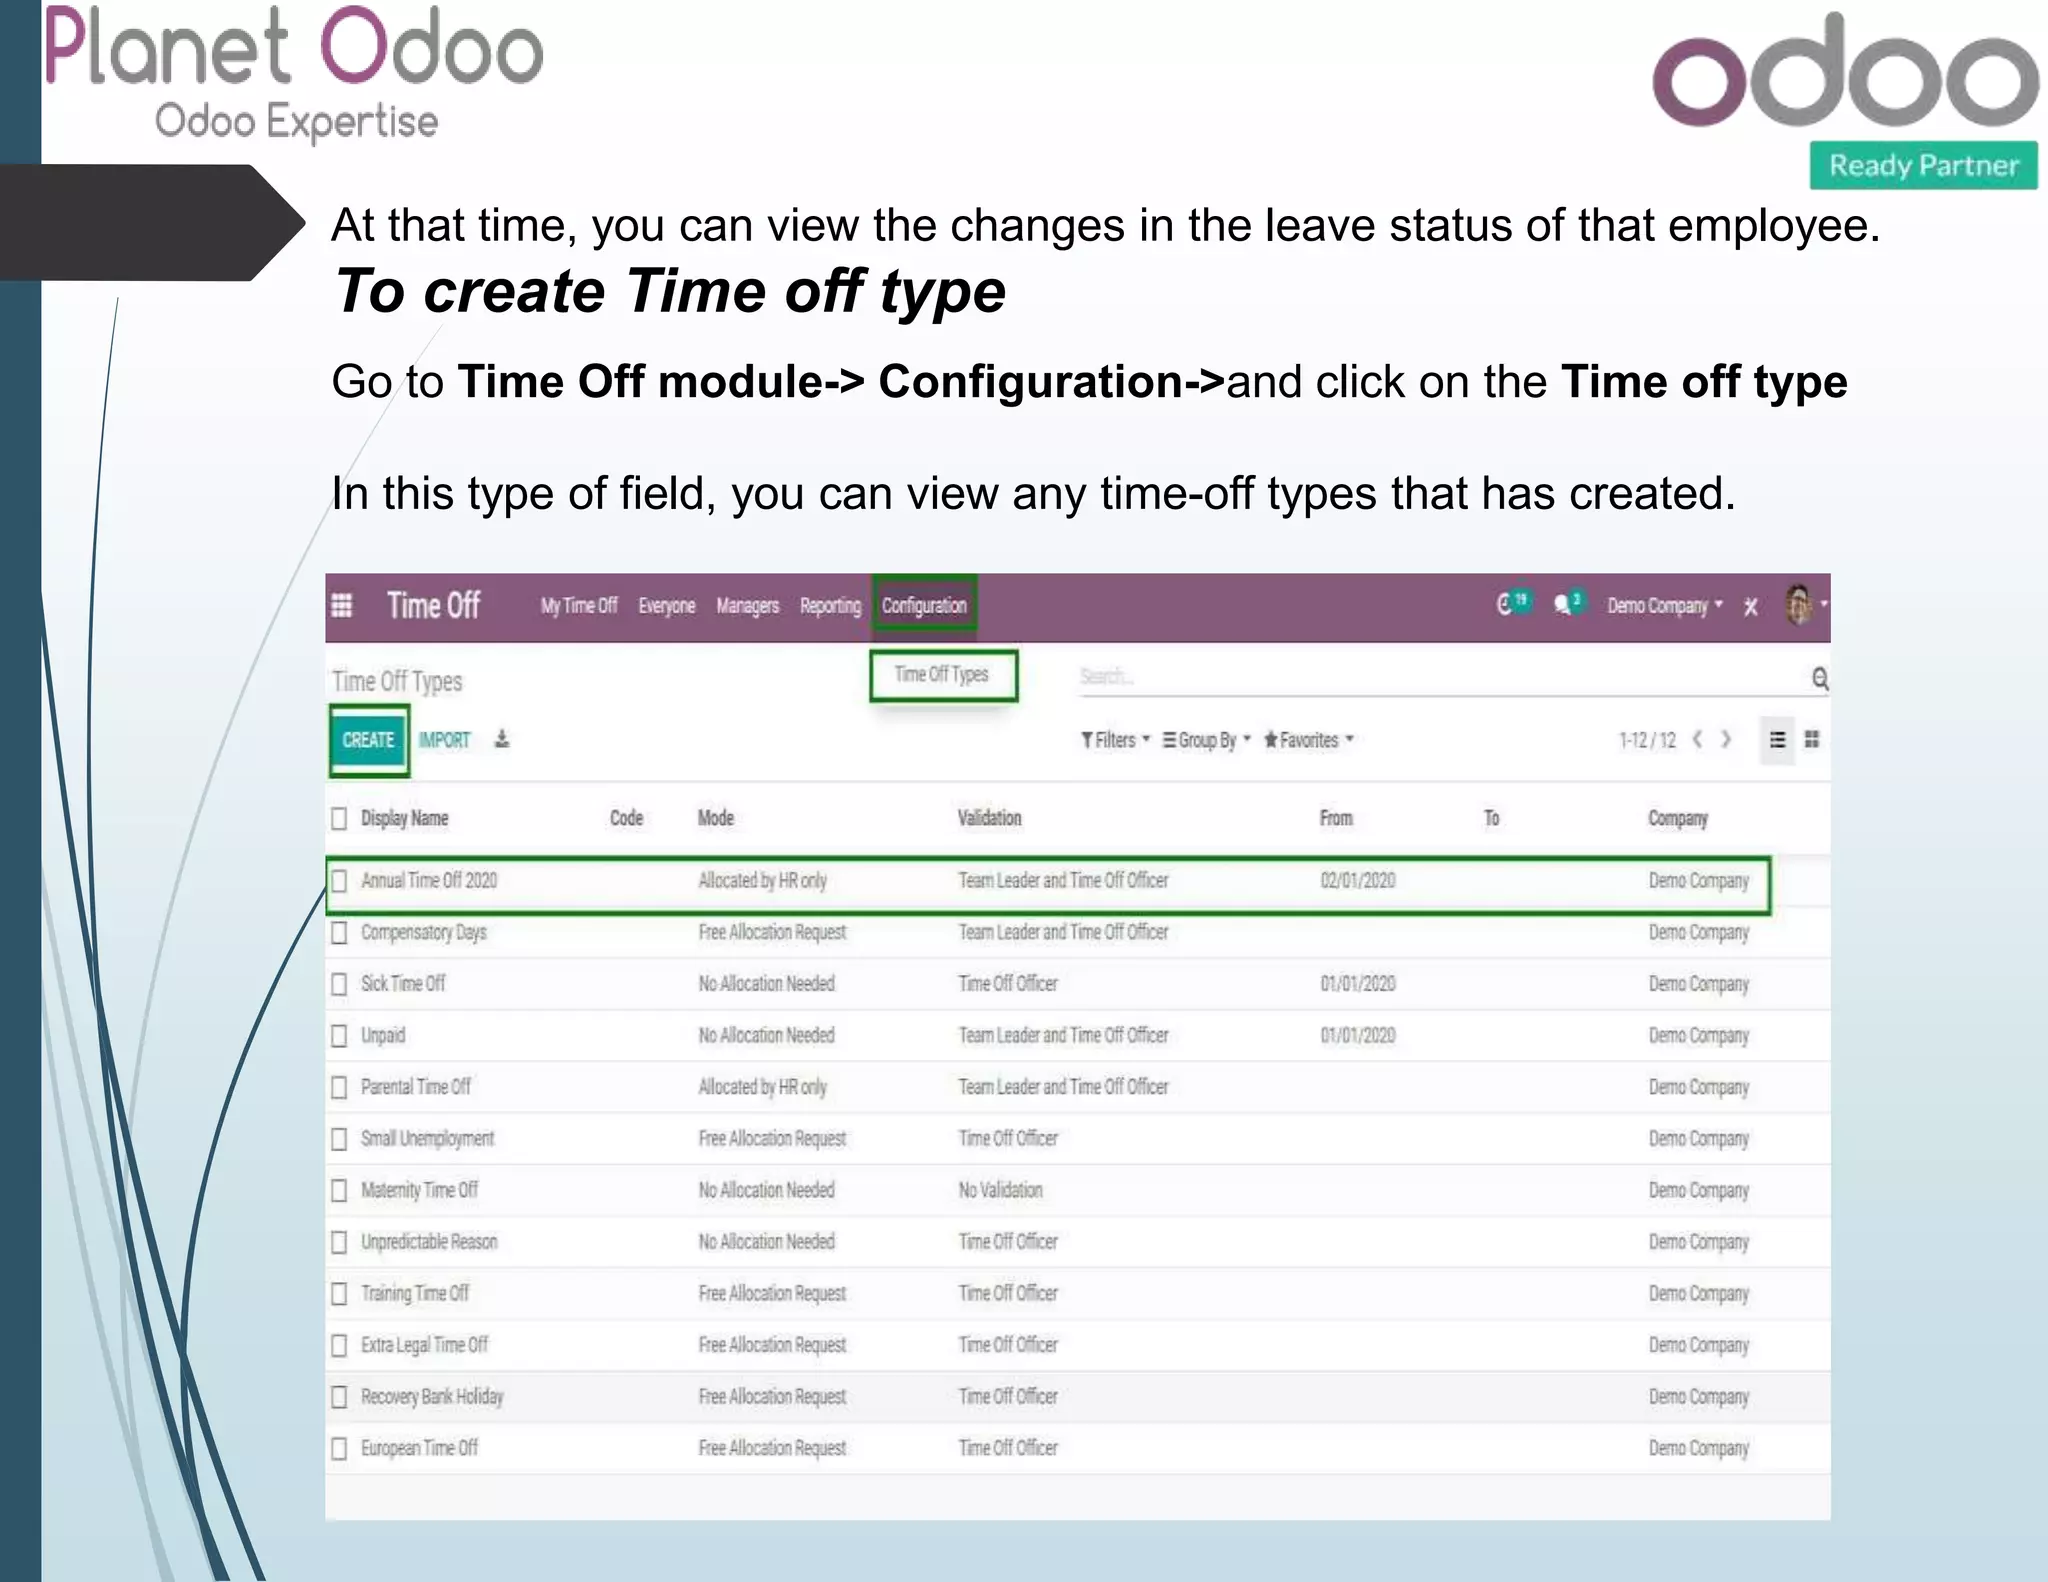
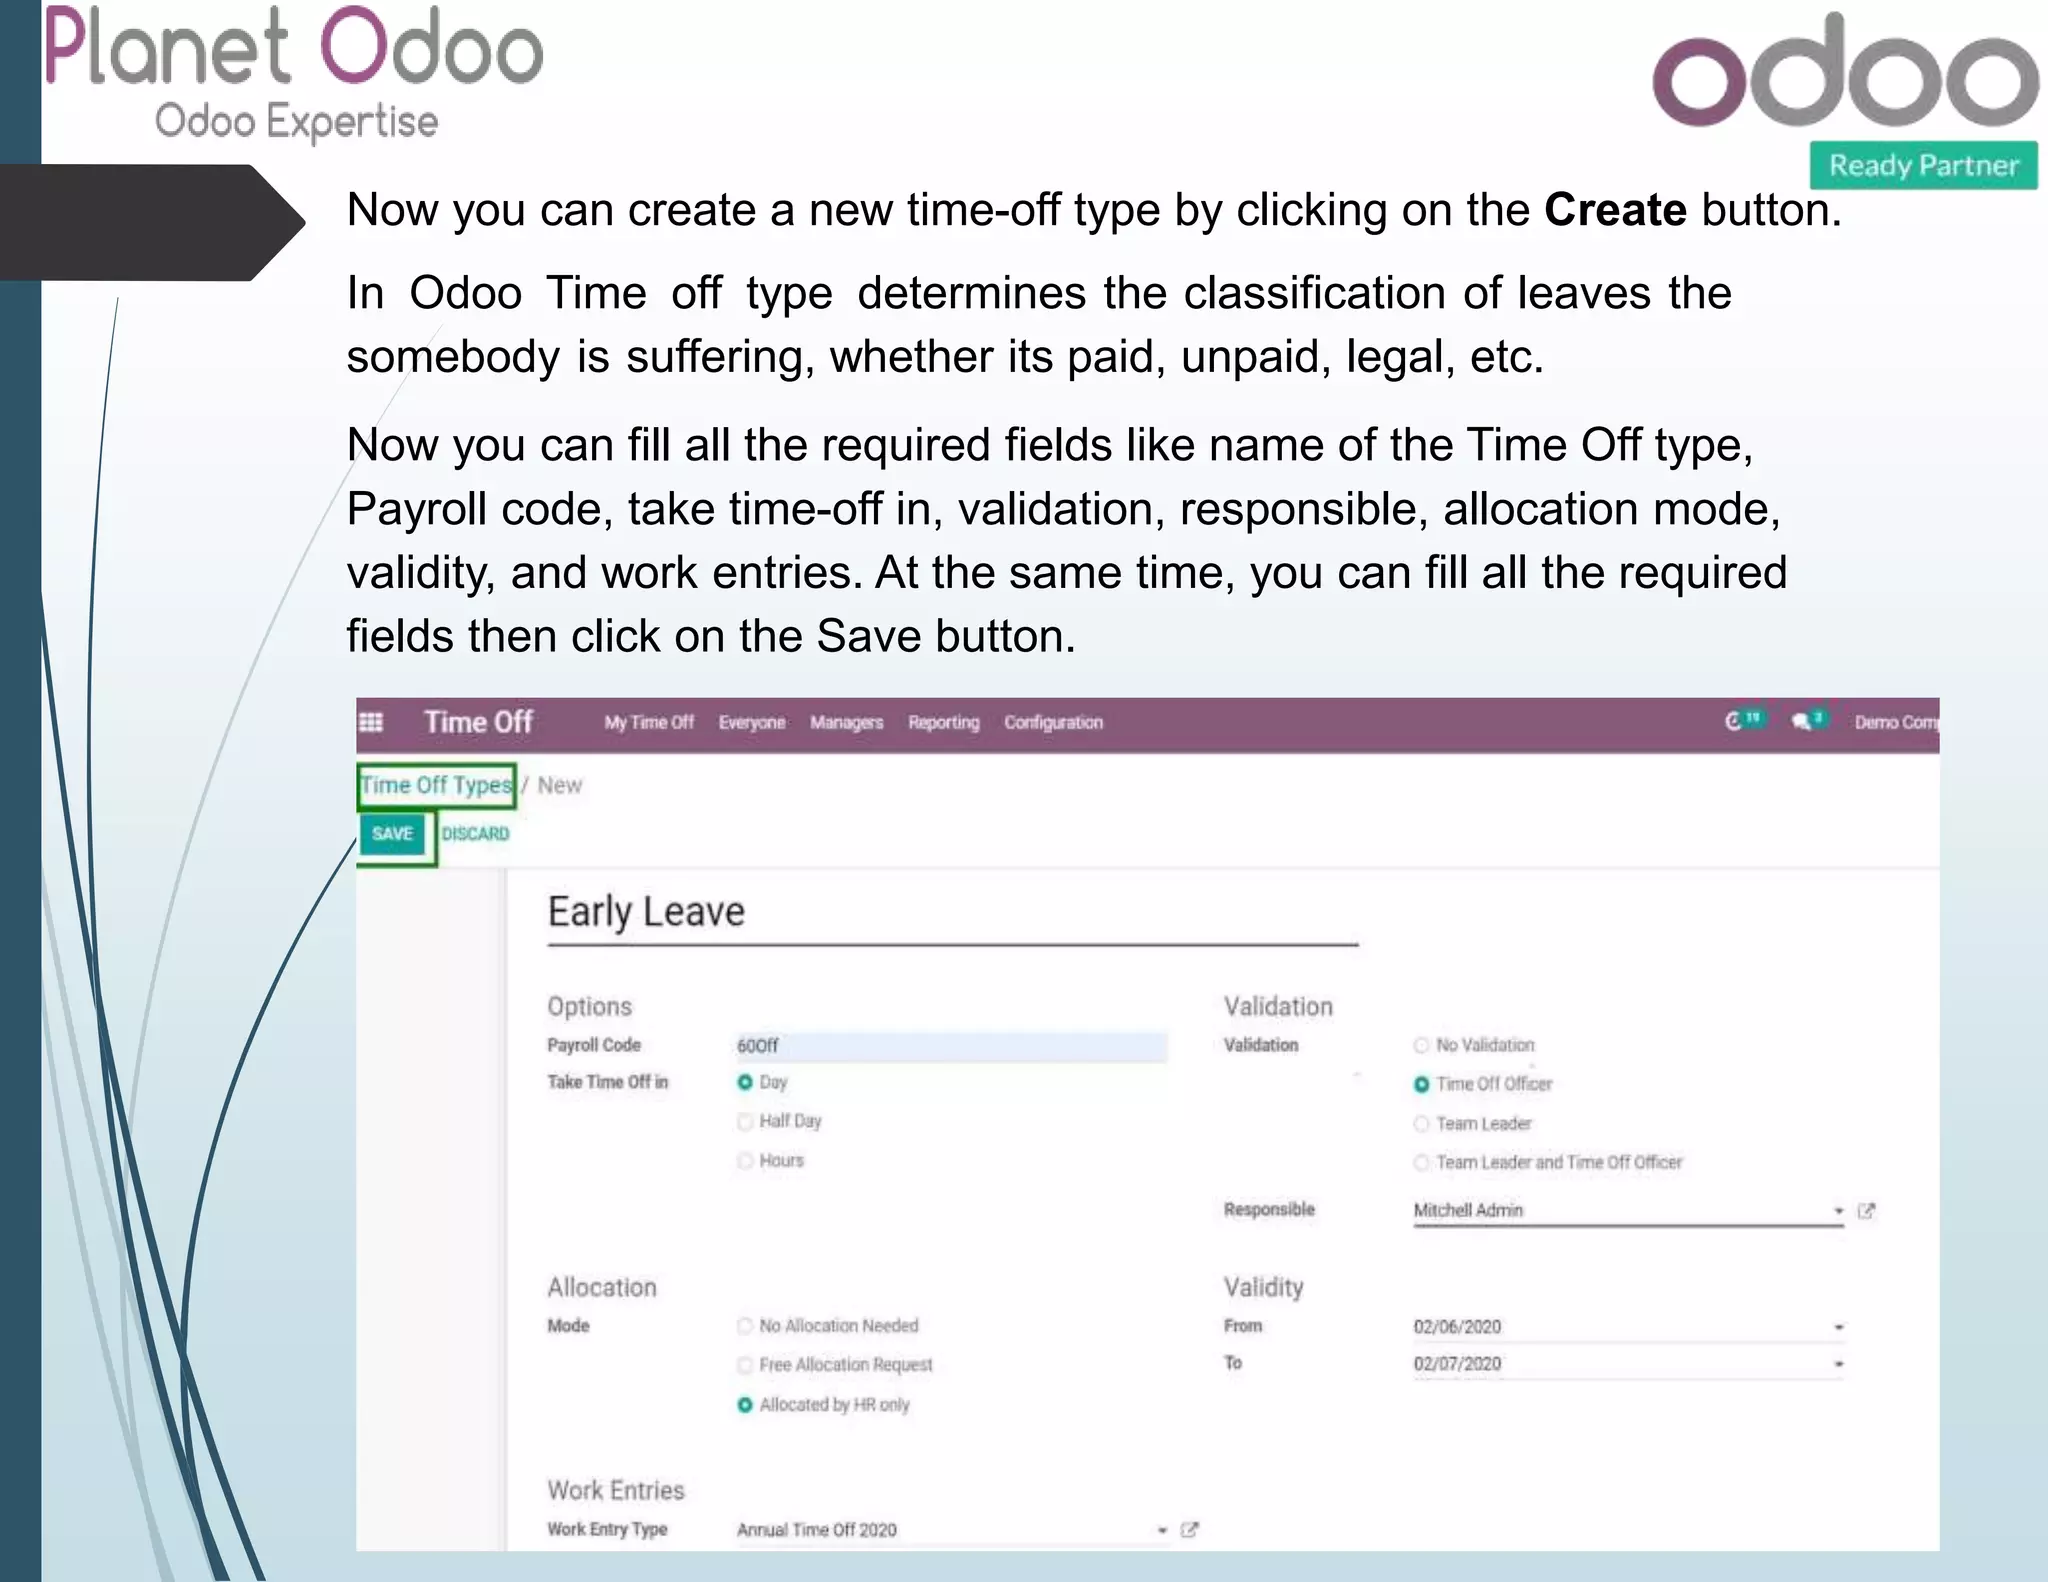
Odoo 13 Time Off Module
Odoo 13 Time Off refers to manage leaves of employees or employers in
the company. In Odoo 13 leave module gives the versatility to determine
leaves based on the hours worked on the day – Half Paid day or half-day
leave without pa. All leave types are handled by leave rules & HR policy
Leave Management in Odoo ERP facilitates various features for
maintaining leave in the company and also tracks records related to the
type of leave allocation.
In Odoo 13 Leave is renamed as Time off. Any company generally consists
of Sick Leaves,
Legal Leaves, Compulsory Days, Unpaid, Public Holidays, these are to be
maintained by the HR department. Leaves are allocated to every employee
according to profile and these leave records are reviewed during the salary
calculation.
Leave Management ensures uniform implementation of leave policy of the
company and reduces manual HR Monitoring.
Configuration:
First of all, you can install the Time off module in your instance.
In Odoo 13 Time off module provides various views for leaves like Calendar
view and List view.
Calendar view
Now you can view the My Time off Dashboard. Go to Time off Module->
My Time off -> Dashboard.
List View
Now you can see your Time off request. Go to Time Off Module -> My Time
off -> Time off requests.
Now you can create new Time-off Requests: Annual Time Off 2020 by
clicking on the
Create button.
Now you can fill all the required fields like Time off Type, From,
Time Duration, Description then click on the Save button.
–> Whenever you want to approve the Time-off Request now click on the
Approve button.
–> Whenever you want to reject the Time-off Request now click on the Reject
Button.
At the same time. whenever you want to view the request becomes
received approval. Now your manager can allot the Time off to any
employee.
Go to Time Off module -> Managers-> and click on the Time off button.
Now you can create the allocate Time off as per your need.
At that time, you can fill all the required fields like select the name of the
employee, type of time off, date, time duration, description, add the manager
comment, and you can view the time-off status in the present year.
After fill all the required fields at that time, click on the Approve button.
After successfully approving the Time Off at that time, you can click on the
Validate button.
At that time, you can view the changes in the leave status of that employee.
To create Time off type
Go to Time Off module-> Configuration->and click on the Time off type
In this type of field, you can view any time-off types that has created.
Now you can create a new time-off type by clicking on the Create button.
In Odoo Time off type determines the classification of leaves the
somebody is suffering, whether its paid, unpaid, legal, etc.
Now you can fill all the required fields like name of the Time Off type,
Payroll code, take time-off in, validation, responsible, allocation mode,
validity, and work entries. At the same time, you can fill all the required
fields then click on the Save button.
Odoo 13 time off module

Odoo 13 time off module

  • 2.
    Odoo 13 TimeOff Module Odoo 13 Time Off refers to manage leaves of employees or employers in the company. In Odoo 13 leave module gives the versatility to determine leaves based on the hours worked on the day – Half Paid day or half-day leave without pa. All leave types are handled by leave rules & HR policy Leave Management in Odoo ERP facilitates various features for maintaining leave in the company and also tracks records related to the type of leave allocation. In Odoo 13 Leave is renamed as Time off. Any company generally consists of Sick Leaves, Legal Leaves, Compulsory Days, Unpaid, Public Holidays, these are to be maintained by the HR department. Leaves are allocated to every employee according to profile and these leave records are reviewed during the salary calculation. Leave Management ensures uniform implementation of leave policy of the company and reduces manual HR Monitoring.
  • 3.
    Configuration: First of all,you can install the Time off module in your instance.
  • 4.
    In Odoo 13Time off module provides various views for leaves like Calendar view and List view. Calendar view Now you can view the My Time off Dashboard. Go to Time off Module-> My Time off -> Dashboard.
  • 5.
    List View Now youcan see your Time off request. Go to Time Off Module -> My Time off -> Time off requests.
  • 6.
    Now you cancreate new Time-off Requests: Annual Time Off 2020 by clicking on the Create button. Now you can fill all the required fields like Time off Type, From, Time Duration, Description then click on the Save button. –> Whenever you want to approve the Time-off Request now click on the Approve button. –> Whenever you want to reject the Time-off Request now click on the Reject Button.
  • 7.
    At the sametime. whenever you want to view the request becomes received approval. Now your manager can allot the Time off to any employee. Go to Time Off module -> Managers-> and click on the Time off button.
  • 8.
    Now you cancreate the allocate Time off as per your need. At that time, you can fill all the required fields like select the name of the employee, type of time off, date, time duration, description, add the manager comment, and you can view the time-off status in the present year. After fill all the required fields at that time, click on the Approve button.
  • 9.
    After successfully approvingthe Time Off at that time, you can click on the Validate button.
  • 10.
    At that time,you can view the changes in the leave status of that employee. To create Time off type Go to Time Off module-> Configuration->and click on the Time off type In this type of field, you can view any time-off types that has created.
  • 11.
    Now you cancreate a new time-off type by clicking on the Create button. In Odoo Time off type determines the classification of leaves the somebody is suffering, whether its paid, unpaid, legal, etc. Now you can fill all the required fields like name of the Time Off type, Payroll code, take time-off in, validation, responsible, allocation mode, validity, and work entries. At the same time, you can fill all the required fields then click on the Save button.