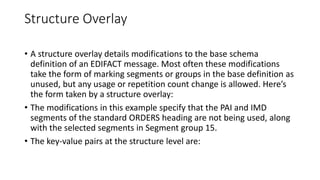
Mule EDIFACT Module
• The EDIFACT Module provides message reading, validation, and writing capabilities to
communicate with trading partners using EDIFACT EDI exchanges.
• Included in the EDIFACT Module are the following capabilities:
• EDIFACT message reading, validation, and writing
• Integration with DataSense and DataMapper
• The ability to define your own schemas or customize the base EDIFACT schemas
• Support for many common EDIFACT versions out of the box
• To get started using the connector, follow these steps:
• Install the EDIFACT connector
• Create schemas to describe your EDIFACT messages according to your implementation
• Configure the EDIFACT Module for your trading partner according to your
implementation convention
• Use the EDIFACT module inside Mule flows
• This page helps you learn how to do each of these 4 steps.
Installation
Installing the EDIFACT Module in Anypoint Studio
• Follow the steps below to install an EDIFACT Module connector in Anypoint
Studio. To use the EDIFACT Module connector in a production
environment, you must have purchased a license for Anypoint B2B.
• Under the Help menu in Anypoint Studio, select Install New Software.
• Select the Anypoint Connectors Update Site.
• Click to expand the Premium folder, then select EDIFACT Module. Click
Next.
• Review the details of the item you selected, then click Next.
• Click to accept terms and conditions of the product, then click Finish.
• Click Restart Now to complete the installation. After you install the
connector and restart Studio you can see several new message
processors available in the palette, under the Connectors category.
• Using the EDIFACT Module via Maven
EDI Schema Language
• The EDIFACT Module uses a YAML format called ESL (for EDI Schema
Language) to represent EDI schemas. Basic ESLs define the structure of EDI
messages in terms of structures (messages, in EDIFACT
terminology), groups (segment groups, in EDIFACT), segments, composites,
and elements. Currently, ESLs for the EDIFACT D.96A, D.98B, and D.01B
versions are included out of the box.
• To configure the EDIFACT Module according to your implementation
convention, define an "overlay schema." An overlay schema is a special
form of ESL that allows you to modify a base schema, such as an EDIFACT
D.98B ORDERS schema, with your specific conventions. (You don’t need an
overlay schema if you’re using the structure defined by the standard, but
most EDI exchanges modify the base definitions in an implementation
convention)
Defining your Implementation Convention with an
Overlay Schema
• To specify a schema according to your implementation convention, you can follow the following process:
• Create an "overlay" schema which imports the base schema you want to customize - for example, EDIFACT D.98B ORDERS
• Customize the overall structure - segment usage, positions, groups and counts
• Customize segments - including usage and counts
• Overlay schemas are very similar in structure to a complete schema definition, but instead of providing all the details of the
schema structure they only list changes. They’re designed for specifying the way implementation conventions being used with a
particular trading partner extend and customize the standard.
• By way of example, here’s the start of a sample overlay schema modifying the basic EDIFACT D.98B ORDERS definition. This sample
customizes the "PAI" segment and specifies that it is unused - thereby ensuring that it doesn’t show up in the mapping structures
in Studio.
Structure Overlay
• A structure overlay details modifications to the base schema
definition of an EDIFACT message. Most often these modifications
take the form of marking segments or groups in the base definition as
unused, but any usage or repetition count change is allowed. Here’s
the form taken by a structure overlay:
• The modifications in this example specify that the PAI and IMD
segments of the standard ORDERS heading are not being used, along
with the selected segments in Segment group 15.
• The key-value pairs at the structure level are:
• The lists of segment modifications for the different sections of the
structure (heading, detail, summary) all use the same structure. Each
item in the list is either a segment reference or a group definition.
Segment references are shown using a compact YAML syntax where
the values for each reference are given as comma-separated key-
value pairs enclosed in curly braces. The values are:
Segment Overlays
• A segment overlay again details modifications to the base schema
definition. Most often these modifications take the form of marking
elements or composites in the base definition as unused, but any
usage or repetition count change is allowed. Here are some sample
segment overlays:
• The above example uses the compact form for segment modifications
that only involve a truncate, while modifications that make changes
to individual values are expressed in expanded form. As with all the
other YAML examples, the two forms are actually equivalent and can
be used interchangeably.
• The key-value pairs in a segment overlay are:
Determining the EDIFACT Schema Location
• To use DataSense views of input and output EDI data you need to
know the locations of the schemas in your project. If you’re using the
out of the box EDIFACT schemas and not customizing anything, the
schema location follows the pattern
"/edifact/{version}/{message}.esl", so for the D.98B version of the
ORDERS message your schema location is
"/edifact/d98b/ORDERS.esl".
• If you’re creating a custom implementation convention, you should
put your schemas under a directory in src/main/app and refer to the
location using ${app.home}. For example, if you’ve put your ORDERS
schema under src/main/app/mypartner/ORDERS.esl, your schema
location is "${app.home}/mypartner/ORDERS.esl".
Configuring the EDIFACT Module
• Once you have installed the connector and configured your schema
customizations (if any), you can start using the connector. Create
separate configurations for each implementation convention.
• Once you’ve set up a global element for your EDIFACT module,
configure the schemas, acknowledgements, IDs, and the parser
options. A reference for these options is located in the module
reference.
Setting Your Schema Locations
• Using the schema locations determined above, switch to the XML
view by clicking Configuration XML and modify your EDIFACT module
configuration to include a list of all the schemas you wish to include
by adding an <edi:schema> element for each document type:
• When the connector is processing an input or output message it first
looks for a match among the configured schemas. If it doesn’t find a
match with one of these it then tries to load a schema from the
classpath, using the path construction described at the start of this
section. So you can work with messages which are not included in the
configuration, but only the data structures for these will not show up
in DataSense within Anypoint Studio.
Setting your Interchange IDs
• You can also configure the interchange and group identifiers and qualifiers
for you and your partner on the EDIFACT module configuration.
• The "Self identification" parameters identify your side of the trading
partner relationship, while the "Partner identification" parameters identify
your trading partner. The values you set are used when writing EDI
messages to supply the sender interchange identifier, interchange identifier
qualifier, group application identifier, and group identifier qualifier, and are
verified in receive messages. If you don’t want to restrict incoming
messages you can leave these blank, and set the values for outgoing
message in the write operation or the actual outgoing message. Values set
in the write operation override the connector configuration, and values set
directly in the message override both the connector configuration and any
values set in the write operation.
Understanding the Mule Message Structure for
EDIFACT documents
• The connector enables reading or writing of EDIFACT documents into
or from the canonical EDI message structure. This structure is
represented as a hierarchy of Java Maps and Lists, which can be
manipulated using DataMapper or code. Each transaction has its own
structure, as defined in the schemas, as outlined above.
• The message itself contains the following keys:
Reading and Validating EDI Messages
• To read an EDIFACT message, search the palette for "EDIFACT EDI" and drag
the EDIFACT module into a flow. Then, go to the properties view, select the
connector configuration you created above and select the "Read" operation. This
operation reads any byte stream into the structure described by your EDI
schemas.
• The EDIFACT module validates the input when it reads it in. Validation includes
checking the syntax and content of interchange envelope segments UNA/UNB
and UNZ, optional group envelope segments UGH and UNE, as well as the actual
messages. Normally errors are both logged and entered in the receive data map,
as well as accumulated and reported in CONTRL acknowledgment messages. All
accepted messages (whether error free or with non-fatal errors) are passed on
for processing as part of the output message Map. Errors in reading the input
data results in exceptions being thrown.
•
Limitations
• EDIFACT packages (containers for binary data) are not supported, and causes
errors if you attempt to use them.
• EDIFACT interactive exchanges (using UIB header segment and UIZ trailer
segment) are not supported.
• Code values are not currently verified for either reading or writing.
• EDIFACT dependency notes are not currently enforced for either reading or
writing.
• EDIFACT groups are not supported yet.

Mule edifact module

  • 1.
  • 2.
    • The EDIFACTModule provides message reading, validation, and writing capabilities to communicate with trading partners using EDIFACT EDI exchanges. • Included in the EDIFACT Module are the following capabilities: • EDIFACT message reading, validation, and writing • Integration with DataSense and DataMapper • The ability to define your own schemas or customize the base EDIFACT schemas • Support for many common EDIFACT versions out of the box
  • 3.
    • To getstarted using the connector, follow these steps: • Install the EDIFACT connector • Create schemas to describe your EDIFACT messages according to your implementation • Configure the EDIFACT Module for your trading partner according to your implementation convention • Use the EDIFACT module inside Mule flows • This page helps you learn how to do each of these 4 steps.
  • 4.
    Installation Installing the EDIFACTModule in Anypoint Studio • Follow the steps below to install an EDIFACT Module connector in Anypoint Studio. To use the EDIFACT Module connector in a production environment, you must have purchased a license for Anypoint B2B. • Under the Help menu in Anypoint Studio, select Install New Software. • Select the Anypoint Connectors Update Site. • Click to expand the Premium folder, then select EDIFACT Module. Click Next.
  • 5.
    • Review thedetails of the item you selected, then click Next. • Click to accept terms and conditions of the product, then click Finish. • Click Restart Now to complete the installation. After you install the connector and restart Studio you can see several new message processors available in the palette, under the Connectors category.
  • 6.
    • Using theEDIFACT Module via Maven
  • 7.
    EDI Schema Language •The EDIFACT Module uses a YAML format called ESL (for EDI Schema Language) to represent EDI schemas. Basic ESLs define the structure of EDI messages in terms of structures (messages, in EDIFACT terminology), groups (segment groups, in EDIFACT), segments, composites, and elements. Currently, ESLs for the EDIFACT D.96A, D.98B, and D.01B versions are included out of the box. • To configure the EDIFACT Module according to your implementation convention, define an "overlay schema." An overlay schema is a special form of ESL that allows you to modify a base schema, such as an EDIFACT D.98B ORDERS schema, with your specific conventions. (You don’t need an overlay schema if you’re using the structure defined by the standard, but most EDI exchanges modify the base definitions in an implementation convention)
  • 8.
    Defining your ImplementationConvention with an Overlay Schema • To specify a schema according to your implementation convention, you can follow the following process: • Create an "overlay" schema which imports the base schema you want to customize - for example, EDIFACT D.98B ORDERS • Customize the overall structure - segment usage, positions, groups and counts • Customize segments - including usage and counts • Overlay schemas are very similar in structure to a complete schema definition, but instead of providing all the details of the schema structure they only list changes. They’re designed for specifying the way implementation conventions being used with a particular trading partner extend and customize the standard. • By way of example, here’s the start of a sample overlay schema modifying the basic EDIFACT D.98B ORDERS definition. This sample customizes the "PAI" segment and specifies that it is unused - thereby ensuring that it doesn’t show up in the mapping structures in Studio.
  • 9.
    Structure Overlay • Astructure overlay details modifications to the base schema definition of an EDIFACT message. Most often these modifications take the form of marking segments or groups in the base definition as unused, but any usage or repetition count change is allowed. Here’s the form taken by a structure overlay: • The modifications in this example specify that the PAI and IMD segments of the standard ORDERS heading are not being used, along with the selected segments in Segment group 15. • The key-value pairs at the structure level are:
  • 10.
    • The listsof segment modifications for the different sections of the structure (heading, detail, summary) all use the same structure. Each item in the list is either a segment reference or a group definition. Segment references are shown using a compact YAML syntax where the values for each reference are given as comma-separated key- value pairs enclosed in curly braces. The values are:
  • 11.
    Segment Overlays • Asegment overlay again details modifications to the base schema definition. Most often these modifications take the form of marking elements or composites in the base definition as unused, but any usage or repetition count change is allowed. Here are some sample segment overlays: • The above example uses the compact form for segment modifications that only involve a truncate, while modifications that make changes to individual values are expressed in expanded form. As with all the other YAML examples, the two forms are actually equivalent and can be used interchangeably. • The key-value pairs in a segment overlay are:
  • 12.
    Determining the EDIFACTSchema Location • To use DataSense views of input and output EDI data you need to know the locations of the schemas in your project. If you’re using the out of the box EDIFACT schemas and not customizing anything, the schema location follows the pattern "/edifact/{version}/{message}.esl", so for the D.98B version of the ORDERS message your schema location is "/edifact/d98b/ORDERS.esl". • If you’re creating a custom implementation convention, you should put your schemas under a directory in src/main/app and refer to the location using ${app.home}. For example, if you’ve put your ORDERS schema under src/main/app/mypartner/ORDERS.esl, your schema location is "${app.home}/mypartner/ORDERS.esl".
  • 13.
    Configuring the EDIFACTModule • Once you have installed the connector and configured your schema customizations (if any), you can start using the connector. Create separate configurations for each implementation convention. • Once you’ve set up a global element for your EDIFACT module, configure the schemas, acknowledgements, IDs, and the parser options. A reference for these options is located in the module reference.
  • 14.
    Setting Your SchemaLocations • Using the schema locations determined above, switch to the XML view by clicking Configuration XML and modify your EDIFACT module configuration to include a list of all the schemas you wish to include by adding an <edi:schema> element for each document type:
  • 15.
    • When theconnector is processing an input or output message it first looks for a match among the configured schemas. If it doesn’t find a match with one of these it then tries to load a schema from the classpath, using the path construction described at the start of this section. So you can work with messages which are not included in the configuration, but only the data structures for these will not show up in DataSense within Anypoint Studio.
  • 16.
    Setting your InterchangeIDs • You can also configure the interchange and group identifiers and qualifiers for you and your partner on the EDIFACT module configuration. • The "Self identification" parameters identify your side of the trading partner relationship, while the "Partner identification" parameters identify your trading partner. The values you set are used when writing EDI messages to supply the sender interchange identifier, interchange identifier qualifier, group application identifier, and group identifier qualifier, and are verified in receive messages. If you don’t want to restrict incoming messages you can leave these blank, and set the values for outgoing message in the write operation or the actual outgoing message. Values set in the write operation override the connector configuration, and values set directly in the message override both the connector configuration and any values set in the write operation.
  • 17.
    Understanding the MuleMessage Structure for EDIFACT documents • The connector enables reading or writing of EDIFACT documents into or from the canonical EDI message structure. This structure is represented as a hierarchy of Java Maps and Lists, which can be manipulated using DataMapper or code. Each transaction has its own structure, as defined in the schemas, as outlined above. • The message itself contains the following keys:
  • 18.
    Reading and ValidatingEDI Messages • To read an EDIFACT message, search the palette for "EDIFACT EDI" and drag the EDIFACT module into a flow. Then, go to the properties view, select the connector configuration you created above and select the "Read" operation. This operation reads any byte stream into the structure described by your EDI schemas. • The EDIFACT module validates the input when it reads it in. Validation includes checking the syntax and content of interchange envelope segments UNA/UNB and UNZ, optional group envelope segments UGH and UNE, as well as the actual messages. Normally errors are both logged and entered in the receive data map, as well as accumulated and reported in CONTRL acknowledgment messages. All accepted messages (whether error free or with non-fatal errors) are passed on for processing as part of the output message Map. Errors in reading the input data results in exceptions being thrown. •
  • 19.
    Limitations • EDIFACT packages(containers for binary data) are not supported, and causes errors if you attempt to use them. • EDIFACT interactive exchanges (using UIB header segment and UIZ trailer segment) are not supported. • Code values are not currently verified for either reading or writing. • EDIFACT dependency notes are not currently enforced for either reading or writing. • EDIFACT groups are not supported yet.