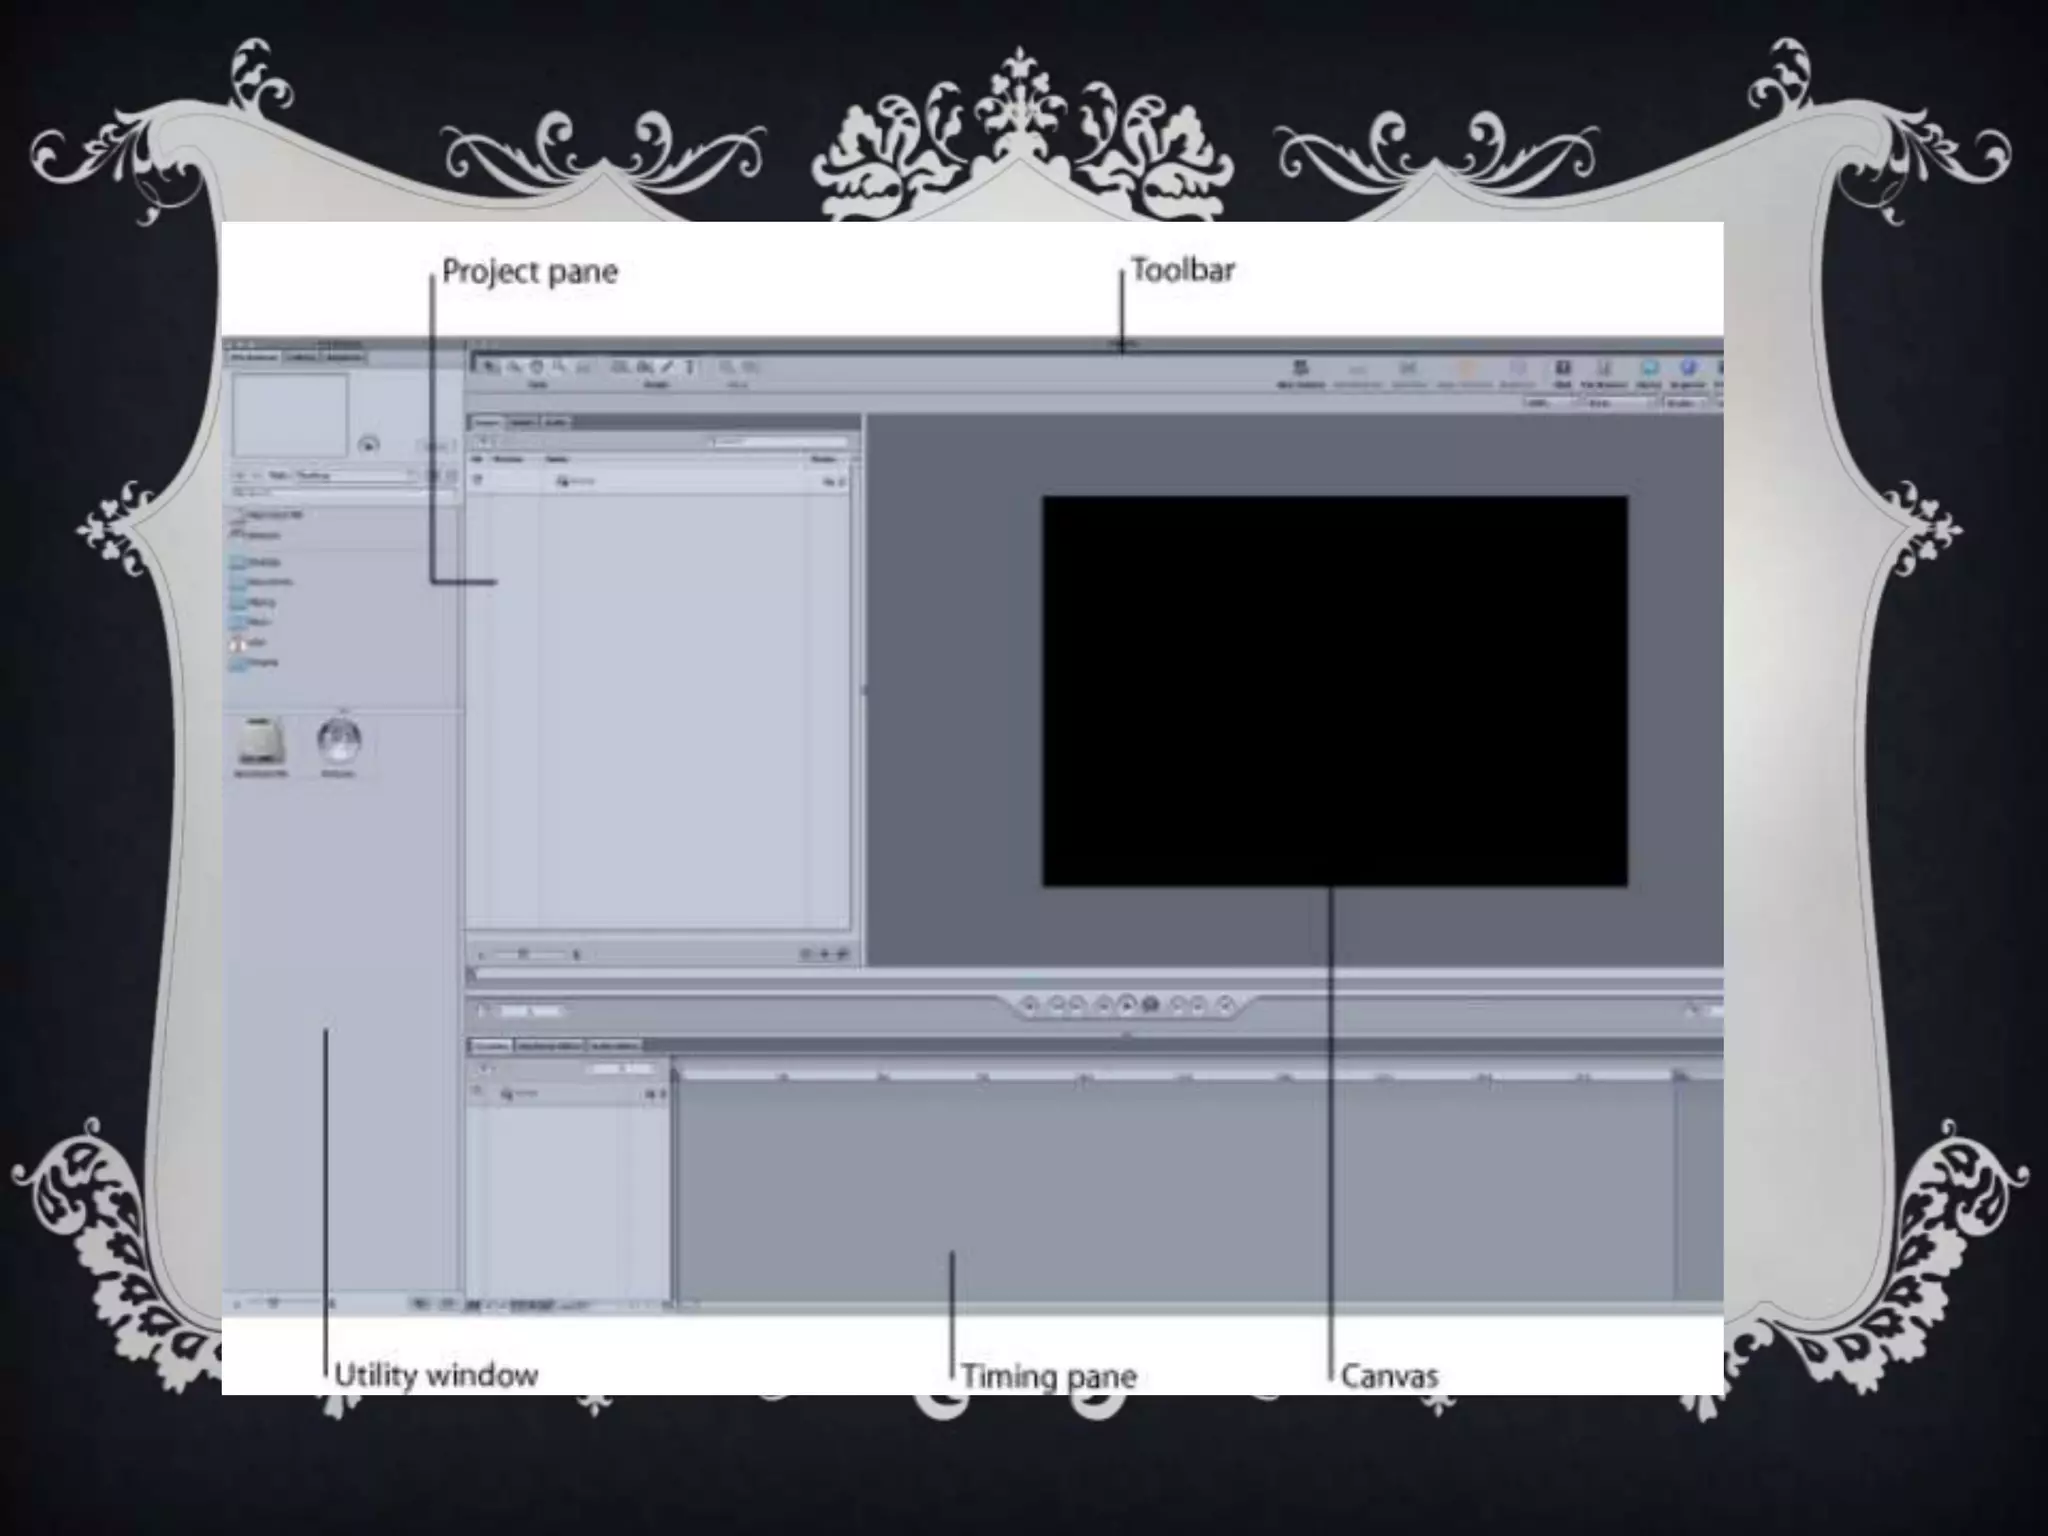
Motion is software that allows users to create sophisticated animations and visual effects in real time. The document discusses several key components of the Motion interface that were used to create a social media animation. The Project Pane allows organizing and manipulating project contents by moving images to correspond with voiceover topics. The Toolbar provides tools for creating and editing elements like shapes, masks and filters. The Canvas is the main workspace where animations can be viewed and playback controlled. The Utility Window imports images from the internet and places them in the project. The Timing Pane, similar to a timeline, arranges project elements and allows manipulating their placement over time.
2. WHAT IS MOTION…..
Motion lets you create sophisticated moving images and other visual
effects on the fly and in real time. Simply drag one of Motion’s built-in
behaviours (such as Spin or Throw) or filters (such as Glow or Strobe)
onto an object in the Canvas and watch your clip be made. We have used
motion for our social networks animation clip when our voice of god
talks about how many people use social networks. The animation is used
to support the Voice of God which is conventional for documentaries.
3.
4. PROJECT PANE
The Project pane can appear on either the left or right side of the
Canvas window and can be hidden to maximize the Canvas working area.
The Project pane contains three tabs that allowed us to see and
manipulate the contents of the current project in a variety of ways.
We used the project Plane when creating our animation all the time as
we had to move different images around in order to get our animation to
make sense. We couldn’t have an image of Facebook when our voice over
was talking about twitter.
5. TOOLBAR
The Toolbar contains controls to create and edit elements in our
project, such as text, shapes, and masks. There are also icons to apply
filters and behaviours, to create particle systems and replicators, and to
show and hide the various windows and panes of the Motion interface.
We used the toolbar all the time when we had to put a mask over each
of our images so they could be seen and also when we put our space like
background in.
6. CANVAS
The Canvas is the main work area of the interface, where we can
view and manipulate elements, as well as control playback of our
project. The Canvas also contains the Status bar and the project view
options.
Obviously we had to keep watching our animation back to see if
the timings were right and to see if it worked so this is when we used
the canvas.
7. UTILITY WINDOW
The utility window includes the Preview area, File Browser,
Library, and the Inspector. This basically allowed us to take the
images from the internet such as the Facebook logo and put them
into motion. It is a little like exporting on final cut. This then allowed
us to put them onto our project pane to play around with them and
edit them.
8. TIMING PANE
The Timing pane appears at the bottom of the Canvas window and
can be hidden to maximize the Canvas working area. The Timing pane
contains three tabs that allow you to see and manipulate different aspects
of the current project with an emphasis on how they are arranged in time.
This is a little bit like a timeline on final cut as it is where your clips
will go to be editing and it is where you can drag your play head over to
get the correct bit of clip which you want.