Downloaded 12 times


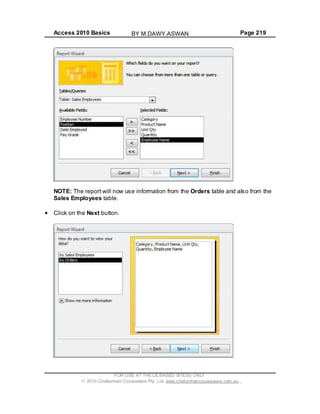
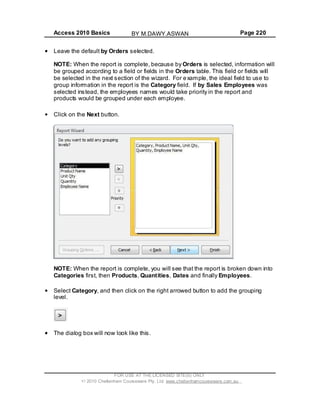
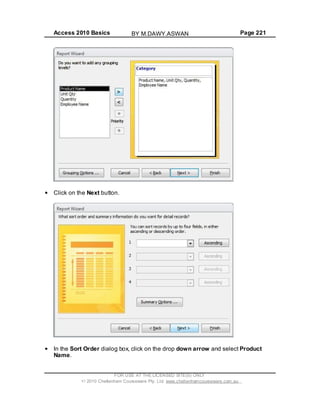
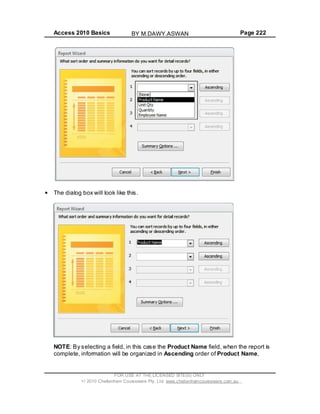
![Access 2010 Basics Page 208
Close the Access program.
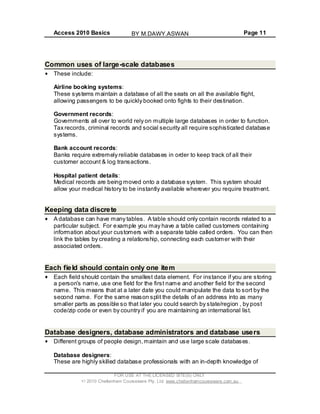
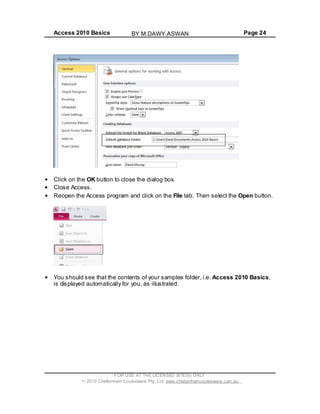
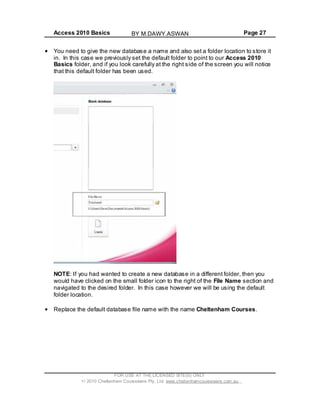
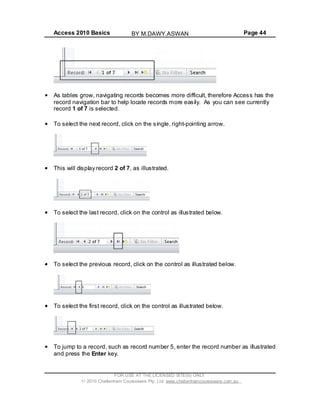
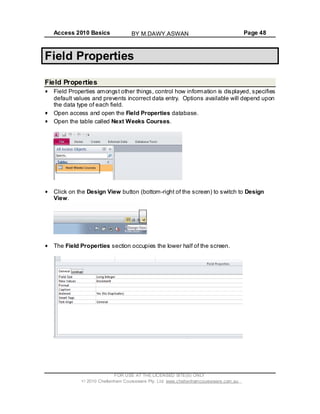
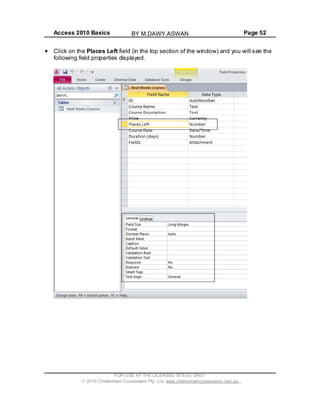
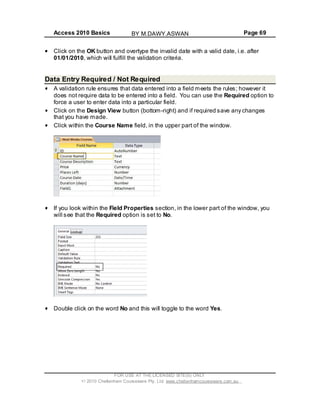
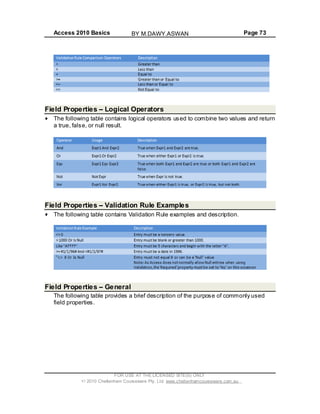
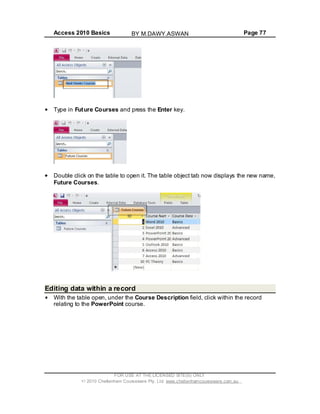
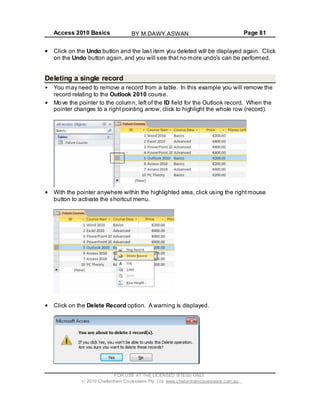
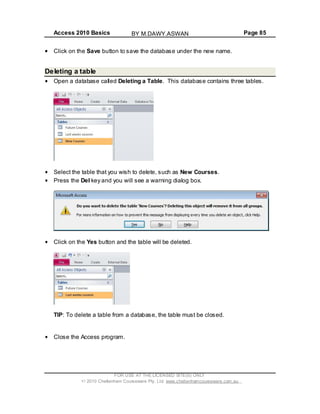
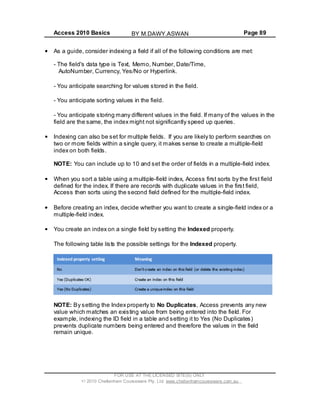
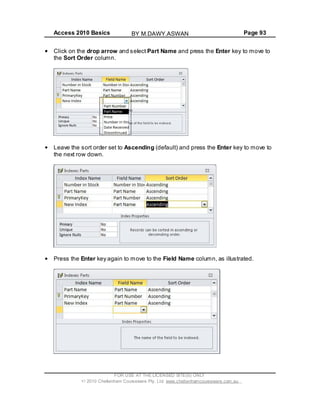
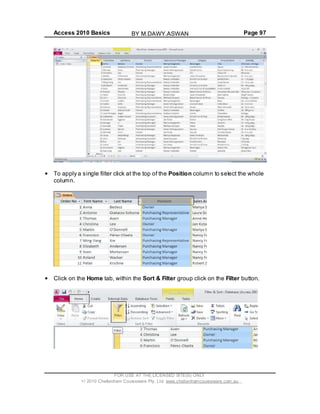
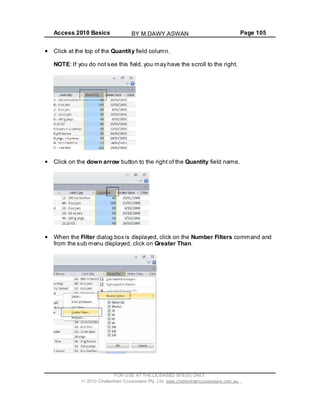
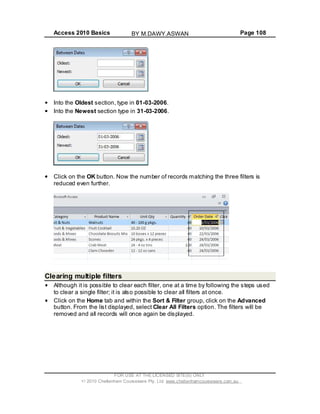
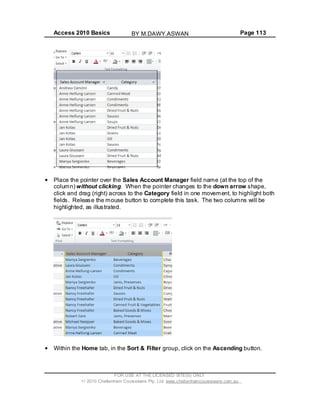
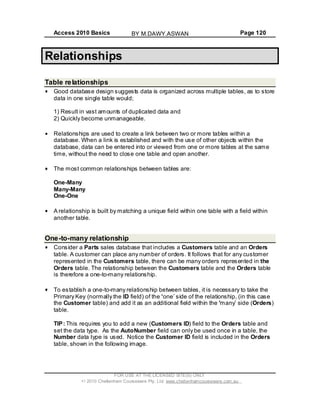
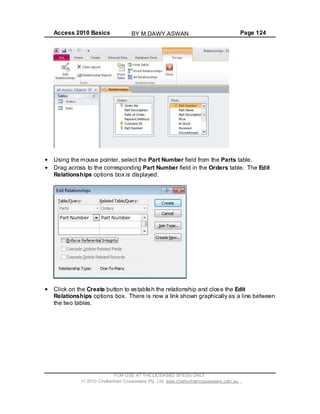
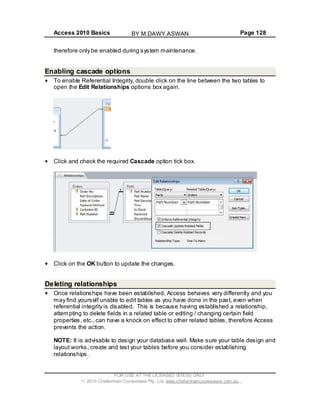
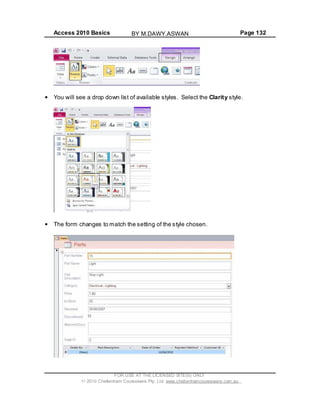
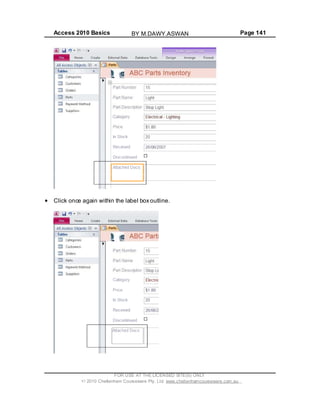
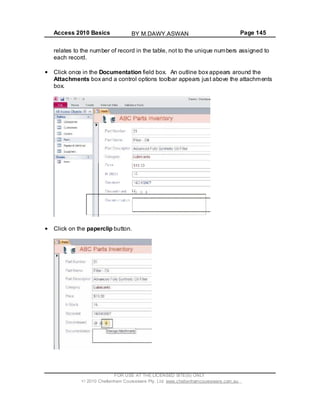
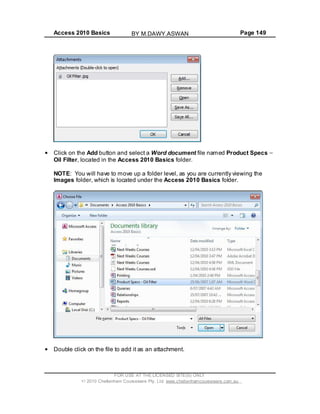
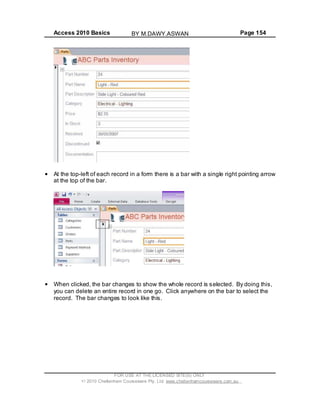
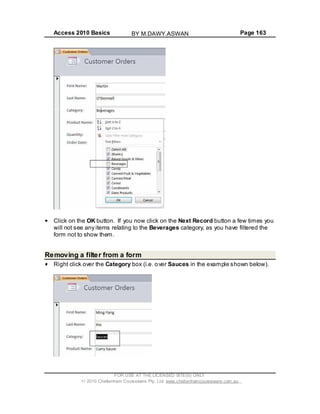
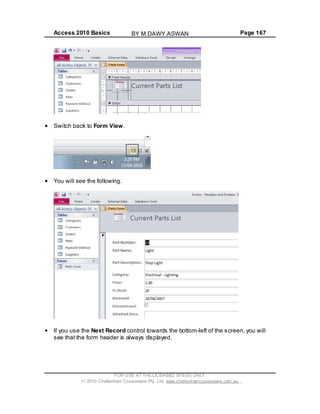
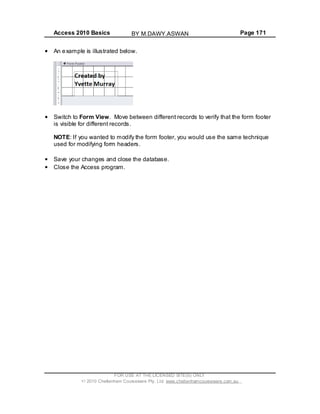
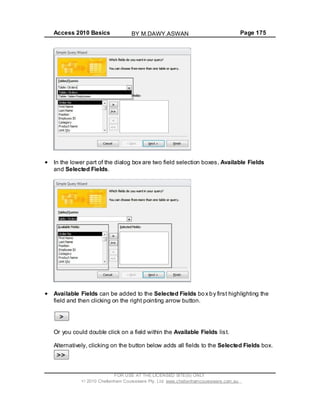
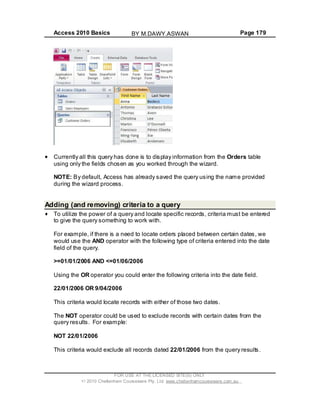
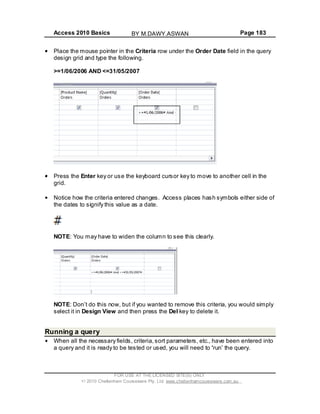
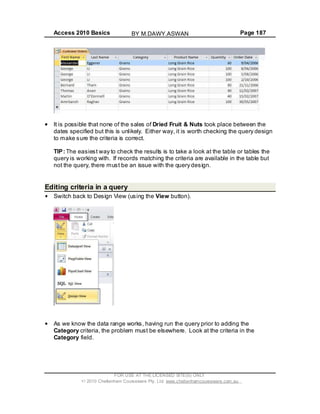
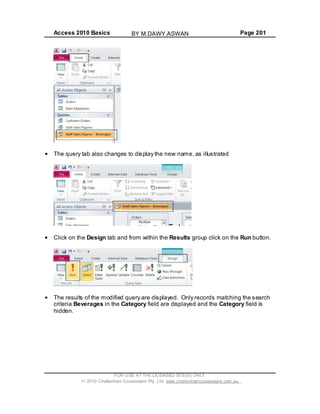
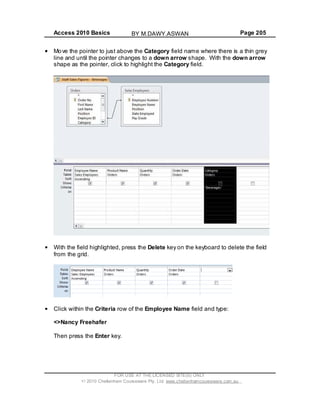
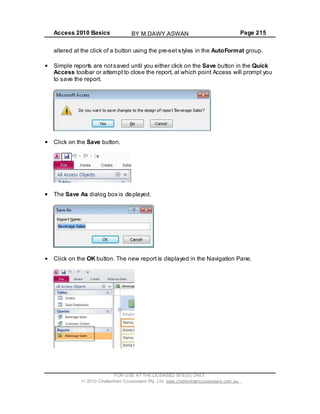
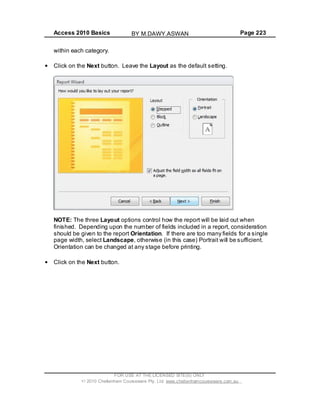
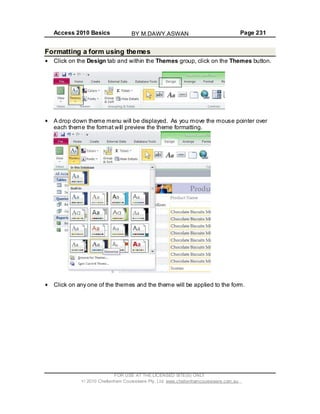
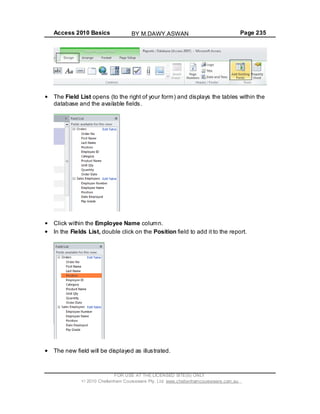
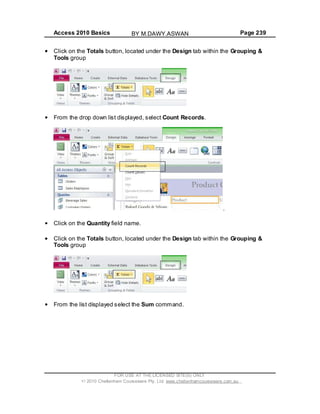
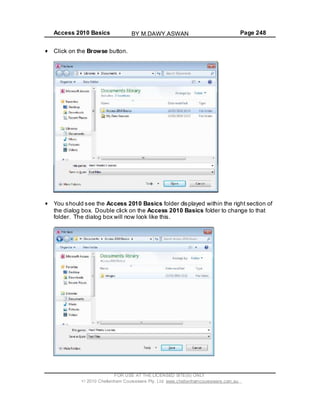
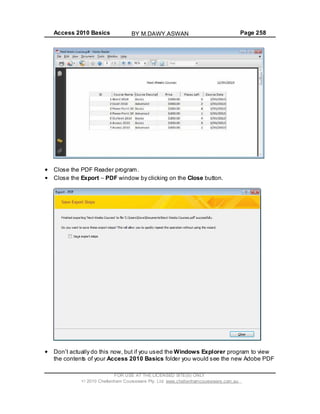
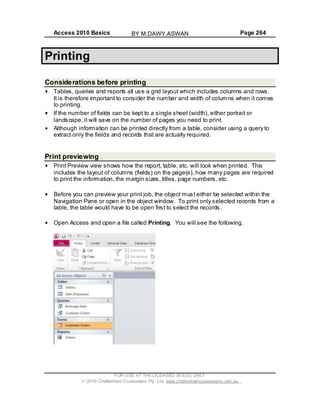
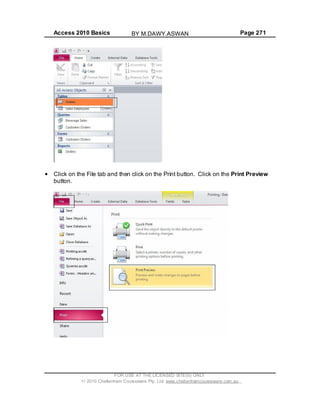
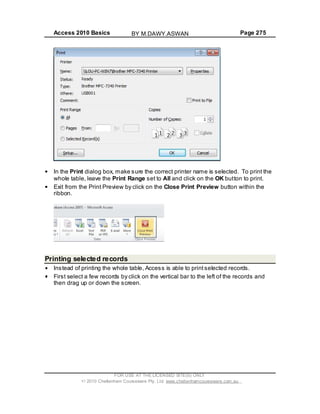
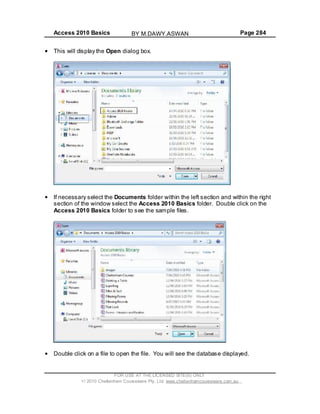
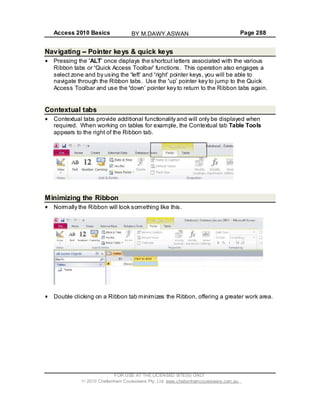
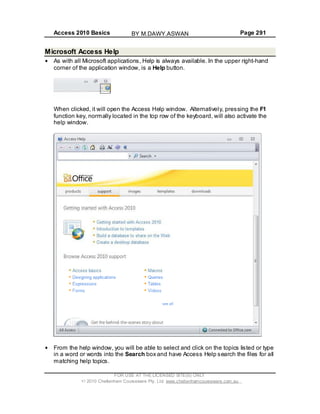
What are Wildcards?
Wildcards are special characters that you can use within a query to specify or
exclude certain characters. If you examine the charts below, they should become
more understandable.
Wildcard Function Examples
% Matches multiple characters within a
string at the start or finish of a character
string.
wh% would find:
when
what
which
It would not find:
awhile
watch
water
_ Matches a single alphabetic character
within a string
B_ll would find:
bull
ball
bell
It would not find:
Bail
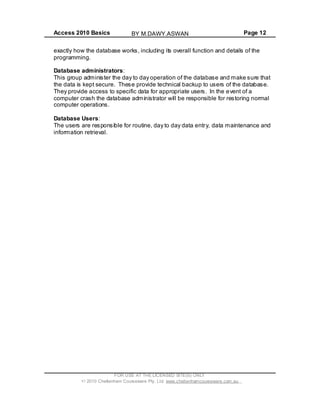
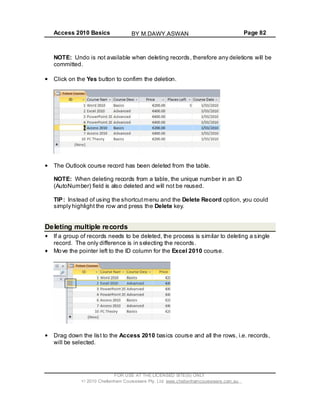
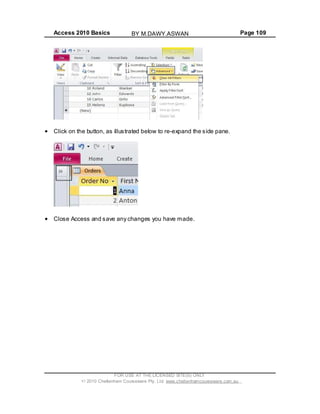
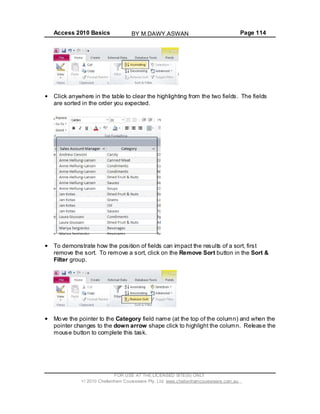
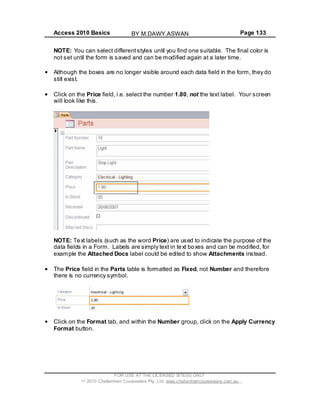
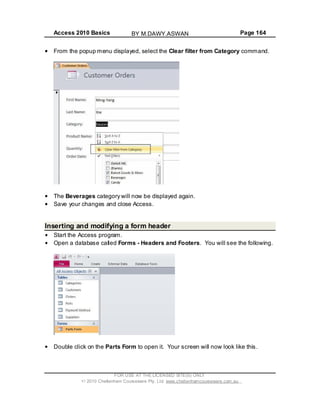
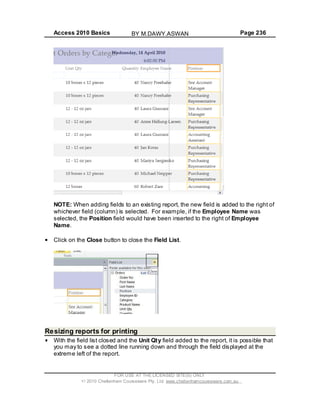
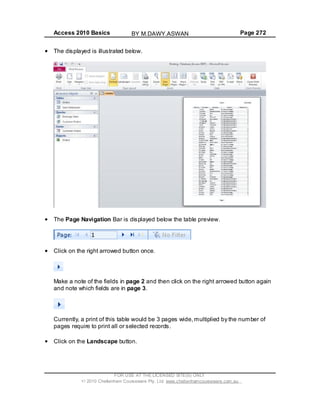
[ ] Matches any single character defined
within the brackets.
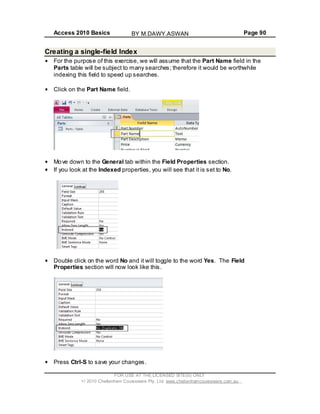
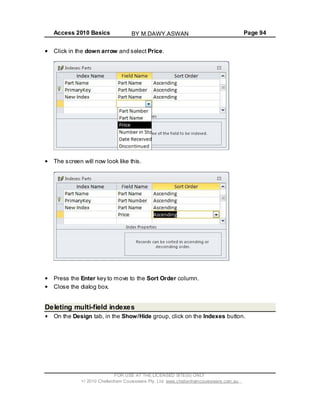
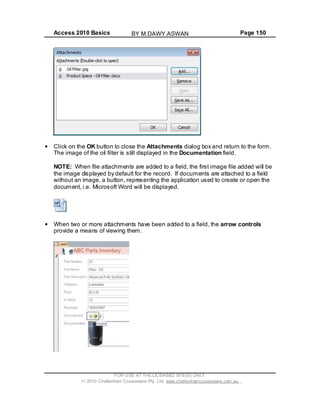
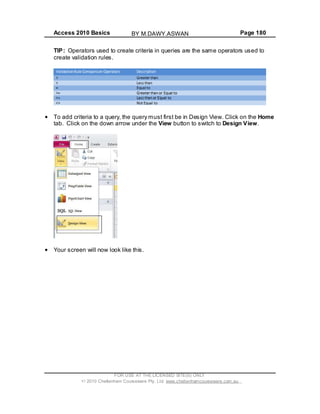
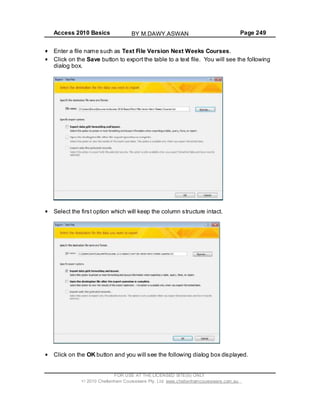
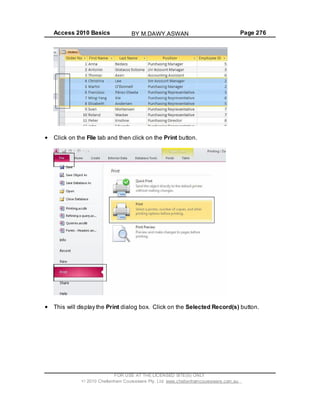
B[ae]ll would find:
ball
bell
FOR USE AT THE LICENSED SITE(S) ONLY
2010 Cheltenham Courseware Pty. Ltd. www.cheltenhamcourseware.com.au
BY M.DAWY.ASWAN](https://image.slidesharecdn.com/module5access2010-150205005330-conversion-gate02/85/Module-5-access2010-208-320.jpg)
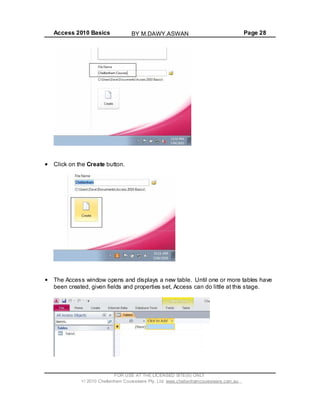
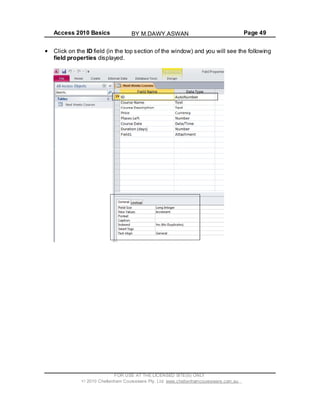
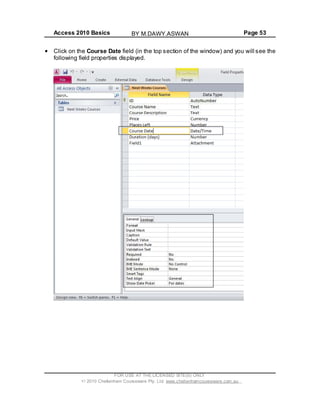
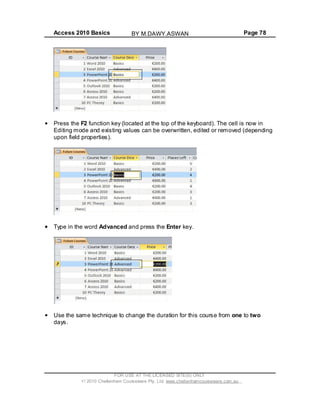
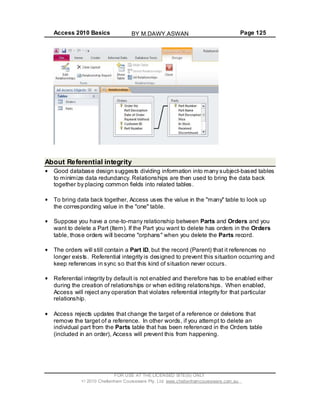
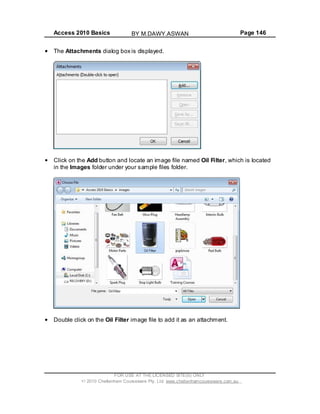
![Access 2010 Basics Page 209
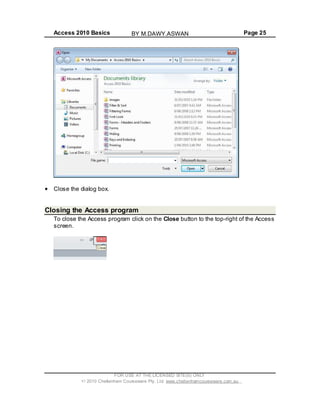
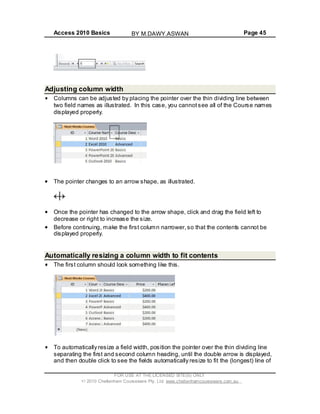
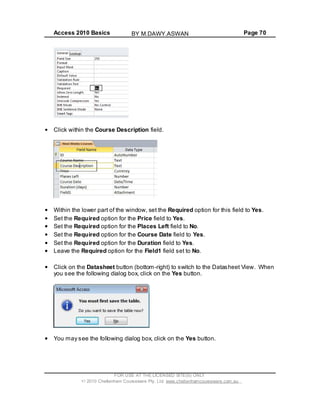
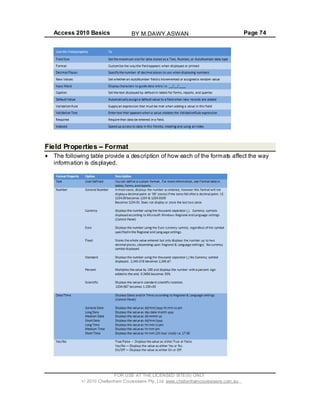
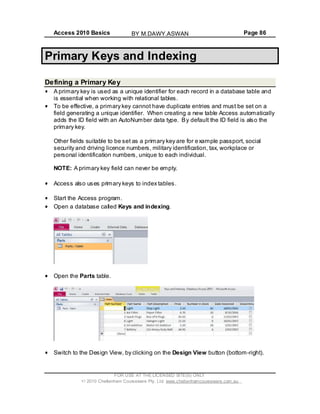
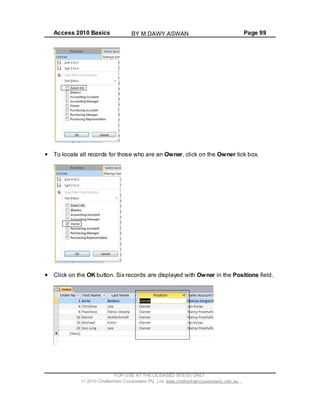
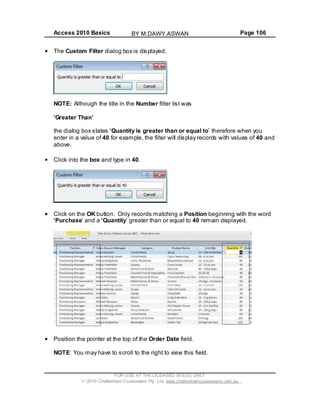
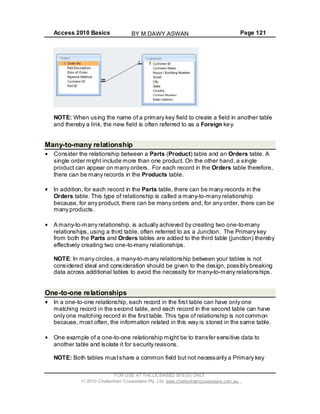
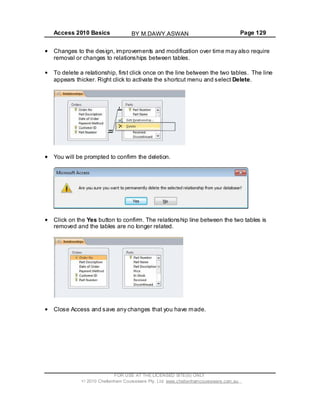
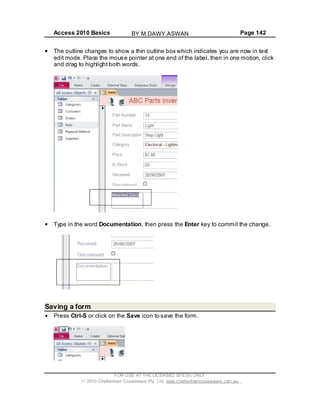
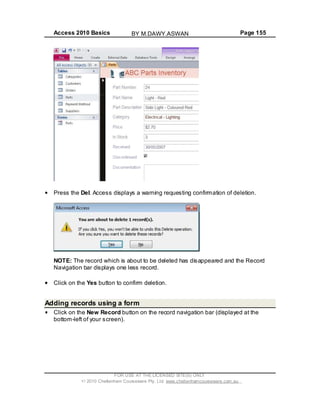
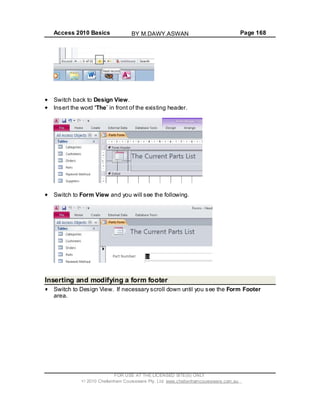
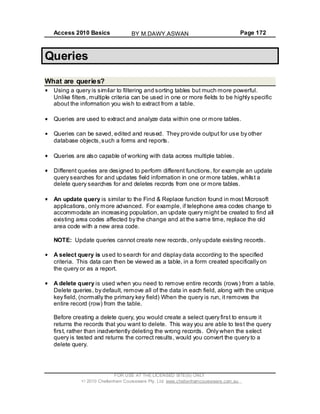
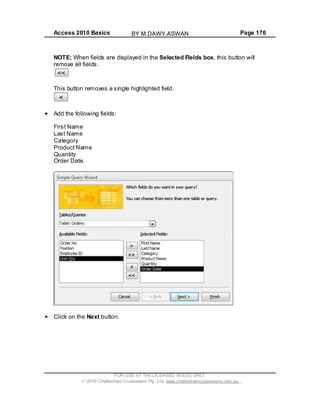
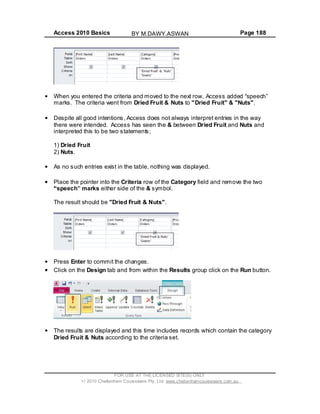
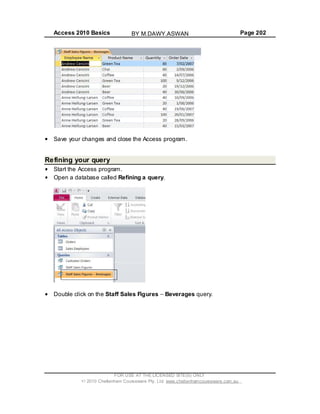
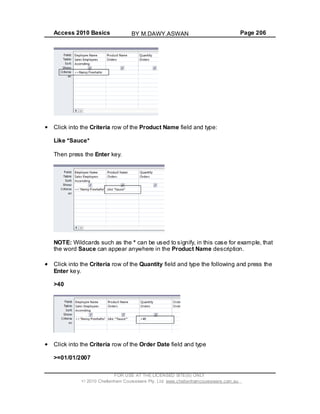
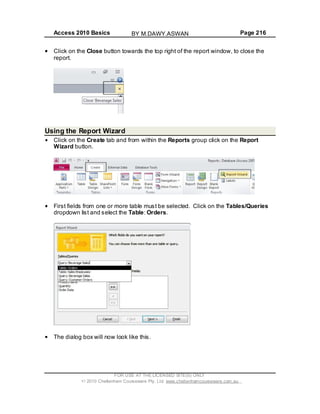
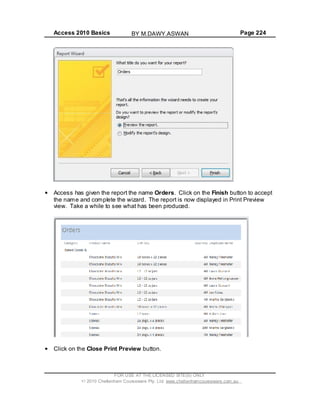
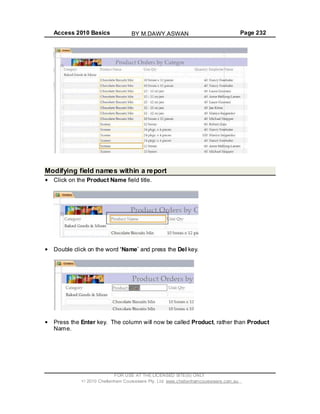
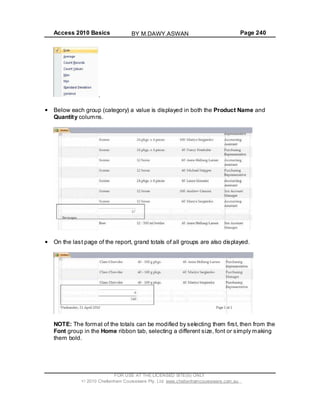
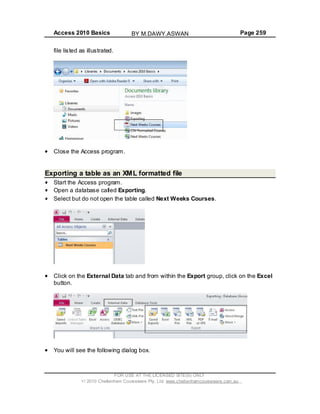
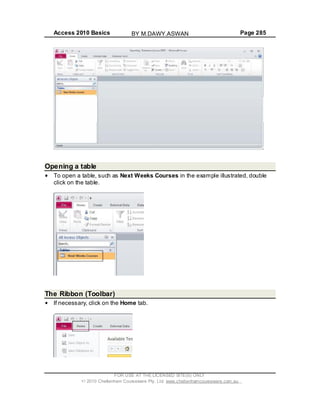
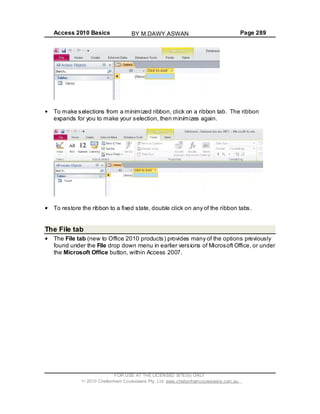
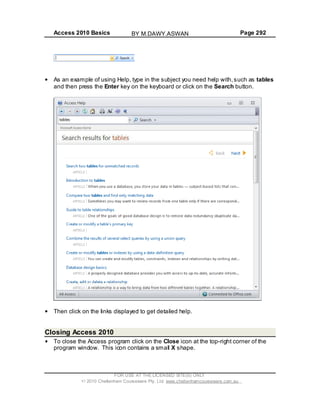
It would not find:
bill
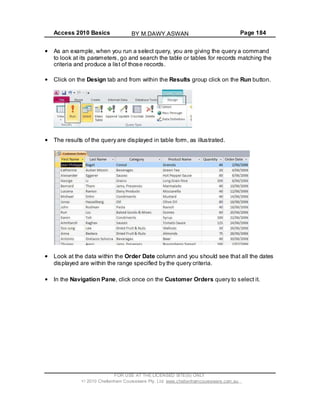
^ Matches any character not defined within
the brackets.
b[^ae]ll would find:
bill
bull
It would not find:
ball
bell
- Matches any one of a range of characters
defined within the brackets, which must
be defined in ascending order, i.e. A to Z
and not Z to A.
z[a-c]z would find:
xaz
xbz
xcz
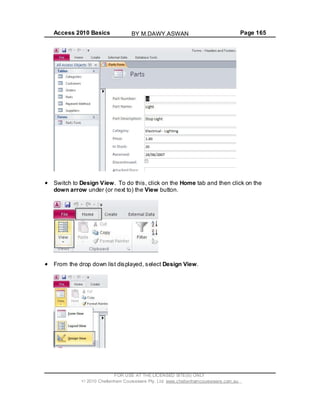
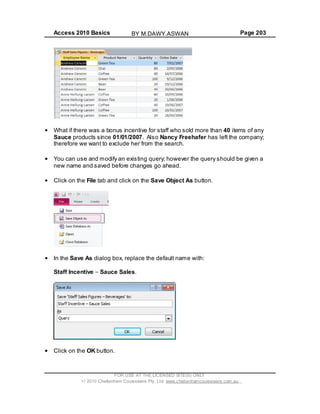
Deleting a query
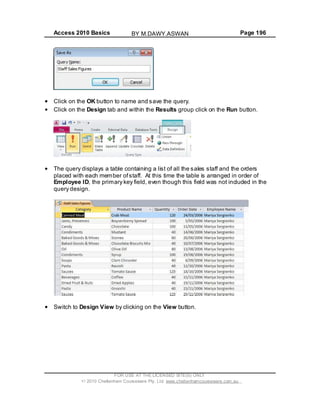
In the Navigation Pane, click once to highlight the Staff Sales Figures query.
Press the Delete key on the keyboard. Access displays a warning dialog box.
Click on the Yes button to continue and delete the query. The screen will now look
like this
FOR USE AT THE LICENSED SITE(S) ONLY
2010 Cheltenham Courseware Pty. Ltd. www.cheltenhamcourseware.com.au
BY M.DAWY.ASWAN](https://image.slidesharecdn.com/module5access2010-150205005330-conversion-gate02/85/Module-5-access2010-209-320.jpg)


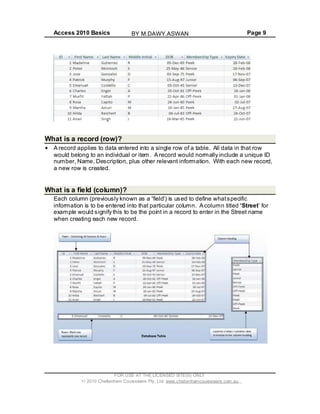
The document provides an overview of database concepts, including definitions of key terms like database, table, record, field, data, and relational database. It explains that a database is an organized collection of data that can be stored across multiple tables. Each table contains rows (records) and columns (fields) to structure the data. Relational databases reduce data duplication by linking related information across tables.


![ECDL module 5: using databases [To be continued]](https://cdn.slidesharecdn.com/ss_thumbnails/icdlmodule5usingdatabases-150417150536-conversion-gate02-thumbnail.jpg?width=640&height=640&fit=bounds)