Download as PDF, PPTX


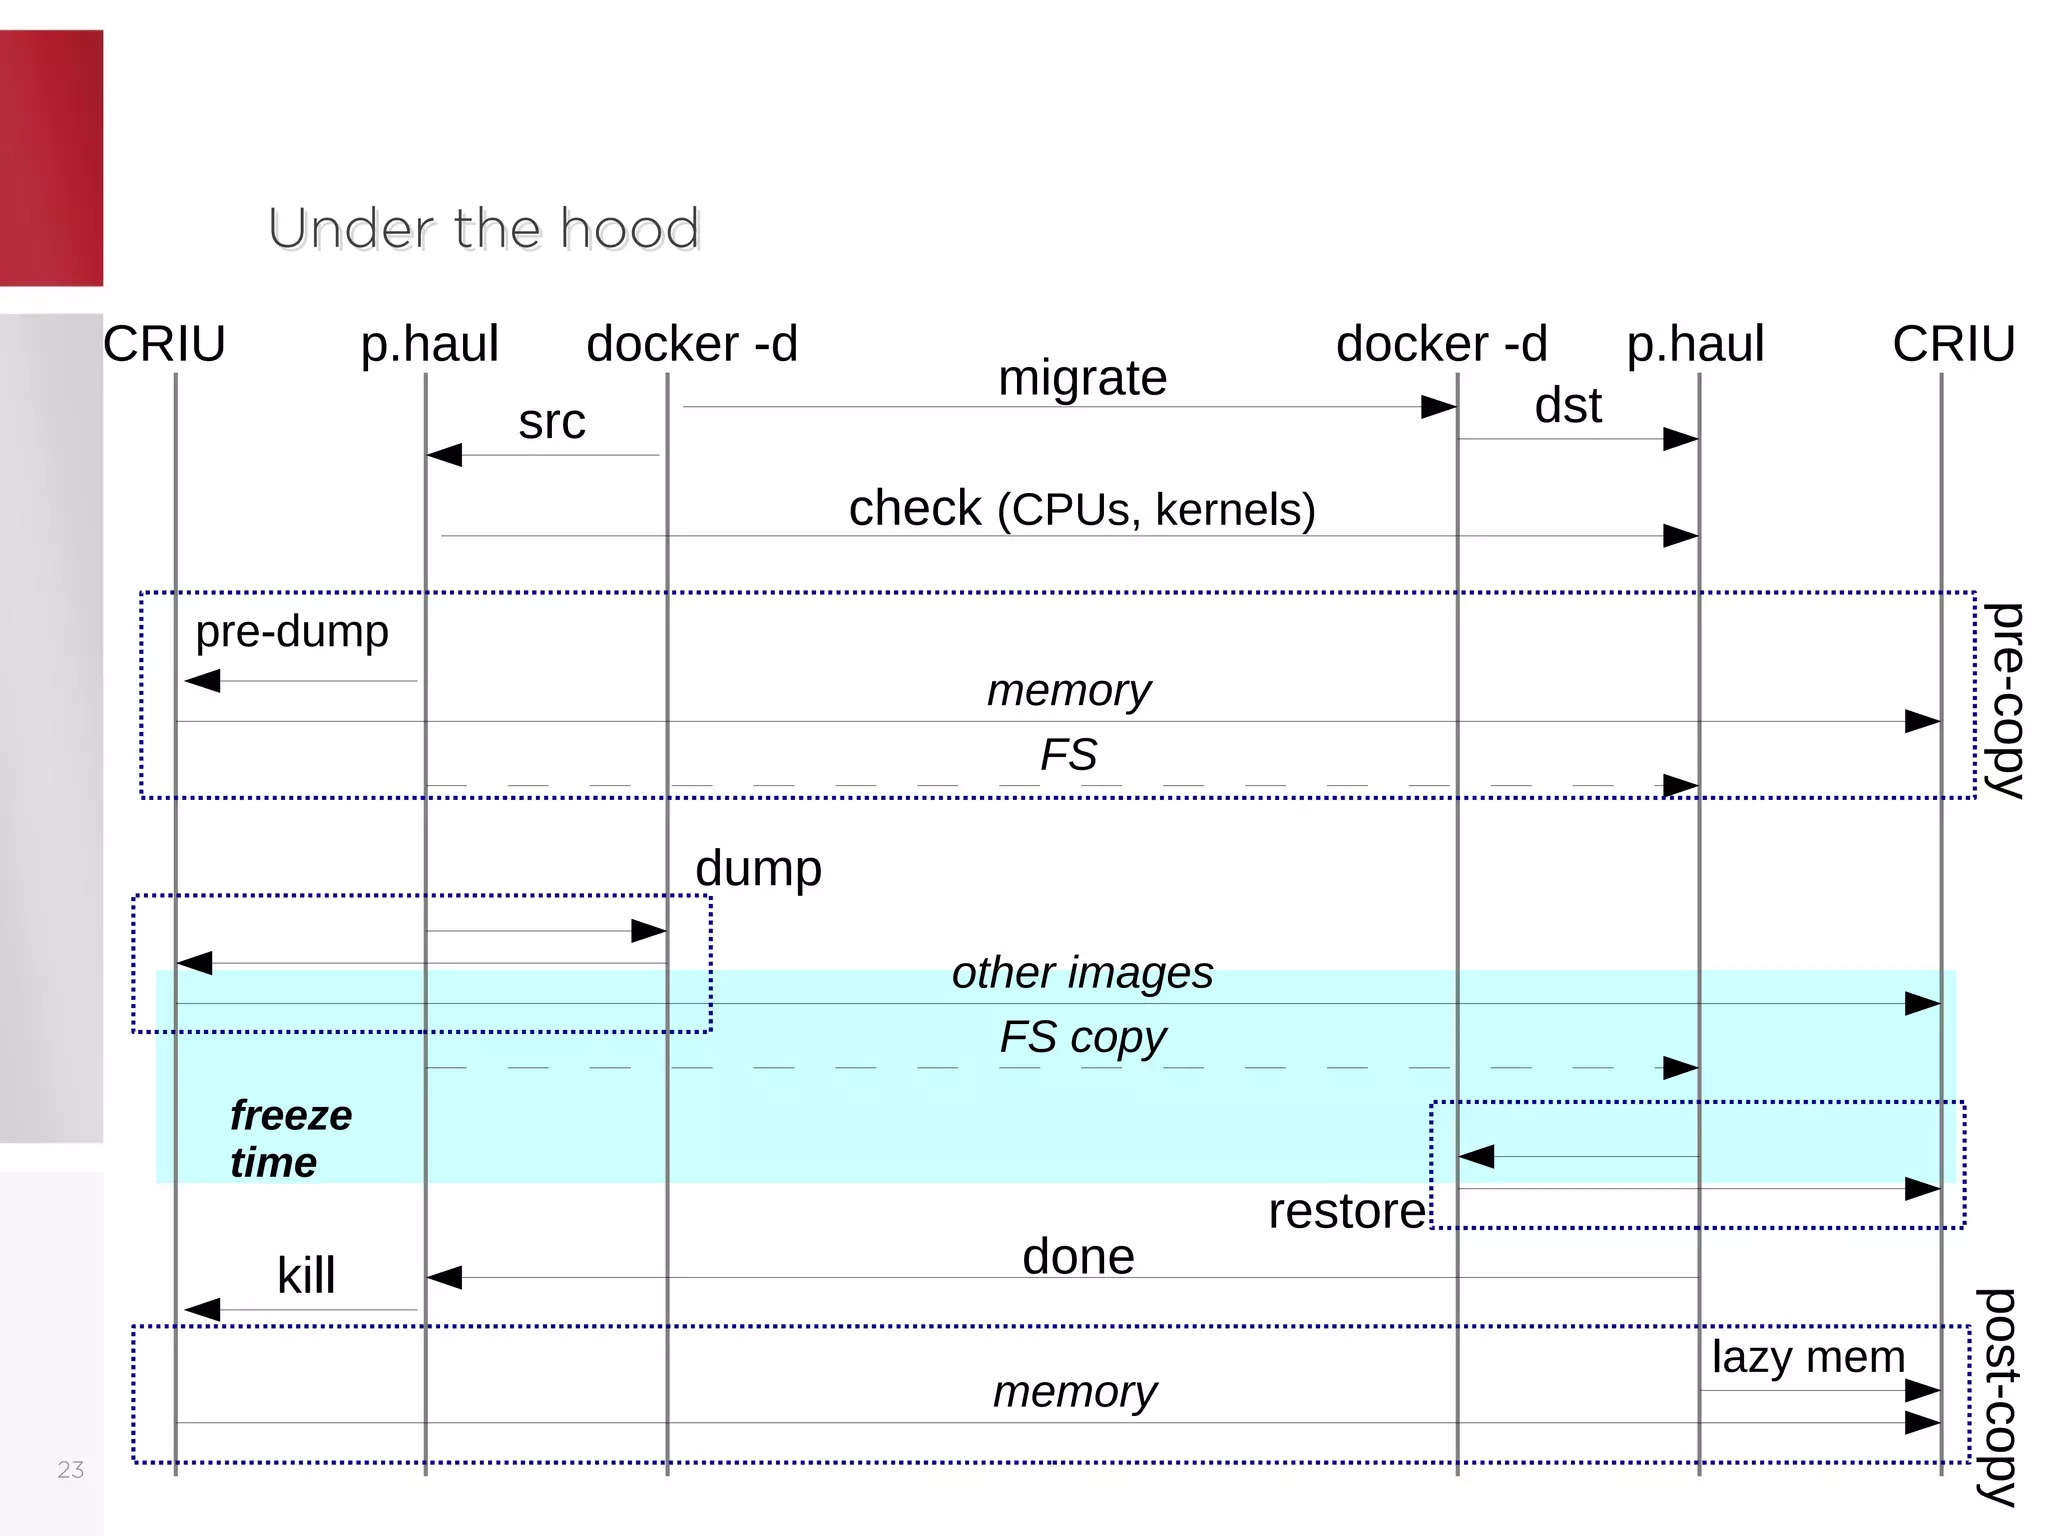

The document discusses live migration of containers, outlining its advantages such as load balancing and hardware updates, as well as issues that may arise, including complexity and safety concerns. It explains methods like memory pre-copy and post-copy for state transfer, detailing their pros and cons. Finally, it emphasizes the importance of proper implementation and necessary checks to ensure successful migrations using tools like CRIU and p.haul.