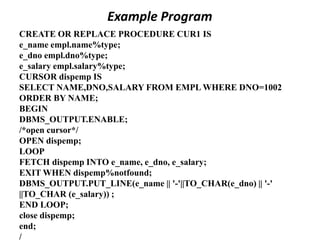
The document provides a comprehensive overview of cursors in Oracle SQL, detailing their definition, types (implicit and explicit), and the four main steps for creating a cursor: declaration, opening, fetching, and closing. It includes examples of how to declare and open cursors, as well as the attributes and commands associated with managing them. Additionally, the document outlines a sample procedure that uses a cursor to display employee data from a table.

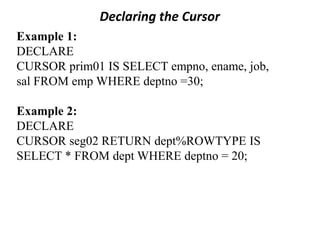
![Declaring the Cursor
The DECLARE command is used to declare a cursor.
Syntax:
DECLARE
CURSOR cursor_name [(parameter[, parameter]...)]
[RETURN return_type] IS SELECT COMMAND;
Arguments:
cursor_name
Name of the cursor to be created.
return_type
Represents a row or record in a table.](https://image.slidesharecdn.com/lecturenotesunit5chapter19cursor-240814012837-084b9a88/85/Lecture-Notes-Unit5-chapter19-Cursor-in-Pl-SQL-4-320.jpg)


![Les21[1]Writing Explicit Cursors](https://cdn.slidesharecdn.com/ss_thumbnails/les211-220214163511-thumbnail.jpg?width=640&height=640&fit=bounds)