Download to read offline

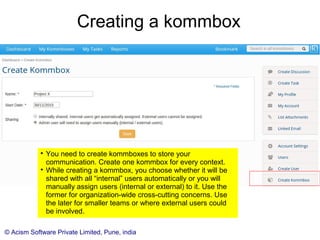
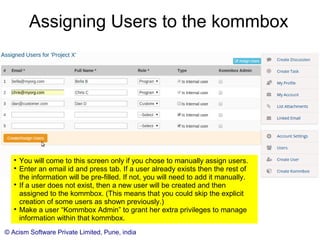
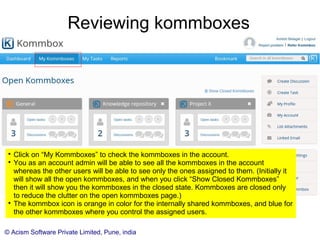

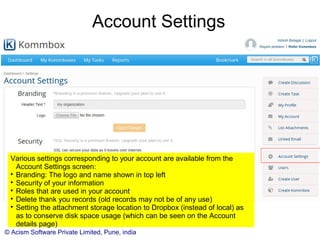

This document provides step-by-step instructions for getting started with and administering a Kommbox account. It explains how to sign up, activate an account, complete the one-time setup, understand the user interface and menus, create and manage users, create and assign kommboxes, review kommboxes, manage account details and settings. The overall purpose is to guide new administrators on essential Kommbox account configuration and administration tasks.


