Download to read offline
![IPV6 Test Plan for OPNFV PoC v2.0 11/23/2015
Yardstick supporting Rally will need to ping6, tcpdump6 as part of VM creation or at least
scp/ftp capabilities for VM as well IPv6=serviceVM
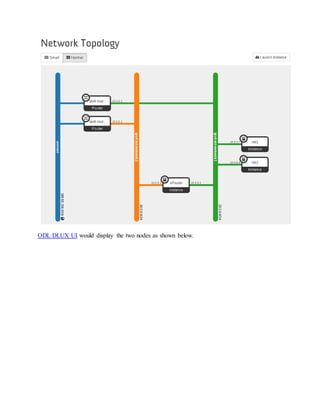
Requirements:Totestthe IPv6Service VMwitha OPNFV IPv6setupusingOpenStackLiberty &SDN
controllerODLLithiumSR2
IPV6Testingforthe POC-X3referlink
https://wiki.opnfv.org/ipv6_opnfv_project
A Service VM in OpenStack+SDN controller[ODL or ONOS or OC] environmentthat is capable of
(1) advertisingIPv6 Router Advertisements(RA) to the VMson the internal tenant network (E-W
traffic)
(2) IPv6 Forwarding (i.e.,North-Southtraffic),i.e.capability of an IPv6 vRouter
The designdetailsare overlink
https://wiki.opnfv.org/ipv6_opnfv_project/poc_design
Testdesign:](https://image.slidesharecdn.com/ipv6testplanforopnfvpocv2-200616053005/85/Ipv6-test-plan-for-opnfv-poc-v2-2-spirent-vctlab-1-320.jpg)
![IPV6 Test Plan for OPNFV PoC v2.0 11/23/2015
Yardstick supporting Rally will need to ping6, tcpdump6 as part of VM creation or at least
scp/ftp capabilities for VM as well IPv6=serviceVM
Requirements:Totestthe IPv6Service VMwitha OPNFV IPv6setupusingOpenStackLiberty &SDN
controllerODLLithiumSR2
IPV6Testingforthe POC-X3referlink
https://wiki.opnfv.org/ipv6_opnfv_project
A Service VM in OpenStack+SDN controller[ODL or ONOS or OC] environmentthat is capable of
(1) advertisingIPv6 Router Advertisements(RA) to the VMson the internal tenant network (E-W
traffic)
(2) IPv6 Forwarding (i.e.,North-Southtraffic),i.e.capability of an IPv6 vRouter
The designdetailsare overlink
https://wiki.opnfv.org/ipv6_opnfv_project/poc_design
Testdesign:](https://image.slidesharecdn.com/ipv6testplanforopnfvpocv2-200616053005/75/Ipv6-test-plan-for-opnfv-poc-v2-2-spirent-vctlab-1-2048.jpg)
![– Our Step4 instructionstosetupIPv6 vRouter
Test:
variablesto be defined:
OS-C-Node=IPaddr1=10.134.156.113
ODL-C-Node=IPaddr2=10.134.156.177
Compute-Node1=IPaddr3=10.134.156.112
Compute -Node2=IPaddr4=?
ipv4-router1=20.0.0.1
ipv6-router2=10.0.0.1
ext-router-gateway-ip=198.159.156.1
IPv6-Service VM=20.0.0.3
VM1=20.0.0.6
VM2=20.0.0.7
DNS-8.8.8.8=8.8.8.8
ipv6-prefix-to-use:2001:db8:0:2::/64
IPVSIX_ST-01 : Testing IPv6 ping to the nodeson the tenant network (E-W traffic)
ssh to VM1
IPVSIX_ST-01-VM1-vR -ping6
(note now ping6 will use prfixas 2001:db8:0:2::/64)
ping6 -c 1 [IPV6-service-VM]
PING 2001:db8:0:2::1(::1) from...::1 : 56 data bytes
64 bytes from ...::1: icmp6_seq=0 hops=64 time=292 usec
--- ::1 ping statistics ---
1 packets transmitted, 1 packets received, 0% packet loss
IPVSIX_ST-01-VM1-VM2-ping6
ping6 -c 1 [V2M]
PING 2001:db8:0:2::1(::1) from...::1 : 56 data bytes
64 bytes from ...::1: icmp6_seq=0 hops=64 time=292 usec](https://image.slidesharecdn.com/ipv6testplanforopnfvpocv2-200616053005/85/Ipv6-test-plan-for-opnfv-poc-v2-2-spirent-vctlab-4-320.jpg)
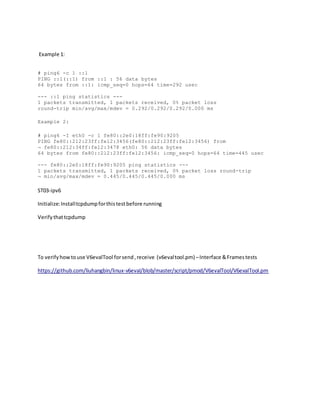
![--- ::1 ping statistics ---
1 packets transmitted, 1 packets received, 0% packet loss
IPVSIX_ST-01-VM1- ipv4-router1-ping
ping -c 1 [ipv4-router1]
PING 20.0.0.1(::1) from...::1 : 56 data bytes
64 bytes from ...::1: icmp6_seq=0 hops=64 time=292 usec
--- ::1 ping statistics ---
1 packets transmitted, 1 packets received, 0% packet loss
IPVSIX_ST-01-VM1- ipv6-router2-ping
ping6 -c 1 [ipv6-router2]
PING 2001:db8:0:2::1(::1) from...::1 : 56 data bytes
64 bytes from ...::1: icmp6_seq=0 hops=64 time=292 usec
--- ::1 ping statistics ---
1 packets transmitted, 1 packets received, 0% packet loss
IPVSIX_ST-01-VM1- ipv6-router2-traceroute
traceroute [ipv6-router2]
traceroute to 10.0.0.1 (30 hop max) , 60 byte packets
1 20.0.0.3..10 ms...
2.20.0.0.1 .. 1 ms
IPVSIX_ST-01-8.8.8.8-DNS-ping
ping -c 1 [DNS-8.8.8.8]
PING 8.8.8.8(::1) from...::1 : 56 data bytes
64 bytes from ...::1: icmp6_seq=0 hops=64 time=292 usec
--- ::1 ping statistics ---
1 packets transmitted, 1 packets received, 0% packet loss
TestingIPv6 & IPv4 Forwarding(N-Straffic)
ssh to : IPV6 Service VM
IPVSIX_ST-02 : vR-DNS-8.8.8.8-ping6
ping6 -c 1 [DNS-8.8.8.8]
PING ::1(::1) from ::1 : 56 data bytes](https://image.slidesharecdn.com/ipv6testplanforopnfvpocv2-200616053005/85/Ipv6-test-plan-for-opnfv-poc-v2-2-spirent-vctlab-5-320.jpg)
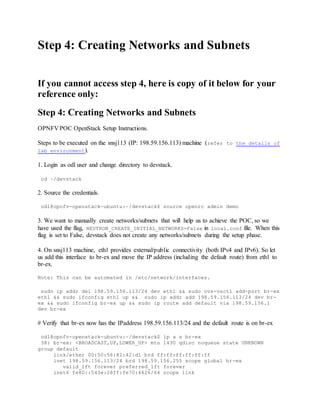
![64 bytes from ::1: icmp_seq=0 hops=64 time=292 usec
--- ::1 ping statistics ---
1 packets transmitted, 1 packets received, 0% packet loss
IPVSIX_ST-02 : vR-DNS-8.8.8.8-ping
ping -c 1 [DNS-8.8.8.8]
PING ::1(::1) from ::1 : 56 data bytes
64 bytes from ::1: icmp_seq=0 hops=64 time=292 usec
--- ::1 ping statistics ---
1 packets transmitted, 1 packets received, 0% packet loss
All are positive tests and expected to PASS, refer table below.
Test From To Pass/Fail
IPVSIX_ST-01-VM1-vR -ping6 VM1 vR Positive Pass
IPVSIX_ST-01-VM1-VM2-ping6 VM1 VM2 Positive Pass
IPVSIX_ST-01-VM1- ipv4-router1-
ping
VM1 ipv4-router1 Positive Pass
IPVSIX_ST-01-VM1- ipv6-router2-
ping
VM1 ipv6-router2 Positive Pass
IPVSIX_ST-01-VM1- ipv6-router2-
traceroute
VM1 ipv6-router2 Positive Pass
IPVSIX_ST-01-8.8.8.8-DNS-ping Vm1 DNS-8.8.8.8 Positive Pass
IPVSIX_ST-02 : vR-DNS-8.8.8.8-
ping6
vR DNS-8.8.8.8 Positive Pass
IPVSIX_ST-02 : vR-DNS-8.8.8.8-
ping
vR DNS-8.8.8.8 Positive Pass
Negative testscan be set for
each of 8 above tests by test
developers.
*** *** Negative Pass
We can have commontestsfor all communitylabswithashell scriptwithabove 8 positive and
correspondingnegative testswithparametersandvariablesfromabove..](https://image.slidesharecdn.com/ipv6testplanforopnfvpocv2-200616053005/85/Ipv6-test-plan-for-opnfv-poc-v2-2-spirent-vctlab-6-320.jpg)
![vRouter creation and relation to ODL and OpenStack Neutron Configurations for VCT Spirent
Lab
vRouterVMwouldbe advertisingthe followingIPv6prefix 2001:db8:0:2::/64 [Ref:1]
The radvd daemon(whichwe are manuallyspawninginside the ipv6-routernamespace) wouldbe
advertisingthe prefix 2001:db8:0:1::/64 [Ref:2]
The actual IPv6 addressesthatwouldbe configuredinVM1/VM2 wouldbe basedonthe VMMAC
address(asit isconfiguredviaSLAAC).
JFYI,to knowthe EUI-64 IPv6 addressderivedfromIPv6prefix,youcanuse the followingonline
calculator[Ref:3]
Let me knowif you have anyquestions.
[Ref:1] http://fpaste.org/276989/39903414/
[Ref:2] Step12 of page - https://wiki.opnfv.org/ipv6_opnfv_project/create_networks
[Ref:3] http://tools.petrkadlec.com/lookup/ipv6eui64gen/](https://image.slidesharecdn.com/ipv6testplanforopnfvpocv2-200616053005/85/Ipv6-test-plan-for-opnfv-poc-v2-2-spirent-vctlab-10-320.jpg)

![neutron net-create ipv4-int-network2
# Create an IPv4 subnet for the ipv6-router internal network.
neutron subnet-create --name ipv4-int-subnet2 --dns-nameserver 8.8.8.8 ipv4-
int-network2 10.0.0.0/24
# Associate the ipv4 internal subnet2 to ipv6-router.
neutron router-interface-add ipv6-router ipv4-int-subnet2
5. Download fedora20 image which would be used as vRouter.
glance image-create --name 'Fedora20' --disk-format qcow2 --container-format
bare --is-public true --copy-from http://cloud.fedoraproject.org/fedora-
20.x86_64.qcow2
6. Create a keypair.
nova keypair-add vRouterKey > ~/vRouterKey
7. Copy the contents of the following url to metadata.txt (i.e., metadata which enables IPv6
router functionality inside vRouter)
http://fpaste.org/276989/39903414/
8. Boot the vRouter using Fedora20 image on the Compute node (hostname: opnfv-odl-ubuntu)
nova boot --image Fedora20 --flavor m1.small --user-data ./metadata.txt --
availability-zone nova:opnfv-odl-ubuntu --nic net-id=$(neutron net-list |
grep -w ipv4-int-network2 | awk '{print $2}') --nic net-id=$(neutron net-list
| grep -w ipv4-int-network1 | awk '{print $2}') --key-name vRouterKey vRouter
9. Verify that Fedora20 image boots up successfully and the ssh keys are properly injected.
Note: It may take few minutes for the necessary packages to get installed and
ssh keys to be injected.
nova list
nova console-log vRouter
# Sample output:
[ 762.884523] cloud-init[871]: ec2:
#############################################################
[ 762.909634] cloud-init[871]: ec2: -----BEGIN SSH HOST KEY FINGERPRINTS---
--
[ 762.931626] cloud-init[871]: ec2: 2048
e3:dc:3d:4a:bc:b6:b0:77:75:a1:70:a3:d0:2a:47:a9 (RSA)
[ 762.957380] cloud-init[871]: ec2: -----END SSH HOST KEY FINGERPRINTS-----](https://image.slidesharecdn.com/ipv6testplanforopnfvpocv2-200616053005/85/Ipv6-test-plan-for-opnfv-poc-v2-2-spirent-vctlab-13-320.jpg)
![[ 762.979554] cloud-init[871]: ec2:
#############################################################
10. In order to verify that the setup is working, let's create two cirros VMs on the ipv4-int-
network1 (i.e., vRouter eth1 interface - internal network).
Note: VM1 is created on Control+Network node (i.e., opnfv-openstack-ubuntu)
nova boot --image cirros-0.3.4-x86_64-uec --flavor m1.tiny --nic net-
id=$(neutron net-list | grep -w ipv4-int-network1 | awk '{print $2}') --
availability-zone nova:opnfv-openstack-ubuntu --key-name vRouterKey VM1
Note: VM2 is created on Compute node (i.e., opnfv-odl-ubuntu). We will have
to configure appropriate mtu on the VM iface by taking into account the
tunneling overhead and any physical switch requirements. If so, push the mtu
to the VM either using dhcp options or via meta-data.
nova boot --image cirros-0.3.4-x86_64-uec --flavor m1.tiny --nic net-
id=$(neutron net-list | grep -w ipv4-int-network1 | awk '{print $2}') --
availability-zone nova:opnfv-odl-ubuntu --key-name vRouterKey VM2
11. Confirm that both the VMs are successfully booted.
nova list
nova console-log VM1
nova console-log VM2
12. Lets manually spawn a radvd daemon inside ipv6-router namespace (to simulate external
router). For this, we will have to identify the ipv6-router namespace and move to the namespace.
sudo ip netns exec qrouter-$(neutron router-list | grep -w ipv6-router |
awk '{print $2}') bash
# On successful execution of the above command, you will be in the router namespace.
# Configure the IPv6 address on the <qr-xxx> iface.
router_interface=$(ip a s | grep -w "global qr-*" | awk '{print $7}')
ip -6 addr add 2001:db8:0:1::1 dev $router_interface
# Copy the following contents to some file (say /tmp/br-ex.radvd.conf)
interface $router_interface
{
AdvSendAdvert on;
MinRtrAdvInterval 3;
MaxRtrAdvInterval 10;
prefix 2001:db8:0:1::/64
{
AdvOnLink on;
AdvAutonomous on;
};
};](https://image.slidesharecdn.com/ipv6testplanforopnfvpocv2-200616053005/85/Ipv6-test-plan-for-opnfv-poc-v2-2-spirent-vctlab-14-320.jpg)


This document outlines test plans and requirements for testing IPv6 in an OPNFV PoC v2.0 environment using OpenStack Liberty and ODL Lithium SR2. It details: (1) Setting up an IPv6 service VM in OpenStack with ODL controller capability for IPv6 routing and address advertisement. (2) A test design and steps for setting up infrastructure, ODL and OpenStack controllers, and compute nodes. (3) Positive test cases to validate IPv6 and IPv4 connectivity between VMs, routers and external DNS via ping, traceroute from the VM and service VM. (4) References for IPv6 configuration and testing in Linux.