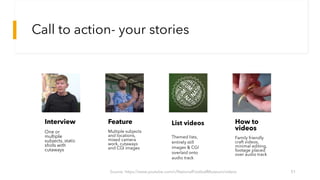
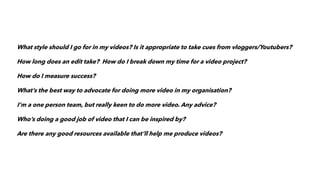
Introduction to video editing
David Mansell, Belinda Scarlett, Kate Turner
Team introduction
David
Mansell
Belinda
Scarlett
Kate
Turner
9/4/20XX 2
Contents
1. Introduction to video content
2. Planning your video projects
3. Jargon buster
4. Case study: OpenShot fundamentals
5. Next steps
6. Q&A
3
Introduction-
audience insights 1
4
User insights
24 June 2020, Ofcom wrote:
• Adults spend 4 hours a
day online on average
• One in three watch online
video more than
traditional TV
• 2 in 5 make videos
themselves
Source: https://www.ofcom.org.uk/about-ofcom/latest/media/media-releases/2020/uk-internet-use-surges 5
6
Source: https://www.ofcom.org.uk/about-ofcom/latest/media/media-releases/2020/uk-internet-use-surges
Source: https://www.theguardian.com/media/2020/nov/25/ofcom-bbc-services-such-as-iplayer-an-afterthought-for-younger-audiences 7
Planning your video
projects 2
8
“There’s nothing in the world more
powerful than a good story”
What’s your story?
10
STORY •What’s your
story, and
who’s it for?
DESTINATION
• Where will
you share
your story?
• How will
you ensure
your story is
optimised
for that
platform?
FORMAT
• How will
you tell your
story?
• Vlog? How
to?
Interview?
Video content genres
Source: https://www.youtube.com/c/NationalFootballMuseum/videos 11
List videos
Themed lists,
entirely still
images & CGI
overlaid onto
audio track
How to
videos
Family friendly
craft videos,
minimal editing,
footage placed
over audio track
Interview
One or
multiple
subjects, static
shots with
cutaways
Feature
Multiple subjects
and locations,
mixed camera
work, cutaways
and CGI images
Optimising content for social media
12
Know your (length) limits: Some social platforms impose limits on video length (Twitter = 140 seconds).
Others are more likely to recommend longer videos (Youtube). It’s a good idea to speak to your
marketing team early to determine where video can enhance your online offer
Work out a great hook: The first 30 seconds of a video are the most important part. It’s useful to
communicate your message quickly before your audience moves onto another piece of content
Use subtitles & transcripts where possible: A significant amount of video is consumed without sound-
burning in subtitles can help you deliver your message. Transcripts on Youtube & Facebook can also be
used to improve accessibility & SEO
Think phone- aspect ratios & resolution: Experiment with vertical and square videos to take advantage
of an increasingly mobile centric audience. Use the aspect ration & resolution settings of your NLE to
set up content which is properly optimised for a mobile experience
Jargon buster
3
NLE: Non linear editor- a digital workspace for creating video files
OpenShot profile (project settings): The basic information of your video including: resolution and
frame rate
Video resolution (spatial resolution): The total amount of pixels in a video file, usually given as a
horizontal & vertical measurement e.g. 1920x1080 (HD video) 3840x1260 (4K Ultra HD) 7680x 4320
(8K). More pixels = more detail
Aspect ratio: The relationship between a video’s height & width. Video displayed on modern
TVs/monitors will usually be 16:9. It is common to see aspect ratios of 1:1 and 3:2 on social media
Pixel ratio: The relationship between the height and width of individual pixels in a video frame. Most
NLE’s have the option to change this. 1:1 is commonly seen in web video
Frame rate (FPS): The amount of frames contained in a single second of video. Frame rates are
determined by artistic/technical requirements
Video encoding: The process of compressing a video into a single file. A codec allows the video to be
opened and played by a device. A common web codec is h.264
15
SD
(720x576)
HD
(1280x720)
Full HD
(1920x1080)
Quad HD
(3840x2160)
Comparing resolutions
16
Youtube/Facebook/Twitter (16:9) IG TV/ Tik Tok (9:16)
Instagram/Facebook
optimised/Twitter
optimised (1:1)
Comparing aspect ratios
Using OpenShot
4
Project workflow
Setting up
With OpenShot open, choose your
desired video profile. Choose File >
Save Project As and save your project
somewhere on your computer
Import your media
Choose File > Import Files to open
your file explorer. Double click on any
video clips, images, and audio files that
you would like to include in your final
video. These will now be available in
the Project files section of the
workspace
Structure your edit
Begin dragging your content onto the
video tracks at the bottom of the
workspace. You can do this in the order
you’d like them to appear in the video.
The razor tool can be used to make cuts
to individual video clips
Add effects
Add any desired transitions, effects, and
graphic overlays. It’s a good idea to
leave one or more tracks free above
your content to give you plenty of room
Export your video
Choose File > Export project > Export
video. This will call up a dialogue box
allowing you to configure various options
on your final file. There are various presets
you can use on the Simple tab for
exporting to web destinations
9/4/20XX Presentation Title 18
Time management
19
Planning
50%
Shooting
12%
Editing
25%
Marketing
13%
Production schedule
Planning Shooting Editing Marketing
Planning & editing are generally the most time consuming
parts of a video project. The aim of good planning is to reduce
editing time- it’s worth spending time to think of everything
before you open you hit record.
Organising your media
9/4/20XX Presentation Title 20
✓

Getting to
know the
workspace
• Panels
• Tools
• Menus
21
Getting to know the workspace
Timeline tools
26
Add Track: Inserts
another track at the top
of the timeline
Next / Previous Marker:
Moves the playhead to
the nearest marker on
the timeline
Add Marker: Inserts a
marker into the project.
Useful for reference
purposes
Centre Timeline on
Playhead: Useful for
navigating big projects
Snapping Tool: Toggles
timeline snapping
Razor Tool: Used to cut
media on the timeline
Structuring the timeline- video and audio
27
A video will be displayed on the timeline at
its recorded length. If there are mistakes or
pauses, we can cut these with the Razor
tool. Be prepared to cover the cut with
additional video or images.
Structuring the timeline- images
28
Images appear on the timeline with a default duration of 10
seconds. This can be changed by left clicking the end of an
image and dragging it to the desired length. It is good to start
at a length of 5 seconds and adjust as required
The default image length can also be changed by
choosing File > Preferences > Image Length.
29
9/4/20XX Presentation Title 30
31
We can use the Separate Audio command
to allow us to independently move the
audio and video components of a video
The video and audio are now displayed on
different tracks
This means that we can add cutaways,
transitions, and effects to the video element
without altering the audio. We can also
remove the audio and replace it- useful for
voiceovers, background music etc.
Structuring advice
32
Keep your mind on your message: Stick to your main message and cut anything that doesn’t support it.
It’s useful to keep a copy of your script to hand when you’re editing
Use your B roll: Keep your edit varied with cutaways. If you don’t have additional footage, use images.
Strong visuals can often speak for themselves without vocalised explanations
Get a second opinion: Let somebody else watch your edit without commentary. Ask them if it made
sense, and what the main points were. This is a good indication on whether your video is easy to
understand of it needs more work
Applying effects and animations
34
OpenShot comes preloaded with a number
of effects that can be applied to videos and
images. These can be dragged directly onto
the timeline elements & controlled via the
properties panel
Effects in action
35
Transforming X & Y values
Inappropriately scaled X value
Proportionally scaled X & Y values
9/4/20XX Presentation Title 39
We are able to see the pixels on an image when it is scaled to a certain point. Here, the left hand
image has been scaled to around 16 times its original size. We should be careful to not apply
inappropriate transformational effects to images & footage to avoid noticeable pixilation
Animated scaling
Using keyframes
Select an element on the timeline
panel. Right click the desired property,
choose Insert Keyframe. This will allow
you to set the initial value
Navigate to the end of the element, and
repeat the process, ensuring that the
final value is different from the initial
value. OpenShot will then calculate the
range animate accordingly
Animation presets
42
Some animation can be done in the
timeline panel with the use of presets.
These presets automatically generate a
keyframed range which can then be
adjusted as required. Presets are
accessed by right clicking and then
choosing the desired effect via the
Animate menu
Titles and typography
43
Titles are available via a dedicated
button on the top toolbar. Editing and
saving one of the options will bring the
title into the project panel where it can
be dropped onto the timeline.
Titles on the timeline
44
Applying transitions
45
Timeline elements will cut together by default. This technique
is employed in countless pieces of media is often the most
effective way of doing things.
Other transitions can simply be dropped onto the timeline
overlapping two clips on the same track and adjusted as
required.
• Transitions can often be distracting, so use them with
caution
• Transitions should compliment your narrative (e.g. fades to
show the passage of time)
Exporting your video
46
Choose File > Export Project > Export
Video. A separate window will appear with
options to configure your final file. Make
sure that these options are correct for your
final destination
Next steps
5
47
Filming
Audio editing
Animation
and motion
graphics
Graphic
design
SEO & Social
media
optimisation
Editing
People &
project
management
Writing
Alternative NLEs
PC/Mac
• iMovie (Mac only) Free
• Premiere Elements $99 per licence
Mobile
• Kinemaster Free & paid options available
• Power Director Free & paid options
available
• Premiere Rush Adobe subscription
required
Download Sporting Heritage’s online resources: https://www.sportingheritage.org.uk/content/what-
we-do/projects/whats-your-digital-story/whats-your-digital-sporting-story-online-resources
Past Webinars: Film making with Si Gamble
https://www.youtube.com/watch?v=Ed_J8XCSyMQ&list=PLo4dOSLqKYaiwkQbGD2KAlk0fowsFteXv&in
dex=2
Sharing your collection online: https://www.youtube.com/watch?v=MSYGjxQeFS4
Download OpenShot: https://www.openshot.org/
Resources to look at
Call to action- your stories
Source: https://www.youtube.com/c/NationalFootballMuseum/videos 51
List videos
Themed lists,
entirely still
images & CGI
overlaid onto
audio track
How to
videos
Family friendly
craft videos,
minimal editing,
footage placed
over audio track
Interview
One or
multiple
subjects, static
shots with
cutaways
Feature
Multiple subjects
and locations,
mixed camera
work, cutaways
and CGI images
FAQs/Q&A
6
52
What style should I go for in my videos? Is it appropriate to take cues from vloggers/Youtubers?
How long does an edit take? How do I break down my time for a video project?
How do I measure success?
What’s the best way to advocate for doing more video in my organisation?
I’m a one person team, but really keen to do more video. Any advice?
Who’s doing a good job of video that I can be inspired by?
Are there any good resources available that’ll help me produce videos?

Introduction-to-video-audio-editing-ppt.

  • 1.
    Introduction to videoediting David Mansell, Belinda Scarlett, Kate Turner
  • 2.
  • 3.
    Contents 1. Introduction tovideo content 2. Planning your video projects 3. Jargon buster 4. Case study: OpenShot fundamentals 5. Next steps 6. Q&A 3
  • 4.
  • 5.
    User insights 24 June2020, Ofcom wrote: • Adults spend 4 hours a day online on average • One in three watch online video more than traditional TV • 2 in 5 make videos themselves Source: https://www.ofcom.org.uk/about-ofcom/latest/media/media-releases/2020/uk-internet-use-surges 5
  • 6.
  • 7.
  • 8.
  • 9.
    “There’s nothing inthe world more powerful than a good story” What’s your story?
  • 10.
    10 STORY •What’s your story,and who’s it for? DESTINATION • Where will you share your story? • How will you ensure your story is optimised for that platform? FORMAT • How will you tell your story? • Vlog? How to? Interview?
  • 11.
    Video content genres Source:https://www.youtube.com/c/NationalFootballMuseum/videos 11 List videos Themed lists, entirely still images & CGI overlaid onto audio track How to videos Family friendly craft videos, minimal editing, footage placed over audio track Interview One or multiple subjects, static shots with cutaways Feature Multiple subjects and locations, mixed camera work, cutaways and CGI images
  • 12.
    Optimising content forsocial media 12 Know your (length) limits: Some social platforms impose limits on video length (Twitter = 140 seconds). Others are more likely to recommend longer videos (Youtube). It’s a good idea to speak to your marketing team early to determine where video can enhance your online offer Work out a great hook: The first 30 seconds of a video are the most important part. It’s useful to communicate your message quickly before your audience moves onto another piece of content Use subtitles & transcripts where possible: A significant amount of video is consumed without sound- burning in subtitles can help you deliver your message. Transcripts on Youtube & Facebook can also be used to improve accessibility & SEO Think phone- aspect ratios & resolution: Experiment with vertical and square videos to take advantage of an increasingly mobile centric audience. Use the aspect ration & resolution settings of your NLE to set up content which is properly optimised for a mobile experience
  • 13.
  • 14.
    NLE: Non lineareditor- a digital workspace for creating video files OpenShot profile (project settings): The basic information of your video including: resolution and frame rate Video resolution (spatial resolution): The total amount of pixels in a video file, usually given as a horizontal & vertical measurement e.g. 1920x1080 (HD video) 3840x1260 (4K Ultra HD) 7680x 4320 (8K). More pixels = more detail Aspect ratio: The relationship between a video’s height & width. Video displayed on modern TVs/monitors will usually be 16:9. It is common to see aspect ratios of 1:1 and 3:2 on social media Pixel ratio: The relationship between the height and width of individual pixels in a video frame. Most NLE’s have the option to change this. 1:1 is commonly seen in web video Frame rate (FPS): The amount of frames contained in a single second of video. Frame rates are determined by artistic/technical requirements Video encoding: The process of compressing a video into a single file. A codec allows the video to be opened and played by a device. A common web codec is h.264
  • 15.
  • 16.
    16 Youtube/Facebook/Twitter (16:9) IGTV/ Tik Tok (9:16) Instagram/Facebook optimised/Twitter optimised (1:1) Comparing aspect ratios
  • 17.
  • 18.
    Project workflow Setting up WithOpenShot open, choose your desired video profile. Choose File > Save Project As and save your project somewhere on your computer Import your media Choose File > Import Files to open your file explorer. Double click on any video clips, images, and audio files that you would like to include in your final video. These will now be available in the Project files section of the workspace Structure your edit Begin dragging your content onto the video tracks at the bottom of the workspace. You can do this in the order you’d like them to appear in the video. The razor tool can be used to make cuts to individual video clips Add effects Add any desired transitions, effects, and graphic overlays. It’s a good idea to leave one or more tracks free above your content to give you plenty of room Export your video Choose File > Export project > Export video. This will call up a dialogue box allowing you to configure various options on your final file. There are various presets you can use on the Simple tab for exporting to web destinations 9/4/20XX Presentation Title 18
  • 19.
    Time management 19 Planning 50% Shooting 12% Editing 25% Marketing 13% Production schedule PlanningShooting Editing Marketing Planning & editing are generally the most time consuming parts of a video project. The aim of good planning is to reduce editing time- it’s worth spending time to think of everything before you open you hit record.
  • 20.
    Organising your media 9/4/20XXPresentation Title 20 ✓ 
  • 21.
    Getting to know the workspace •Panels • Tools • Menus 21
  • 22.
    Getting to knowthe workspace
  • 26.
    Timeline tools 26 Add Track:Inserts another track at the top of the timeline Next / Previous Marker: Moves the playhead to the nearest marker on the timeline Add Marker: Inserts a marker into the project. Useful for reference purposes Centre Timeline on Playhead: Useful for navigating big projects Snapping Tool: Toggles timeline snapping Razor Tool: Used to cut media on the timeline
  • 27.
    Structuring the timeline-video and audio 27 A video will be displayed on the timeline at its recorded length. If there are mistakes or pauses, we can cut these with the Razor tool. Be prepared to cover the cut with additional video or images.
  • 28.
    Structuring the timeline-images 28 Images appear on the timeline with a default duration of 10 seconds. This can be changed by left clicking the end of an image and dragging it to the desired length. It is good to start at a length of 5 seconds and adjust as required The default image length can also be changed by choosing File > Preferences > Image Length.
  • 29.
  • 30.
  • 31.
    31 We can usethe Separate Audio command to allow us to independently move the audio and video components of a video The video and audio are now displayed on different tracks This means that we can add cutaways, transitions, and effects to the video element without altering the audio. We can also remove the audio and replace it- useful for voiceovers, background music etc.
  • 32.
    Structuring advice 32 Keep yourmind on your message: Stick to your main message and cut anything that doesn’t support it. It’s useful to keep a copy of your script to hand when you’re editing Use your B roll: Keep your edit varied with cutaways. If you don’t have additional footage, use images. Strong visuals can often speak for themselves without vocalised explanations Get a second opinion: Let somebody else watch your edit without commentary. Ask them if it made sense, and what the main points were. This is a good indication on whether your video is easy to understand of it needs more work
  • 34.
    Applying effects andanimations 34 OpenShot comes preloaded with a number of effects that can be applied to videos and images. These can be dragged directly onto the timeline elements & controlled via the properties panel
  • 35.
  • 36.
  • 37.
  • 38.
  • 39.
    9/4/20XX Presentation Title39 We are able to see the pixels on an image when it is scaled to a certain point. Here, the left hand image has been scaled to around 16 times its original size. We should be careful to not apply inappropriate transformational effects to images & footage to avoid noticeable pixilation
  • 40.
  • 41.
    Using keyframes Select anelement on the timeline panel. Right click the desired property, choose Insert Keyframe. This will allow you to set the initial value Navigate to the end of the element, and repeat the process, ensuring that the final value is different from the initial value. OpenShot will then calculate the range animate accordingly
  • 42.
    Animation presets 42 Some animationcan be done in the timeline panel with the use of presets. These presets automatically generate a keyframed range which can then be adjusted as required. Presets are accessed by right clicking and then choosing the desired effect via the Animate menu
  • 43.
    Titles and typography 43 Titlesare available via a dedicated button on the top toolbar. Editing and saving one of the options will bring the title into the project panel where it can be dropped onto the timeline.
  • 44.
    Titles on thetimeline 44
  • 45.
    Applying transitions 45 Timeline elementswill cut together by default. This technique is employed in countless pieces of media is often the most effective way of doing things. Other transitions can simply be dropped onto the timeline overlapping two clips on the same track and adjusted as required. • Transitions can often be distracting, so use them with caution • Transitions should compliment your narrative (e.g. fades to show the passage of time)
  • 46.
    Exporting your video 46 ChooseFile > Export Project > Export Video. A separate window will appear with options to configure your final file. Make sure that these options are correct for your final destination
  • 47.
  • 48.
    Filming Audio editing Animation and motion graphics Graphic design SEO& Social media optimisation Editing People & project management Writing
  • 49.
    Alternative NLEs PC/Mac • iMovie(Mac only) Free • Premiere Elements $99 per licence Mobile • Kinemaster Free & paid options available • Power Director Free & paid options available • Premiere Rush Adobe subscription required
  • 50.
    Download Sporting Heritage’sonline resources: https://www.sportingheritage.org.uk/content/what- we-do/projects/whats-your-digital-story/whats-your-digital-sporting-story-online-resources Past Webinars: Film making with Si Gamble https://www.youtube.com/watch?v=Ed_J8XCSyMQ&list=PLo4dOSLqKYaiwkQbGD2KAlk0fowsFteXv&in dex=2 Sharing your collection online: https://www.youtube.com/watch?v=MSYGjxQeFS4 Download OpenShot: https://www.openshot.org/ Resources to look at
  • 51.
    Call to action-your stories Source: https://www.youtube.com/c/NationalFootballMuseum/videos 51 List videos Themed lists, entirely still images & CGI overlaid onto audio track How to videos Family friendly craft videos, minimal editing, footage placed over audio track Interview One or multiple subjects, static shots with cutaways Feature Multiple subjects and locations, mixed camera work, cutaways and CGI images
  • 52.
  • 53.
    What style shouldI go for in my videos? Is it appropriate to take cues from vloggers/Youtubers? How long does an edit take? How do I break down my time for a video project? How do I measure success? What’s the best way to advocate for doing more video in my organisation? I’m a one person team, but really keen to do more video. Any advice? Who’s doing a good job of video that I can be inspired by? Are there any good resources available that’ll help me produce videos?