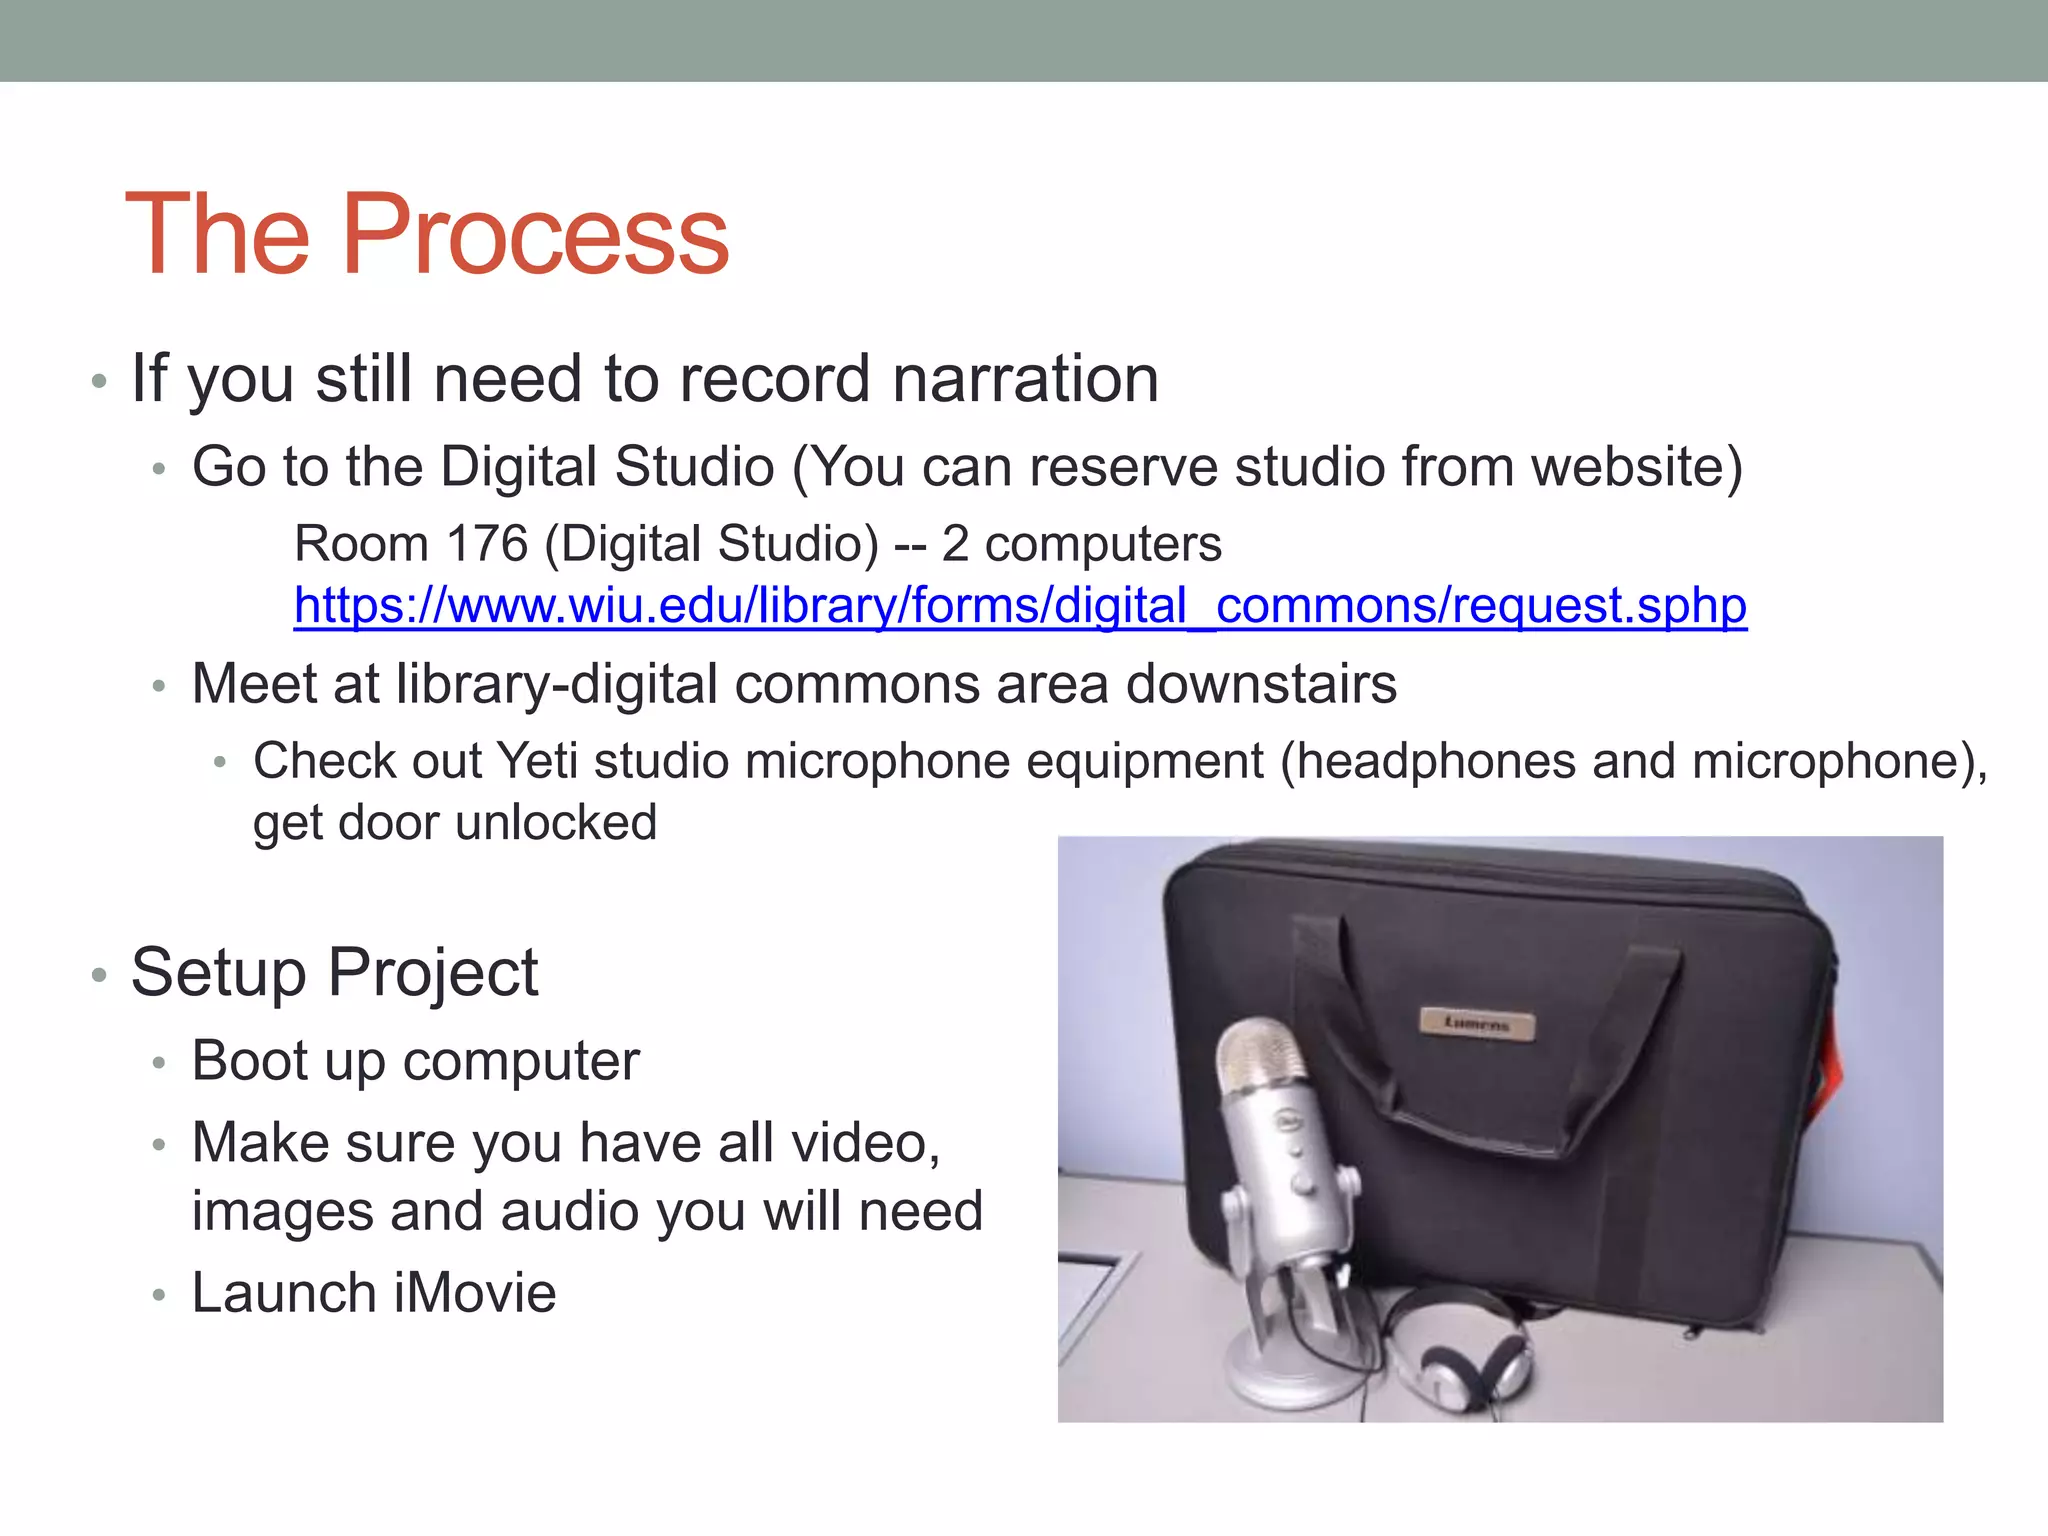
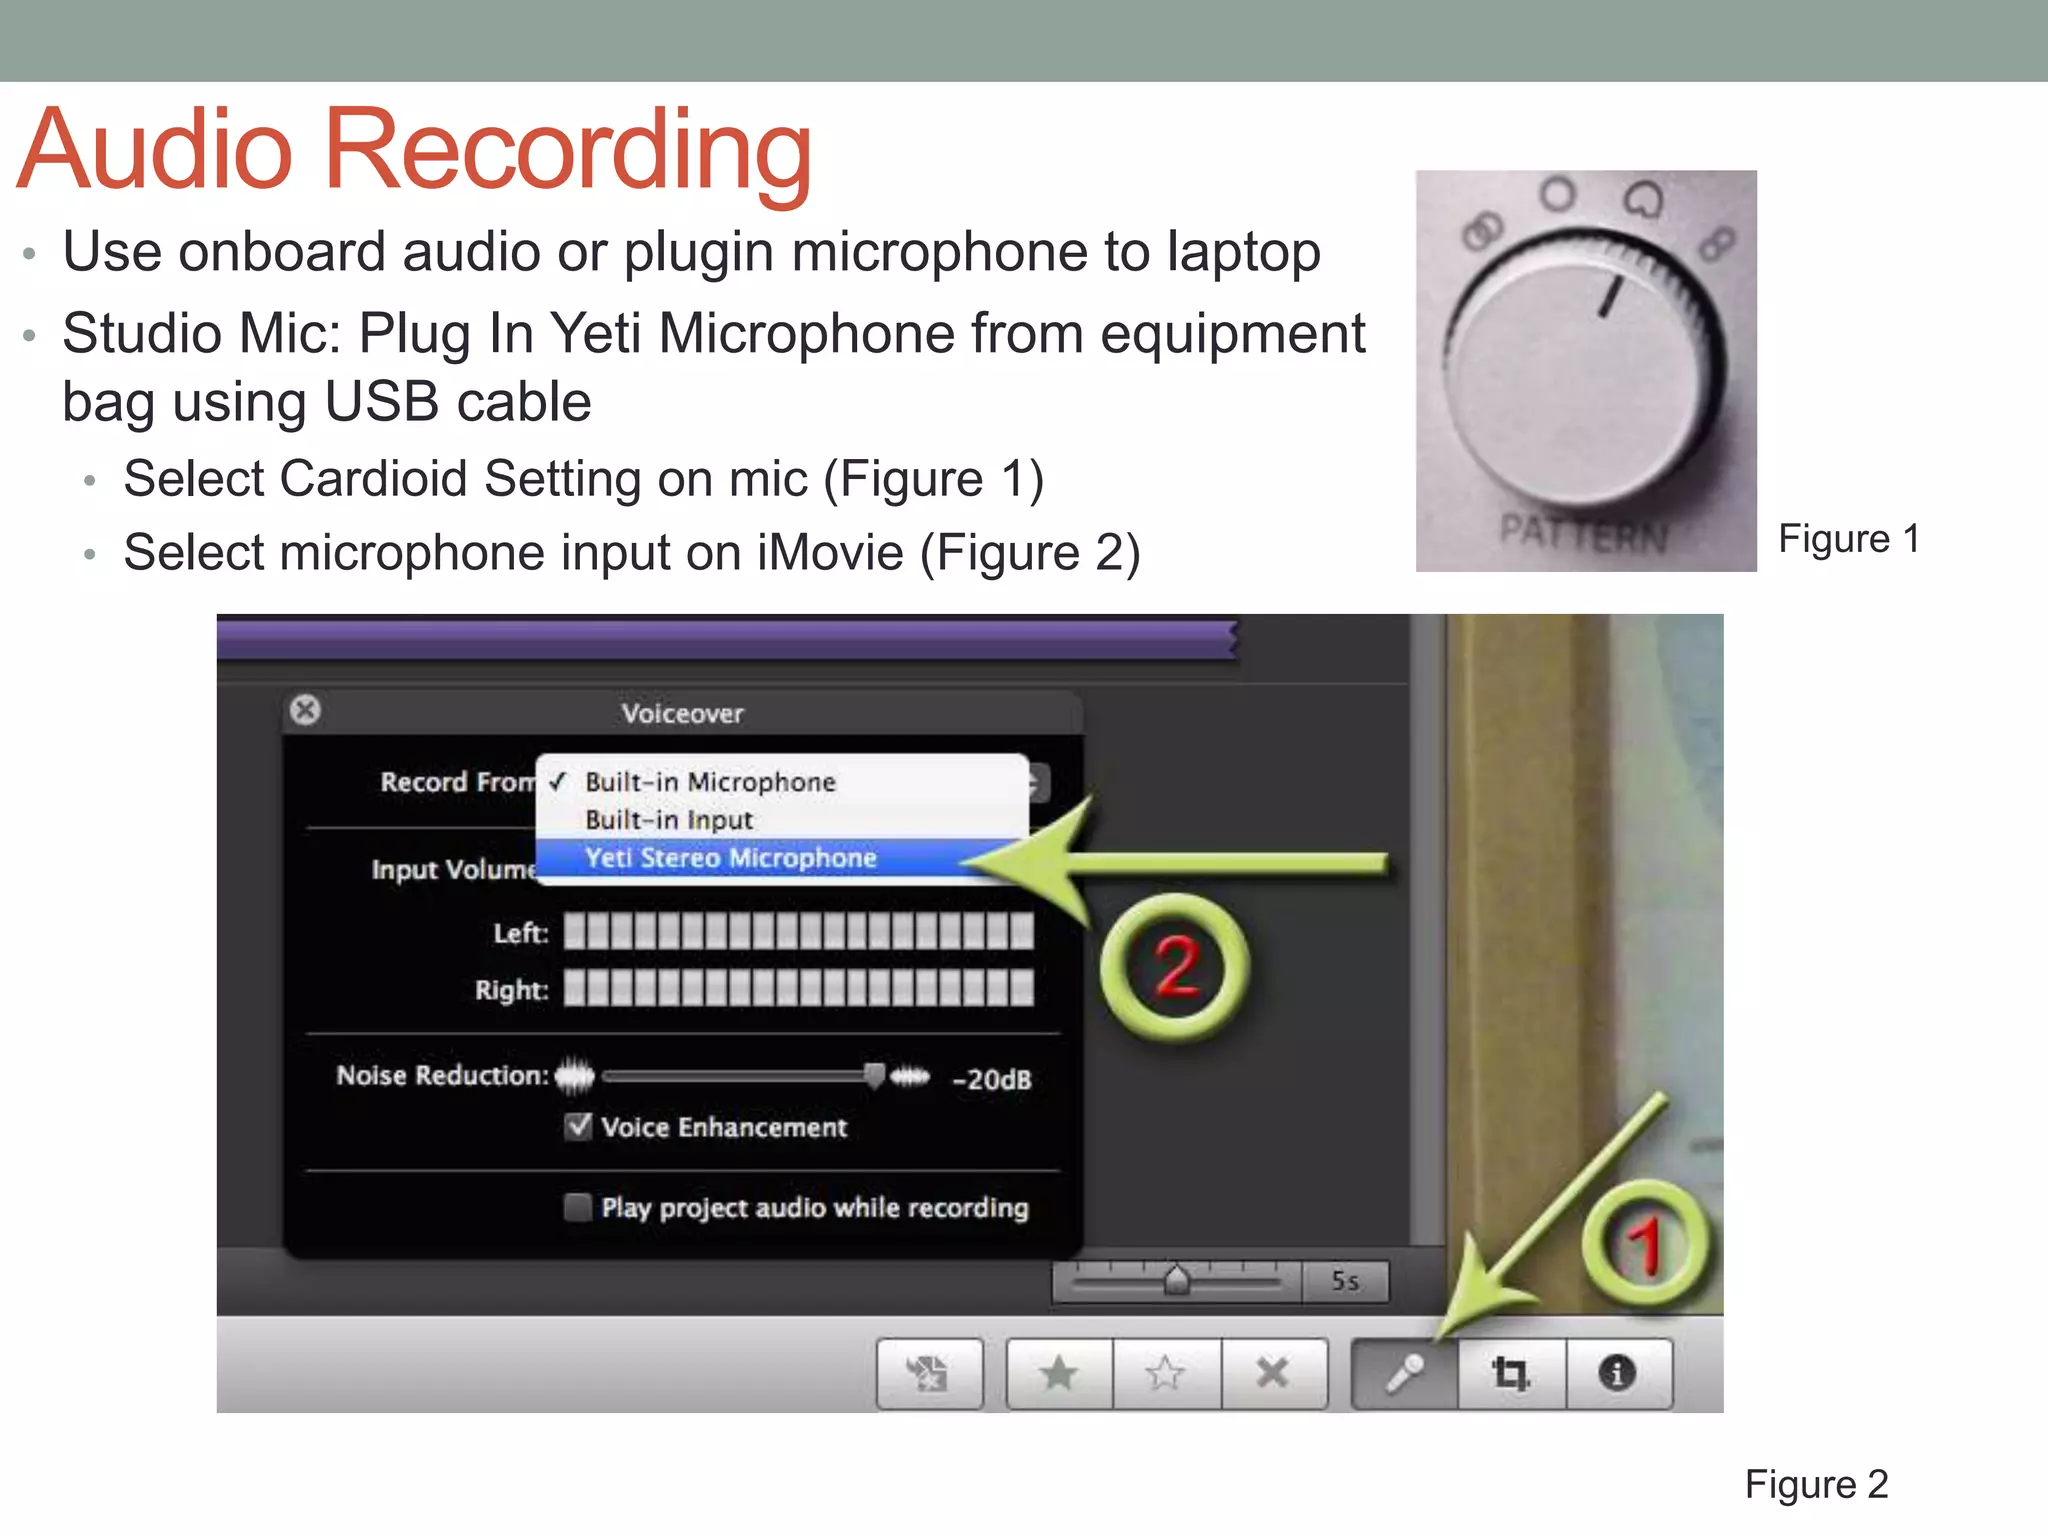
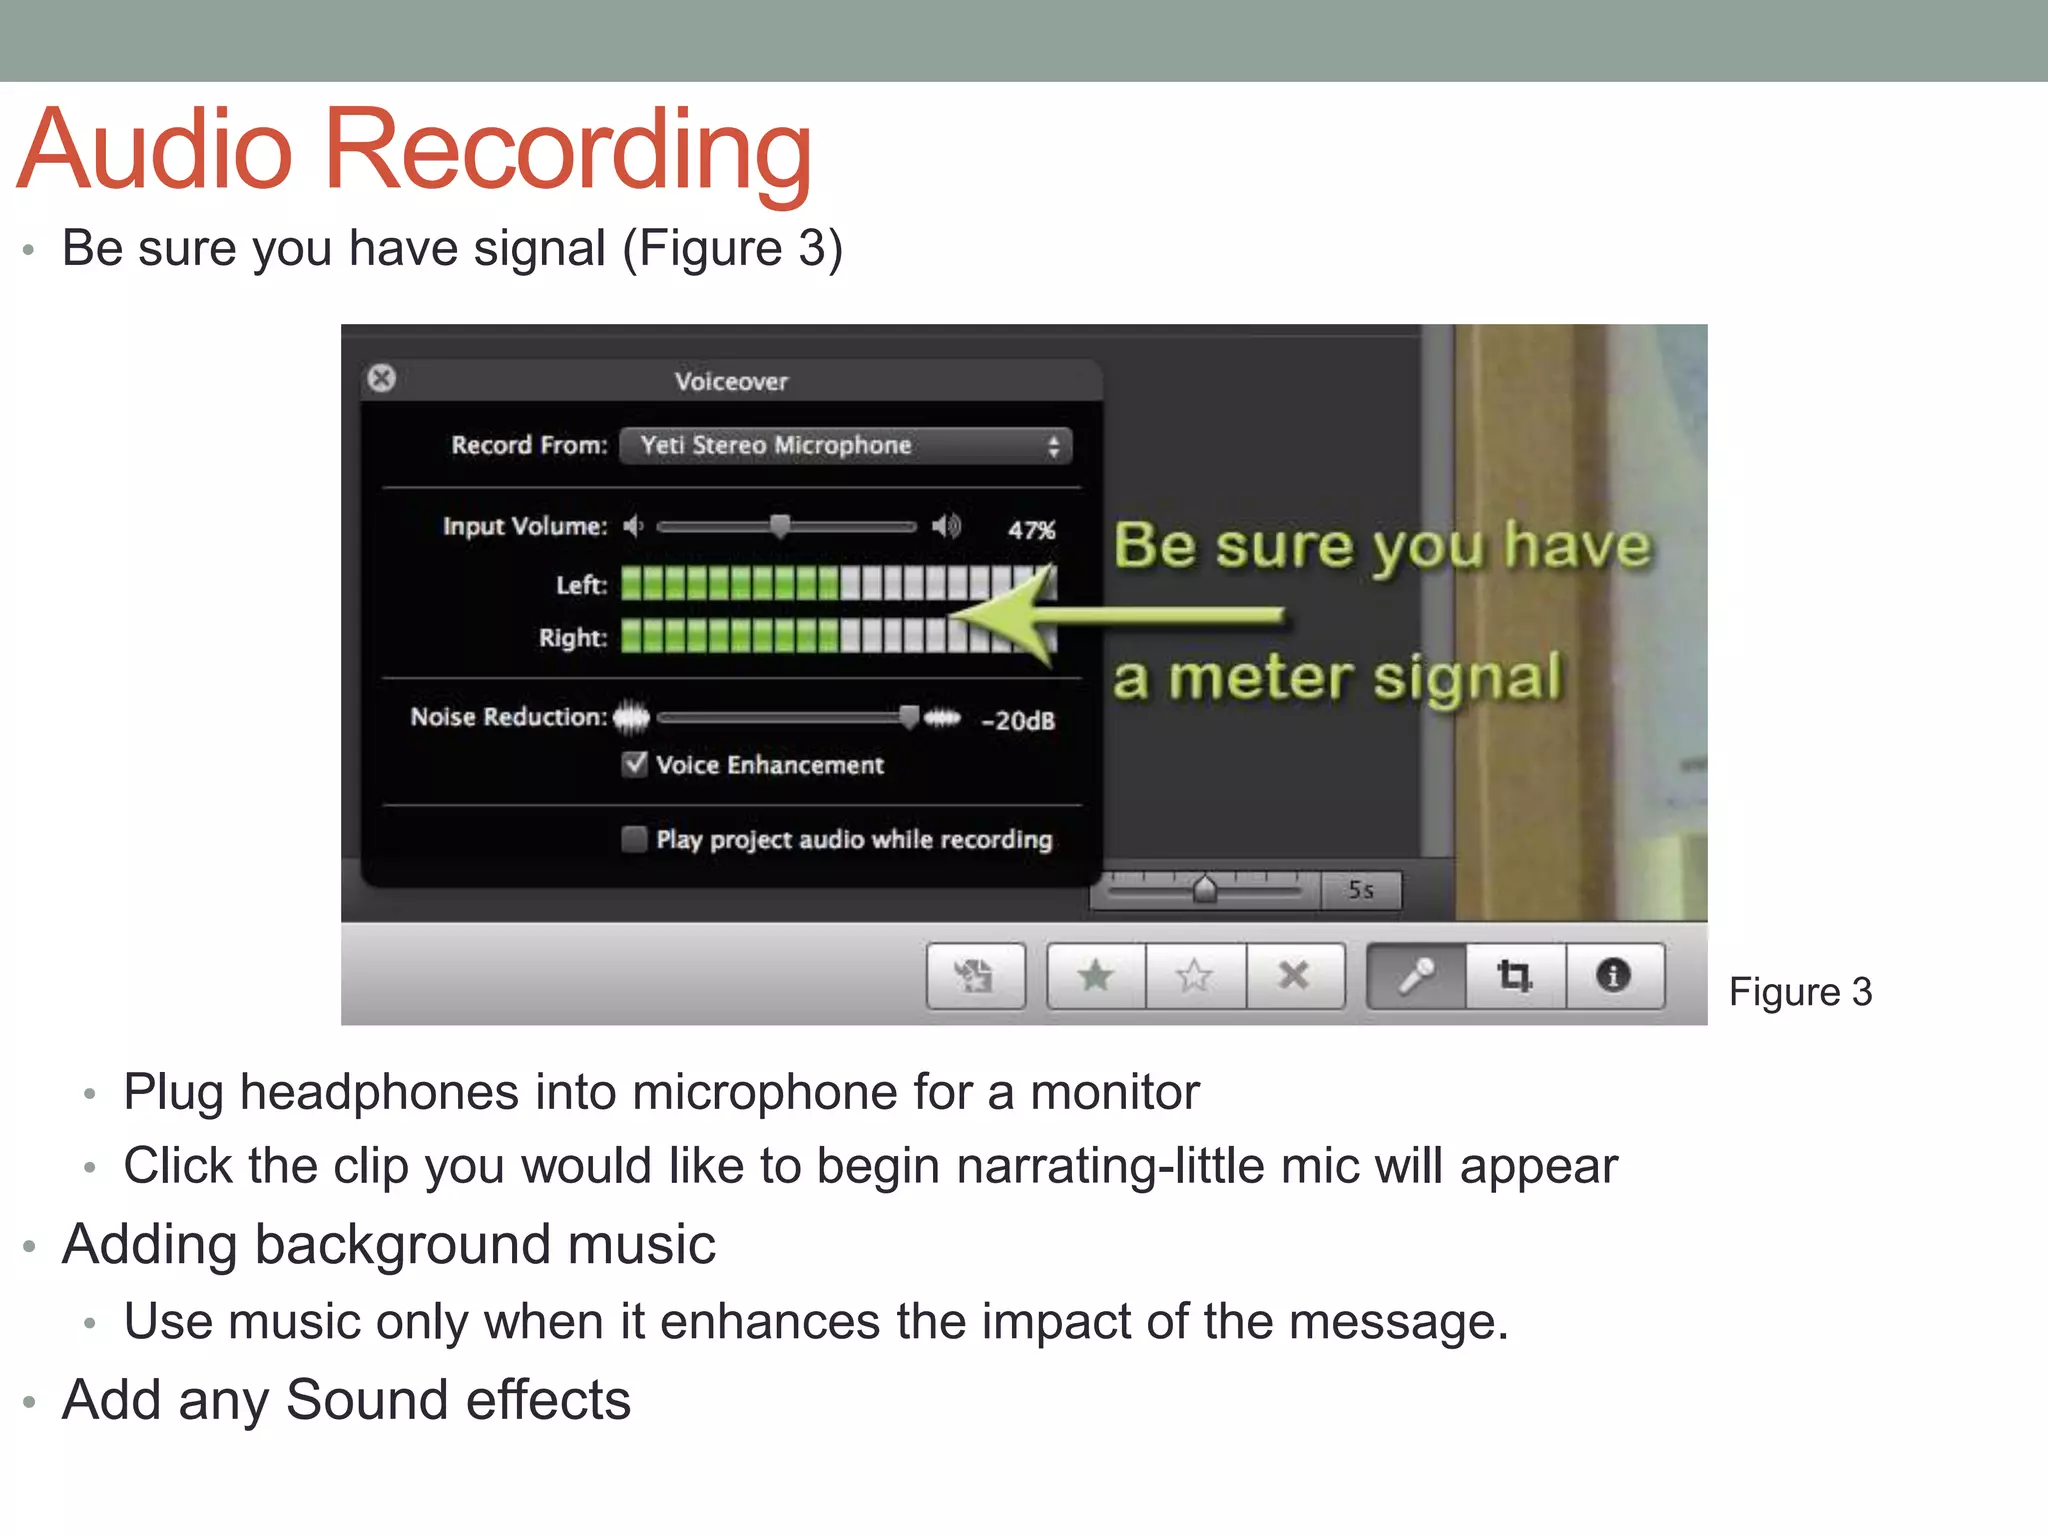
PSA VIDEO PRODUCTION
SESSION 3: POST-PRODUCTION
 Sean Cordes
 Justin Georges

 Malpass Library Instruction 2012

  http://wiu.libguides.com/psaworkshop
Purpose

1. Setting up to do post production
2. Enhancing your video with visual adjustments
3. Recording audio and adding sound effects and
   background music
4. Sharing your video
The Process
• If you still need to record narration
   • Go to the Digital Studio (You can reserve studio from website)
        Room 176 (Digital Studio) -- 2 computers
        https://www.wiu.edu/library/forms/digital_commons/request.sphp
  • Meet at library-digital commons area downstairs
    • Check out Yeti studio microphone equipment (headphones and microphone),
      get door unlocked


• Setup Project
  • Boot up computer
  • Make sure you have all video,
    images and audio you will need
  • Launch iMovie
Build and Enhance Movie
• Compile the timeline
  • Select clips from events and pull to project timeline
  • Add any images to timeline from USB or other storage area
    • Animating Still Photos-Ken Burns Effect
  • Add any background slides for titles, etc.
• Add any graphics and titles
• Add transitions between clips
• Make any audio or video clip adjustments
  • Remove camera audio from video clip
• Preview entire video
Audio Recording
• Use onboard audio or plugin microphone to laptop
• Studio Mic: Plug In Yeti Microphone from equipment
 bag using USB cable
  • Select Cardioid Setting on mic (Figure 1)
  • Select microphone input on iMovie (Figure 2)        Figure 1


                                                       Figure 2
Audio Recording
• Be sure you have signal (Figure 3)


                                                                              Figure 3

  • Plug headphones into microphone for a monitor
  • Click the clip you would like to begin narrating-little mic will appear
• Adding background music
  • Use music only when it enhances the impact of the message.
• Add any Sound effects
Sharing and Saving Your Project
• Sharing your video
  • Export video from “Share” menu-save on USB drive.
  • Login and upload to You Tube account
    • Give your video a description and tag it
    • Copy url and share video with others or embed to website.
      Click here for a helpful guide


• Save files to USB drive for later use
  • Plug USB drive into computer
  • Navigate to “Movies” folder and copy folders to project folder on USB
    drive

Introduction to making psa’s pt3

  • 1.
    PSA VIDEO PRODUCTION SESSION3: POST-PRODUCTION Sean Cordes Justin Georges Malpass Library Instruction 2012 http://wiu.libguides.com/psaworkshop
  • 2.
    Purpose 1. Setting upto do post production 2. Enhancing your video with visual adjustments 3. Recording audio and adding sound effects and background music 4. Sharing your video
  • 3.
    The Process • Ifyou still need to record narration • Go to the Digital Studio (You can reserve studio from website) Room 176 (Digital Studio) -- 2 computers https://www.wiu.edu/library/forms/digital_commons/request.sphp • Meet at library-digital commons area downstairs • Check out Yeti studio microphone equipment (headphones and microphone), get door unlocked • Setup Project • Boot up computer • Make sure you have all video, images and audio you will need • Launch iMovie
  • 4.
    Build and EnhanceMovie • Compile the timeline • Select clips from events and pull to project timeline • Add any images to timeline from USB or other storage area • Animating Still Photos-Ken Burns Effect • Add any background slides for titles, etc. • Add any graphics and titles • Add transitions between clips • Make any audio or video clip adjustments • Remove camera audio from video clip • Preview entire video
  • 5.
    Audio Recording • Useonboard audio or plugin microphone to laptop • Studio Mic: Plug In Yeti Microphone from equipment bag using USB cable • Select Cardioid Setting on mic (Figure 1) • Select microphone input on iMovie (Figure 2) Figure 1 Figure 2
  • 6.
    Audio Recording • Besure you have signal (Figure 3) Figure 3 • Plug headphones into microphone for a monitor • Click the clip you would like to begin narrating-little mic will appear • Adding background music • Use music only when it enhances the impact of the message. • Add any Sound effects
  • 7.
    Sharing and SavingYour Project • Sharing your video • Export video from “Share” menu-save on USB drive. • Login and upload to You Tube account • Give your video a description and tag it • Copy url and share video with others or embed to website. Click here for a helpful guide • Save files to USB drive for later use • Plug USB drive into computer • Navigate to “Movies” folder and copy folders to project folder on USB drive