Downloaded 33 times
![Official boards
Arduino RS232[39]
(male pins)
Arduino Diecimila Arduino Duemilanove[41]
(rev 2009b)
Arduino Uno R2 Arduino Uno SMD R3](https://image.slidesharecdn.com/introductiontoarduino-221210154813-68d11f67/85/Introduction-to-Arduino-pptx-6-320.jpg)

![Libraries
• The open-source nature of the Arduino project has facilitated
the publication of many free software libraries that other
developers use to augment their projects.
Operating systems/threading
• There is a Xinu OS port for the atmega328p (Arduino Uno and
others with the same chip), which includes most of the basic
features.[75] The source code of this version is freely
available.[76]
• There is also a threading tool, named Protothreads.
Protothreads are described as "extremely lightweight stackless
threads designed for severely memory constrained systems,
such as small embedded systems or wireless sensor network
nodes](https://image.slidesharecdn.com/introductiontoarduino-221210154813-68d11f67/85/Introduction-to-Arduino-pptx-12-320.jpg)

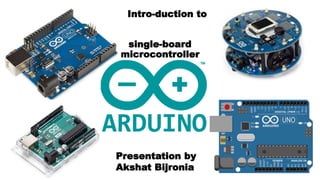
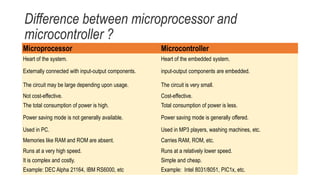
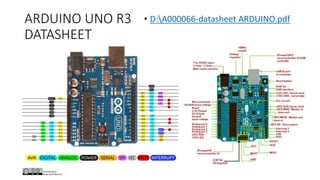
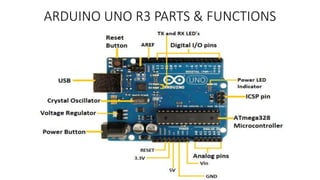
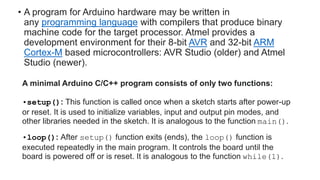
The document provides an overview of the Arduino platform, which is an open-source hardware and software community that designs single-board microcontrollers for building digital devices. It discusses the programming languages supported, differentiates between microprocessors and microcontrollers, and explains fundamental concepts in programming Arduino, including example code for a basic 'blink' program. Additionally, it highlights applications and tools related to Arduino, such as libraries, operating systems, and simulation platforms.