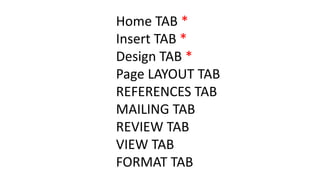
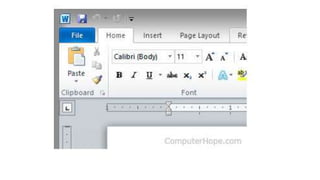
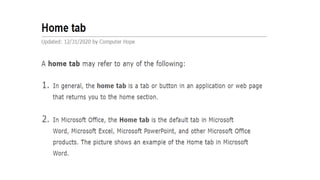
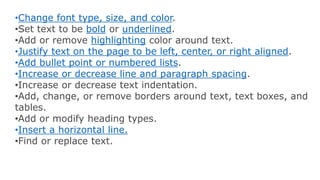
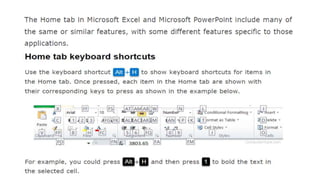
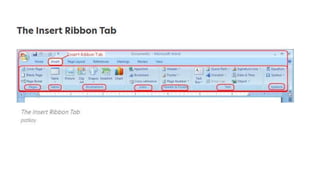
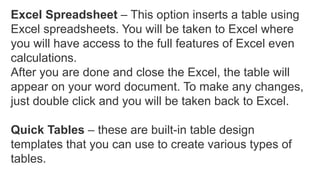
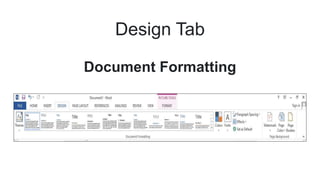
Different Tabs in Microsoft
Word
Home TAB *
Insert TAB *
Design TAB *
Page LAYOUT TAB
REFERENCES TAB
MAILING TAB
REVIEW TAB
VIEW TAB
FORMAT TAB
•Change font type, size, and color.
•Set text to be bold or underlined.
•Add or remove highlighting color around text.
•Justify text on the page to be left, center, or right aligned.
•Add bullet point or numbered lists.
•Increase or decrease line and paragraph spacing.
•Increase or decrease text indentation.
•Add, change, or remove borders around text, text boxes, and
tables.
•Add or modify heading types.
•Insert a horizontal line.
•Find or replace text.
Cover Page – Under the pages group, you will be able to insert or
remove a cover page where you will add the title, author, date, and
other information.
Blank Page – This option will help you to insert a new blank page at
the cursor position. Click on where you want your blank page to
appear and click on the blank page command.
Page Break – This command creates a new page at the current
position (you can also use the shortcut keys Ctrl + Enter). This is
the best way to create another page rather than using the return
(enter) key several times.
Tables Group of Microsoft Office Word 2007
Tables – Use this command to insert a table into your
document. You have 5 ways of coming up with a table
using this option. Click on the drop-down button and
select the option you want to use.
Select Boxes – Select the boxes that correspond to the
size of your table in terms of rows and columns.
Insert Table – Using this option, you will be able to insert
a table automatically by defining how many rows and
columns you want.
Draw Table – This option lets you draw a
customized table outline first before dividing it into
rows and columns that you want.
Convert Text To Table – You can convert text to
a table using this command. Highlight the text you
want to convert to a table and click on convert
text to table. You will have to set the columns you
want and what you want to use to separate your
text.
Excel Spreadsheet – This option inserts a table using
Excel spreadsheets. You will be taken to Excel where
you will have access to the full features of Excel even
calculations.
After you are done and close the Excel, the table will
appear on your word document. To make any changes,
just double click and you will be taken back to Excel.
Quick Tables – these are built-in table design
templates that you can use to create various types of
tables.
Creating Tables in Word 2007
Illustrations Group
This command will help you insert pictures, clip arts, shapes, smart
art, and charts into your document.
Links Group
Hyperlink – Use this option to create a link to a web page, a
picture, an e-mail address, or another program.
Bookmark – Bookmark helps to assign a name to a specific point
in a document.
Cross-reference – This option will help you to insert a link that will
refer to items such as headings, figures, and tables.
The Header and Footer Group
Header – A header is a text that appears at the very top of
your page. Sometimes it can be repeated on all pages of
the document. Using the header option, you will be able to
set up, edit, or even remove a header.
Footer – This option will help you to set a footer on
your page. The footer appears at the bottom of the
page.
Design Tab
Document Formatting
Themes - Drop-Down. The drop-down contains the commands:
Built-in, More Themes on Microsoft Office Online, Browse for
Themes and Save Current Theme. The built-in themes are: Office,
Apex, Aspect, Civic, Concourse, Equity, Flow, Foundry, Median,
Metro, Module, Opulent, Oriel, Origin, Paper, Solstice, Technic,
Trek, Urban and Verve. Tooltip indicates the current theme. The
default theme is "Office". Tooltip indicates the current theme. Quick
Access to more themes saved down on Microsoft Office Online.
Default theme is "Office". Changes the overall design of the entire
document inc colours, fonts and effects. This drop-down has an
additional command not found in Excel or PowerPoint which is
"Reset to Theme from Template".
Style Set - Change the look of your document
by choosing a new style set. Style sets change
the font and paragraph properties of your entire
document.
Colors - Drop-Down. Displays a list of all the
available colors and lets you change the color
component of the active theme.
Fonts - Drop-Down. Displays a list of all the
available fonts and lets you change the font
component of the active theme.
Paragraph Spacing - Drop-Down. Quickly change the line
and paragraph spacing in your document. The drop-down
contains the commands: No Paragraph Space, Compact,
Tight, Open, Relaxed, Double, Custom Paragraph Spacing.
Effects - Drop-Down. Displays a list of all the available effects
and lets you change the effect component of the active theme.
The drop-down contains the commands: Office, Apex, Aspect,
Civic, Concourse, Equity, Flow, Foundry, Median, Metro,
Module, Opulent, Oriel, Origin, Paper, Solstice, Technic, Trek,
Urban and Verve.
Set As Default - Use the current look for all new documents.
Watermark - Drop-Down. The drop-down contains
the commands: Custom Watermark, Remove
Watermark and Save Selection to Watermark Gallery.
Page Color - Drop-Down. Lets you change the
background colour of the page. Displays the full
theme colour palette.
Page Borders - Displays the "Border and Shading"
dialog box.
END

icf ppt.pptx

  • 3.
    Different Tabs inMicrosoft Word
  • 4.
    Home TAB * InsertTAB * Design TAB * Page LAYOUT TAB REFERENCES TAB MAILING TAB REVIEW TAB VIEW TAB FORMAT TAB
  • 8.
    •Change font type,size, and color. •Set text to be bold or underlined. •Add or remove highlighting color around text. •Justify text on the page to be left, center, or right aligned. •Add bullet point or numbered lists. •Increase or decrease line and paragraph spacing. •Increase or decrease text indentation. •Add, change, or remove borders around text, text boxes, and tables. •Add or modify heading types. •Insert a horizontal line. •Find or replace text.
  • 12.
    Cover Page –Under the pages group, you will be able to insert or remove a cover page where you will add the title, author, date, and other information. Blank Page – This option will help you to insert a new blank page at the cursor position. Click on where you want your blank page to appear and click on the blank page command. Page Break – This command creates a new page at the current position (you can also use the shortcut keys Ctrl + Enter). This is the best way to create another page rather than using the return (enter) key several times.
  • 13.
    Tables Group ofMicrosoft Office Word 2007 Tables – Use this command to insert a table into your document. You have 5 ways of coming up with a table using this option. Click on the drop-down button and select the option you want to use. Select Boxes – Select the boxes that correspond to the size of your table in terms of rows and columns. Insert Table – Using this option, you will be able to insert a table automatically by defining how many rows and columns you want.
  • 14.
    Draw Table –This option lets you draw a customized table outline first before dividing it into rows and columns that you want. Convert Text To Table – You can convert text to a table using this command. Highlight the text you want to convert to a table and click on convert text to table. You will have to set the columns you want and what you want to use to separate your text.
  • 15.
    Excel Spreadsheet –This option inserts a table using Excel spreadsheets. You will be taken to Excel where you will have access to the full features of Excel even calculations. After you are done and close the Excel, the table will appear on your word document. To make any changes, just double click and you will be taken back to Excel. Quick Tables – these are built-in table design templates that you can use to create various types of tables.
  • 16.
  • 17.
    Illustrations Group This commandwill help you insert pictures, clip arts, shapes, smart art, and charts into your document. Links Group Hyperlink – Use this option to create a link to a web page, a picture, an e-mail address, or another program. Bookmark – Bookmark helps to assign a name to a specific point in a document. Cross-reference – This option will help you to insert a link that will refer to items such as headings, figures, and tables.
  • 18.
    The Header andFooter Group Header – A header is a text that appears at the very top of your page. Sometimes it can be repeated on all pages of the document. Using the header option, you will be able to set up, edit, or even remove a header. Footer – This option will help you to set a footer on your page. The footer appears at the bottom of the page.
  • 19.
  • 20.
    Themes - Drop-Down.The drop-down contains the commands: Built-in, More Themes on Microsoft Office Online, Browse for Themes and Save Current Theme. The built-in themes are: Office, Apex, Aspect, Civic, Concourse, Equity, Flow, Foundry, Median, Metro, Module, Opulent, Oriel, Origin, Paper, Solstice, Technic, Trek, Urban and Verve. Tooltip indicates the current theme. The default theme is "Office". Tooltip indicates the current theme. Quick Access to more themes saved down on Microsoft Office Online. Default theme is "Office". Changes the overall design of the entire document inc colours, fonts and effects. This drop-down has an additional command not found in Excel or PowerPoint which is "Reset to Theme from Template".
  • 21.
    Style Set -Change the look of your document by choosing a new style set. Style sets change the font and paragraph properties of your entire document. Colors - Drop-Down. Displays a list of all the available colors and lets you change the color component of the active theme. Fonts - Drop-Down. Displays a list of all the available fonts and lets you change the font component of the active theme.
  • 22.
    Paragraph Spacing -Drop-Down. Quickly change the line and paragraph spacing in your document. The drop-down contains the commands: No Paragraph Space, Compact, Tight, Open, Relaxed, Double, Custom Paragraph Spacing. Effects - Drop-Down. Displays a list of all the available effects and lets you change the effect component of the active theme. The drop-down contains the commands: Office, Apex, Aspect, Civic, Concourse, Equity, Flow, Foundry, Median, Metro, Module, Opulent, Oriel, Origin, Paper, Solstice, Technic, Trek, Urban and Verve. Set As Default - Use the current look for all new documents.
  • 24.
    Watermark - Drop-Down.The drop-down contains the commands: Custom Watermark, Remove Watermark and Save Selection to Watermark Gallery. Page Color - Drop-Down. Lets you change the background colour of the page. Displays the full theme colour palette. Page Borders - Displays the "Border and Shading" dialog box.
  • 25.