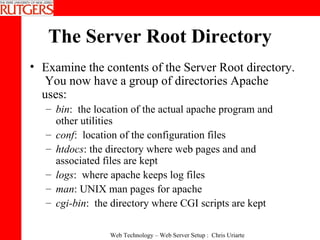
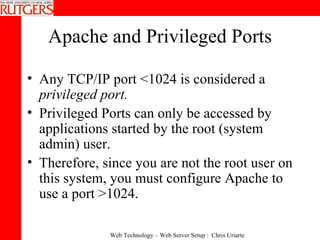
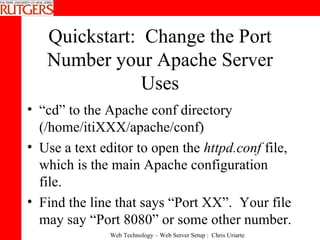
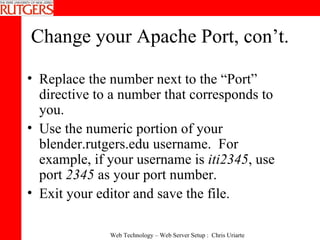
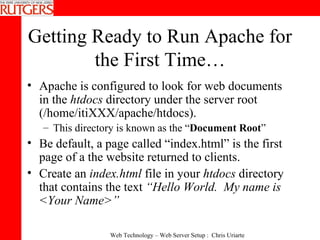
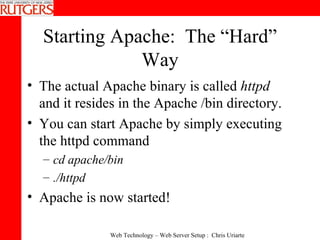
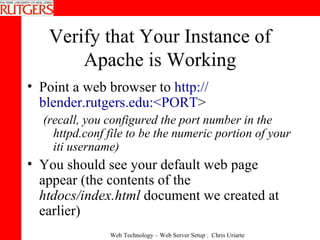
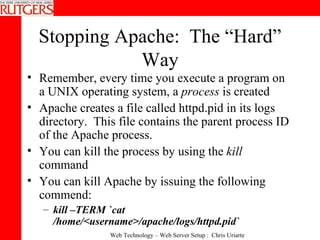
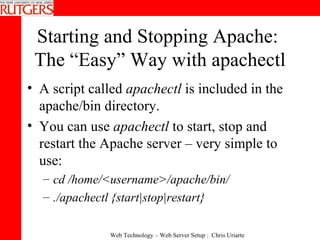
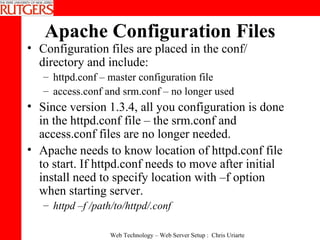
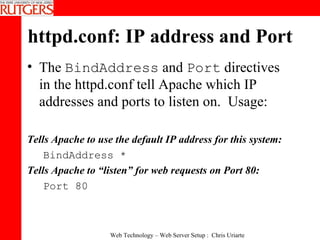
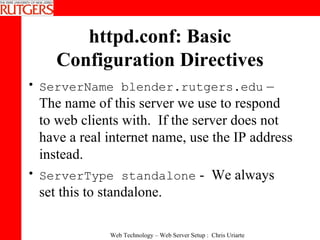
WMB-520:  Web Technology Web Server Setup Meeting 2: Apache Installation and Initial Configuration Rutgers University Center for Applied Computing Technology Instructor:  Chris Uriarte
Apache The world’s leading web server software (powers 65% of all web sites in the world) Runs on UNIX and Windows platforms.  UNIX version is the most stable and most widely used. Configuration is the same on all UNIX platforms, varies slightly on Windows systems.
How Do I Get Apache? There are currently two supported releases of Apache:  v1.3 and v2.0.  Version 1.3 is the most widely used (95% of all Apache installation), but version 2.0 will become more popular over the next 12-18 months.  There are many subversions released throughout the lifetime of a major version (i.e. 1.3.10)  You can download it from the Apache Website:  http://www.apache.org/dist/   Binary Versions – software that is ready-to-use for your specific operating system platform Source Code – the computer code used to build Apache.  You must use a  compiler  to build the code. You can buy a Unix distribution that comes bundled with Apache pre-built (most Linux distributions include Apache by default).
Installing Apache from Source Allows you to build the Apache binaries from scratch. Optimizes Apache for the platform on which it will run.  Allows you to specify special server features at build-time. You need a C compiler (i.e. gcc) installed on your system to compile source code, which is included in most UNIX distributions.
Apache Modules Apache has a  modular  structure.  Only a core set of features exists within the main Apache executable.  Apache Modules  provide additional functionalityto Apache. Example Module:  mod_speling :  The Speling module attempts to correct misspellings of URLs that users might have entered, namely by checking capitalization or by allowing up to one misspelling (character insertion, omission, transposition, typo).
Apache: Static vs. Dynamic Servers Static Servers  Must decide at build time what modules to include. Recompiling will be necessary to add modules later.  Dynamic Servers  Allows you to utilize new modules without re-compiling apache.
Static vs. Dynamic Apache Building a static (standard) Apache distribution limits you to the modules you choose when you compile the server. However, using Apache with dynamic modules makes apache more difficult to administer, perform slower and increases its memory requirements.  Consider building a static server, as the need to add new modules is not very common and re-compiling Apache is simple.
Installing Apache Source Create a directory under your blender.rutgers.edu home directory called “apache” mkdir apache You now need to obtain the Apache source file (which you’d usually do from  http://www.apache.org/dist ).  You can copy the source that is contained locally on the blender.rutgers.edu server: cd apache cp ~chrisjur/apache_1.3.27.tar.gz  . You should now have the Apache source file under your home directory in /home/<username>/apache.
Unzipping and Untar’ing the Source File You now have the Apache source distribution under your home directory in /home/<username>/apache. The source file is actually a group of tar’ed files and directories, which is then zipped using the gzip utility. You can untar and unzip the source distribution by issuing: tar –xvzf apache_1.3.27.tar.gz
Unzipping and Untar’ing the Source File – con’t. Unpacking the distribution file will create another directory under /home/<username>/apache called “apache_1.3.27” (/home/<username>/apache/apache_1.3.27). “ cd” to the apache_1.3.27 to view the files and directories that are included in the distribution.
Sample Directory Listing from Source Distribution iti% cd apache_1.3.27 iti% ls ABOUT_APACHE  LICENSE  README.NT  conf  htdocs Announcement  Makefile  README.configure  config.layout  icons INSTALL  Makefile.tmpl  WARNING-NT.TXT  config.status  logs KEYS  README  cgi-bin  configure  src iti% ls -al total 272 drwx------  8 chrisjur users  4096 Oct 15 20:21 . drwx------  13 chrisjur users  4096 Oct 15 21:10 .. -rw-------  1 chrisjur users  12957 Mar 31  1999 ABOUT_APACHE -rw-------  1 chrisjur users  2922 Feb 23  2000 Announcement -rw-------  1 chrisjur users  27964 Dec 21  1999 INSTALL -rw-------  1 chrisjur users  35773 Aug 20  1999 KEYS -rw-------  1 chrisjur users  2848 Jan  1  1999 LICENSE -rw-------  1 chrisjur users  26929 Oct 15 20:20 Makefile -rw-------  1 chrisjur users  26758 Jan 11  2000 Makefile.tmpl -rw-------  1 chrisjur users  2046 Apr  1  1998 README -rw-------  1 chrisjur users  3132 Mar 19  1999 README.NT -rw-------  1 chrisjur users  11176 Dec 20  1999 README.configure -rw-------  1 chrisjur users  331 Sep 21  1998 WARNING-NT.TXT drwx------  2 chrisjur users  4096 Feb 23  2000 cgi-bin drwx------  2 chrisjur users  4096 Feb 23  2000 conf -rw-------  1 chrisjur users  5909 Dec 28  1999 config.layout -rwx--x--x  1 chrisjur users  312 Oct 15 20:20 config.status -rwx------  1 chrisjur users  56062 Feb  5  2000 configure drwx------  3 chrisjur users  4096 Feb 23  2000 htdocs drwx------  3 chrisjur users  4096 Feb 23  2000 icons drwx------  2 chrisjur users  4096 Feb 23  2000 logs drwx------  11 chrisjur users  4096 Oct 15 20:21 src
Apache Installation:  Step 1 Before actually building the Apache binaries, you must run a  configure  utility, which inspects your system and prepares the distribution for compiling.  The configure script is located in the directory that was created when you unpacked the Apache source distribution (i.e. /home/itiXXX/apache/apache_1.3.27) The included  INSTALL  file has instructions on how to configure and compile Apache.
Apache Installation:  Step 1 con’t. Run the configure script like this: ./configure --prefix=/home/itiXXX/apache The “prefix” flag tells Apache where you actually want to install the software and configuration files.  It also builds the Apache software so it knows where to look for configuration files
Apache Installation:  Step 2 After the  configure  script runs successfully, you now need to compile the software code into the actual binaries. You can start the compile by issuing the  make  command in the Apache distribution directory, i.e: cd /home/itiXXX/apache/apache_1.3.27 make The compile process will take 2-10 minutes, depending on the speed of your system.
Apache Installation:  Step 3 When the compile is complete, you can install the software and configuration files by issuing the  make install  command. This will copy the built binaries and configuration files into the /home/<username>/apache directory you specified when you ran the configuration script.  We will now refer to this directory as the  Server Root  directory.
The Server Root Directory Examine the contents of the Server Root directory.  You now have a group of directories Apache uses:  bin :  the location of the actual apache program and other utilities  conf :  location of the configuration files  htdocs : the directory where web pages and and associated files are kept logs :  where apache keeps log files man : UNIX man pages for apache cgi-bin :  the directory where CGI scripts are kept
Apache and Privileged Ports Any TCP/IP port <1024 is considered a  privileged port. Privileged Ports can only be accessed by applications started by the root (system admin) user. Therefore, since you are not the root user on this system, you must configure Apache to use a port >1024.
Quickstart:  Change the Port Number your Apache Server Uses “ cd” to the Apache conf directory (/home/itiXXX/apache/conf) Use a text editor to open the  httpd.conf  file, which is the main Apache configuration file. Find the line that says “Port XX”.  Your file may say “Port 8080” or some other number.
Change your Apache Port, con’t. Replace the number next to the “Port” directive to a number that corresponds to you. Use the numeric portion of your blender.rutgers.edu username.  For example, if your username is  iti2345 , use port  2345  as your port number.  Exit your editor and save the file.
Getting Ready to Run Apache for the First Time… Apache is configured to look for web documents in the  htdocs  directory under the server root (/home/itiXXX/apache/htdocs). This directory is known as the “ Document Root ” Be default, a page called “index.html” is the first page of a the website returned to clients.  Create an  index.html  file in your  htdocs  directory that contains the text  “Hello World.  My name is <Your Name>”
Starting Apache:  The “Hard” Way The actual Apache binary is called  httpd  and it resides in the Apache /bin directory. You can start Apache by simply executing the httpd command  cd apache/bin ./httpd Apache is now started!
Verify that Your Instance of Apache is Working Point a web browser to  http:// blender.rutgers.edu :<PORT > (recall, you configured the port number in the httpd.conf file to be the numeric portion of your iti username) You should see your default web page appear (the contents of the  htdocs/index.html  document we created at earlier)
Stopping Apache:  The “Hard” Way Remember, every time you execute a program on a UNIX operating system, a  process  is created Apache creates a file called httpd.pid in its logs directory.  This file contains the parent process ID of the Apache process. You can kill the process by using the  kill  command You can kill Apache by issuing the following commend: kill –TERM `cat /home/<username>/apache/logs/httpd.pid`
Starting and Stopping Apache:  The “Easy” Way with apachectl A script called  apachectl  is included in the apache/bin directory. You can use  apachectl  to start, stop and restart the Apache server – very simple to use: cd /home/<username>/apache/bin/ ./apachectl {start|stop|restart}
Apache Configuration Files Configuration files are placed in the conf/ directory and include:  httpd.conf – master configuration file  access.conf and srm.conf – no longer used Since version 1.3.4, all you configuration is done in the httpd.conf file – the srm.conf and access.conf files are no longer needed. Apache needs to know location of httpd.conf file to start. If httpd.conf needs to move after initial install need to specify location with –f option when starting server. httpd –f /path/to/httpd/.conf
httpd.conf: IP address and Port The  BindAddress  and  Port  directives in the httpd.conf tell Apache which IP addresses and ports to listen on.  Usage: Tells Apache to use the default IP address for this system: BindAddress *  Tells Apache to “listen” for web requests on Port 80: Port 80
Tell Apache to Listen To  Additional  Ports and IP addresses The Listen directive in the httpd.conf tells Apache to listen to additional Ports and/or Port/IP address combinations. Usage: Listen <Port Number>  or Listen <IP>:<Port Number> These IP/Ports are used in addition to the IP and Port specified in the BindAddress and Port directive described earlier.
httpd.conf: Basic Configuration Directives ServerName blender.rutgers.edu  – The name of this server we use to respond to web clients with.  If the server does not have a real internet name, use the IP address instead.  ServerType standalone  -  We always set this to standalone.
httpd.conf:  Basic Configuration Directives User nobody, Group nobody  - For security reasons, we usually run Apache assumes the identity of a non-root user and group on the system.  A lot of times we run Apache as the nobody user/group. ServerAdmin itiXXX@blender.rutgers.edu  - A contact address to report problems – returned to the web client when an error occurs.
httpd.conf: Basic Configuration  ServerRoot /home/<username>/apache  - Where Apache keeps all its essential files. DocumentRoot /usr/local/apache/htdocs   - Where the actual Web pages reside.  ErrorLog /home/<username>/apache/logs/error_log  – The location of the Apache error log  PidFile /home/<username>/apache/logs/httpd.pid  -Process id for the Apache parent process. Used with the kill command to stop Apache.
httpd.conf: Virtual Directories Sometime you want to create a  Virtual Directory , where a document directory may not exist under your  htdocs  directory, but you want web clients to have access to it. This is configured using the Alias directive in the httpd.conf, usage: Alias <virtualdirectory> <real directory>
Virtual Directories, con’t. For example, if your Document Root is the default htdocs directory and you want web client to access a directory that contains Icons (/home/<username>/apache/icons), you can create a Virtual Virtual Directory called myicons like this: Alias /myicons /home/<username>/apache/icons Now web clients can access this virtual directory by going to  http:// blender.rutgers.edu:XXXX/myicons  to view the files in the icons directory.
httpd.conf:  Redirects The Redirect directive allows web clients to access a URL on your system and be re-directed to a remote URL somewhere else. Usage:  Redirect /localpath  http://remote-url Example:  Redirect /photos http://members.yahoo.com/user/photos Redirects all request to  http://yoursite.com/photos  to  http://members.yahoo.com/user/photos Useful when you move portions of a webpage
Giving Web Access to Users on the System Individual users on your system may wan the ability to post web content. The UserDir Apache directive, allows each user on the system to create an special directory used to contain web content. Usage:  UserDir public_html Now system users can place all of their web documents in a directory called public_html under their home directory.  These documents can be accessed via the URL http://systemname/~username.
Access Control Files Per directory configuration files can be used to supplement or override settings set on the server level. Most commonly used to password-protect a directory. Allows for “on-the-fly” changes. No need to restart the server.  Generally referred to as .htaccess files even though the actual name of the file can be set in httpd.conf: AccessFileName .htaccess
Access Control Files, con’t. Level of overrides allowed should also be set in httpd.conf:  AllowOverride None|All|Options|Indexes| FileInfo|AuthConfig|Limit  Default is “All”.  Access control file is placed in root of directory for which configuration is being modified.
Access Restrictions by Location Access to directory contents can be granted or denied by IP address, network, hostname or name.  <Directory /home/apache/apache/htdocs/restricted>  order deny,allow  deny from all  allow from 165.230.30.68 .rutgers.edu internet.rutgers.edu  </Directory>  Best to control access by IP address rather than hostname to avoid require DNS lookups for every attempted connection. You can place these blocks access control blocks in the httpd.conf file or in an .htaccess file.
The Index File When a web browser points to a directory, rather than a particular file  (e.g.  http://www.internet.rutgers.edu/II/ITI520  vs.  http://www.internet.rutgers.edu/II/ITI520/index.html ),  Apache looks for an  index file , which is the default web page for a particular directory. You can specify the name of acceptable index files by using the  DirectoryIndex  directive in the httpd.conf file. Usage:  DirectoryIndex filename filename… Apache will look for the index file names specified when a request is made to a directory.
Indexing What happens if you type a URL into a browser that points to a directory rather than a specific file?  Will load the index file if directory includes any of the files specified with DirectoryIndex in httpd.conf:  DirectoryIndex index.html index.htm  If no index file exists and indexing has been enabled, will get a directory listing.  If no index file exists and indexing has been disabled, will get an error message.  Advisable to leave indexing disabled for security reasons unless there is a specific need for it.
Indexing, con’t. To enable indexing in httpd.conf:  Options Indexes  Fancy indexing generates listing that includes representative icon, name, last modified, size, and description: IndexOptions FancyIndexing  Indexing requires module mod_autoindex, which is installed by default.

Apache Web Server Setup 2

  • 1.
    WMB-520: WebTechnology Web Server Setup Meeting 2: Apache Installation and Initial Configuration Rutgers University Center for Applied Computing Technology Instructor: Chris Uriarte
  • 2.
    Apache The world’sleading web server software (powers 65% of all web sites in the world) Runs on UNIX and Windows platforms. UNIX version is the most stable and most widely used. Configuration is the same on all UNIX platforms, varies slightly on Windows systems.
  • 3.
    How Do IGet Apache? There are currently two supported releases of Apache: v1.3 and v2.0. Version 1.3 is the most widely used (95% of all Apache installation), but version 2.0 will become more popular over the next 12-18 months. There are many subversions released throughout the lifetime of a major version (i.e. 1.3.10) You can download it from the Apache Website: http://www.apache.org/dist/ Binary Versions – software that is ready-to-use for your specific operating system platform Source Code – the computer code used to build Apache. You must use a compiler to build the code. You can buy a Unix distribution that comes bundled with Apache pre-built (most Linux distributions include Apache by default).
  • 4.
    Installing Apache fromSource Allows you to build the Apache binaries from scratch. Optimizes Apache for the platform on which it will run. Allows you to specify special server features at build-time. You need a C compiler (i.e. gcc) installed on your system to compile source code, which is included in most UNIX distributions.
  • 5.
    Apache Modules Apachehas a modular structure. Only a core set of features exists within the main Apache executable. Apache Modules provide additional functionalityto Apache. Example Module: mod_speling : The Speling module attempts to correct misspellings of URLs that users might have entered, namely by checking capitalization or by allowing up to one misspelling (character insertion, omission, transposition, typo).
  • 6.
    Apache: Static vs.Dynamic Servers Static Servers Must decide at build time what modules to include. Recompiling will be necessary to add modules later. Dynamic Servers Allows you to utilize new modules without re-compiling apache.
  • 7.
    Static vs. DynamicApache Building a static (standard) Apache distribution limits you to the modules you choose when you compile the server. However, using Apache with dynamic modules makes apache more difficult to administer, perform slower and increases its memory requirements. Consider building a static server, as the need to add new modules is not very common and re-compiling Apache is simple.
  • 8.
    Installing Apache SourceCreate a directory under your blender.rutgers.edu home directory called “apache” mkdir apache You now need to obtain the Apache source file (which you’d usually do from http://www.apache.org/dist ). You can copy the source that is contained locally on the blender.rutgers.edu server: cd apache cp ~chrisjur/apache_1.3.27.tar.gz . You should now have the Apache source file under your home directory in /home/<username>/apache.
  • 9.
    Unzipping and Untar’ingthe Source File You now have the Apache source distribution under your home directory in /home/<username>/apache. The source file is actually a group of tar’ed files and directories, which is then zipped using the gzip utility. You can untar and unzip the source distribution by issuing: tar –xvzf apache_1.3.27.tar.gz
  • 10.
    Unzipping and Untar’ingthe Source File – con’t. Unpacking the distribution file will create another directory under /home/<username>/apache called “apache_1.3.27” (/home/<username>/apache/apache_1.3.27). “ cd” to the apache_1.3.27 to view the files and directories that are included in the distribution.
  • 11.
    Sample Directory Listingfrom Source Distribution iti% cd apache_1.3.27 iti% ls ABOUT_APACHE LICENSE README.NT conf htdocs Announcement Makefile README.configure config.layout icons INSTALL Makefile.tmpl WARNING-NT.TXT config.status logs KEYS README cgi-bin configure src iti% ls -al total 272 drwx------ 8 chrisjur users 4096 Oct 15 20:21 . drwx------ 13 chrisjur users 4096 Oct 15 21:10 .. -rw------- 1 chrisjur users 12957 Mar 31 1999 ABOUT_APACHE -rw------- 1 chrisjur users 2922 Feb 23 2000 Announcement -rw------- 1 chrisjur users 27964 Dec 21 1999 INSTALL -rw------- 1 chrisjur users 35773 Aug 20 1999 KEYS -rw------- 1 chrisjur users 2848 Jan 1 1999 LICENSE -rw------- 1 chrisjur users 26929 Oct 15 20:20 Makefile -rw------- 1 chrisjur users 26758 Jan 11 2000 Makefile.tmpl -rw------- 1 chrisjur users 2046 Apr 1 1998 README -rw------- 1 chrisjur users 3132 Mar 19 1999 README.NT -rw------- 1 chrisjur users 11176 Dec 20 1999 README.configure -rw------- 1 chrisjur users 331 Sep 21 1998 WARNING-NT.TXT drwx------ 2 chrisjur users 4096 Feb 23 2000 cgi-bin drwx------ 2 chrisjur users 4096 Feb 23 2000 conf -rw------- 1 chrisjur users 5909 Dec 28 1999 config.layout -rwx--x--x 1 chrisjur users 312 Oct 15 20:20 config.status -rwx------ 1 chrisjur users 56062 Feb 5 2000 configure drwx------ 3 chrisjur users 4096 Feb 23 2000 htdocs drwx------ 3 chrisjur users 4096 Feb 23 2000 icons drwx------ 2 chrisjur users 4096 Feb 23 2000 logs drwx------ 11 chrisjur users 4096 Oct 15 20:21 src
  • 12.
    Apache Installation: Step 1 Before actually building the Apache binaries, you must run a configure utility, which inspects your system and prepares the distribution for compiling. The configure script is located in the directory that was created when you unpacked the Apache source distribution (i.e. /home/itiXXX/apache/apache_1.3.27) The included INSTALL file has instructions on how to configure and compile Apache.
  • 13.
    Apache Installation: Step 1 con’t. Run the configure script like this: ./configure --prefix=/home/itiXXX/apache The “prefix” flag tells Apache where you actually want to install the software and configuration files. It also builds the Apache software so it knows where to look for configuration files
  • 14.
    Apache Installation: Step 2 After the configure script runs successfully, you now need to compile the software code into the actual binaries. You can start the compile by issuing the make command in the Apache distribution directory, i.e: cd /home/itiXXX/apache/apache_1.3.27 make The compile process will take 2-10 minutes, depending on the speed of your system.
  • 15.
    Apache Installation: Step 3 When the compile is complete, you can install the software and configuration files by issuing the make install command. This will copy the built binaries and configuration files into the /home/<username>/apache directory you specified when you ran the configuration script. We will now refer to this directory as the Server Root directory.
  • 16.
    The Server RootDirectory Examine the contents of the Server Root directory. You now have a group of directories Apache uses: bin : the location of the actual apache program and other utilities conf : location of the configuration files htdocs : the directory where web pages and and associated files are kept logs : where apache keeps log files man : UNIX man pages for apache cgi-bin : the directory where CGI scripts are kept
  • 17.
    Apache and PrivilegedPorts Any TCP/IP port <1024 is considered a privileged port. Privileged Ports can only be accessed by applications started by the root (system admin) user. Therefore, since you are not the root user on this system, you must configure Apache to use a port >1024.
  • 18.
    Quickstart: Changethe Port Number your Apache Server Uses “ cd” to the Apache conf directory (/home/itiXXX/apache/conf) Use a text editor to open the httpd.conf file, which is the main Apache configuration file. Find the line that says “Port XX”. Your file may say “Port 8080” or some other number.
  • 19.
    Change your ApachePort, con’t. Replace the number next to the “Port” directive to a number that corresponds to you. Use the numeric portion of your blender.rutgers.edu username. For example, if your username is iti2345 , use port 2345 as your port number. Exit your editor and save the file.
  • 20.
    Getting Ready toRun Apache for the First Time… Apache is configured to look for web documents in the htdocs directory under the server root (/home/itiXXX/apache/htdocs). This directory is known as the “ Document Root ” Be default, a page called “index.html” is the first page of a the website returned to clients. Create an index.html file in your htdocs directory that contains the text “Hello World. My name is <Your Name>”
  • 21.
    Starting Apache: The “Hard” Way The actual Apache binary is called httpd and it resides in the Apache /bin directory. You can start Apache by simply executing the httpd command cd apache/bin ./httpd Apache is now started!
  • 22.
    Verify that YourInstance of Apache is Working Point a web browser to http:// blender.rutgers.edu :<PORT > (recall, you configured the port number in the httpd.conf file to be the numeric portion of your iti username) You should see your default web page appear (the contents of the htdocs/index.html document we created at earlier)
  • 23.
    Stopping Apache: The “Hard” Way Remember, every time you execute a program on a UNIX operating system, a process is created Apache creates a file called httpd.pid in its logs directory. This file contains the parent process ID of the Apache process. You can kill the process by using the kill command You can kill Apache by issuing the following commend: kill –TERM `cat /home/<username>/apache/logs/httpd.pid`
  • 24.
    Starting and StoppingApache: The “Easy” Way with apachectl A script called apachectl is included in the apache/bin directory. You can use apachectl to start, stop and restart the Apache server – very simple to use: cd /home/<username>/apache/bin/ ./apachectl {start|stop|restart}
  • 25.
    Apache Configuration FilesConfiguration files are placed in the conf/ directory and include: httpd.conf – master configuration file access.conf and srm.conf – no longer used Since version 1.3.4, all you configuration is done in the httpd.conf file – the srm.conf and access.conf files are no longer needed. Apache needs to know location of httpd.conf file to start. If httpd.conf needs to move after initial install need to specify location with –f option when starting server. httpd –f /path/to/httpd/.conf
  • 26.
    httpd.conf: IP addressand Port The BindAddress and Port directives in the httpd.conf tell Apache which IP addresses and ports to listen on. Usage: Tells Apache to use the default IP address for this system: BindAddress * Tells Apache to “listen” for web requests on Port 80: Port 80
  • 27.
    Tell Apache toListen To Additional Ports and IP addresses The Listen directive in the httpd.conf tells Apache to listen to additional Ports and/or Port/IP address combinations. Usage: Listen <Port Number> or Listen <IP>:<Port Number> These IP/Ports are used in addition to the IP and Port specified in the BindAddress and Port directive described earlier.
  • 28.
    httpd.conf: Basic ConfigurationDirectives ServerName blender.rutgers.edu – The name of this server we use to respond to web clients with. If the server does not have a real internet name, use the IP address instead. ServerType standalone - We always set this to standalone.
  • 29.
    httpd.conf: BasicConfiguration Directives User nobody, Group nobody - For security reasons, we usually run Apache assumes the identity of a non-root user and group on the system. A lot of times we run Apache as the nobody user/group. ServerAdmin itiXXX@blender.rutgers.edu - A contact address to report problems – returned to the web client when an error occurs.
  • 30.
    httpd.conf: Basic Configuration ServerRoot /home/<username>/apache - Where Apache keeps all its essential files. DocumentRoot /usr/local/apache/htdocs - Where the actual Web pages reside. ErrorLog /home/<username>/apache/logs/error_log – The location of the Apache error log PidFile /home/<username>/apache/logs/httpd.pid -Process id for the Apache parent process. Used with the kill command to stop Apache.
  • 31.
    httpd.conf: Virtual DirectoriesSometime you want to create a Virtual Directory , where a document directory may not exist under your htdocs directory, but you want web clients to have access to it. This is configured using the Alias directive in the httpd.conf, usage: Alias <virtualdirectory> <real directory>
  • 32.
    Virtual Directories, con’t.For example, if your Document Root is the default htdocs directory and you want web client to access a directory that contains Icons (/home/<username>/apache/icons), you can create a Virtual Virtual Directory called myicons like this: Alias /myicons /home/<username>/apache/icons Now web clients can access this virtual directory by going to http:// blender.rutgers.edu:XXXX/myicons to view the files in the icons directory.
  • 33.
    httpd.conf: RedirectsThe Redirect directive allows web clients to access a URL on your system and be re-directed to a remote URL somewhere else. Usage: Redirect /localpath http://remote-url Example: Redirect /photos http://members.yahoo.com/user/photos Redirects all request to http://yoursite.com/photos to http://members.yahoo.com/user/photos Useful when you move portions of a webpage
  • 34.
    Giving Web Accessto Users on the System Individual users on your system may wan the ability to post web content. The UserDir Apache directive, allows each user on the system to create an special directory used to contain web content. Usage: UserDir public_html Now system users can place all of their web documents in a directory called public_html under their home directory. These documents can be accessed via the URL http://systemname/~username.
  • 35.
    Access Control FilesPer directory configuration files can be used to supplement or override settings set on the server level. Most commonly used to password-protect a directory. Allows for “on-the-fly” changes. No need to restart the server. Generally referred to as .htaccess files even though the actual name of the file can be set in httpd.conf: AccessFileName .htaccess
  • 36.
    Access Control Files,con’t. Level of overrides allowed should also be set in httpd.conf: AllowOverride None|All|Options|Indexes| FileInfo|AuthConfig|Limit Default is “All”. Access control file is placed in root of directory for which configuration is being modified.
  • 37.
    Access Restrictions byLocation Access to directory contents can be granted or denied by IP address, network, hostname or name. <Directory /home/apache/apache/htdocs/restricted> order deny,allow deny from all allow from 165.230.30.68 .rutgers.edu internet.rutgers.edu </Directory> Best to control access by IP address rather than hostname to avoid require DNS lookups for every attempted connection. You can place these blocks access control blocks in the httpd.conf file or in an .htaccess file.
  • 38.
    The Index FileWhen a web browser points to a directory, rather than a particular file (e.g. http://www.internet.rutgers.edu/II/ITI520 vs. http://www.internet.rutgers.edu/II/ITI520/index.html ), Apache looks for an index file , which is the default web page for a particular directory. You can specify the name of acceptable index files by using the DirectoryIndex directive in the httpd.conf file. Usage: DirectoryIndex filename filename… Apache will look for the index file names specified when a request is made to a directory.
  • 39.
    Indexing What happensif you type a URL into a browser that points to a directory rather than a specific file? Will load the index file if directory includes any of the files specified with DirectoryIndex in httpd.conf: DirectoryIndex index.html index.htm If no index file exists and indexing has been enabled, will get a directory listing. If no index file exists and indexing has been disabled, will get an error message. Advisable to leave indexing disabled for security reasons unless there is a specific need for it.
  • 40.
    Indexing, con’t. Toenable indexing in httpd.conf: Options Indexes Fancy indexing generates listing that includes representative icon, name, last modified, size, and description: IndexOptions FancyIndexing Indexing requires module mod_autoindex, which is installed by default.