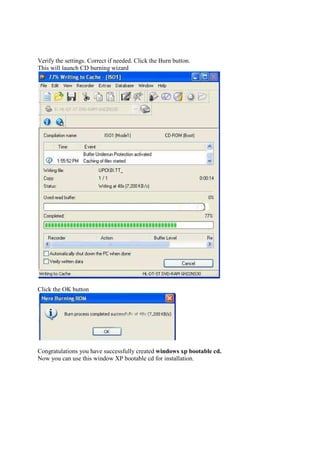
Download to read offline
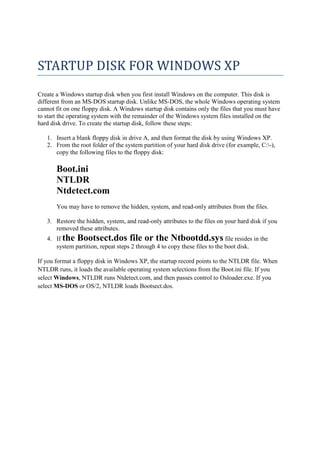


To create a Windows XP startup disk: 1. Insert a blank floppy disk and format it in Windows XP. 2. Copy the files Boot.ini, NTLDR, and Ntdetect.com from the Windows partition on the hard drive to the floppy disk. 3. The startup disk allows you to start Windows XP and load operating system selections from the Boot.ini file when NTLDR runs.