Download to read offline
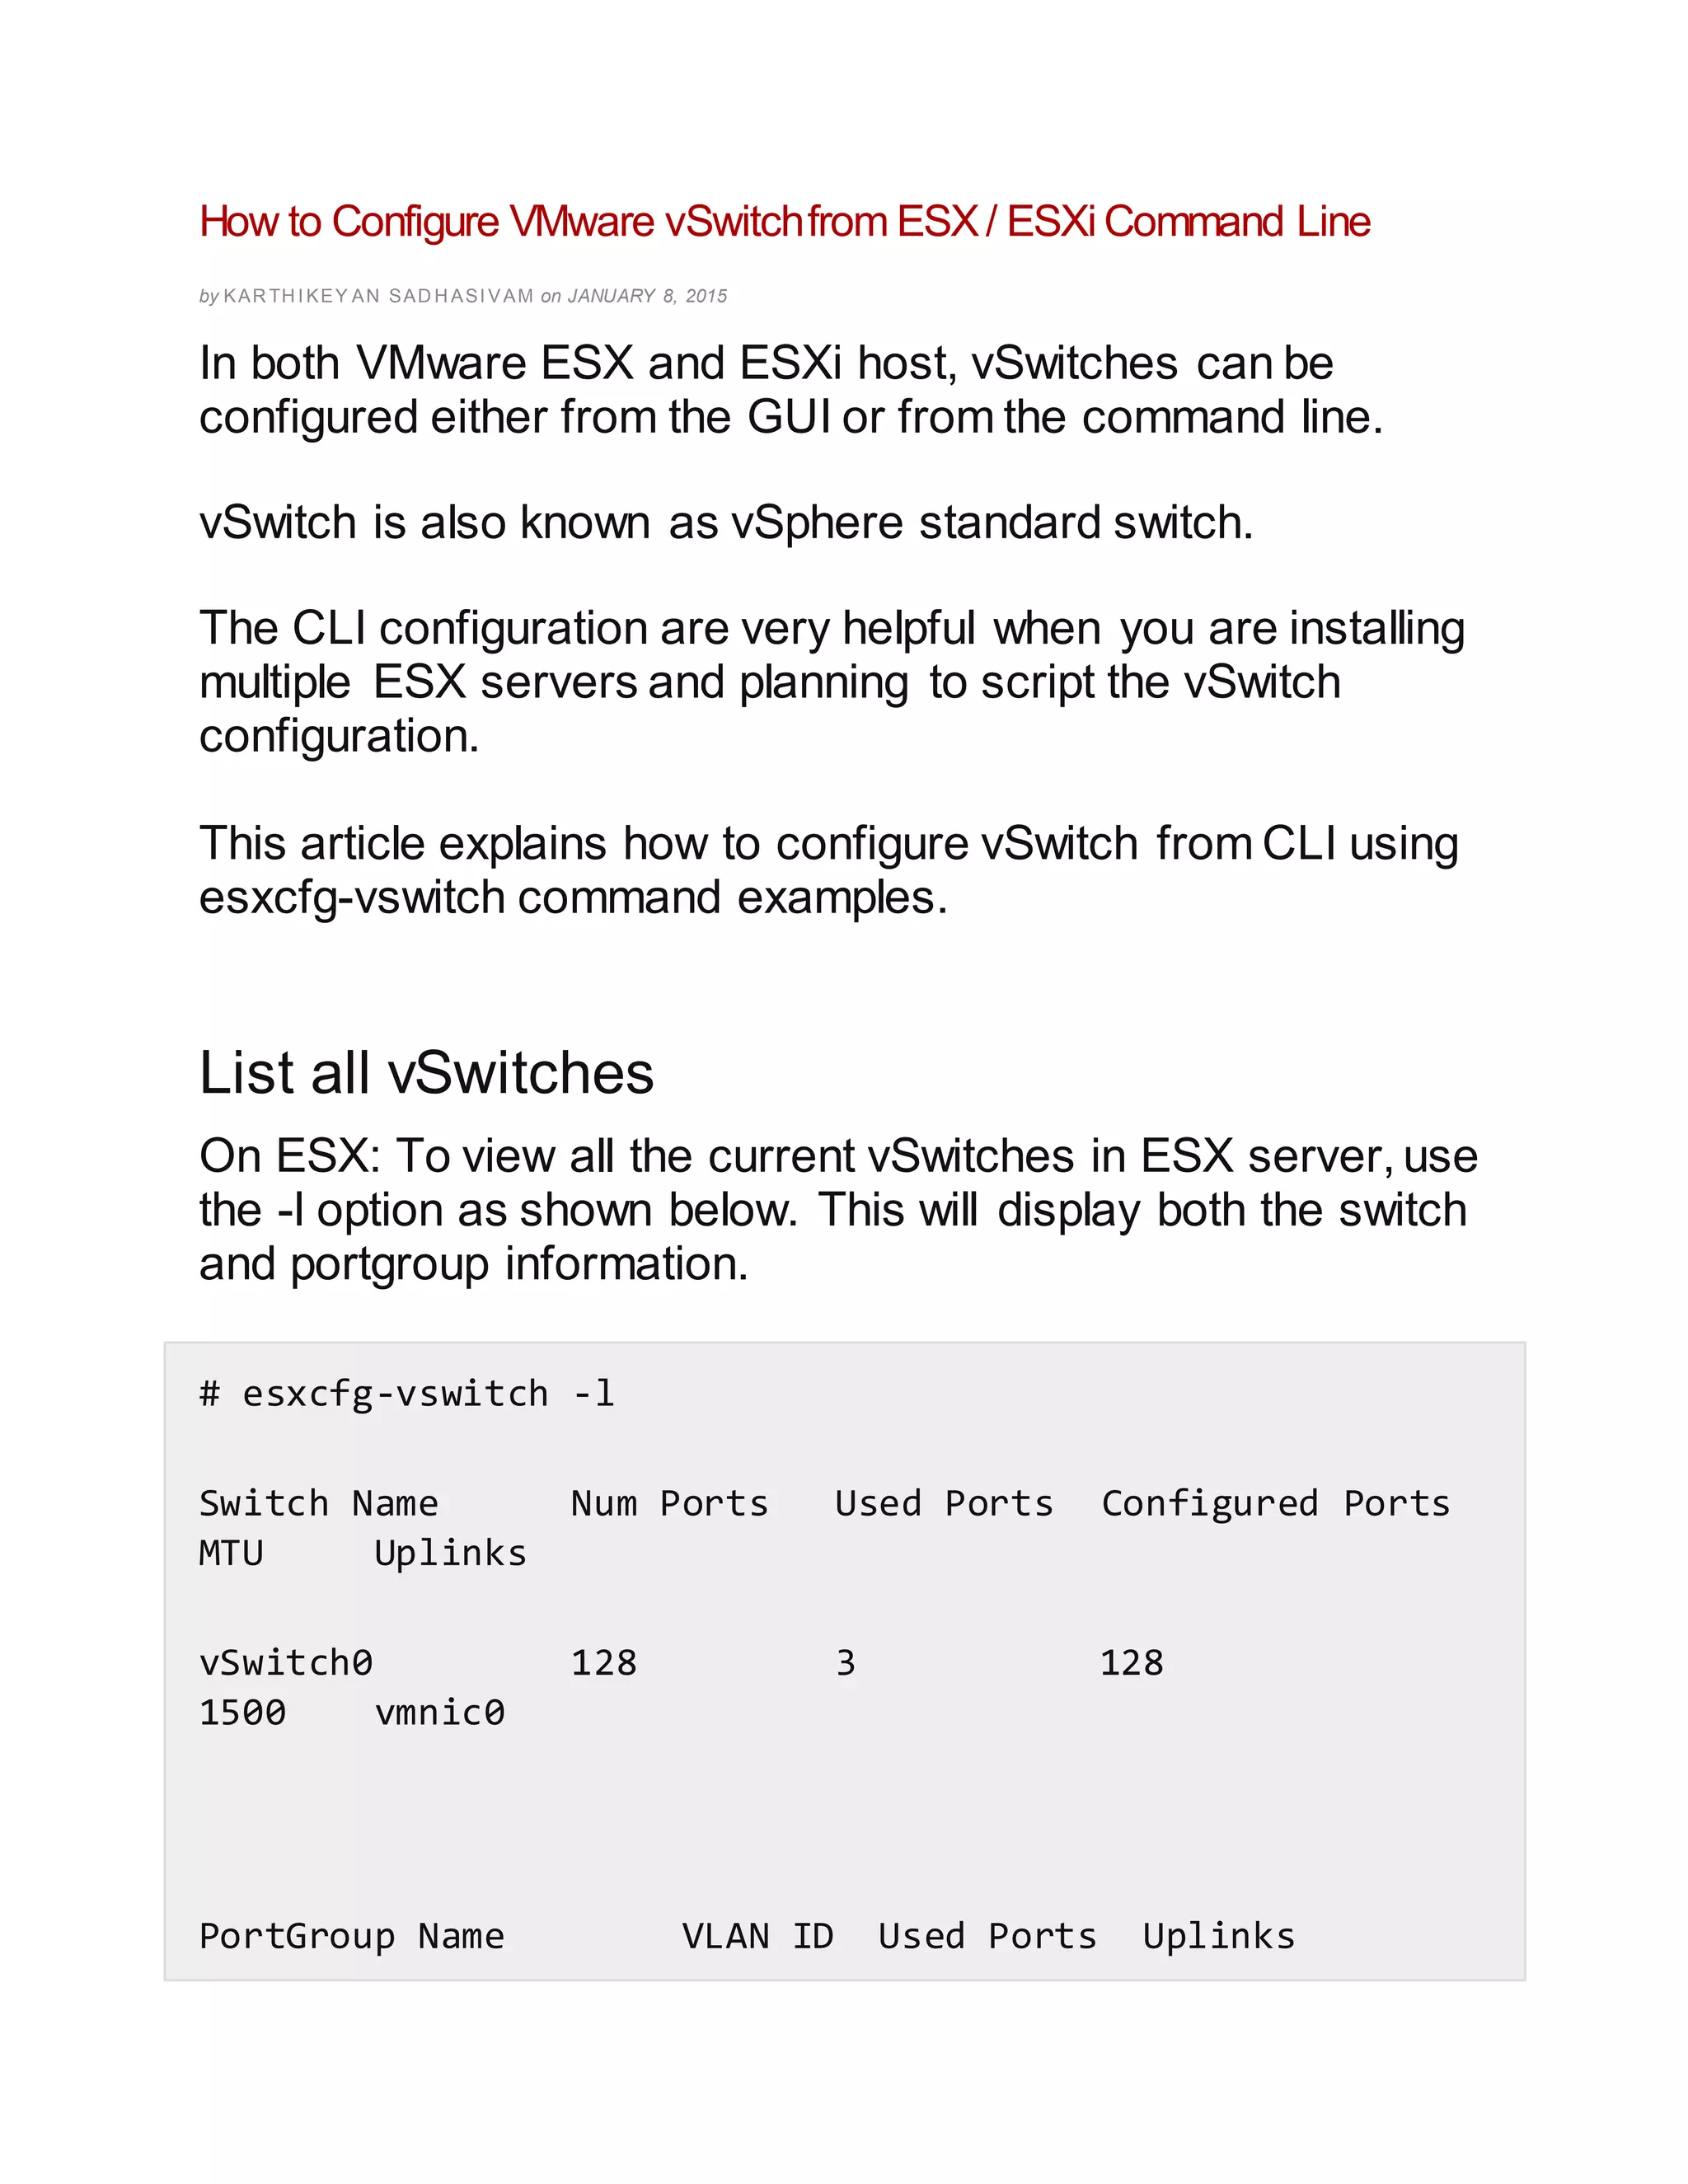
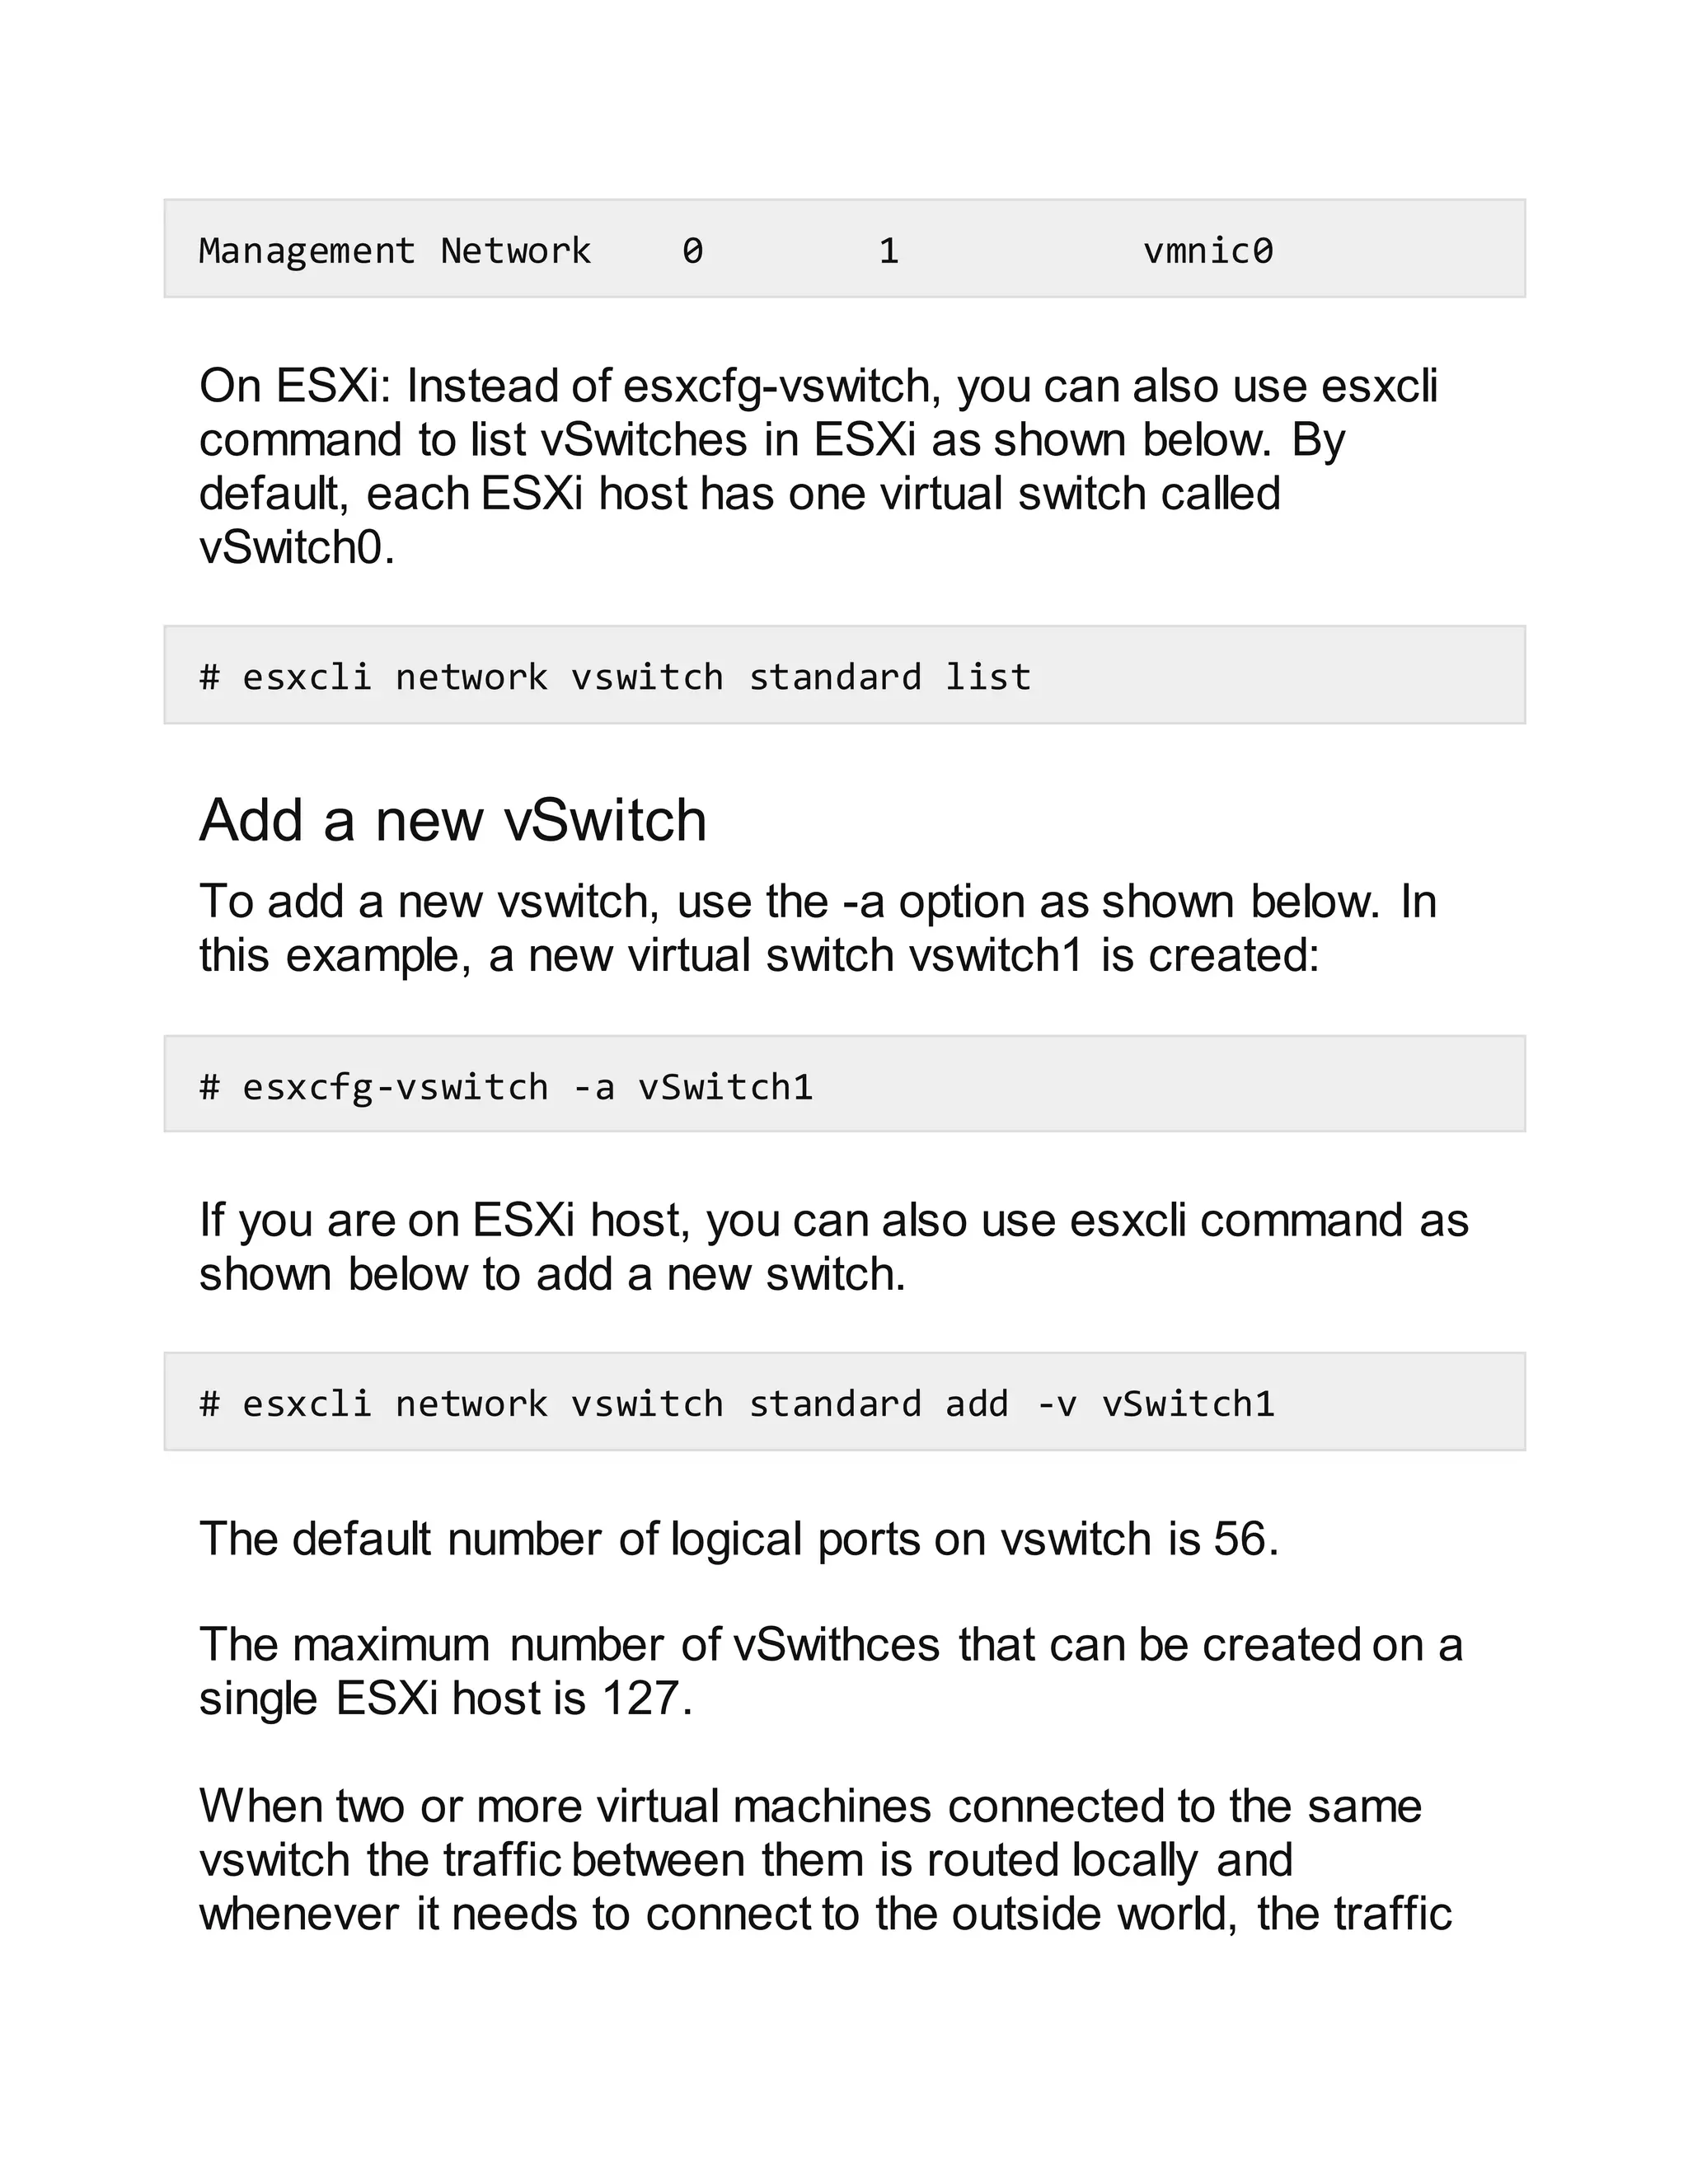

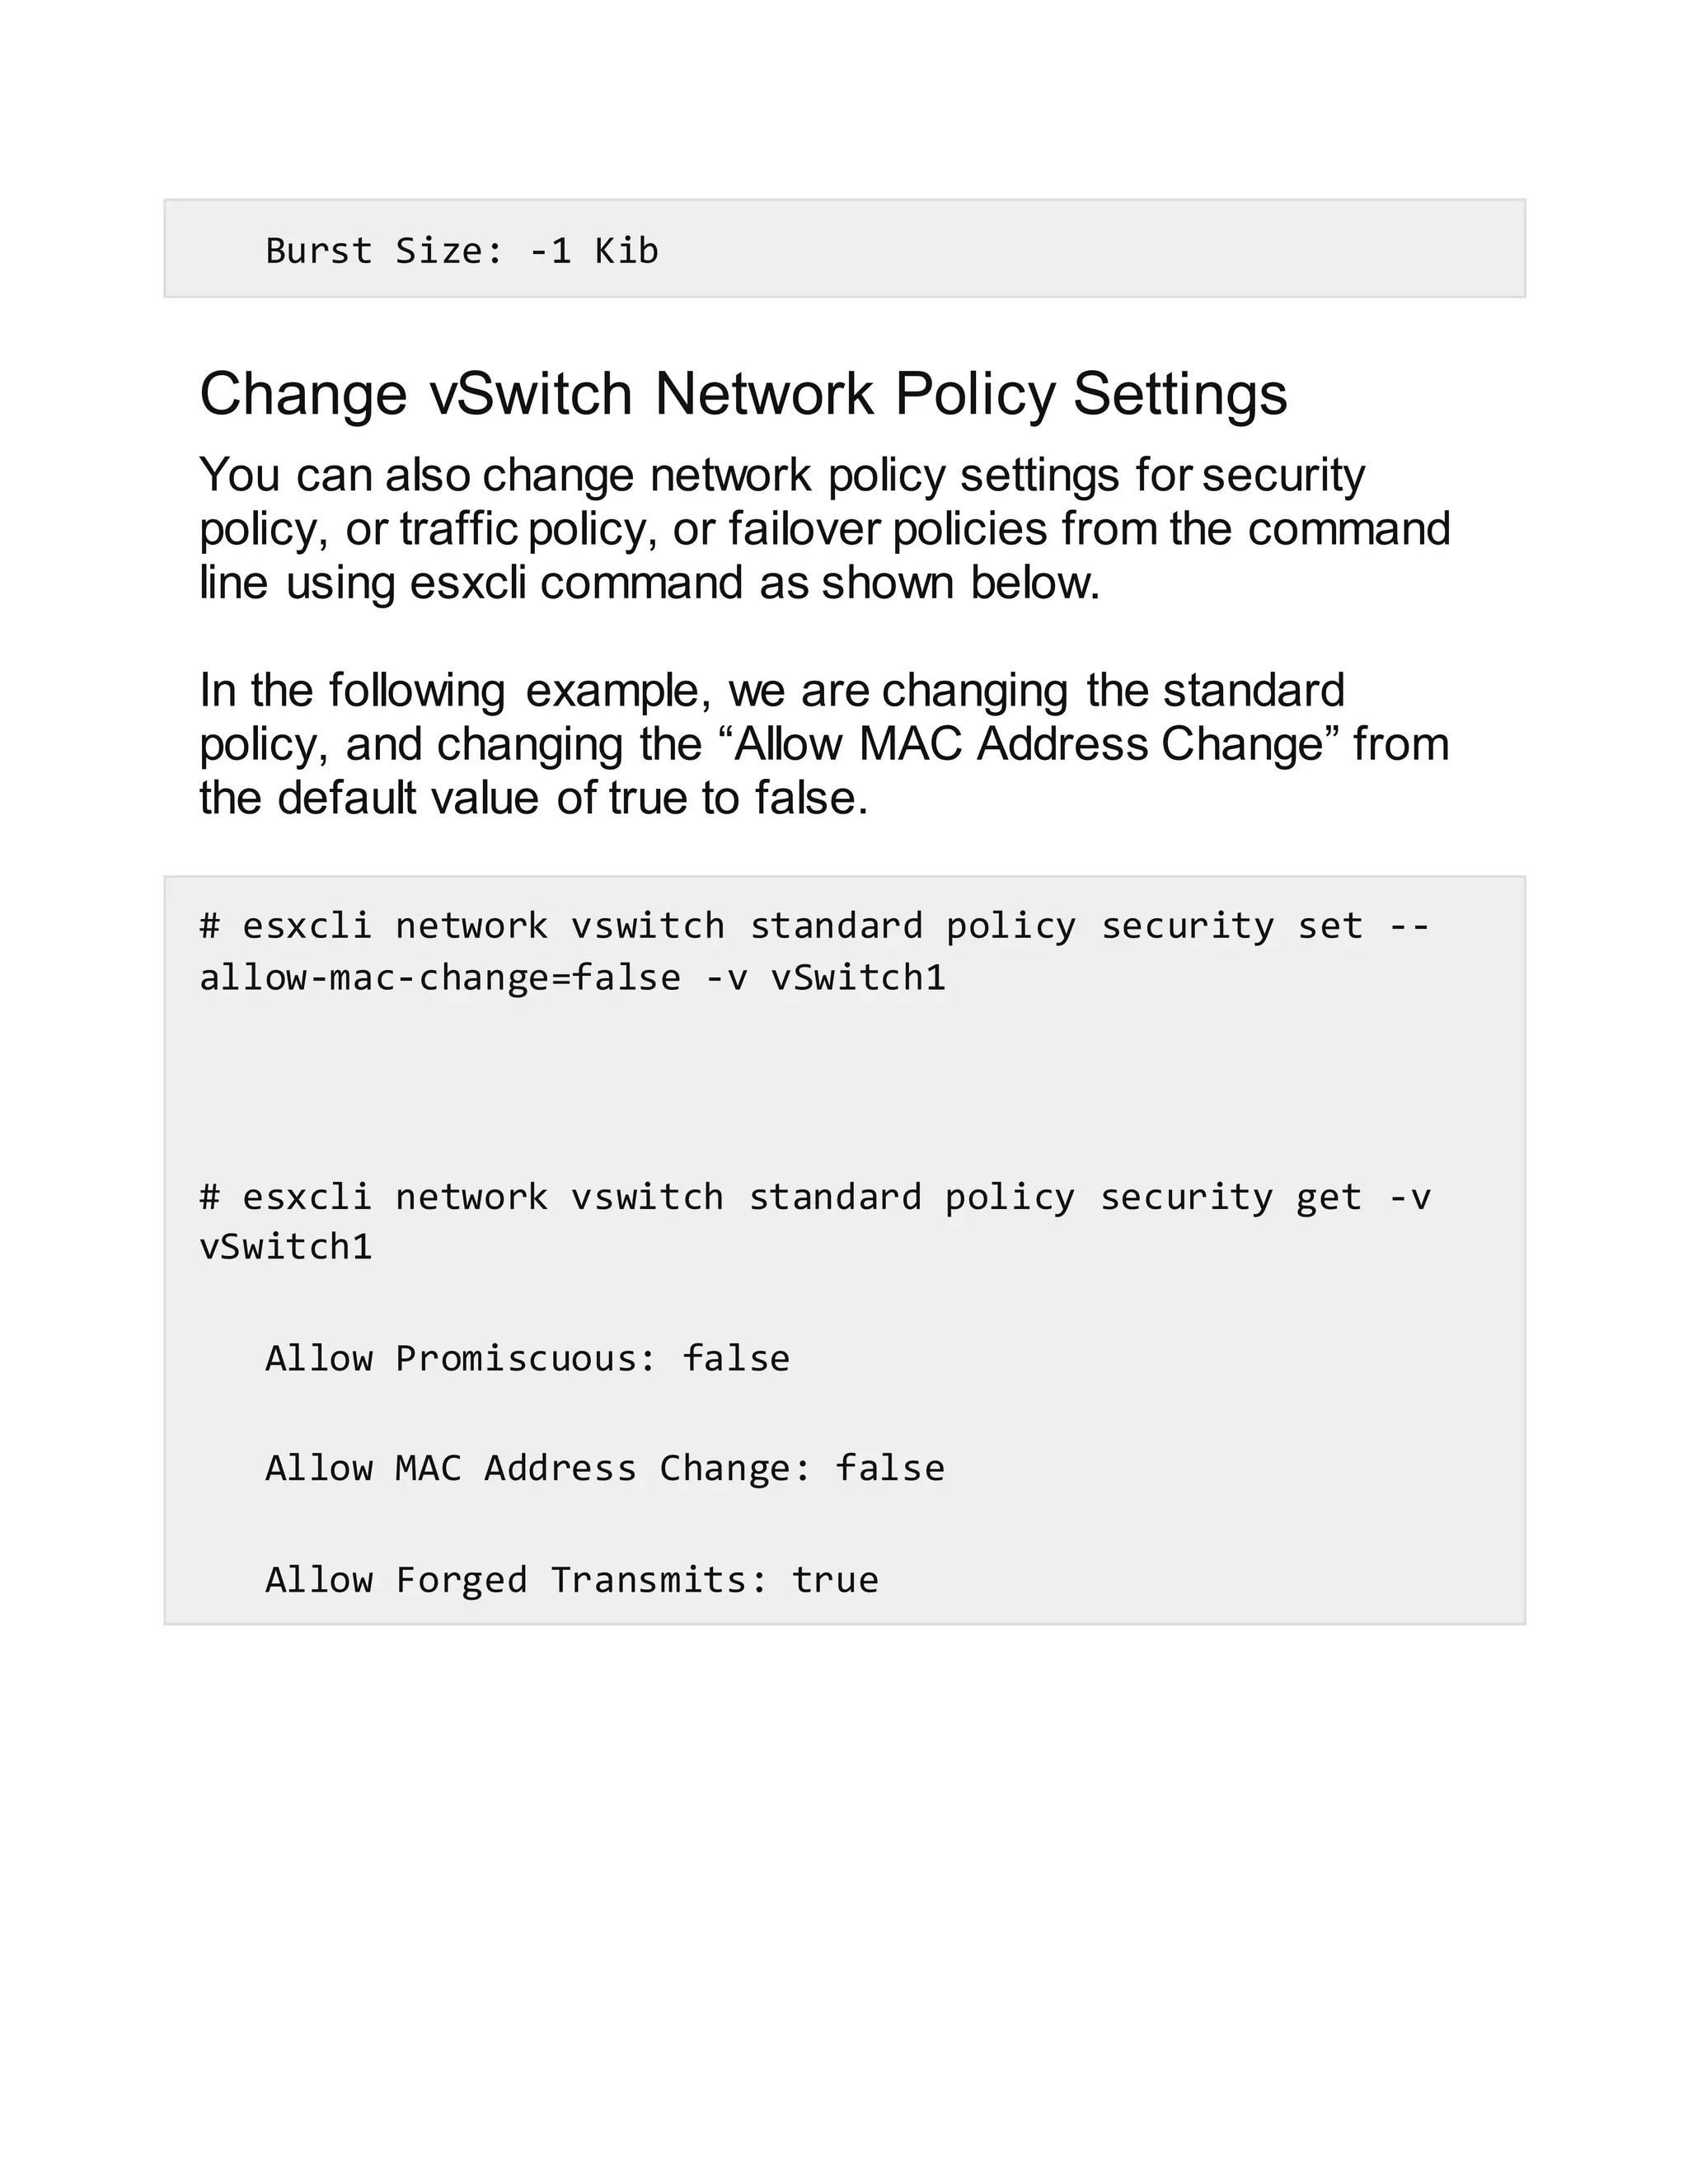

This document discusses how to configure vSwitches from the command line in VMware ESX and ESXi. It provides examples of how to list existing vSwitches, add new vSwitches, add ports/uplinks to vSwitches, create port groups, verify switch and port group existence, add a vMotion network, set the MTU, remove port groups, and view/change network policy settings using the esxcfg-vswitch and esxcli commands.


![IPv4 over IPv6 Tunneling with IPSec [DRAFT]](https://cdn.slidesharecdn.com/ss_thumbnails/ipv4overipv6withipsec-20140204-n-matsumoto-140204035813-phpapp02-thumbnail.jpg?width=640&height=640&fit=bounds)