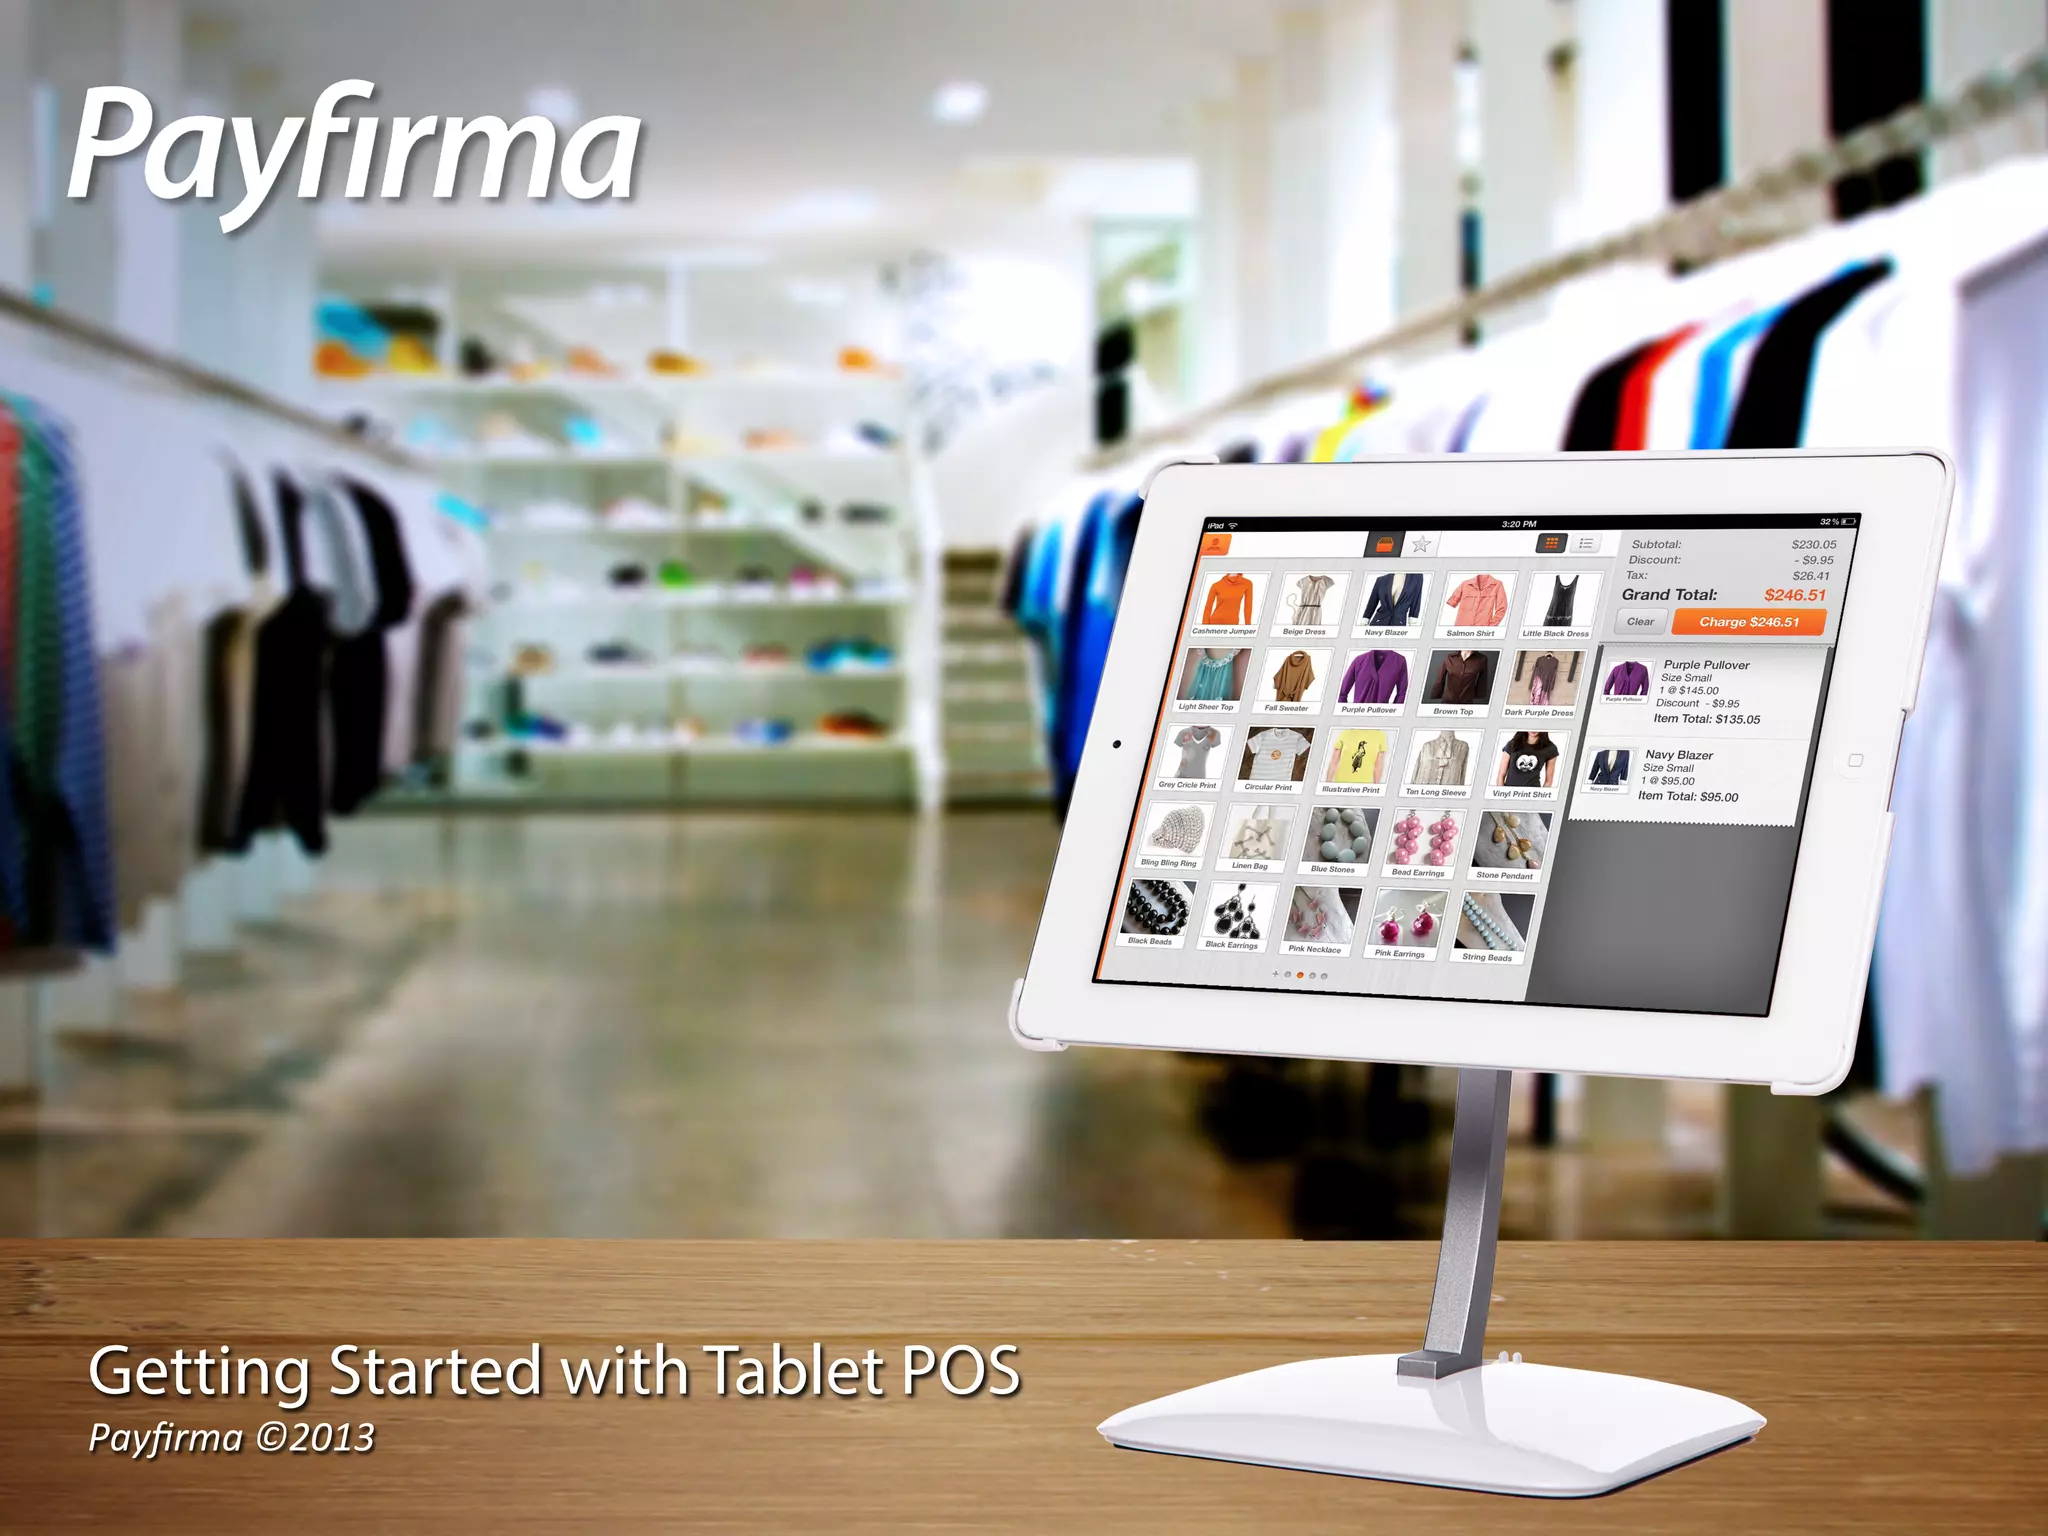
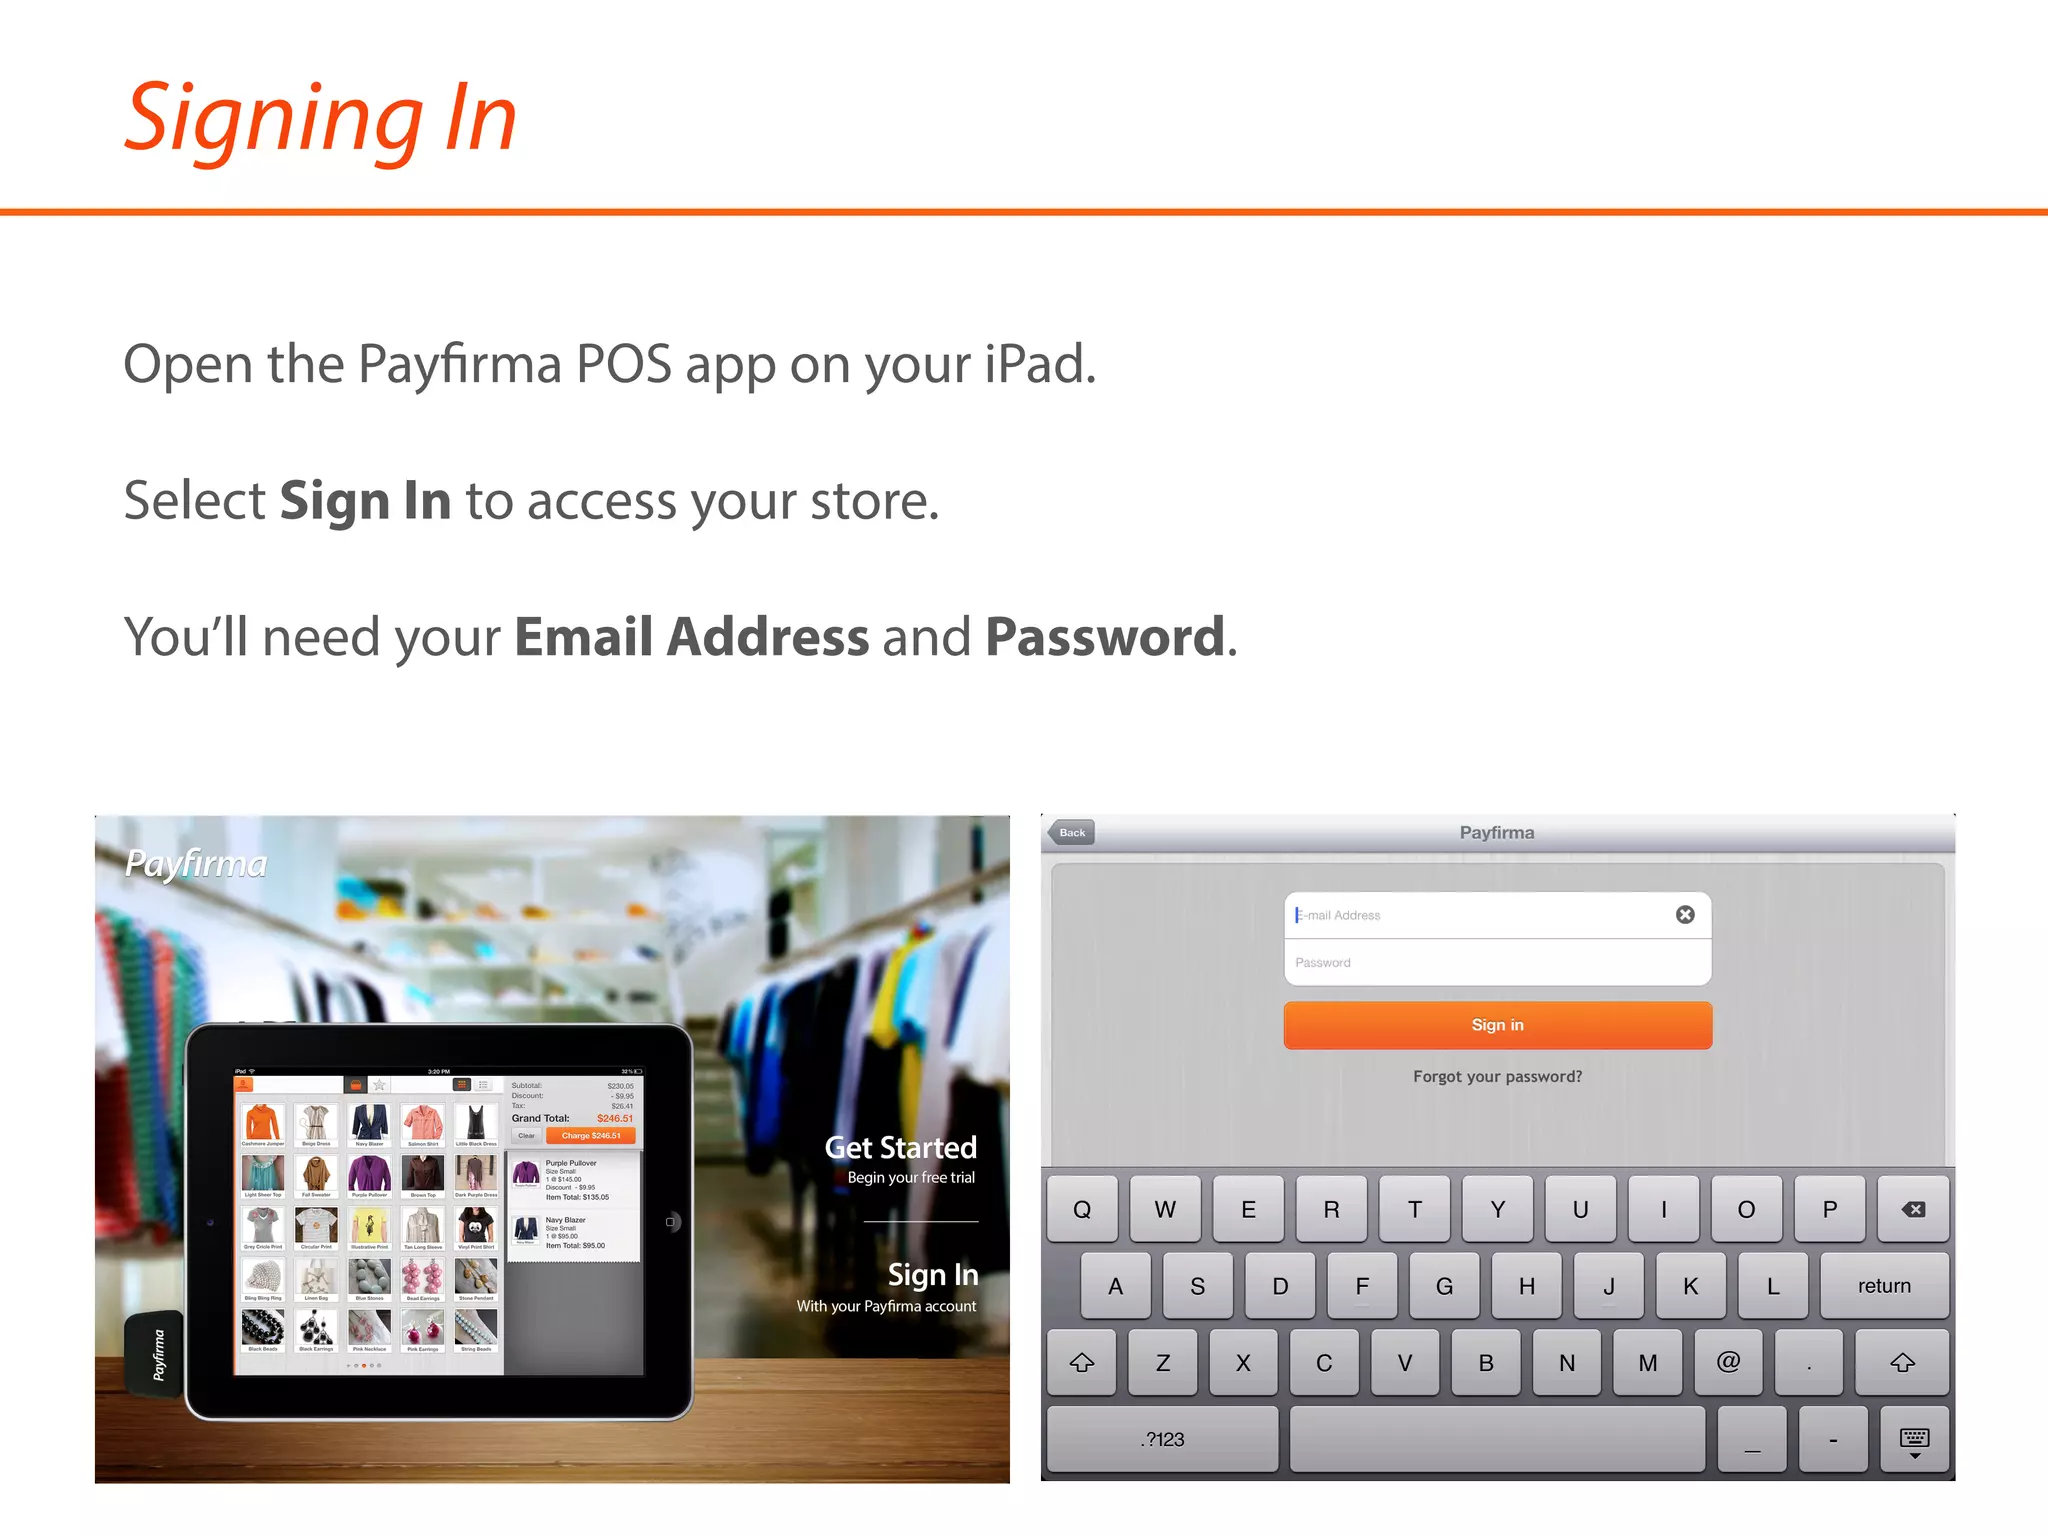
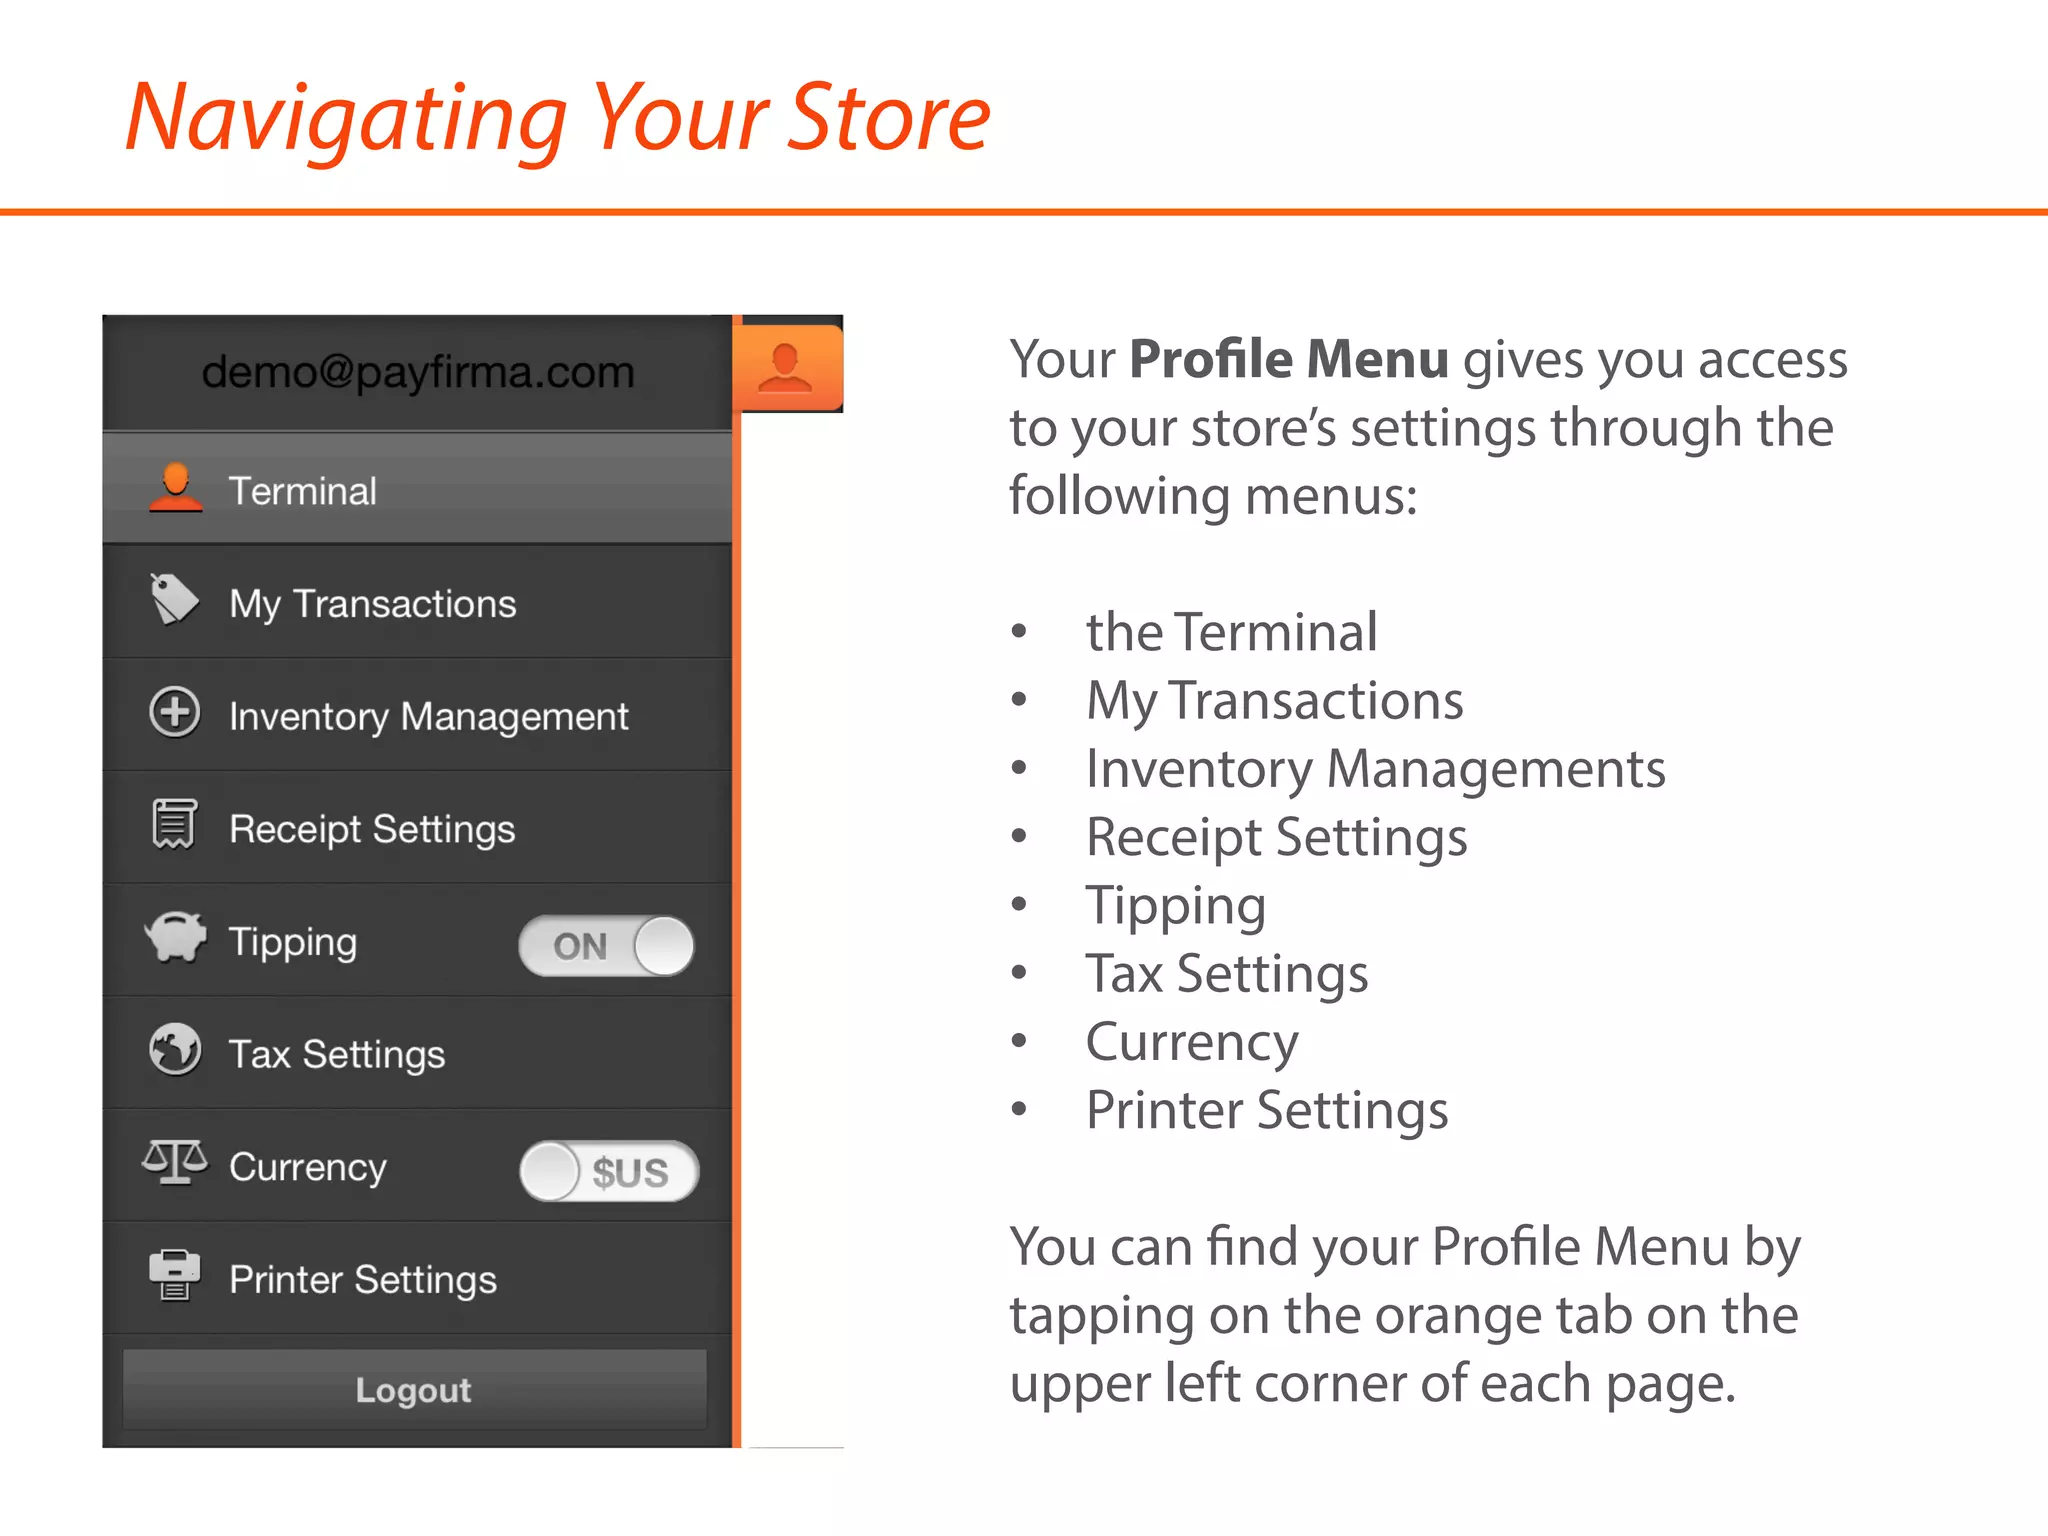
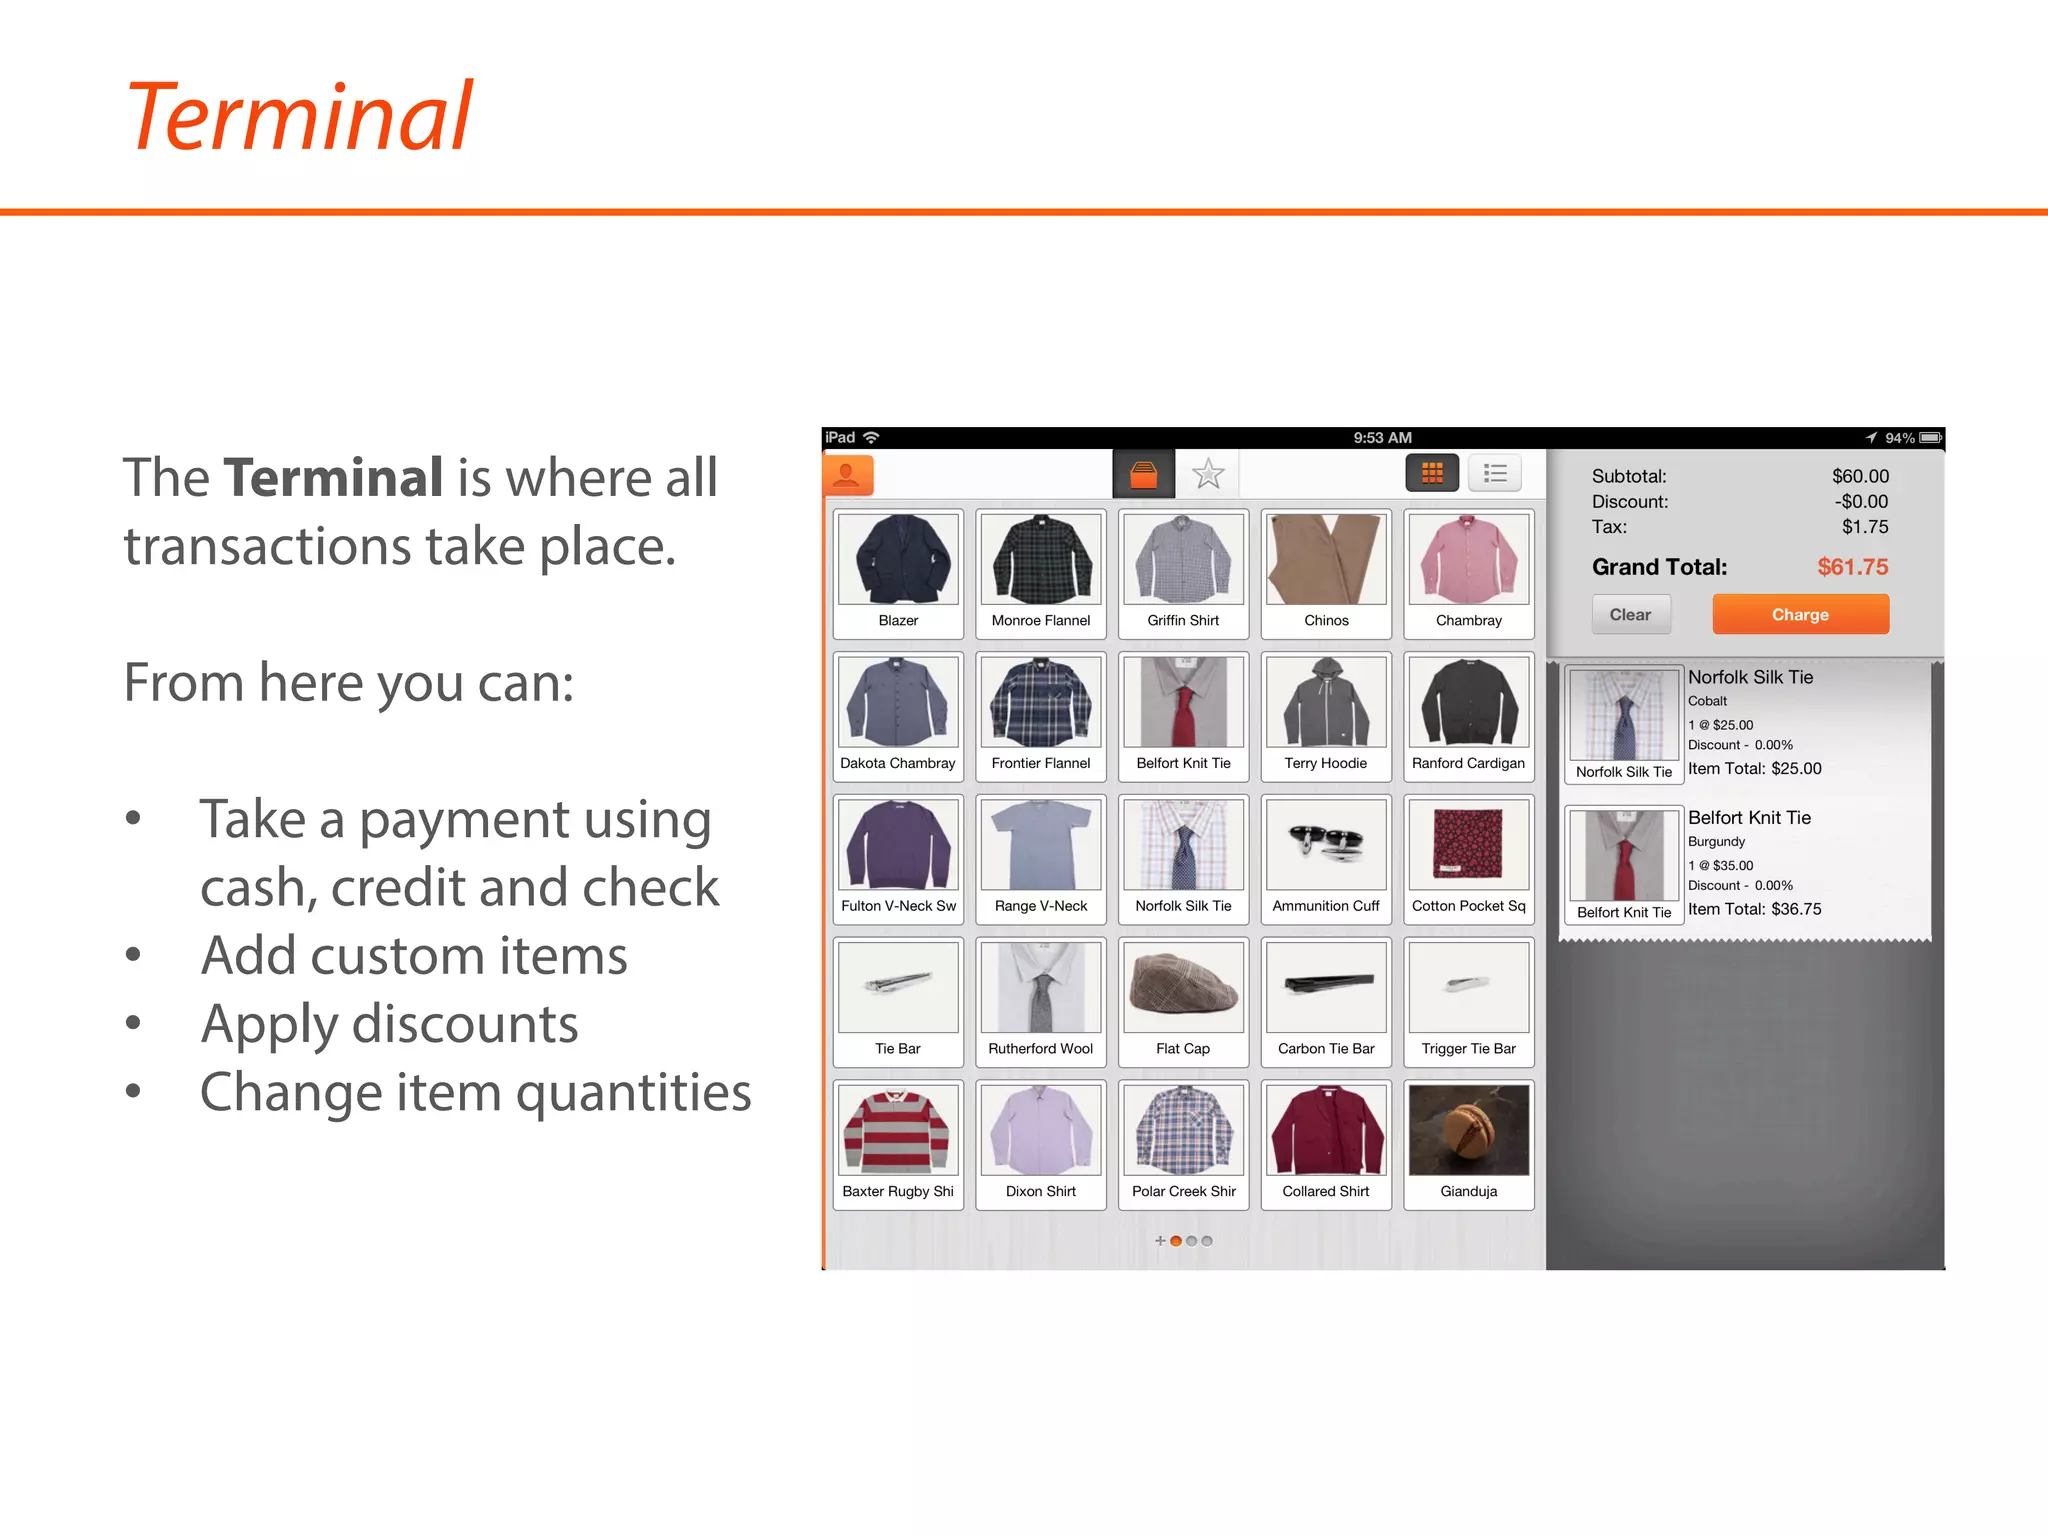
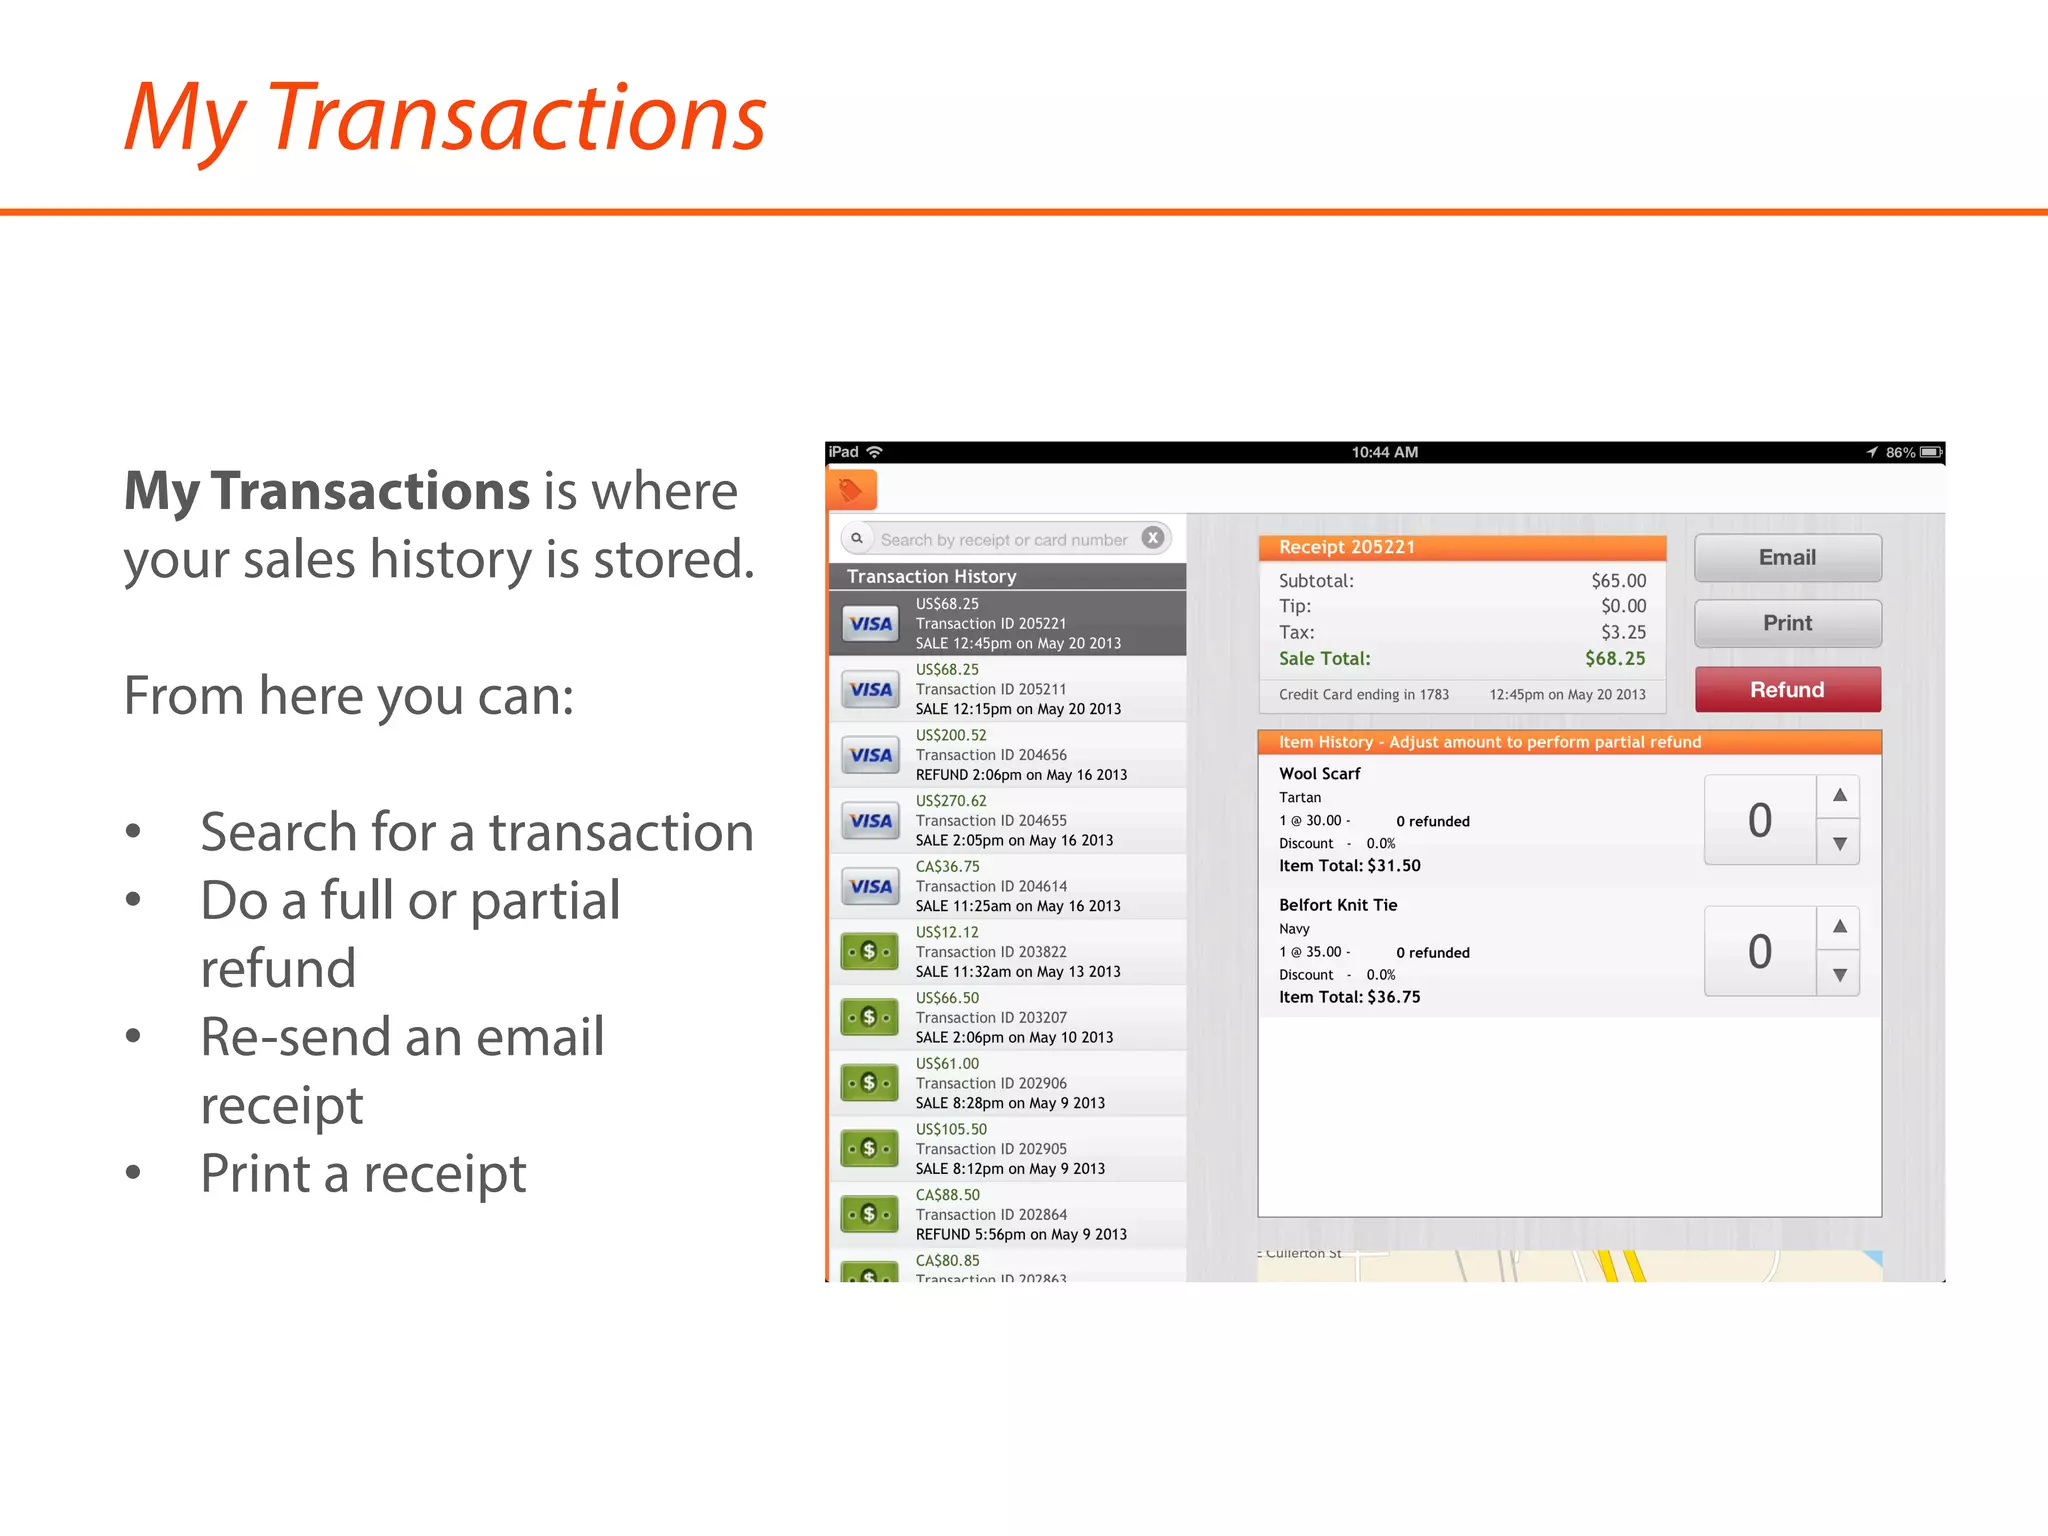
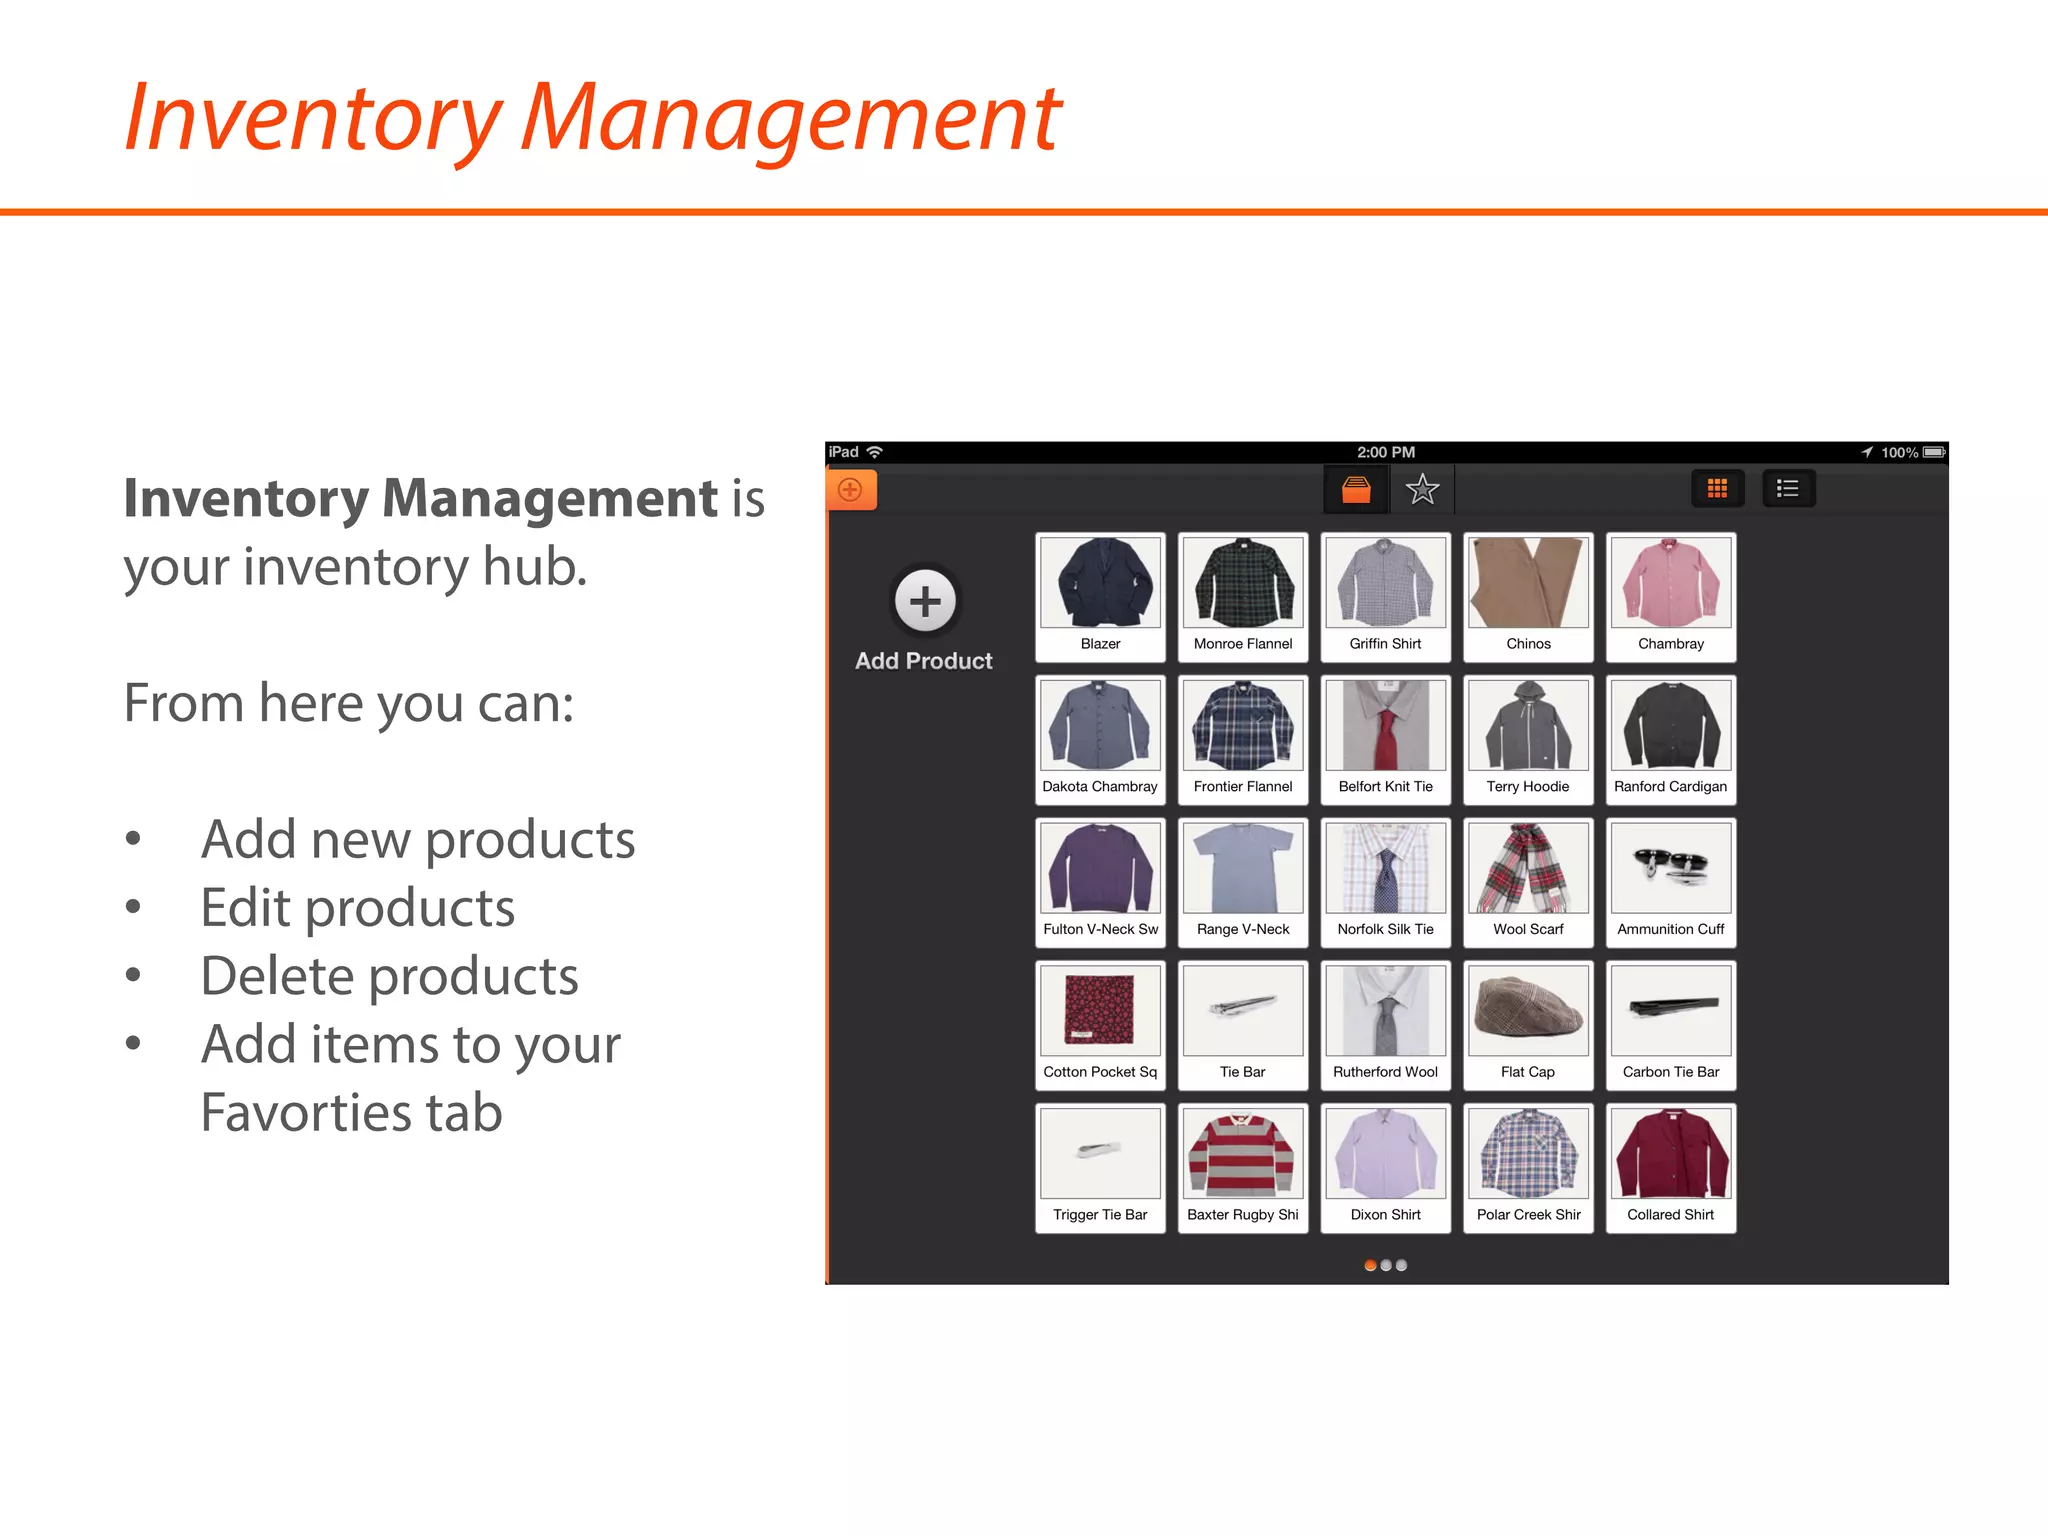
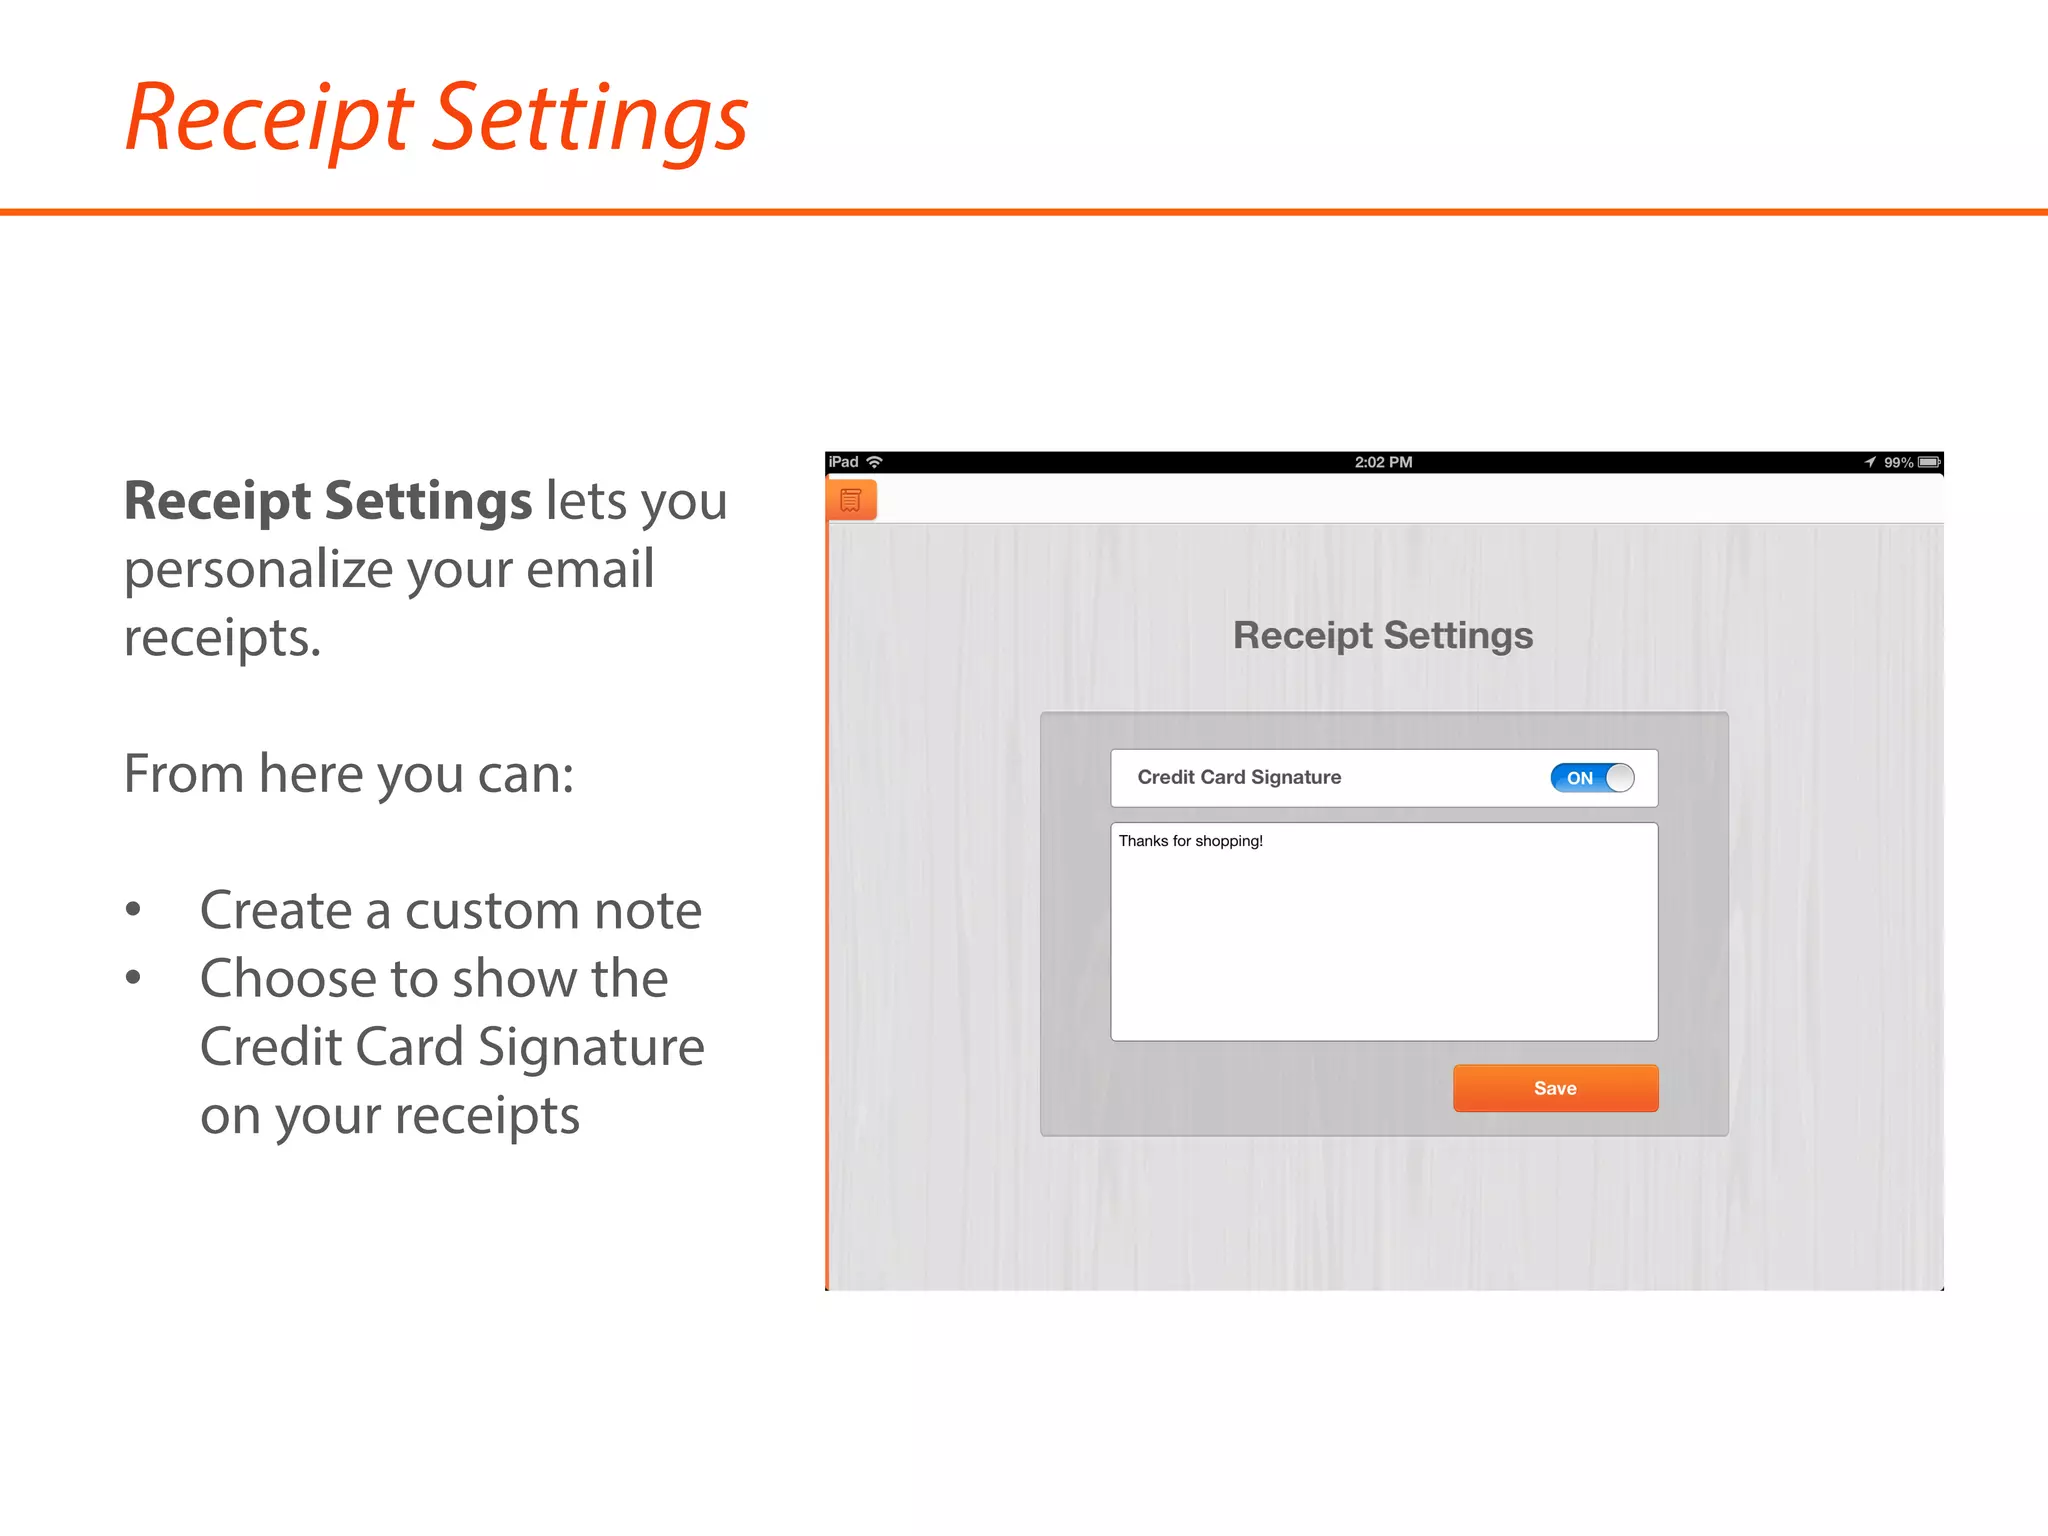
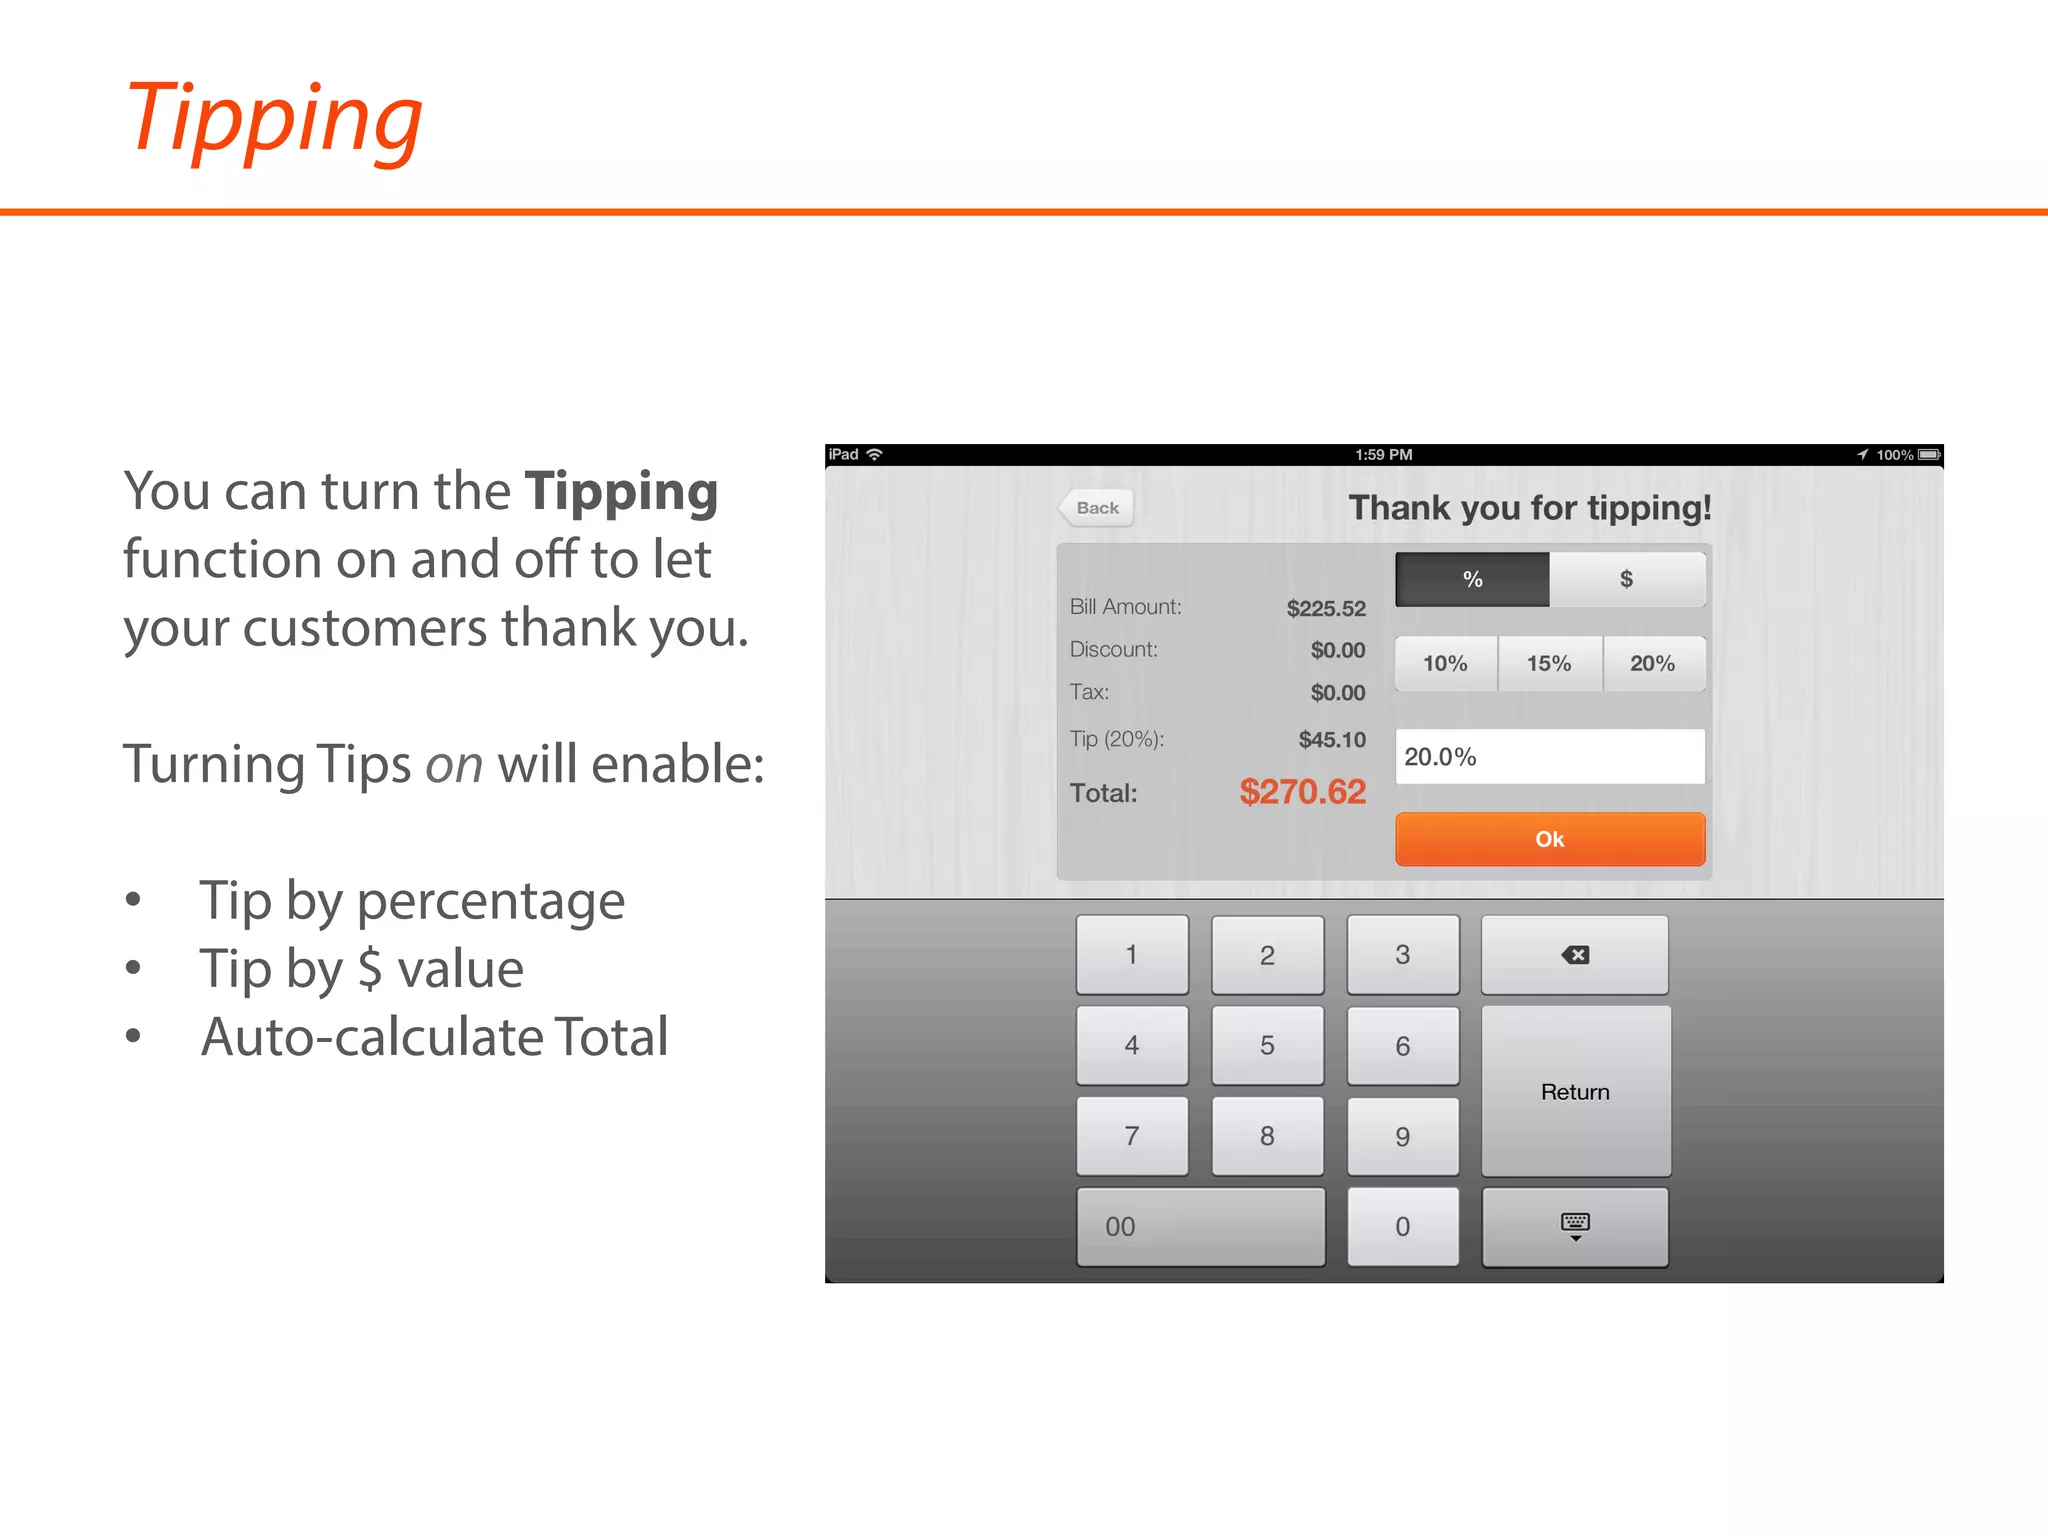
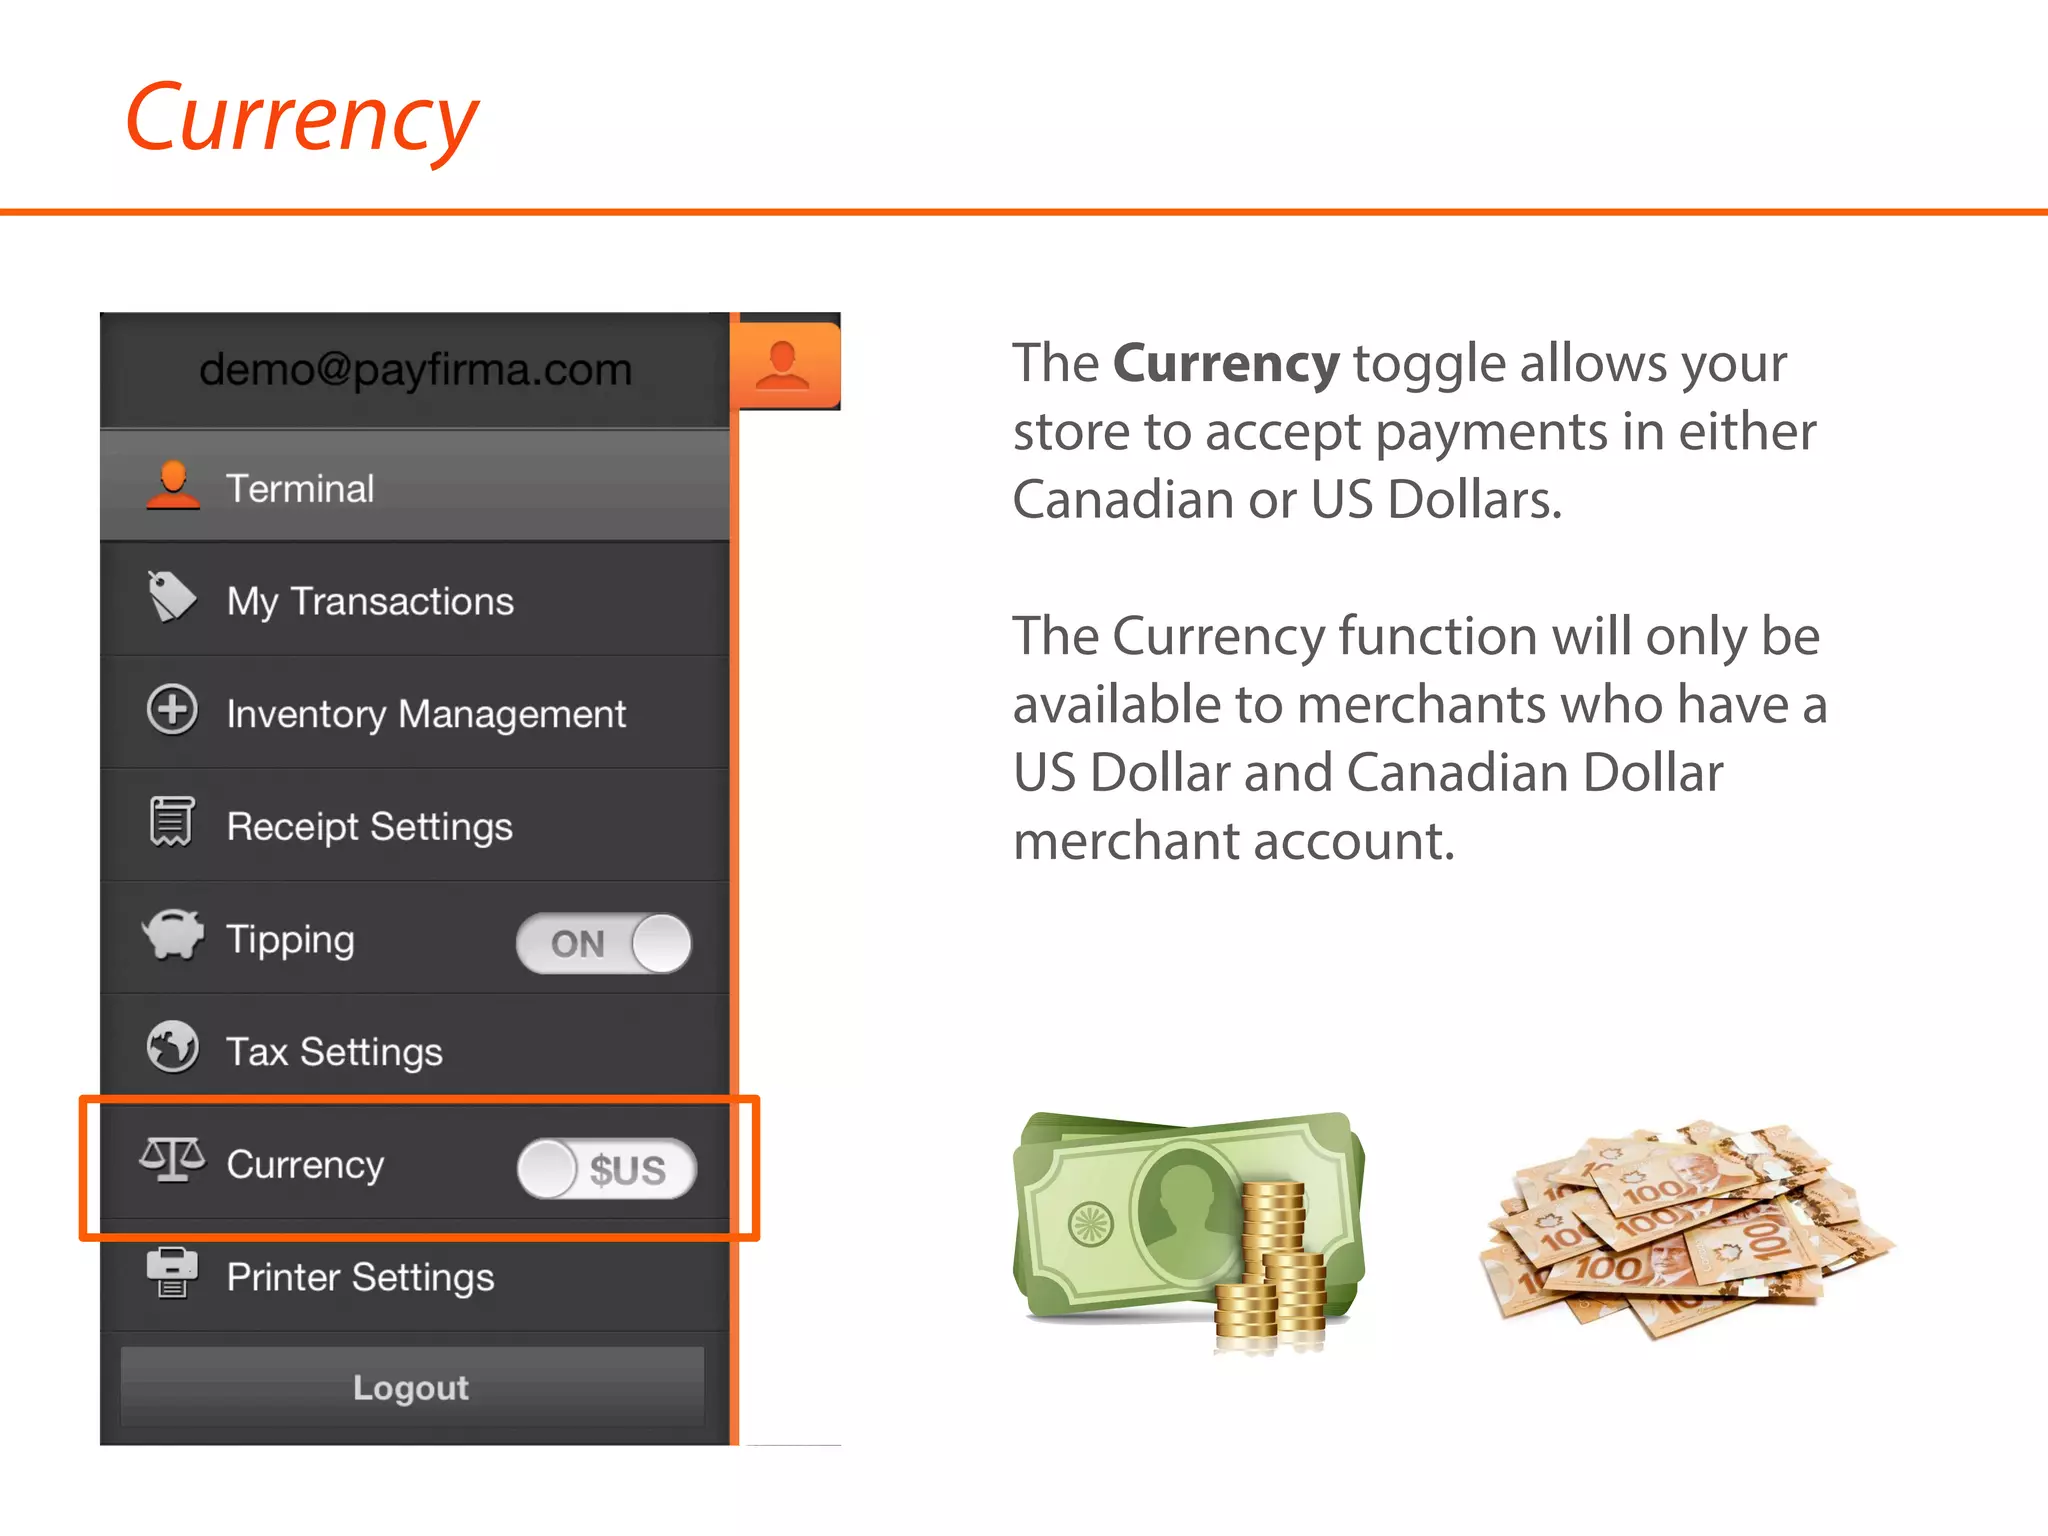
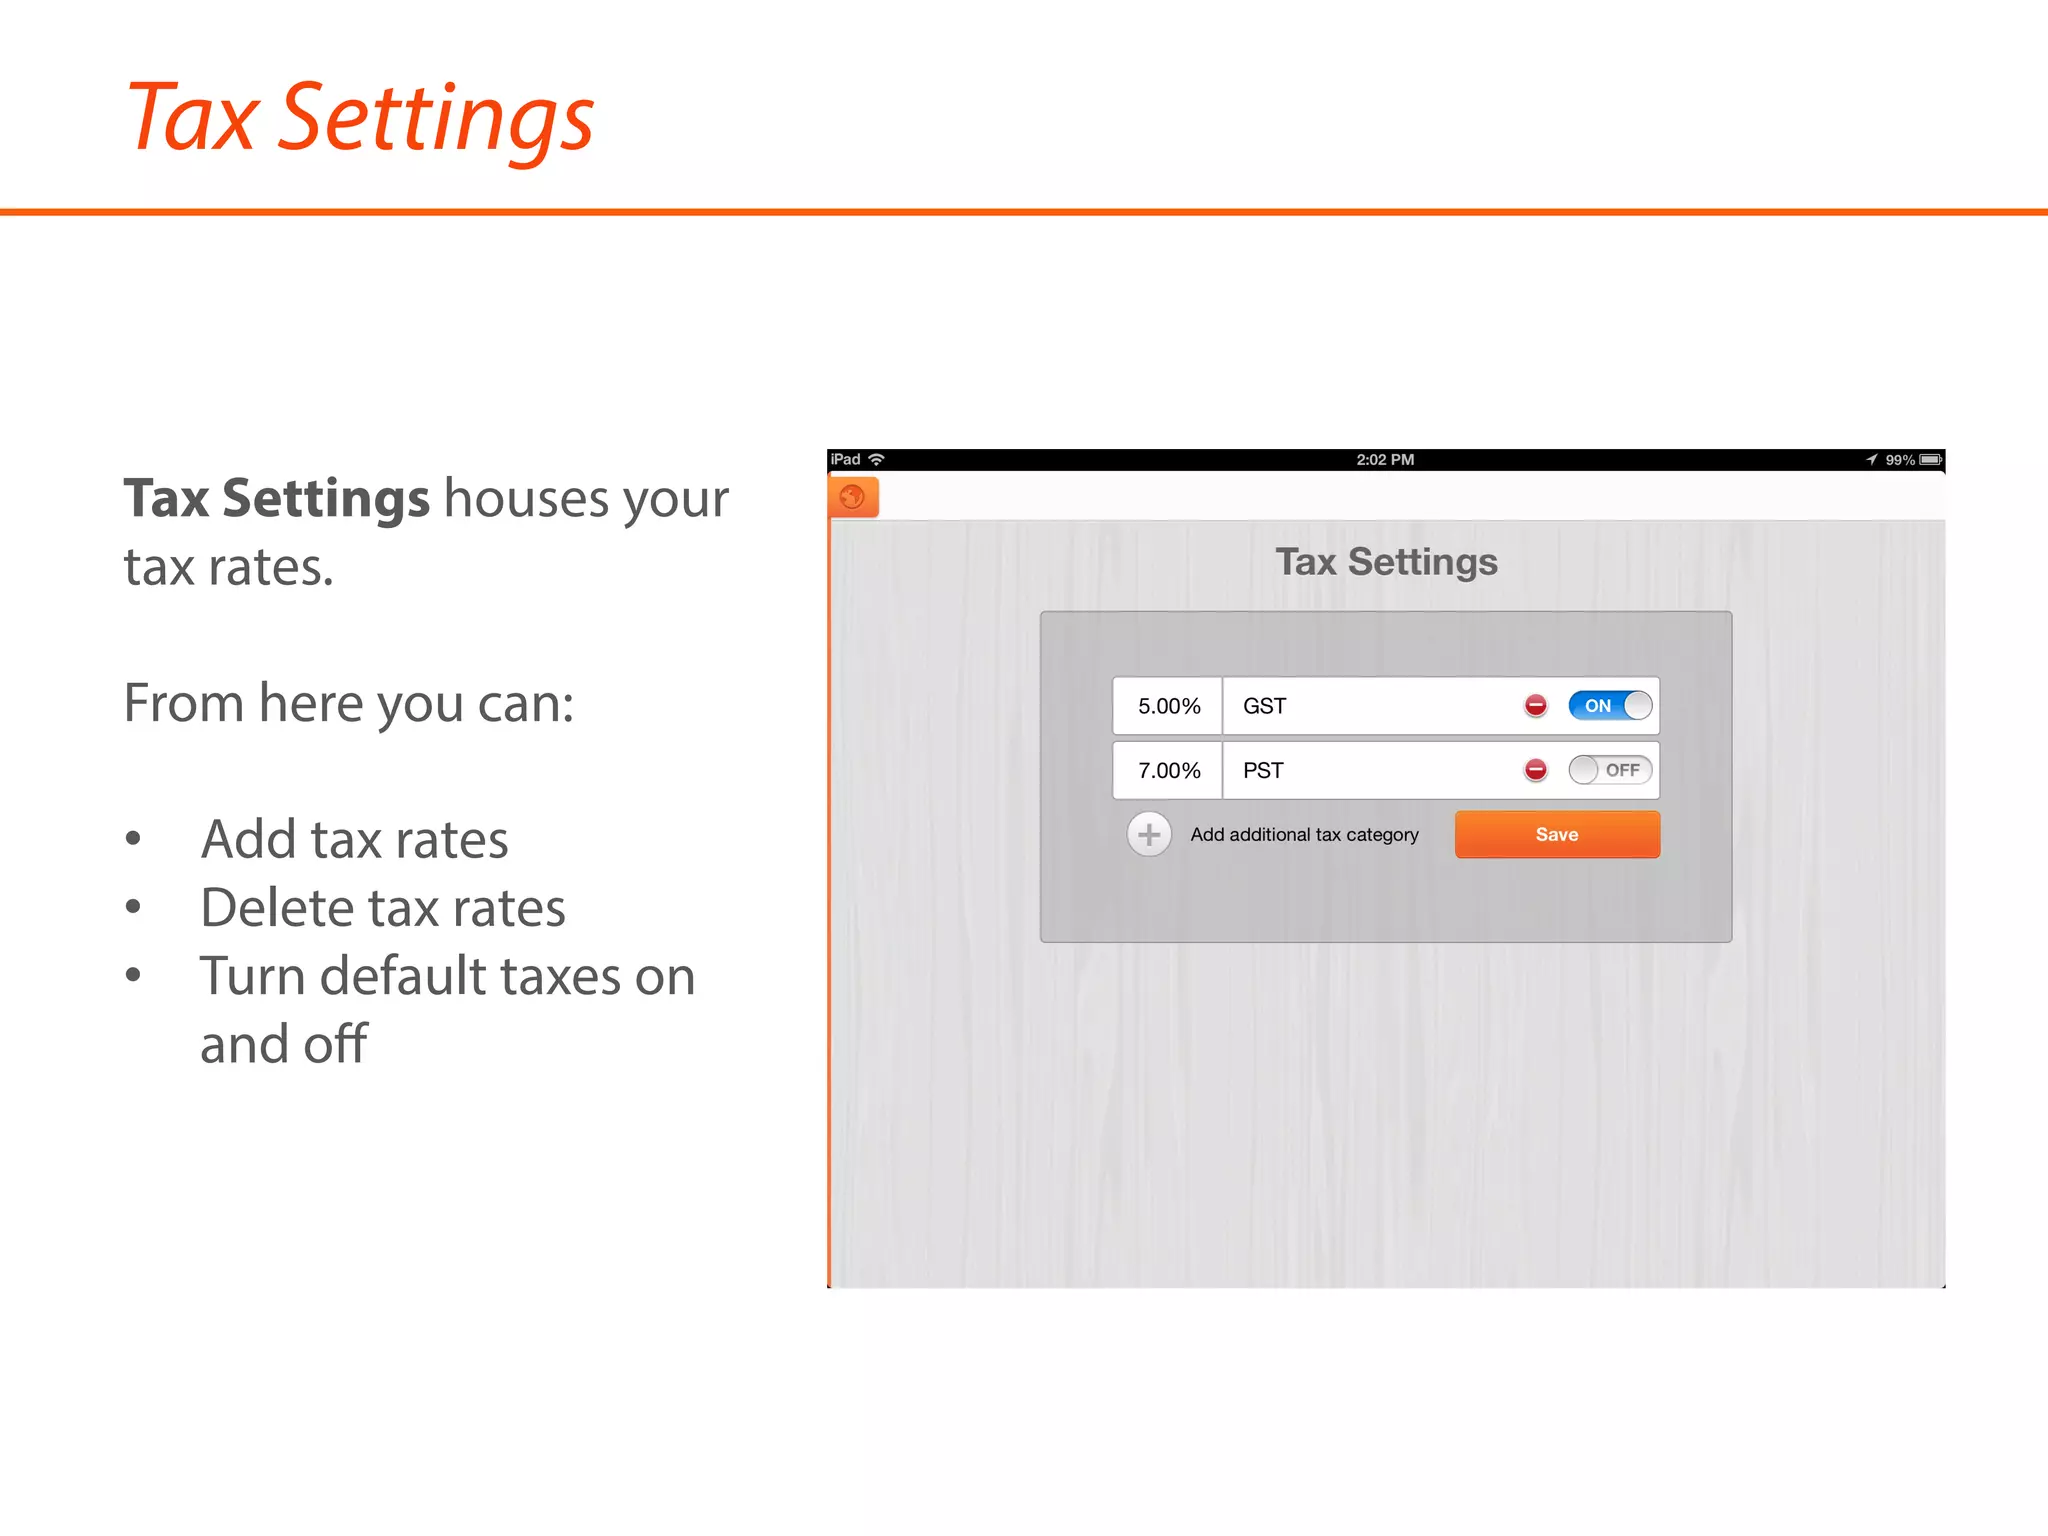
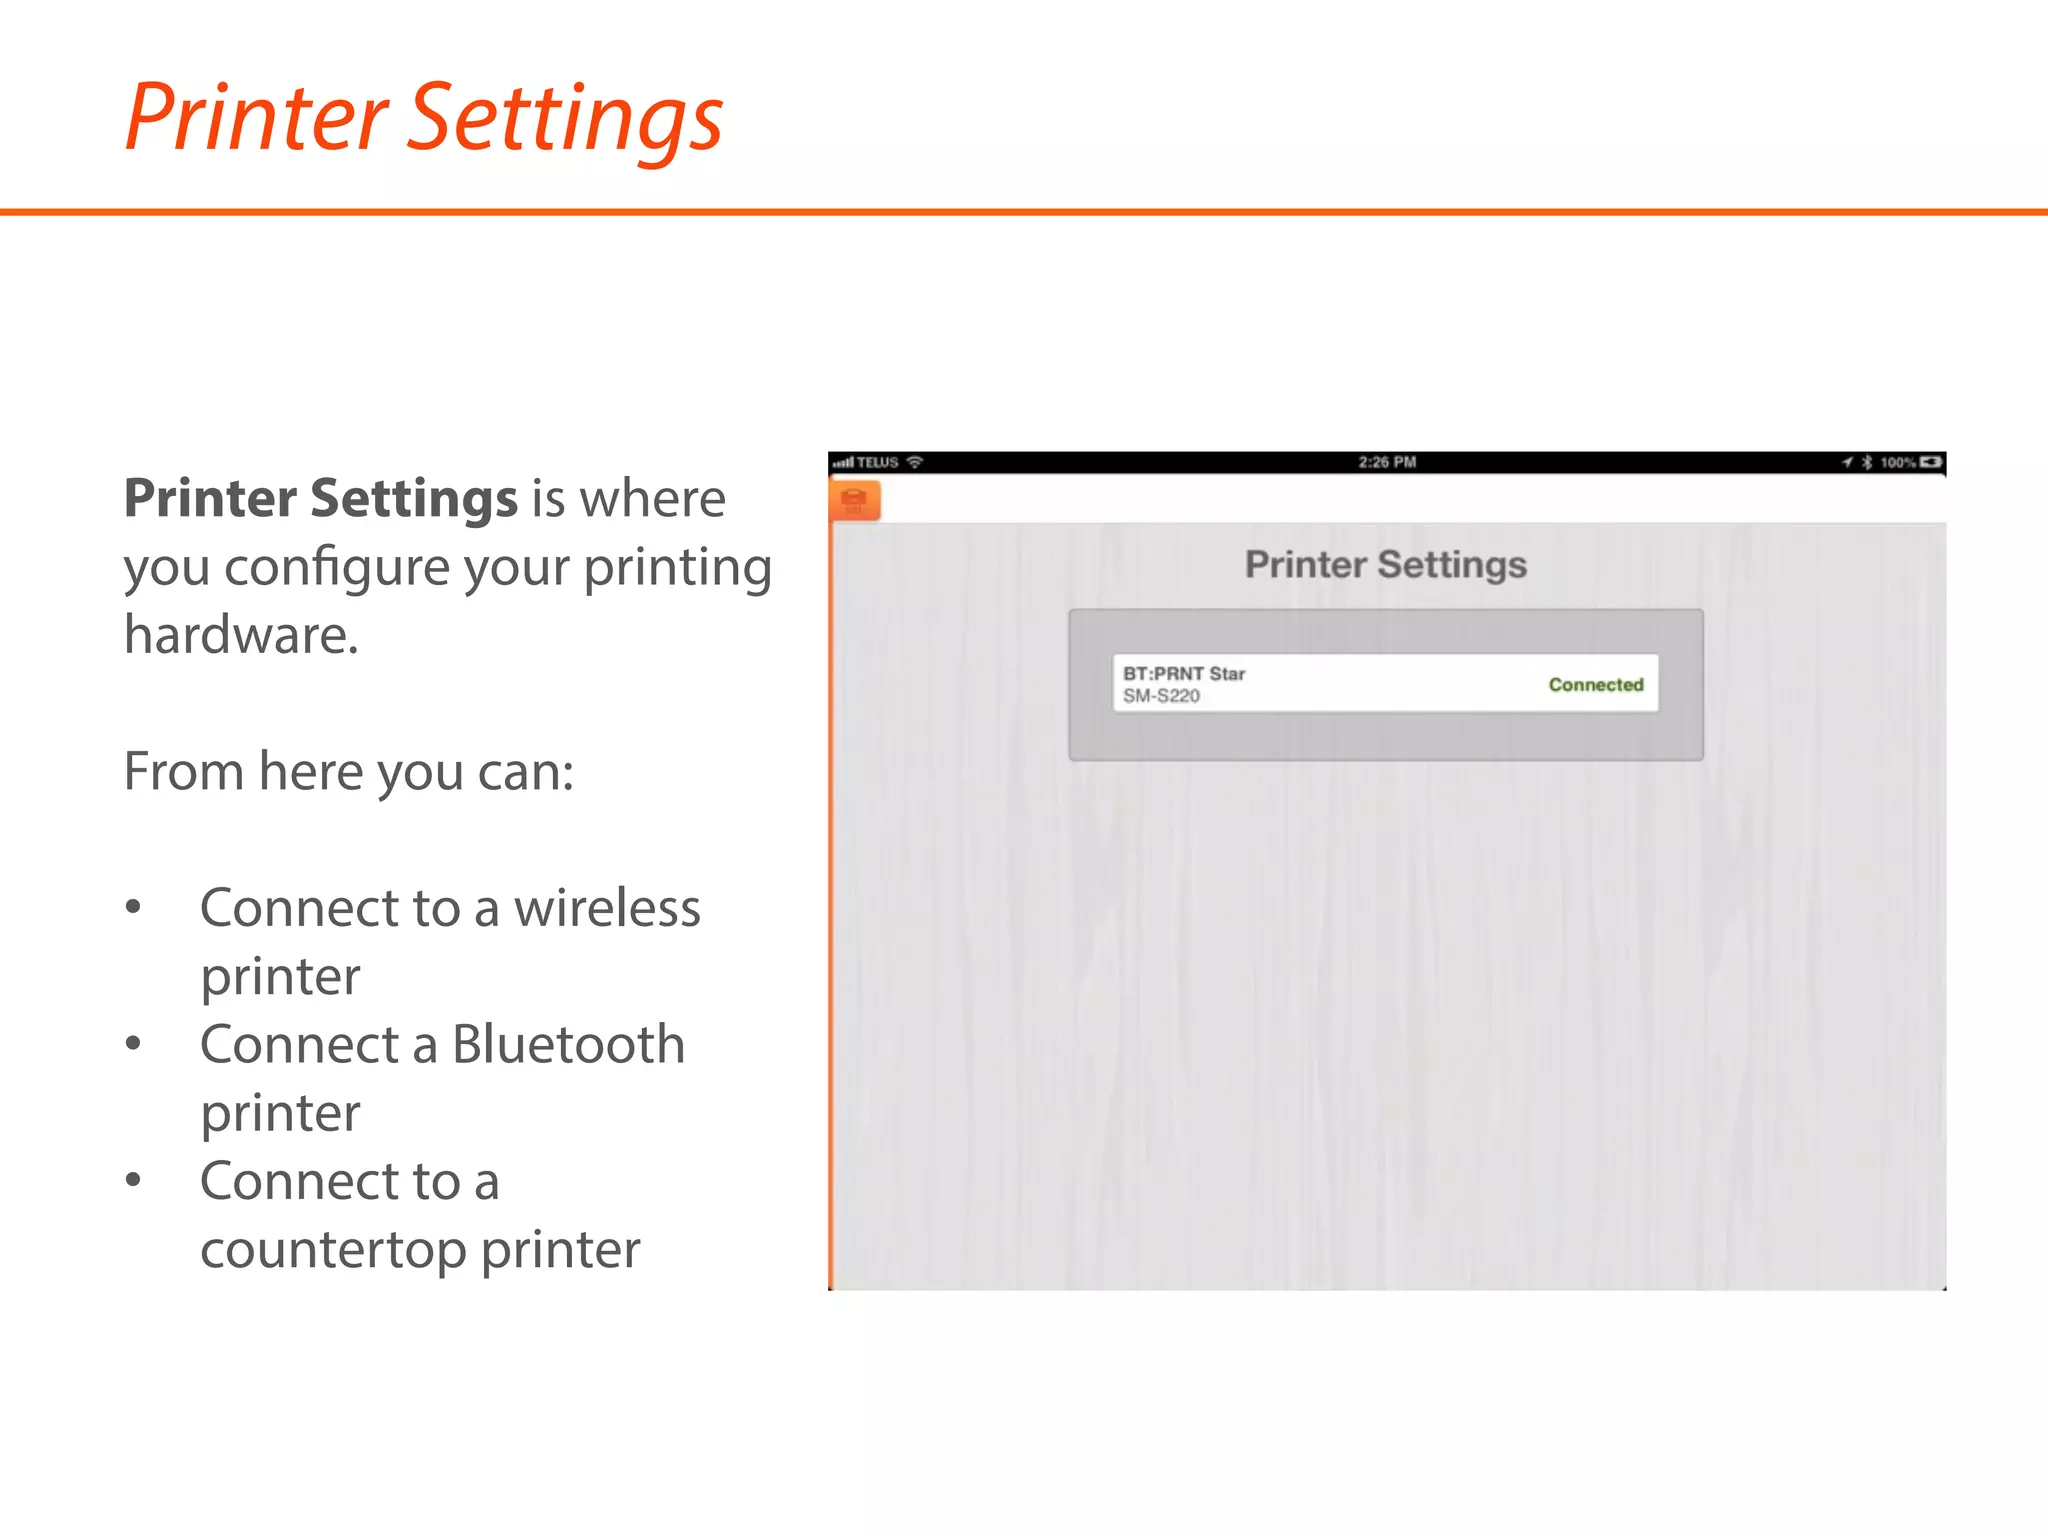
Getting Started with Tablet POS
Payfirma	
  ©2013	
  
Signing In
Open the Payfirma POS app on your iPad.
Select Sign In to access your store.
You’ll need your Email Address and Password.
Navigating Your Store
Your Profile Menu gives you access
to your store’s settings through the
following menus:
•  the Terminal
•  My Transactions
•  Inventory Managements
•  Receipt Settings
•  Tipping
•  Tax Settings
•  Currency
•  Printer Settings
You can find your Profile Menu by
tapping on the orange tab on the
upper left corner of each page.
Terminal
The Terminal is where all
transactions take place.
From here you can:
•  Take a payment using
cash, credit and check
•  Add custom items
•  Apply discounts
•  Change item quantities
My Transactions
My Transactions is where
your sales history is stored.
From here you can:
•  Search for a transaction
•  Do a full or partial
refund
•  Re-send an email
receipt
•  Print a receipt
Inventory Management
Inventory Management is
your inventory hub.
From here you can:
•  Add new products
•  Edit products
•  Delete products
•  Add items to your
Favorties tab
Receipt Settings
Receipt Settings lets you
personalize your email
receipts.
From here you can:
•  Create a custom note
•  Choose to show the
Credit Card Signature
on your receipts
Tipping
You can turn the Tipping
function on and off to let
your customers thank you.
Turning Tips on will enable:
•  Tip by percentage
•  Tip by $ value
•  Auto-calculate Total
Currency
The Currency toggle allows your
store to accept payments in either
Canadian or US Dollars.
The Currency function will only be
available to merchants who have a
US Dollar and Canadian Dollar
merchant account.
Tax Settings
Tax Settings houses your
tax rates.
From here you can:
•  Add tax rates
•  Delete tax rates
•  Turn default taxes on
and off
Printer Settings
Printer Settings is where
you configure your printing
hardware.
From here you can:
•  Connect to a wireless
printer
•  Connect a Bluetooth
printer
•  Connect to a
countertop printer

Getting Started with Tablet POS

  • 1.
    Getting Started withTablet POS Payfirma  ©2013  
  • 2.
    Signing In Open thePayfirma POS app on your iPad. Select Sign In to access your store. You’ll need your Email Address and Password.
  • 3.
    Navigating Your Store YourProfile Menu gives you access to your store’s settings through the following menus: •  the Terminal •  My Transactions •  Inventory Managements •  Receipt Settings •  Tipping •  Tax Settings •  Currency •  Printer Settings You can find your Profile Menu by tapping on the orange tab on the upper left corner of each page.
  • 4.
    Terminal The Terminal iswhere all transactions take place. From here you can: •  Take a payment using cash, credit and check •  Add custom items •  Apply discounts •  Change item quantities
  • 5.
    My Transactions My Transactionsis where your sales history is stored. From here you can: •  Search for a transaction •  Do a full or partial refund •  Re-send an email receipt •  Print a receipt
  • 6.
    Inventory Management Inventory Managementis your inventory hub. From here you can: •  Add new products •  Edit products •  Delete products •  Add items to your Favorties tab
  • 7.
    Receipt Settings Receipt Settingslets you personalize your email receipts. From here you can: •  Create a custom note •  Choose to show the Credit Card Signature on your receipts
  • 8.
    Tipping You can turnthe Tipping function on and off to let your customers thank you. Turning Tips on will enable: •  Tip by percentage •  Tip by $ value •  Auto-calculate Total
  • 9.
    Currency The Currency toggleallows your store to accept payments in either Canadian or US Dollars. The Currency function will only be available to merchants who have a US Dollar and Canadian Dollar merchant account.
  • 10.
    Tax Settings Tax Settingshouses your tax rates. From here you can: •  Add tax rates •  Delete tax rates •  Turn default taxes on and off
  • 11.
    Printer Settings Printer Settingsis where you configure your printing hardware. From here you can: •  Connect to a wireless printer •  Connect a Bluetooth printer •  Connect to a countertop printer