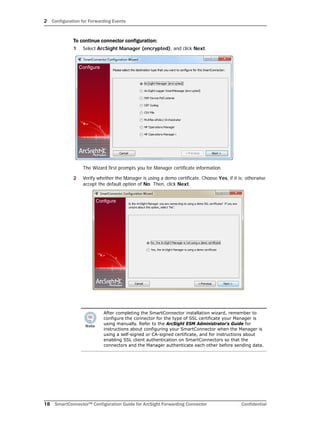
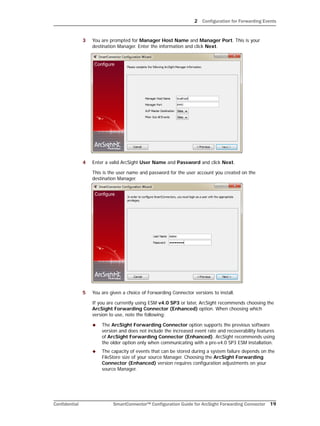
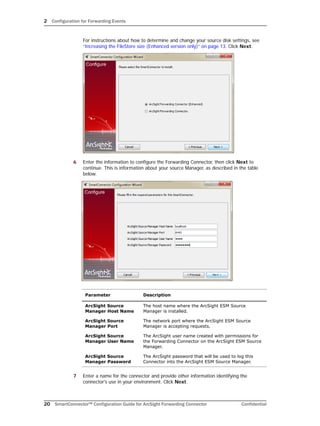
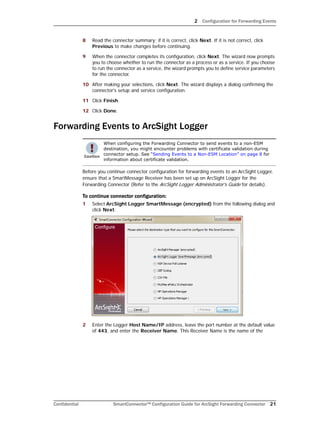
This document provides an overview and instructions for installing the ArcSight Forwarding Connector. The Forwarding Connector allows events from a source ArcSight ESM Manager to be forwarded to a destination ESM Manager, ArcSight Logger, or other non-ESM locations. Standard installation procedures are outlined, including verifying the source ESM is correctly installed, assigning privileges, installing the Forwarding Connector, upgrading, and uninstalling. Configuration instructions are provided for forwarding events to various destinations such as ESM Managers, Logger, CSV files, and HP and McAfee systems.

![1 Overview and Installation
Confidential SmartConnector™ Configuration Guide for ArcSight Forwarding Connector 13
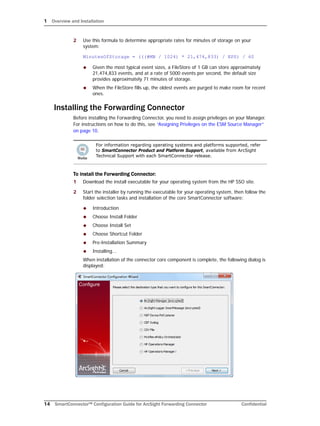
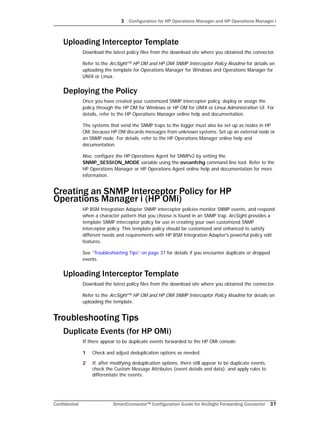
1 To find the entityID, go to $AGENT_HOME/user/agent/agent.properties and
search for agents[0].entityid. Copy the text string starting in 3w to a text
editing program, such as Notepad.
agents[0].entityid=3w+05uiYBABCCLKvzx0stdQ==
2 To find the userid, go to the Console of the source Manager.
a From to the Navigator panel, choose the Resources tab.
b Choose Users to find your Forwarding Connector user.
c Locate the Resource ID and copy the text string from the second column, as
shown below.
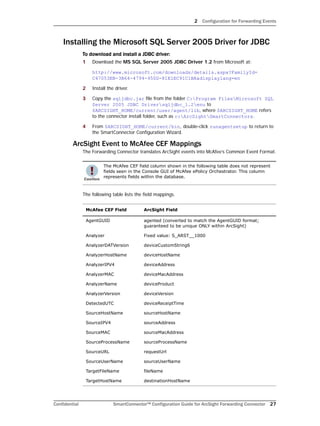
In the $Arcsight_HOME/config/server.properties file on the source
Manager, add the entityid and userid to the eventstream.cfc property, as shown
below.
eventstream.cfc=EntityID.UserID
3 Restart the source Manager and, if still running, the Forwarding Connector.
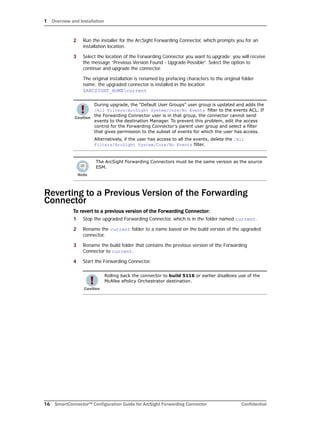
Increasing the FileStore size (Enhanced version only)
Installation of the ArcSight Forwarding Connector (Enhanced) option provides fault-
tolerance, enabling events to be saved in the event of a failure.
The capacity of events that can be stored during a system failure is dependent on the
amount of disk space the FileStore can use on the source Manager. Although the default
size of 1024 MB (1 GB) is suitable for most installations, you can increase the size of your
FileStore.
To increase the size of the FileStore:
1 Open the server.defaults.properties file, located under
$ARCSIGHT_HOMEconfig.
The file displays the default file size:
filestore.disksize.max.megabytes.int=1024](https://image.slidesharecdn.com/fwdconnconfigguide5-170529110504/85/Fwd-conn-configguide_5-1-7-6151_6154-11-320.jpg)


![A Using the Forwarding Connector in FIPS mode
Confidential SmartConnector™ Configuration Guide for ArcSight Forwarding Connector 47
18 After making your selections, click Next. The wizard displays a dialog confirming the
connector's setup and service configuration.
19 Click Finish.
Enable FIPS Suite B Support
If you have installed a SmartConnector in FIPS-compliant mode, you can enable FIPS
Suite B support by modifying the ESM destination parameters.
To enable FIPS Suite B support:
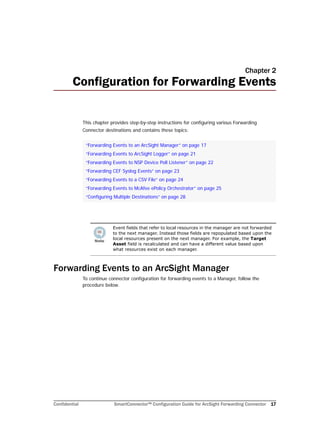
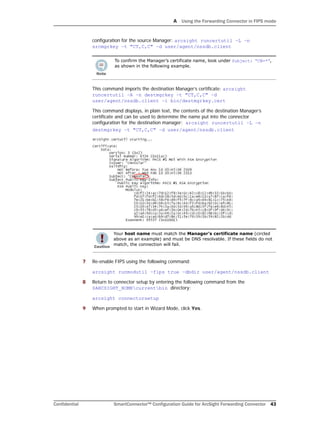
1 From $ARCSIGHT_HOMEcurrentuseragent, open the agent.properties
file.
2 Locate the following property for ESM destination parameters (approximately, line 10
in the file):
agents[0].destination[0].params=<?xml version="1.0"
encoding="UTF-8"?>n<ParameterValues>n <Parameter
Name="port" Value="8443"/>n <Parameter
Name="filterevents" Value="false"/>n <Parameter
Name="host" Value="samplehost.sv.arcsight.com"/>n
<Parameter Name="aupmaster" Value="false"/>n <Parameter
Name="fipsciphers"
Value="fipsDefault"/>n</ParameterValues>n
The destination parameters are specified here as an XML string where each element is
one parameter. Based on the Suite B mode of the Manager, change fipsDefault to
suiteb128 (for 128-bit security) or suiteb192 (for 192-bit security).
3 Save and exit the agent.properties file.
Using Logger in FIPS Mode
ArcSight Logger supports the Federal Information Processing Standard 140-2 (FIPS 140-2).
To use Logger in the FIPS mode, refer to the ArcSight Logger Administrator's Guide and
see “Installing or Updating a SmartConnector to be FIPS-compliant” in
Chapter 7, “System Admin” for instructions.
The ArcSight Manager must also be installed in FIPS Suite B mode.](https://image.slidesharecdn.com/fwdconnconfigguide5-170529110504/85/Fwd-conn-configguide_5-1-7-6151_6154-45-320.jpg)