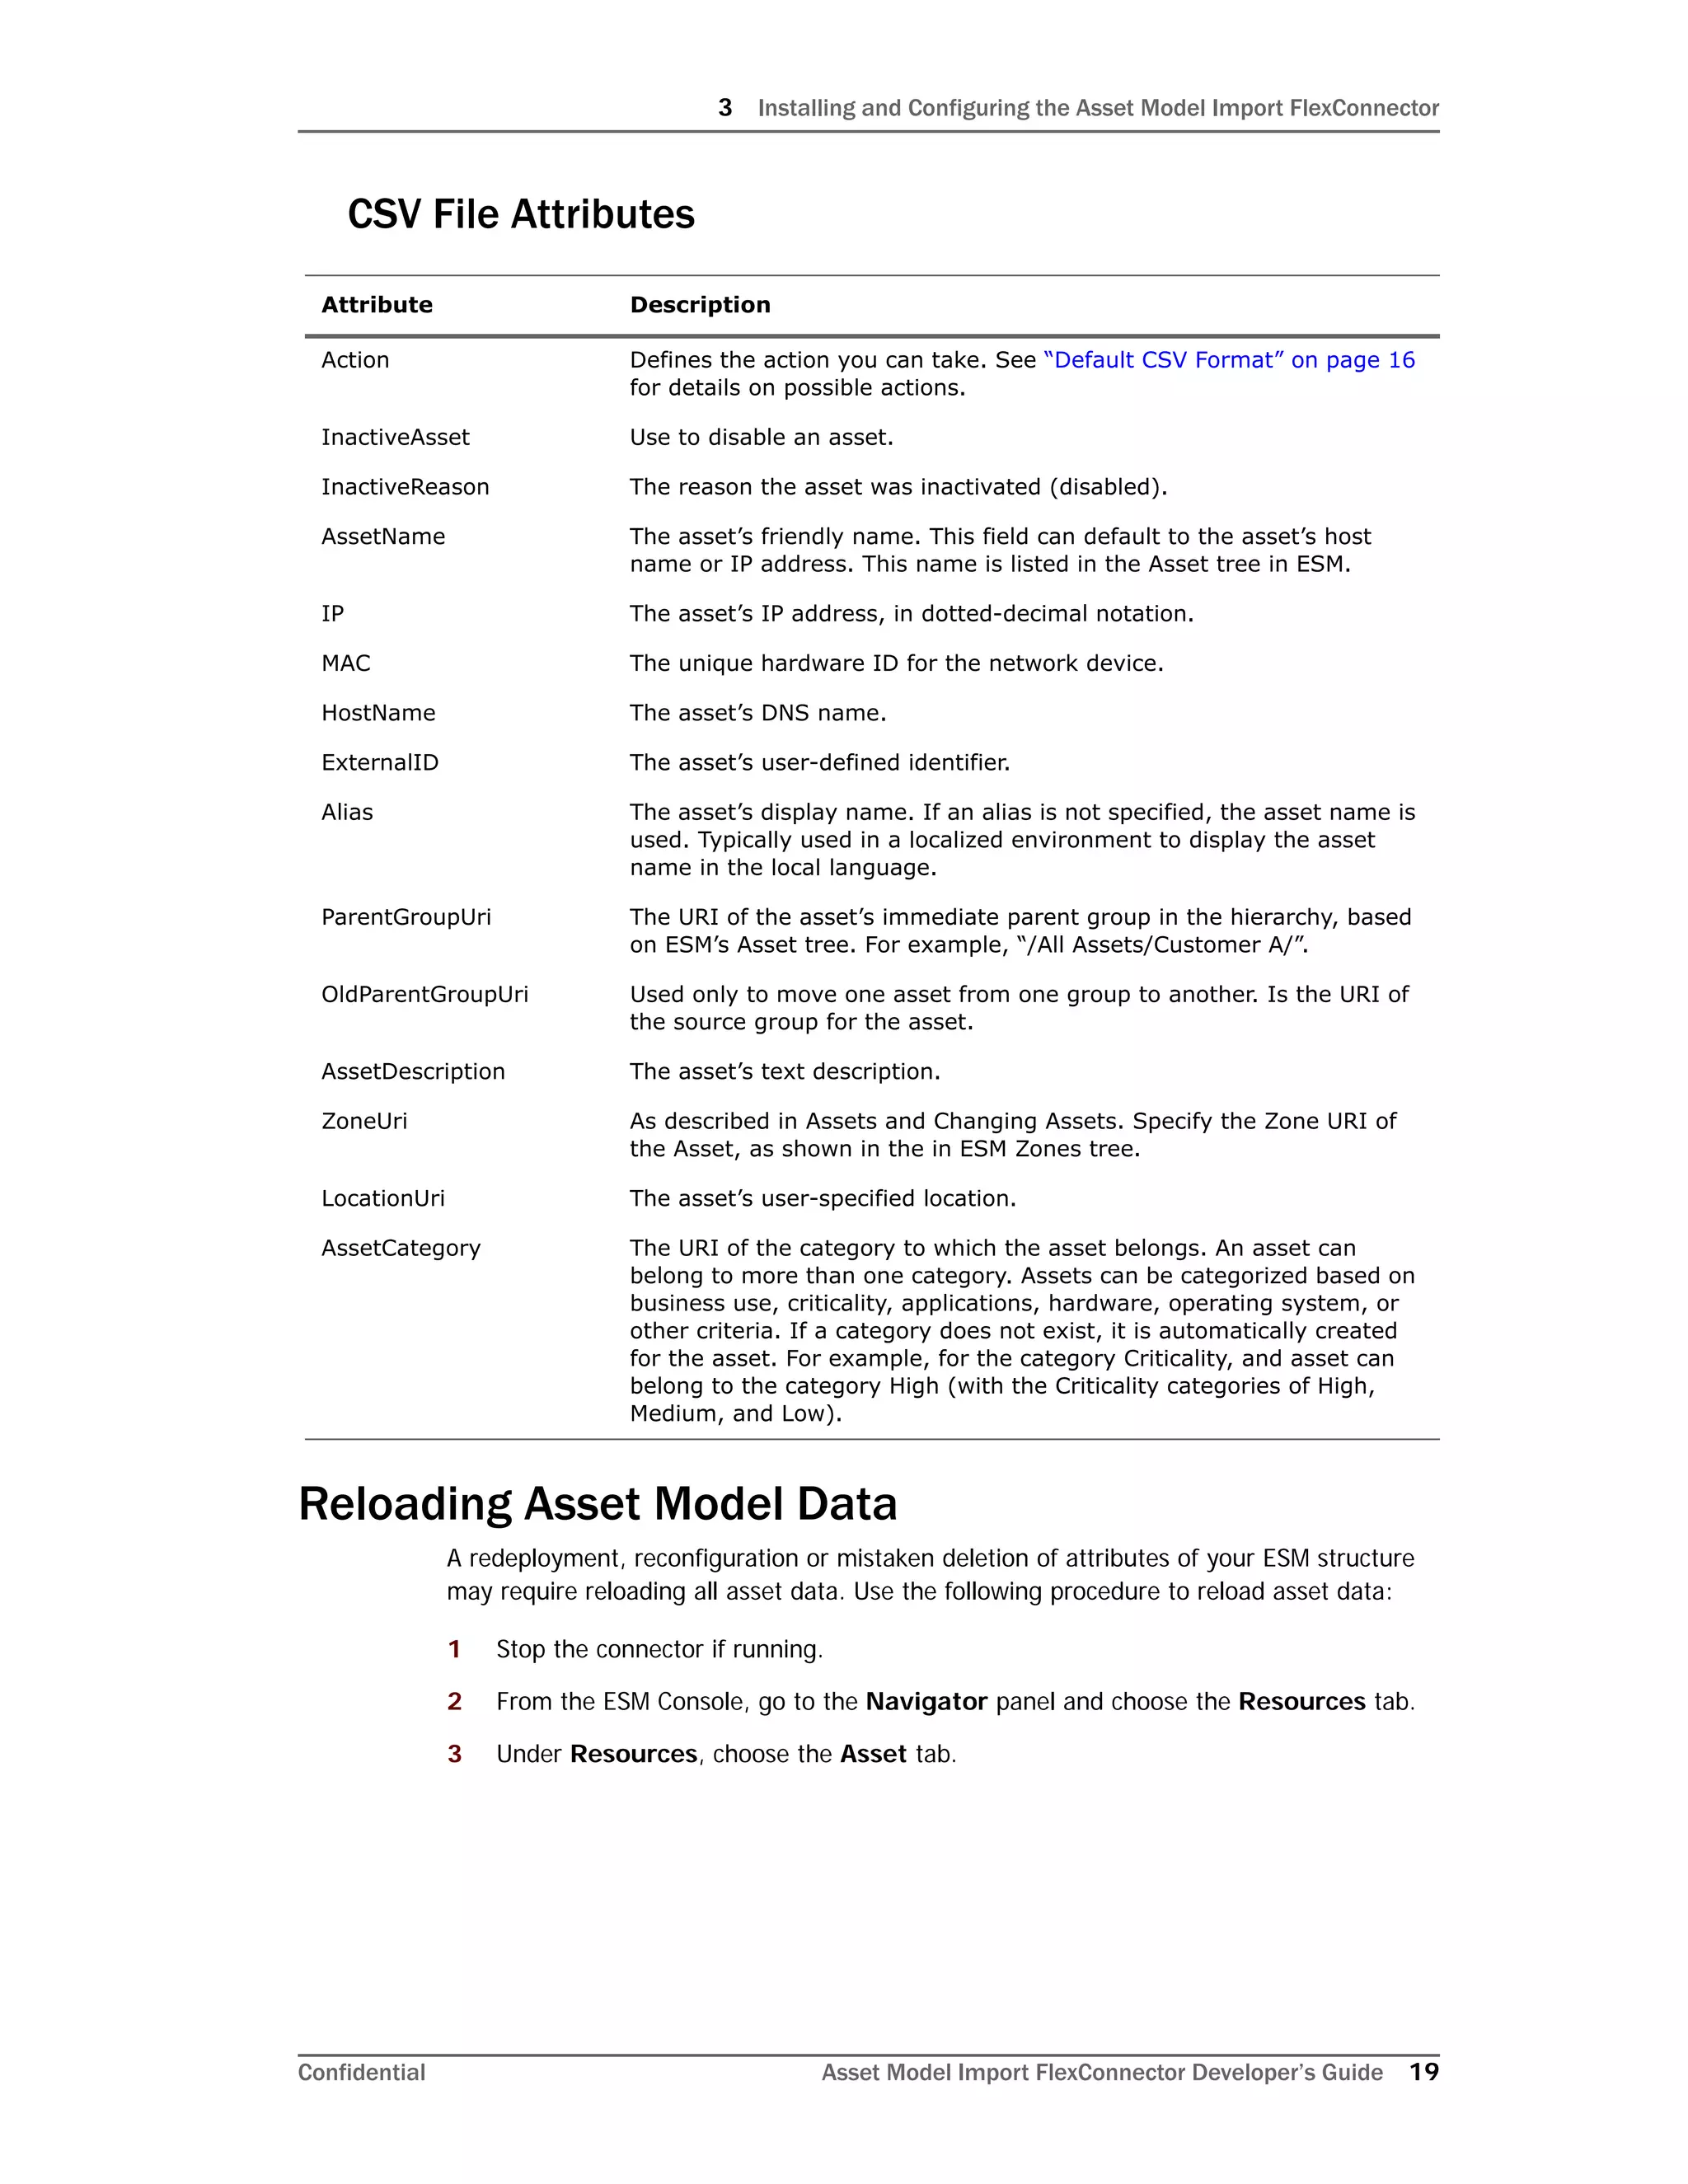
This document provides instructions for installing and configuring the Asset Model Import FlexConnector in ArcSight ESM. It assumes familiarity with writing FlexConnectors. The FlexConnector imports asset data from CSV files into the ESM network model based on a configured parser. It supports initial import and ongoing detection of updates. The document describes prerequisites, supported platforms, installation steps, configuration options and reloading of asset data.


![3 Installing and Configuring the Asset Model Import FlexConnector
Confidential Asset Model Import FlexConnector Developer’s Guide 17
comments.start.with=#
delimiter=,
token.count=15
token[0].name=Action
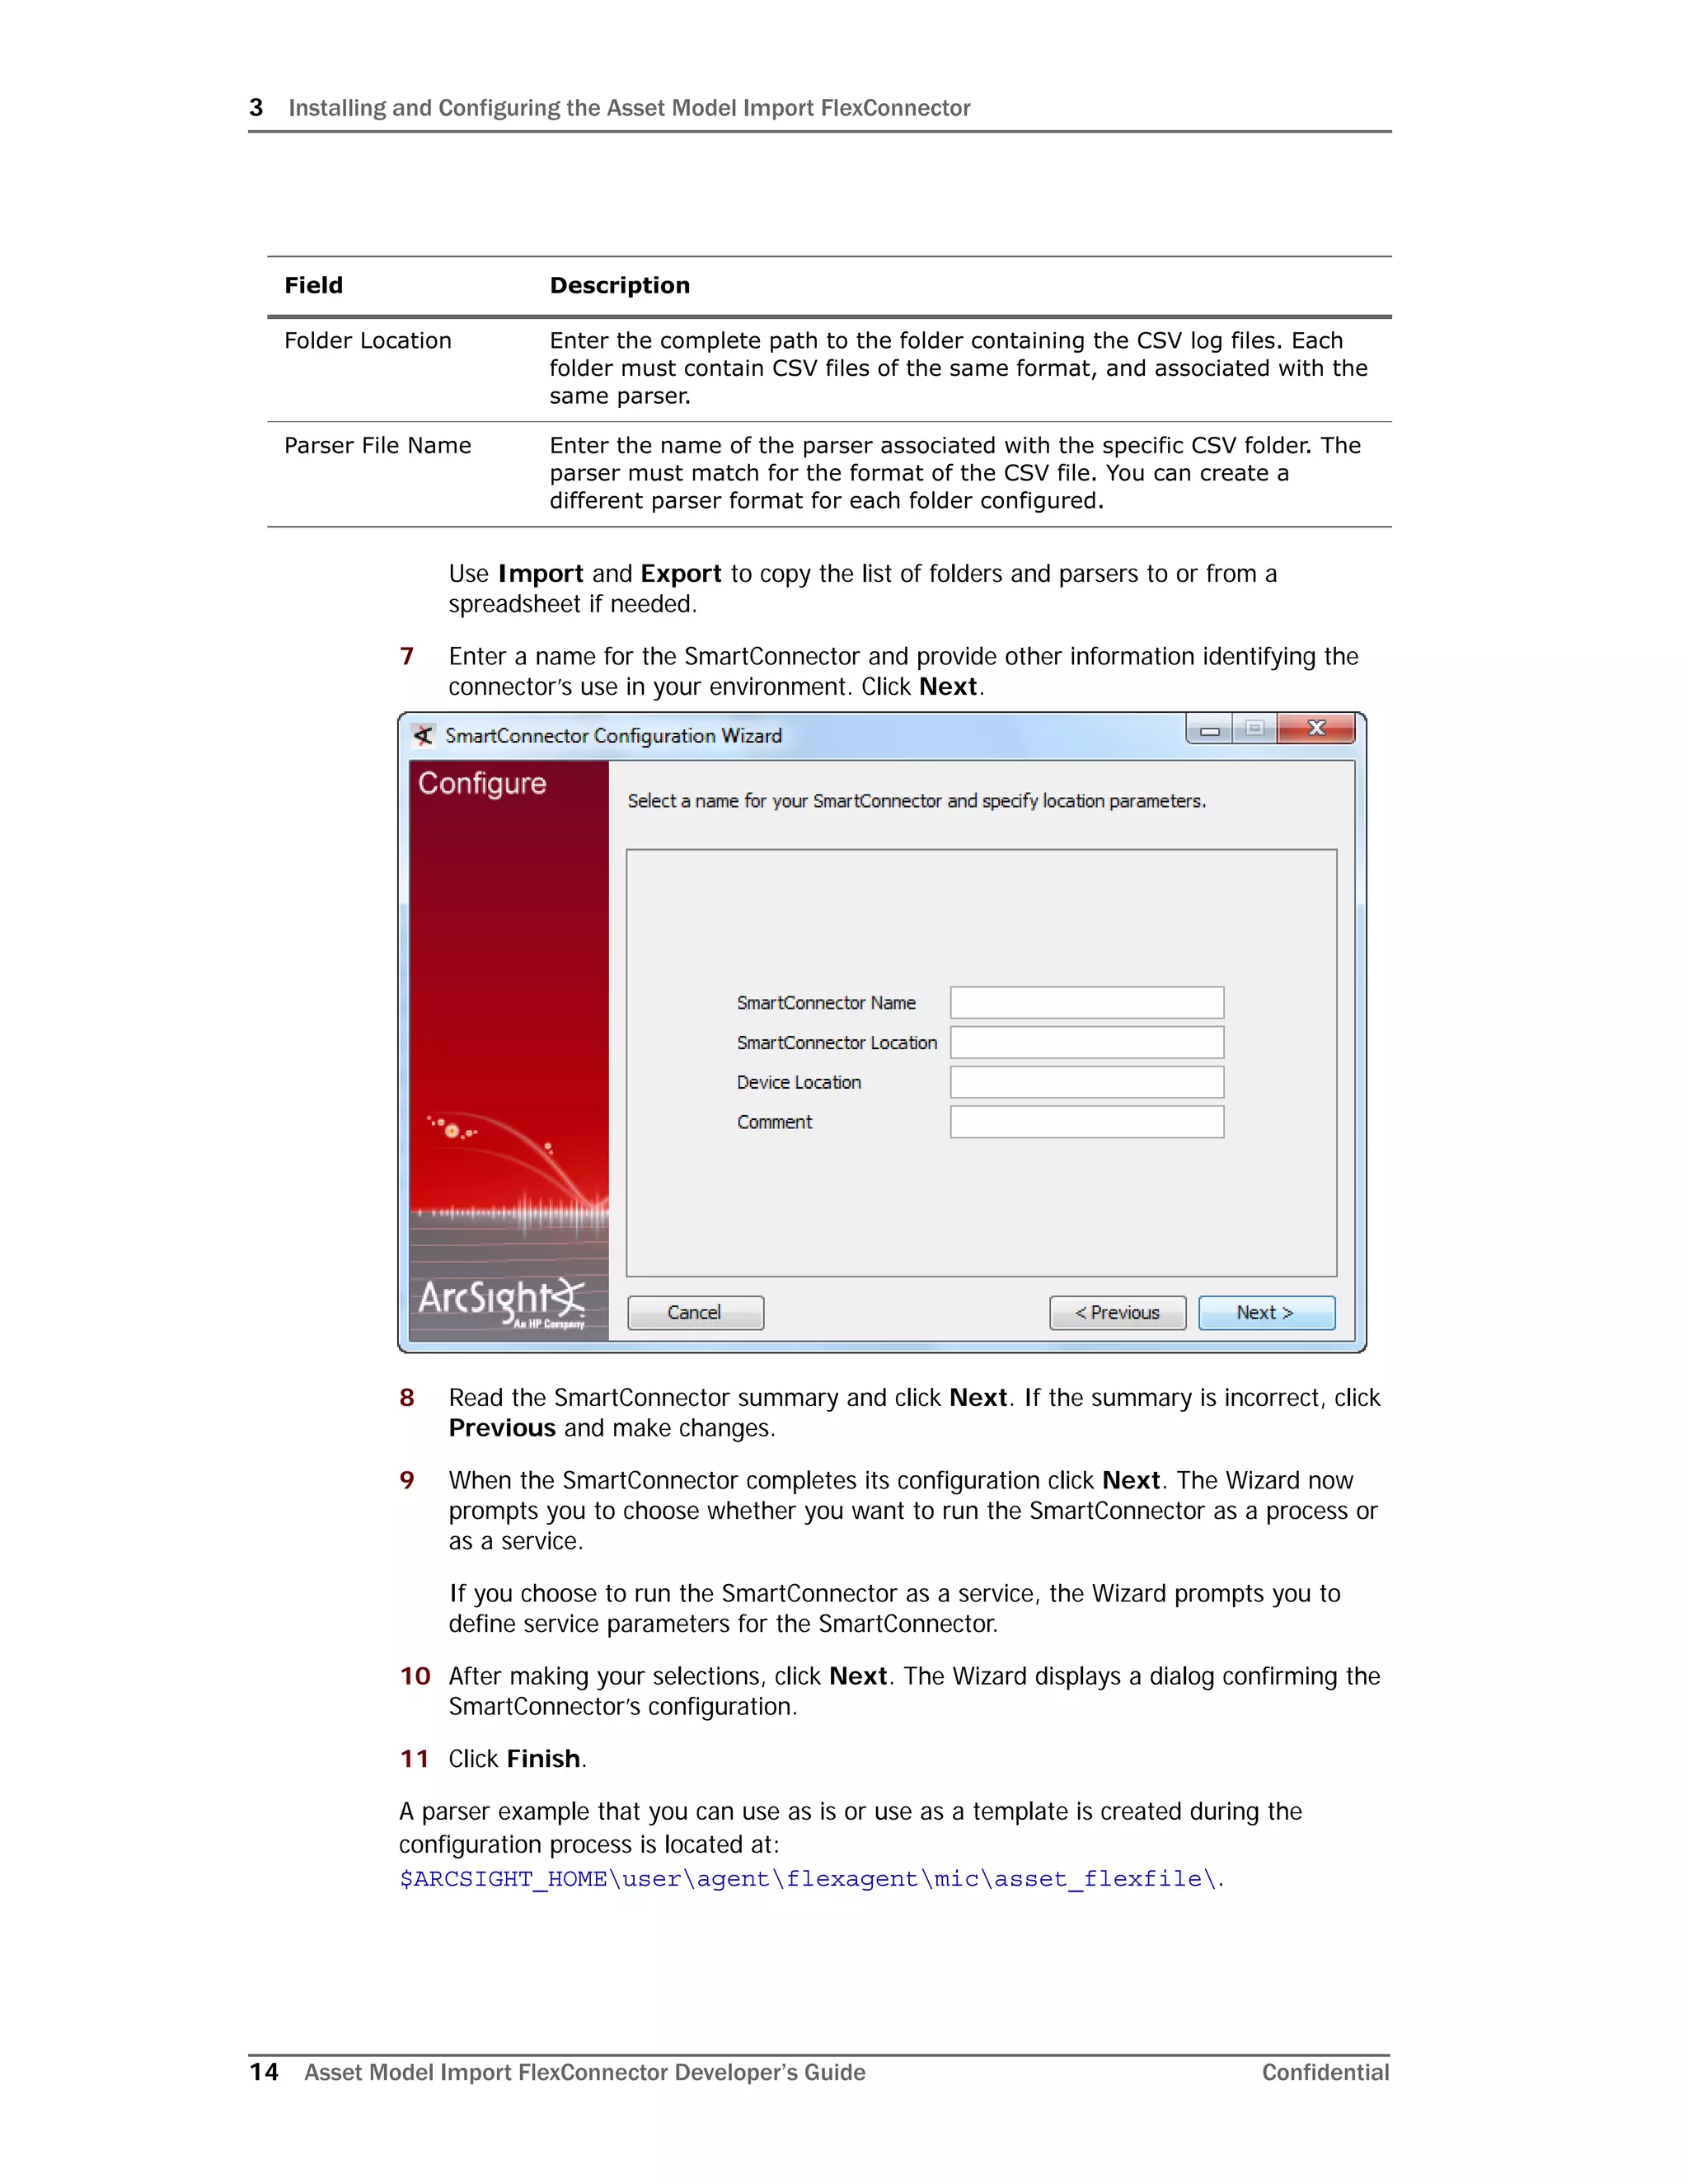
token[0].type=String
token[1].name=Inactive
token[1].type=String
token[2].name=InactiveReason
token[2].type=String
token[3].name=AssetName
token[3].type=String
token[4].name=Ip
token[4].type=String
token[5].name=Mac
token[5].type=String
token[6].name=HostName
token[6].type=String
token[7].name=ExternalId
token[7].type=String
token[8].name=Alias
token[8].type=String
token[9].name=ParentGroupUri
token[9].type=String
token[10].name=OldParentGroupUri
token[10].type=String
token[11].name=AssetDescription
token[11].type=String
token[12].name=ZoneUri
token[12].type=String
token[13].name=LocationUri
token[13].type=String
token[14].name=AssetCategory](https://image.slidesharecdn.com/assetmodelimportconndevguide5-170529110257/75/Asset-modelimportconn-devguide_5-2-1-6190-0-17-2048.jpg)
![3 Installing and Configuring the Asset Model Import FlexConnector
18 Asset Model Import FlexConnector Developer’s Guide Confidential
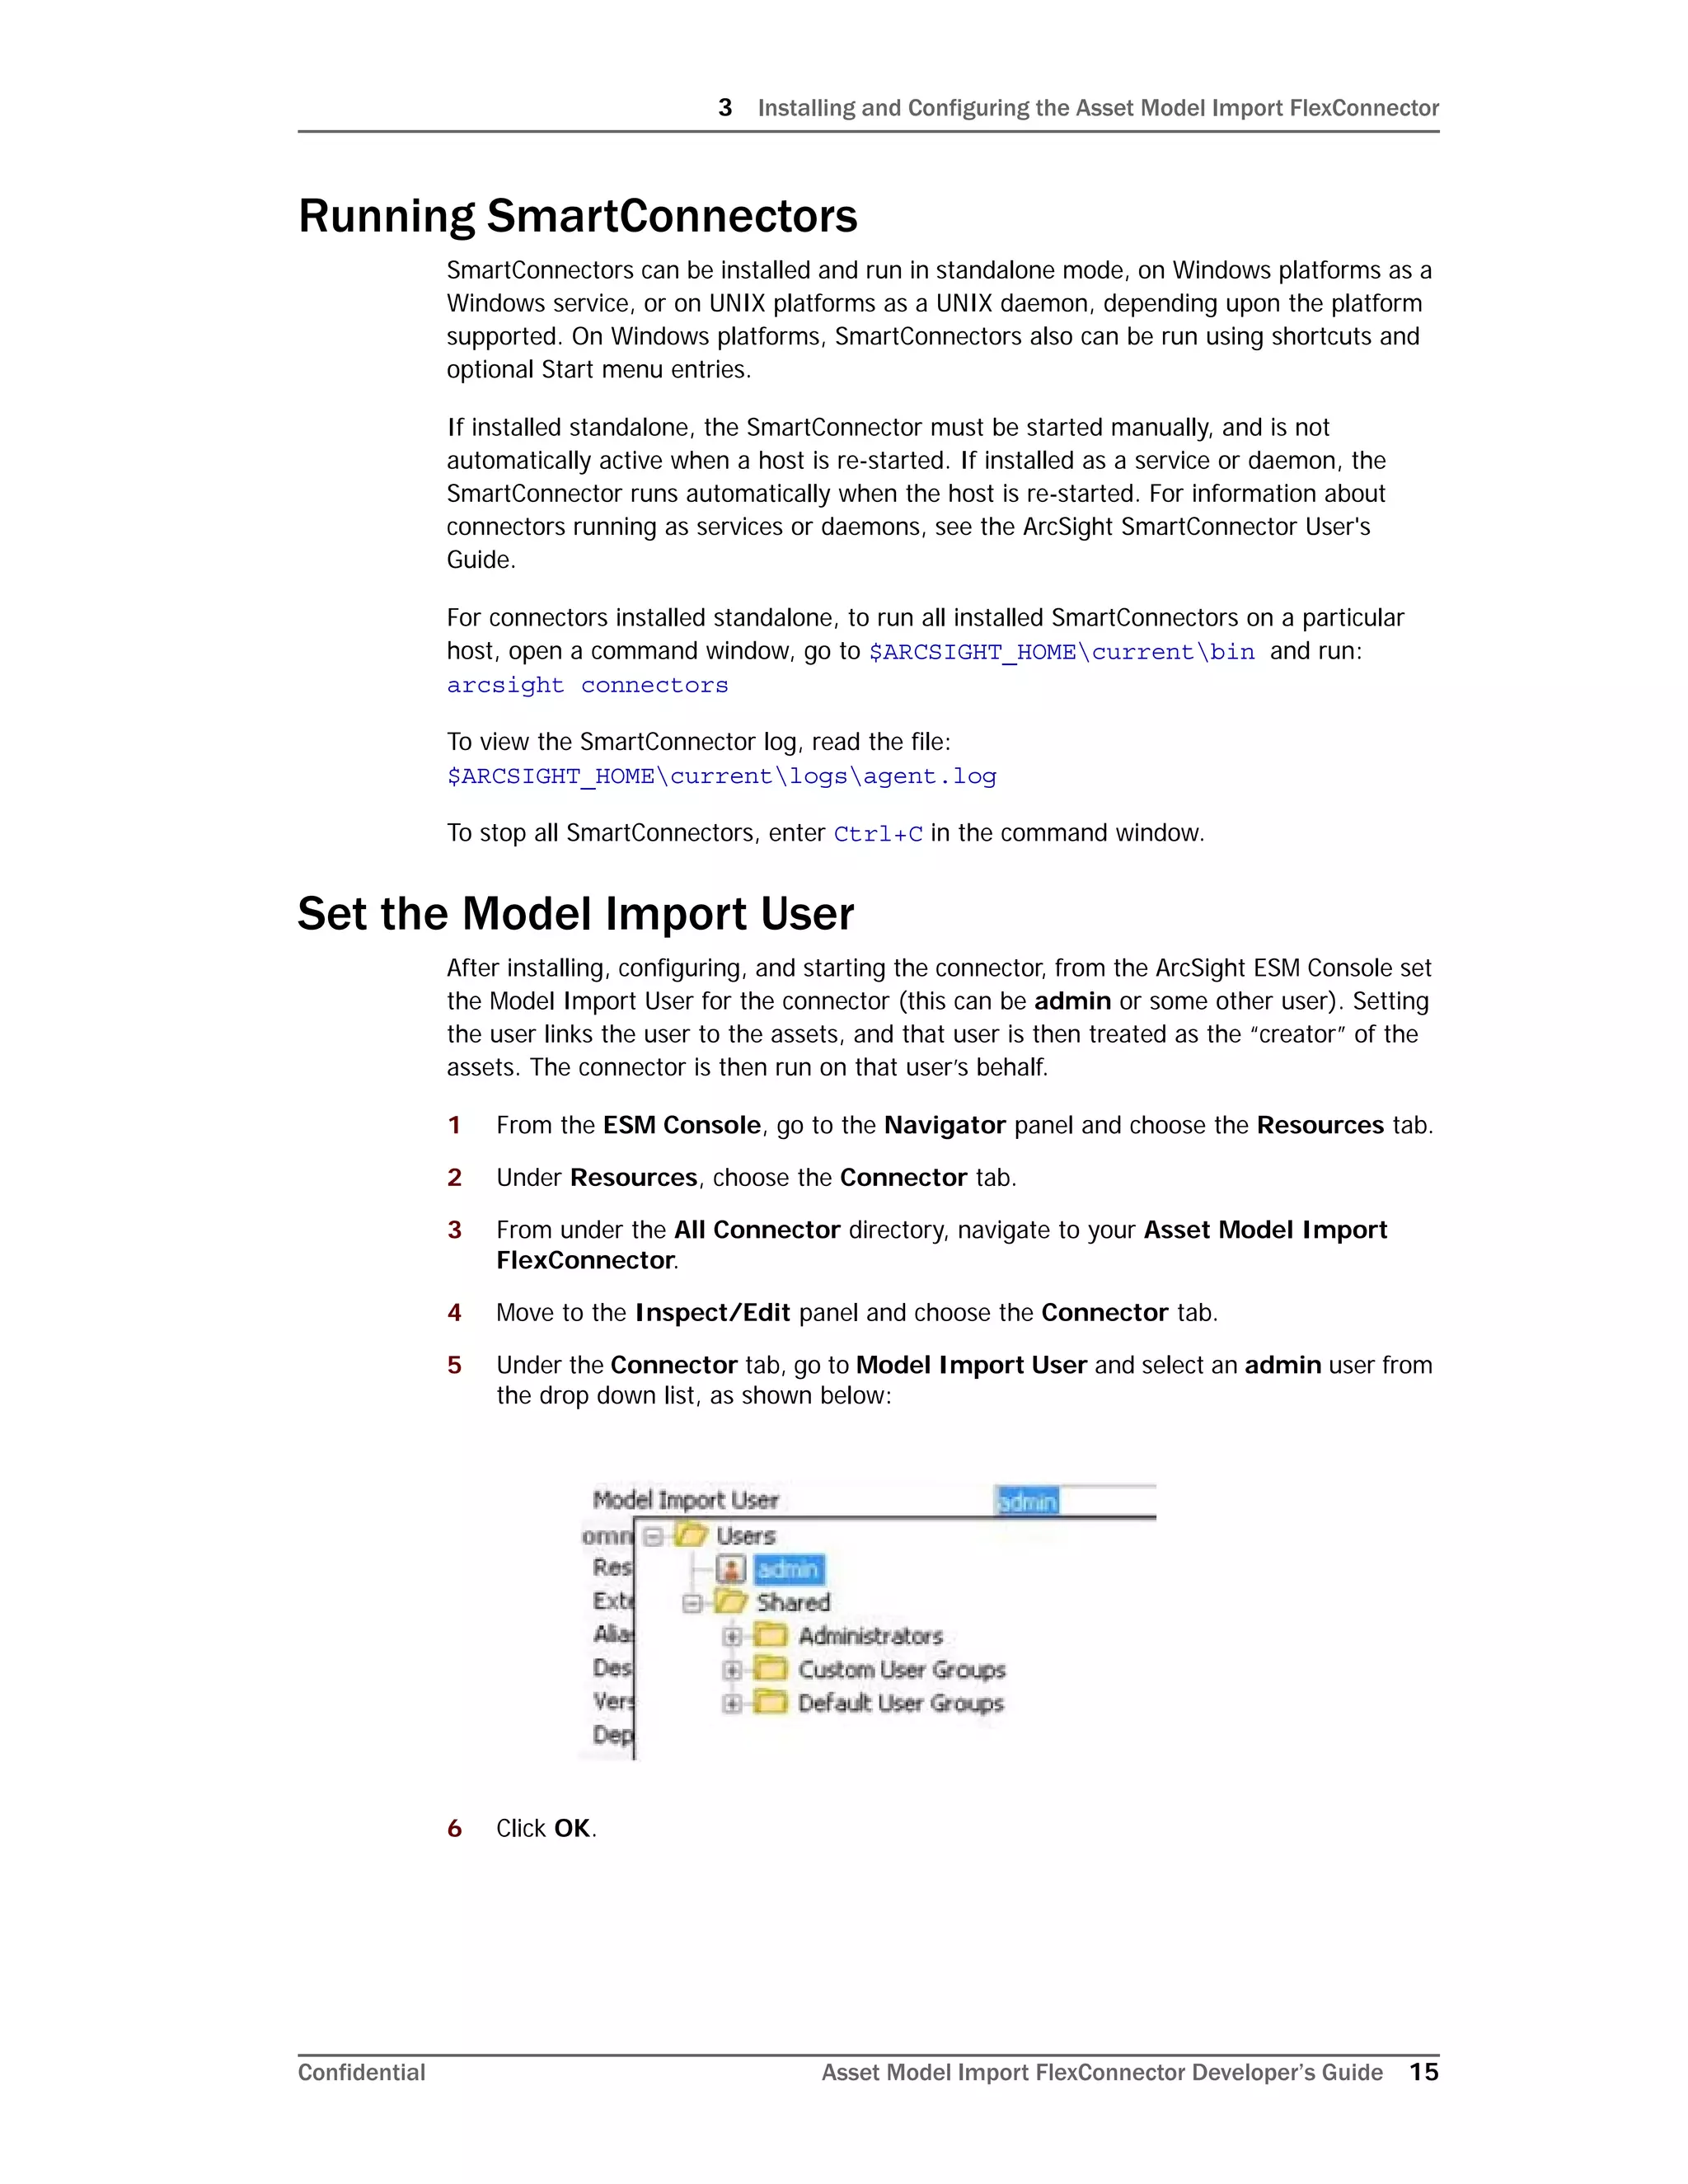
token[14].type=String
###keep these 7 fields unchanged###
additionaldata.enabled=true
additionaldata.duplicate.keys.allowed=false
event.deviceEventCategory=__stringConstant(Asset)
event.deviceCustomString1Label=__stringConstant(model.sender)
event.deviceCustomString1=__stringConstant(flexcsv)
event.deviceCustomString2Label=__stringConstant(model.template)
event.deviceCustomString2=__stringConstant(mic/asset_flexcsv/asset
.vm)
###field mappings###
event.deviceVendor=__getVendor(CSV File)
event.deviceProduct=__stringConstant(Assets)
event.deviceAction=Action
additionaldata.Action=Action
event.externalId=ExternalId
event.flexString1=AssetName
#following mappings maybe removed in future but required for now
additionaldata.UniqueUserId=AssetName
event.destinationUserId=AssetName](https://image.slidesharecdn.com/assetmodelimportconndevguide5-170529110257/75/Asset-modelimportconn-devguide_5-2-1-6190-0-18-2048.jpg)